Written By: Don Dodi
Fact Checked By: Kristen Brown
Reviewed By: Diego Rosenberg
You actually have to adjust the hand brake as it is design to keep your car from rolling on the steep slopes, but you need to ensure about the tension and brake shoes as cables can naturally stretch over the period of time, which is why it slowly reduces the brake’s holding power as well.
Yes, actually it works independently from your main hydraulic brakes, as it uses a mechanical cable or electronic motor to hold the wheels firmly in place whenever the vehicle is in parked condition.
But over the period of time, brake shoes can also wear down or even the small components inside the drum or rotor starts to shift as well.
Plus, you should be aware of the fact that even a few millimeters of extra slack can actually weaken the brake’s ability to hold the car on a slope, which unfortunately increases the risk of accidental rolling.
Additionally, there’s a research that shows that the parking brake systems are actually designed to hold a vehicle on a slope of at least 20% to 30% grade, but it will work only when it is properly adjusted and maintained.
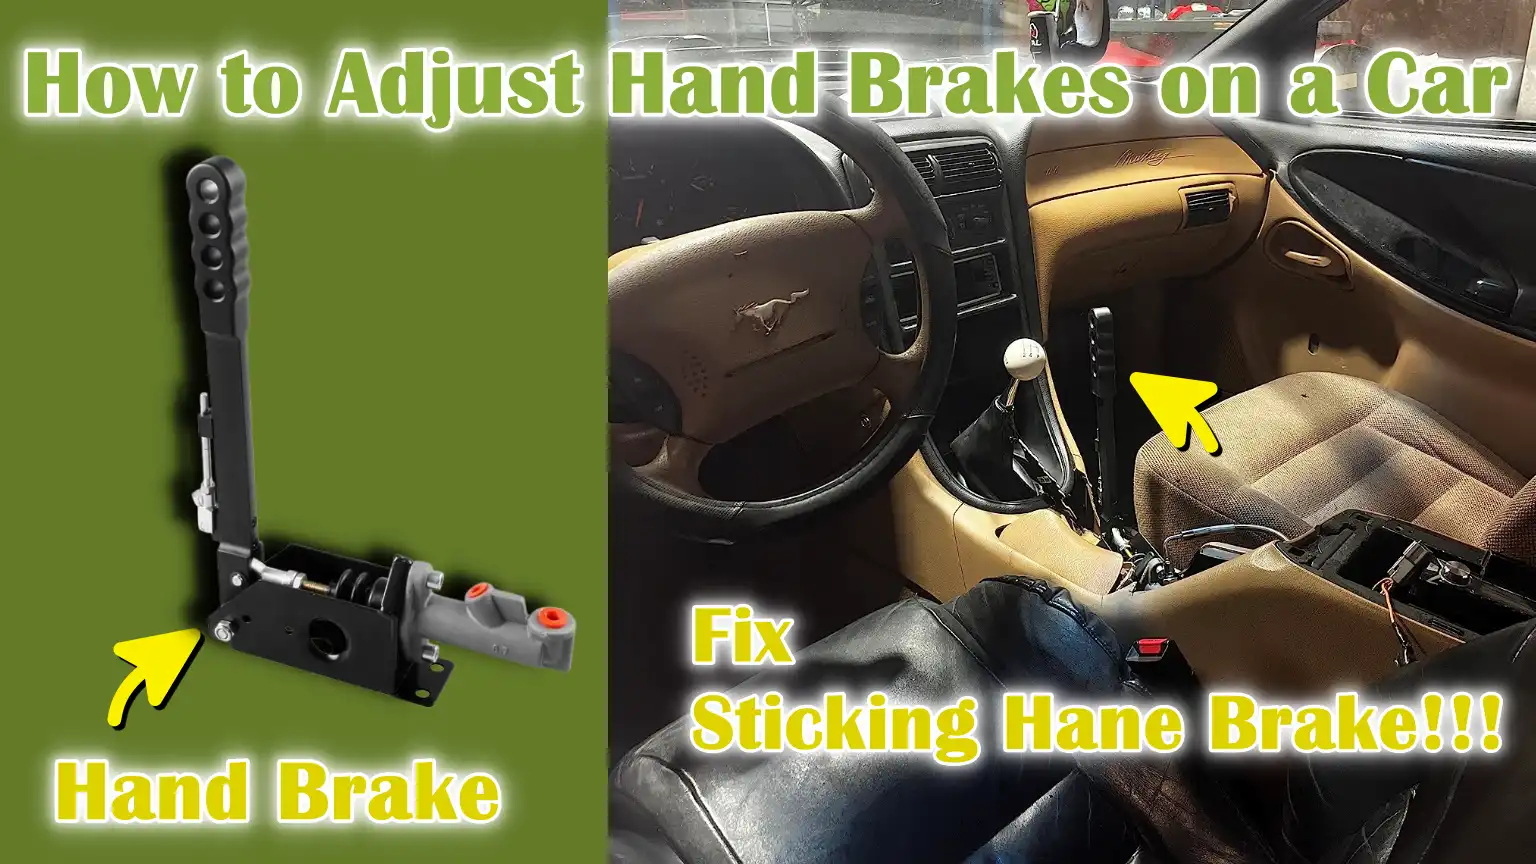
Which is why, which guide shows everything about How to Adjust Hand Brakes on a Car, so that you can actually restore the correct tension and ensure the working of hand brake exactly as it should be every time the car is in parked way.
Now, Let’s Understand All About Your Hand Brake System
The hand brake system is designed to keep a parked car completely stationary, even on steep slopes.
It works differently from the main hydraulic brakes, using mechanical force instead of brake fluid pressure.
This makes it more reliable in holding the vehicle in place because the mechanical components don’t lose pressure like hydraulic systems.
Each hand brake system consists of a lever or button inside the car, a connection system such as a cable or electric motor and braking components on the wheels.
When you pull the lever or press the switch, the system applies pressure to the rear wheels and locks them in place.
Knowing the type of hand brake used in your car helps you understand how to adjust it, how it works when loose and which components may need repair over time.
Both older and modern vehicles rely on this system for parking safety, so a clear understanding helps prevent rolling accidents, reduce wear on brake components and increase overall driving confidence.
1. Difference Between Cable-Operated and Electronic Handbrakes
Cable-operated handbrakes have a thick metal cable that runs from a lever inside the car to the braking parts of the rear wheels.
When you pull the lever, the cable tightens and generates a mechanical force that locks the wheels.
These systems are common in older and many budget-friendly vehicles and require frequent adjustment because the metal cable naturally stretches over years of use.
Electronic handbrakes work differently.
They use a small electric motor controlled by a switch to apply the brakes.
When you press the button, the motor automatically applies the brakes with precise pressure.
This type does not rely on a cable and, in most cases, adjusts itself.
However, if the motor weakens or the internal mechanism malfunctions, the electronic system may also need servicing.
Understanding which system your car has helps you know whether you need to manually adjust the cable or check the proper functioning of the electronic components.
2. Drum-in-Disc vs Traditional Drum Brake Setup
Traditional drum brakes have brake shoes inside a round metal drum that apply outward pressure to stop the wheel.
Many older cars and some modern trucks still use this system because it provides strong braking force and maintains excellent grip when used as a parking brake.
The drum-in-disc system is different.
In many newer cars with rear disc brakes, the brake is applied by a disc and caliper for driving, but the handbrake uses a small drum mechanism hidden in the center of the rotor.
This design gives the car the stopping power of disc brakes, while a drum system is also used for parking, as drum brakes lock more effectively at low speeds or in stationary conditions.
Knowing which setup your vehicle uses helps you understand where the adjusters are located and why the handbrake may loosen over time, either from worn shoes on the drum or from movement in the internal mechanism.
3. Where are the adjustment points located?
Adjustment points depend on the type of handbrake used in your car.
In most cable-operated systems, the main adjustment point is near the handbrake lever inside the center console or under the car where the cable splits to both rear wheels.
This area allows you to tighten or loosen the cable to restore proper tension.
In drum brakes and drum-in-disc setups, additional adjustment points are found on the rear wheels.
These are usually small star-shaped mechanisms inside the drum or rotor cap that allow you to expand or contract the brake shoes to achieve the correct fit.
Electronic parking brake systems may not have manual adjustment points because the motor automatically controls tension, but some models include access points for service mode.
Understanding these locations simplifies handbrake adjustment, helps you diagnose problems faster and ensures that the brakes lock the wheels securely every time.
How to Prepare the Vehicle
Preparing the vehicle before adjusting the handbrake is an important safety step because it keeps the car stable and prevents any movement while working.
A properly prepared vehicle allows you to easily access the adjustment points and reduces the risk of injury.
Handbrake adjustment often involves working on the wheels, center console, or underneath the car, so the vehicle must be in a safe and stable position.
Taking a few minutes to properly prepare the car makes the entire process easier, as you can access the parts without any hassle or worry about the car moving.
Whether your vehicle uses a cable-operated system or an electronic system, proper preparation keeps you safe, prevents the car from skidding and ensures that the final adjustments you make are accurate and reliable.
1. Park on Level Ground
Parking on level ground is important because it prevents the car from rolling while working on the handbrake.
A flat and level surface keeps the weight evenly distributed across all wheels, making it safer to adjust brake tension and inspect parts.
When a car is parked on a slope, even the slightest movement can generate enough force to cause the vehicle to turn unexpectedly, specially if the handbrake is already weak or loose.
Working on level ground gives you more control when checking the handbrake later, as you’ll know any movement is due to the brakes, not the angle of the surface.
A flat parking lot provides a stable starting point for the entire adjustment process.
2. Installing Wheel Chocks
Installing wheel chocks is one of the most reliable ways to prevent the car from moving when braking.
Wheel chocks are solid blocks that fit tightly over the tires to prevent the car from rolling forward or backward.
Even when the handbrake is fully released, the chocks hold the vehicle in place.
This is specially important when working on the rear brakes, as you may need to release or loosen the handbrake during adjustment.
Using chocks creates a strong mechanical barrier that enhances safety in addition to the handbrake.
Simple rubber or plastic chocks are sufficient, but heavy wooden blocks can also work if placed correctly.
Chocking the wheels before any adjustments ensures that the car remains stationary in one position throughout the operation.
3. Raise the Vehicle If Necessary
When adjustment points are located near the rear wheels or inside the brake drums or rotors, it becomes necessary to raise the vehicle.
Some cars can adjust the handbrake from inside the cabin, but many require access to the underside or internal components of the brakes.
Using a proper jack and jack stands keeps the car safely and stably raised, providing enough space to remove the wheels or inspect the brake components.
Raising the vehicle allows you to freely rotate the wheels, which is important when checking the resistance exerted by the brake shoes or pads after adjustment.
A properly raised and supported car allows you to make adjustments with confidence and ensures that each part can be clearly reached without any strain.
4. Locate the Hand Brake Adjustment Mechanism
Locating the hand brake adjustment mechanism is a crucial step, as these components are located in different locations on different cars.
Cable-operated systems often have an adjuster nut near the hand brake lever or under the vehicle where the cable splits into two lines.
Some vehicles also have additional adjusters on the rear wheels to adjust the brake shoes inside drum or drum-in-disc systems.
Vehicles with drum brakes usually have the star wheel adjuster hidden inside the drum or inside the rotor cap.
Adjustment components for electronic parking brake systems may be located near the rear calipers or inside the motor assembly.
Finding the correct mechanism ensures you can adjust the correct part and avoid tightening or loosening components not intended for manual changes.
Knowing where the adjustment point is located helps you work faster, reduce errors and ensure that the hand brake is correctly tuned for safe and reliable use.
How to Adjust a Cable-Operated Handbrake
Adjusting a cable-operated handbrake is a simple process because these systems rely on a mechanical cable that can stretch over time.
When the cable becomes loose, the handbrake lever can move too far before connecting to the wheels, reducing parking safety.
Cable systems are common in many older and mid-range vehicles and often require manual adjustment to restore proper tension.
The goal of adjustment is to remove excess slack from the cable so that the handbrake lever engages firmly with fewer clicks.
A well-adjusted cable makes the handbrake more responsive, keeps the car stable on slopes and reduces unnecessary wear on brake components.
Understanding how to reach the adjustment point, measure the correct lever travel and balance both sides of the cable helps ensure that the brakes operate evenly and safely every time.
1. Accessing the Center Console or Rear Tunnel
Accessing the center console or rear tunnel is usually the first step, as in many vehicles, the handbrake cable adjuster is located there.
The center console is the plastic or padded space between the front seats where the handbrake lever is located.
Removing a few screws or lifting a trim panel often reveals the cable mechanism underneath.
In some vehicles, the adjuster is located in the rear tunnel area, slightly behind the lever, in the middle of the car.
This tunnel protects the cable and provides direct access to the rear brakes.
Accessing this area gives you a clear view of the main tension point and in many cases, you can make adjustments without removing the wheels or lifting the car.
Once the console or tunnel is open, you can see how much slack there is in the cable and prepare for the next step.
2. Locating the Adjuster Nut
Locating the adjuster nut is important, as this is the part that controls the tightness or looseness of the handbrake cable.
The adjuster nut is usually attached to a threaded rod connected to the handbrake lever and the main cable leading to the rear wheels.
When the nut is turned, it moves along the thread and changes the length of the cable path.
This simple action can increase or decrease the tension on the cable.
Some cars use a double-nut design, where one nut maintains tension while the other nut locks it in place.
In other vehicles, the adjuster may be located under the car where the cable splits into two separate cables for each rear wheel.
Identifying the correct nut ensures you are adjusting the correct part and avoids stressing components not designed to handle the tension.
3. Tightening or Loosening the Cable
Tightening or loosening the cable is a crucial part of the adjustment process.
Tightening the cable removes excess slack and immediately applies the handbrake when the lever is pulled.
If the brake is too tight, loosening the cable increases the slack, which can put constant pressure on the wheels and cause overheating or premature brake failure.
Correct tension allows the handbrake to hold the car firmly while allowing the wheels to spin freely when the brake is released.
Most mechanics prefer a tension that begins to grip within about one or two clicks of the lever, but does not lock completely too quickly.
By turning the adjuster nut slightly and repeatedly checking its movement, you can achieve the right amount of tension without overtightening.
4. Checking Lever Travel
Checking lever travel is an important way to confirm whether your adjustments are correct.
Lever travel refers to how many clicks the handbrake lever makes before it is fully tightened.
Most vehicles are designed for a travel range of about five to eight clicks, depending on the model.
If the lever pulls too high, the cable is still too loose.
If the lever is tightened with too few clicks, the cable may be too tight and cause the brake to drag.
Testing the lever after each adjustment ensures that the handbrake operates within the manufacturer’s safe operating limits.
Proper lever travel also makes the handbrake easier to use because the driver can feel the brake fully engaged without excessive force.
5. Ensuring Equal Tension on Both Wheels
Ensuring equal tension on both wheels is essential because uneven tension can cause one wheel to lock up sooner than the other, reducing stability and increasing wear.
Cable-operated systems often split into two cables near the rear axle, each controlling one wheel.
If one side is overtightened, the car may pull slightly when braking or may not grip evenly when parked on a slope.
After adjusting the main cable, it is important to test the handbrake by lightly applying it and rotating both rear wheels.
Both wheels should begin to slow at the same time and the levers should lock at the same level of travel.
If one side responds differently, additional adjustment may be needed at the wheel end.
Equal tension improves safety, extends the life of brake components and ensures the safety of the handbrake.
How to Adjust the Hand Brake on Drum Brakes
Adjusting the hand brake on a drum brake system is a crucial maintenance step because drum brakes rely on brake shoes that apply pressure to the inside of a metal drum.
Over time, these shoes wear out, increasing the distance they must travel before making contact, causing the hand brake to feel weak or loose.
Drum brakes are still commonly used on many rear-wheel setups because they provide strong grip at low speeds, making them ideal for parking brakes.
When the shoes wear out or the internal adjuster shifts, the hand brake loses its effectiveness even when the cable tension is correct.
Adjusting the drum brake mechanism restores the proper distance between the shoes and the drum, allowing the hand brake to grip firmly with minimal lever movement.
This adjustment improves parking safety, reduces the risk of rollovers and helps maintain even wear on internal components.
1. Wheel and Drum Removal
Removing the wheel and drum gives you direct access to the internal brake shoes and adjustment components.
Removing the wheel is necessary to expose the drum and brake assembly.
Some drums can be removed easily, while others may require a gentle tap as rust or dust may accumulate on the edges.
Removing the drum allows you to clearly see the brake shoes, springs and adjusting mechanism.
This visibility is important because it allows you to check for worn shoes, damaged springs, or signs of uneven movement.
Without removing the drum, accurately adjusting the handbrake becomes very difficult because you won’t be able to confirm the condition of the internal braking components.
2. Locating the Star Wheel Adjuster
An essential part of working with drum brakes is locating the star wheel adjuster.
The star wheel is a small, serrated wheel that controls how far the brake shoes are positioned from the inner surface of the drum.
When turned in one direction, it pushes the shoes outward, reducing the distance they must travel to make contact.
Turning it in the opposite direction pulls the shoes inward, creating more space.
This adjuster is usually found between two shoes at the bottom of the brake assembly.
Many vehicles also have an access door behind the brake plate or drum so that the star wheel can be adjusted without completely removing the drum.
Identifying the star wheel ensures that you are adjusting the correct part responsible for restoring correct shoe spacing.
3. Expansion or Contraction of Shoes
Expansion or contraction of shoes changes the movement of the handbrake.
Expansion of the shoes brings them closer to the inner surface of the drum, reducing the lever movement required to apply the handbrake.
This important adjustment is necessary when the handbrake is loose or weak.
If the brake is too tight, the contraction of the shoes increases the space, which can cause constant rubbing or overheating during driving.
The correct amount of extension is enough to create a slight pull when the drum is rotated by hand, but not enough to prevent it from rotating freely.
This balance allows the handbrake to be applied firmly without creating unnecessary friction during normal driving.
4. Reinstalling the Drum
Reinstalling the drum is a crucial step as it ensures that the brake shoes are properly seated on the braking surface.
Once the shoes are adjusted, the drum should easily return to its place without any force.
If it is not properly fitted, the shoes may overstretch and the star wheel may tilt slightly inward.
A properly fitted drum ensures uniform braking force and prevents rubbing or vibration while driving.
Once the drum is in place, installing it on the wheel holds everything firmly in place, allowing the internal components to function smoothly even under pressure.
5. Rotation and Resistance Test
The rotation and resistance test confirms that the adjustment is correct before dismounting the vehicle.
With the wheel off the ground, you can check that the drum is rotating freely with minimal resistance by turning it by hand.
A little resistance is normal and necessary for proper handbrake operation, but the wheel should not feel stiff or difficult to turn.
After turning the wheel, pulling the handbrake lever should lock the wheel securely without excessive force.
If one side is engaging faster or harder than the other, additional adjustment may be needed to balance both wheels.
Proper testing ensures that the handbrake is firmly engaged, holding the vehicle securely and releasing smoothly without long-term wear.
How to Adjust the Handbrake on a Drum-in-Hat Design Disc Brake
To adjust the handbrake on a drum-in-hat design disc brake system, it’s important to understand that there are two separate braking systems within a single wheel assembly.
The outer part of the rotor handles normal braking using calipers and brake pads, while the inner hat section houses a small drum setup used solely for parking braking.
This inner drum contains small brake shoes that extend outward to grip the inside of the hat when the handbrake is applied.
Over time, these inner shoes wear out or slip slightly, reducing handbrake power even when the cable tension is correct.
Adjusting this type of handbrake ensures the proper gap between the shoes and the drum-in-hat surface, allowing the brake to safely engage the vehicle with minimal lever movement.
This system is widely used in modern cars because it provides strong general braking performance while providing the secure gripping power of drum brakes for parking.
1. Wheel and Brake Rotor Removal
Removing the wheel and brake rotor is essential because the internal parking brake mechanism is hidden inside the rotor cap.
After removing the wheel, slide the rotor off the hub to expose the small brake shoes inside.
Sometimes, rust, dust, or slight protrusions inside the cap can make it difficult to remove the rotor, but lightly tapping with a rubber hammer usually loosens it.
Removing the rotor gives you direct access to the internal parking brake components, allowing you to inspect the condition of the shoes, springs and hardware.
This step is crucial because visual inspection ensures that the adjustments you make are accurate and that no components are damaged or excessively worn.
2. Locating the Internal Shoe Adjuster
Locating the internal shoe adjuster is crucial for adjusting the drum-in-hat parking brake system.
The adjuster is usually a small star wheel located between the two brake shoes, similar to the adjuster found in conventional drum brakes.
This star wheel controls how far the shoes are from the inner surface of the rotor cap.
Turning the adjuster causes the shoes to extend outward or inward depending on the direction of rotation.
Some vehicles also have a small hole in the backing plate that allows adjustment without removing the rotor, but the most accurate method is to perform the adjustment immediately after removing the rotor.
Knowing the location and direction of the star wheel’s movement ensures you can adjust the shoe position correctly.
3. Determining the Correct Shoe Distance
Determining the correct shoe distance is one of the most important steps, as it determines how well the handbrake will grip the car.
The shoes should be close enough to the drum-in-cap surface that they engage quickly when the handbrake is applied, but they should not constantly touch each other during normal driving.
When test-fitting the rotor, spread the shoes slightly until they create very slight resistance; this helps maintain the proper spacing.
If the shoes are too far apart, the rotor will not fit on them or the wheels will wear out during driving.
If the shoes are too far apart, the handbrake will require excessive lever movement or will not be able to hold the vehicle securely.
Maintaining the correct spacing balances the safety, performance and durability of the internal brake components.
4. Reinstalling the Rotor
Reinstalling the rotor ensures that the shoes are in the correct position in the drum-in-hat cavity.
The rotor should slide back onto the hub easily and without force.
If the rotor does not fit easily, the shoes may be too far apart and may need to be positioned slightly inward on the star wheel.
Once the rotor is properly seated, the wheel can be reinstalled to help keep the assembly tightly aligned.
Proper installation of the rotor ensures that the handbrake shoes maintain even contact within the hat section and that there is no pulling, scratching, or vibration during driving.
5. Verifying Smooth Operation
Verifying smooth operation is the final step in confirming correct adjustment.
Once the wheel is off the ground, it should feel mostly free when turned by hand, with only slight resistance.
This slight pull indicates that the shoes are close enough to engage quickly, but not so tight that they constantly touch.
Pulling the handbrake lever should lock the wheel firmly without excessive force.
Upon releasing, the wheel should spin freely again, indicating that the shoes are retracting properly.
Smooth operation confirms that the handbrake is correctly adjusted, holds the vehicle firmly and operates without causing unnecessary damage to internal components.
Read More:
How to Test the Hand Brake After Adjustment
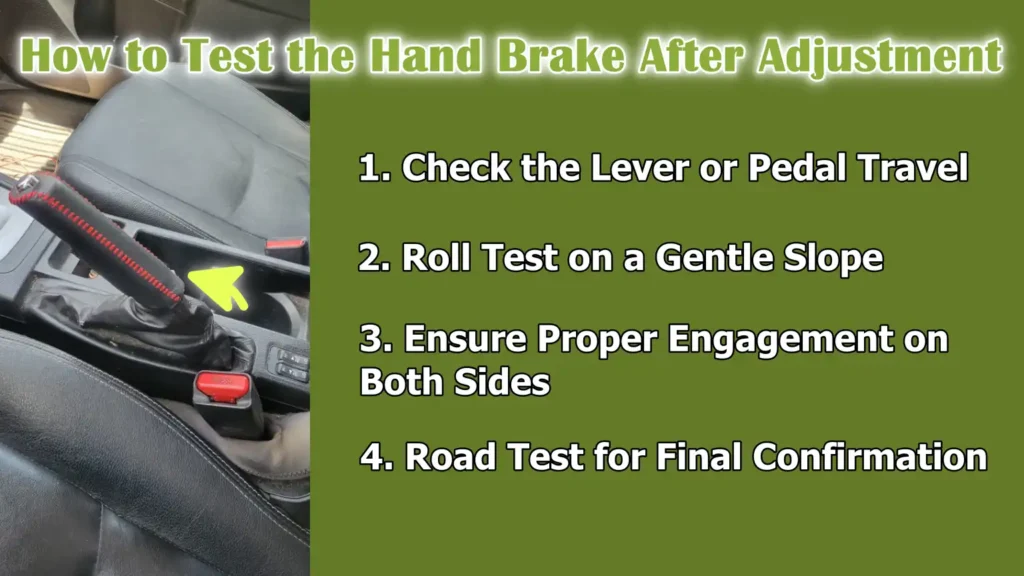
Testing the hand brake after adjustment is essential because it confirms that the system is working safely and correctly under real conditions.
Even if the adjustment process seems precise, the true reliability of the hand brake can only be verified through controlled testing.
A properly adjusted hand brake should apply smoothly, hold the car firmly on slopes, release without any tension and apply equal braking force to both rear wheels.
This testing step prevents unexpected rolling, uneven brake wear, or premature brake failure.
It also helps identify problems such as overtightened shoes, stretched cables, stiff mechanisms, or weak engagement that may not be apparent during adjustment.
Completing these tests gives you confidence that the parking brake will operate reliably every time you park the vehicle.
1. Check the Lever or Pedal Travel
Checking the lever or pedal travel allows you to confirm that the hand brake is working within the correct speed range.
Most vehicles are designed to lock the handbrake lever firmly within a certain number of clicks, while pedal-type systems require a certain travel distance before reaching full tension.
If the lever is pulled too high or the pedal is pressed too hard, the system may still be too loose.
If it locks too quickly at very low speeds, the brakes may overtighten and cause friction during driving.
Correct lever or pedal movement also helps maintain comfortable use, as the driver must accurately feel the brakes fully engaged.
This test ensures that adjustments are in accordance with the braking system’s intended design and prevents long-term stress on brake components.
2. Roll Test on a Gentle Slope
Rolling tests on a gentle slope are one of the most accurate ways to test handbrake performance in real life.
By driving the car down a gentle slope and applying the handbrake, you can see if the system holds the vehicle firmly without skidding.
If the car continues to move or even slightly sways, the handbrake may need additional tightening or internal shoe adjustment.
Using a gentle slope ensures the test is safe and also applies enough force to expose any weaknesses in the brake system.
This test shows how the handbrake responds under the vehicle’s natural load, which is more realistic than testing on flat ground.
3. Ensure Proper Engagement on Both Sides
Ensuring proper engagement on both sides is important because the handbrake should apply equal force to both rear wheels.
If one wheel locks sooner than the other or if one side continues to rotate slightly, the braking force is unbalanced.
Uneven engagement can lead to unsafe parking behavior, uneven wear on the brake shoes or pads and potential stress during emergency use.
To check this, the vehicle is raised and each wheel is manually rotated while the handbrake is applied.
Both wheels should begin to resist rotation at the same level of lever or pedal travel.
Equal engagement ensures that the brake system works harmoniously and provides safe, stable stopping power during parking.
4. Road Test for Final Confirmation
A road test provides final confirmation that the handbrake works correctly under real driving conditions.
During this test, you drive the vehicle slowly and gently apply the handbrake to ensure it engages smoothly, without any noise, vibration, or uneven grip.
The handbrake should release cleanly and allow the wheels to rotate freely.
Road testing also helps identify hidden problems, such as sticking shoes, cable friction, or delayed retraction, that may not be visible during a stationary check.
By combining acceleration, braking and release cycles, this test ensures that the adjustment is correct and that the handbrake will operate safely every time the car is parked.
8. Troubleshooting Common Problems
Troubleshooting handbrake problems is important because even a minor issue can affect stopping power, stability and safety when parking on a slope.
Many handbrake problems are caused by incorrect adjustment, worn parts, rusted hardware, or faulty cables.
Knowing the exact cause helps you troubleshoot quickly and prevent damage to brake components like rotors, drums, or pads.
You can quickly identify problems by checking the brake response when you pull the lever or press the pedal, hearing unusual noises and feeling the vehicle roll.
Understanding these signs in simple and clear steps can help you quickly resolve the problem and maintain a handbrake that engages firmly, releases easily and keeps the vehicle safe in all conditions.
1. The Handbrake Is Still Too Loose
A loose feeling in the handbrake, even after adjustment, usually means that the shoes or pads inside the drum or drum-in-hat setup are not extending sufficiently to contact the braking surface.
This often occurs when the star wheel adjuster is not tightened enough or its inner shoes are worn.
Another common cause is slack in the cable, which can increase with age and use, causing the lever or pedal to travel a greater distance before the brakes engage.
Sometimes, pivot points or levers within the assembly become sticky due to dirt or lack of lubrication, making them difficult to fully engage.
Carefully inspecting each part helps you pinpoint the exact cause and tighten the system so the handbrake engages normally.
2. Handbrake Too Tight or Worn While Driving
If the handbrake feels too tight or the wheels are rubbing while driving, it usually means that the brake shoes or pads have shifted out of place and are constantly touching the inner surface of the drum or rotor.
This friction can cause heat, an unusual odor and accelerated wear.
Another cause could be a stuck star adjuster or a rusted cable that won’t fully release even after the lever is lowered.
In cold or wet weather, moisture can cause parts to swell or rust, preventing the brake from releasing properly.
Slightly tightening the adjuster and ensuring the cable moves freely releases the brake properly and prevents damage to the wheel bearing, rotor, or drum.
3. Rusty or Stretched Cables
Rusty or stretched cables are common in older vehicles because brake cables are exposed to moisture, dirt and changing temperatures.
Corrosion inside the cable housing can cause the cable to move slowly or fail to return to its normal position.
This can cause the handbrake to become weak or uneven.
Stretched cables lose tension over time, causing the brakes to feel soft even with proper adjustment.
In severe cases, the cable may not be able to apply enough force to handle the vehicle on slopes.
Inspecting the cable from end to end, checking the outer casing and ensuring that the inner wire is running smoothly helps you determine if cleaning, lubrication, or replacement is required for proper braking performance.
4. Left vs Right Uneven Braking
Uneven braking between the left and right sides often occurs when one side is adjusted differently or has worn parts that don’t respond evenly.
If one side is subjected to more pressure over time, uneven wear may appear on the shoes, internal springs, or adjuster mechanism.
Rust or dirt can also affect only one side, causing the parts to operate slower than the other.
This imbalance can cause the vehicle to pull slightly during a handbrake test or roll unevenly when parked on a slope.
Correcting this requires carefully checking both sides, matching the adjustments on each wheel and ensuring that all mechanical parts are clean, lubricated and operate with equal force to ensure smooth and consistent handbrake operation.
When You Should Go To Ask For Help for Adjustment of Hand Brakes
It’s important to know when to seek professional help because the handbrake system has many moving parts that must work together with precise accuracy.
If any component is worn, misaligned, or damaged, the brakes will not be able to hold the vehicle safely, specially on steep hills.
While basic adjustments can be made at home, serious problems such as worn friction material, internal damage, or problems with modern electronic systems require specialist equipment and experience.
Professional technicians have the right tools to measure shoe thickness, test cable tension, inspect hidden hardware and diagnose electronic errors that are invisible to the naked eye.
Seeking expert help at the right time helps avoid unsafe driving conditions, protect other brake components and ensure that the handbrake lasts a long time with reliable performance.
1. Overworn Brake Shoes or Pads
If brake shoes or pads are excessively worn, proper handbrake grip may be difficult to achieve, even after adjustment.
Worn friction material reduces contact with the drum or rotor surface, resulting in a weak brake feel and requiring more lever rotation before braking.
Professionals can accurately measure the remaining thickness and determine if resurfacing or complete replacement is necessary.
They also check for heat damage, glazing, or cracks that may not be visible to inexperienced individuals.
Promptly replacing worn shoes or pads ensures safe stopping power and can prevent damage to the drum, rotor, or internal components.
2. Damaged Cables
Damaged cables are another situation where professional assistance is recommended, as cable replacement often involves inserting a new cable through tight spaces under the vehicle, removing heat shields and adjusting the equalizer mechanism.
Worn, bent, rusted, or overstretched cables cannot apply consistent pressure to the brake shoes or pads.
A professional mechanic can perform a thorough inspection to confirm the condition of the cable and install a new cable that matches the correct length and tension.
This ensures smooth movement, proper release and a strong grip without uneven resistance on both sides.
3. Electronic Parking Brake Problems
Electronic parking brakes, commonly found in modern vehicles, require specialized tools and diagnostic equipment that most people don’t have at home.
These systems use electric motors, sensors and control modules that communicate through the vehicle’s computer network.
If the electronic brake doesn’t respond, displays a warning on the dashboard, or doesn’t activate or deactivate, it could be due to a software error, motor failure, or sensor malfunction.
Professionals can perform an electronic scan, reset the system and calibrate the brake motor to factory standards.
Attempting to fix these problems without the proper tools could cause further damage or disable safety features.
Seeking expert help ensures that electronic systems function smoothly and the vehicle remains safe under all conditions.
Basic Maintainance Tips to Keep Your Handbrake Working
Keeping your handbrake in good condition is essential because it ensures reliable grip every time you park your vehicle.
A well-maintained handbrake system also reduces wear on the cables, brake shoes and internal mechanisms, making them last longer and function more smoothly.
Regular care prevents problems like sticking, uneven braking, weak grip and excessive lever travel.
By understanding how the system works and paying attention to small details like lubrication, inspection and replacement of parts, you can avoid major repairs in the future.
Proper maintenance also keeps the handbrake responsive in emergency situations, where quick engagement can prevent the vehicle from rolling unexpectedly.
Also, it is seen that the moisture, salt and long periods of non-use actually makes the brakes parts such as: parking-brake shoes, drums and cable housings stick together. As well as, the corrosion can make a parking brake either fail to release or become unreliable when it gets engaged, which is why it is really recommended to inspect it regularly, lubricate and replace heavily corroded parts to maintain and restore safe functions of hand brakes again.[¹]
1. Lubrication of Cable Components
Lubrication of cable components is important because the handbrake cable runs inside a protective outer casing and friction inside this casing increases over time due to dirt, moisture, or rust.
When the internal wire dries out or rusts, it can stick or move unevenly, causing the brakes to feel stiff or sluggish.
Using the right type of lubricant ensures smooth cable gliding and reduces pressure on the lever or pedal.
It also prevents corrosion, which can weaken the wire.
Proper lubricant should only be applied to exposed linkages and pivot points, as sealed cables are designed to remain secure and should not be opened.
2. Regular Inspection Intervals
Regular inspection intervals help catch minor problems before they become major issues.
Over time, brake shoes, pads, cables and adjusters naturally deteriorate due to use and exposure to road conditions such as dirt, salt and water.
Inspecting the handbrake system every six to twelve months ensures that worn parts, stuck mechanisms, or loose connections are identified early.
During the inspection, you can check for corrosion on the cable ends, uneven shoe wear, damaged adjusters and excessive lever movement.
Continuous monitoring also helps maintain balanced braking on both wheels, which is essential for keeping the vehicle stable on slopes.
3. Avoiding Overtightening the Brakes
It is important to avoid overtightening the brakes because excessive cable tension can put constant pressure on the wheels.
Even slightly tightening the brake shoes or pads while driving can cause them to overheat, wear faster and reduce fuel efficiency.
Overtightening can also damage internal components such as springs, adjusters and cables, leading to costly repairs.
The handbrake should be applied firmly within a normal number of clicks without any resistance while the vehicle is moving.
Maintaining balanced tension ensures both safety and smooth operation of the braking system.
4. Replacing Components Before They Wear Out
Replacing components before they wear out is one of the most effective ways to maintain a reliable handbrake system.
Parts such as cables, shoes, springs, levers and adjusters wear out gradually and waiting for them to break can result in a sudden decrease in handbrake performance.
Early replacement prevents secondary damage, such as worn shoes damaging the drum or stretched cables damaging the equalizer mechanism.
It also keeps the system stable, as new parts operate more efficiently and maintain proper tension.
By replacing worn parts promptly when they show signs of wear, you ensure reliable performance and reduce the risk of unexpected rolling or braking problems.
Conclusion – How to Adjust Hand Brakes on a Car
You should always have to maintain the hand brake, as it is a really dependable and quiet safety system that works for you every day as it is not just a parking tool.
Plus, a properly functioning handbrake does more than just hold the car in place while parking.
It protects the transmission, prevents roll-away accidents, reduces stress on other braking components and ensures safe driving on steep hills.
By understanding how different systems, such as cable-operated brakes, drum-in-disc setups and electronic parking brakes, work, you can gain confidence in identifying problems early and making the right adjustments.
Careful preparation, accurate adjustment, frequent inspection and timely maintenance all play a vital role in handbrake performance over time.
While many steps can be taken at home, knowing when to seek professional help ensures that serious problems—like worn shoes, damaged cables, or electronic malfunctions—are addressed before they compromise safety.
When you follow these steps, your handbrake remains smooth, responsive and reliable, giving you peace of mind every time you park.
Also, you can ask related questions in the comment box.
Frequently Asked Questions
Q1. What is a handbrake and why is it important?
Answer: The handbrake, also called the parking brake or emergency brake, is a mechanical system designed to keep your car stationary while parking. Unlike the main hydraulic brakes, which use brake fluid to stop the wheels, the handbrake typically works with a cable or electronic motor to lock the rear wheels. This is important because it prevents your car from rolling, specially on slopes and provides an additional safety mechanism if the main brakes fail. A properly functioning handbrake also helps reduce transmission wear when the vehicle is parked.
Q2. How do I know if my handbrake needs adjusting?
Answer: There are several signs that indicate the handbrake may need adjusting. If the handbrake lever shakes excessively before engaging, or if you feel the car still swaying slightly on a slope, the system may be loose. Another sign is if the handbrake feels too tight and creates friction even when released. Uneven braking between the left and right rear wheels is also a sign. Regular inspections every six months or after heavy use can help detect these problems early.
Q3. What is the difference between a cable-operated and an electronic handbrake?
Answer: A cable-operated handbrake uses a metal cable connected to the handbrake lever inside the cabin. When you pull the lever, the cable tightens and applies force to the rear brakes. Electronic handbrakes, on the other hand, have a small electric motor controlled by a button or switch. These motors apply the brakes automatically and can adjust themselves over time. Cable-operated systems are more common in older cars and must be adjusted manually, while servicing electronic systems usually requires specialized diagnostic equipment.
Q4. Can I adjust my handbrake myself?
Answer: Yes, many handbrakes, specially cable-operated ones, can be adjusted at home with basic tools. Adjustment usually involves tightening or loosening the cable via an adjuster nut located near the lever or on the rear wheels and checking the lever’s rotation to ensure proper engagement. Drum brake shoes may also require internal adjustment using a star wheel to set the correct spacing. However, to ensure safety, servicing electronic parking brakes or excessively worn parts should be performed by a professional.
Q5. How often should handbrake maintenance be performed?
Answer: Handbrake maintenance should be part of a regular vehicle inspection, ideally every six months to a year, depending on usage. Maintenance includes checking cable tension, checking brake shoes or pads for wear, lubricating moving parts and testing the lever or pedal’s movement. Cars driven in hilly or wet conditions may require more attention as the cables and internal components are exposed to additional pressure and moisture.
Q6. What causes a loose handbrake?
Answer: Loose handbrakes are usually caused by stretched cables, worn brake shoes or pads, or looseness in the internal adjustment mechanism. Dirt, rust, or lack of lubrication can also prevent the system from fully engaging. If the handbrake lever moves several clicks before the car stops, this indicates excessive looseness and requires adjustment.
Q7. What causes a worn or too-tight handbrake?
Answer: Handbrake wear occurs when the brake shoes or pads are too close to the drum or rotor, or when the cable is overtightened. Sticking mechanisms, rusted parts, or environmental conditions such as moisture or rust can also prevent the brakes from fully releasing. Wear can damage brake components and cause additional wear on the wheels, so it’s important to address this problem immediately.
References:
[1] Corrosion Stiction in Automotive Braking Systems
https://pmc.ncbi.nlm.nih.gov/articles/PMC10224365/

Guys, I’m a car audio enthusiast and customization expert and I love clear sound and clean installation. Plus, I have spent years helping people build their dream audio setups. And whenever I’m working on cars, I probably listen to music and thinks about the next big upgrade.