
Written By: Don Dodi
Fact Checked By: Kristen Brown
Reviewed By: Diego Rosenberg
The simple fact that: the darker your wheels looks, the more possible damage can happen, as brake dust is not just the normal road dirt that just stuck in, but it is literally made from the metallic particles that is created whenever you presses the brake pedal.
Yes, brake dust is the stubborn type of dirt that collects on the car wheels.
Literally, they forms when brake pads presses against the brake rotors to slow down the car, in that braking process the creation of tiny particles happens and they are literally made of: iron, carbon fibers and adhesive resins.
Because of the braking process, these particles becomes extremely hot whenever they gets released and strongly adhere to the wheel surface, that’s how they slowly harden over the period of time.
Additionally, there are studies in automotive materials science that shows that the iron-rich brake dust can actually oxidize whenever they gets in contact with the air and moisture, that’s how your wheels often develops that dark ugly stains or rough textures, if you don’t clean them at the regular time interval.
Basically, if you don’t have will to clean them, then they can damage the clear coats, cause corrosion on alloy wheels and even permanently stain chrome or painted finishes as well.
That’s why, we have come up with this guide on How to Remove Brake Dust From Wheels, so that you can protect the wheel material, its shine of course and ultimately extend the lifespan.
Know, Why is Removing Brake Dust Is That Important?
1. Prevents permanent stains and corrosion
Brake dust is composed of tiny metal particles from the brake pads and rotors, mixed with carbon and other materials.
When left on the wheels for extended periods, these particles can react with moisture and road salt, leading to corrosion, staining and even pitting of the wheel surface.
Over time, this can cause permanent damage that cannot be removed with regular washing.
Regularly removing brake dust ensures your wheels remain in pristine condition, preventing long-term damage and costly repairs.
2. Protects the wheel finish – alloy, chrome, painted, matte
Different wheel finishes, such as polished alloy, chrome, painted, or matte, can react differently to brake dust.
Brake dust is slightly acidic and when it accumulates on the wheel surface, it can degrade or discolor the finish.
Alloy wheels can lose their shine, chrome wheels can develop rust spots, painted wheels can experience paint chipping or fading and matte finishes can become uneven.
By regularly cleaning brake dust, you protect the quality and appearance of your wheel finish, keeping your wheels looking new and well-maintained.
3. Improves vehicle appearance and resale value
Clean wheels make a significant difference to the overall appearance of a vehicle.
Wheels covered in brake dust look neglected and dirty, while clean wheels enhance the car’s aesthetics.
Maintaining clean wheels can also positively impact resale value, as potential buyers or appraisers often assess the condition of the wheels as part of the overall vehicle evaluation.
A car with well-maintained wheels indicates attention to care and maintenance, which increases buyer confidence and value.
4. Reduces cleaning effort in the long run
Brake dust that accumulates over time becomes difficult to remove, often requiring strong cleaners or vigorous scrubbing.
By regularly removing brake dust, you prevent the buildup that can become embedded in the wheel’s surface.
This not only makes future cleaning quicker and easier but also reduces the risk of damage from harsh cleaning methods.
A regular cleaning schedule helps manage maintenance while ensuring your wheels remain in top condition.
What are The Wheel Types and Brake Dust Sensitivity
1. Alloy Wheels and Heat-Bonded Dust
Alloy wheels are made from a mixture of metals, typically aluminum or magnesium, which are lightweight and improve vehicle performance.
The brake dust produced by these wheels often contains iron particles, which can bond to the surface when exposed to high temperatures during braking.
If left uncleaned, the dust can become embedded in the alloy, leading to pitting, discoloration, or loss of shine.
Regular cleaning with a wheel-safe cleaner prevents this heat-bonding and maintains the smooth, glossy look of alloy wheels.
2. Chrome Wheels and Pitting Risk
Chrome wheels feature a polished metallic layer over the wheel base, giving them a highly reflective finish.
Brake dust and road salt can react with the chrome surface, leading to pitting or small rust spots.
These imperfections are difficult to repair and can spread if left untreated.
Frequent cleaning of chrome wheels with non-abrasive cleaners and soft materials protects the delicate chrome layer and keeps the wheels looking bright and new.
3. Painted and Clear-Coated Wheels
Painted wheels have layers of paint and are often clear-coated to protect against scratches, dirt and oxidation.
Brake dust contains acidic particles that can degrade the clear coat over time, leading to discoloration, staining, or peeling paint.
Consistent cleaning maintains the protective layer, prevents fading and preserves the wheel’s original appearance.
Special care should be taken to use pH-neutral wheel cleaners to avoid damaging the paint.
4. Matte and Powder-Coated Wheel Precautions
Matte and powder-coated wheels have a textured, non-glossy finish that looks distinctive but is more sensitive to harsh chemicals and abrasive cleaning.
Brake dust can leave marks on these surfaces and vigorous scrubbing can damage the coating or alter its uniform appearance.
Using mild, non-acidic cleaners and soft brushes ensures that brake dust is removed without damaging the matte or powder-coated finish.
Regular maintenance prevents stubborn stains and keeps the wheels looking smooth and consistent.
Tools
| Tool / Supply | Description | Purpose / Why It’s Important |
|---|---|---|
| Wheel Cleaner (pH-neutral vs Iron-Reactive) | This is a cleaning liquid specially formulated for wheels. Its pH-neutral formula makes it gentle and safe for all surfaces. The iron-reactive cleaner reacts with brake dust and breaks it down. | Safely removes brake dust, dirt and grime. Protects wheel surfaces from damage or discoloration. |
| Soft Wheel Brushes and Detailing Brushes | Soft bristle brushes designed for wheel surfaces. Small detailing brushes help reach tight spaces. | It loosens brake dust and dirt without scratching the wheel. It also cleans hard-to-reach areas around the nuts and spokes. |
| Microfiber Towels and Wash Mitts | Soft microfiber cloth and gloves. Extremely gentle on surfaces. | Dry and wipe wheels without leaving scratches. Helps remove loose dust and cleaner residue. |
| Bucket, Water Hose, or Pressure Washer | Water source and container used to wash and clean the wheels. | It safely rinses away brake dust and cleaner, helping to prevent dust from building up on the wheel again. |
| Protective Gloves and Eye Protection | Gloves to protect hands and glasses or goggles to protect eyes. | It protects the skin from irritation caused by cleaning products and keeps the eyes safe from chemical splashes. |
How to Make Sure the Safety Before Cleaning the Brake Dust from Wheels
1. Allow the wheels to cool completely
Wheels get very hot after driving, specially near the brakes, as friction generates considerable heat.
Cleaning hot wheels can cause the cleaner to dry too quickly, reducing its effectiveness, or react with brake dust, potentially causing stains or marks on the wheel surface.
Additionally, touching hot wheels can burn your skin.
Always allow the wheels to cool completely before beginning the cleaning process.
This ensures safe handling and better results when removing brake dust.
2. Avoid using strong acids on sensitive finishes
Some wheel cleaners contain strong acids designed to break down stubborn dirt or iron deposits.
While effective, these acids can damage sensitive finishes such as painted, clear-coated, matte, or powder-coated wheels.
Using harsh chemicals on these finishes can lead to discoloration, etching, or permanent damage.
For the longevity and pristine look of your delicate wheels, always choose a pH-neutral or wheel-safe cleaner.
3. Work in a shaded, well-ventilated area
Direct sunlight can cause wheel cleaners to dry too quickly, leading to streaks or spots on the surface.
Working in a shaded area prevents this problem and allows the cleaner to work effectively.
Furthermore, cleaning chemicals can emit fumes, so working in a well-ventilated area is crucial to minimize inhalation risks.
Both shade and good ventilation ensure safety and optimal cleaning results.
4. Test the cleaner on a small, inconspicuous area
Different wheels react differently to cleaners depending on their material and finish.
Before applying the cleaner to the entire wheel, it’s essential to test it on a small, hidden area.
This allows you to test for adverse reactions such as discoloration, bubbling, or staining without risking the entire wheel.
Pre-testing ensures the cleaner is safe for the wheel and provides peace of mind before proceeding with the complete cleaning process.
How to Remove Brake Dust From Wheels – Easy to Follow Steps
1. Washing Away Loose Dirt and Debris
Before applying any cleaner, it’s crucial to thoroughly rinse the wheels with water.
This removes loose dirt, dust and small particles that could scratch the wheel during cleaning.
Using a hose, bucket, or pressure washer, start at the top of the wheel and work your way down to ensure all particles are washed away.
This initial rinse prevents accidentally rubbing dirt into the wheel’s surface during subsequent scrubbing.
2. Applying the Wheel Cleaner Evenly
Once the wheels are rinsed, apply the appropriate wheel cleaner based on the type of wheel.
pH-neutral cleaners are safe for all finishes, while iron-reactive cleaners help break down brake dust quickly.
Spray or pour the cleaner evenly over the entire wheel surface, including the spokes, rim and inner barrel area.
Even coverage ensures that all parts of the wheel receive sufficient contact with the cleaner for effective dust removal.
3. Allowing the Cleaner to Dwell to Break Down Dust
After applying the cleaner, allow it to dwell for a few minutes so the chemical action can break down the brake dust and grime.
This period, known as the dwell time, is crucial as it softens stubborn particles, making them easier to remove.
Avoid letting the cleaner dry on the wheel, specially in direct sunlight, as this can cause staining or streaking.
Following the suggested dwell time ensures maximum cleaning efficiency without damaging the wheel’s finish.
4. Scrubbing with a Soft Brush
After the dwell time, use a soft wheel brush and detailing brushes to gently scrub the wheel.
Pay attention to areas where brake dust is heavily accumulated, such as around the lug nuts and in tight corners.
Soft brushes help remove remaining dust without scratching or damaging the wheel surface.
Work systematically and rinse the brush frequently to prevent dirt from accumulating back onto the wheel.
5. Thorough rinsing to remove remaining residue
Once the brake dust has been loosened and scrubbed away, rinse the wheels thoroughly with clean water.
Ensure that all traces of the cleaner and loose particles are washed away to prevent streaking or chemical reactions that could damage the finish.
This final rinse ensures the wheels are completely clean and ready for drying or further treatments such as wheel wax or sealant.
How to Remove Heavy or Baked-On Brake Dust
1. Using an Iron-Removal Wheel Cleaner
Heavy or baked-on brake dust is often composed of iron particles from the brake pads and rotors that have fused to the wheel surface due to high heat.
Standard wheel cleaners are not effective at removing these stubborn deposits.
Iron-removal or iron-reactive wheel cleaners are specifically formulated to safely break down these particles.
When applied, these cleaners chemically react with the iron dust, transforming it into a softer substance that can be rinsed away, minimizing the risk of scratching or damaging the wheel’s finish.
2. Multiple Gentle Cleanings
For very heavy brake dust buildup, a single cleaning may not be sufficient.
Multiple gentle cleanings ensure that the dust is removed gradually without excessive scrubbing.
Start by rinsing with water, then apply the cleaner, allow it to dwell for a short period and gently agitate.
Rinse thoroughly and repeat as needed.
This method reduces the risk of damaging the wheel’s delicate finish and provides a more thorough and safer cleaning.
3. When to Use a Wheel Clay Bar
Wheel clay bars are effective at removing small particles and contaminants that remain embedded in the wheel surface after regular cleaning.
They are particularly useful for wheels with heavy brake dust buildup that has become embedded in the clear coat or painted finish.
By using a clay bar lubricated with a suitable detailing spray, you can glide the bar across the wheel surface, safely lifting and removing embedded particles without scratching or damaging the finish.
This restores smoothness and improves the overall appearance of the wheel.
4. Avoid abrasive pads and metal brushes
While it may be tempting to use harsh tools to quickly remove stubborn brake dust, abrasive pads or metal brushes can permanently damage the wheel’s surface.
They can cause scratches, pitting, or remove the protective coating, leading to rust or a degraded appearance.
For stubborn buildup, always use soft brushes, microfiber towels, or a clay bar.
Gentler methods may take longer, but they preserve the integrity of the wheels and extend their lifespan.
What are The Common Mistakes to Avoid Them Strictly
Plus, there’s scientific characterization of brake system wear particles that actually shows that the brake dust is a mixture of the metallic and alloy elements which is released from the brake pads and rotors during the frictional braking process, so these are the microscopic particles that actually contributes to the vehicle wheel buildup and non-exhaust emissions as well, that clearly shows that you should use targeted cleaners and wheel-safe techniques so that you can remove that stubborn brake dust without damaging the finish and wheel itself.[¹]
1. Cleaning Hot Wheels
One of the most common mistakes when cleaning wheels is attempting to clean them immediately after driving.
Braking generates friction, causing the wheels to become very hot and applying cleaners to hot surfaces can cause chemical reactions that lead to staining or discoloration.
Additionally, touching hot wheels can burn your hands.
Always allow the wheels to cool completely before beginning the cleaning process.
This ensures safety and prevents damage to the wheel’s finish.
2. Using Household Degreasers
Many people use household degreasers or all-purpose cleaners to remove brake dust, thinking they are good alternatives to specialized wheel cleaners.
Household products can be too harsh for wheel finishes, specially painted, clear-coated, or matte wheels.
These cleaners can strip protective coatings, cause discoloration, or leave residues that damage the surface over time.
It’s essential to use cleaners specifically formulated for wheels for safe and effective cleaning.
3. Scrubbing with Stiff Bristles
Scrubbing wheels with stiff-bristled brushes or abrasive pads can scratch and damage the surface.
Brake dust contains metallic particles and stiff brushes can grind these particles into the wheel, causing permanent marks or damaging the finish.
Always use soft wheel brushes and detailing brushes and apply light pressure to keep the wheel surface smooth and undamaged.
4. Skipping Proper Rinsing
Another common mistake is not thoroughly rinsing the wheels before and after cleaning.
Insufficient rinsing leaves dirt, brake dust and cleaning chemicals on the wheel surface, which can react and cause stains, corrosion, or streaks.
Washing before cleaning removes loose dirt and washing afterward ensures that all residue is rinsed away.
This step is crucial for achieving a clean, shiny and safe wheel surface.
How to Prevent Brake Dust Buildup
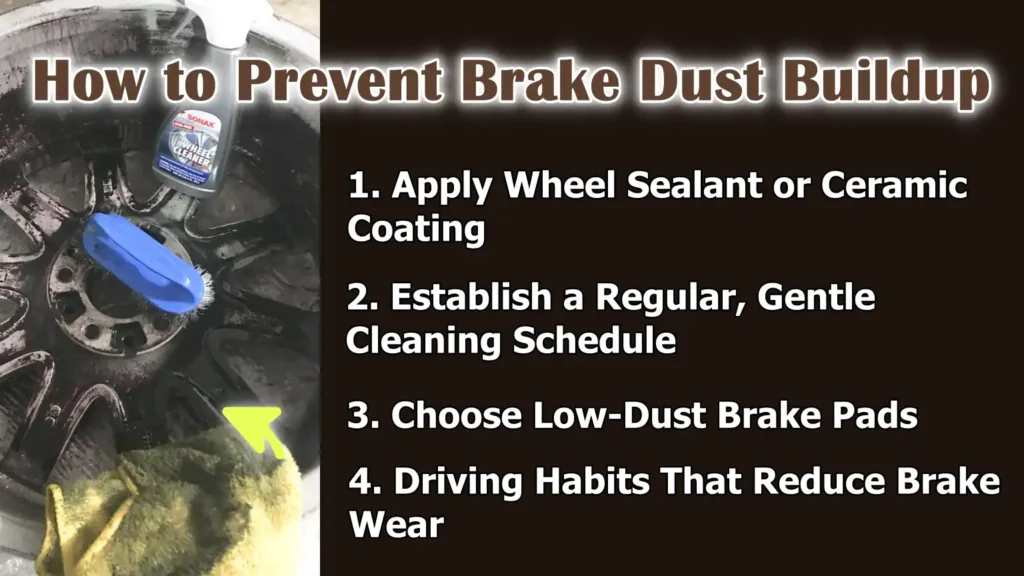
1. Apply Wheel Sealant or Ceramic Coating
Wheel sealants and ceramic coatings create a protective layer on your wheels’ surface that repels dirt, brake dust and road grime.
This barrier makes cleaning the wheels much easier, as brake dust is less likely to stick or bake onto the surface.
Ceramic coatings are particularly effective as they chemically bond to the wheel’s surface, providing long-lasting protection and enhancing the wheel’s shine.
Regular use of these products helps maintain a clean look and reduces the need for aggressive cleaning.
2. Establish a Regular, Gentle Cleaning Schedule
Preventing brake dust buildup is easier than removing it once it has accumulated.
By regularly cleaning your wheels, even with just a light rinse or gentle wash, you can prevent particles from embedding themselves in the wheel’s surface or baking on due to heat.
A consistent cleaning schedule keeps wheels looking clean, reduces the risk of corrosion or staining and ensures that heavy-duty cleaning is unnecessary.
Smaller, frequent maintenance sessions are more effective and safer for the wheel’s finish than occasional aggressive cleaning.
3. Choose Low-Dust Brake Pads
The type of brake pads used directly impacts brake dust production.
Low-dust or ceramic brake pads are designed to produce less residue than traditional semi-metallic pads.
By choosing these pads, less brake dust will accumulate on the wheels, reducing the frequency of cleaning and preserving the wheel’s finish.
Low-dust pads are specially beneficial for vehicles with delicate finishes or for owners who desire easier wheel maintenance.
4. Driving Habits That Reduce Brake Wear
Driving habits significantly influence how much brake dust is generated.
Applying the brakes gradually, avoiding sudden stops and maintaining sufficient distance to slow down gradually can reduce friction and brake wear.
Less wear on the brake pads means less dust accumulation, which means your wheels will stay cleaner for longer.
Adopting careful and consistent driving habits not only improves safety but also helps reduce the maintenance needs of your wheels.
Read More:
So, How Often Should You Clean Brake Dust?
1. Daily Drivers vs Weekend Cars
Vehicles used daily accumulate brake dust much faster than those driven only on weekends or occasionally.
Daily driving involves frequent braking, stop-and-go traffic and exposure to dirt and road debris, all of which contribute to brake dust buildup.
For daily drivers, it’s recommended to clean the wheels at least once every one to two weeks to prevent the dust from caking onto the surface.
Weekend or occasional-use vehicles can often be cleaned less frequently, but regular checks are still important to maintain the wheels’ appearance and prevent damage.
2. City Driving vs Highway Use
City driving typically involves more frequent braking due to traffic lights, stop signs and congested areas.
This generates more brake dust compared to highway driving, where braking is less frequent and more gradual.
Therefore, vehicles primarily driven in urban areas may require more frequent wheel cleaning, sometimes weekly, while those mostly used on highways may only need cleaning every two to three weeks.
Understanding your driving habits helps determine an effective cleaning schedule.
3. Seasonal Considerations
Seasonal factors influence brake dust accumulation and wheel maintenance needs.
In winter, road salt and chemicals can combine with brake dust to accelerate corrosion and staining, making more frequent cleaning necessary.
During the warmer summer months, higher temperatures can cause brake dust to bake onto the wheels, which may also require more attention.
Adapting your cleaning routine to seasonal conditions ensures your wheels remain protected and look their best year-round.
4. Visual Inspection Tips
Regularly inspecting your wheels is the easiest way to determine when cleaning is necessary.
Look for visible layers of dust, discoloration, or uneven patches on the wheel surface.
If your wheels look dull or dirty, it’s time to clean them, even if it hasn’t been long as the last cleaning.
Visual inspection helps prevent buildup from hardening or damaging the wheel’s finish, allowing for timely maintenance.
Conclusion – How to Remove Brake Dust From Wheels
Now, you have understood that you can easily prevent that ugly brake dust from building and prevent from any permanent damage, also coatings and sealants keeps the shine always maintained, as it literally creates a barrier against the relentless effects of the dirt, dust and other harsh environmental elements.
Brake dust contains tiny metal particles and chemicals that can damage your wheels’ finish over time, leading to corrosion, pitting, or permanent stains.
By understanding different wheel types, using the right tools and cleaners and adopting safe and consistent cleaning practices, you can prevent long-term damage and keep your vehicle looking shiny and well-maintained.
Implementing protective measures such as wheel sealants and ceramic coatings and choosing low-dust brake pads, further reduces maintenance and increases durability.
Regular inspections, careful driving habits and timely cleaning ensure your wheels remain protected, gleaming and free from damaging buildup.
A proactive approach to brake dust not only preserves the aesthetics of your wheels but also contributes to your vehicle’s overall longevity and resale value.
Now, it is time to solve other queries that bothers you, as you just have to comment below for more information.
Frequently Asked Questions
Q1. How often should I clean the brake dust from my wheels?
Answer: The frequency of cleaning depends on how often you drive and the type of driving you do. Cars driven daily and frequently in city stop-and-go traffic accumulate brake dust quickly and may need cleaning every one to two weeks. Cars driven mostly on highways or only occasionally can be cleaned less often, approximately every two to three weeks. Regular visual inspections are also important; if your wheels look dusty or dull, it’s a good indication that you should clean them regardless of your your schedule.
Q2. What’s the best way to remove heavy or caked-on brake dust?
Answer: For heavy or caked-on brake dust, it’s best to use an iron-removal or iron-reactive wheel cleaner. These cleaners are specifically designed to safely break down the metallic particles present in brake dust. Apply the cleaner and let it sit for a few minutes, then gently scrub with a soft wheel brush. In some cases, using a clay bar can help remove any remaining stubborn particles without scratching the wheel. Avoid using stiff brushes or abrasive pads, as these can damage the wheel’s finish.
Q3. Can I use household products to clean brake dust?
Answer: Some household products, such as baking soda or mild dish soap, may work for light cleaning, but they are generally not strong enough for heavy brake dust. Vinegar can be used with caution, but it is acidic and can damage painted, clear-coated, or matte wheels. Commercial wheel cleaners are specifically designed to safely and effectively break down brake dust, making them a superior option for maintaining wheels over time.
Q4. Are certain types of wheels more susceptible to brake dust?
Answer: Yes, different types of wheels react differently to brake dust. On alloy wheels, the heat can cause the dust to bake on, leading to staining or discoloration. Chrome wheels can develop pitting if the dust is left on for too long. Painted and clear-coated wheels can stain or lose their shine if not cleaned carefully. Matte and powder-coated wheels are delicate and can be damaged by harsh chemicals or scrubbing. Knowing your wheel type helps you choose the safest cleaning method.
Q5. How can I prevent brake dust from accumulating quickly?
Answer: You can prevent brake dust accumulation by applying a wheel sealant or ceramic coating, which creates a protective layer that repels dust. Regular, gentle cleaning also prevents dust from building up on the surface. Choosing low-dust brake pads will also reduce the amount of dust produced by your brakes. Additionally, practicing good driving habits, such as braking gradually and avoiding sudden stops, helps minimize brake wear and dust formation.
Q6. Is it safe to clean wheels immediately after driving?
Answer: No, wheels can be very hot after driving, specially near the brakes. Cleaning hot wheels can cause chemical reactions that lead to stains or spots and can also burn your hands. Always wait for the wheels to cool completely to ensure safety and prevent damage to the wheel surface.
Q7. What tools and supplies will I need to effectively clean brake dust?
Answer: You will need a wheel cleaner suitable for your wheel type, a soft wheel brush and a detailing brush for hard-to-reach areas and microfiber towels or wash mitts for wiping and drying. A bucket of water, a hose, or a pressure washer is necessary for washing. Protective gloves and eye protection are essential to protect your hands and eyes from the chemicals. Using the right tools ensures a thorough cleaning without damaging the wheels.
Q8. Can I use a pressure washer to clean brake dust?
Answer: Yes, a pressure washer can help effectively wash away brake dust. However, it should be used on a medium setting to avoid damaging the wheel’s finish or forcing dirt into delicate areas. Always pre-rinse to remove loose dirt, then use a brush and cleaner for more stubborn dust before the final rinse. Pressure washers are helpful for thorough cleaning but should be used with caution.
References:
[1] Wear debris from brake system materials: A multi-analytical characterization approach
https://www.sciencedirect.com/science/article/abs/pii/S0301679X15003539

Guys, I’m a car audio enthusiast and customization expert and I love clear sound and clean installation. Plus, I have spent years helping people build their dream audio setups. And whenever I’m working on cars, I probably listen to music and thinks about the next big upgrade.