Written By: Don Dodi
Fact Checked By: Kristen Brown
Reviewed By: Diego Rosenberg
You need to be aware of the fact that, the car headliner is actually glued in place, which is why you can’t use too much liquid as it can lead to the loosen up or sag for forever.
The car headliner is actually fabric-covered surface which is attached to the inside of the roof of a vehicle, without a doubt it plays a major role in maintaining the interior cleanliness, air quality, comfort and overall vehicle look as well.
But, just like the other accessories and vehicle part; headliner also collects dust, airborne pollutants, smoke particles, moisture, body oils and all kinds of odors from pets, food and daily driving.
As well as, there are research on the vehicle’s interiors that shows that enclosed cabin surface like: fabric-based materials that headliners made of, these kinds of surface can trap fine amount of particles and volatile organic compounds more easily than other hard surfaces of vehicle.
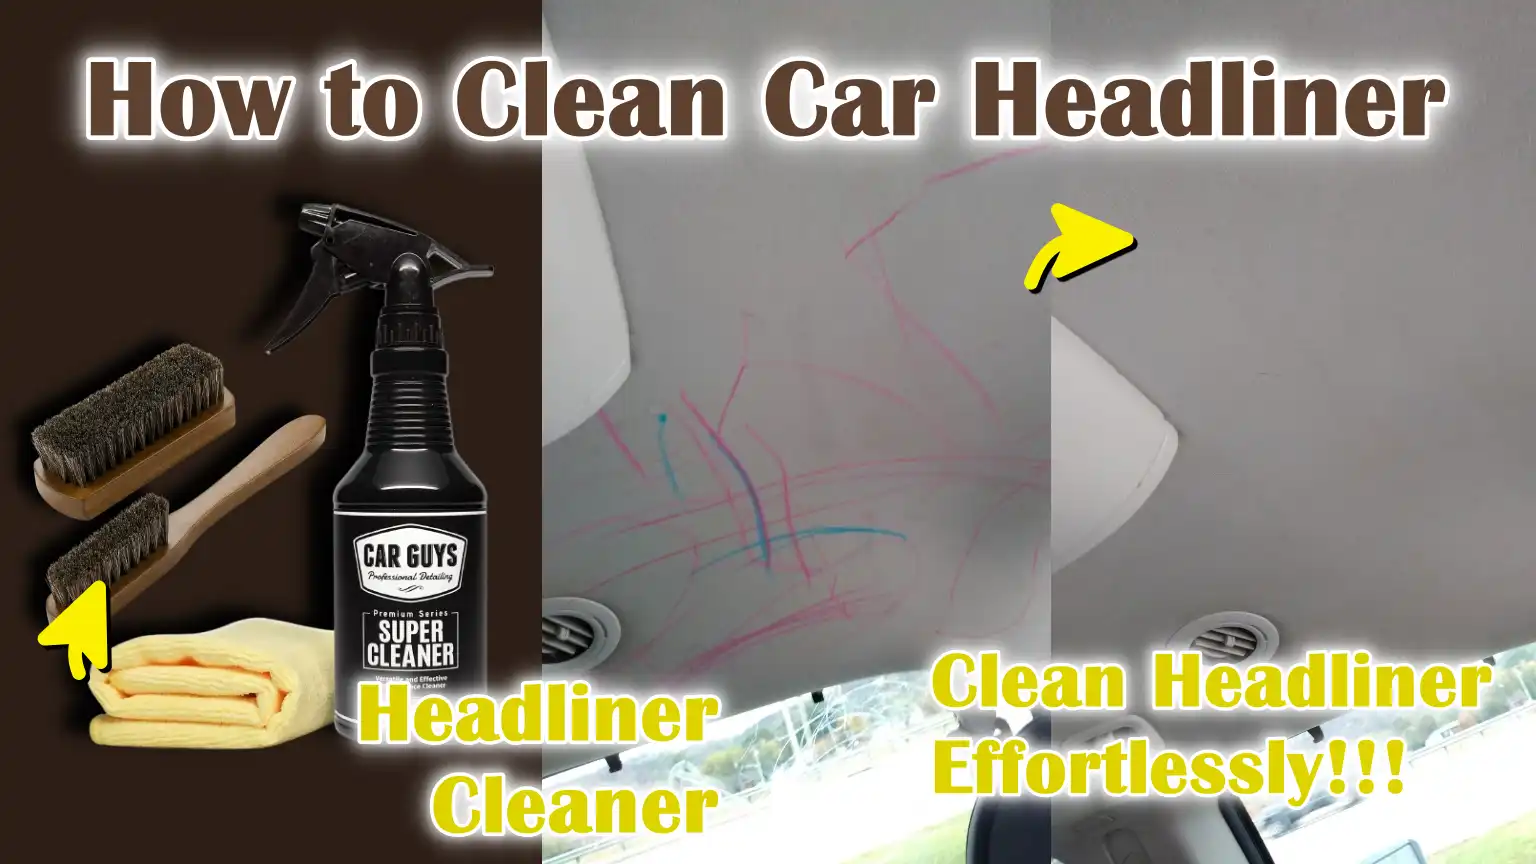
So, this is the proper guide on How to Clean Car Headliner, so that you can maintain the cleanliness and interior looks quiet effortlessly.
Know, About Common Headliner Materials
1. Fabric Headliners – Foam-Backed Cloth
Fabric headliners are the most common type found in everyday cars.
They are typically made of a thin layer of fabric bonded to a soft foam backing, which is then adhered to the car’s metal roof.
The foam helps reduce noise, improves insulation and gives the interior a soft, comfortable look.
However, due to this foam-backed design, fabric headliners are very susceptible to moisture.
When too much water or cleaning solution is used, the foam absorbs it, weakens over time and can lead to sagging or delamination of the fabric.
Fabric headliners also easily trap dust, smoke particles, body oils and odors due to their porous nature.
This is why gentle cleaning with minimal moisture is crucial.
Understanding this material helps readers avoid common mistakes like soaking the surface or scrubbing too aggressively, which can permanently damage the headliner.
2. Suede or Alcantara-Style Headliners
Suede or Alcantara-style headliners are typically found in luxury or performance vehicles and are designed to provide a premium look and feel.
These materials are synthetic but closely resemble natural suede, featuring a soft, textured surface that feels smooth to the touch.
While aesthetically pleasing, they are even more delicate than standard fabric headliners.
Their fibers can easily be damaged, flattened, or discolored if scrubbed too aggressively or cleaned with the wrong products.
They also show stains, fingerprints and watermarks easily.
Because these headliners are very delicate, cleaning should always be done with very mild cleaners and light pressure.
Understanding the nature of suede-style materials helps readers understand why cleaning gently and carefully is safer than trying to remove stains quickly.
3. Vinyl or Synthetic Headliners
Vinyl or synthetic headliners are less common today but are still found in older vehicles, commercial cars, or utility models.
These headliners have a smooth, non-porous surface that doesn’t absorb moisture like fabric or suede materials.
Because of this, they are easier to clean and more resistant to stains and odors.
Dirt usually stays on the surface and doesn’t penetrate.
However, vinyl headliners can crack, fade, or harden over time if harsh chemicals are used.
They also react poorly to strong solvents and excessive scrubbing.
Understanding that vinyl is durable but still sensitive to chemicals helps readers choose safe cleaning methods and avoid long-term damage to the surface.
4. Why Headliners Are More Delicate Than Seats or Carpets
Car headliners are more delicate than seats or carpets because they are not designed to withstand heavy pressure, repeated scrubbing, or excessive moisture.
Seats and carpets are sturdily stitched, thicker and often designed to withstand moisture and wear and tear.
In contrast, headliners are mostly glued, not stitched.
This adhesive can weaken when exposed to excessive liquids, heat, or strong cleaners.
Gravity also works against the headliner, so once the adhesive begins to fail, the fabric can sag or detach from the roof.
This makes the damage to the headliner more apparent and difficult to repair.
Understanding this key difference helps readers understand why gentle cleaning methods are not only recommended but also necessary to protect the headliner and avoid costly repairs.
Tools
| Tool or Cleaning Supply | What It Is | Why It Is Needed |
|---|---|---|
| Soft microfiber cloths | Extremely soft cloths that absorb dust and dirt without scratching surfaces. | Headliner fabric is delicate and can tear or come loose if rubbed with a rough cloth. |
| Soft-bristle brush or upholstery brush | Brush with flexible, soft bristles designed for fabric surfaces. | Some stains are deeply embedded in the fabric fibers and require a gentle brushing to loosen them. |
| Fabric-safe upholstery cleaner | Specially formulated cleaner for car fabric and interior materials. | Harsh cleaning agents can damage the glue and fabric fibers. |
| Mild detergent or diluted interior cleaner | A mild soap with a low concentration that is mixed with water. | This is useful when furniture cleaning tools are not available. |
| Spray bottle with clean water | A simple bottle that emits a fine spray of water. | Controls the amount of moisture used during cleaning. |
| Vacuum cleaner with brush attachment | Vacuum cleaner with a soft brush head. | Dust and dirt should be removed before wet cleaning. |
How to Do Pre-Cleaning Preparation
1. Park the car in a shaded, well-ventilated area
Before beginning to clean the headliner, it’s crucial to park the car in a shaded and well-ventilated area, such as under a tree, in a garage, or in an open space away from direct sunlight.
The sun’s heat can cause cleaning liquids to dry too quickly, potentially leaving streaks or water stains on the headliner fabric.
Good ventilation allows moisture to dry slowly and evenly, reducing the risk of trapped moisture that could weaken the adhesive holding the headliner in place.
Fresh air also helps prevent strong cleaner odors from lingering in the car, making the cleaning process safer and more comfortable.
2. Test the cleaner on a hidden section of the headliner
Testing the cleaner on a small, inconspicuous section of the headliner is a simple step that can prevent significant damage.
Headliner materials can react differently to cleaning products, even those marketed as safe for fabrics.
A quick test allows you to see if the cleaner causes discoloration, stiffening of the fabric, or noticeable water stains.
This step helps readers avoid visible stains or permanent damage to the main areas of the ceiling.
Waiting a few minutes after the test also reveals how the fabric reacts after drying, which is important as some damage only becomes apparent once the moisture has evaporated.
3. Vacuum the headliner to remove dust and loose debris
Vacuuming the headliner before applying any liquid cleaner is a crucial step that many people overlook.
Dust, pollen and loose dirt accumulate on the headliner’s surface and can combine with moisture to create muddy stains.
These dry particles can be gently removed using a vacuum cleaner with a soft brush attachment, without pushing them further into the fabric.
This makes subsequent cleaning more effective and reduces the need for scrubbing, helping to protect delicate materials and the underlying adhesive.
4. Differentiate Between Spot Stains and General Surface Soiling
Taking a moment to assess the condition of the headliner helps in choosing the right cleaning method.
Some headliners may only have small, localized stains such as fingerprints, food spills, or smoke residue, while others may have light soiling spread across the entire surface.
Spot stains require targeted cleaning, while general soiling requires gentle, even cleaning over a larger area.
Understanding this distinction prevents over-cleaning, saves time and reduces the risk of damaging the headliner by using unnecessary moisture or pressure.
How to Clean The Light Dirt and Dust
1. Using a Dry Microfiber Cloth for Surface Dust
Light dirt and dust are the most common types of stains on a headliner and should always be cleaned using the gentlest method.
A dry microfiber cloth works well because it’s designed to trap fine dust particles rather than pushing them deeper into the fabric.
The headliner material easily collects airborne dust, skin particles and small debris that circulate inside the car during daily driving.
Gently wiping with a dry cloth removes this top layer without damaging the foam backing or underlying adhesive.
This method is specially useful for regular maintenance, as it keeps the headliner clean without introducing moisture, which is a major cause of loosening and fabric deterioration.
2. Gently Vacuuming with Low Pressure
Vacuuming is useful for removing loose dust that the cloth might not fully capture, but it must be done carefully.
Using a vacuum with a soft brush attachment and very low suction removes dirt without pulling at the fabric.
Headliners are not as tightly woven as seats or carpets, so strong suction or excessive pressure can stretch the fabric or weaken the adhesive.
Gentle vacuuming reduces the need for scrubbing later and prevents dust from spreading during cleaning.
This step is particularly important for cars that are frequently driven with the windows down or parked in dusty areas.
3. The Importance of Wiping in One Direction
Consistently wiping the headliner in one direction helps protect the fabric fibers and maintain a uniform appearance.
Rubbing the fabric back and forth or haphazardly can damage the surface texture, specially on fabric or suede-style headliners.
Wiping in a single direction gradually removes dirt and prevents visible streaks or uneven coloring.
This simple technique also reduces stress on the fabric and minimizes the risk of it separating from the ceiling surface.
Maintaining a consistent speed provides better control and makes the cleaning process safer and more effective.
4. Avoid excessive scrubbing or soaking
Excessive scrubbing or soaking is one of the most common causes of damage to the headliner.
Scrubbing too hard can break down the fabric fibers and loosen the adhesive that holds the headliner in place.
Using too much liquid can allow moisture to seep into the foam backing, leading to sagging, water stains and unpleasant odors.
Light dirt doesn’t require aggressive scrubbing or wet cleaning.
Using light pressure and keeping the surface as dry as possible preserves the headliner’s structure and ensures it lasts longer without needing repairs or replacement.
How to Remove Stains from a Headliner – Easy Process
1. Apply the cleaner to a cloth, not directly to the headliner
When removing stains from a car’s headliner, it’s crucial to apply the cleaner to a cloth rather than spraying it directly onto the headliner.
Headliners are installed using adhesives and direct spraying can allow the liquid to seep through the fabric to the foam and adhesive layers.
This can weaken the adhesive and cause the headliner to sag or develop unsightly water stains.
Applying the cleaner to a cloth allows for better control over the amount of moisture used and confines the cleaning area to the stain itself.
This method helps to gently lift the stain while preserving the structural integrity of the headliner.
2. Blot the stain instead of rubbing
Blotting is the safest and most effective way to remove stains from a headliner.
Blotting involves gently pressing and lifting the cloth onto the stain, allowing the fabric to absorb the dirt and moisture without spreading the stain.
Rubbing can push the stain further into the fabric and damage the fibers or loosen the adhesive backing of the headliner.
Many common stains, such as fingerprints, food and drink spills and light smoke residue, can be easily removed with patient blotting.
This gentle approach minimizes the risk of visible damage and allows the headliner to dry evenly.
3. For stubborn stains, use gentle circular motions
Some stains won’t completely disappear with just blotting, specially older or oily stains.
In these cases, very gentle circular motions can help loosen the stain without damaging the fabric.
The key is to keep the pressure light and the movements small.
Excessive pressure can compress the fabric fibers or cause uneven shading after the area dries.
Using a circular motion ensures even cleaning and prevents the formation of sharp edges or rings around the cleaned area.
This technique should only be used when necessary and always with controlled moisture.
4. Use a soft brush only when necessary
A soft brush should only be used as a last resort for very stubborn stains that cannot be removed with a cloth.
The brush bristles must be very soft and designed for upholstery to avoid damaging or roughening the fabric.
Gentle brushing helps lift dirt trapped in the fibers, but aggressive brushing can damage the delicate headliner material.
Using a brush carefully and for short periods can help remove difficult stains while minimizing the risk of long-term damage.
Knowing when to start brushing is just as important as knowing when to stop.
How to Clean Grease, Smoke and Odor Stains
1. Special Considerations for Oil or Nicotine Stains
Grease and nicotine stains differ from ordinary dirt because they are oily and sticky.
These stains don’t just sit on the surface but penetrate and become embedded in the fabric fibers over time.
Nicotine smoke rises inside the car and settles on the headliner, forming a thin, yellowish or brownish film that also carries a strong odor.
Grease stains from hands or food can easily spread when rubbed.
Therefore, these stains require a gentle but controlled cleaning approach.
Excessive water can spread the oil further and push it deeper into the foam backing.
Gentle, careful cleaning removes the oily residue without damaging the headliner or leaving deeper stains.
2. Using Foam-Based Upholstery Cleaners
Foam-based upholstery cleaners are particularly useful for cleaning headliners because they use very little liquid.
The foam mostly stays on the surface, helping to break down grease and smoke residue without soaking the fabric.
This is crucial because excessive moisture is a primary cause of headliner sagging and adhesive failure.
Foam cleaners work by lifting dirt and oil to the surface, where it can be gently wiped away.
This controlled cleaning method is safer for delicate headliner materials than liquid sprays.
3. Methods for Removing Smoke or Food Odors
Smoke or food odors often linger in the headliner, even after visible stains have been removed.
This is because the fabric fibers trap odor-causing particles.
The correct approach to odor removal focuses on eliminating these trapped particles, not just masking the smell.
After cleaning, allowing fresh air into the car helps the headliner dry and removes odor-causing particles.
Proper drying after light cleaning prevents moisture buildup, which can lead to unpleasant, musty odors later on.
4. Safe Use of Baking Soda for Odor Absorption
Baking soda is known for its odor-absorbing properties and when used correctly, it can be safely used to control odors in the headliner.
Baking soda works by absorbing odor-causing particles rather than simply masking the smell.
It should be used in its dry form and should never be mixed with water for cleaning the headliner.
Using it lightly allows it to absorb odors without introducing excess moisture into the fabric.
After some time, it can be gently removed with a low-suction vacuum cleaner.
This method is particularly helpful for persistent smoke or food odors and is safe when used with caution.
How to Dry The Headliner in Proper Way
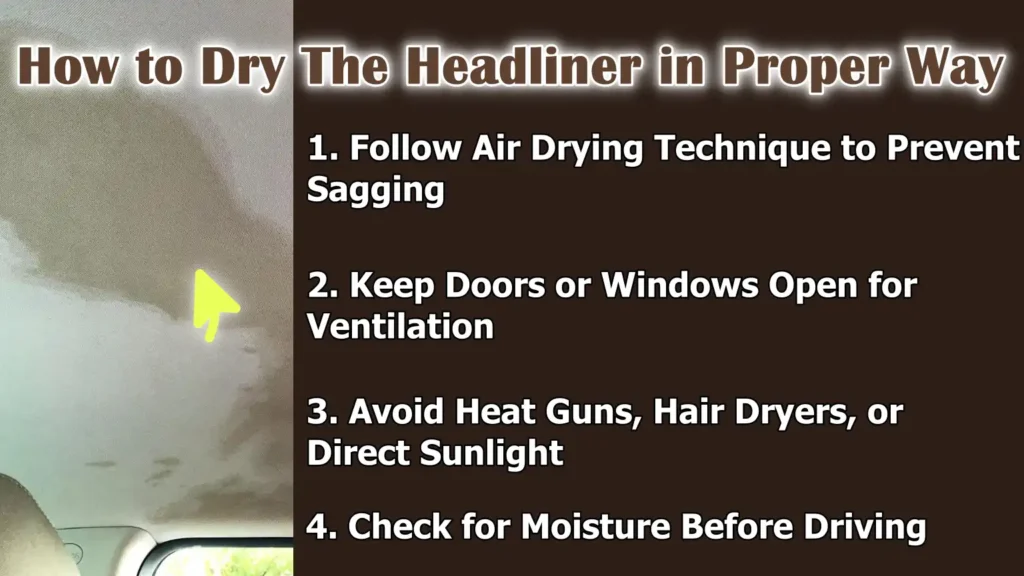
1. Follow Air Drying Technique to Prevent Sagging
Proper drying is one of the most crucial steps in headliner care because moisture can weaken the adhesive that holds the fabric to the roof.
Headliners are designed to stay in place under normal conditions, but when they remain wet for extended periods, gravity gradually pulls the fabric down, causing it to sag.
Allowing the headliner to air dry naturally allows the moisture to evaporate slowly and evenly, without putting stress on the adhesive.
Gentle air drying preserves the foam backing and keeps the fabric taut and smooth.
This step is specially important after any stain removal, even if only a small amount of cleaner was used.
2. Keep Doors or Windows Open for Ventilation
Good ventilation helps speed up the drying process and protects the headliner.
Opening the car doors or windows allows fresh air to circulate in the cabin and carry away trapped moisture from the fabric.
Proper airflow also prevents odors and reduces the likelihood of mold or mildew forming within the headliner.
Ventilation promotes even drying and keeps the interior air fresh, which is specially helpful in humid environments where moisture tends to linger.
3. Avoid Heat Guns, Hair Dryers, or Direct Sunlight
Using intense heat sources to dry the headliner can do more harm than good.
Heat guns and hair dryers blast hot air onto the fabric, which can quickly soften the adhesive and cause the fabric to sag or shrink.
Direct sunlight can also overheat the roof area, leading to uneven drying and potential damage to the headliner.
Drying slowly and naturally is safer because it protects both the fabric and the adhesive layer.
Avoiding artificial heat preserves the headliner’s original shape and strength.
4. Check for Moisture Before Driving
Before driving, it’s crucial to ensure the headliner is completely dry.
Even a small amount of hidden moisture can weaken the adhesive while driving, specially when the cabin heats up.
Gently touching the surface helps detect any damp spots that might not be visible.
Allowing extra drying time ensures the headliner remains secure and prevents future problems like sagging or odors.
This final check helps protect the interior and ensures the cleaning results last.
Read More:
What are the Common Mistakes You Should Avoid While Cleaning the Car’s Headliner
1. Over-wetting the Headliner Fabric
One of the most common and damaging mistakes during headliner cleaning is using too much water or cleaning solution.
The headliner is made of a thin layer of fabric glued to a soft foam backing and held in place with adhesive.
When excessive liquid is used, it can seep through the fabric to the foam and adhesive layers.
This weakens the adhesive and often leads to sagging, deep water stains, or a loose headliner that is difficult to repair.
Even if the surface appears clean initially, trapped moisture can cause long-term damage.
Using minimal moisture and controlled cleaning techniques will keep the headliner safe and intact.
2. Using Harsh Chemicals or Bleach
Harsh chemicals, bleach, or strong household cleaners can permanently damage the headliner material.
These products can break down the fabric fibers, cause discoloration and release strong fumes into the car’s cabin.
Bleach, in particular, can weaken the fabric and leave uneven white spots that are impossible to remove.
Strong chemicals can also react with the adhesive behind the headliner, causing it to deteriorate over time.
Choosing mild, fabric-safe cleaners will protect both the appearance and integrity of the headliner, while also ensuring the air inside the car remains safe to breathe.
3. Scrubbing Too Hard
Scrubbing too hard is a mistake many people make in an attempt to quickly remove stubborn stains.
The headliner fabric is not designed to withstand heavy pressure or vigorous scrubbing.
Aggressive scrubbing can tear the fibers, damage the surface texture and cause the fabric to separate from the roof.
This can spread stains instead of removing them.
Gentle blotting and light wiping are far more effective and reduce the risk of visible damage.
Cleaning slowly and carefully preserves the headliner’s original appearance and integrity.
4. Ignoring the Sensitivity of the Adhesive Behind the Fabric
Many people forget that the headliner fabric isn’t sewn to the ceiling, but rather glued.
This adhesive is sensitive to moisture, heat and harsh cleaners.
Ignoring this often leads to cleaning methods that gradually weaken the adhesive without any immediate signs.
Over time, this can cause corners to sag or large sections of the fabric to detach.
Understanding the adhesive’s sensitivity helps readers understand why gentle cleaning, proper drying and avoiding heat are crucial steps in headliner maintenance.
Protecting the adhesive layer is just as important as cleaning the visible surface.
How to Maintain & Keep Your Headliner Clean
Plus, it is really important to understand the internal structure of a car headliner, as it determines how safely you would able to clean it, also according to the Journal of Industrial Textiles: the automotive headliners consists polyurethane foam core to provide the insulation, sound absorption and structural support as well, but that’s why it becomes really absorbent and that is why you need to be aware of the sagging problem, as this foam layer is a reason why excess moisture from the cleaning solutions can weaken adhesive bonds and unfortunately leads to the sagging or other long-term damage if you don’t perform cleaning in safe way.[¹]
1. Regular Light Dusting and Vacuuming
Regular light cleaning is the easiest and safest way to keep your headliner in good condition.
Dust, pollen and small airborne particles gradually accumulate on the ceiling area every time the car is driven, specially with the windows open.
If this dry dirt is removed promptly, it doesn’t have a chance to combine with moisture or oil to form stains.
A light dusting with a soft cloth and gentle vacuuming with a low-suction vacuum cleaner keeps the surface clean without putting excessive stress on the fabric or adhesive.
This simple habit reduces the need for deep cleaning and helps the headliner last longer.
2. Prompt Cleaning of Fresh Stains
Fresh stains are much easier to remove than old ones because they haven’t yet bonded to the fabric fibers.
Spilled liquids, fingerprints, or splatters should be cleaned as quickly as possible by gently blotting and using minimal moisture.
Waiting too long allows oils and dirt to penetrate deeper into the foam-backed fabric, making cleaning more difficult and increasing the risk of permanent stains.
Taking immediate action prevents stains from spreading and reduces the need for harsh cleaners later on.
3. Caution with Smoking and Eating/Drinking in the Car
Smoking and eating/drinking in the car increase the risk of stains and odors on the headliner.
Smoke rises and clings to the ceiling fabric, leaving behind oily residue and strong odors that are difficult to remove.
Food particles and grease can also travel upwards and accumulate on the headliner over time.
Reducing smoking in the car and being careful while eating and drinking helps prevent yellowing, grease stains and unpleasant odors.
These small lifestyle changes make a big difference in keeping the headliner clean and fresh.
4. Use of Interior Protectants and Cabin Air Filters
Interior protectants and clean cabin air filters play a crucial role in maintaining the headliner.
Cabin air filters reduce the amount of dust, pollen and pollutants entering the car, resulting in less dirt accumulating on interior surfaces.
Interior protectants, when properly applied to surrounding surfaces, help minimize the spread of oils and dirt that could reach the headliner.
Together, these measures help keep the air inside the car cleaner and reduce the overall amount of dirt that comes into contact with the headliner.
When to Consider Professional Cleaning
1. Deep Stains or Severe Discoloration
When the headliner has deep stains or significant discoloration, opting for professional cleaning is a safer option than attempting to clean it yourself.
Deep stains often result from prolonged exposure to smoke, oil buildup, or repeated moisture exposure, causing dirt to penetrate deep into the fabric and foam layers.
At this stage, surface cleaning may not be sufficient and using excessive moisture can worsen the problem.
Professional cleaners have specialized equipment and low-moisture techniques that clean deeply without damaging the adhesive.
Seeking professional help in such cases minimizes the risk of permanent stains and fabric damage.
2. Mold or Water Damage Issues
Mold or water damage within the headliner is a serious issue that should not be addressed with typical household cleaning methods.
Moisture trapped in the foam backing creates an environment where mold can thrive, specially in warm and humid conditions.
Mold not only damages the headliner material but can also compromise the air quality inside the vehicle and produce unpleasant odors.
Professional services utilize controlled drying techniques and appropriate cleaning agents to safely remove mold and mitigate health risks.
Attempting to clean mold without the proper equipment can spread spores and exacerbate the problem.
3. Headliner Fabric Sagging or Delaminating
Headliner sagging or delaminating typically indicates that the adhesive behind the fabric has weakened.
Cleaning alone will not fix this problem and introducing moisture can cause further damage.
Professionals can assess whether the headliner can be repaired or if replacement is necessary.
They understand how to work with the adhesive layer and foam backing to prevent further loosening.
Seeking professional help at this stage can save you unnecessary effort and prevent the problem from spreading throughout the entire headliner.
4. Cost Comparison – DIY vs Professional Service
DIY headliner cleaning is typically less expensive and works well for light dirt and minor stains if done carefully.
However, common mistakes such as over-wetting or aggressive scrubbing can cause damage that is costly to repair.
Professional cleaning may have a higher initial cost, but it often saves money in the long run by preventing further loosening, mold growth, or the need for a complete headliner replacement.
Understanding the cost differences allows readers to make an informed decision based on the condition of their headliner and the level of risk involved.
Conclusion – How to Clean Car Headliner
So, when you keep the headliner neat and clean, then it affects the air quality and keeps the interior safe to breathe.
The headliner is constantly exposed to increasing heat, humidity, smoke, dust and airborne contaminants, which gradually accumulate in the fabric over time.
And, because it’s attached with adhesive and backed with soft foam, it reacts very differently to cleaning compared to the seats or carpets.
Also, the gentle techniques, controlled moisture and proper drying are key factors that determine whether the headliner remains taut and clean or becomes loose and stained.
Yes, you need a Regular and gentle maintenance prevents deep-seated dirt buildup, reduces odors and avoids costly repairs or replacements.
When you clean it in correct way, then the headliner can last for many years, maintaining the freshness of the interior and improving the air quality inside the car.
Now, you can ask questions in the comment box.
Frequently Asked Questions
Q1. What is a car headliner and why does it get dirty so easily?
Answer: A car headliner is the fabric-covered surface on the interior roof of a car. It gets dirty easily because the heat inside the car causes air to rise and this rising air carries dust, smoke, moisture and odors towards the ceiling. Over time, these particles accumulate in the headliner fabric. Because headliners are typically made of foam-backed fabric, they trap dirt and odors more easily than hard surfaces like plastic panels.
Q2. Can I clean my car headliner myself at home?
Answer: Yes, a car headliner can be cleaned at home if the dirt or stains are light and the correct methods are used. Home cleaning works well for dust, fingerprints, light stains and mild odors. The key is to use minimal moisture, light pressure and a fabric-safe cleaner. Excessive soaking or scrubbing should always be avoided because the headliner fabric is glued, not sewn, to the roof.
Q3. What is the safest way to clean a car headliner?
Answer: The safest way to clean a car headliner is to start with dry cleaning methods, such as light vacuuming and wiping with a dry microfiber cloth. If a cleaner is needed, it should be applied to the cloth, not directly to the headliner. Dabbing the stain is safer than rubbing. This method removes dirt while also protecting the fabric’s adhesive and foam backing.
Q4. Why should I avoid using too much water on the headliner?
Answer: Excessive water can seep through the fabric and reach the foam and adhesive layer behind the headliner. When this happens, the adhesive can weaken and lose its grip, causing the fabric to sag or detach. Excessive moisture can lead to deep water stains and unpleasant odors. Therefore, controlled moisture and gentle cleaning are essential for headliner care.
Q5. Can household cleaners damage car headliners?
Answer: Yes, many household cleaners can damage headliners. Harsh chemicals, bleach and strong detergents can fade the fabric’s color, weaken the fibers and damage the adhesive backing. Some cleaners also release strong fumes that linger in the car. Mild, fabric-safe cleaners or diluted interior cleaners are safer and help maintain the headliner’s appearance and texture.
Q6. How do I remove stains from my car’s headliner without damaging it?
Answer: Stains should be gently blotted with a slightly damp cloth treated with a cleaner. Rubbing should be minimal and gentle. For stubborn stains, a light circular motion can be used carefully, but with very little pressure. The goal is to lift the stain, not force it out. Patience is key, as rushing often leads to damage.
Q7. How can I remove smoke or food odors from the headliner?
Answer: Smoke and food odors linger in the headliner because the fabric fibers trap odor particles. Gentle cleaning, proper drying and ventilation help eliminate these odors. Baking soda can also be carefully used in its dry form to absorb odors. Allowing fresh air into the car after cleaning plays a crucial role in naturally dissipating any remaining odors.
References:
[1] Polyurethane Foam as an Integral “Core” Component of Automotive Headliner
https://www.researchgate.net/publication/254116265_Polyurethane_Foam_as_an_Integral_Core_Component_of_Automotive_Headliner

Guys, I’m a car audio enthusiast and customization expert and I love clear sound and clean installation. Plus, I have spent years helping people build their dream audio setups. And whenever I’m working on cars, I probably listen to music and thinks about the next big upgrade.