Written By: Don Dodi
Fact Checked By: Kristen Brown
Reviewed By: Diego Rosenberg
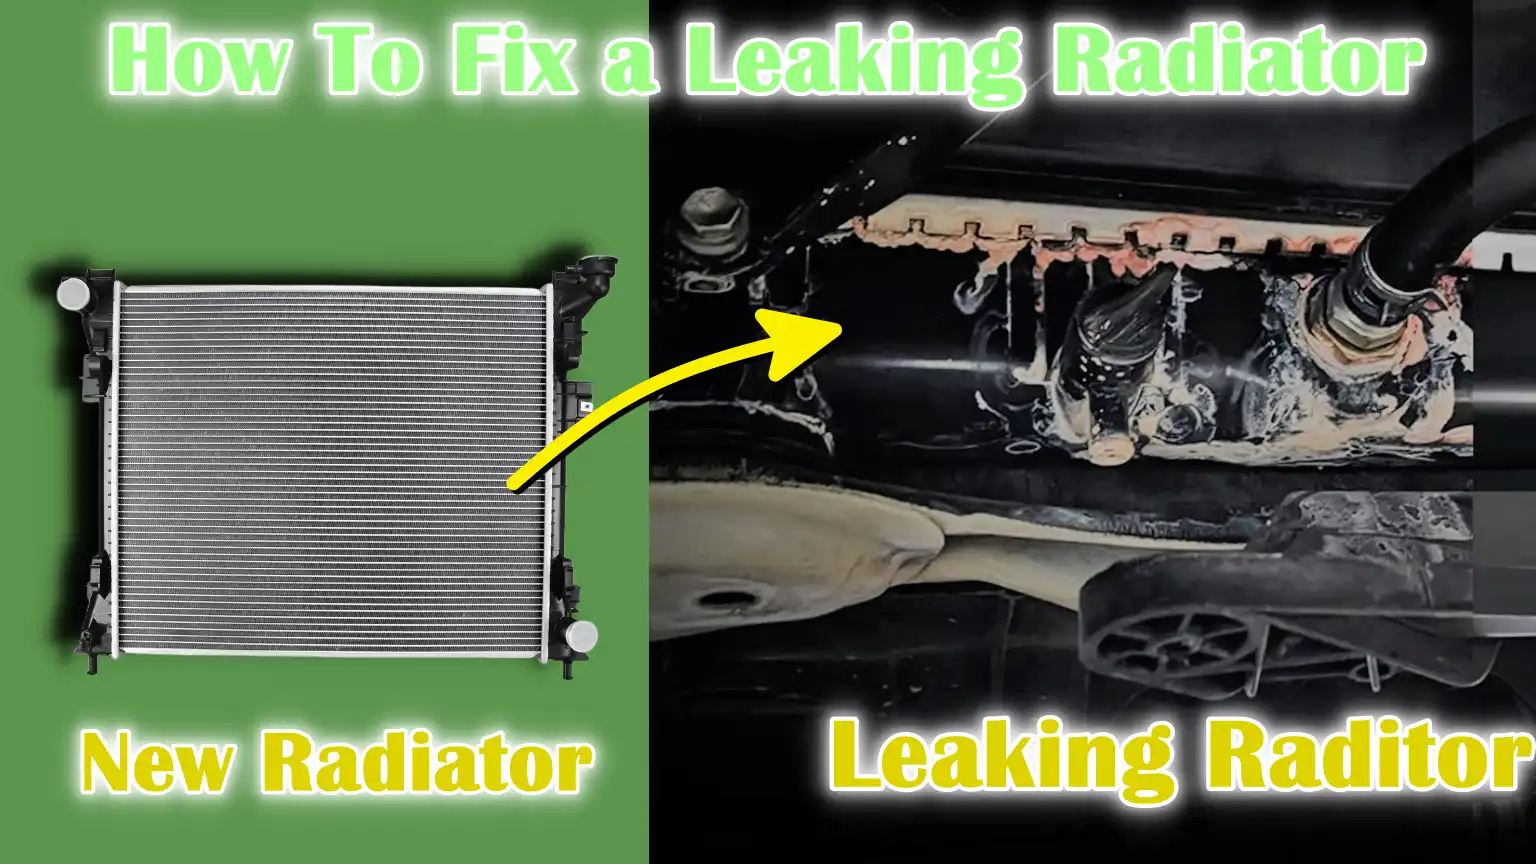
When your radiator leaks even a small portion of it then it can actually cause your engine to overheat and break down within minutes, which is why it becomes really important to stop it as quick as possible.
As radiator actually plays a critical role that keeps your car engine from overheating as it circulate the coolant through the engine and that releases the excess heat.
And if your radiator now starts to leak then it can quickly lead to some serious engine damage as well: and sometimes in as little as 15 to 30 minutes of driving.
So, leaks can be happen due to some reasons such as: corrosion, cracked plastic tanks, old hoses or even impact from the road debris as well.
And in the colder climates, the leaks may also result from the freeze damage when the coolant levels are too low or the wrong antifreeze is is actually used in it.
When you catch and fix a radiator leak in the early time then it not only prevents from expensive repairs but also it actually ensures your car remains safe, more efficient and reliable for the long time.
So, this is the guide on How To Fix a Leaking Radiator and here’s you will know about how you can diagnose it, how you can patch it for temporarily purpose and later on you will know the about the permanently fix a leaking radiator as well.
Safety Precautions Before You Begin
Before attempting to fix a leaking radiator, safety should be your first priority. Radiators deal with high pressure and high temperature fluids and improper operation can cause serious burns or injury.
Even if the leak seems minor, taking some basic precautions can help you prevent damage and make the repair process much easier and safer.
1. Let the Engine Cool Completely
Never open the radiator cap when the engine is hot.
When your engine is running, the coolant inside the radiator can reach temperatures of 200°F (93°C) or more and is under a lot of pressure. Opening the lid too quickly can release hot coolant and steam, which can cause serious burns.
Allow the engine to cool for at least 30-60 minutes before you begin working on the cooling system. You can also check the temperature gauge on the dashboard—it should be at its lowest before you begin.
2. Use Protective Gloves and Safety Glasses
Working with coolant means handling chemicals such as ethylene glycol, which can be poisonous if it comes into contact with your skin or eyes. Always wear mechanic gloves and safety glasses when working with radiator fluid, sealant or replacement parts.
Even if you’re just doing a quick inspection or minor repairs, protective gear helps prevent burns, chemical exposure and accidental injuries.
3. Park on a Flat Surface and Engage the Parking Brake
Your car should be parked on a flat, level surface to ensure stability while you’re working under the hood.
A sloping driveway or uneven ground can cause the car to rock or roll, specially when you’re raising the car with a jack to check hoses or access the lower radiator. Always:
- Put the car in park (P) or first gear (if it’s manual).
- Apply the parking brake fully.
- Place wheel chocks behind the tires if necessary.
4. Work in a Well-Ventilated Area
Coolant fumes can be harmful in large quantities, specially in a closed garage. Always perform repairs in an open space or in a place with good ventilation. If you are working inside, open the garage door and run a fan to circulate air if necessary.
5. Keep a Fire Extinguisher and First-Aid Kit Nearby
Although it’s rare, working with electric fans, hot tools or spilled liquids can pose a fire risk. Keeping a Class B fire extinguisher (suitable for flammable liquids such as coolant or oil) nearby is a sensible precaution.
A first aid kit is also essential in case of minor cuts, burns, or exposure to chemicals.
Tools
| Item | What It Is | Why You Need It |
|---|---|---|
| Safety gloves and goggles | Protective gear for your hands and eyes. | To protect against burns, cuts and chemical splashes. |
| Radiator stop leak product (optional) | A liquid or powder that seals small leaks from the inside. | Temporary solution for small leaks without disassembling parts. |
| Radiator hose clamps | Metal rings that tighten around the hose. | Securing the hose and preventing leaks at hose connections. |
| Epoxy/sealant or radiator repair kit | A special glue or patching material. | Used to seal cracks in plastic or metal parts of radiators. |
| Replacement hoses or radiator (if needed) | New parts that may need replacement. | If the hose or radiator is so damaged beyond repair. |
| Screwdrivers, pliers and socket set | Common hand tools for loosening or tightening bolts and clamps. | Remove or install radiator parts safely and correctly. |
| Coolant (50/50 premixed) | The engine fluid is composed of water and antifreeze. | Prevents engine from overheating and prevents corrosion. |
| Drain pan | A shallow container to catch the old coolant. | Safely collects leaked or drained coolant without making a mess. |
| Funnel | A cone-shaped device for pouring liquids. | Helps to fill coolant in radiator cleanly and easily. |
| Clean rags or shop towels | Absorbent clothing. | Wipe away spills, clean hands and dry parts prior to repair. |
How to Diagnose the Radiator Leak In a Car
Before you can fix a radiator leak, you need to figure out where the leak is coming from. Some leaks are easy to spot, while others may take more time and equipment to locate.
Below are the most important steps you should follow, with each step clearly described to help you understand what to look for and why it’s important.
1. Check Under the Car for Coolant Puddles
The first and easiest way to detect a radiator leak is to look underneath the car after letting it sit for a few hours.
If you see bright green, orange, pink or blue puddles, it’s probably coolant. These colors depend on the brand and type of antifreeze used.
Coolant is slippery to the touch and may have a sweet smell – this is due to the presence of ethylene glycol or propylene glycol, which are toxic chemicals used to keep the engine from overheating or freezing.
Note: Sometimes coolant only leaks when the engine is hot and under pressure, so you won’t always find the clog right away.
2. Inspect the Radiator and Surrounding Parts
Open the hood and take a close look at the radiator, which is located at the front of your engine bay. Pay attention to these key parts:
- Seams: These are the joints where the radiator pieces are joined. Over time, heat and pressure can weaken these joints and cause them to leak.
- Core: This is the main central part of the radiator where the coolant flows. Check for any wet spots, white flaky deposits (dried coolant), or rust.
- Tanks (side or top/bottom): These plastic or metal parts contain the coolant before it flows into the engine. Tanks can develop cracks due to age or heat.
- Hoses and hose connections: Look for cracked hoses, loose clamps, or coolant dripping from the ends.
Sometimes, a hose leak can look like a radiator leak if coolant drips downward and pools around the radiator.
3. Use a Radiator Pressure Tester (If Available)
If you can’t spot the leak with your eyes, using a radiator pressure tester can be really helpful.
This device allows you to pump air into the radiator system (while the engine is off and cold) to simulate the pressure felt during normal driving.
It helps as follows:
- A leak that is caused solely by pressure will begin dripping or spraying coolant, letting you know where the problem is.
- The tester attaches to the radiator cap opening and includes a pump and a gauge.
- If the pressure on the gauge drops rapidly, it means there is a leak somewhere in the system.
How to Temporary Fix The Radiator Leaks In The Car
Sometimes, you need a quick way to stop a radiator leak — specially if you’re far from a mechanic or you just need to drive the car for a short time until permanent repairs can be made.
There are two common methods of temporary solutions: using a radiator stop leak product and applying epoxy or sealant.
These methods may buy you time and help prevent engine damage, but they are not permanent solutions and a complete repair should be done as soon as possible.
a. Use of Radiator Stop Leak
1. How It Works:
Radiator Stop Leak is a liquid or powder additive that you pour directly into the radiator or coolant reservoir.
It passes through the cooling system and seals small cracks and leaks from inside.
Most products contain fibers, sodium silicate, or ceramic particles that stick to the leak when exposed to air or pressure. This works well for pinhole leaks, seam leaks, or small cracks in hoses or gaskets.
2. How to Apply Properly:
- Allow the engine to cool completely before opening the radiator cap.
- Shake the Stop Leak bottle well and pour the recommended amount into the radiator or overflow tank.
- Start the engine and let it run for about 10-20 minutes with the heater running at full power. This helps the sealant circulate.
- Keep an eye on the temperature gauge and make sure the temperature does not rise too high during this time.
Pros and Cons:
| Pros | Cons |
|---|---|
| Easy and quick to use. | Not a permanent solution. |
| Inexpensive (usually under $20). | Could be blocking the heater core or narrowing the coolant passages. |
| Great for emergencies. | Large or high-pressure leaks cannot be sealed. |
b. Epoxy or Sealant Application
1. For Cracks in Plastic or Aluminum:
If there are visible cracks in the radiator—specially in the plastic tank or metal core—you can use a radiator-safe epoxy or sealant. These are thick glue-like substances that harden when dry and form a watertight seal over the crack.
They’re great for repairing external leaks, specially in older radiators made with plastic side tanks and aluminum cores.
2. Surface Preparation and Curing Time:
For this method to work well, follow these steps:
- Clean the area around the crack with a wire brush or sandpaper to remove dirt, oil or rust.
- Wipe it dry with a cloth or towel. The surface must be clean and dry for the epoxy to adhere.
- Apply the epoxy directly onto the crack, covering a little extra space on either side.
- Let it harden completely – this usually takes at least 1 to 2 hours, but some types require up to 24 hours.
3. Limitations of This Method:
- Epoxy is not ideal for high pressure leaks or coolant escaping situations.
- If the radiator is severely rusted or leaking in multiple locations, epoxy will not be enough.
- It is best used for hair-sized cracks and small holes, not larger breaks or complete hose failures.
How To Fix a Leaking Radiator – Permanent Repair Methods
If your radiator leak is more severe or a temporary solution doesn’t work, you’ll need a permanent solution to prevent long-term damage to your engine.
Depending on the location of the leak, you may need to replace the hose, patch the crack, or replace the entire radiator.
These steps require more equipment and time, but can be done at home with the proper care and guidance. Below are the three main permanent repair options explained in an easy to understand way and backed up with useful facts.
a. Replacing a Damaged Radiator Hose
1. How to Remove the Old Hose:
Radiator hoses carry hot coolant between the radiator, engine and heater core. Over time, these hoses can crack, bulge or burst due to the heat and pressure.
To remove a damaged hose:
- Allow the engine to cool completely.
- Place a drain pan beneath the hose to catch the leaking coolant.
- Use a screwdriver or pliers to loosen the hose clamps at both ends.
- Twist the hose gently to break the seal, then pull it off the fitting.
2. How to Fit and Clamp a New Hose Securely:
- Place a new hose clamp on the new hose before connecting it.
- Press the hose firmly onto both fittings.
- Tighten the hose clamps snugly, but don’t overtighten—they should feel secure without crushing the hose.
- Make sure the hose is not rubbing against other engine parts to prevent future damage.
3. Refill and Bleed Air from the System:
- Refill the radiator with a 50/50 mixture of coolant and water (or pre-mixed coolant).
- Start the engine with the radiator cap removed and the heater running on full power.
- Let it run until the thermostat opens and the air bubbles escape.
- Fill with coolant as needed and close the lid.
b. Repairing Cracks in the Radiator Itself
1. Use of Radiator-Specific Epoxy or Welding (If Metal):
If you find a crack in the plastic tank or metal core of the radiator and it’s still small, you can fix it using radiator epoxy (for plastic) or aluminum weld (for metal radiators).
- Clean the surface with sandpaper and degreaser.
- Apply epoxy liberally to the crack and allow it to dry completely.
- If it is a metal crack, a permanent seal can be created by aluminum soldering or TIG welding, but this should only be done if you are trained or experienced.
2. When to Consider Replacing the Radiator:
- The crack is more than 2-3 inches long.
- You see multiple leaks in different areas.
- There is heavy rust or the radiator fins are broken.
- Coolant leak reoccurs even after patching.
c. Replacing the Radiator (If Necessary)
1. How to Remove the Radiator Safely:
- Disconnect the battery to avoid electrical short circuit.
- Drain the coolant completely into the pan using the radiator drain valve.
- Remove the cooling fan, radiator hoses and transmission cooler lines (if your car has an automatic transmission).
- Unscrew the radiator from the support brackets and carefully pull it out – avoid bending the fins.
2. Installation of a New Radiator:
- Place the new radiator in place and secure it with the brackets.
- Reconnect the hoses, clamps and electrical connectors.
- Reinstall the cooling fan (if removed).
- Check all fittings to make sure nothing is loose or leaking.
3. System Flush and Coolant Refill:
- Before adding new coolant, flush the system with water or a flush solution to remove rust, old coolant and debris.
- Refill with the recommended coolant type (check your owner’s manual).
- Bleed the system to remove any air pockets.
How to Refill and Test the Cooling System
Once you’ve completed the repairs – whether it’s replacing a hose, filling a crack, or installing a new radiator – the final and most important step is to refill the system with coolant and properly test it.
This process ensures that your engine stays cool, coolant flows properly and there are no hidden leaks or air pockets that could cause overheating.
1. Add New Coolant (Recommended Type)
Always fill the radiator with the correct type of coolant for your vehicle. Check your owner’s manual to confirm the type of coolant used for your vehicle:
- Ethylene glycol-based coolants (most common)
- Dex-Cool (orange coolant) for GM vehicles
- HOAT or OAT coolant (used in many newer European or Asian models)
Use a 50/50 mixture of coolant and distilled water (or pre-mixed coolant).
Don’t use tap water, as it contains minerals that can cause scale buildup and corrosion inside your radiator and engine block.
2. Start Engine and Let It Reach Operating Temperature
After filling the system:
- Start the engine with the radiator cap removed (if safe to do so) and the heater cranked up. This also improves coolant circulation in the heater core.
- Allow the engine to run for about 10-15 minutes or until it reaches normal operating temperature (usually up to half of the dashboard gauge).
- As the engine warms up, the thermostat opens, allowing coolant to flow and trapped air to escape the system.
3. Check for Leaks and Monitor Temperature Gauge
Carefully inspect all areas you worked on: hose connections, radiator seams, clamps and all areas where patches were applied.
Look for:
- Dripping coolant
- steam or effervescence
- A strong sweet smell, which often indicates a new or hidden leak.
Also keep an eye on the dashboard temperature gauge. It should remain within the normal range. If it goes above half or reaches the red zone, stop the engine immediately and check.
4. Bleed Air Pockets If Necessary
Air trapped in the cooling system can prevent coolant from flowing properly, causing hot spots or false overheating.
To remove this air:
- Use a coolant bleeder valve if your car has one (usually found on the upper hose or near the thermostat housing).
- If no bleeder valve is present, continue running the engine with the radiator cap removed and gently press the upper radiator hose to expel air.
- When the coolant level stops dropping and no bubbles appear, there is probably no air in the system.
Read More:
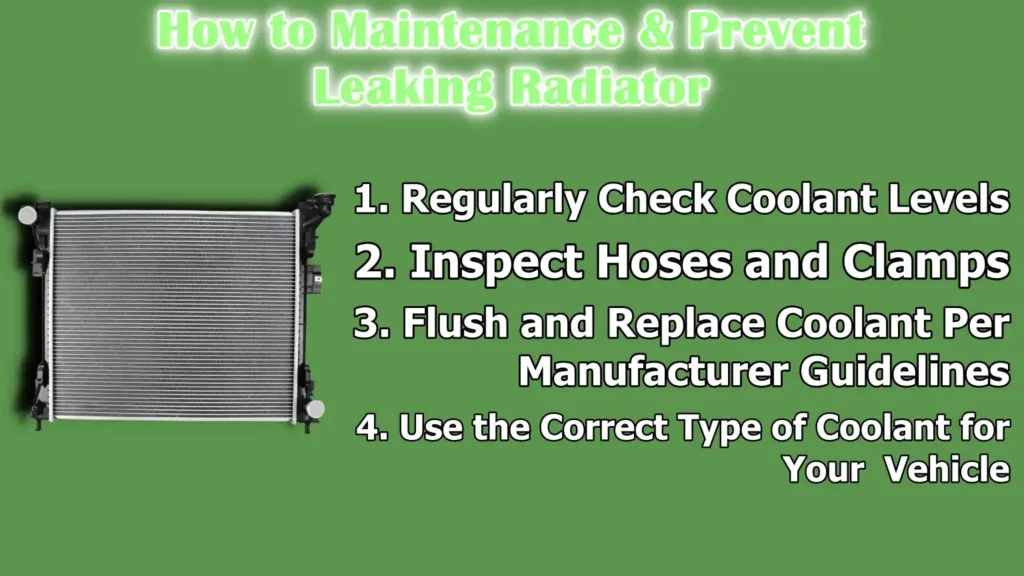
How to Maintenance & Prevent Leaking Radiator
Taking care of your car’s cooling system is one of the best ways to avoid leaks, overheating and costly engine damage.
Some simple maintenance habits can go a long way in keeping your radiator, hoses and coolant in top condition. Below are some of the most effective and easy tips, explained with useful information and real facts.
1. Regularly Check Coolant Levels
Make it a habit to check your coolant reservoir (also called the overflow tank) every two weeks or before a long drive.
The coolant level should always be between the “MIN” and “MAX” lines when the engine is cold.
If it’s low, fill with the correct type of coolant—never with plain water, unless it’s an emergency.
2. Inspect Hoses and Clamps
Check all radiator hoses and hose clamps at least once every few months.
Pay attention to:
- Bulge or soft spot in the tube.
- Cracks, specially near the ends.
- Signs of dried coolant (white, green, or rusty residue).
- Loose or rusted clamps that don’t hold pressure.
When the engine has cooled, gently squeeze the hoses – they should feel firm but flexible, not sticky or brittle.
3. Flush and Replace Coolant Per Manufacturer Guidelines
Over time, coolant loses its ability to protect your engine from heat, cold and corrosion.
That’s why it’s important that you flush the system and replace the coolant according to your car’s maintenance schedule — usually every 2 to 5 years, depending on the vehicle and type of coolant.
Flushing removes:
- Old, dirty coolant.
- Rust and metal particles.
- Sludge or scale that may be blocking coolant flow.
4. Use the Correct Type of Coolant for Your Vehicle
Not all coolants are the same. Using the wrong type of coolant can cause chemical reactions that can lead to sludge formation or damage to rubber and metal parts.
There are three main types of it:
- IAT (green) – for older cars (before 1995).
- OAT (orange, red, or pink) – Long lasting coolant used in modern GM, Toyota, Honda, etc.
- HOAT (Yellow, Blue, or Pink) – hybrid formula used in Chrysler, Ford and many European cars.
Always check the owner’s manual or coolant label to match the approved type for your car.
Never mix different coolant types unless labeled “universal” – this can reduce performance and safety.
Conclusion – How To Fix a Leaking Radiator
So, basically radiator is your car’s internal air conditioner as it keeps everything cool and under pressure as well.
This is why radiator leaks are the most common cause of engine overheating.
From noticing a puddle of coolant under your car to temporarily stopping a leak or replacing the entire radiator, each step in this guide is designed to give you confidence and clarity you need to get your car safely back on the road.
While many radiator problems can be solved with basic tools and DIY skills, it’s just as important to know when to call in a professional – specially when there are internal leaks or frequent overheating issues.
Preventing future problems is just as important as fixing current ones.
As well as, according to a 2024 safety article, coolant leaks not only pose a risk of overheating but can also cause a vehicle fire, which goes to show how quickly a small leak can turn into a major one.[¹]
Simple habits like checking the coolant level regularly, using the right type of coolant, flushing your system on time and inspecting hoses and clamps can extend the life of your radiator by years and save you from unnecessary repairs.
So, now you can ask questions and queries in the mind.
Frequently Asked Questions
Q1. How expensive is it to fix a radiator leak?
Answer: The cost to fix a radiator leak depends on how severe the leak is and what part of the radiator is damaged. If the leak is small and you use a leak-stopping product, the repair will only cost you about $10 to $25. These products are quick fixes and may work for small cracks or pinhole leaks. However, if the problem is due to a damaged hose or clamp, the parts can cost between $10 and $50 and if you go to a mechanic, you may have to pay around $100 to $200 including labor. But if your radiator is broken or has severe corrosion and needs to be replaced, the price goes up. A new radiator typically costs $150 to $400 and a complete replacement at a repair shop can cost anywhere from $300 to $900 or more, depending on the make and model of your car. Repair costs for luxury or imported vehicles are typically higher. So, fixing a radiator leak can be cheap or expensive – it all depends on the size of the leak and the part that needs repair or replacement.
Q2. What can be used to seal a leaking radiator?
Answer: Depending on the location and size of the leak, there are several things you can use to seal a leaking radiator. One of the most common and easiest solutions is a radiator stop leak product. This comes in liquid or powder form and is poured into the radiator or overflow tank. It works by flowing through the cooling system and sealing small cracks from the inside. It is a good temporary solution and usually works on small leaks in the radiator core, seams or gaskets. For cracks that appear on the outside of the radiator, particularly in plastic or aluminum parts, you can use a special radiator epoxy or sealant. This type of repair involves cleaning the area, applying epoxy to the crack and allowing it to dry completely. Some people also use metal-based sealants or soldering for metal radiators, although these repairs require more skill and equipment. Keep in mind that while these solutions may work for minor problems, they are not always permanent. If the leak is large or returns even after sealing, it may be better to replace the damaged part or the entire radiator.
Q3. Can I still drive if my radiator is leaking?
Answer: Technically, you can drive a car with a leaking radiator—but it’s not safe and it’s not a good idea. When your radiator leaks, the coolant level drops and your engine doesn’t get the cooling it needs. This can cause the engine to overheat very quickly, specially in hot weather or during stop-and-go traffic. Driving even a short distance with a leak can cause serious damage, such as a blown head gasket, warped engine parts, or complete engine failure. If the leak is very small and you’re only driving a few miles to the mechanic or to pick up parts, it may be okay to drive — but only if you keep a close eye on the temperature gauge and make sure there’s still enough coolant in the system. You should never drive a car that is overheating or spraying coolant. It is always safe to stop the car, let the engine cool down and either temporarily top up the coolant or call for towing. Fixing a small leak early can help you avoid more costly repairs later.
References:
[1] OTSI. Fire Risks of Engine Coolant Leaks in Buses.
https://www.otsi.nsw.gov.au/sites/default/files/2024-07/Knowledge%20article%20-%20Fire%20risks%20of%20engine%20coolant%20leaks%20in%20buses.pdf

Guys, I’m a car audio enthusiast and customization expert and I love clear sound and clean installation. Plus, I have spent years helping people build their dream audio setups. And whenever I’m working on cars, I probably listen to music and thinks about the next big upgrade.