 Skip to content
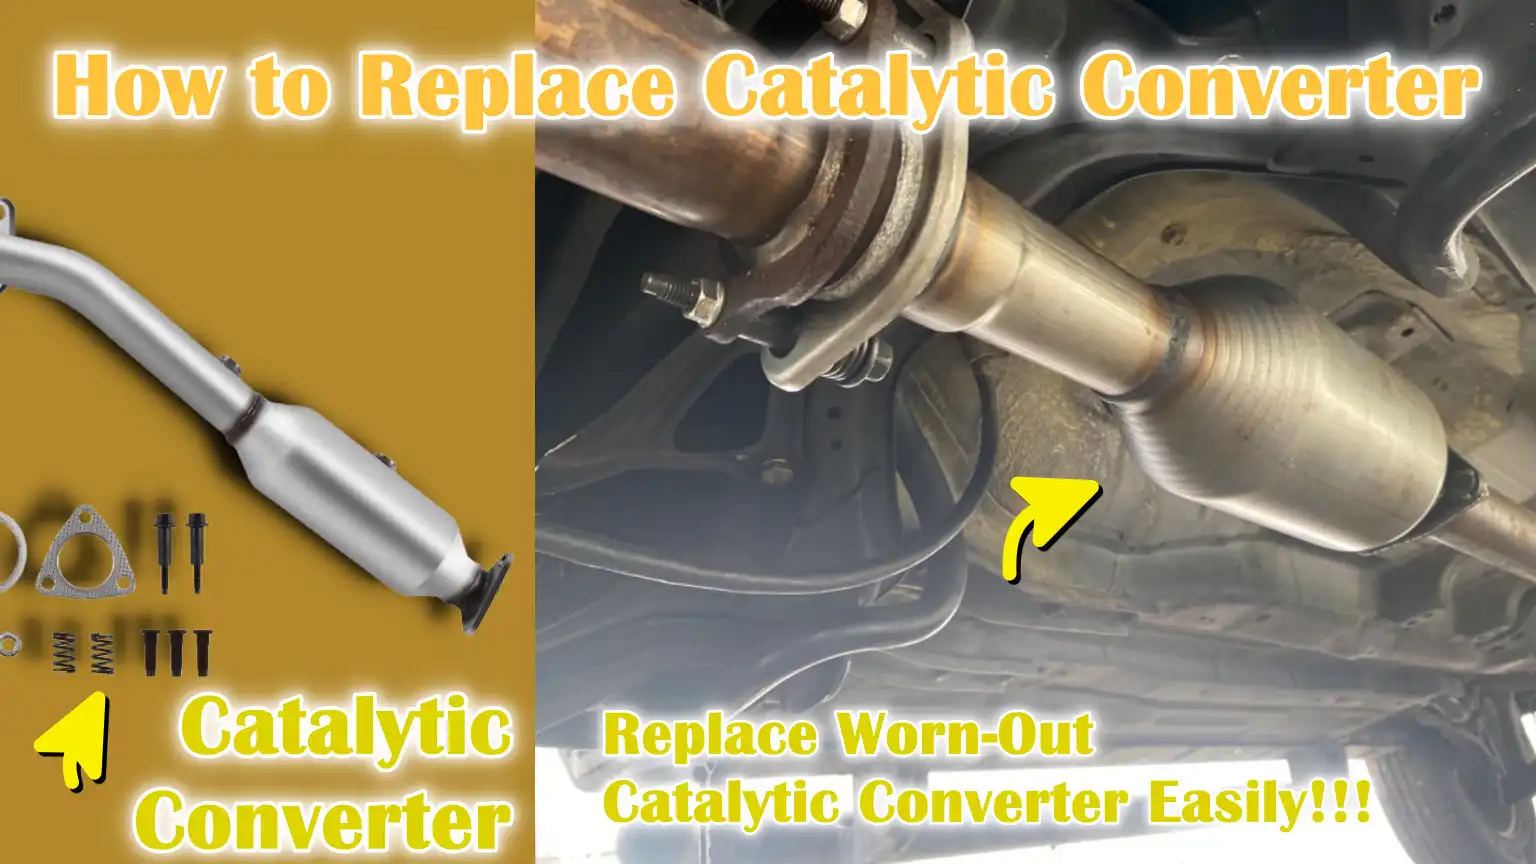
Written By: Don Dodi
Fact Checked By: Kristen Brown
Reviewed By: Diego Rosenberg
A catalytic converter is just like the filter for your vehicle’s exhaust, as it cleans the all kinds of harmful gases before they teach in the air.
As, there are many harmful gases produced during the engine combustion such as: carbon monoxide, nitrogen oxides and there are unburned hydrocarbons as well, so the work of catalytic converter is: it converts them into less harmful substances such as: carbon dioxide, nitrogen and water vapor as well, with the help of precious metals such as: platinum, palladium and rhodium that triggers the chemical reactions to convert them.
But, over the period of time and use, the catalytic converter becomes clogged up, damaged or contaminated due to the engine misfires, oil or coolant leaks, poor fuel quality or long-term heat exposure can have impact as well.
Plus, whenever a catalytic converter fails to work efficiently, then a vehicle may lose power, it can consume more fuel, emit stronger exhaust smells and even it can fail mandatory emissions tests as well.
That’s why, we have come up with this guide about How to Replace Catalytic Converter, so that you can avoid any mistakes and ensure your vehicle runs efficiently and cleanly.
What are the Signs That Indicate a Catalytic Converter Needs Immediate Replacement
1. Check Engine Light and Diagnostic Trouble Codes
One of the first and clearest signs of a failing catalytic converter is the illumination of the check engine light on your dashboard.
Modern vehicles are equipped with oxygen sensors that monitor the efficiency of the catalytic converter.
When the converter malfunctions, these sensors detect irregularities in the exhaust gases and trigger a diagnostic trouble code (DTC) in the car’s computer.
Mechanics can read these codes using a scanner to determine if the catalytic converter is faulty or if there’s another engine-related problem.
Ignoring this warning can lead to further damage to the engine and other parts of the exhaust system.
2. Reduced Engine Performance or Power Loss
A clogged or failing catalytic converter can restrict the flow of exhaust gases, reducing engine efficiency.
This often manifests as noticeable performance issues, such as sluggish acceleration, hesitation while driving and a general lack of power.
In some cases, the vehicle may struggle to reach higher speeds or climb hills.
Decreased fuel efficiency is also common as the engine has to work harder to overcome the restriction in exhaust flow.
Timely replacement ensures smooth engine operation and restores normal power levels.
3. Rattling Noise from the Exhaust System
A catalytic converter contains a ceramic or metallic honeycomb structure coated with catalytic metals.
When the converter fails, cracks, or breaks internally, these pieces can rattle around inside the housing.
This noise is usually most noticeable when starting the vehicle or accelerating.
This rattling sound is a clear mechanical indicator that the catalytic converter is failing and needs attention.
If ignored, loose pieces can damage other parts of the exhaust system or be drawn back into the engine, leading to even more serious problems.
4. Failure to Pass Emissions or Smog Tests
Vehicles with a failing catalytic converter often fail official emissions or smog tests.
The converter’s job is to reduce harmful gases such as carbon monoxide, nitrogen oxides and unburned hydrocarbons.
When it malfunctions, these toxic gases are released into the environment in higher quantities.
Failing an emissions test not only means the converter needs replacing, but it can also result in fines or the vehicle being declared unfit for road use until repairs are made.
5. Strong Sulfur or Rotten Egg Smell from the Exhaust
A common and easily identifiable sign of a failing catalytic converter is a strong sulfur or rotten egg smell coming from the exhaust.
This odor occurs because the converter is no longer properly processing hydrogen sulfide, a byproduct of fuel combustion.
This gas accumulates in the exhaust system and produces the distinctive smell.
If this odor is consistently present while driving or idling, it’s a strong indication that the catalytic converter has failed and needs to be replaced to prevent further engine problems and environmental pollution.
How to Ensure Safety By Taking All the Necessary Precautions Before Starting
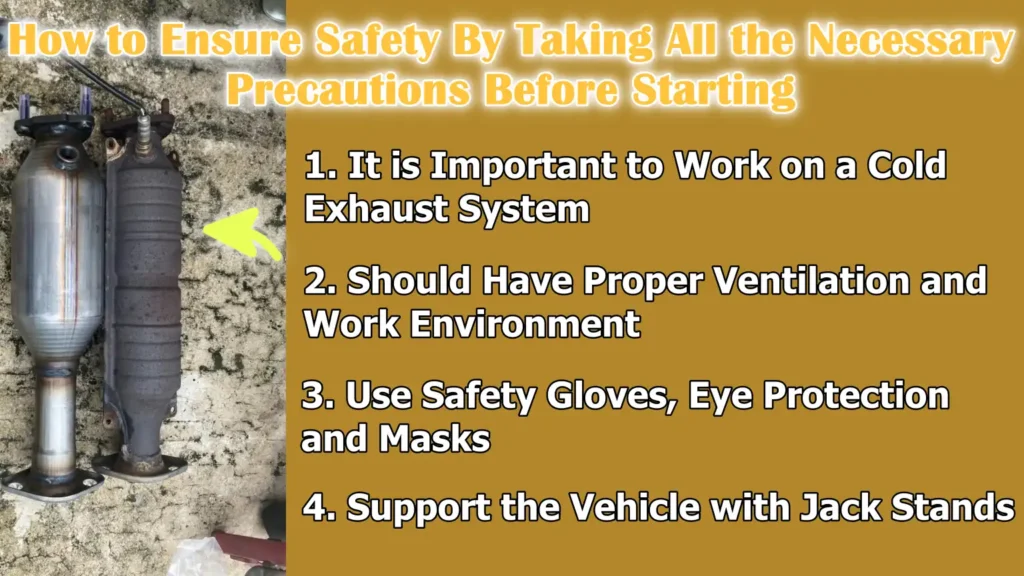
1. It is Important to Work on a Cold Exhaust System
Before beginning any work on the catalytic converter, it is crucial to ensure that the exhaust system and engine are completely cool.
Exhaust components can become extremely hot during operation and touching a hot catalytic converter, pipes, or surrounding engine parts can cause severe burns.
Waiting for the system to cool down not only protects your skin but also prevents accidental damage to components that expand when hot.
Working on a cool system allows for safer and more precise handling of bolts, sensors and gaskets, reducing the risk of errors during installation or removal.
2. Should Have Proper Ventilation and Work Environment
Working on a vehicle’s exhaust system can expose you to harmful gases such as carbon monoxide, which can accumulate in enclosed spaces and cause serious health problems.
Always work in a well-ventilated area, ideally outdoors or in a garage with open doors and windows.
Avoid working in areas with poor airflow and never run the engine for extended periods in an enclosed space.
Keeping your workspace clean, organized and well-ventilated also reduces the risk of tripping over tools, slipping on fluids, or inhaling harmful particles while handling the catalytic converter and exhaust components.
3. Use Safety Gloves, Eye Protection and Masks
Safety equipment is essential when replacing a catalytic converter.
Safety gloves protect against cuts, burns and chemical exposure when handling sharp metal parts, rusted bolts, or residual substances on the exhaust.
Eye protection safeguards against flying debris, dust and accidental splashes of chemicals such as penetrating oil or cleaning agents.
Wearing a mask is also essential in areas where dust, rust, or carbon buildup may be present inside the exhaust system.
Proper safety equipment minimizes the risk of injury and ensures that the replacement process is safe for your hands, eyes and respiratory system.
4. Support the Vehicle with Jack Stands
Before going under the vehicle to access the catalytic converter, it’s crucial to secure it properly.
Using only a jack to lift the car is unsafe because hydraulic jacks can fail or slip unexpectedly.
Jack stands provide stable support and prevent the vehicle from falling, which could cause serious injury or damage.
Ensure the car is on a level surface and the emergency brake is engaged.
Jack stands placed correctly under the recommended lifting points create a safe environment for working under the vehicle, giving you confidence and stability throughout the replacement process.
Tools
| Tool / Material | Purpose / Use | Tips for Use |
|---|---|---|
| Vehicle Jack and Jack Stands | To safely lift the vehicle and keep it stable while working underneath it. | Always use a level surface and never rely solely on the jack; place jack stands at the manufacturer’s recommended lift points. |
| Socket Set and Wrenches | Unscrew and tighten the bolts and nuts holding the catalytic converter and exhaust parts. | Use the correct size for each bolt to prevent the bolts from rounding; a ratchet socket can make the job quicker. |
| Penetrating Oil | To loosen rusted or jammed bolts on the exhaust system. | Apply it and let it sit for 10 to 15 minutes so that the bolt comes out easily. |
| Replacement Catalytic Converter | The new component that will replace the damaged one. | Make sure it matches your vehicle’s make, model, engine type and emission standards. |
| New Gaskets, Bolts and Hardware | To properly seal and protect the catalytic converter. | Always use a new gasket to prevent exhaust leaks; tighten bolts according to manufacturer’s instructions. |
| Torque Wrench | Tightens bolts to the correct torque without overtightening. | Follow the torque instructions in the vehicle manual to avoid damage to parts. |
How to Identify the Correct Catalytic Converter
1. OEM vs Aftermarket Catalytic Converters
When replacing a catalytic converter, the first decision is whether to use an OEM (Original Equipment Manufacturer) part or an aftermarket converter.
OEM converters are manufactured by the same company that made the vehicle and are designed to precisely match the original part’s specifications, materials and performance.
They often guarantee emissions compliance and fit perfectly without any modifications.
Aftermarket converters are made by third-party companies and their quality, materials and efficiency can vary.
Some aftermarket options are less expensive, but they may not meet stringent emissions standards or may require adjustments during installation.
Choosing the correct type ensures the new catalytic converter functions effectively and that your vehicle remains legally compliant and environmentally friendly.
2. Matching Engine Size, Model Year and Emissions Standards
Catalytic converters are not universal; they are designed to match specific engine sizes, model years and emissions standards.
Engines of different sizes or designs produce varying amounts and types of exhaust gases, so the converter must be compatible to function correctly.
Vehicle emissions regulations also vary in their stringency across different regions, which affects the type of converter required.
Using a converter that matches your engine specifications, model year and local emissions regulations ensures proper exhaust treatment, prevents engine problems and avoids failing emissions tests.
3. Understanding Direct-Fit vs Universal Converters
Catalytic converters come in two main types: direct-fit and universal.
Direct-fit converters are designed to precisely replace the original unit, featuring matching flanges, bolt patterns and sensor ports.
This allows for easy installation without any modifications.
Universal converters, on the other hand, are more flexible in size and shape and often require cutting, welding, or adjusting the exhaust system to achieve a proper fit.
Understanding this difference is crucial, as choosing the wrong type can lead to installation problems, exhaust leaks, or converter failure.
4. Verifying Sensor Port Compatibility
Modern catalytic converters work in conjunction with oxygen sensors that monitor exhaust gases before and after the converter.
It’s essential to verify that the replacement converter has the correct number and placement of sensor ports for your vehicle.
Incorrect port placement can prevent the sensors from functioning, trigger the check engine light and compromise emission performance.
Ensuring compatibility with your vehicle’s sensors guarantees that the converter will operate efficiently and provide accurate data to the engine computer for proper fuel and emission management.
How to Locate the Catalytic Converter
1. Understanding the Exhaust System Layout
To locate the catalytic converter, it’s essential to first understand the general layout of your vehicle’s exhaust system.
The exhaust system typically begins at the engine’s exhaust manifold, which collects gases from the engine cylinders.
From there, the exhaust gases travel through pipes, the catalytic converter, a resonator (if present) and finally the muffler, before exiting through the tailpipe.
Knowing this sequence helps in identifying where the catalytic converter is located.
In most vehicles, the converter is positioned between the engine and the muffler, as the exhaust gases need to be treated while they are still hot for maximum efficiency.
Understanding this layout ensures you are looking in the correct place and can plan your work safely.
2. Identifying Upstream and Downstream Positions
Catalytic converters are often referred to as upstream or downstream based on their position relative to the engine.
The upstream converter is closer to the engine and is the first to process the exhaust gases, while the downstream converter is located further down the exhaust system and works to further reduce emissions.
Some vehicles have only one converter, while others, particularly modern or high-performance models, may have multiple converters.
Knowing whether your vehicle has an upstream, downstream, or single converter is crucial for correctly identifying the part that needs replacing and ensuring the proper functioning of the emissions system.
3. Identifying Oxygen Sensor Locations
Oxygen sensors are vital components that monitor the efficiency of the catalytic converter.
Vehicles typically have at least two sensors around the catalytic converter: one upstream, before the converter and one downstream, after the converter.
The upstream sensor measures the oxygen levels in the exhaust gases leaving the engine, while the downstream sensor measures the converter’s effectiveness in cleaning those gases.
Identifying the locations of these sensors helps in safely removing and reinstalling them during replacement.
The correct placement of the sensors ensures accurate data for the engine control unit, which is crucial for fuel efficiency, engine performance and emissions compliance.
4. Access Points Based on Vehicle Design
The exact location and accessibility of the catalytic converter can vary depending on the vehicle’s make, model and design.
In some vehicles, it is located directly beneath the engine and is easily accessible from below.
In other vehicles, particularly SUVs or those with complex exhaust systems, it may be partially enclosed or located further back under the vehicle’s undercarriage or rear section.
Accessing the converter safely often requires lifting the vehicle with a jack and supporting it with jack stands.
Understanding its location based on the design allows you to efficiently plan the replacement process, avoid damaging surrounding components and ensure a safe working environment.
How to Remove Oxygen Sensor
1. Marking the Sensor Locations Before Removal
Before removing oxygen sensors from the exhaust system, it is crucial to carefully mark their locations.
Vehicles typically have multiple sensors located before and after the catalytic converter and each sensor provides specific information to the engine control unit.
Swapping these locations can lead to incorrect readings, trigger the check engine light and affect engine performance.
Using a permanent marker, masking tape, or a labeling system to mark each sensor ensures they are reinstalled in their correct original positions, maintaining the accuracy of the emission system and proper engine function.
2. Using the Correct Sensor Socket
Oxygen sensors are typically threaded into the exhaust pipe and require a specialized sensor socket for safe removal.
Using the correct sensor socket prevents damage to the sensor body or wiring and provides the necessary leverage to loosen tightly fitted or corroded sensors.
Standard wrenches may not fit properly or could strip the sensor’s hex nut.
A sensor socket is designed to fit around the sensor, allowing clearance for the wire, making removal easier and safer.
Using the correct tool ensures the sensors remain functional and avoids unnecessary replacement costs.
3. Protecting the Wiring During Removal
The wires connected to oxygen sensors are delicate and transmit electrical signals to the engine control unit.
During removal, it’s essential to avoid pulling, twisting, or cutting these wires.
Excessive force can break internal connections, rendering the sensor inoperable.
Carefully guiding the wires, holding them near the base of the sensor and ensuring they don’t get caught on surrounding components protects the sensor during the removal process.
Maintaining the integrity of the wiring is crucial for accurate sensor readings and avoiding unnecessary repairs or replacements.
4. Safely Storing the Sensors for Reinstallation
After removing the oxygen sensors, it’s crucial to store them properly to protect them from damage before reinstallation.
The sensors should be kept in a clean, dry place, away from dust, moisture, or heavy objects that could damage the delicate tip.
Placing them on a soft surface or wrapping them in a clean cloth will protect the ceramic element and keep it free from contaminants.
Proper storage ensures that the sensors remain in good working condition, allowing for effective reinstallation, accurate exhaust monitoring and proper catalytic converter function.
How to Remove the Old Catalytic Converter
1. Loosening Rusted or Seized Bolts
One of the most common challenges when removing an old catalytic converter is dealing with rusted or seized bolts.
These bolts are often exposed to heat, moisture and road salt, which can lead to corrosion over time.
Using penetrating oil and allowing it to soak for a few minutes can help loosen these stubborn bolts.
Applying controlled force with the correct size socket or wrench minimizes the risk of stripping or breaking the bolts.
Carefully loosening the bolts ensures a safer removal process and prevents further damage to the exhaust system.
2. Cutting the Exhaust Pipe if Necessary
In some vehicles, the catalytic converter is welded directly to the exhaust pipe, making bolt removal impossible.
In such cases, it may be necessary to cut the exhaust pipe to free the converter.
Using the correct cutting tool, such as a reciprocating saw or exhaust pipe cutter, allows for precise cuts without damaging surrounding components.
Properly measuring and marking the cut points ensures that the new catalytic converter can be installed with minimal adjustments.
The pipe should always be cut carefully to maintain the structural integrity of the exhaust system and avoid costly mistakes.
3. Supporting Exhaust Components During Removal
The catalytic converter is part of the exhaust system, which may include heavy pipes, mufflers and brackets.
Supporting these components with jacks or additional stands during removal is crucial to prevent them from falling or bending.
Failure to support the system can lead to damage to connected components, strain on hangers, or even personal injury.
Proper support ensures the exhaust system remains stable, making the removal of the catalytic converter easier and safer for both the vehicle and the person performing the work.
4. Inspecting Surrounding Exhaust Components
Once the catalytic converter is removed, it’s crucial to carefully inspect the surrounding exhaust components.
Look for signs of rust, cracks, leaks, or worn hangers and clamps.
Damaged components can compromise the performance of the new catalytic converter or lead to exhaust leaks, reduced engine performance and increased emissions.
Replacing or repairing any damaged parts before installing the new converter ensures the exhaust system functions efficiently, extends the lifespan of the replacement part and maintains proper vehicle safety and emissions compliance.
How to Prepare the Catalytic Converter for Installation
1. Cleaning the Exhaust Flange Surfaces
Before installing a new catalytic converter, it’s crucial to thoroughly clean the exhaust flange surfaces.
Over time, rust, carbon deposits and remnants of old gaskets can accumulate on the flanges, preventing a proper seal.
Use a wire brush, sandpaper, or appropriate cleaning tools to ensure the surfaces are smooth and free of debris.
Properly cleaned flanges help create an airtight connection, reducing the risk of exhaust leaks and ensuring the new catalytic converter operates efficiently and quietly.
2. Comparing the Old and New Catalytic Converters
Before installation, it’s essential to compare the old catalytic converter with the new one.
Check the dimensions, mounting points, sensor ports and pipe connections to ensure they match exactly.
Differences in size, shape, or sensor placement can lead to incorrect installation, exhaust leaks, or check engine light issues.
Comparing the converters ensures the replacement part is compatible with your vehicle’s make, model and engine type, saving time and preventing potential problems during installation.
3. Installing New Gaskets and Hardware
Using new gaskets, bolts and other hardware with the catalytic converter is essential for a proper seal and secure fit.
Old gaskets may be worn or compressed and may not provide a reliable seal, leading to exhaust leaks and reduced converter effectiveness.
Properly fitting bolts and hardware ensure the converter remains securely in place despite the heat and vibrations of the exhaust system.
Using new components also prevents future corrosion and makes maintenance easier if further replacements are needed later.
4. Proper Exhaust Section Alignment
Proper alignment of the exhaust section is crucial before tightening the bolts on the catalytic converter.
Misaligned pipes can put stress on the converter, exhaust hangers, or engine components, potentially leading to cracks, leaks, or premature failure.
Carefully fitting the converter and connecting pipes ensures smooth exhaust flow and reduces stress on the system.
Correct alignment also helps maintain optimal performance, fuel efficiency and emission control, ensuring the vehicle operates safely and effectively after installation.
How to Install a New Catalytic Converter – Easy Process
1. Positioning the Converter Correctly
Proper positioning of the new catalytic converter is crucial for its optimal performance.
The converter must be correctly aligned with the exhaust pipe and sensor ports according to your vehicle’s design.
Incorrect positioning can lead to exhaust leaks, inaccurate sensor readings and reduced efficiency in reducing harmful emissions.
Taking the time to properly position the converter also prevents stress on surrounding exhaust components, preventing cracks or premature failure over time.
2. Hand-Tightening Bolts to Confirm Alignment
Before fully tightening the bolts, it’s essential to hand-tighten them first.
Hand-tightening allows for minor adjustments to the catalytic converter’s position and ensures that the flanges, gaskets and pipes are properly aligned.
This step prevents misalignment that could lead to leaks or stress on the exhaust system during vehicle operation.
Hand-tightening gives you control over the positioning and reduces the risk of cross-threading the bolts or damaging the new hardware.
3. Torquing Bolts to Manufacturer Specifications
Once proper alignment is confirmed, the bolts should be torqued to the vehicle manufacturer’s specifications using a torque wrench.
Applying the correct torque ensures that the bolts are tight enough to create a secure seal, but not so tight that they damage the flanges or the catalytic converter itself.
For long-lasting performance, to prevent leaks and to guarantee that the exhaust system maintains the correct pressure and flow for optimal engine performance and emissions control, it is essential to use the recommended torque values.
4. Ensuring Proper Exhaust Clearance
Once the catalytic converter is installed and the bolts are tightened, it is crucial to check that there is sufficient clearance between the converter, the exhaust pipes and the surrounding components of the vehicle.
Insufficient clearance can lead to vibrations, rattling, or contact with heat-sensitive parts such as brake lines, fuel lines, or the vehicle’s underbody.
Maintaining proper clearance allows the exhaust system to safely expand and contract with temperature changes, preventing damage to surrounding components and ensuring that the catalytic converter operates efficiently without obstruction.
How to Reinstall the Oxygen Sensor
1. Applying Anti-Seize Compound – If Recommended
Before installing the oxygen sensor, it is often recommended to apply a small amount of anti-seize compound to the sensor threads, unless the sensor is already pre-coated.
The anti-seize prevents the sensor from seizing or becoming stuck in the exhaust pipe due to heat, corrosion, or rust over time.
This ensures that the sensor can be easily removed in the future without damaging the exhaust system or surrounding components, making maintenance and future repairs safer and easier.
2. Installing the Sensor in the Correct Location
Oxygen sensors must be installed in the exact location from which they were removed.
Vehicles typically have an upstream sensor before the catalytic converter and a downstream sensor after it.
If they are installed incorrectly, the exhaust gas readings will be inaccurate, potentially triggering the check engine light, reducing fuel efficiency and causing issues with emission control.
Installing them in the correct location ensures that the sensors accurately monitor the exhaust gases, allowing the engine control unit to properly adjust the air-fuel ratio for optimal performance and reduced emissions.
3. Tightening the Sensor to the Correct Torque
Once properly positioned, the oxygen sensor should be tightened using a torque wrench according to the manufacturer’s specifications.
Overtightening can damage the sensor or the exhaust system, while undertightening can lead to inaccurate sensor readings.
Using the correct torque ensures a secure fit that maintains a good seal, prevents exhaust gas leaks and preserves the accuracy and lifespan of the sensor.
4. Securely Connecting the Electrical Connector
Finally, the oxygen sensor’s electrical connector must be securely connected to the vehicle’s wiring harness.
Check these engine components.
An engine warning light can indicate a problem and a technical inspection of the engine can pinpoint the fault.
Ensuring that the sensors are properly connected and free from dirt, corrosion, or damage will guarantee that they function correctly and maintain efficient emissions control, fuel economy and overall engine health.
How to Test and Perform Final Inspection
1. Checking Exhaust System Alignment
After installing the new catalytic converter and reconnecting the oxygen sensors, it’s crucial to carefully check the alignment of the entire exhaust system.
Proper alignment ensures that the exhaust pipes, hangers and converter are positioned correctly without any strain or bending.
Misaligned parts can create pressure points, cause cracks, or generate vibrations that can damage the converter and connected components over time.
Correct alignment ensures smooth exhaust flow, improves engine performance and prevents premature wear of the exhaust system.
2. Checking for Leaks or Loose Connections
Once the alignment is confirmed, the next step is to check for leaks or looseness at all flanges, bolts, gaskets and sensor connections.
Even small gaps or improperly tightened bolts can allow exhaust gases to escape, compromising engine efficiency and emission control.
Thoroughly checking and tightening all loose connections ensures that the catalytic converter is properly sealed, maintains correct exhaust pressure and prevents harmful gases from entering the passenger cabin or the environment.
3. Safely Lowering the Vehicle
Before starting the engine, the vehicle should be safely lowered from the jack stands or lift.
Ensuring the vehicle is stable and on a level surface prevents accidents during exhaust system testing.
Carefully removing the support equipment protects both the installer and the vehicle, providing a safe setup for running the engine and monitoring performance.
Safely lowering the vehicle is a crucial step to avoid damage to the undercarriage or personal injury.
4. Starting the Engine and Listening for Unusual Noises
Finally, start the engine and listen carefully for any unusual noises such as rattling, hissing, or knocking.
Unusual noises can indicate problems such as loose bolts, misaligned pipes, or internal damage to the catalytic converter.
Also, observe the exhaust flow and check that the check engine light is off.
Identifying and addressing problems at this stage ensures that the catalytic converter functions efficiently, engine performance is optimized, fuel economy is maintained and emission standards are met, resulting in a safer and more reliable driving experience.
Read More:
What are the Important Post-Replacement Checks
1. Clearing Diagnostic Trouble Codes
After installing a new catalytic converter, it’s crucial to clear any diagnostic trouble codes (DTCs) stored in the vehicle’s engine control unit.
These codes may have been triggered by the faulty converter or issues with the oxygen sensors during the replacement process.
Using an OBD-II scanner, the codes can be reset, allowing the engine computer to start fresh and properly monitor the new converter.
Clearing the codes ensures that the check engine light reflects the vehicle’s current condition rather than old problems, preventing confusion and maintaining optimal engine performance.
2. Test Driving the Vehicle
Test driving the vehicle is an essential step to ensure the new catalytic converter and exhaust system are functioning correctly under real-world driving conditions.
During the drive, pay attention to acceleration, engine response and overall performance.
Smooth engine operation indicates that exhaust gases are flowing properly and the converter is working efficiently.
The test drive also helps identify any vibrations, rattles, or unusual noises that may have been overlooked during installation, allowing for immediate correction before regular use of the vehicle.
3. Monitoring Check Engine Light Behavior
Even after clearing old codes, it’s important to monitor the check engine light during and after the test drive.
If the light illuminates again, it could indicate problems with the new catalytic converter, oxygen sensors, or exhaust connections.
Monitoring the check engine light ensures that any potential issues are detected early, maintaining engine efficiency, preventing emission failures and avoiding further damage to the vehicle.
Proper monitoring confirms that the replacement process was successful and the emission system is functioning correctly.
4. Verification of Emission System Performance
Finally, it’s essential to verify that the emission system is functioning as intended.
This can be done through a professional emissions test or by using an OBD-II scanner to monitor oxygen sensor readings and exhaust efficiency.
A properly functioning catalytic converter reduces harmful gases such as carbon monoxide, nitrogen oxides and hydrocarbons to safe levels.
Verifying emission performance ensures that the vehicle complies with local environmental regulations, protects the environment and maintains engine health and fuel efficiency.
What are the Common Mistakes to Avoid in Replacement of Catalytic Converter
1. Installing the Wrong Converter Type
One of the most common mistakes when replacing a catalytic converter is installing the wrong type.
Using a converter that doesn’t match the vehicle’s engine size, model year, or emission standards can lead to problems such as restricted exhaust flow, reduced engine performance and failure to pass emission tests.
Direct-fit converters should align perfectly with the original part, while universal converters may require some modifications.
Choosing the correct type ensures the new converter functions efficiently, protects the engine and allows the vehicle to comply with environmental regulations.
2. Reusing Worn Gaskets or Bolts
Reusing old or worn gaskets and bolts is another common mistake that can compromise the seal between the catalytic converter and the exhaust system.
Worn gaskets can lead to exhaust leaks, resulting in reduced efficiency, increased emissions and the risk of harmful gases entering the cabin.
Similarly, damaged or corroded bolts can break or fail due to heat and vibration.
Always using new gaskets and hardware ensures a secure, leak-free installation and improves the longevity and reliability of the exhaust system.
3. Overtightening Exhaust Components
Overtightening bolts or fasteners during installation can cause several problems, including stripped threads, cracked flanges, or warped exhaust pipes.
Excessive torque can put undue stress on the catalytic converter and connected components, leading to premature failure or leaks.
Following the manufacturer’s torque specifications for all fasteners ensures that the converter and exhaust system are installed securely without damage, maintaining proper exhaust flow and engine performance.
4. Ignoring Oxygen Sensor Placement
Incorrect oxygen sensor placement is a mistake that can severely impact the performance of both the engine and the catalytic converter.
Installing sensors in the wrong locations, swapping upstream and downstream sensors, or failing to reconnect them properly can trigger the check engine light, reduce fuel efficiency and prevent proper emissions monitoring.
Ensuring each sensor is in its correct location guarantees that the engine control unit receives accurate data, allowing the catalytic converter to function efficiently and the vehicle to comply with emissions regulations.
How to Maintain & Extend the Life of Catalytic Converter
Plus, the three-way catalytic converters, which is the most common type in modern gasoline vehicles, that achieve conversion efficiencies of up to 99.9% for harmful gases when they reach operating temperatures between 450 to 500°C. Also, it has core components such as: the ceramic honeycomb substrate and washcoat materials such as: aluminum oxides that supports the catalytic metals. So, over the period of use and time the catalytic converters eventually wear out as well and they need replacement, as its efficiency drops when the system cannot reach or maintain these ideal conditions.[¹]
1. Address Engine Misfires Immediately
If left unaddressed, engine misfires can severely damage the catalytic converter.
When a cylinder misfires, unburned fuel can enter the exhaust system and overheat the converter, potentially melting the internal ceramic or metallic components.
Promptly identifying and fixing misfires caused by faulty spark plugs, ignition coils, or fuel injectors can prevent this damage.
A smoothly running engine protects the catalytic converter, improves fuel efficiency and reduces harmful emissions.
2. Use the Correct Fuel and Oil
The quality and type of fuel and engine oil used directly impact the catalytic converter’s lifespan.
Low-quality fuel with high sulfur content or contaminants can lead to carbon buildup and clogging inside the converter.
Similarly, using the wrong grade of engine oil or allowing oil to leak into the exhaust system can cause deposits on the converter’s internal surfaces, reducing its efficiency.
Consistently using the fuel and oil recommended by the manufacturer ensures the catalytic converter functions correctly, extends its lifespan and guarantees cleaner exhaust emissions.
3. Avoid Driving for Extended Periods with Warning Lights On
Ignoring warning lights, such as the check engine light, can jeopardize the catalytic converter.
These lights often indicate problems with the engine or emission system that, if left unaddressed, can cause the converter to overheat, clog, or chemically degrade.
Whenever a warning light illuminates, addressing problems promptly can prevent further damage and avoid costly repairs.
Timely attention ensures the converter continues to function correctly, maintaining the vehicle’s overall performance and safety.
4. Regular Exhaust System Inspections
Regular inspections of the exhaust system are crucial for extending the life of the catalytic converter.
Checking for leaks, corrosion, loose hangers, or damaged pipes helps identify issues early that could stress or misalign the converter.
Inspections also detect faulty gaskets, malfunctioning sensors, or rust before they significantly impact the converter’s efficiency.
Routine maintenance ensures the catalytic converter remains effective in reducing harmful emissions, protects the engine and contributes to the long-term reliability of the exhaust system.
Conclusion – How to Replace Catalytic Converter
If you always maintain the catalytic converter in good condition or just replace them in time, then your vehicle runs smoothly and it actually contributes to the cleaner air, even timely replacement is a smart decision for your wallet as well.
A successful catalytic converter replacement requires understanding the technical and environmental importance of this component.
And, a proper installation ensures that oxygen sensors function correctly, exhaust gases flow efficiently and the engine control unit receives accurate information for optimal fuel and emissions management.
Also, regular checks after replacement, such as clearing diagnostic codes, performing test drives and monitoring sensor performance, confirm that the system is operating efficiently.
Furthermore, using the correct fuel, promptly addressing misfires and conducting routine exhaust inspections can prevent future damage and extend the lifespan of the converter for years to come.
Ultimately, replacing a catalytic converter is an investment in engine health, vehicle longevity, fuel economy and environmental responsibility.
So, that’s all from this guide and comment down for more information about this guide.
Frequently Asked Questions
Q1. What is a catalytic converter and why is it important?
Answer: A catalytic converter is a part of your vehicle’s exhaust system that helps reduce harmful emissions from the engine. It uses precious metals like platinum, palladium and rhodium to convert toxic gases such as carbon monoxide, nitrogen oxides and unburned fuel into less harmful substances like carbon dioxide, nitrogen and water vapor. This makes your car more environmentally friendly and helps it meet legal emission standards. Without a functioning catalytic converter, your car can produce more pollution, experience reduced engine power and fail emission tests.
Q2. How do I know if my catalytic converter needs replacing?
Answer: Several signs indicate that a catalytic converter may need replacing. The check engine light may illuminate and a diagnostic scan may show emission-related codes. You might experience a decrease in engine power, sluggish acceleration, or reduced fuel efficiency. A rattling noise from under the vehicle, specially during acceleration, can indicate internal damage. A strong sulfur or rotten egg smell from the exhaust is also a sign of a problem. Finally, failing an emissions test is a clear indication that the catalytic converter is not functioning correctly.
Q3. Can I replace a catalytic converter myself?
Answer: Yes, a catalytic converter can be replaced by someone with basic mechanical skills and the right tools. However, it requires safety precautions, including working on a cool vehicle, securely supporting it with jack stands and carefully handling the oxygen sensors. Following a step-by-step guide and using the correct tools and replacement parts is essential. If you are not comfortable lifting the vehicle or working underneath it, or if the converter is welded in place, it is advisable to seek professional help.
Q4. What tools and materials are needed to replace a catalytic converter?
Answer: Necessary tools include a vehicle jack and jack stands to safely lift the vehicle, a socket set and wrench to remove bolts, penetrating oil for rusted bolts, a torque wrench to tighten bolts to the correct specifications and a new catalytic converter with matching gaskets, bolts and hardware. These tools help you safely remove the old converter and securely install the new one, preventing leaks and damage to other components.
Q5. How do I identify the correct catalytic converter for my car?
Answer: You need to consider whether you want an OEM (Original Equipment Manufacturer) converter or an aftermarket one. The converter must match your engine size, model year and local emissions standards. There are direct-fit converters, which are exact replacements for the original and universal converters, which may require some modifications. It’s also crucial that the converter has the correct oxygen sensor ports and positions. Installing the wrong type of converter can lead to poor performance, engine problems and failure of emissions tests.
Q6. How long does it take to replace a catalytic converter?
Answer: For most vehicles with direct-fit converters and easily accessible bolts, the replacement can take approximately 1 to 2 hours if you have the right tools and carefully follow the steps. Vehicles with welded converters or complex exhaust systems may take longer and might require pipe cutting or professional welding. The time required also depends on how much rust is on the old bolts and how easily the old converter comes off.
Q7. Can a bad catalytic converter damage my engine?
Answer: Yes, a faulty catalytic converter can affect your engine. If the converter becomes clogged, it can restrict exhaust flow, leading to increased back pressure in the engine and reduced power and acceleration. Unburned fuel entering a faulty converter can cause it to overheat and melt internally, potentially damaging other exhaust components. A faulty converter can also cause the oxygen sensor to send incorrect information to the engine computer, resulting in reduced fuel efficiency, misfires, or other engine problems.
References:
[1] Catalytic Converters for Vehicle Exhaust: Fundamental Aspects and Technology Overview for Newcomers to the Field
https://www.mdpi.com/2624-8549/3/2/44

Guys, I’m a car audio enthusiast and customization expert and I love clear sound and clean installation. Plus, I have spent years helping people build their dream audio setups. And whenever I’m working on cars, I probably listen to music and thinks about the next big upgrade.
