 Skip to content
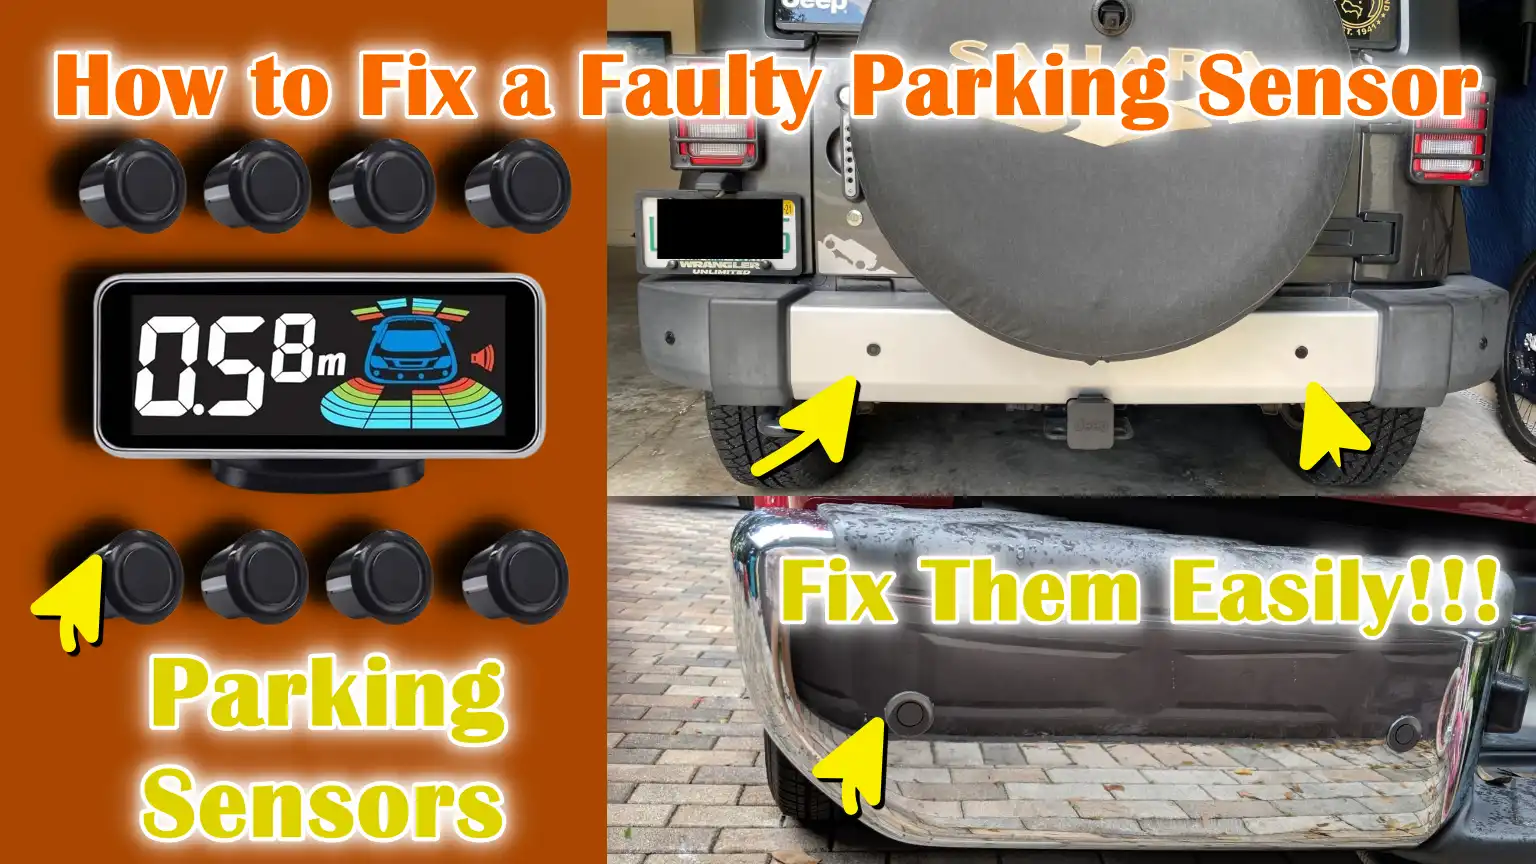
Written By: Don Dodi
Fact Checked By: Kristen Brown
Reviewed By: Diego Rosenberg
Basically, parking sensors literally helps the drivers to avoid any hidden obstacles that your mirrors and cameras cannot always shows you.
Without a doubt, parking sensors are really useful safety features that gives you safe passage in low-speed driving and tight parking situations as well.
As, these sensors actually uses ultrasonic or electromagnetic technology that detects the objects behind or in front of the vehicle and gives alert to the driver through the beeps, visual displays or it can be both ways.
Plus, there’s road safety and automotive engineering studies that shows that; low-speed collisions during the parking account for a significant percentage of minor vehicle damage in worldwide, that literally makes these parking sensors an really important tool that effectively reduces accidents, repair costs and stress for drivers as well.
However, it is just like any electronic components; the parking sensors that can develop faults over the time due to several reasons such as: dirt buildup, moisture, minor impacts, wiring issues or it can be electrical problems as well.
But, whenever a parking sensor become faulty, then it may gives false alerts, stop detection the obstacles at all or continuously beep without any kind of reasons.
So, this is the guide about How to Fix a Faulty Parking Sensor, so that you can fix them in simple and easy way to restore their proper functionality and improve the parking safety as well.
What are the Common Signs of a Faulty Parking Sensors
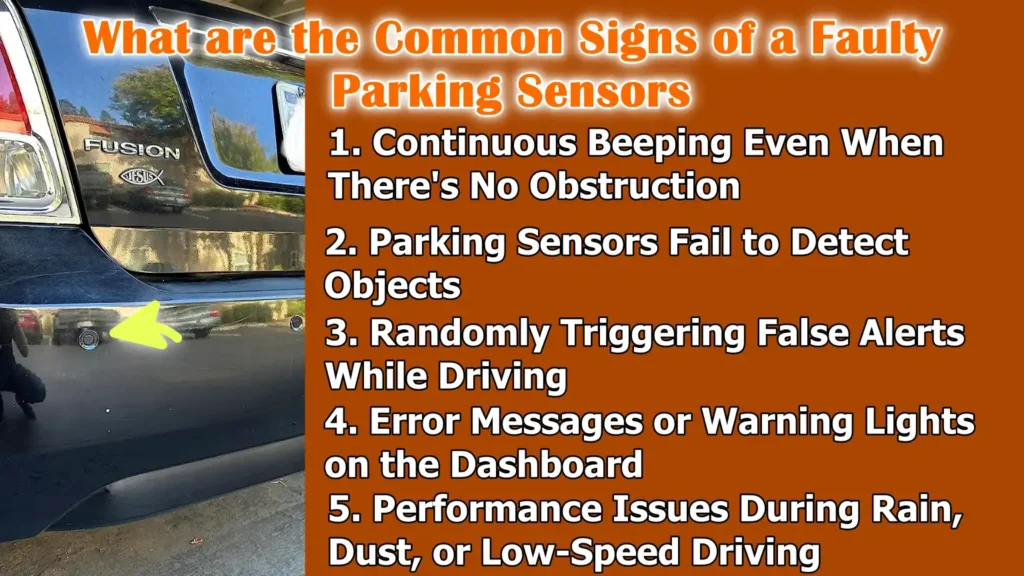
1. Continuous Beeping Even When There’s No Obstruction
One of the most common signs of a faulty parking sensor is a continuous beeping sound, even when there’s nothing near the vehicle.
This usually happens when the sensor becomes confused or blocked and mistakenly detects something nearby.
Dirt, mud, road salt, ice, or even a thick layer of wax can obstruct the sensor’s ability to send and receive ultrasonic signals.
In some cases, internal damage to the sensor or moisture inside the sensor can also cause this problem.
A continuous beep should never be ignored, as it reduces driver confidence and can mask genuine warnings when a real obstruction is present.
2. Parking Sensors Fail to Detect Objects
Another clear sign of a faulty parking sensor is when the system completely fails to detect objects behind or in front of the vehicle.
This can make parking very difficult and unsafe, specially in tight spaces.
This problem is often caused by broken wires, blown fuses, or a defective sensor unit.
Over time, vibrations, water exposure, or minor impacts can also damage internal components, causing the sensors to stop working altogether.
When the sensors don’t react at all, it usually means the system is no longer sending signals to the vehicle’s alert system.
3. Randomly Triggering False Alerts While Driving
Faulty parking sensors can also trigger random alerts even when the vehicle is moving slowly or normally.
These false alerts can distract and confuse the driver.
This problem is often associated with electrical interference, loose wiring, or slightly misaligned sensors in the bumper.
Weather conditions such as heavy rain or high humidity can exacerbate the problem by affecting signal accuracy.
Erratic alerts reduce the reliability of the parking system and make it difficult to trust when a genuine obstruction is detected.
4. Error Messages or Warning Lights on the Dashboard
Many modern vehicles are designed to display warning messages or symbols on the dashboard when a parking sensor malfunctions.
These warnings are generated by the vehicle’s control unit when it detects irregular sensor signals or communication errors.
Dashboard warnings are helpful because they indicate that the problem is not simply external dirt, but may involve wiring, software, or sensor failure.
Ignoring these warnings can lead to complete system failure over time, making repairs even more difficult and expensive.
5. Performance Issues During Rain, Dust, or Low-Speed Driving
Malfunctioning sensors in specific conditions are also a major indicator of faulty parking sensors.
Sensors may function normally in dry weather but fail in rain, fog, or dusty environments.
This happens because moisture or small particles interfere with the ultrasonic waves used by the sensors.
While parking sensors are designed to handle normal weather conditions, worn seals or components can make them more susceptible to environmental changes.
If the sensor’s performance varies significantly depending on the weather or speed, it often means the sensor is failing and needs to be inspected or replaced.
Know, The Main Causes of Parking Sensor Failure
1. Dirt, Mud, Snow, or Debris Blocking the Sensor Surface
One of the most common and easily overlooked causes of parking sensor failure is the accumulation of dirt or debris on the sensor surface.
Parking sensors work by emitting sound waves and measuring how quickly they are reflected back from surrounding objects.
When mud, road grime, ice, or dried water stains cover the sensor, these sound waves cannot travel properly.
As a result, the sensor may perceive an object as closer than it actually is, or it may fail to detect anything altogether.
This is specially common in winter conditions, rainy weather, or after driving on muddy roads.
Regular cleaning is crucial, as even a thin layer of dirt can reduce the sensor’s accuracy and cause false alerts.
2. Physical Damage from Minor Bumps or Scratches
Parking sensors are typically mounted on vehicle bumpers, making them vulnerable to minor impacts.
Even slight contact with another vehicle, a wall, a pole, or the sidewalk can damage the sensor without causing any visible damage to the bumper.
Scratches, cracks, or dents around the sensor can alter its position or affect how it sends and receives signals.
In some cases, the sensor may appear fine from the outside but be damaged on the inside.
Physical damage often causes persistent beeping, loss of detection, or complete sensor failure, specially after minor parking accidents.
3. Loose, Corroded, or Damaged Wiring Connections
Parking sensors rely on electrical wiring to send signals to the vehicle’s control unit.
Over time, these wires can become loose due to vibration, heat, or poor installation.
Moisture and road salt can also cause corrosion in the connectors, specially in areas near the bumper.
When wiring connections are loose or corroded, sensors can malfunction intermittently, sometimes working and sometimes failing.
This often results in random alerts or sensors that stop working without warning.
Wiring problems are a common cause of parking sensor problems in older vehicles or cars frequently driven in poor weather conditions.
4. Defective Sensor Module or Control Unit
In some cases, the problem isn’t with the sensors themselves, but with the sensor module or control unit that manages the entire parking sensor system.
This control unit processes information from all sensors and sends alerts to the driver.
If the module malfunctions due to age, water damage, or internal electronic malfunction, the system may stop working properly.
A defective control unit can malfunction multiple sensors simultaneously, trigger warning lights on the dashboard, or cause the parking system to shut down completely.
These problems usually require a proper diagnosis because their symptoms can mimic sensor or wiring problems.
5. Electrical problems such as blown fuses or voltage issues
Parking sensors require a stable power supply to function properly.
If a fuse connected to the parking sensor system blows, the sensors can immediately stop working.
Voltage problems caused by a weak battery, a bad alternator, or poor grounding can also affect sensor performance.
Low or unstable voltage can cause delayed alerts, system malfunctions, or complete failure of the parking sensors.
Electrical problems are often overlooked, but checking the health of the fuses and battery is an important step in diagnosing parking sensor malfunctions.
Tools
| Tool or Material | What It Is Used For |
|---|---|
| Clean Microfiber Cloth and Mild Cleaner | It is used to gently clean away dust, dirt, or stains from the sensor surface. This helps remove anything that might be blocking the sensor’s signals. |
| Vehicle Owner’s Manual | It shows the exact location of the sensors, the location of the fuse box and detailed system information. This helps in understanding the functioning of the parking system. |
| Basic Hand Tools | This involves using a simple screwdriver and trim tool to carefully remove the panel or bumper cover. These are used to access the sensor. |
| Multimeter | It is used to check the proper flow of electricity through wires and connectors. It helps detect broken or weak connections. |
| Replacement Parking Sensor | It is used when the original sensor is damaged or stops working. It must match the vehicle model. |
How to Ensure Safety By Taking Necessary Precautions Before Starting Repairs
1. Parking the Vehicle on a Level, Secure Surface
Before working on faulty parking sensors, the vehicle should be parked on a level and stable surface.
A level surface prevents the vehicle from rolling or shifting while you are inspecting or removing components near the bumper.
Parking on uneven ground can lead to sudden movements, increasing the risk of injury or damage to the vehicle.
Using a level surface also makes it easier to assess sensor alignment and ensures accurate testing after the repair is complete.
Engaging the parking brake, if available, adds an extra layer of safety during the repair process.
2. Turning Off the Ignition and Disconnecting the Battery
Turning off the ignition and disconnecting the battery is a crucial safety step when working on any electrical vehicle system.
Parking sensors are connected to the vehicle’s electrical system and leaving the battery connected can lead to short circuits or accidental system activation.
Disconnecting the battery minimizes the risk of electric shock and protects sensitive electronic components from damage.
This step also prevents false error codes from appearing on the dashboard while inspecting the sensors or wiring.
3. Avoiding Applying Direct Pressure to Painted Sensor Surfaces
Parking sensors are typically painted to match the vehicle’s bumper and their surfaces are sensitive to pressure and scratches.
Applying excessive pressure to the sensors can damage the internal components or crack the paint coating, affecting the sensor’s accuracy.
Even minor cracks or dents can interfere with how the sensors transmit and receive signals.
Handling the sensors gently and avoiding the use of sharp tools near the painted surfaces helps maintain the proper functioning of the sensors and prevents costly cosmetic damage.
4. Wearing gloves to protect your hands and vehicle components
Wearing gloves during repairs protects both your hands and the vehicle’s components.
Gloves reduce the risk of cuts from sharp edges inside the bumper area and protect your skin from dirt, grease and electrical components.
They also prevent oils from your hands from getting onto sensors or connectors, which can affect performance over time.
Wearing gloves is a simple step that improves safety and keeps the repair process clean and controlled.
How to Fix a Faulty Parking Sensor – Easy & Step By Step Process
1. Thoroughly Cleaning the Parking Sensors
The first and most crucial step in fixing faulty parking sensors is to clean them properly.
Parking sensors work by emitting sound waves and any dirt, mud, snow, road salt, or dried water spots on the sensor surface can obstruct these waves.
Even a thin layer of grime can cause false alerts or prevent the sensors from accurately detecting objects.
Use a soft microfiber cloth and gently wipe the sensor surfaces with a mild automotive cleaner.
Avoid using harsh chemicals or abrasive materials, as these can damage the sensor coating.
In many cases, a thorough cleaning is all that’s needed to get the sensors working normally again.
2. Checking for Cracks, Scratches, or Misalignment in the Sensors
After cleaning, carefully inspect each sensor for any damage.
Small cracks, deep scratches, or dents can interfere with how the sensors send and receive signals.
Misalignment is also common after minor collisions, where the sensor might be unevenly mounted in the bumper.
A sensor that isn’t pointing straight outwards might detect the ground or the bumper itself instead of obstacles.
Carefully check that each sensor is securely mounted and properly aligned.
Early identification of physical damage helps determine whether repair or replacement is necessary.
3. Checking for Loose or Damaged Wiring and Connectors
Parking sensors rely on wiring and connectors to communicate with the vehicle’s control system.
Over time, vibrations, heat, moisture and road salt can cause connectors to become loose or corroded.
Inspect the wiring behind the bumper and ensure all connectors are secure and free of corrosion or debris.
Faulty connectors can disrupt electrical signals, leading to false alerts or sensor malfunctions.
Gently cleaning the connectors and reconnecting any loose wires often resolves these issues without the need for new parts.
4. Testing Sensor Functionality Using Reverse Gear or Diagnostic Mode
Once cleaning and inspection are complete, it’s crucial to test the sensor system to confirm proper operation.
Start the vehicle, engage reverse gear and slowly move an object near each sensor to check for alerts.
Many vehicles also have a built-in diagnostic mode or display that shows sensor activity.
Testing each sensor individually helps identify which one is malfunctioning.
A thorough test ensures that all issues are resolved before reconnecting any removed components.
5. Resetting the Parking Sensor System – If Applicable
In some vehicles, parking sensor problems may persist even after physical repairs due to errors stored in the system.
Resetting the parking sensor system clears these errors and recalibrates the system.
This can be done through the vehicle’s settings, a diagnostic tool, or by temporarily disconnecting the battery.
The reset allows the control unit to recognize the repaired or replaced sensors.
This final step ensures the system functions correctly and reduces the likelihood of recurring false warnings.
Now, Understand How to Replace a Faulty Parking Sensor
1. Identifying the Correct Faulty Sensor
Before replacing a parking sensor, it’s crucial to identify which sensor is faulty.
Replacing the wrong sensor wastes time and money and doesn’t fix the problem.
A faulty sensor may not respond during testing, may continuously beep, or display an error message.
Some vehicles display sensor activity on the dashboard, which helps pinpoint the problem.
Correct identification ensures that only the faulty sensor is replaced and that the system functions properly after repair.
2. Safely Removing the Bumper Trim or Access Panel
Most parking sensors are located inside the vehicle’s bumper, which means removing the bumper trim or access panel to access them.
This should be done carefully to avoid breaking clips or scratching painted surfaces.
Using light pressure and the right tools will loosen the panels without causing any damage.
Many vehicles have hidden screws or clips and forcibly removing the trim can cause costly cosmetic damage.
Taking time with this step makes reassembly easier and ensures the vehicle retains its original look.
3. Properly Disconnecting the Old Sensor
Once the sensor is accessible, disconnect the old sensor from its wiring connector.
This should be done gently by releasing the connector lock rather than pulling on the wires.
Pulling on the wires can damage the connector or cause internal damage, leading to future electrical problems.
Properly disconnecting the sensor protects the wiring harness and ensures that the new sensor will connect securely and function correctly.
4. Properly Installing and Aligning the New Sensor
The new parking sensor must be installed in the correct location and orientation.
The sensor is designed to sit level with the bumper surface and face straight outward to accurately detect objects.
If a sensor is bent or improperly seated, it may detect the ground, the bumper itself, or give false alerts.
The sensor type and size must also match the vehicle for proper communication with the system.
Correct installation ensures reliable performance and accurate distance warnings.
5. Reconnecting the Wiring and Reassembling the Vehicle Panel
After installing the new sensor, the wiring connectors must be securely reconnected to ensure a stable electrical connection.
Loose connections can cause intermittent malfunctions or warning messages.
Once the wiring is confirmed, the bumper trim or access panel should be carefully reassembled, ensuring all clips and screws are properly secured.
Proper reassembly restores the vehicle’s appearance and protects the sensor from dirt, water and vibration.
Completing this step correctly ensures the sensor’s long-term reliability.
How to Test Parking Sensors After Repair
1. Turning on the Ignition and Engaging Reverse Gear
After the repair is complete, the first step is to turn on the ignition and carefully engage reverse gear.
Most parking sensor systems activate automatically when reverse gear is selected.
This allows the system to begin scanning the area around the vehicle.
The vehicle should remain stationary during this step to avoid any confusion caused by movement.
If the system activates without delay, it’s a good indication that the sensors are receiving power and communicating correctly with the vehicle’s control unit.
2. Checking the Accuracy of Audible Alerts and Display
Once the system is active, listen carefully to the warning sounds and observe any visual display on the dashboard or screen.
The beeping sound should become more frequent as an object gets closer and should slow down or stop when the area is clear.
If there is a display, it should accurately show the position and distance of nearby objects.
Clear and consistent alerts indicate that the sensor signals are being processed correctly.
Any delayed, weak, or erratic alerts may indicate alignment or wiring problems.
3. Testing Sensor Response with Objects at Different Distances
To thoroughly test the accuracy of the sensors, slowly move an object, such as a box or a flat board, towards each sensor.
Start from a safe distance and move in small increments.
The sensor should easily detect the object and provide stronger alerts as the distance decreases.
Testing at different distances helps confirm that the sensor is accurately measuring distance and not reacting too early or too late.
This step is crucial as accurate distance detection is the primary purpose of parking sensors.
4. Ensuring no error messages appear on the dashboard
The final step is to check the dashboard for any warning messages or symbols related to the parking sensor system.
Modern vehicles store error codes when unusual sensor behavior is detected.
If no warning messages appear after the test, it means the system is functioning correctly.
Persistent warnings usually indicate incomplete repairs, faulty wiring, or the need for a system reset.
Confirming a clear dashboard ensures that the repair was successful and the parking sensors are ready for everyday use.
So, When to Reset or Recalibrate Your Parking Sensor System
1. Situations Requiring a Reset After Repair
Parking sensors often require a reset after repairs because the vehicle’s system may still store old error data.
When a sensor is cleaned, repaired, or replaced, the control unit may register a fault until the system is reset.
This can lead to issues such as warning messages, false alerts, or the sensor not functioning correctly.
A reset is particularly important after replacing sensors, repairing wiring, or disconnecting electrical components.
Resetting clears stored faults from the system and allows it to recognize the repaired parts as functioning correctly.
2. Basic Reset Methods Using Vehicle Settings or Battery Disconnection
Many vehicles offer a simple reset option through the infotainment system or vehicle settings menu.
This restarts the parking sensor system without requiring any special tools.
For vehicles without this option, disconnecting the battery for a short period can reset the system.
Removing power clears temporary memory and the system reboots when the battery is reconnected.
This method should be performed carefully to avoid disrupting other vehicle settings.
A basic reset is often sufficient to restore normal sensor function after minor repairs.
3. The Importance of Professional Recalibration for Advanced Systems
Some modern vehicles utilize advanced parking sensor systems that integrate with cameras, automatic braking, or steering assistance.
These systems require precise calibration to accurately measure distances.
After bumper removal, sensor replacement, or alignment changes, professional recalibration may be necessary.
Recalibration involves using diagnostic tools to set the correct sensor angles and detection ranges.
Without proper calibration, sensors can give false warnings or fail to detect obstacles accurately.
Professional recalibration ensures safety, accuracy and optimal system performance.
Read More:
How to Maintain the Parking Sensor to Prevent From Future Parking Sensor Problems
Additionally, there’s research that shows that parking sensors literally plays a important role to prevent the low-speed collisions, as the researchers combined it with other park-assist technologies such as: rear parking sensors, rearview cameras and automatic braking systems then Insurance Institute for Highway Safety experienced that up to a 78% reduction in backing crash rates when we compare it with the vehicles without these features, so according to the data it shows that parking sensors actually contributes to the safer reversing and fewer parking-lot accidents, so ultimately it protects the both drivers and the pedestrians and must have accessories in vehicle.[¹]
1. Regular Cleaning During Car Washes
Regular cleaning is the easiest and most effective way to keep parking sensors functioning correctly.
Whenever a car is driven, the parking sensors are exposed to dust, dirt, road salt and pollution.
Over time, this buildup can block sensor signals and reduce accuracy.
Gently wiping the sensors during regular car washes helps maintain clear signal transmission.
Using mild cleaners and soft cloths prevents damage to the sensor surface and painted finish.
Consistent cleaning significantly reduces false alerts and detection failures.
2. Avoiding Direct Pressure Washing on Sensors
High-pressure water can damage parking sensors if sprayed directly at close range.
The forceful stream of water can force moisture into the sensor housing or wiring connections, leading to internal corrosion or electrical malfunctions.
Even sensors designed to withstand rain and splashes can be affected by repeated pressure washing.
Keeping the pressure washer at a safe distance and avoiding direct focus on the sensors helps protect the internal components.
This simple habit can significantly extend the lifespan of the sensors.
3. Checking Sensor Performance After Minor Collisions
Even minor collisions during parking can affect sensor alignment without any visible damage to the bumper.
Light contact with walls, posts, or other vehicles can slightly loosen or misalign the sensors.
Checking sensor performance after such incidents helps detect problems early.
If the alerts sound differently or stop working altogether, the sensors may require adjustment or inspection.
Early detection prevents long-term damage and costly repairs later on.
4. Regular Inspection of Wiring and Connectors
The wiring and connectors for parking sensors are often located behind the bumper, where they are exposed to vibrations, moisture and heat.
Over time, the connectors can become loose or corroded, leading to unreliable sensor performance.
Periodic inspections help identify loose connections or early signs of wear.
Ensuring that the wiring is secure and clean maintains a stable signal flow.
Regular checks improve the system’s reliability and reduce the likelihood of sudden sensor failures.
Conclusion – How to Fix a Faulty Parking Sensor
Now, its been clear that a properly working parking sensor system can literally turns tight parking spaces from stressful moments into the confident and truly safe way of dealing.
As, parking sensors play a really important role in preventing low-speed collisions, mitigating blind-spot risks and protecting vehicles from costly bumper damage.
And, most of the parking sensor problems comes from simple causes such as dirt accumulation, minor physical impacts, loose wiring, or electrical issues, rather than complete system failure.
Also, you need to understand when to clean, repair, replace, reset, or recalibrate the system empowers car owners to make informed decisions and avoid unnecessary expenses.
Not only this, regular maintenance, careful use and timely troubleshooting is also important that also ensure the sensors function correctly but also extend the lifespan of the entire parking assistance system.
Now, it is time to have your feedback and unsolved queries in the comment section.
Frequently Asked Questions
Q1. Why do parking sensors suddenly stop working?
Answer: Parking sensors typically stop working suddenly due to dirt buildup, moisture ingress into the sensors, loose wiring, or a blown fuse. In many cases, the sensor itself is fine, but it fails to send or receive signals properly because something is blocking it or there’s an interruption in the power supply. Sudden malfunctions often occur after heavy rain, car washes, minor bumper collisions, or electrical problems related to the battery.
Q2. Can dirty parking sensors really cause false beeps?
Answer: Yes, dirty parking sensors are one of the most common causes of false beeps. Parking sensors work by emitting sound waves and even a thin layer of dirt, dust, wax, or dried water spots can interfere with these signals. When the sensor can’t properly read the reflection, it might mistakenly detect something as being too close, even if the area is clear. A simple cleaning often resolves this problem immediately.
Q3. Is it safe to drive with faulty parking sensors?
Answer: Driving with faulty parking sensors is generally safe, but it reduces safety during parking and low-speed maneuvers. A malfunctioning sensor might give false warnings or fail to warn of actual obstacles, increasing the risk of minor accidents and bumper damage. Until the sensors are repaired, drivers should rely more on mirrors and visual checks.
Q4. How do I know if my parking sensors need replacing or just repairing?
Answer: Parking sensors usually need replacing if they show clear physical damage, fail to respond during testing, or continue to malfunction after cleaning, wiring checks and system resets. If the sensor works intermittently or gives random alerts, the problem is most likely related to dirt, wiring, or electrical connections. Proper testing helps determine whether repair or replacement is needed.
Q5. Why do parking sensors fail more often in rainy or winter weather?
Answer: Parking sensors fail more often in rainy or winter weather because moisture, ice, road salt and mud interfere with the sensor signals. Water can seep into faulty seals and ice can completely block the sensor surface. Cold weather also affects electrical connections, making existing weaknesses more apparent. Regular cleaning and inspection help prevent weather-related malfunctions.
Q6. Can a blown fuse affect parking sensors?
Answer: Yes, a blown fuse can completely disable the parking sensor system. Parking sensors operate on a dedicated electrical circuit and when the fuse blows, power is immediately cut off. This often causes the system to stop working without any warning. Checking the fuse is one of the easiest and quickest ways to diagnose a sensor failure.
Q7. Do parking sensors need recalibration after replacement?
Answer: In many vehicles, basic sensor replacement does not require recalibration. However, advanced systems that work with cameras, automatic braking, or steering assistance often require professional recalibration. Recalibration ensures that the sensors accurately measure distances and detect objects correctly. Failing to recalibrate such systems can lead to false warnings.
Q8. Why does my parking sensor beep even when the car is not moving?
Answer: This usually happens when the sensor detects a false obstruction due to dirt, moisture, misalignment, or an internal malfunction. Electrical interference or a faulty sensor module can also trigger alerts even when the vehicle is stationary. Persistent beeping should be investigated promptly to prevent complete system failure.
Q9. Can I fix a faulty parking sensor at home?
Answer: Yes, many parking sensor problems can be fixed at home with basic tools and careful troubleshooting. Cleaning the sensors, checking the wiring, replacing blown fuses and resetting the system often resolve the issue. Replacing the sensors yourself is also possible in many vehicles if done carefully. However, advanced electrical or calibration problems may require professional assistance.
Q10. How long do parking sensors typically last?
Answer: Parking sensors are designed to last for many years under normal conditions. Their lifespan depends on driving environment, exposure to weather and maintenance habits. Regular cleaning, avoiding direct pressure washing and checking the sensors after minor collisions can significantly extend their working life.
Q11. Can a weak battery affect parking sensor performance?
Answer: Yes, a weak or failing battery can cause parking sensor malfunctions. Low voltage can lead to delayed alerts, error messages, or system shutdown. Parking sensors require a stable power supply, so battery health plays a crucial role in the system’s reliability.
References:
[1] Park assist helps drivers avoid backing crashes
https://www.iihs.org/news/detail/park-assist-helps-drivers-avoid-backing-crashes

Guys, I’m a car audio enthusiast and customization expert and I love clear sound and clean installation. Plus, I have spent years helping people build their dream audio setups. And whenever I’m working on cars, I probably listen to music and thinks about the next big upgrade.
