
Written By: Don Dodi
Fact Checked By: Kristen Brown
Reviewed By: Diego Rosenberg
Basically, blind spot monitoring systems helps the drivers to see what mirrors cannot see, that’s why it becomes really safe accessory to add-on during the lane changes as it makes them safer and more confident.
Yes, this is the modern vehicle safety feature which is designed to help the drivers to detect the vehicles that are not visible in the side or rear-view mirrors.
Plus, there’s safety studies that shows that the blind spots are a major causes of lane-change accidents, specially on the highways where vehicles approached in quick way from the side.
And, blind spot monitoring systems actually uses sensors, radar or cameras which can be mounted near the rear of the vehicle and they continuously scans the adjacent lanes.
So, whenever the another vehicle enters the blind spot area, then the system throws alerts to the driver by using visual lights on the mirrors, dashboard indicators or it can be audible warnings as well.
Now, in this guide you’ll learn How to Install a Blind Spot Monitoring System, so that you can improve the safety during the journey.
Yes, now-a-days many newer vehicles comes with factory-installed blind spot monitoring systems, but you can add them in the older cars as well.
Just understand this: this technology does not replace the use of the mirrors or careful driving, but it actually adds an extra layer of awareness that significantly reduces the human error which is great thing to consider.
Know, What are the Types of Blind Spot Monitoring Systems are Available
Along with this, there’s real-world research that shows that the blind spot monitoring systems are more than just a convenience features, as they literally have really amazing and measurable safety benefits. So, the study in Traffic Injury Prevention actually found out that the vehicles that are equipped with blind spot monitoring had 14% fewer lane-changes crashes compared to those without them; so having this technology in vehicle could effectively prevent tens of thousands of collisions annually in the United States.[¹]
1. Radar-Based Blind Spot Monitoring Systems
Radar-based blind spot monitoring systems are among the most widely used and reliable blind spot technologies.
These systems use short-range radar sensors mounted behind the rear bumper to detect vehicles in the adjacent lanes of your car.
The radar works by emitting radio waves that bounce back when they hit another vehicle, allowing the system to accurately measure distance and speed.
A major advantage of radar-based systems is that they perform well even in rain, fog, dust and low-light conditions, where cameras might fail.
Due to their accuracy and consistency, radar systems are extensively used by vehicle manufacturers in factory-installed blind spot monitoring.
Aftermarket radar systems also offer good performance and are ideal for highway driving, where fast-moving vehicles can quickly enter blind spots.
2. Camera-Based Blind Spot Detection Systems
Camera-based blind spot detection systems rely on wide-angle cameras mounted on the rear or sides of the vehicle to monitor surrounding lanes.
These systems capture live visual data and process it to identify vehicles approaching or traveling alongside your car.
Camera systems excel at providing real-time images, helping drivers understand what’s happening around them.
However, their performance is highly dependent on lighting and weather conditions.
Bright sunlight, heavy rain, dirt, or fog can reduce camera clarity and affect detection accuracy.
Camera-based systems are often paired with a display screen and are commonly found in vehicles that already have reverse or surround-view cameras.
They work best in urban traffic where vehicle speeds are lower and visual confirmation is helpful.
3. Ultrasonic Sensor-Based Blind Spot Monitoring Systems
Ultrasonic sensor-based blind spot monitoring systems use sound waves to detect objects near the vehicle.
These sensors emit high-frequency sound pulses that bounce back when they hit nearby vehicles or obstacles.
Ultrasonic systems are commonly used in parking sensors, but some blind spot monitoring systems also rely on this technology.
They are effective at detecting objects at short distances and perform well at low speeds.
However, ultrasonic sensors have a shorter detection range compared to radar systems, making them less suitable for high-speed highway driving.
These systems are generally more affordable and easier to install, making them a popular choice for budget-friendly aftermarket upgrades.
4. Indicator Styles Used in Blind Spot Monitoring Systems
Blind spot monitoring systems alert the driver with various types of indicators designed to be quickly and easily noticed.
Warning lights mounted on the mirrors are the most common and effective because they are located precisely where the driver naturally looks when changing lanes.
Dashboard alerts provide visual warnings on the instrument cluster or infotainment screen and are useful for drivers who prefer centralized information.
Audible warnings provide sound alerts when a vehicle enters the blind spot or when the turn signal is activated and another vehicle is detected.
Some systems combine visual and audible alerts to ensure the driver notices the warning immediately, even in busy traffic or noisy driving environments.
5. Choosing the Right Blind Spot Monitoring System Based on Vehicle and Budget
Choosing the right blind spot monitoring system depends on your vehicle type, driving habits and budget.
Radar-based systems are the best option for drivers who frequently drive on highways and want the highest detection accuracy in all weather conditions.
Camera-based systems are ideal for vehicles that already have built-in screens and for drivers who prefer visual confirmation.
Ultrasonic systems are a practical option for city driving and for those seeking an affordable safety upgrade.
Ease of installation, system compatibility and long-term reliability should also be considered.
Choosing a system that matches your driving environment ensures better performance, greater safety benefits and more peace of mind on the road.
Tools
| Item Name | Detailed Explanation |
|---|---|
| Blind Spot Sensors or Radar Units | These are key components of the system that detects vehicles in adjacent lanes. They are typically mounted behind the rear bumper and continuously scan the blind spot area. Correct placement and alignment are essential for accurate detection. |
| Control Module | The control module serves as the brain of the blind spot monitoring system. It receives data from the sensors and decides when to issue an alert. This unit is typically located inside the trunk or behind an interior panel. |
| Warning Indicators | When a vehicle is detected in the blind spot, warning indicators alert the driver. These can be small lights on the mirrors or on the dashboard panel. It’s crucial that these indicators are clearly visible so the driver can react quickly. |
| Screwdrivers | Screwdrivers are used to remove interior panels, trim pieces and mounting screws. Both flathead and Phillips head screwdrivers may be needed. Using the correct size will prevent damage to the screws and panels. |
| Socket Wrench Set | A socket wrench set helps in loosening and tightening bolts when removing bumpers or trim. It provides better grip and control compared to a regular spanner. This tool is specially useful for accessing bolts on the rear bumper. |
| Trim Removal Tool | The trim removal tool helps remove plastic panels without scratching or breaking them. It is designed to safely remove clips and fasteners. This tool minimizes the risk of damage to both interior and exterior components. |
| Wire Stripper and Cutter | A wire stripper cleanly removes the insulation from wires without cutting the inner metal. The cutter cuts the wires to the correct length. Clean wire ends are essential for strong electrical connections. |
| Crimp Connectors | Crimp connectors securely join wires without soldering. They ensure a stable electrical flow and reduce the risk of loose connections. Proper crimping increases system reliability. |
| Electrical Tape | Electrical tape protects and insulates wire connections from moisture and vibration. It also helps organize wiring bundles. High-quality tape prevents short circuits over time. |
| Safety Gloves | Safety gloves protect hands from sharp edges and hot surfaces. They also improve grip when handling tools and panels. Wearing gloves reduces the risk of cuts and injuries. |
| Safety Glasses | Safety glasses protect your eyes from dust, plastic clips and small metal fragments. They are specially useful when working under the bumper. Eye protection is recommended during installation. |
| Battery Disconnect Tool or Spanner | This tool is used to disconnect the vehicle’s battery before installation. Disconnecting the power prevents electrical damage and accidental short circuits. This is an essential safety step before any wiring work. |
Let’s Do Pre-Installation Preparation and Safety Checks
1. Checking Vehicle Compatibility with the Blind Spot Monitoring System
Before installing a blind spot monitoring system, it’s important to ensure the system is compatible with your vehicle.
Not all vehicles have the same bumper design, body shape, or electrical layout and these differences directly impact how the system works.
Some systems require plastic bumper covers for the sensors to function properly, while metal reinforcement bars or tow hooks can block the signal if neglected during installation.
Checking compatibility helps prevent poor detection, false alerts, or system failure.
This step also ensures that the system supports your vehicle’s voltage, turn signal wiring and dashboard indicator setup, ensuring safer and more reliable performance after installation.
2. Safely Disconnecting the Vehicle Battery
Disconnecting the vehicle’s battery is an important safety step that should never be overlooked.
Blind spot monitoring systems require electrical connections and working on live circuits can cause short circuits, blown fuses, or damage the vehicle’s sensitive electronics.
By disconnecting the battery, you reduce the risk of electric shock and prevent the accidental activation of airbags or warning systems.
Always turn off the engine and remove the key before disconnecting the battery.
This simple step protects both the installer and the vehicle and creates a safe working environment for the entire installation process.
3. Carefully Read the Manufacturer’s Installation Manual
Every blind spot monitoring system is designed slightly differently, so it’s important to read the manufacturer’s installation manual.
The manual contains precise information about sensor placement, mounting height, wiring colors and calibration steps.
Skipping this step could result in incorrect installation, reduced detection accuracy, or permanent damage to system components.
The manual also explains system limitations and operating conditions, helping users understand what the system can and cannot do.
Taking the time to read and understand these instructions improves installation quality and avoids costly mistakes.
4. Planning Sensor Placement and Wiring Routes
Properly planning sensor placement and wiring routes significantly improves system performance and long-term reliability.
Sensors must be installed at the correct height and distance to accurately detect vehicles in adjacent lanes.
Placing sensors too high, too low, or too close together can reduce detection range or result in false alerts.
Planning the wiring route in advance helps avoid sharp edges, moving parts and heat sources that can damage cables over time.
A well-planned layout ensures a neat installation, improves signal accuracy and reduces future maintenance issues.
How to Identify the Correct Sensor Mounting Location
1. Recommended Sensor Mounting Height and Distance
The correct sensor mounting height and distance are crucial for accurate blind spot detection.
Most blind spot monitoring sensors are designed to operate within a specific height range from the ground to accurately detect vehicles in adjacent lanes.
If the sensors are mounted too low, they may detect the road surface or small obstacles instead of vehicles.
If mounted too high, they may miss lower vehicles such as small cars or motorcycles.
The correct distance between the sensors ensures that the blind spot area is fully covered without any gaps or overlaps.
The correct height and distance help the system accurately measure distance and speed, providing reliable alerts when changing lanes.
2. Ideal Location on the Rear Bumper or Quarter Panel
The rear bumper and rear quarter panels are the most effective locations for mounting blind spot monitoring sensors.
These locations provide a clear view of the adjacent lanes and allow the sensors to detect vehicles approaching from the rear.
Mounting the sensors closer to the outer edges of the bumper improves side-lane coverage and reduces detection delays.
The sensors should be mounted behind the plastic section of the bumper, as plastic allows signals to pass through easily.
Choosing the correct location on the rear of the vehicle ensures early detection and a smoother warning response when another vehicle enters the blind spot zone.
3. Avoiding Interference from Metal, Exhaust, or Tow Hooks
Interference from metal objects can significantly impair the performance of blind spot monitoring sensors.
Metal reinforcement bars, exhaust pipes, tow hooks and trailer mounts can block or reflect sensor signals, leading to false alerts or missed detections.
Heat from exhaust components can also damage the sensors over time or affect signal accuracy.
Keeping sensors away from these areas ensures a clear path for detection.
Carefully inspecting the bumper area before installation helps identify and avoid these sources of interference, leading to improved long-term system reliability.
4. Precisely Marking and Measuring Installation Points
Precisely marking and measuring the installation points ensures consistent and balanced sensor placement.
Measuring from fixed reference points, such as the edges of the bumper or body lines, ensures the sensors are aligned on both sides of the vehicle.
Uneven placement can cause objects on one side of the vehicle to be detected before those on the other, leading to confusing alerts.
Careful measurement also prevents drilling or mounting errors that could damage the bumper.
Taking the time to accurately mark the locations results in a professional-quality installation and more predictable system performance.
How to Remove the Interior and Exterior Panels
1. Safely Removing the Rear Bumper or Trim Panel
The rear bumper or trim panel must be removed carefully to prevent damage to the vehicle’s body.
Most rear bumpers are attached with a combination of screws, bolts and plastic clips, often hidden behind the wheel liners or under the vehicle.
Applying consistent and even pressure when loosening fasteners helps prevent breakage or bending.
Pulling the panel too forcefully can break clips or damage the paint edges.
Taking the time to locate all fasteners before removal ensures the bumper comes off easily and provides sufficient access for proper installation of the blind spot sensors.
2. Accessing Interior Panels for Wiring Routing
Routing the wiring from the sensors to the control module and indicator often requires removing interior panels.
These panels are typically located in the trunk, rear side walls, or near the door sills.
Carefully removing them ensures the wires remain hidden and protected, improving both safety and aesthetics.
Proper access helps avoid routing wires near sharp edges or moving parts that could cause wear over time.
A clean and well-planned wiring route reduces the risk of electrical problems and simplifies future maintenance.
3. Preventing Damage to Clips, Fasteners and Paint
Preventing damage during panel removal is crucial for both safety and aesthetics.
Plastic clips are designed to securely hold panels but can break if pulled at the wrong angle.
Using controlled force and supporting the panel evenly helps keep the clips intact.
Protecting painted surfaces is equally important, as panels can scratch the body if they rub against it.
Taking care during removal preserves the vehicle’s original fit and finish and ensures that the panels can be securely reinstalled after the installation is complete.
4. Properly Storing Removed Parts for Reinstallation
Properly storing removed panels, clips and fasteners helps prevent confusion and damage during reinstallation.
Keeping the parts in a clean, safe place protects them from scratches, bending, or dirt.
Grouping fasteners with their corresponding panels saves time and reduces the risk of incorrect installation later.
Well-organized storage ensures that each part goes back to its original location, resulting in a tight fit, reduced noise and a factory-like finish after the blind spot monitoring system is installed.
How to Install Blind Spot Sensors or Cameras
1. Securely Mounting Sensors at the Correct Angle
For accurate detection, it’s crucial to securely mount blind spot sensors at the correct angle.
The sensors are designed to scan a specific area to the side and rear of the vehicle and even a slight tilt can alter how they perceive distance and speed.
If a sensor is tilted too far inward, it might detect the vehicle’s body instead of surrounding traffic.
If it’s tilted too far outward, it might miss vehicles entering the blind spot.
Secure mounting prevents movement caused by road vibrations, which could lead to false alerts or delayed warnings.
A stable and correctly angled sensor ensures consistent performance in real-world driving conditions.
2. Mounting Cameras with Proper Alignment
When blind spot systems utilize cameras, proper alignment is essential for clear and reliable visuals.
The cameras must be mounted in a way that covers the side lanes without showing too much of the road surface or the vehicle’s body.
Poor alignment can confuse the system or fail to provide the driver with a clear view of surrounding traffic.
The cameras must be securely mounted to prevent movement over time, as even slight shifts can affect image accuracy.
Correct alignment helps the system provide useful visual information that aids in safe lane changes.
3. Ensuring Sensors are Weather-Sealed and Vibration-Free
Blind spot sensors and cameras are exposed to rain, dust, heat and road debris, making weather sealing crucial.
Water ingress into the sensor housing can lead to corrosion, signal loss, or complete system failure.
Secure sealing also protects the internal electronics from temperature fluctuations and dirt buildup.
Minimizing vibration is equally important, as constant shaking can loosen connections or affect sensor accuracy.
Proper sealing and a stable mounting system help extend lifespan and maintain reliable performance in all weather conditions.
4. Rechecking Sensor Orientation and Spacing
Before final assembly, it’s crucial to recheck the sensor orientation and spacing.
Sensors placed too close together can create overlapping detection zones, while those placed too far apart can leave blind spots.
Uneven spacing between the left and right sides of the vehicle can lead to inconsistent alerts.
Verifying the orientation and spacing ensures balanced detection and predictable warning behavior.
This final check helps avoid rework later and ensures the blind spot monitoring system functions as intended.
How to Do Wiring of Blind Spot Monitoring System
1. Wiring Routing from Sensors to Control Module
Proper routing of the wiring from the sensors to the control module is crucial for reliable system operation.
The wires should be routed along the vehicle’s existing wiring harness whenever possible, as these pathways are designed to protect the cables from heat, moisture and moving parts.
Poor routing can lead to pinched wires, signal loss, or electrical failures over time.
Keeping the wires away from sharp edges and suspension components helps prevent damage to the insulation.
Clean and well-planned routing improves system reliability and makes future troubleshooting significantly easier.
2. Connecting Power Supply and Ground Points
A stable power supply and proper grounding are essential for the correct functioning of the blind spot monitoring system.
The system typically connects to a low-voltage power source within the vehicle, such as the fuse box or an accessory power line.
Poor power connections can lead to intermittent alerts or system shutdowns.
Ground connections should be attached to clean, unpainted metal surfaces to ensure a strong electrical flow.
Reliable power and ground connections protect the system from voltage drops and improve long-term performance.
3. Integrating Turn Signal or Reverse Signal Connections
Many blind spot monitoring systems rely on turn signal or reverse signal inputs to activate alerts at the appropriate time.
Connecting to these signals allows the system to warn the driver only when a lane change is intended or when the vehicle is reversing.
Incorrect signal connections can result in delayed alerts or false warnings.
Careful identification of the correct vehicle wiring ensures that the system responds accurately during real-world driving conditions.
Proper integration makes the alerts more meaningful and less distracting.
4. Securing Wires to Prevent Movement or Damage
Securing all wiring is crucial to preventing wear and tear and electrical problems over time.
Loose wires can rub against metal surfaces, potentially damaging the insulation or causing a short circuit.
Constant vibration can also loosen connectors and degrade signal quality.
Securing the wires firmly in place keeps them safe and organized.
Secure wiring improves safety, reduces noise and ensures that the blind spot monitoring system operates reliably for years to come.
How to Install the Control Module and Indicators
1. Choosing a Secure Location for the Control Unit
The control unit is the main processing component of the blind spot monitoring system, so choosing a secure and stable location is crucial.
It should be installed inside the vehicle in a dry location, such as behind the trunk side panel or interior trim, where it is protected from water, heat and direct impact.
Placing the control unit near strong vibrations or moving parts can shorten its lifespan and affect performance.
A secure and protected location ensures consistent signal processing and long-term reliability of the system.
2. Mounting the Dashboard, Mirror, or A-Pillar Indicators
The indicators are designed to alert the driver immediately when a vehicle is detected in the blind spot, so they must be mounted in a location that is easily visible without obstruction.
Mirror-mounted indicators are effective because drivers naturally check their mirrors when changing lanes.
Dashboard or A-pillar indicators should be within the driver’s normal line of sight, but not in a way that blocks the view of the road.
Proper mounting ensures that the indicators do not fall off or become loose over time.
Clear visibility of the indicators helps drivers react quickly and make safe lane change decisions.
3. Connecting the Indicators to the Main Control Module
The indicators must be correctly wired to the control module to ensure accurate and timely alerts.
Each indicator wire carries a signal that tells the indicator when to illuminate or emit a warning sound.
Incorrect connections can lead to delayed alerts, constant warnings, or no alerts at all.
Carefully matching the wires according to the system instructions ensures reliable communication between the control module and the indicators.
Correct connections result in smooth and predictable system behavior while driving.
4. Organizing and Securing Excess Wiring
Organizing and securing excess wiring improves both safety and aesthetics.
Any excess wire length should be neatly routed and secured in place to prevent rattling or accidental damage.
Loose wiring can interfere with interior panels or other vehicle systems.
Keeping the wiring tidy also makes future repairs or upgrades easier.
Well-organized wiring helps maintain a clean, factory-like installation and ensures that the blind spot monitoring system remains reliable over time.
Let’s Do, System Calibration and Setup
1. Initial System Power-Up Procedure
The initial power-up procedure is the first step in ensuring the blind spot monitoring system is functioning correctly.
After all sensors, wiring and indicators are installed, the vehicle’s battery can be reconnected and the system can be powered on.
During this stage, the control module checks all connections and confirms that the sensors and indicators are communicating properly.
Some systems perform a self-check and may briefly display lights or sounds to confirm normal operation.
This step helps identify any wiring or connection issues early, before driving the vehicle.
2. Calibrating Sensor Detection Range and Sensitivity
Calibrating the sensor detection range and sensitivity ensures the system accurately detects vehicles without generating false alerts.
The detection range determines how far the sensors can sense approaching vehicles, while sensitivity controls how quickly the system reacts to nearby movement.
If the range is set too high, the system may detect vehicles in distant lanes.
If set too low, it may miss rapidly approaching vehicles.
Proper calibration balances these settings to match real-world traffic conditions.
Correct calibration increases reliability and builds driver confidence in the system.
3. Aligning the System According to Manufacturer Guidelines
Alignment ensures that the sensors are positioned correctly to cover the appropriate blind spot areas.
Manufacturer guidelines provide precise instructions for alignment based on the type of sensor and vehicle size.
Ignoring these guidelines can lead to inconsistencies in detection on the left and right sides of the vehicle.
Proper alignment ensures consistent alerts and predictable system behavior.
Following the suggested alignment procedure ensures that the system operates as designed and minimizes the need for frequent adjustments.
4. Resetting or Updating System Settings as Needed
Some blind spot monitoring systems require resetting or updating settings after installation or calibration.
Resetting allows the system to store the new sensor positions and calibration values.
Updating the system settings can improve detection accuracy or resolve minor issues.
This process ensures that the system operates with the latest and most accurate configuration.
Completing this step finalizes the setup and prepares the system for real-world driving conditions.
How to Test Working of Blind Spot Monitoring System
1. Static Testing in a Safe Parking Area
Static testing should always be the first step before driving on public roads.
This test is conducted in a safe, open parking area where the vehicle can remain stationary or move slowly.
Another vehicle can be positioned next to the blind spot area to confirm that the sensors are accurately detecting its presence.
During static testing, the indicators should activate clearly and consistently when a vehicle is within range.
This step helps confirm that the sensors, wiring and indicators are working correctly together without the risks of live traffic.
2. Real-World Driving Test for Detection Accuracy
A real-world driving test checks how accurately the system performs in typical traffic conditions.
This test should be conducted on a road with light traffic where vehicles can safely pass on either side.
The system should detect vehicles approaching from behind and traveling in adjacent lanes at varying speeds.
Accurate detection during real driving confirms that the sensor placement, calibration and alignment are correct.
This step is crucial because some issues only become apparent when the vehicle is moving at normal road speeds.
3. Verifying Alerts During Lane Changes
Verifying alerts during lane changes ensures that the system responds at the appropriate time.
When the turn signal is activated and a vehicle is present in the blind spot, the system should provide a clear visual or audible warning.
The alerts should be noticeable but not distracting.
If the alerts activate too early or too late, it can confuse the driver.
Correct alert timing helps drivers trust the system and use it as a helpful safety aid during everyday driving.
4. Troubleshooting False Alerts or Non-Detection Issues
If the system is giving false alerts or failing to detect vehicles, troubleshooting is necessary.
False alerts can be caused by incorrect sensor angles, interference from nearby metal objects, or overly sensitive settings.
Non-detection can be due to faulty wiring connections, incorrect sensor spacing, or a blocked sensor area.
Carefully checking each component of the system helps identify and resolve these issues.
Addressing problems at this stage ensures that the blind spot monitoring system operates reliably and provides accurate safety warnings.
Now, How to Reinstall Panel and Final Assembly
1. Reinstalling Bumpers, Trim and Interior Panels
Reinstalling the bumpers, trim and interior panels is the final physical step of the installation process and should be done carefully to restore the vehicle’s original appearance.
Each panel must be aligned with its original mounting points to ensure a proper fit without gaps or uneven edges.
Forcing panels into place can break clips or cause panels to become loose.
Proper reinstallation ensures that sensors, wiring and control units remain secure and that the vehicle looks clean and factory-finished after the installation is complete.
2. Ensuring All Fasteners Are Secure
Securing all fasteners is crucial for both safety and durability.
Screws, bolts and clips hold the panels firmly in place and prevent them from rattling or vibrating while the vehicle is in motion.
Loose fasteners can lead to rattling noises, panel vibrations, or even panels coming loose over time.
Tightening fasteners to the correct torque levels ensures that the panels remain stable without damaging the plastic or metal components.
Properly secured fasteners help maintain a solid installation and reduce the risk of future repairs.
3. Cleaning the Installation Areas
Cleaning the installation areas improves both aesthetics and long-term performance.
Removing dust, grease and fingerprints ensures a better panel fit and prevents debris from interfering with sensors or wiring.
Clean surfaces also make it easier to identify any loose parts or misaligned panels.
A clean finish gives the vehicle a professional look and ensures that sensors and indicators remain unobstructed for proper functioning.
4. Final Visual Inspection
A final visual inspection ensures that everything is installed correctly and securely.
This step includes checking panel alignment, sensor placement, indicator visibility and hidden wires.
Any uneven gaps, loose edges, or exposed wires must be corrected before driving the vehicle.
This inspection confirms that the blind spot monitoring system is properly integrated and the vehicle is ready for regular use with full safety support.
Understand, Common Installation Mistakes to Avoid Them During Installation
1. Incorrect Sensor Height or Angle
Incorrect sensor height or angle is one of the most common causes of malfunction in blind spot monitoring systems.
The sensors are designed to detect vehicles in a specific zone to the side and rear of the car.
If the sensor is mounted too high, it may miss smaller vehicles or motorcycles.
If mounted too low, it may detect the road surface or nearby objects instead of traffic.
Incorrect angles can cause the sensors to read the vehicle body or empty space, leading to false alerts or no warnings at all.
Correct height and angle ensure accurate detection and reliable system performance.
2. Poor Grounding or Power Connections
Poor grounding or weak power connections can cause the system to function erratically.
Unstable power supply can lead to flickering indicators, delayed alerts, or the system shutting down completely.
Ground connections attached to painted or dirty metal surfaces reduce electrical flow and increase resistance.
This can confuse the control module and affect sensor readings.
Strong and clean power and ground connections ensure stable operation and protect the system from electrical malfunctions.
3. Incorrect Routing of Wires Near Moving Parts
Routing wires too close to moving parts is a serious installation mistake that can lead to long-term damage.
Suspension components, steering parts and door hinges are constantly moving while the vehicle is in operation.
Friction from these parts can wear down the wire insulation and cause short circuits.
Heat from exhaust components can also damage the wiring over time.
Proper wire routing protects the cables, minimizes wear and tear and prevents electrical failures.
4. Skipping Calibration or Testing Steps
Skipping calibration or testing steps can render the blind spot monitoring system unreliable or unsafe.
Even if the sensors are installed correctly, they must be calibrated to match the vehicle and driving environment.
Testing confirms that the alerts activate at the appropriate times and respond correctly when changing lanes.
Without calibration and testing, the system may miss vehicles or provide false warnings.
Completing these steps ensures that the system functions as intended and provides genuine safety benefits.
How to Maintain Blind Spot Monitoring System
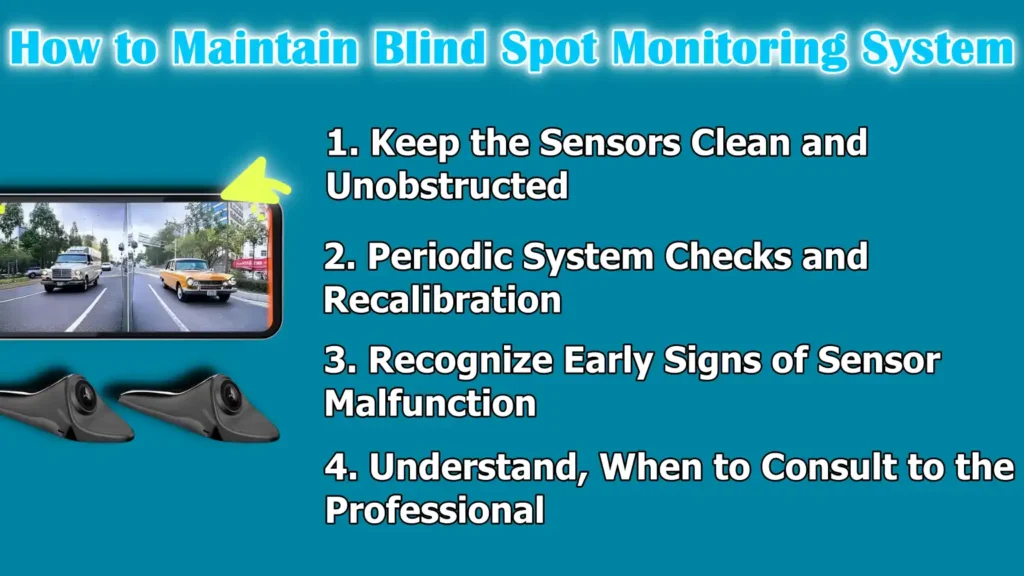
1. Keep the Sensors Clean and Unobstructed
Keeping the blind spot monitoring sensors clean and unobstructed is crucial for accurate detection.
The sensors are typically located behind the rear bumper or near the exterior panels, where dirt, mud, snow, or road salt can accumulate over time.
Even a thin layer of grime can reduce signal strength and affect detection accuracy.
Regularly cleaning the bumper area ensures the sensors can clearly detect vehicles.
Clean sensors provide faster and more reliable alerts, specially in rainy or dusty driving conditions.
2. Periodic System Checks and Recalibration
Periodic system checks ensure the blind spot monitoring system continues to function correctly over time.
Changes such as bumper repairs, minor collisions, or sensor replacements can affect calibration.
Recalibration adjusts the sensor range and sensitivity to the vehicle’s current configuration.
Regular checks help identify problems before they become serious.
Maintaining proper calibration ensures consistent detection and reliable alerts during everyday driving.
3. Recognize Early Signs of Sensor Malfunction
Recognizing early signs of sensor malfunction can prevent complete system failure.
Common signs include delayed alerts, frequent false warnings, or the indicator failing to activate even when a vehicle is present.
Moisture intrusion, wiring issues, or sensor damage can cause these problems.
Paying attention to unusual system behavior allows for timely repairs.
Early detection reduces repair costs and helps maintain driving safety.
4. Understand, When to Consult to the Professional
When problems persist even after basic checks or recalibration, a professional inspection is recommended.
Certified technicians have the necessary equipment to check sensor alignment, wiring integrity and control module performance.
Professional service is also essential after accidents, bumper replacements, or major electrical work.
Having the system inspected by a specialist ensures that it meets safety standards and continues to provide reliable blind spot detection.
Read More:
What are the Legal, Safety and Compatibility Considerations
1. Local Regulations Regarding Aftermarket Safety Systems
Before using aftermarket blind spot monitoring systems on public roads, it is crucial to understand local vehicle safety regulations.
Many jurisdictions permit aftermarket safety upgrades, but they must not alter the vehicle’s basic structure or interfere with essential safety features.
Some laws specify that added systems should not distract the driver or obstruct the view of the road.
Ensuring the system complies with local regulations helps avoid legal issues and ensures the vehicle remains roadworthy.
Checking regulations before installation protects both the driver and the vehicle.
2. Ensuring the System Does Not Interfere with Airbags or ADAS
Blind spot monitoring systems must be carefully installed to avoid interfering with airbags or Advanced Driver Assistance Systems (ADAS).
Airbags rely on precise sensor signals and wiring and any interference can compromise their effectiveness during a collision.
Similarly, ADAS features like lane assist and automatic braking depend on accurate sensor data.
Incorrect wiring or control module placement can disrupt these systems.
Careful installation ensures all safety systems work together without conflict, maintaining the vehicle’s overall safety.
3. Compatibility with Parking Sensors and Reverse Cameras
Compatibility with existing parking sensors and reverse cameras is an important consideration.
Many vehicles already have sensors in the rear bumper and placing new blind spot sensors too close can cause signal overlap or false alerts.
Reverse cameras rely on clear electrical signals and correct mounting angles.
Ensuring proper spacing and wiring isolation helps maintain the accurate operation of all systems.
Compatibility checks prevent system conflicts and improve the vehicle’s overall safety performance.
4. Safety Check Before Regular Road Use
Before regular road use, a thorough safety check is essential.
This includes verifying that the sensors are correctly detecting vehicles, the indicators are clearly visible and no warning lights are illuminated on the dashboard.
Checking for loose panels or exposed wiring helps prevent future problems.
The final safety check confirms that the system is ready for daily driving.
Completing this step ensures that the blind spot monitoring system provides reliable assistance without compromising vehicle safety.
Conclusion – How to Install a Blind Spot Monitoring System
Now, you have the understanding about how useful the blind spot monitoring systems can be, as they just transforms a vehicle from ordinary to the proactive safety-ready ones, as it gives drivers an extra set of eyes to change the lane in safe and confident way.
The system’s sensors, control module and indicators work together to provide timely alerts when changing lanes, reducing the risk of collisions.
Also, you need to do regular maintenance, including cleaning the sensors, checking the wiring and recalibrating as needed, ensures long-term performance.
A properly installed blind spot monitoring system not only enhances driver awareness but also increases confidence, reduces accidents and contributes to safer driving in both city and highway conditions.
By taking the time to properly install and maintain the system, drivers can reap the full benefits of this advanced safety technology for years to come.
Now, you can ask related queries or unsolved questions in the comment section below.
Frequently Asked Questions
Q1. What is a blind spot monitoring system?
Answer: A blind spot monitoring system is a safety technology in vehicles that helps drivers detect other vehicles that are not visible in the side or rear-view mirrors. It uses sensors, radar, or cameras to scan the lanes next to and behind the car. When another vehicle enters these blind spots, the system alerts the driver through visual indicators on the mirrors or dashboard and sometimes with an audible warning. This system does not replace mirrors or safe driving practices, but rather provides an extra layer of awareness to reduce accidents when changing lanes.
Q2. How does a blind spot monitoring system work?
Answer: The system works by sending signals from sensors or cameras mounted on the rear bumper or side panels of the vehicle. These sensors continuously detect objects in the surrounding lanes. The data is sent to a control module, which processes it and activates an alert whenever a vehicle is detected in the blind spot. The alerts can be lights on the side mirrors, dashboard indicators, or audible warnings. Some systems are also integrated with the turn signals to warn the driver when they are attempting to change lanes and another vehicle is in the blind spot.
Q3. Can I install a blind spot monitoring system myself?
Answer: Yes, many aftermarket blind spot monitoring systems are designed for DIY installation. However, installation requires basic knowledge of vehicle wiring, panel removal and electrical safety. The sensors must be mounted at the correct height and angle, the wiring must be carefully routed and the system must be calibrated for accurate alerts. While DIY installation can save money, it requires time and patience. For those with limited experience or vehicles with complex electrical systems, professional installation is recommended to ensure complete safety and reliability.
Q4. Will installing a blind spot monitoring system affect my car’s warranty?
Answer: This depends on your vehicle and the system being installed. If the system is installed incorrectly or interferes with existing safety systems, it could void the factory warranty. Professional installation minimizes this risk as trained technicians follow proper procedures. Aftermarket systems that are compatible with your vehicle and installed according to the manufacturer’s instructions typically do not cause warranty issues, but it’s always best to check with your car manufacturer before installation.
Q5. Do blind spot monitoring systems work in all weather conditions?
Answer: Most modern systems, specially radar-based systems, perform well in rain, fog and low-light conditions. Camera-based systems may be affected by heavy rain, bright sunlight, or dirt accumulating on the lens. Snow, ice, or mud buildup on the sensors can reduce accuracy, so keeping the sensors clean is important. Proper installation, correct sensor positioning and regular maintenance ensure the system functions reliably in varying weather conditions.
Q6. How do I maintain a blind spot monitoring system?
Answer: Maintenance is simple and mainly involves keeping the sensors clean and free of dirt, snow, or road salt. Regular checks of the wiring, indicators and system alerts ensure everything is functioning correctly. Recalibration may be necessary if the sensors are moved out of position due to minor collisions or repairs. Monitoring for early signs of malfunction, such as delayed alerts or false warnings, helps prevent larger problems. Periodic professional checks are recommended if any issues arise.
Q7. Can blind spot monitoring systems give false alerts?
Answer: Yes, false alerts can occur if the sensors are dislodged, blocked by dirt, or affected by nearby metal objects such as tow hooks or trailers. Overly sensitive calibration settings can also trigger alerts even when no vehicle is present. Proper sensor placement, correct calibration and regular cleaning minimize false alerts. If false warnings persist, a professional inspection may be necessary to correct alignment or system settings.
Q8. Will the blind spot monitoring system detect motorcycles or bicycles?
Answer: Most modern systems are designed to detect all vehicles in adjacent lanes, including motorcycles and bicycles. Radar-based sensors are particularly effective at detecting smaller vehicles because they measure distance and speed rather than relying on visual identification. Camera-based systems may have difficulty detecting very small objects depending on lighting and weather conditions. Proper placement and calibration improve the detection of smaller vehicles, helping to prevent accidents.
References:
[1] Effects of blind spot monitoring systems on police-reported lane-change crashes
https://pubmed.ncbi.nlm.nih.gov/29927678/

Guys, I’m a car audio enthusiast and customization expert and I love clear sound and clean installation. Plus, I have spent years helping people build their dream audio setups. And whenever I’m working on cars, I probably listen to music and thinks about the next big upgrade.