Written By: Don Dodi
Fact Checked By: Kristen Brown
Reviewed By: Diego Rosenberg
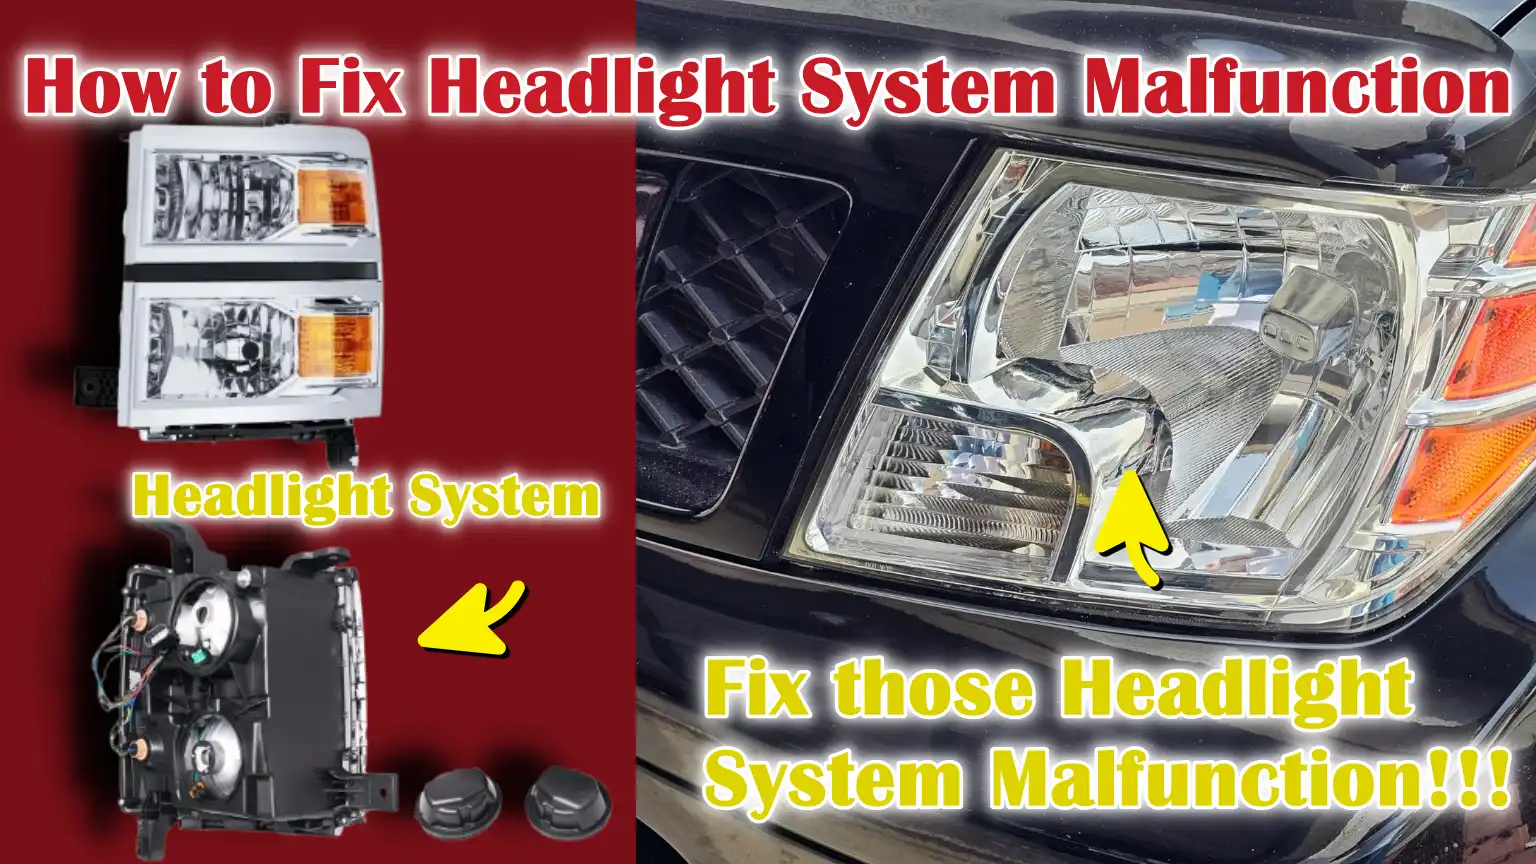
Now-a-days, headlights also relies on the sensors and control modules, not just the bulbs anymore, which is why the problem is not just replacement of the bulb, but you need to inspect those system issues as well.
Any reason to the headlight system malfunction is a direct threat to the safety, as it affects the visibility, which becomes really crucial factor in the night driving.
As, modern vehicles actually uses advanced headlight systems such as: bulbs obviously, wiring, sensors and other electronic control modules as well; and these all things works together and provide you the proper vision.
Basically, whenever any one of these parts fails, then the system may stop working completely or it can trigger a malfunction warning as well.
Additionally, there’s road safety studies that shows that the poor or faulty headlights significantly reduces the nighttime vision; and that literally increases the risk of the accidents, specifically during the high speed driving or during the rain and fog as well.
That’s why, we have come up with this guide about How to Fix headlight System Malfunction, so that you can understand everything about deeper electrical, to software-related faults to simple issues such as: blown fuses, weak batteries, moisture inside the headlamp or just the bulb is passed-out.
Learn, Common Symptoms of Headlight System Malfunctions
1. Headlights Not Turning On At All
The clearest indication of a headlight system malfunction is when the headlights fail to turn on at all, even after the switch is activated.
This can be due to a blown fuse, a faulty bulb, a defective headlight relay, or a completely dead battery.
In some cases, the headlight control module, an electronic unit that manages the lighting, may be malfunctioning and preventing the lights from turning on.
Driving without headlights is extremely dangerous, specially at night or in poor weather conditions, as it significantly reduces your visibility and increases the risk of accidents.
Regularly checking the headlight system and replacing faulty bulbs or fuses can prevent this problem.
2. One Headlight Working While the Other Doesn’t
Sometimes, only one headlight works while the other remains off, which is a clear sign of a malfunction.
This often happens when a bulb on one side burns out, but it can also be caused by loose or corroded electrical connections in the wiring harness.
Another possible cause could be a problem with the headlight control module or relay that affects only one circuit.
Driving with only one headlight can be dangerous as it reduces your visibility on the road and makes it difficult for other drivers to gauge your position, increasing the likelihood of a collision.
Identifying which component is faulty is crucial to restoring proper function.
3. Flickering, Dim, or Uneven Lighting
If your headlights are flickering, shining unevenly, or emitting dim light, it’s usually due to electrical problems or weak bulbs.
Loose or corroded connections, a voltage drop in the battery, or a faulty alternator can cause the lights to flicker.
Similarly, old bulbs may appear dim or provide uneven illumination on the road.
In some modern vehicles with LED or adaptive headlight systems, flickering can occur if the control module is faulty or the sensors are misaligned.
Properly functioning headlights are crucial for safe driving at night and addressing flickering promptly can prevent reduced visibility and further electrical damage.
4. Warning Messages or Symbols on the Dashboard
Many modern vehicles display warnings on the dashboard when there is a malfunction in the headlight system.
This may appear as a “headlight malfunction” message, a warning light, or a headlight symbol.
These warnings are triggered by sensors that monitor the system for electrical faults, bulb failures, or control module issues.
Ignoring these alerts can lead to complete headlight failure, which is unsafe and potentially illegal.
Checking dashboard messages promptly allows drivers to address problems before they escalate.
5. Automatic Headlights Not Functioning Correctly
Automatic headlights, which turn on or adjust based on ambient light conditions, may stop working correctly if there is a malfunction in the headlight system.
This can happen if the ambient light sensors are blocked, dirty, or faulty.
Electrical problems in the control module or wiring can also prevent the headlights from turning on at the appropriate time.
When automatic headlights fail, drivers may be unaware of poor lighting conditions, specially at dusk or in tunnels, creating a safety hazard.
Understanding and addressing these malfunctions ensures that your vehicle’s advanced lighting system operates reliably in all conditions.
Understand, What Are The Main Causes of Headlight System Malfunctions
1. Burnt-out or Incorrect Headlight Bulbs
One of the most common causes of headlight system malfunctions is a burnt-out bulb or the use of an incorrect type of bulb.
Headlight bulbs have a specific wattage and design recommended by the manufacturer and using a different type can result in uneven lighting, flickering, or even damage to the headlight system.
Over time, bulbs naturally degrade and lose their brightness, leading to reduced visibility and potentially triggering system warnings.
Regular inspection of the bulbs and timely replacement with bulbs of the correct specifications ensures proper illumination and prevents system malfunctions.
2. Blown Fuses or Faulty Relays
Fuses and relays protect the headlight system by controlling the flow of electricity.
A blown fuse will prevent power from reaching the headlights, causing them not to turn on, while a faulty relay can result in intermittent lighting or complete failure.
These electrical components can fail due to power surges, corrosion, or age.
Regularly checking the fuses and relays and replacing any faulty components is an effective way to restore proper headlight function and prevent recurring malfunctions.
3. Wiring Faults or Loose Electrical Connections
The headlight system relies on wiring harnesses and connectors to deliver power from the battery to the bulbs.
Damaged wires, worn insulation, or loose connections can disrupt the flow of electricity, leading to flickering, dim lighting, or complete failure.
Moisture or corrosion in the connectors can exacerbate the problem over time.
Inspecting the wiring and ensuring all connections are secure and clean is crucial for a reliable headlight system and consistent visibility on the road.
4. Headlight Control Module Malfunction
Modern vehicles often have a headlight control module, an electronic unit that manages lighting functions such as automatic headlights, adaptive beams and daytime running lights.
If the module fails, it can result in warning messages, flickering lights, or the headlights not working at all.
Control modules can malfunction due to software glitches, electrical surges, or internal component failure.
Diagnosing module problems often requires specialized tools, but replacing a faulty module usually restores full system functionality.
5. Leveling Motor or Adaptive Headlight Sensor Failure
Vehicles with adaptive or automatic leveling headlights use motors and sensors to adjust the beam angle based on road conditions and vehicle load.
If the leveling motors fail or the sensors become misaligned, blocked, or faulty, the headlights may not illuminate properly, leading to reduced visibility and potential system warnings.
Proper functioning of these motors and sensors is crucial for safe driving at night, specially on hills, curves, or uneven roads.
Regular inspection and calibration of these components ensure optimal performance.
6. Battery Voltage or Charging System Issues
Low battery voltage or problems with the vehicle’s charging system can also cause headlight malfunctions.
A weak battery, a faulty alternator, or corroded battery terminals can reduce the power supplied to the headlights, resulting in dimming, flickering, or system errors.
Maintaining a healthy battery and charging system ensures consistent headlight performance and prevents unexpected light failures on the road.
7. Water or Moisture Inside the Headlight Assembly
Moisture or water entering the headlight assembly can cause short circuits, corrosion, or condensation, leading to system malfunction warnings.
Common causes include faulty seals, cracks in the headlight lens, or condensation due to temperature changes.
Persistent moisture can also damage the bulbs and control modules over time.
Inspecting the headlight assembly for leaks, resealing faulty parts and replacing damaged components can prevent long-term electrical problems and ensure clear, bright illumination.
How to Ensure Safety By Taking Precautions Before Repairing the Headlight System
1. Parking the Vehicle in a Level, Well-Lit Area
Before beginning any work on your headlight system, it’s crucial to park the vehicle in a level and well-lit area.
A flat surface ensures the vehicle remains stable while working, reducing the risk of accidents or sudden overturns.
Good lighting allows you to clearly see the headlight assembly, wiring and components, helping to prevent mistakes like misconnecting wires or damaging delicate parts.
Taking these simple steps improves both safety and efficiency when diagnosing or repairing headlight problems.
2. Turning Off the Engine and Removing the Key
Always turn off the engine and remove the key from the ignition before attempting any headlight repair.
This precaution prevents accidental electric shock or short circuits while working on the system.
Additionally, when the engine is off, components like the alternator are deactivated, preventing sudden voltage surges that could damage bulbs, fuses, or the control module.
Removing the key also ensures that the vehicle isn’t accidentally started during maintenance, keeping both the car and the person safe.
3. Disconnecting the Battery When Necessary
Disconnecting the vehicle’s battery is essential for many headlight repairs, specially those involving wiring or the control module.
Disconnecting the battery prevents electrical shorts, sparks, or shocks that can occur from touching live wires.
It also protects sensitive electronic components from sudden voltage fluctuations.
When disconnecting the battery, always remove the negative terminal first and reconnect it last when the repair is complete.
This simple safety measure is crucial to prevent injury and protect the vehicle’s electronics.
4. Using the Right Gloves and Basic Safety Equipment
Wearing the right gloves and using the right tools is essential to protect yourself and the headlight components.
Gloves prevent cuts from sharp metal or plastic parts inside the assembly and reduce the risk of oil from your hands getting on the bulb, which could shorten its life.
Using basic safety tools like a screwdriver, pliers and an insulated tester allows you to work efficiently without damaging the car or risking personal injury.
Proper preparation reduces mistakes and makes the repair process easier.
5. Avoiding Direct Contact with Headlight Bulbs
Touching a headlight bulb directly with your fingers can significantly shorten its life and even cause it to fail immediately.
When the bulb is hot, oil and dirt from your skin create hot spots on the glass, which can cause cracks or premature failure.
Always hold the bulb by its base or use a clean cloth or gloves when installing or replacing it.
Taking these precautions ensures that the bulbs function properly and do not require frequent replacement, saving both time and money.
Tools
| Tool / Material | Explanation |
|---|---|
| Replacement Headlight Bulbs – Vehicle-Specific | These are essentially the same lights that illuminate the road. Using the correct type of light ensures the right brightness and prevents system malfunctions. Always consult your vehicle’s owner’s manual for the correct bulb specifications before purchasing. |
| Fuse Puller or Needle-Nose Pliers | These tools help safely remove fuses and small electrical parts without causing damage. A fuse puller is specifically designed for removing fuses, but pliers can also be used if you don’t have one. Using these tools can prevent accidental short circuits or burns. |
| Multimeter for Electrical Testing | A multimeter measures voltage, current and resistance in a headlight system. It helps identify problems such as broken wires, faulty relays, or weak battery voltage. Using it allows for accurate troubleshooting and avoids guesswork. |
| Screwdrivers and Trim Removal Tools | These tools are used to open headlight housings, remove covers and access hidden screws or clips. Trim removal tools prevent scratching the car’s body or plastic parts. Using the correct tools makes the process safe and efficient. |
| Electrical Contact Cleaner | This spray cleans corroded or dirty connectors and wiring contacts. Clean connections improve electrical flow and prevent flickering or malfunctions. Always use it carefully on dry parts and avoid spraying it directly onto light bulbs. |
| Owner’s Manual or Wiring Diagram | The manual shows the correct bulb type, fuse location and wiring layout. Wiring diagrams are very helpful in troubleshooting electrical problems. Consulting them ensures that you perform repairs safely and correctly. |
How to Fix Headlight System Malfunction – Easy & Quality Fixes
1. Check and Replace Faulty Headlight Bulbs
The first step in troubleshooting a headlight system malfunction is to check if the bulbs themselves are working.
Headlight bulbs are the most common component to fail and even a single burnt-out bulb can trigger a warning light on the dashboard.
Inspect the bulbs for broken filaments or blackened glass and replace them with the correct type of bulb specified by the vehicle manufacturer.
Always avoid touching the glass of halogen bulbs with your fingers, as the oil can create hot spots and shorten the bulb’s lifespan.
Ensuring the bulbs are properly seated and connected will restore proper illumination and often immediately turn off the warning light.
2. Check and Replace Blown Fuses
If the bulbs are working, the next step is to check the fuses that protect the headlight circuit.
Fuses prevent electrical overloads but can blow due to power surges, age, or minor short circuits.
Use a fuse puller or needle-nose pliers to remove and inspect each relevant fuse, checking for broken filaments or discoloration.
Replace any blown fuses with new fuses of the same amperage to restore proper electrical flow.
Regularly checking fuses helps prevent recurring malfunctions and ensures consistent power to the headlights.
3. Test and Replace Relays as Needed
Relays are small electrical switches that control power to the headlight system.
A faulty relay can cause intermittent lighting, flickering, or complete headlight failure.
Using a multimeter, you can test the continuity and proper functioning of the relays.
If a relay fails the test, replace it with a new relay that matches the vehicle’s specifications.
Replacing the relay often quickly resolves headlight system malfunctions and restores consistent operation.
4. Inspecting the Wiring Harness for Damage or Corrosion
The wiring harness connects the battery, bulbs, relays and control modules to form a complete headlight system.
Damaged wires, faulty insulation, or corroded connections can disrupt power flow, leading to flickering, dimming, or warning messages.
Carefully inspect the harness for cuts, abrasions, or green corrosion on the connectors.
Repairing or replacing damaged wires and cleaning corroded terminals ensures reliable electrical connectivity, preventing recurring malfunctions and maintaining consistent headlight performance.
5. Cleaning and Securing Loose Connectors
Loose or dirty connectors are a common cause of headlight system problems.
Over time, vibrations from driving can loosen connections and dirt or oxidation can obstruct the electrical path.
Disconnect the connectors, clean them with an electrical contact cleaner and ensure they are properly seated when reconnecting.
Securely connected connectors ensure smooth power flow, preventing flickering or intermittent malfunctions and ensuring the system operates as designed.
6. Resetting the Headlight System – Battery Reset or Scan Tool
After repairs, it’s often necessary to reset the headlight system to allow the vehicle to recognize that the problem has been resolved.
In some cars, a simple battery reset can be performed by disconnecting the negative terminal for a few minutes.
In other cars, specially those with advanced electronic modules, a scan tool is required to clear system faults and recalibrate sensors.
Resetting the system ensures that dashboard warnings disappear, the headlight control module functions correctly and adaptive or automatic features work as expected.
How to Fix Adaptive or Automatic Headlight Malfunctions
1. Calibrate the Headlight Leveling Sensor
Adaptive and automatic headlights rely on leveling sensors to adjust the beam angle according to vehicle load and driving conditions.
If the sensors are misplaced, blocked, or damaged, the headlights may shine too high or too low, reducing visibility and dazzling other drivers.
Calibration involves adjusting the sensors so that the headlights shine at the correct angle.
For many vehicles, calibration can be performed using a scan tool, while others require manual adjustment according to the owner’s manual.
Proper sensor calibration ensures safe driving at night and full compliance with road safety standards.
2. Checking the Steering Angle and Ride-Height Sensors
Automatic headlights often rely on steering angle sensors and ride-height sensors to optimize the direction of the beam when turning or driving on uneven surfaces.
Malfunctioning sensors can cause the lights to react incorrectly, resulting in incorrect lighting or warning messages.
Checking these sensors involves testing their electrical signals and physical alignment to ensure they accurately reflect steering movement and vehicle height.
Replacing or repairing faulty sensors restores proper headlight function and ensures the adaptive lighting system responds correctly to road conditions.
3. Resetting the Headlight Control Module
The headlight control module is the electronic brain that manages the adaptive and automatic lighting features.
Sometimes, malfunctions or temporary glitches in the module can cause the system to malfunction, even if all other hardware components are functioning properly.
Restarting the module, either by resetting the battery or using a diagnostic scan tool, allows the system to relearn the sensor status and correct the lighting behavior.
This step is crucial for restoring automatic function, eliminating warning messages and ensuring that all adaptive features, such as curve lighting or auto-leveling, work as designed.
4. Identifying Software-Related Problems
In modern vehicles, many headlight malfunctions are caused by software errors rather than physical component failure.
Software-related problems can include outdated firmware, communication issues between modules, or programming errors that prevent the system from correctly interpreting sensor data.
These software errors can be identified using a diagnostic scan tool or, often, by visiting a professional service center for updates or reprogramming.
Fixing software issues ensures that the adaptive or automatic headlight system works reliably, improves road visibility and reduces the risk of recurring malfunctions.
How to Diagnose the Headlight System Malfunctions Using an OBD Scanner
1. Reading Fault Codes Related to the Lighting System
An OBD scanner allows you to read fault codes stored in the vehicle’s electronic control module, including those related to the headlight system.
When the system detects a problem, it generates a specific error code that indicates which component or circuit is malfunctioning.
Using the scanner, you can quickly access these codes without guesswork, making diagnosis faster and more accurate.
This tool is essential for modern vehicles where complex electronics control everything from automatic headlights to adaptive lighting features.
2. Understanding Common Headlight-Related Error Codes
Once fault codes are retrieved, understanding their meaning is crucial for effective repair.
Common codes might indicate issues such as a burnt-out bulb, relay problems, sensor malfunctions, or control module failures.
For example, a code might indicate a burnt-out left headlight bulb, a faulty headlight leveling sensor, or a communication problem between the module and the lights.
Knowing the precise meaning of each code helps you accurately target the repair, saving time and avoiding unnecessary component replacements.
3. Clearing Codes After Repair
After diagnosing and repairing a headlight issue, it’s essential to clear the stored fault codes using the OBD scanner.
If the codes remain in the system, warning lights or dashboard messages may persist even after the repair.
Clearing the codes resets the system and allows the vehicle to re-check all components to ensure the repair was successful.
This step confirms that the headlight system is functioning correctly and prevents confusion caused by old or irrelevant warnings.
4. Recognizing When Codes Indicate a Module Malfunction
Sometimes, fault codes indicate problems that aren’t related to bulbs, fuses, or sensors, but rather point to an issue within the headlight control module itself.
Persistent codes, even after replacing bulbs, fuses, or relays, suggest that the module is failing or has an internal electronic fault.
Identifying a module malfunction early is crucial because it may require replacement or reprogramming to restore full system functionality.
Understanding when a module is faulty ensures that repairs are effective and that the headlight system operates safely and reliably.
Understand, When the Headlight Control Module Needs Replacement
1. Signs of a Faulty Headlight Control Unit
A faulty headlight control module can cause several noticeable problems, even if the bulbs, fuses and wiring are in good condition.
Common signs include headlights flickering, failing to turn on, or remaining stuck on high or low beam.
Adaptive or automatic headlights may stop functioning correctly and warning or error messages may persist on the dashboard even after checking all other components.
Recurring malfunctions that cannot be fixed by standard repairs often indicate that the control module is failing and requires professional attention.
2. Testing the Module Before Replacement
Before replacing the headlight control module, it’s crucial to test it to confirm the malfunction.
Using a multimeter, scan tool, or diagnostic equipment, you can check the module’s electrical signals, communication with other systems and response to sensor inputs.
Testing ensures the problem isn’t due to faulty wiring, blown fuses, or defective bulbs, which are much simpler and less expensive to fix.
Proper testing prevents unnecessary replacements and ensures that a new module will resolve the issue.
3. Coding or Programming Requirements After Installation
After installing a new headlight control module, many vehicles require coding or programming to ensure the module functions correctly with the vehicle’s electronics.
This process allows the module to recognize the sensors, bulbs and other components and communicate properly with the vehicle’s central computer.
This step often requires professional scan tools or dealership equipment, as incorrect installation can lead to persistent warning lights or malfunctions in adaptive and automatic headlights.
Correct coding guarantees reliable operation and restores all headlight system features.
4. Typical Replacement Costs and Labor
The cost of replacing a headlight control module depends on the vehicle’s make, model and whether the part is OEM or aftermarket.
On average, the module itself can cost between $200 and $600, while labor for installation and programming can range from $100 to $300.
Vehicles with advanced adaptive lighting systems may require additional calibration, which can increase the cost.
Understanding these expected expenses helps vehicle owners plan for repairs and ensures they choose a qualified technician for installation and programming.
What are the Difference Between Temporary Fixes vs Permanent Repairs
1. Quick Fixes That Can Temporarily Restore Headlights
Some headlight problems can be temporarily resolved with simple, quick fixes.
For example, a loose connector might be fixed with a gentle tap, a faulty bulb can be replaced, or a fuse can be temporarily reset to restore headlight function for a short period.
These quick fixes can be useful in emergencies or when professional help is not immediately available, allowing the vehicle to remain drivable.
However, they do not address the root cause of the malfunction, meaning the problem is likely to recur.
2. Why Temporary Solutions Are Not Recommended for the Long Term
Relying on temporary fixes is not a safe long-term solution because they do not address the underlying cause of the malfunction in the headlight system.
Issues such as control module failure, faulty wiring, or defective sensors can worsen over time if not properly repaired.
Temporary solutions can also create a false sense of security, leading drivers to believe their headlights are fully functional when they are not.
In the long run, proper repairs ensure consistent headlight performance and prevent recurring malfunctions.
3. Risks of Driving with Faulty Headlights
Driving with faulty or malfunctioning headlights is a serious safety hazard.
Reduced visibility at night, in fog, or during rainy conditions increases the likelihood of accidents.
Faulty headlights also make it difficult for other drivers to see your vehicle, potentially leading to collisions.
Furthermore, driving with faulty headlights may be illegal in many jurisdictions, resulting in fines or failed vehicle inspections.
Permanent repairs are crucial for maintaining safety, complying with legal regulations and ensuring peace of mind while driving.
When You Should Visit a Professional Mechanic or Dealership
1. Electrical Problems Beyond Basic Troubleshooting
Some headlight system issues stem from complex electrical malfunctions that cannot be resolved with simple checks like replacing bulbs or fuses.
Problems such as faulty control modules, short circuits in the wiring, or intermittent glitches in the vehicle’s computer require advanced diagnostic tools and expertise.
Professional mechanics or dealership technicians possess the specialized equipment and training to safely diagnose and repair these issues, ensuring the headlight system functions correctly and preventing further electrical damage.
2. Recurring Headlight System Malfunction Warnings
If your vehicle continues to display headlight system malfunction warnings even after standard repairs, it’s a clear indication of a more significant problem.
Persistent warnings can signal faulty sensors, defective relays, or issues with the headlight control module that require professional attention.
Ignoring recurring warnings increases the risk of complete headlight failure, compromising nighttime visibility and jeopardizing road safety.
3. Adaptive Headlight Calibration Requirements
Vehicles equipped with adaptive or automatic headlights often require precise calibration after repairs or parts replacement.
Calibration ensures that the headlights adjust correctly based on steering input, road incline and vehicle load.
Incorrect calibration can result in reduced illumination, glare for oncoming drivers, or system malfunction warnings.
Dealerships and professional mechanics have the necessary equipment and expertise to perform accurate calibration, restoring the full functionality of the adaptive headlights.
4. Consider your warranty or manufacturer recall
Sometimes, a headlight system malfunction is covered under your vehicle’s warranty or a manufacturer recall.
In such cases, attempting to repair it yourself could void your warranty or disqualify you from recall coverage.
Taking your vehicle to a dealership ensures that the repairs are performed according to the manufacturer’s standards and that any covered issues are resolved at no cost to you.
Checking for recalls and consulting with an authorized service center protects both your investment in your vehicle and your safety on the road.
How to Prevent From Future Headlight System Failures
Not only this, there’s U.S. government research by the National Highway Traffic Safety Administration that shows that the headlamp glare and visibility actually effects on the driver’s performance, yes it is true that the glare itself contributes to a relatively small share of the nighttime crashes, but the study shows that headlights much balance illuminating the road ahead without excessive glare for other drivers, that’s why becomes really important to have properly functioning and well-aimed headlight systems so that it can have improved visibility and minimize the risk to others as well.[¹]
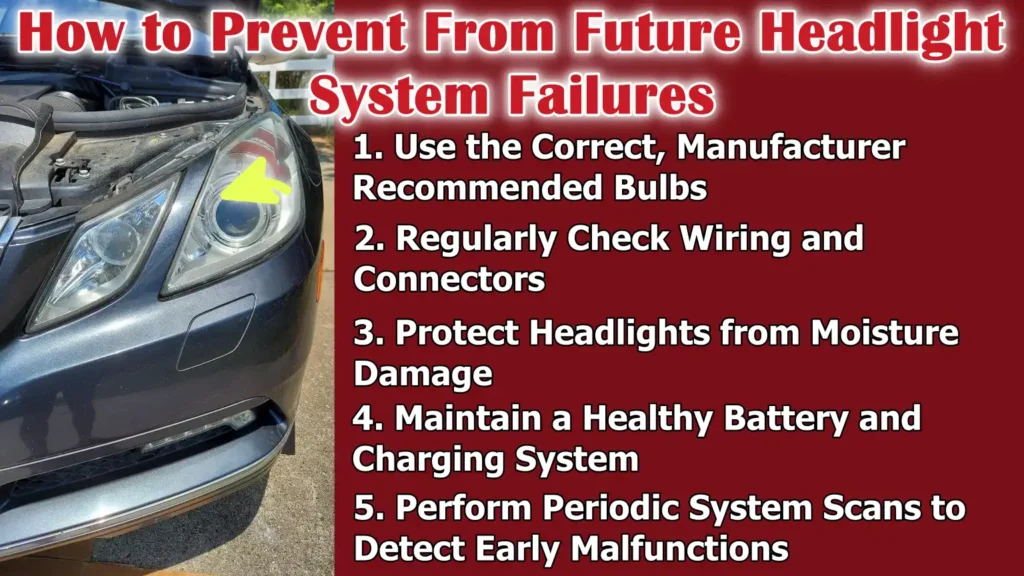
1. Use the Correct, Manufacturer-Recommended Bulbs
The easiest and most effective way to prevent headlight system failure is to always use the correct bulbs recommended by your vehicle manufacturer.
Using the wrong bulbs, with the wrong wattage, size, or type, can cause electrical problems, flickering, or even system warnings.
Manufacturer-recommended bulbs are designed to work seamlessly with your vehicle’s electrical system and control module, ensuring reliable lighting, long life and safe driving conditions.
2. Regularly Check Wiring and Connectors
Regularly checking your headlight system’s wiring and connectors helps identify potential problems before they become serious.
Look for signs of corrosion, broken wires, loose connections, or poor insulation.
Keeping the wiring harness clean and safe can prevent intermittent failures, reduce flickering and ensure consistent power flow to the headlights, maintaining optimal performance and system reliability.
3. Protect Headlights from Moisture Damage
Moisture inside the headlight assembly can cause short circuits, corrosion, or fogging, often leading to malfunctions.
To protect your headlights from water damage, check the seals, avoid driving through deep water whenever possible and repair any cracks or leaks in the headlight housing.
Keeping the assembly dry protects both the bulbs and electronic components, preventing electrical failure and maintaining bright, clear light.
4. Maintain a Healthy Battery and Charging System
A strong, stable battery and a properly functioning charging system are essential for reliable headlight system operation.
A weak battery, a bad alternator, or corroded terminals can reduce voltage to the headlights, resulting in dim lights or system warnings.
Regular battery checks, terminal cleaning and charging system monitoring help maintain a consistent power supply to the headlights and prevent malfunctions caused by low voltage.
5. Perform Periodic System Scans to Detect Early Malfunctions
Modern vehicles often use electronic modules to monitor headlight function and detect early signs of malfunction.
Periodic system scans using an OBD scanner can help detect minor problems, such as sensor malfunctions or communication errors, before they become major issues.
Early detection through regular scans ensures timely repairs, prevents unexpected malfunctions and keeps the headlight system operating safely and efficiently.
Read More:
Conclusion – How to Fix Headlight System Malfunction
Yes, it is necessary thing to maintain a fully functional headlight system as it is crucial for your safety and others on the road as well.
Yes, the headlight malfunctions can be triggered from minor issues such as: burnt-out bulbs or blown fuses to more complex problems involving wiring, sensors, or control modules.
So, when you properly understand the symptoms, causes and repair procedures, drivers can quickly identify problems, perform effective repairs and prevent future malfunctions.
And, it doesn’t matter whether it’s basic halogen bulbs or advanced adaptive lighting systems, proactive maintenance and knowledge empower vehicle owners to maintain reliability, avoid costly repairs and enjoy peace of mind while driving, day or night.
Now, if you still have questions then you can ask them on the comment section below this guide.
Frequently Asked Questions
Q1. Can I drive with a headlight system malfunction warning?
Answer: Driving with a headlight system malfunction warning is not advisable. This warning indicates that one or more parts of your headlight system are not functioning correctly, which can reduce your visibility at night or in poor weather conditions. This also makes it difficult for other drivers to see your vehicle. While you might be able to drive short distances during the day, it’s safest to have the problem diagnosed and repaired as soon as possible to avoid accidents or legal issues.
Q2. Why does the headlight system malfunction warning come on?
Answer: The headlight system malfunction warning can come on for several reasons. Common causes include burnt-out bulbs, blown fuses, faulty relays, damaged wiring, or loose electrical connections. In modern vehicles, it can also be due to a faulty headlight control module, adaptive sensors, or a software glitch. Moisture inside the headlight assembly or a weak battery can also trigger this warning. Identifying the exact cause is crucial for proper repair.
Q3. How do I know if my headlight bulbs need replacement?
Answer: If the headlight bulbs are dim, flickering, or not working at all, they should be replaced. You can inspect them for blackened glass or broken filaments. Some vehicles display a warning light or message when a bulb fails. Always use the bulbs recommended by your vehicle manufacturer, as using the wrong type of bulb can cause flickering or trigger system warnings. Replacing bulbs promptly ensures proper visibility and prevents potential electrical problems.
Q4. Will disconnecting the battery fix a headlight system malfunction?
Answer: Disconnecting the battery can sometimes reset the headlight control system and resolve temporary malfunctions. This works in some cases where the malfunction is due to a minor glitch in the control module. However, this will not fix internal problems such as burnt-out bulbs, blown fuses, faulty wiring, or defective sensors. The battery should be disconnected carefully and the negative terminal should be removed first to avoid electrical shock or damage.
Q5. Do I need special tools to fix headlight system malfunctions?
Answer: Yes, certain tools are very helpful in safely and effectively troubleshooting headlight problems. Basic tools like screwdrivers and pliers help access the headlight assembly. A fuse puller or multimeter helps check fuses, relays and wiring. An OBD scanner is useful for reading error codes and diagnosing modern electronic systems. Electrical contact cleaner can fix loose or corroded connections. Using the right tools makes the repair process faster, safer and more reliable.
Q6. How often should I check my headlight system?
Answer: It’s a good idea to check your headlights every few months or before long trips. Check that all bulbs are working, the wiring is secure and there is no moisture inside the headlight assembly. For vehicles with adaptive or automatic headlights, periodic scans using an OBD scanner can detect minor malfunctions before they become serious. Regular maintenance helps prevent sudden failures and ensures your headlights remain bright and reliable.
Q7. Can software updates fix headlight system malfunctions?
Answer: Yes, in many modern vehicles, software updates can fix headlight system problems. Electronic control modules sometimes develop glitches that prevent the system from functioning correctly. Updating the firmware or reprogramming the module can restore proper communication between the sensors, bulbs and control unit. Professional mechanics or dealership technicians typically perform these updates using specialized tools.
Q8. How much does it cost to fix a headlight system malfunction?
Answer: The cost of fixing a headlight system malfunction depends on the cause. Simple fixes like replacing a bulb or fuse can be very inexpensive, often less than $50. More complex problems, such as replacing a headlight control module or recalibrating adaptive headlights, can cost several hundred dollars, including labor. A diagnostic scan to pinpoint the exact problem helps in accurately estimating the cost and avoiding unnecessary replacements.
Q9. Why do adaptive headlights sometimes stop working?
Answer: Adaptive headlights rely on sensors and control modules to adjust the beam based on steering, vehicle load and road conditions. They may stop working if a leveling sensor, steering angle sensor, or ride-height sensor malfunctions, or if there is an error in the headlight control module. Software glitches can also prevent the adaptive function from working. Proper testing, sensor calibration and module reinitialization usually restore full functionality.
References:
[1] Nighttime Glare and Driving Performance
https://www.nhtsa.gov/sites/nhtsa.gov/files/glare_congressional_report.pdf

Guys, I’m a car audio enthusiast and customization expert and I love clear sound and clean installation. Plus, I have spent years helping people build their dream audio setups. And whenever I’m working on cars, I probably listen to music and thinks about the next big upgrade.