 Skip to content
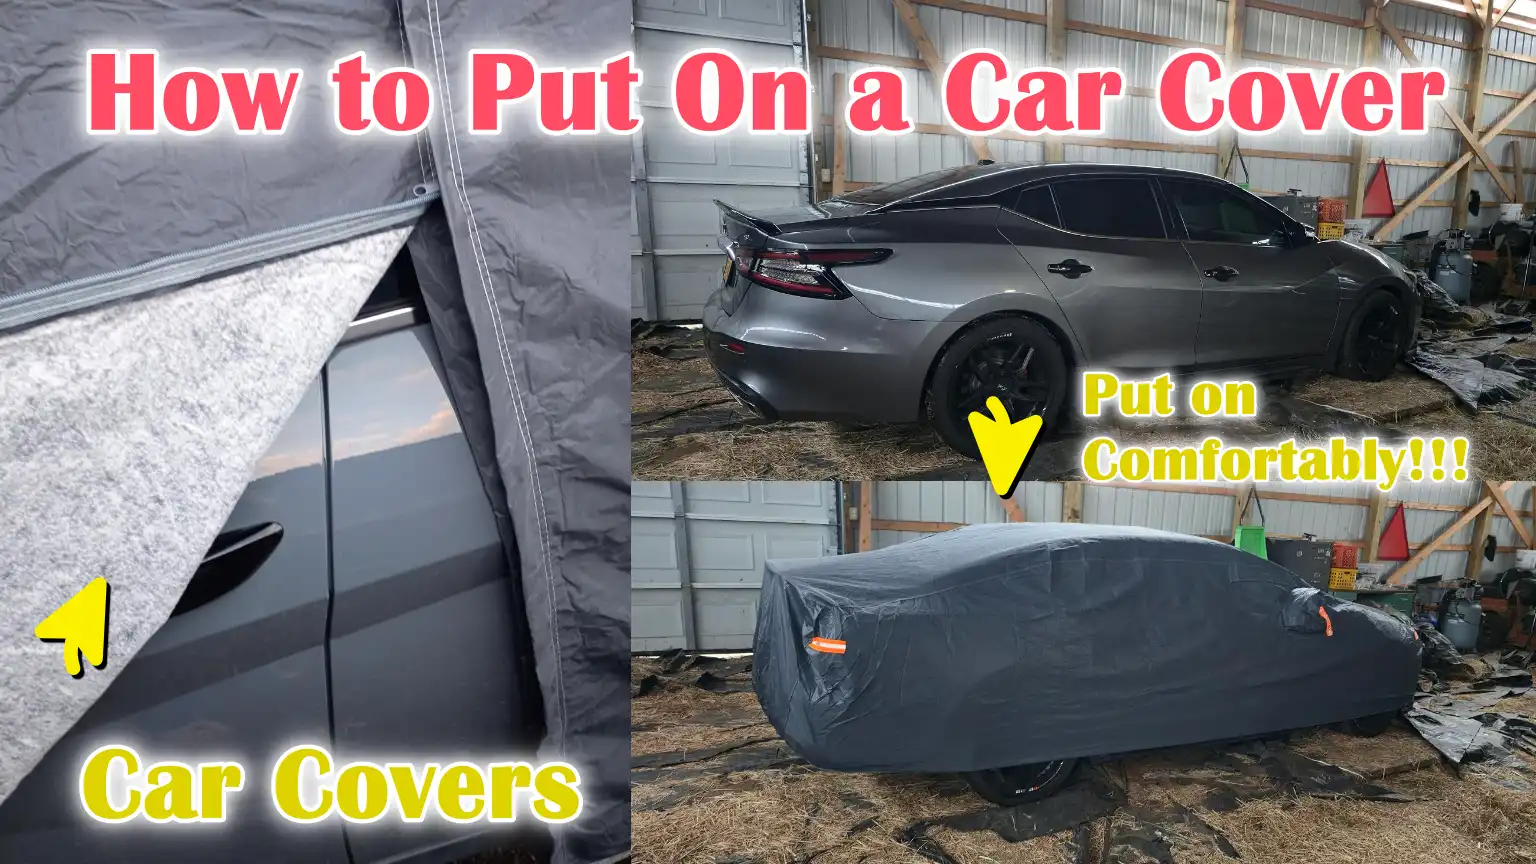
Written By: Don Dodi
Fact Checked By: Kristen Brown
Reviewed By: Diego Rosenberg
So, when you install the car cover in the perfect way, then and only then it will provide ultimate protection to your vehicle, otherwise it can get scratches as well.
And, there’s not doubt about the effectiveness of the car covers in terms of protecting the vehicle from damage from sunlight, dust, bird droppings, tree sap and pollution for their obvious reasons.
Plus, there’s even studies in automotive care that shows that the long-term expsoure to the UV rays can even fade the paint of the vehicle, even it can crack the dashboards and weaken the rubber seals over the period of time, not only this moisture and dirt can also lead to the corrosion and surface scratches as well.
This is why, it becomes really important to learn How to Put On a Car Cover, so that it can effectively acts as a physical barrier and maintain the car’s paint quality, interior condition and overall value as well.
Because, if you use a car cover in the wrong way, then it can still cause some bad looking scratches instead of preventing them from it.
Know About, The Types of Car Covers
1. Indoor Car Covers vs Outdoor Car Covers
Indoor car covers are designed for vehicles parked in garages or covered parking spaces.
Their primary purpose is to protect the vehicle from dust, minor scratches, accidental bumps and moisture in enclosed spaces.
These covers are typically lightweight, soft and breathable, helping to prevent light scratches on the paintwork.
Outdoor car covers, on the other hand, are made for cars parked in open areas where they are exposed to sun, rain, wind, pollution, bird droppings and tree sap.
These are thicker, more durable and often water-resistant or waterproof.
Choosing the right type is crucial, as using an indoor cover outdoors can lead to water and sun damage, while using a heavy outdoor cover indoors can restrict airflow and trap moisture.
2. Weather-Specific Car Covers – Sun, Rain, Snow and Dust
Weather-specific car covers are designed to address particular environmental conditions.
Sun covers focus on blocking harmful ultraviolet rays, which can fade paint over time, damage the clear coat and crack dashboards.
Rain covers are designed to repel water and prevent rust and corrosion, specially in humid or coastal areas.
Snow covers are thicker and more robust, allowing them to withstand cold temperatures and the weight of snow without tearing.
Dust covers are lightweight and breathable, making them ideal for dry climates or indoor use where fine particles can accumulate on the vehicle’s surface.
Choosing a cover based on local weather conditions ensures better protection and longevity for both the vehicle and the cover itself.
3. Custom-Fit Car Covers vs Universal-Fit Car Covers
Custom-fit car covers are made to match the exact shape and dimensions of a specific vehicle model.
They fit snugly around windows, bumpers and body lines, minimizing flapping in the wind and reducing the risk of scratches.
Due to their precise fit, custom covers typically offer superior overall protection.
Universal-fit car covers are designed to fit a wide range of vehicles within a size category, such as sedans, SUVs, or hatchbacks.
While they are more affordable and readily available, they may not fit as well and can flap more in windy conditions.
Understanding this difference allows users to weigh cost savings against maximum protection.
4. Car Cover Materials and Their Benefits
Car covers are made from various materials and each material serves a specific purpose.
Soft cotton or polyester blends are gentle on paint and allow for breathability, preventing moisture buildup.
Multi-layer fabrics are soft on the inside and durable on the outside, providing balanced protection against scratches and the elements.
Waterproof or water-resistant materials are useful in rainy weather, but they should also be breathable to prevent moisture from accumulating underneath.
Some covers also feature UV-resistant layers that help block sunlight and reduce heat buildup.
Learning about car cover materials helps users understand how well a cover will protect their vehicle and how long it will last.
Tools
| Tool / Preparation Item | Detailed Explanation |
|---|---|
| Clean Car Cover | The car cover should be clean and free of dust, sand, or other small particles. A dirty cover can rub against the paint and cause fine scratches. Always shake and inspect the cover before using it. |
| Clean and Dry Vehicle | The car’s surface must be completely clean and dry. Dirt can scratch the paint and moisture trapped under the cover can lead to rust or paint damage over time. |
| Antenna Patch – If Needed | Antenna patches are used to prevent the cover around the antenna from tearing. This reduces stress on the fabric and extends the lifespan of the cover. |
| Mirror Pockets | Mirror pocket covers help to properly fit the covers onto the side mirrors. They hold the covers in place and prevent them from slipping or spreading unevenly. |
| Lock Cable or Tie-Down Strap | A locking cable or strap secures the cover, specially in windy areas. It also helps prevent theft and keeps the cover from blowing away or slipping off. |
| Calm and Wind-Free Area | Applying a car cover in a calm location makes the job easier and safer. Wind can drag the cover along the ground and pick up dust, which can scratch the car’s paint. |
How to Prepare the Car Properly
1. Washing the Car to Remove Dirt and Dust
Washing the car before applying a car cover is crucial because even tiny dust particles can damage the paint.
Dirt, sand and dust particles act like small abrasive stones when trapped between the cover and the car’s surface.
When the cover moves slightly due to wind or handling, these particles can create fine scratches on the paint and clear coat.
Using clean water and a mild car wash soap removes these damaging particles and leaves a smooth surface.
A clean car also ensures the cover fits properly and provides better overall protection.
2. Thoroughly Drying the Car to Prevent Moisture Damage
After washing, the car must be completely dry before covering it.
Any remaining water on the surface can become trapped under the car cover, specially in areas with limited airflow.
Trapped moisture can lead to rust on metal parts, paint damage and the growth of mold or mildew over time.
Drying the car with a clean microfiber towel or allowing it to air dry ensures no water remains on the body.
A dry surface helps the car cover protect the vehicle, rather than contributing to long-term damage.
3. Folding in Side Mirrors if Necessary
Folding in the side mirrors before applying a car cover ensures a proper fit and reduces tension on the fabric.
Mirrors that are not folded in can stretch the cover excessively or create pressure points that could lead to tearing.
Folding the mirrors allows the cover to drape more easily over the sides of the car, resulting in better protection and reduced wind movement.
This simple step extends the lifespan of both the mirrors and the car cover.
4. Removing or Adjusting Antennas and Accessories
Antennas and other external accessories should be removed or adjusted whenever possible before applying a car cover.
Fixed antennas, roof racks, or sharp accessories can snag on the fabric and cause tears or holes over time.
If the antenna cannot be removed, adjusting it or using a protective patch will minimize damage.
Properly preparing these areas ensures the cover lies flat and provides complete, uniform protection across the entire vehicle surface.
How to Identify the Front and Back of the Car Cover
1. Look for Labels or Tags Indicating “Front” or “Back”
Most high-quality car covers have small labels or sewn-in tags that clearly indicate the front or back of the cover.
These tags are included by the manufacturer to help users correctly orient the cover without confusion.
Checking these labels before unfolding the cover saves time and prevents errors.
Correct orientation ensures that specific design features, such as mirror pockets and elastic edges, align properly with the car.
Ignoring these indicators can result in an improper fit and reduced protection.
2. Identify Mirror Pockets and Elastic Hem
Mirror pockets are one of the easiest ways to identify the front of a car cover.
These pockets are designed to fit over the side mirrors and typically indicate the front half of the cover.
The elastic hem, which is tighter and more contoured, is often located around the front and rear bumpers to ensure the cover securely grips the car.
Identifying these features ensures a proper fit and minimizes flapping in the wind.
A correctly fitted cover provides better paint protection and lasts longer.
3. Match the Cover’s Shape to the Car’s Shape
Car covers are designed to conform to the natural contours of the vehicle, with most covers featuring a longer section for the hood and a slightly shorter section for the trunk.
Matching the wider or more contoured sections of the cover to the corresponding parts of the vehicle ensures a smooth and snug fit.
When the cover matches the car’s shape, it distributes tension evenly across the fabric.
This reduces stress on the seams and prevents the cover from slipping or bunching.
4. Avoiding Orientation Mistakes
Putting a car cover on inside out or in the wrong direction is a common mistake that can compromise its effectiveness.
Incorrect orientation can leave mirrors uncovered, bumpers exposed, or cause the cover to stretch in the wrong places.
Over time, this can lead to tearing and premature wear.
Taking a moment to correctly identify the front and rear sections ensures complete coverage, better weather protection and a longer lifespan for your car cover.
How to Put On a Car Cover – Conveniently Install Them
1. Unfolding the cover correctly without dragging it on the ground
Unfolding the car cover correctly is crucial because the ground often contains dust, sand and small pebbles that can cling to the fabric.
If the cover touches the ground, these particles can later rub against the car’s paint and cause scratches.
The best approach is to unfold the cover slowly, lifting it and keeping it under control.
This keeps the inner surface clean and ensures the cover protects the car rather than damaging it.
2. Placing the cover on the roof first
The roof is the highest and most stable part of the car, making it the best starting point for installation.
Placing the cover on the roof first centers it and balances the weight on both sides of the vehicle.
This method prevents slipping and makes it easier to guide the cover into place.
Starting from the roof also prevents the cover from sliding off and falling to the ground during installation.
3. Pulling the cover evenly towards the front and back
Once the cover is centered on the roof, it should be gently pulled towards the front and back of the car simultaneously.
Pulling evenly prevents the fabric from stretching or bunching up.
This step ensures that the hood, trunk and bumpers are covered smoothly without any tension.
Even pulling ensures the cover conforms properly to the car’s body lines.
4. Adjusting around mirrors, bumpers and spoilers
After the main sections are in place, the cover should be carefully adjusted around the side mirrors, bumpers and any spoilers.
These areas have curves and edges that need to be handled gently to prevent tearing the fabric.
Proper adjustment ensures a snug fit and minimizes loose areas that could flap in the wind.
A well-fitting cover protects these exposed areas more effectively.
5. Complete Coverage from Top to Bottom
The final step is to ensure the entire vehicle is completely covered, from the roof down to the lower edges of the doors and bumpers.
Gaps or exposed areas can allow sunlight, dust and moisture to reach the car.
Complete coverage preserves the paint quality and provides uniform protection.
A fully covered car also prevents the cover from shifting during changes in weather.
How to Secure the Car Cover In Proper Way
1. Utilizing the Elastic Hem for a Snug Fit
Most car covers feature an elastic hem around the bottom edges of the vehicle for a secure fit.
When used correctly, these elastic edges pull the cover tightly against the bumpers and sides, minimizing loose fabric.
A snug fit is crucial because loose sections can flap in the wind and rub against the paint, potentially causing scratches over time.
The elastic hem helps keep the cover in place even in light winds and provides a neat and well-fitted appearance.
2. Attaching Tie-Down Straps or Buckle Systems
Many car covers come with tie-down straps or buckle systems that run from one side to the other underneath the vehicle.
These straps provide added security and prevent the cover from blowing off in strong winds.
Properly tightened straps help keep the cover centered and evenly distributed over the car.
This reduces fabric movement, protects the paint and extends the overall lifespan of the car cover.
3. Attaching Wind Straps – If Available
Wind straps are designed to handle high wind conditions and are specially useful for outdoor parking.
They are typically attached to the underside of the car, either in the middle or towards the front, to prevent the cover from billowing.
When wind lifts a loose cover, it can trap air and create constant movement that damages both the cover and the paint.
Attaching wind straps keeps the cover stable and ensures consistent protection even in changing weather conditions.
4. Locking the Cover for Theft Prevention
Locking the car cover is an optional step, but it can be beneficial in public or open parking areas.
A lockable cable is threaded through the cover’s grommets or edges and secured underneath the car.
This prevents theft and makes it difficult to remove the cover.
The securely locked cover also applies extra tension, ensuring that the cover remains firmly in place, even in windy conditions.
How to Ensure Final Fit and Perform Safety Checks
1. Checking for Loose or Flapping Sections
After fully installing the car cover, it’s crucial to check for any loose or sagging sections.
Loose fabric can move back and forth in the wind, even a light breeze and this movement can gradually rub against the paint.
Over time, this rubbing can cause dull spots or fine scratches on the surface.
Adjusting the cover to eliminate looseness ensures it remains stable and protects the car more effectively during daily use.
2. Ensuring Mirrors and Corners are Fully Covered
Side mirrors, bumper corners and the edges of the car are more exposed than flat surfaces.
If these areas are not fully covered, they are often the first to be affected by sun, dust and moisture.
Ensuring the cover fits snugly over the mirrors and wraps securely around the corners helps protect these vulnerable areas.
Complete coverage also prevents the cover from shifting and improves its overall fit.
3. Verifying Airflow Vents are Properly Positioned
Many modern car covers feature airflow vents that allow trapped heat and moisture to escape.
These vents help reduce moisture buildup under the cover, which can lead to rust, paint damage, or mildew.
Checking that these vents are open and properly positioned ensures adequate air circulation.
Good airflow keeps the car dry and maintains the condition of both the vehicle and the cover.
4. Ensuring No Sharp Edges are Putting Pressure on the Fabric
Sharp edges such as mirror tips, antenna bases, or trim corners can put excessive pressure on the car cover.
If the fabric is stretched tightly over these areas, it can lead to premature tearing or wear.
Gently adjusting the cover to relieve pressure helps prevent damage and extends the cover’s lifespan.
This final check ensures long-term protection and safe daily use.
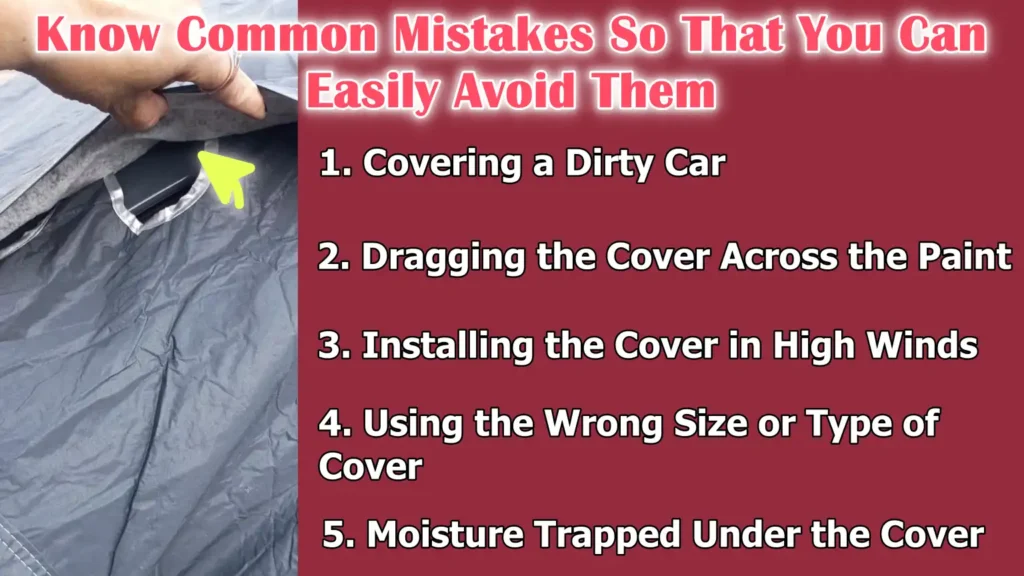
Know Common Mistakes So That You Can Easily Avoid Them
Along with this, there’s scientific experiments on the radiative cooling car covers and that reveals that when a cover is completely wraps a vehicle in the perfect way, then it can lower the surface temperatures by up to 27°C even under the intense sun, so that’s why you need to learn how to put on a car cover in the correct way so that it can protect against dust, scratches and also actively reduces the heat buildup that can degrade paint and interior plastics over the period of time and use.[¹]
1. Covering a Dirty Car
Putting a car cover on a dirty vehicle is one of the most common and damaging mistakes.
Dust, sand and road grime may seem harmless, but when trapped under a cover, they can act like abrasive particles rubbing against the paint.
Even slight movement from wind or handling can cause fine scratches and dull the paint surface.
Cleaning the car first ensures the cover protects the vehicle rather than damaging it.
2. Dragging the Cover Across the Paint
Dragging a car cover across the paint allows dirt from the ground to easily cling to it and be pressed directly against the car’s surface.
This can cause scratches that may not be immediately visible but will become more apparent over time.
Gently lifting and placing the cover keeps the inner surface clean and safe.
Proper handling preserves the quality of both the paint finish and the cover fabric.
3. Installing the Cover in High Winds
Attempting to install a car cover in strong winds makes the process difficult and risky.
The wind can blow the cover onto the ground, picking up dirt and debris.
It can also cause sudden tugs that can stretch or tear the fabric.
Installing the cover in calm weather allows for proper placement and prevents unnecessary damage to both the car and the cover.
4. Using the Wrong Size or Type of Cover
Using a car cover that is too small, too large, or not designed for the environment reduces its effectiveness.
A tight cover can strain the seams and tear easily, while a loose cover can flap and rub against the paint.
Indoor covers won’t provide adequate protection from sun and rain outdoors, while heavy-duty outdoor covers can trap moisture if used indoors.
Choosing the correct size and type ensures a proper fit and reliable protection.
5. Moisture Trapped Under the Cover
Moisture trapped under a car cover can cause serious damage over time.
Water left on the car’s surface can lead to rust, corrosion and paint problems, specially in humid climates.
Trapped moisture can also cause unpleasant odors and mildew.
Ensuring the car is completely dry and using a breathable cover will help keep your vehicle protected and in good condition.
Read More:
How to Remove and Store a Car Cover
1. Carefully Removing the Cover Without Scratching the Paint
Car covers should be removed gently and carefully to protect the car’s paint surface.
Pulling the cover off quickly can cause dust or debris trapped underneath to rub against the car, potentially causing fine scratches.
The best approach is to loosen the cover from the bottom first and gradually lift it upwards towards the roof.
This method keeps dirt away from the paint and helps maintain a smooth, clean surface over time.
2. Folding the Cover Properly
Folding a car cover correctly makes it easier to use in the future and helps prevent damage to the fabric.
Neatly folding it keeps the inner surface clean and minimizes deep creases that can weaken the material.
A properly folded cover can be quickly put back on the car the next time and is less likely to accumulate dirt.
Good folding habits also help the cover last longer and maintain its shape.
3. Cleaning the Cover When Needed
Over time, car covers accumulate dust, pollution and small environmental particles.
If left uncleaned, these particles can reduce the cover’s effectiveness and potentially damage the car’s paint.
Washing the cover according to the manufacturer’s instructions removes harmful buildup and keeps the fabric breathable.
A clean cover provides better protection and prevents scratches caused by trapped dirt.
4. Storing it in a Dry, Ventilated Bag
When the car cover is not in use, proper storage is essential to keep it in good condition.
Storing the cover in a dry, ventilated bag helps prevent moisture buildup, mildew and unpleasant odors.
Avoid storing the cover in airtight plastic bags if it is not completely dry.
Good storage habits protect the fabric and ensure the cover is ready for safe use when needed.
How to Maintain Car Covers for Proper Protection
1. How often should you wash your car cover?
Regularly washing your car cover keeps it effective and protective for your vehicle.
Over time, dust, pollution, bird droppings and tree sap can accumulate on the fabric.
If left uncleaned, these particles can reduce breathability and potentially damage the paintwork.
Under normal conditions, washing the cover every few months is usually sufficient, while covers used outdoors in dusty or polluted areas may require more frequent cleaning.
A clean cover provides better protection and lasts longer.
2. Checking for tears or worn areas
Regularly inspecting your car cover helps catch minor issues before they become serious.
Areas around mirrors, corners and seams are often the first to show wear due to movement and stretching.
Small tears or thin spots can allow water, dust and sunlight to reach the car.
Frequent checks allow for timely repairs or replacement, ensuring continuous protection for your vehicle.
3. Replacing worn straps or buckles
Straps and buckles play a crucial role in securing the car cover, specially in windy conditions.
Over time, these components can weaken, stretch, or break due to weather exposure and regular use.
Damaged straps can cause the cover to become loose and potentially rub against the paintwork.
Replacing worn straps or buckles ensures the cover remains tight, secure and effective for long-term use.
4. When to upgrade to a new cover
Even with proper care, car covers don’t last forever.
If the fabric becomes thin, loses its water-repellent properties, or no longer fits properly, it might be time to upgrade.
An old cover may not provide adequate protection and could even cause damage.
Replacing the old cover with a new, well-fitting cover provides continuous protection and helps maintain the car’s condition and value.
Conclusion – How to Put On a Car Cover
Yes, indeed it is small thing to ensure proper fitment of car cover respective to your vehicle size and design, actually keeps your vehicle shielded in every day hazards.
And, a properly fitted and well-maintained car cover protects your car from sun, dust, rain, pollution and moisture: all things that can gradually damage your vehicle, even when it’s parked.
Also, there are really simple steps like cleaning your car before covering it, choosing the right type of cover, fitting it correctly and ensuring proper airflow make a big difference in long-term protection.
Along with this, whenever you use correctly, a car cover prevents paint fading, protects against minor scratches, reduces the risk of rust and keeps the interior cooler and cleaner.
Now, if you still have confusion then you can ask them on the comment box.
Frequently Asked Questions
Q1. Why is it important to install a car cover correctly?
Answer: Installing a car cover correctly is crucial because improper installation can lead to scratches, trapped moisture, or exposed areas of the car. A properly fitted cover protects the paint from sun, dust, rain and pollution. When installed correctly, the cover remains stable, allows for airflow and doesn’t rub against the car’s surface, keeping the vehicle in good condition for longer.
Q2. Should I wash my car before putting on a car cover?
Answer: Yes, it’s essential to wash your car before using a car cover. Dirt, dust and small particles of sand trapped between the cover and the car can scratch the paint. Even slight movement from the wind can cause damage over time. A clean surface allows the cover to protect the car rather than harm it.
Q3. Is it safe to put a car cover on a wet car?
Answer: It is not safe to put a car cover on a wet car. Trapped moisture under the cover can lead to rust, paint damage and mildew. In humid environments, trapped water can also cause mold growth. For proper protection and airflow, the car should be completely dry before covering it.
Q4. Which part of the car should I cover first?
Answer: Always start by covering the roof, as it’s the highest and most stable part of the car. Starting from the roof helps center and balance the cover on both sides. This method also prevents the cover from slipping or touching the ground during installation.
Q5. How do I know which side of the car cover is the front?
Answer: Most car covers have labels or tags indicating “front” or “rear” to help identify the correct orientation. Mirror pockets also typically indicate the front of the cover. Checking these features before installation prevents incorrect fitting and ensures complete protection.
Q6. Can a car cover scratch the paint?
Answer: Yes, a car cover can scratch the paint if used incorrectly. Scratches typically occur when the car is dirty, the cover is dirty, or the cover is loose and flapping in the wind. Using a clean cover on a clean car and ensuring a proper fit significantly reduces the risk of scratches.
Q7. How tight should a car cover be?
Answer: A car cover should have a comfortable fit, but not be too tight. It should fit snugly over the car without stretching the fabric. A loose cover can flap in the wind and cause abrasion, while a very tight cover can put stress on the seams and tear. A proper fit keeps the cover stable and protects the car evenly.
Q8. Do I need to secure the car cover with straps?
Answer: Yes, it’s recommended to secure the car cover with straps or buckles, specially for outdoor use. The straps help keep the cover in place during windy conditions and prevent it from blowing off or shifting. A securely fitted cover provides better paint protection and lasts longer.
Q9. Can I put on a car cover in strong winds?
Answer: It’s not advisable to put on a car cover in strong winds. The wind can drag the cover along the ground, accumulating dirt and making it difficult to install. It can also cause sudden tugs that can damage the fabric. Installation is safer and more effective in calm weather.
Q10. Should I fold in the side mirrors before putting on a car cover?
Answer: Folding in the side mirrors is helpful as it allows the cover to fit more easily. Unfolded mirrors can stretch the fabric and create pressure points that could lead to tearing. Folding the mirrors ensures a better fit and protects both the mirrors and the cover.
Q11. How do I remove the car cover without scratching the car?
Answer: The cover should be removed gently by lifting it from the bottom towards the roof. Pulling it from the sides can cause dirt to rub against the paint. Removing it slowly and carefully keeps the paint surface safe and clean.
References:
[1] Design of radiative cooling covers for automobiles with maximized cooling power
https://www.sciencedirect.com/science/article/pii/S0017931024004320

Guys, I’m a car audio enthusiast and customization expert and I love clear sound and clean installation. Plus, I have spent years helping people build their dream audio setups. And whenever I’m working on cars, I probably listen to music and thinks about the next big upgrade.
