 Skip to content
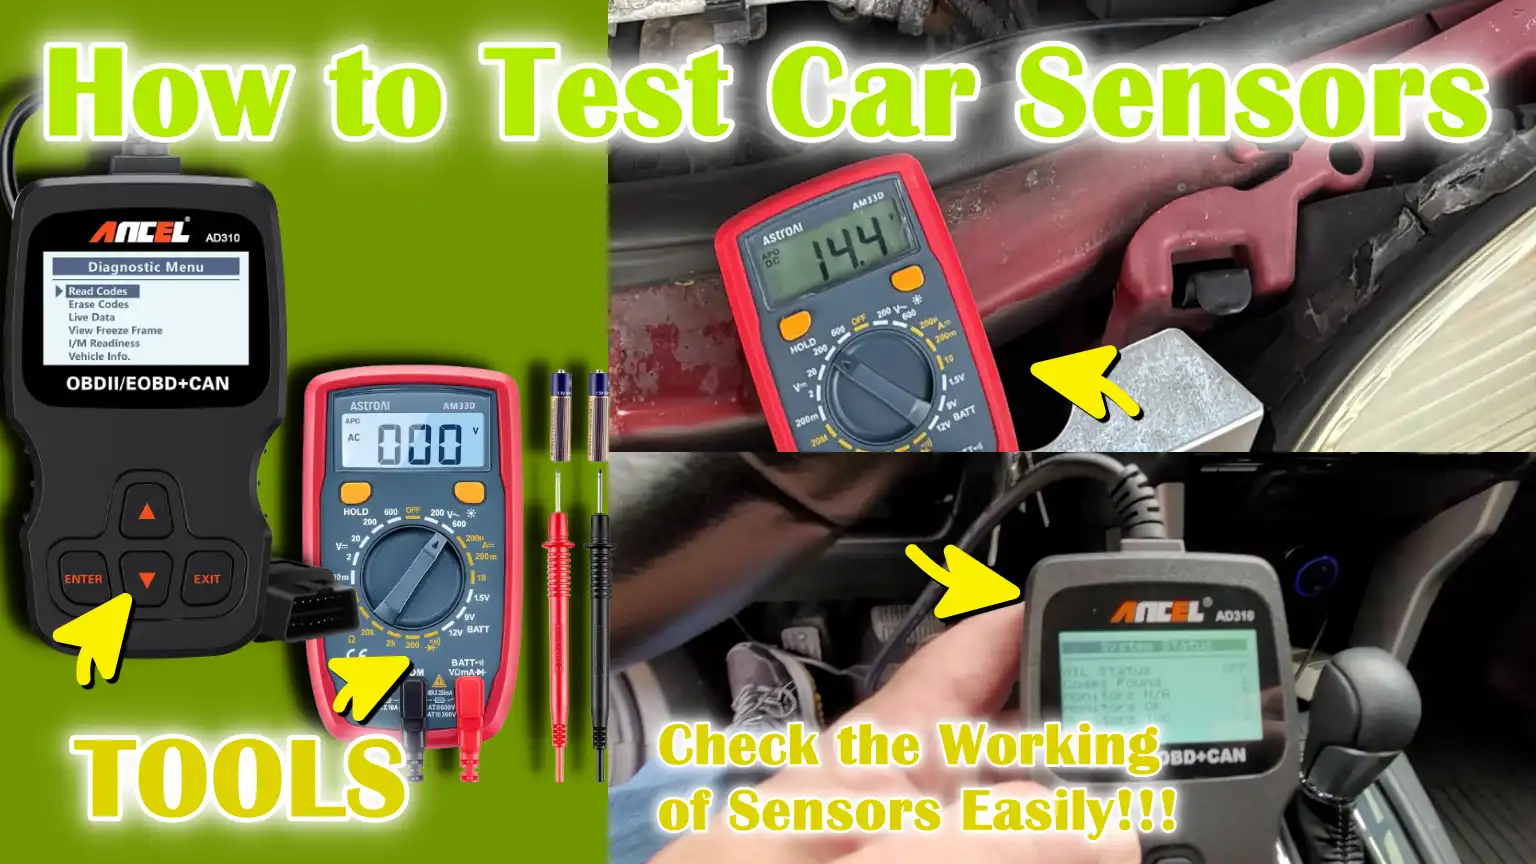
Written By: Don Dodi
Fact Checked By: Kristen Brown
Reviewed By: Diego Rosenberg
There’s not a single doubt about that: the modern cars heavily relies on its sensors to run in a smooth, safe and truly efficient way.
Would you believe that there’s even 30 to over 100 sensors can be available in a single vehicle; and all should be working together to measure things such as: engine temperature, air intake, oxygen levels, wheel speed and throttle positions as well.
Actually, these sensors constantly sends the data tot he car’s computer which is ECU, which then makes the real-time decisions to control how much fuel it takes, timing of the ignition, emissions, braking and other safety systems as well.
So, whenever one of more sensors starts to give wrong readings, then it can lead to the problems such as: poor fuel mileage, rough engine performance, you can see warning lights on the dashboard or even engine stalling as well.
Not only this, there’s automotive diagnostics studies and manufacturer service data that shows that the sensor-related faults are literally among the most common causes of check engine lights.
Which is why, we have come up with this specific guide on How to Test Car Sensors, so that you can test and identify the problems early and prevent any unnecessary part replacement.
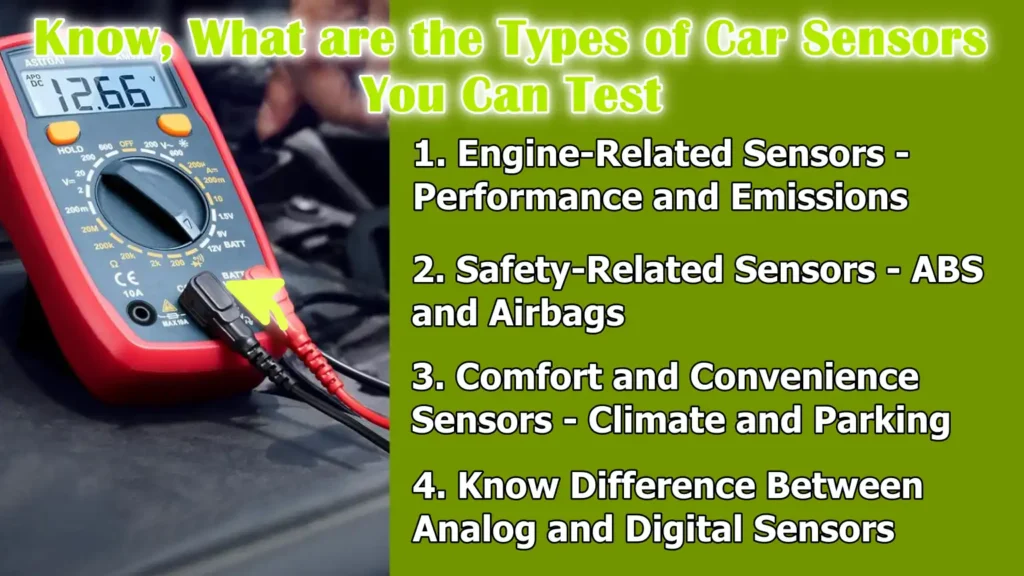
Know, What are the Types of Car Sensors You Can Test
Car sensors can be categorized based on which part of the vehicle they monitor and how they contribute to the car’s operation.
Understanding these types makes it much easier to identify which sensor is causing a problem and how to test it correctly.
1. Engine-Related Sensors – Performance and Emissions
Engine-related sensors are responsible for ensuring the engine runs smoothly, efficiently and within emissions limits.
These sensors measure critical factors such as the air entering the engine, the fuel mixture, engine temperature, exhaust gases and engine speed.
Common examples include oxygen sensors, mass airflow sensors, throttle position sensors, coolant temperature sensors and crankshaft or camshaft position sensors.
The car’s computer uses the data from these sensors to adjust fuel injection, ignition timing and air intake in real time.
If an engine sensor malfunctions or provides inaccurate readings, the car may experience problems such as poor fuel mileage, rough idling, hesitation during acceleration, increased emissions, or a check engine light.
Testing these sensors helps confirm whether the problem lies with the sensor itself, its wiring, or another engine component.
2. Safety-Related Sensors – ABS and Airbags
Safety-related sensors play a crucial role in protecting the driver and passengers.
These sensors are designed to monitor conditions that affect braking, stability and collision protection.
ABS wheel speed sensors track the rotational speed of each wheel to prevent the wheels from locking up during braking.
Airbag sensors detect sudden deceleration or the force of a collision to determine when the airbags should deploy.
These sensors must be highly accurate, as even a slight malfunction can compromise braking performance or airbag deployment.
A faulty safety sensor can trigger warning lights such as the ABS or airbag light and in some cases, it can disable critical safety systems.
Testing these sensors ensures that the vehicle’s safety systems remain reliable and function correctly when needed.
3. Comfort and Convenience Sensors – Climate and Parking
Comfort and convenience sensors enhance the driving experience by helping systems operate automatically and smoothly.
Climate control sensors measure cabin temperature, outside air temperature and sometimes even sunlight intensity to maintain a comfortable interior.
Parking sensors use ultrasonic or radar signals to detect nearby objects and help drivers avoid collisions while parking.
Other sensors in this category may include rain sensors, ambient light sensors and seat occupancy sensors.
When these sensors malfunction, drivers may experience problems such as incorrect temperature control, faulty parking alerts, or automatic features working unexpectedly.
Testing these sensors helps restore normal comfort functions and can prevent unnecessary replacement of control units or displays.
Read More:
4. Know Difference Between Analog and Digital Sensors
Car sensors can also be classified based on how they send information to the vehicle’s computer.
Analog sensors send a continuously varying signal, typically in the form of voltage or resistance, which depends on conditions such as temperature or pressure.
For example, the resistance of a coolant temperature sensor changes as the engine heats up.
Digital sensors, on the other hand, send signals in the form of clear on-off patterns or precise data pulses.
Wheel speed sensors and crankshaft position sensors often operate in this way.
It’s important to know whether a sensor is analog or digital because the testing methods differ.
Analog sensors are typically tested by measuring voltage or resistance with a multimeter, while digital sensors are often tested using a scan tool that reads live data or signal patterns.
Understanding this difference helps avoid incorrect testing and erroneous results.
Tools
| Tool Name | Why It Is Needed |
|---|---|
| OBD-II Scanner – Basic | This device reads fault codes from the car’s computer and tells you which sensor is causing the problem. This is very helpful for beginners. |
| OBD-II Scanner – Advanced | This helps verify whether the sensors are sending accurate data in real time, leading to more precise diagnoses. |
| Digital Multimeter | It is used to test the power, ground and signal values of the sensor to confirm whether the sensor is functioning correctly. |
| Scan Tool Live Data Feature | This helps in comparing the real sensor readings with normal values and easily identifying faulty or malfunctioning sensors. |
| Manufacturer Service Manual or Specifications | It provides precise sensor values and testing steps, ensuring that the readings are not estimated or misinterpreted. |
| Safety Gloves and Eye Protection | During sensor testing, they protect their hands and eyes from heat, sharp edges and electrical sparks. |
Let’s Learn How to Ensure Safety Before Testing Sensors
Testing a car’s sensors involves working with electrical circuits, moving engine parts and hot components.
Following proper safety precautions protects both the person performing the test and the vehicle’s electronic systems.
Many modern cars have sensitive computers and sensors that can be easily damaged if safety measures are ignored.
Taking a few minutes to prepare properly can prevent injuries, electrical damage and costly repairs.
1. Disconnecting the Battery When Necessary
Disconnecting the car’s battery is crucial when testing wiring, connectors, or sensors that measure resistance.
Removing the negative battery terminal stops the flow of electricity and prevents accidental short circuits or incorrect readings.
This also protects the car’s computer from sudden voltage spikes that can occur if probes or connectors are touched incorrectly.
While some live-data tests require the battery to be connected, many manual sensor tests are safer and more accurate with the battery disconnected.
2. Avoiding Hot Engine Components
Many sensors are located near the engine, exhaust, or radiator, which can remain very hot even after the car is turned off.
Touching these components can cause serious burns and make testing difficult.
Allowing the engine to cool completely before testing improves safety and makes it easier to access the sensors without rushing.
Heat can also affect sensor readings, so testing on a cool engine provides more accurate results.
3. Preventing Electrical Short Circuits
An electrical short circuit occurs when electricity travels along an unintended path, such as when test leads come into contact with exposed metal or damaged wires.
This can blow fuses, damage sensors, or even harm the car’s control modules.
Using insulated tools, keeping metal objects away from connectors and testing one wire at a time helps prevent this problem.
Carefully placing multimeter probes ensures accurate readings without the risk of electrical damage.
4. Handling Connectors and Wiring Correctly
Sensor connectors and wiring are often made of thin plastic and delicate pins that can break easily.
Pulling on the wires instead of the connector, forcing the plug, or bending the pins can cause hidden damage that may lead to sensor malfunctions in the future.
Always gently press the locking tab and firmly grasp the connector when disconnecting or connecting.
Checking the wires for cracks, corrosion, or loose connections before testing helps identify problems without creating new ones.
How to Test Sensors Using an OBD-II Scanner
An OBD-II scanner is one of the most reliable tools for testing car sensors because it communicates directly with the vehicle’s computer.
Almost all cars manufactured after 1996 use the OBD-II system to monitor sensor performance and detect problems.
The scanner collects information from the sensors and control modules, making it possible to diagnose faults without removing parts.
Using the scanner correctly saves time, eliminates guesswork and prevents unnecessary sensor replacements.
1. Connecting the Scanner to the Vehicle
The OBD-II scanner connects to the vehicle via a diagnostic port, usually located under the dashboard near the driver’s seat.
Once plugged in, the scanner draws power from the car and begins communicating with the vehicle’s computer.
Turning the ignition key to the ON position allows the scanner to access stored data from the sensors and control modules.
A secure connection is crucial, as a loose plug can result in incomplete or inaccurate readings.
2. Reading Diagnostic Trouble Codes – DTCs
When a sensor sends data outside its normal limits, the car’s computer stores diagnostic trouble codes.
These codes are in a standard format, such as P0100 or P0301 and each code points to a specific system or sensor area.
Reading these codes helps identify which sensor might be malfunctioning or providing incorrect information.
The codes don’t always mean the sensor is faulty, but they clearly indicate where further testing is needed.
3. Understanding Sensor-Related Fault Codes
Sensor-related fault codes indicate problems such as incorrect voltage, slow response, or no signal.
For example, an oxygen sensor code might indicate a poor sensor response rather than a complete failure.
Understanding what the code actually means can prevent unnecessarily replacing a perfectly good sensor, when the real problem might be wiring, dirt, or a vacuum leak.
Most scanners provide short descriptions that make these codes easier for beginners to understand.
4. Viewing Live Sensor Data
Live data allows the scanner to display real-time readings from the sensors while the engine is running.
This feature is very useful because the values of a properly functioning sensor change readily as driving conditions change.
For example, throttle position, engine temperature and airflow should increase and decrease in a logical manner.
Viewing live data helps identify sensors that are stuck, slow, or sending unrealistic values, which is often a clear indication of a malfunction.
5. Clearing Codes and Retesting
After testing or repairing a sensor, clearing the stored codes resets the system and turns off the warning lights.
This allows the car’s computer to begin monitoring the sensors again from scratch.
Driving the car for a short period after clearing the codes helps confirm whether the problem has actually been fixed.
If the code does not return, it means the sensor or related issue has been successfully resolved.
How to Test Car Sensors with a Multimeter
A digital multimeter is one of the most useful tools for testing car sensors because it allows for direct measurement of electrical values.
Most car sensors operate by changing voltage or resistance based on temperature, pressure, or movement.
Using a multimeter, you can confirm that the sensor is receiving power, sending a signal and responding correctly to changes.
This method helps identify faulty sensors, damaged wiring, or poor connections without relying solely on fault codes.
1. Setting Up the Multimeter Correctly
Before testing any sensor, it’s crucial to set the multimeter to the correct measurement mode.
Voltage testing requires setting the meter to DC volts, while resistance testing requires the ohms setting.
Using the wrong setting can result in inaccurate readings or even damage the meter.
Choosing the correct range, specially on manual meters, ensures accurate results and prevents confusion during testing.
2. Testing Sensor Voltage
Many sensors operate using a reference voltage supplied by the car’s computer, typically around five volts.
Measuring the sensor voltage helps confirm that the sensor is receiving power and sending a signal back to the computer.
A properly functioning sensor will usually show a smooth change in voltage as engine speed, temperature, or throttle position changes.
If the voltage is absent, stuck, or outside the normal range, the sensor or its wiring may be faulty.
3. Testing Resistance – Ohms
Some sensors change resistance rather than voltage as conditions change.
For example, temperature sensors increase or decrease resistance as the engine warms up.
Measuring resistance with the battery disconnected helps verify that the sensor is reacting correctly.
A sensor that shows no change in resistance or an open circuit often indicates an internal fault.
4. Checking for Continuity
Continuity testing checks whether electrical pathways are complete and unbroken.
This test is essential for detecting damaged wires, loose terminals, or broken connectors between the sensor and the car’s computer.
A good continuity reading confirms that electrical current can flow properly.
A lack of continuity usually indicates a wiring fault rather than a faulty sensor.
5. Comparing Readings to Manufacturer Specifications
Every car sensor is designed to operate within specific electrical limits set by the manufacturer.
Comparing the measured voltage or resistance values to the official specifications confirms whether the sensor is functioning correctly.
Relying on guesswork or assumptions can lead to incorrect conclusions.
Using the correct specifications ensures an accurate diagnosis and prevents unnecessary sensor replacements.
How to Test Common Car Sensors – Easy Steps
Some car sensors are more prone to failure than others because they operate in harsh conditions, such as extreme heat, vibration and exposure to dirt or exhaust gases.
Step-by-step testing of these common sensors helps diagnose engine and performance problems quickly and accurately.
Using simple tools like an OBD-II scanner and a multimeter, both novice and experienced users can determine if a sensor is functioning correctly or needs replacement.
1. Oxygen (O2) Sensor Testing
The oxygen sensor measures the amount of oxygen in the exhaust gases and helps the engine adjust the fuel mixture for better fuel efficiency and lower emissions.
A properly functioning oxygen sensor will constantly change its signal as driving conditions change.
When using a scanner to view live data, the sensor should be seen rapidly switching between low and high values after the engine warms up.
A sensor that is slow, stuck, or showing no activity may be faulty or contaminated.
A faulty oxygen sensor often results in poor fuel mileage and illuminates the check engine light.
Read More:
2. Mass Air Flow (MAF) Sensor Testing
The mass air flow sensor measures the amount of air entering the engine so the computer can deliver the correct amount of fuel.
When testing this sensor, the live data should gradually increase as engine speed increases.
A dirty or faulty MAF sensor can provide inaccurate readings, leading to hesitation, stalling, or poor acceleration.
Visual inspection for dirt or oil buildup is also important, as contamination can affect readings even if the sensor is not electrically faulty.
Read More:
3. Throttle Position Sensor (TPS) Testing
The throttle position sensor tells the car’s computer how far the throttle plate is open.
This information helps control acceleration and shifting behavior.
When testing with a scanner or multimeter, gradually opening the throttle should show a smooth and consistent change in the signal.
Sudden spikes, dropouts, or dead spots in the signal indicate a faulty or failing sensor.
TPS problems often result in jerky acceleration or delayed throttle response.
4. Coolant Temperature Sensor (ECT) Testing
The coolant temperature sensor monitors the engine temperature and helps manage the fuel mixture and cooling fan operation.
When the engine is cold, the sensor should show a low temperature reading that gradually increases as the engine warms up.
If the sensor sends incorrect data, the engine may run too rich or too lean.
Testing the resistance or live data confirms whether the sensor is responding correctly to temperature changes.
5. Crankshaft and Camshaft Position Sensor Testing
Crankshaft and camshaft position sensors track engine speed and the precise position of internal engine parts.
These sensors are crucial for correct ignition timing and fuel injection.
A faulty sensor can cause starting difficulties, engine stalling, or a no-start condition.
Live data testing shows whether the sensor is sending a consistent signal when the engine is cranking or running.
No signal or incorrect readings usually indicate a faulty sensor or wiring problem.
6. MAP (Manifold Absolute Pressure) Sensor Testing
The MAP sensor measures the pressure inside the intake manifold and helps determine engine load.
At idle speed, the sensor should show a stable reading, while acceleration should show a clear change.
Incorrect MAP sensor data can lead to poor fuel economy, rough idle and weak engine performance.
Testing with live data or voltage checks confirms that the sensor is responding correctly to changes in engine load.
Now, Let’s Understand Sensor Test Results
Testing a car’s sensors is only beneficial if the results are interpreted correctly.
Many sensors can still provide a signal even when they are weak or failing.
Understanding the readings reveals whether the sensor is functioning correctly, gradually deteriorating, or affected by wiring or connection problems.
Correct interpretation prevents unnecessary sensor replacements and helps pinpoint the root cause of the problem.
1. What Normal Readings Look Like
Normal sensor readings typically change smoothly and logically based on engine speed, temperature, or driving conditions.
For example, temperature readings should gradually increase as the engine warms up and airflow readings should increase as the throttle opens.
Voltage or data values that follow a natural pattern usually indicate a healthy sensor.
Consistent and predictable behavior is the strongest indicator that a sensor is functioning correctly.
2. Signs of a Weak or Failing Sensor
A weak or failing sensor may still provide readings, but these readings are often sluggish, inaccurate, or delayed.
The sensor may react slowly to changes, provide incorrect values, or cause intermittent performance issues.
These early warning signs often appear before the check engine light illuminates.
Early detection of a weak sensor helps prevent sudden breakdowns and poor vehicle performance.
3. When Readings Fluctuate or Remain Fixed
Sensor readings that fluctuate erratically, drop out, or remain stuck at a single value usually indicate a problem.
Fluctuating readings can be caused by internal sensor damage, contamination, or loose electrical connections.
Readings that remain fixed often mean the sensor is no longer responding to changes.
Both situations require further investigation before driving the vehicle.
4. Differentiating Between Sensor Failure and Wiring Problems
Not all sensor problems are caused by a faulty sensor.
Damaged wires, loose connectors, corrosion, or poor grounding can interrupt the signal and mimic a sensor failure.
A sensor that tests correctly but shows faulty data via a scanner may actually be affected by wiring issues.
Checking the power supply, ground and continuity helps determine whether the fault lies with the sensor or the wiring.
This step can prevent replacing sensors that are still functioning correctly.
Now, Learn How to Perform Inspection of Connector & Wiring the Sensor
Sensor problems aren’t always caused by the sensor itself.
Many malfunctions stem from faulty wiring, loose connectors, or poor grounding.
Inspecting the wiring and connectors is a crucial step before replacing any sensor.
Proper inspection ensures that the signal from the sensor reaches the car’s computer correctly, preventing unnecessary parts replacements and saving both time and money.
1. Checking for Damaged Wires
The wires leading to the sensor can become frayed, pinched, or broken due to heat, vibration, or accidental contact with sharp metal edges.
Damaged wires can interrupt the electrical signal, leading to inaccurate sensor readings or triggering warning lights.
Carefully inspecting each wire from the sensor to its connection point and looking for visible cuts, cracks, or melted insulation can reveal problems.
Even minor damage can affect sensor performance and should be repaired before retesting the sensor.
2. Identifying Corrosion in Connectors
Connectors can degrade over time, specially in areas exposed to moisture, salt, or dirt.
Corrosion prevents proper electrical contact and reduces the voltage reaching the sensor.
Symptoms of corrosion in connectors include fluctuating sensor readings or intermittent system malfunctions.
Disconnecting the connector and checking for green or white deposits on the metal pins reveals corrosion.
Cleaning or replacing corroroded connectors restores reliable connections and improves sensor operation.
3. Testing Ground and Reference Voltage
Sensors rely on a stable ground and reference voltage to provide accurate readings.
If the ground wire is weak or the reference voltage fluctuates, the sensor may display incorrect values, even if it is functioning correctly.
Using a multimeter to measure the voltage between the sensor power wire and ground, or checking the continuity of the ground connection, verifies that the sensor is receiving the correct power.
Ensuring the correct voltage prevents misdiagnosis of sensor malfunctions.
4. Deciding Between Repair and Replacement
After inspecting the wiring and connectors, it’s crucial to determine whether a repair is sufficient or if the sensor needs to be replaced.
If the wires and connectors are intact and the readings are still incorrect, the sensor may be faulty and require replacement.
However, if faulty wiring, loose connectors, or corrosion are found, repairing or replacing the wiring may resolve the problem without needing to replace the sensor.
Making the right decision saves money and ensures the long-term reliability of the vehicle’s electronic system.
So, When It Becomes Important to Replace Car Sensors
Car sensors should only be replaced after proper testing and inspection.
Many sensors can degrade gradually, leading to intermittent or inaccurate readings that affect engine performance, safety and fuel efficiency.
Understanding when replacement is necessary helps avoid unnecessary expenses, prevents further damage to the vehicle and ensures the car continues to operate reliably.
Even, there’s research that shows that the automotive sensors are engineered to work perfectly under the extreme environmental stresses that includes: wide temperatures ranges from –40°C to 150°C and heavy vibrations as well, basically these sensors are truly essential for functions such as: air flow measurement, pressure monitoring and oxygen detection as well; which all of these provide necessary data to have great engine performance and fuel economy as well, which is why the durability and accuracy over the long service life are really important so that it can able to maintain the vehicle efficiency and safety under the everyday driving conditions.[¹]
1. Symptoms of a Faulty Sensor
A faulty sensor often manifests clear signs in the car’s performance.
Common symptoms include a persistent check engine light, rough idling, hesitation during acceleration, poor fuel economy, engine stalling, or inaccurate readings on the dashboard.
For safety-related sensors, such as those for ABS or airbags, warning lights may illuminate or critical systems may be disabled.
If testing confirms that the sensor is not sending correct data despite proper wiring and power, it’s usually time for replacement.
Replacing a sensor at the right time prevents minor issues from escalating into major repairs.
Read More:
2. Cost Comparison: Testing vs Replacement
Testing a sensor is typically inexpensive and requires only basic tools like a multimeter or an OBD-II scanner.
However, replacing a sensor can be more costly, specially if the part is original or specialized.
Performing proper tests before replacement ensures that only truly faulty sensors are replaced, saving money.
In many cases, spending a few minutes on testing can prevent unnecessary purchases and reduce the risk of replacing perfectly functional components.
3. OEM vs Aftermarket Sensors
Original Equipment Manufacturer (OEM) sensors are made by the car manufacturer and typically guarantee precise compatibility and longevity.
Aftermarket sensors are often cheaper and more readily available, but their quality and performance can vary.
The choice between OEM and aftermarket parts depends on budget, vehicle age and the importance of accurate sensor readings.
Critical sensors, such as oxygen, MAF, or crankshaft position sensors, often perform best when replaced with OEM parts to ensure proper engine function.
4. Resetting the ECU After Replacement
After replacing a sensor, the car’s computer, known as the Engine Control Unit (ECU), may retain old fault codes.
Resetting or clearing the ECU allows the system to begin monitoring the new sensor from scratch.
This step ensures accurate readings, prevents false warning lights and helps the vehicle adapt to the new sensor.
The ECU can be reset using an OBD-II scanner or by following the manufacturer’s specific procedures for the car model.
Understand, Some Common Mistakes to Avoid When Testing Sensors
Paying attention to detail is crucial when testing car sensors.
Several mistakes can lead to incorrect readings, unnecessary parts replacements, or even damage to the vehicle’s electronic system.
Understanding these common errors allows both novice and experienced users to perform tests more accurately and safely, saving both time and money.
1. Misinterpreting Multimeter Readings
A very common mistake is misinterpreting the readings on a multimeter.
Using incorrect settings, such as measuring voltage in resistance mode or selecting the wrong range, can yield inaccurate results.
Even correct readings can be misinterpreted if the tester doesn’t know what values are normal for a particular sensor.
Taking the time to properly read the meter and understand what each number represents can prevent misdiagnosis and unnecessary parts replacements.
2. Ignoring Manufacturer Specifications
Every sensor has specific voltage, resistance and response ranges defined by the vehicle manufacturer.
Ignoring these specifications and comparing readings to generic or assumed values can lead to incorrect conclusions.
A sensor that appears “abnormal” based on assumptions might actually be functioning correctly within its specified limits.
Always consulting the manufacturer’s service manual ensures accurate testing and correct interpretation of results.
3. Testing Sensors Without Checking Power Supply
Many testers forget to verify that the sensor is receiving the correct reference voltage and ground before testing.
A sensor receiving insufficient power or a weak ground will produce inaccurate readings, even if it is otherwise functioning correctly.
Checking the power and ground first ensures that any faulty readings are actually due to the sensor itself, not an electrical supply issue.
This step prevents unnecessary parts replacements and helps identify wiring problems.
4. Replacing Sensors Without Proper Diagnosis
Replacing sensors without proper testing is one of the most expensive mistakes you can make.
Many sensor problems are not caused by the sensor itself, but rather by faulty wiring, loose connectors, or a malfunctioning computer.
Replacing a sensor without confirming the fault may not solve the problem and can lead to wasted money.
Proper diagnosis using tools such as a multimeter or an OBD-II scanner ensures that only truly defective sensors are replaced, resulting in improved efficiency and reliability.
What Can Be Differences Between the Self-Testing vs Professional Diagnosis
In many cases, car sensors can be tested at home, but not all sensors or problems are safe or easy for beginners to handle.
Knowing what can be safely tested and when to call a professional helps prevent accidents, vehicle damage and unnecessary expenses.
Understanding the differences between DIY and professional diagnosis ensures that sensor problems are correctly identified and resolved.
1. What Beginners Can Safely Test
Beginners can safely test sensors that are easily accessible and don’t require specialized tools or extensive knowledge.
For example, checking an oxygen sensor with an OBD-II scanner, testing a temperature sensor with a multimeter, or inspecting visible wiring and connectors are all straightforward tasks.
These simple tests help identify clear problems without damaging delicate components.
Observing symptoms like dashboard warning lights or unusual behavior, combined with basic testing, can resolve many minor sensor issues at home.
2. Sensors That Should Be Left to Professionals
Some sensors are difficult to access, require specialized tools, or involve critical safety systems.
For example, crankshaft and camshaft position sensors, airbag sensors, ABS wheel speed sensors, or complex emissions sensors are best left to trained mechanics.
Professionals have the correct diagnostic equipment, manufacturer software and experience to safely take accurate measurements.
Attempting to test these sensors without the proper knowledge can lead to incorrect readings, vehicle damage, or even injury.
3. Cost and Accuracy Comparison
DIY testing is typically less expensive as it only requires basic tools like a multimeter or a standard OBD-II scanner.
Professional diagnostics are more costly but offer greater accuracy, specially for complex systems.
While beginners can fix minor problems at home, professionals can perform in-depth testing that identifies hidden wiring issues, intermittent malfunctions, or subtle sensor defects that might easily be overlooked.
Choosing the right approach depends on the type of sensor, the symptoms and the owner’s confidence with testing tools.
4. When is a mechanic recommended?
A mechanic is recommended whenever a sensor affects critical systems such as engine timing, brakes, airbags, or fuel delivery.
Professional help is also necessary if multiple sensors fail simultaneously, if the vehicle displays complex warning codes, or if previous DIY troubleshooting attempts have failed to resolve the problem.
In such cases, obtaining expert diagnostics ensures proper repairs, prevents further damage and maintains the car’s safety and reliability.
Conclusion – How to Test Car Sensors
Now, its been crystal clear that even the most powerful engine can run in the poor way if its sensors fail to give correct data, so that shows the how important it is to ensure the ideal working of the sensors.
Basically, sensors act like the eyes and ears of a modern car, constantly monitoring everything from engine temperature and air intake to braking and emissions.
And, if you ignore the faulty sensors then it can lead to poor fuel economy, reduced engine performance, unnecessary repairs, or even safety risks.
By using simple tools such as: multimeter and an OBD-II scanner and following a clear testing process, most sensor problems can be accurately diagnosed at home.
Also, you need to understand the readings, checking the wiring and connectors and deciding between repair or replacement ensures your car runs smoothly and avoids preventable issues.
So, that’s it from this guide and you can comment below for more information.
Frequently Asked Questions
Q1. What is a car sensor and why is it important?
Answer: A car sensor is a small device that monitors various parts of your vehicle and sends information to the car’s computer. These sensors help control engine performance, fuel efficiency, safety systems and comfort features. Without sensors, the car cannot properly adjust itself, leading to poor performance, increased fuel consumption, or even safety hazards. Testing the sensors ensures they are functioning correctly so the car can operate smoothly and safely.
Q2. How do I know if a car sensor is failing?
Answer: Signs of a failing sensor include the check engine light illuminating, poor fuel efficiency, rough idling, engine stalling, hesitation during acceleration, or warning lights for ABS or airbags. Some sensors degrade gradually, giving inaccurate readings without immediate warning, while others fail completely. Testing the sensor using an OBD-II scanner or multimeter can determine if the sensor is faulty or if the problem lies elsewhere.
Q3. Can I test car sensors myself at home?
Answer: Yes, many sensors can be safely tested at home using basic tools like a digital multimeter and an OBD-II scanner. Easily testable sensors include oxygen sensors, coolant temperature sensors, throttle position sensors and those with visible wiring and connectors. However, sensors that are difficult to access, are part of safety systems, or require specialized equipment should be left to professionals. Proper testing at home can save money and prevent unnecessary sensor replacements.
Q4. What tools will I need to test car sensors?
Answer: Essential tools include an OBD-II scanner for reading fault codes and live data, a digital multimeter for measuring voltage, resistance and continuity and access to the car’s service manual for manufacturer specifications. Safety gloves and eye protection are also recommended when working near hot or moving parts. Using the correct tools ensures accurate testing and protects both you and the car’s electronics.
Q5. Should I replace a sensor as soon as I get a fault code?
Answer: Not always. A fault code indicates that the sensor is giving an incorrect reading, but the cause could be faulty wiring, loose connectors, or a temporary issue rather than the sensor itself. Thorough testing of the sensor, wiring and connectors is crucial before replacement. The sensor should only be replaced if it is confirmed to be faulty, avoiding unnecessary expense and ensuring the real problem is addressed.
Q6. What is the difference between analog and digital sensors?
Answer: Analog sensors send a continuous signal that changes gradually based on conditions like temperature or pressure. Digital sensors send signals in an on/off pattern or precise pulses. Analog sensors are often tested with voltage or resistance measurements, while digital sensors are typically monitored using live data from an OBD-II scanner. Knowing the type of sensor helps you use the correct testing method.
Q7. How often should I test my car’s sensors?
Answer: There’s no fixed schedule, but it’s a good idea to check the sensors if you notice symptoms like warning lights, poor performance, or unusual behavior. Routine checks can also be done during regular maintenance or before long trips. Preventive testing helps detect minor issues early, reducing repair costs and ensuring the vehicle remains safe and efficient.
Q8. Can a faulty sensor damage my car?
Answer: Yes, a faulty sensor can cause engine misfires, poor fuel economy, overheating, or even damage components like the catalytic converter or brakes. Safety-related sensors, such as ABS or airbag sensors, if malfunctioning, can increase the risk of accidents. Prompt testing and repair of sensors protect your car from damage and ensure that safety systems function correctly.
References:
[1] New technology of sensors for automotive applications
https://www.sciencedirect.com/science/article/abs/pii/0250687486800452

Guys, I’m a car audio enthusiast and customization expert and I love clear sound and clean installation. Plus, I have spent years helping people build their dream audio setups. And whenever I’m working on cars, I probably listen to music and thinks about the next big upgrade.
