Written By: Don Dodi
Fact Checked By: Kristen Brown
Reviewed By: Diego Rosenberg
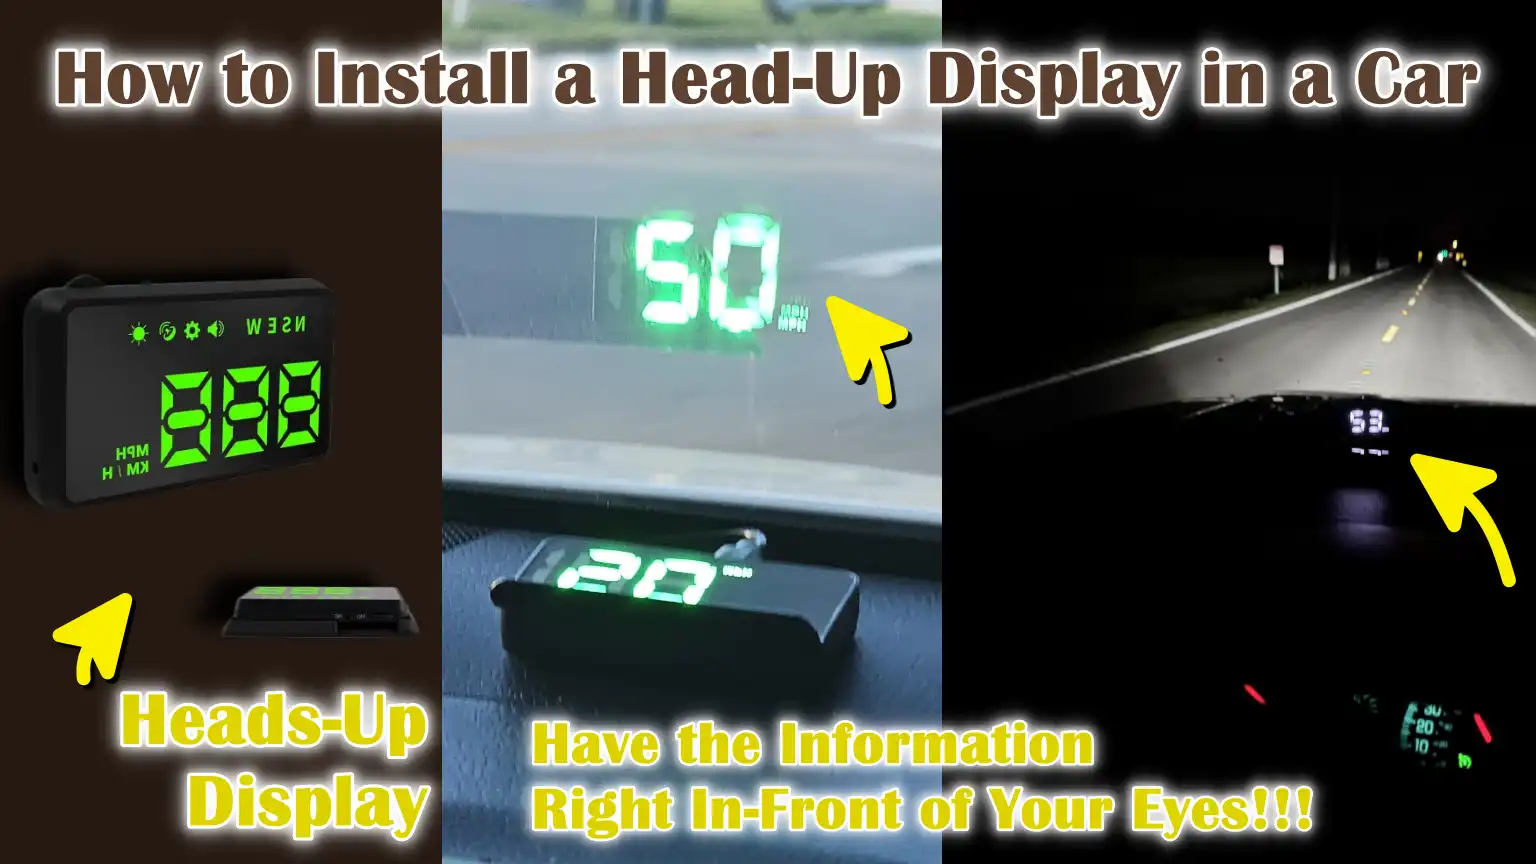
Yes, the head-up display actually helps the drivers to see the important car informations such as: speed, navigation directions, RPM and warning alerts as well.
So, with the help of head-up display you can directly see those things into the your’s line of sight, that usually shown on the windshield or a small transparent screen.
Along with this, the idea behind the HUD technology first comes from the aviation, where pilots actually have used it for decades to read the important data without looking down there.
As well as, in the cars, HUDs also helps the drivers to keep their eyes on the road, which reduces the distration and improves the reaction time as well.
Now, this is the guide that shows How to Install a Head-Up Display in a Car, so that you can improve the driving awareness, enhance the safety and make your driving more comfortable than ever.
What are the Types of Head-Up Displays for Cars
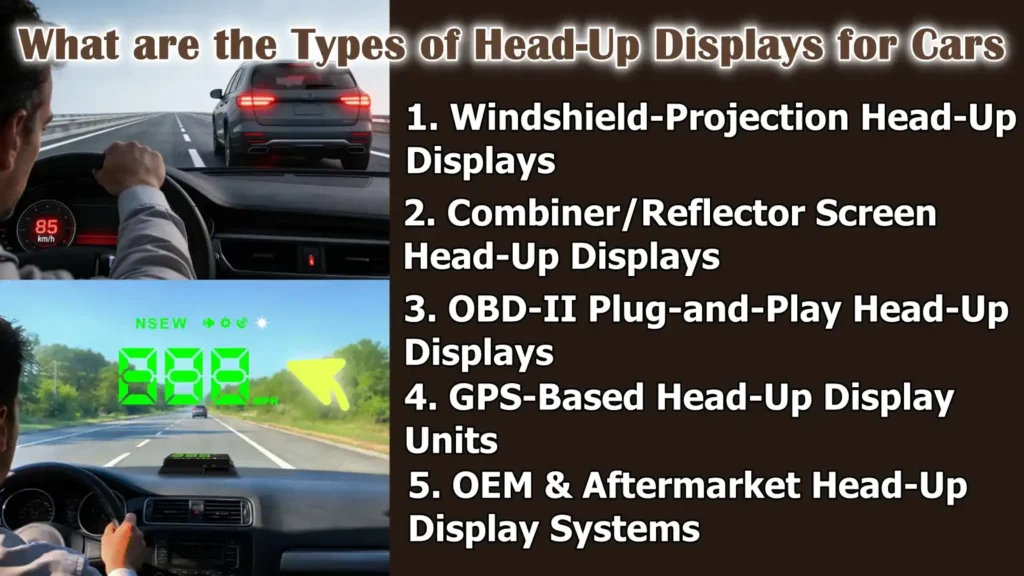
1. Windshield-Projection Head-Up Displays
Windshield-projection head-up displays project driving information directly onto the car’s windshield, making the data appear to float just above the hood.
These systems work best on clear, lightly tinted glass and often utilize a thin reflective film to improve clarity and reduce double images.
Because the information is projected directly ahead, drivers can read their speed or alerts without taking their eyes off the road.
This type of HUD is commonly found in factory-installed systems and high-quality aftermarket units, as it provides the most natural and comfortable viewing experience during both day and night driving.
2. Combiner/Reflector Screen Head-Up Displays
Combiner head-up displays use a small transparent screen that pops up or is mounted on the dashboard in front of the driver.
Instead of projecting onto the windshield, the image is reflected onto this dedicated screen, which helps create a sharper and more consistent display in all lighting conditions.
Combiner HUDs are particularly useful in cars with heavily tinted or curved windshields, where projection clarity might be compromised.
They are easier to install, require no film on the windshield and are a popular option for drivers who want clear visibility with minimal setup.
3. OBD-II Plug-and-Play Head-Up Displays
OBD-II plug-and-play head-up displays connect directly to the vehicle’s OBD-II diagnostic port, which is standard in most cars manufactured after 1996.
These HUDs read real-time data from the car’s computer, including speed, engine RPM, coolant temperature and voltage.
Because the data comes directly from the vehicle, it is typically more accurate than GPS-based systems.
Installation is easy, requires no wiring modifications and is typically completed in just a few minutes, making this type ideal for beginners and everyday drivers.
4. GPS-Based Head-Up Display Units
GPS-based head-up displays rely on satellite signals rather than the car’s internal systems to display information such as vehicle speed and direction.
These HUDs work in almost any vehicle, including older models that don’t support OBD-II connections.
While GPS HUDs are easy to install and portable, they may experience slight delays or inaccuracies in areas with poor signal reception, such as tunnels or densely populated urban areas.
They are best suited for drivers who simply want a speed display without detailed engine data.
5. OEM & Aftermarket Head-Up Display Systems
OEM head-up displays are factory-installed by the vehicle manufacturer and are fully integrated with the car’s design, electronics and safety systems.
They often display advanced information such as navigation prompts, driver assistance alerts and traffic signs.
Aftermarket HUD systems, on the other hand, are installed after purchase and primarily focus on essential driving data such as speed and warnings.
While OEM HUDs offer superior integration and a cleaner look, aftermarket options are more affordable, easier to install and compatible with a wider range of vehicles, making them a practical choice for most drivers.
Understand, About the Benefits of Installing a Head-Up Display
1. Improved Driving Safety and Reduced Distraction
Head-up displays (HUDs) help improve driving safety by allowing drivers to view essential information without taking their eyes off the road.
When speed, warnings, or alerts are displayed directly in the driver’s line of sight, the need to look down at the dashboard is reduced.
This helps drivers stay focused on the traffic ahead, pedestrians and road conditions.
Studies on driving behavior have shown that even momentary glances away from the road can increase reaction time and HUDs help minimize these moments by keeping crucial information in their field of vision.
2. Real-Time Speed and Vehicle Data Visibility
One of the biggest advantages of a head-up display is its ability to clearly and instantly display real-time vehicle information.
Most HUDs display speed data directly from the vehicle’s onboard system or GPS, giving drivers accurate information about their speed at all times.
Some systems also display engine RPM, battery voltage, coolant temperature and warning alerts.
This constant visibility helps drivers detect problems quickly and react before they become serious.
3. Enhanced Driving Experience at Night and on Highways
Driving at night or for long distances on highways can be tiring, specially with constantly changing lighting conditions.
Head-up displays improve comfort by displaying bright, easy-to-read information that adjusts to varying light conditions.
At night, HUDs reduce the need to look down at illuminated gauges, minimizing eye strain.
On highways, where maintaining a consistent speed is crucial, a HUD allows drivers to easily monitor and be aware of their speed without interruption during long drives.
4. Enhanced Vehicle Technology and Aesthetics
Installing a head-up display gives the vehicle’s interior a modern and sophisticated look.
A floating digital display on the windshield or combiner screen gives the car a high-tech look, reminiscent of a new, premium model.
Beyond aesthetics, this technology improves the way information is presented, making it clearer and easier to read.
Many drivers appreciate this upgrade because it enhances both functionality and the overall driving experience without requiring permanent modifications to the vehicle.
5. Speed Limit Compliance and Driving Awareness
Head-up displays help drivers stay more aware of speed limits and their driving behavior.
When the speed is constantly visible to the driver, it becomes easier to avoid unintentional speeding.
Some HUDs also include overspeed warnings that alert the driver when the set limit is exceeded.
This constant awareness promotes better driving habits, reduces the risk of traffic violations and contributes to safer driving in both city and highway conditions.
Tools
| Tool or Material | What It Is and Why It Is Needed |
|---|---|
| Head-Up Display Unit – HUD | This is the main device that displays speed and driving information in front of the driver. It connects to the car and projects clear data so the driver can see it without looking down. |
| OBD-II Cable or Power Wiring Harness | This cable supplies power to the HUD and transmits vehicle data to it. In most cars, it plugs into the OBD-II port under the dashboard and requires no cutting or splicing of wires. |
| Reflective Film or Combiner Screen | These surfaces help make the displayed image sharp and easy to read. The reflective film adheres to the windshield, while a combiner screen is mounted on the dashboard in front of the driver. |
| Microfiber Cloth and Cleaning Solution | These are used to clean the windshield or screen before installation. A clean surface prevents blurry images and helps the film or screen adhere properly. |
| Trim Removal Tools – If Required | These tools help gently remove dashboard panels so the cable can be safely hide out. They minimize the risk of scratching or damaging the car’s interior. |
| Electrical Tape or Cable Clips | These are used to secure loose wires and keep them in place. Properly securing the cables improves safety and makes the installation look neat and professional. |
How to Do Preparation Before Installation
1. Checking Vehicle Compatibility with the HUD System
Before installing a head-up display, it’s crucial to ensure your vehicle is compatible with the type of HUD you plan to use.
Most aftermarket HUDs work with cars manufactured after 1996 because these vehicles have an OBD-II diagnostic system that provides real-time data.
Some older vehicles may still support GPS-based HUDs, but they won’t display engine-related information.
Checking compatibility beforehand helps avoid display errors, inaccurate readings, or power issues after installation.
2. Locating the OBD-II Port or Power Source
Finding the correct power source is a vital preparation step.
In most vehicles, the OBD-II port is located under the dashboard near the steering wheel or center console.
This port provides both power and vehicle data to the HUD.
If the HUD uses a USB or cigarette lighter connection, locating a nearby and stable power outlet is necessary.
Knowing the power source location in advance facilitates faster installation and neater cable management.
3. Choosing the Optimal Location on the Dashboard
Proper placement of the head-up display ensures the driver has a clear, unobstructed view of the road.
The HUD should be positioned directly in front of the driver, centered behind the steering wheel and at a height where the projected image appears just above the hood line.
Placing it too high or too low can make the display difficult to read or cause distractions.
Correct placement enhances comfort and allows the driver to naturally read the information while driving.
4. Cleaning the Windshield or Combiner Surface
A clean surface is essential for a clear and sharp display.
Dust, grease, or fingerprints on the windshield or combiner screen can result in blurry or double images.
Cleaning the area with a microfiber cloth and a mild glass cleaner removes dirt and ensures that the reflective film or screen adheres properly.
Proper cleaning also extends the lifespan of the installation and maintains image clarity over time.
5. Reading the HUD Manufacturer’s Instructions
Reading the manufacturer’s instructions before beginning the installation helps avoid mistakes and saves time.
Each HUD model may have different setup procedures, calibration methods and safety warnings.
Understanding these instructions ensures correct wiring, proper display settings and accurate readings.
Following the provided guidelines also helps maintain warranty coverage and ensures that the HUD functions as designed.
How to Install a Head-Up Display in a Car – Clear Steps
1. Connecting the HUD Power Source
Plugging into the OBD-II Port
Most aftermarket head-up displays draw power and vehicle data from the OBD-II port, which is typically located under the dashboard near the steering wheel.
Connecting the HUD to this port allows it to directly read real-time information from the car’s computer, such as speed, engine RPM and system warnings.
This connection is safe and does not harm the vehicle, as the OBD-II port is designed for diagnostic devices.
Once properly plugged in, the HUD should automatically turn on when the engine is started.
Using USB or Cigarette Lighter Power
Some HUD models use a USB cable or cigarette lighter socket for power instead of the OBD-II port.
These systems are usually GPS-based and primarily display speed and direction.
When using this power option, it’s important to ensure the connection is stable so the HUD doesn’t shut off while driving.
Choosing a power outlet near the dashboard also keeps the cables shorter and prevents excessive wiring clutter inside the vehicle.
2. Mounting the HUD Unit
Positioning for Optimal Visibility
Correct positioning of the HUD unit is crucial for clear and comfortable viewing.
The device should be placed directly in front of the driver, centered behind the steering wheel, so that the projected image appears naturally within the driver’s line of sight.
The display should be low enough not to obstruct the view of the road, but high enough to be read without looking down.
Testing the position before final placement helps in finding the best viewing angle.
Securing the HUD to the Dashboard
Once the ideal position is determined, the HUD should be securely attached to the dashboard using the provided adhesive pad or mounting base.
A stable mount prevents the device from shifting during braking or while driving on uneven roads.
Ensuring the dashboard surface is clean and dry allows the adhesive to work effectively and keeps the HUD stable during prolonged use.
3. Applying the Reflective Film or Combiner
Aligning the Film on the Windshield
For windshield-projection HUDs, a reflective film is applied to enhance image brightness and minimize double reflections.
The film should be applied directly in the projection path, aligned straight and level with the HUD unit.
Correct alignment ensures that the displayed information appears sharp, centered and easy to read while driving.
Removing Air Bubbles and Ensuring Clarity
After applying the reflective film, gently pressing it from the center outwards removes any trapped air bubbles.
Any bubbles or dust particles can distort the image and reduce clarity.
Performing this step carefully results in a clean, clear display and improves visibility in both daytime and nighttime conditions.
4. Routing and Hiding the Cables
Securing the Wires Along the Edges of the Dashboard
To keep the car’s interior neat and organized, the HUD cables should be securely routed along the existing edges and panels of the dashboard.
This keeps the wires out of sight and prevents them from interfering with the pedals or steering components.
Properly securing the cables also prevents them from chafing and getting accidentally snagged.
Avoiding Interference with Airbags or Controls
It is crucial that the HUD cables are not routed near airbags, the steering system, or any moving controls.
Keeping the wires away from these areas ensures that safety systems function correctly in an emergency.
Carefully routing the cables improves safety and gives the installation a professional and secure look.
How to Do HUD Calibration and Settings Adjustment
1. Setting the Correct Speed Unit – km/h or mph
After installing the head-up display, the first and most crucial adjustment is setting the correct speed unit.
Most HUDs allow users to choose between kilometers per hour and miles per hour, based on the driving standards of their region.
Selecting the correct unit ensures that the displayed speed matches road signs and local speed limits.
This step is simple yet essential, as using the wrong unit can lead to confusion and unintentional speeding.
2. Adjusting Brightness and Display Angle
Proper brightness and display angle settings improve readability and reduce eye strain.
An overly bright HUD can be distracting at night, while a dim one may be difficult to see in daylight.
Many HUDs automatically adjust brightness based on ambient light, but manual fine-tuning often yields better results.
Adjusting the display angle ensures that the projected image is straight and clear in the driver’s line of sight, without any distortion or reflection issues.
3. Calibrating Speed Accuracy
Speed calibration helps ensure that the HUD displays the vehicle’s accurate speed.
OBD-II-based HUDs typically provide accurate readings as they receive data directly from the car’s computer.
However, some models may require manual calibration to match the car’s speedometer, specially GPS-based HUDs.
Proper calibration increases confidence in the displayed information and helps drivers rely on the HUD during everyday driving.
4. Configuring Alerts – Overspeed, RPM, Voltage
Many head-up displays include alert settings that notify the driver when certain limits are exceeded.
Overspeed alerts warn the driver when the vehicle exceeds a predetermined speed, promoting safer driving habits.
RPM alerts help protect the engine from over-revving, which is specially useful in vehicles with manual transmissions.
Voltage alerts inform the driver about battery or electrical system problems, allowing for early detection of potential issues and reducing the risk of unexpected breakdowns.
How to Test the Head-Up Display
1. Verifying Real-Time Speed Readings
After the Head-Up Display (HUD) is installed and calibrated, testing the speed readings is crucial to confirm accuracy.
The displayed speed should closely match the vehicle’s speedometer at various speeds.
For OBD-II-based HUDs, this data comes directly from the car’s computer and is typically very accurate.
For GPS-based HUDs, testing in open areas with a clear signal helps confirm stable and accurate speed readings.
2. Checking Visibility in Day and Night Conditions
Testing the HUD in both daytime and nighttime conditions ensures the display remains clear at all times.
During the day, the information should be bright enough to be visible even in direct sunlight.
At night, the display should be subtle and comfortable, avoiding glare or eye strain.
Adjusting the brightness settings during this testing helps achieve balanced visibility for all driving conditions.
3. Ensuring a Stable Power Connection
A stable power connection is essential for consistent HUD performance.
During testing, the display should remain on without flickering, resetting, or turning off while the vehicle is in operation.
Loose connections can cause the HUD to shut down unexpectedly, specially when driving on bumpy roads.
Confirming stable power ensures reliable operation and prevents distractions while driving.
4. Verifying Proper Functioning of Alerts and Warnings
The final step in testing is to verify that all alerts and warnings are functioning as expected.
The overspeed warning should activate when the set speed limit is exceeded and engine or voltage alerts should respond correctly to changes in vehicle conditions.
Properly functioning alerts help drivers stay informed and react quickly to potential problems, improving overall safety and driving confidence.
What are the Common Installation Problems and Their Solutions of HUDs
1. HUD Not Turning On
One of the most common problems after installation is the head-up display failing to turn on.
This is usually due to a loose power connection or an incorrect power source.
If the HUD is connected to the OBD-II port, the plug must be fully inserted and the vehicle’s ignition must be on.
For USB or cigarette lighter-powered HUDs, the power outlet must be active.
Checking these basic things often resolves the issue quickly and avoids unnecessary troubleshooting.
2. Inaccurate or Fluctuating Speed Readings
Fluctuating or inaccurate speed readings can confuse the driver and reduce confidence in the HUD.
This problem often occurs in GPS-based HUDs due to a poor GPS signal or calibration errors in the OBD-II system.
Driving in open areas improves GPS accuracy, while recalibrating the HUD settings aligns the display with the vehicle’s speedometer.
Ensuring the correct setup provides stable and reliable speed readings.
3. Blurry or Double Image on the Windshield
Blurry or double images typically occur when the reflective film is not properly aligned or the windshield surface is dirty.
Uneven application of the film can cause reflections to overlap, making the display difficult to read.
Thoroughly cleaning the windshield and realigning the reflective film improves image clarity.
In some cases, adjusting the display angle can also help reduce ghosting.
4. Display Too Dim or Too Bright
A display that is too dim can be difficult to see in daylight, while one that is too bright can cause glare at night.
This problem is usually resolved by manually adjusting the brightness settings or enabling automatic brightness control if available.
The correct brightness levels enhance comfort and make the HUD usable in all lighting conditions without distracting the driver.
5. Compatibility Issues with Certain Car Models
Some head-up displays may not work correctly with certain car models due to differences in electronic systems or data protocols.
This is more common in older vehicles or some hybrid and electric cars.
Checking the HUD manufacturer’s compatibility list before installation helps avoid this problem.
If compatibility issues arise, switching to a GPS-based HUD is often a reliable solution.
What are the Safety and Legal Considerations
Even, there’s scientific research that shows that the head-up displays (HUDs) actually provides the driving informations such as: speed and engine conditions in the driver’s forward view, that actually allows the drivers to stay in focus on the road and improves their perception of the key information as well, but you need to make sure to have the perfect brightness level, information amount, size and position of this, as it affects the visual perception and safe driving behavior as well.[¹]
1. Windshield Visibility and Obstruction Laws
In many jurisdictions, safety laws explicitly state that a driver’s windshield must be free of obstructions that impede the view of the road.
Head-up displays should never cover a significant portion of the windshield or obstruct the driver’s ability to see pedestrians, traffic signals, or road signs.
Most aftermarket HUDs are designed to display information in a small, transparent area to comply with these regulations, but proper placement is still the driver’s responsibility.
Adhering to visibility laws helps avoid fines and ensures safer driving conditions.
2. Proper HUD Placement for Driver Safety
Proper placement of a head-up display is crucial for safety.
The display should appear just above the vehicle’s hood line and directly in the driver’s normal line of sight.
If placed too high or in bright light, it can be distracting or obstruct vision.
If placed too low, it may require the driver to look down.
Correct placement allows the driver to naturally read the information while maintaining full attention on the road ahead.
3. Avoiding Distractions While Driving
While HUDs are designed to minimize distractions, improper use can have the opposite effect.
Displaying too much information, using bright colors, or enabling unnecessary alerts can distract from driving.
Keeping the display simple and limiting it to essential data such as speed and warnings helps maintain focus.
A well-configured HUD contributes to safer driving by reducing eye movement and cognitive load.
4. Local Regulations Regarding Aftermarket Displays
Laws regarding aftermarket electronic displays can vary by country, state, or region.
In some places, the use of bright or moving images on the windshield is prohibited, while in others, the display must be non-reflective and transparent.
Checking local vehicle regulations before installing a HUD ensures compliance with legal requirements.
Adhering to these regulations helps drivers avoid fines and ensures that the vehicle remains legal and safe to operate on the road.
How to Maintain Head-Up Display in a Car
1. Cleaning the HUD Lens and Windshield Area
Regular cleaning keeps the head-up display clear and easy to read.
Dust, fingerprints and road grime can accumulate on the HUD lens and windshield, leading to blurry or faded images.
Using a soft microfiber cloth and a mild glass cleaner prevents scratches and protects the display surface.
Keeping these areas clean ensures clear visibility and consistent display quality during both daytime and nighttime driving.
2. Preventing Overheating and Sun Damage
Head-up displays can be susceptible to heat damage, specially when the car is parked in direct sunlight.
High temperatures can affect the internal electronics and reduce the display’s lifespan over time.
Parking in shaded areas, using a windshield sunshade, or slightly reducing brightness settings in hot weather can prevent overheating.
Proper heat management protects the HUD and ensures reliable performance for longer.
3. Firmware or Software Updates
Some modern HUDs support firmware or software updates that improve performance, accuracy, or compatibility.
These updates can fix bugs, enhance display stability, or add new features.
Regularly checking the manufacturer’s website or user guide ensures that the HUD is running on the latest version.
Keeping the software updated helps maintain accuracy and smooth operation.
4. Periodic Calibration Checks
Over time, changes in vehicle settings or software can slightly affect the HUD’s accuracy.
Periodic calibration checks ensure that speed readings and alerts remain precise.
Comparing the HUD readings to the vehicle’s speedometer and adjusting settings as needed maintains confidence in the displayed information.
Regular calibration contributes to safer driving and consistent performance.
Read More:
When You Should Go to The Professional Installation
1. Complex Wiring or Hard-Wired HUD Systems
Professional installation is recommended when the head-up display requires hard wiring into the vehicle’s electrical system.
Some advanced HUDs require direct connections to the fuse box or ignition wiring to function correctly.
Incorrect wiring can lead to electrical faults or damage to vehicle components.
A trained installer ensures secure connections, proper grounding and a reliable power supply, minimizing the risk of long-term problems.
2. Luxury or High-End Vehicles
Luxury and high-end vehicles often have complex dashboards, sensitive electronics and advanced safety systems.
Installing a HUD in these vehicles requires careful handling to avoid damaging trim, sensors, or airbag systems.
Professional installers understand the design of these vehicles and use the correct tools to protect interior surfaces.
Choosing expert installation preserves the vehicle’s value and ensures the HUD integrates seamlessly with existing systems.
3. Persistent Calibration or Compatibility Issues
If the head-up display shows inaccurate readings or malfunctions after multiple setup attempts, professional assistance can save time and frustration.
Compatibility issues can arise due to differences in vehicle software or electronic limitations.
Professionals can quickly diagnose these problems, adjust settings correctly, or recommend suitable alternatives.
This ensures the HUD functions properly and provides reliable information during everyday driving.
Conclusion – How to Install a Head-Up Display in a Car
Now, it’s been clear that when the driving information is placed directly in the front of your eyes, then it becomes really easy to keep your focus on the road always.
As, Head-Up Display shows all the essential details like speed and alerts directly in the driver’s line of sight, a HUD reduces the need to look down at the dashboard and promotes safer driving habits.
As well as, the modern aftermarket HUDs are designed to work with most vehicles, are easy to install and require no permanent modifications to the car.
Overall, a well-chosen and properly installed head-up display is a valuable addition that combines safety, convenience and modern driving technology.
Now, if you still have questions related to this guide, just comment that bastard question below.
Frequently Asked Questions
Q1. What is a head-up display and how does it work in a car?
Answer: A head-up display, commonly known as a HUD, is a small electronic device that projects driving information such as speed, warnings and engine data onto the driver’s line of sight. It projects this information onto the windshield or a clear screen so the driver doesn’t have to look down at the dashboard. Most HUDs obtain data either from the car’s onboard computer via the OBD-II port or from GPS signals. This allows the driver to see essential information while keeping their eyes on the road.
Q2. Can a head-up display be installed in any car?
Answer: Most cars manufactured after 1996 can support head-up displays because they have an OBD-II port that provides vehicle data. Older cars can also use GPS-based HUDs, which only require power from a USB port or cigarette lighter. However, not every HUD is compatible with every vehicle, so it’s crucial to check compatibility before purchasing. This can prevent issues such as incorrect readings or the display not turning on.
Q3. Is it difficult to install a head-up display in a car?
Answer: Installing a head-up display is generally easy and doesn’t require advanced mechanical skills. Many HUDs are designed for plug-and-play installation, meaning they only need to be connected to the OBD-II port or a power outlet. The main steps involve positioning the HUD correctly, connecting the power and adjusting the settings. Most drivers can complete the installation in a short time by carefully following the instructions.
Q4. Where should a head-up display be placed on the dashboard?
Answer: The head-up display should be placed directly in front of the driver, centered behind the steering wheel. When projected onto the windshield, the display should appear just above the hood line. This position allows the driver to naturally read the information without blocking their view of the road. Placing it in the wrong location can be distracting or make the display difficult to see, so testing the position before permanent installation is crucial.
Q5. Why is a reflective film or combiner screen necessary?
Answer: A reflective film or combiner screen helps make the HUD image clearer and sharper. Windshields are often angled and tinted, which can cause double images or blurring. The reflective surface mitigates this problem by improving contrast and brightness. Proper installation of the film or screen ensures that the information is easily readable both day and night.
Q6. How do you know if the HUD speed reading is accurate?
Answer: After installation, the HUD speed should be compared to the car’s speedometer while driving. OBD-II-based HUDs typically display accurate speeds because they read data directly from the vehicle. GPS-based HUDs may take a moment to lock onto a signal and work best in open areas. If minor discrepancies are observed, calibration settings can be adjusted, resulting in reliable speed readings.
Q7. Is it legal to use a head-up display while driving?
Answer: In most places, head-up displays are legal as long as they don’t obstruct the driver’s view or cause distractions. The display should be transparent and positioned correctly on the windshield. Laws vary by location, so it’s always best to check local traffic regulations before installation. Using the HUD responsibly and keeping the display simple helps ensure compliance with legal limits.
References:
[1] Ergonomic Analysis of the Automotive Head-Up Displayed Information
https://www.scientific.net/AEF.10.327

Guys, I’m a car audio enthusiast and customization expert and I love clear sound and clean installation. Plus, I have spent years helping people build their dream audio setups. And whenever I’m working on cars, I probably listen to music and thinks about the next big upgrade.