Written By: Don Dodi
Fact Checked By: Kristen Brown
Reviewed By: Diego Rosenberg
There are many reasons to remove that old car wax, as it slowly turns into a thin and uneven film that can dull your paint and that’s how it reduces the shine, or you just wanted to add the new wax and you need to remove them to create a clean base.
Yes, the car wax is really beneficial as it protects your vehicle’s clear coat from UV rays, water, road salt, dirt and all kinds of pollution as well.
But over the period of time, the old wax breaks down unevenly, mixes with dust, road grime and minerals from the water and that’s how it leave behind a dull or patchy surface: however you need to remember that old wax does not simply “disappear”.
Also, it becomes really important to learn How to Remove Old Wax from Car in safe way, as there’s automotive clear coat: which is the transparent top layer that protects your paint is only about 30 to 50 microns thick, which is literally thinner than a human hair.
This is why, you should learn proper wax removal methods that you’ll find in this guide, sot hat you can avoid any damage to the paint.
Know, What is Car Wax and How Does it Work?
Car wax is a protective layer applied to a vehicle’s clear coat, forming a transparent outer layer that protects the colored paint underneath.
Modern automotive paint systems typically consist of three main layers: primer, base coat (color) and clear coat.
The clear coat is typically only 30 to 50 microns thick, which is thinner than a human hair.
Because this layer is thin and constantly exposed to sunlight, heat, rain, dust, pollution, bird droppings and road salt, it gradually wears away over time.
Car wax acts as a temporary shield over the clear coat.
Dirt, UV rays, water minerals and light contaminants interact with the wax layer first instead of directly attacking the paint surface.
This reduces oxidation, slows the color fading process and helps maintain the car’s shine.
Wax doesn’t make paint scratch-proof, but it can reduce minor friction on the surface and make it easier to safely wash away dirt.
1. Purpose of Car Wax – Protection, Gloss, Hydrophobic Layer
The primary purpose of car wax is protection.
It forms a thin sacrificial layer that absorbs environmental stress before applying a clear coat.
One of the biggest threats to paint is ultraviolet radiation from the sun, which can cause oxidation and discoloration over time.
Wax helps reduce direct UV exposure.
Another important function is water resistance, also known as hydrophobic behavior.
When wax is applied properly, it reduces the surface energy of the paint, meaning water can’t spread easily.
Instead, it forms round droplets and rolls off.
This water-beading effect helps reduce water spots because less water remains on the surface, allowing it to evaporate and leave behind mineral deposits.
Wax also improves gloss by filling in microscopic imperfections in the clear coat.
Although these tiny imperfections may not be visible to the naked eye, they scatter light and reduce shine.
By leveling these micro-irregularities, wax reflects light more evenly, making the paint appear darker and clearer.
Simply put, wax protects, makes cleaning easier and enhances shine.
2. Types of Wax – Natural Carnauba, Synthetic Sealant, Hybrid Wax
There are three main types of car wax used today.
Natural carnauba wax comes from the leaves of a Brazilian palm tree known as Copernicia prunifera.
Carnauba is valued because it’s hard, water-resistant and provides a warm, deep shine, specially on dark-colored vehicles.
However, it typically only lasts a few weeks to a few months, depending on the weather.
Synthetic sealants are man-made chemical formulas designed to bond more strongly to the clear coat.
They often last longer than natural waxes, sometimes up to four to six months and offer stronger protection against UV rays and chemicals.
Hybrid waxes combine natural carnauba with synthetic polymers.
These products aim to provide both the deep shine of natural wax and the strength of synthetic protection.
Choosing one depends on whether the owner prefers maximum shine, long-lasting durability, or a balance of both.
3. How Wax Bonds to Clear Coat
Car wax doesn’t bond permanently to the paint.
Instead, it bonds through weak molecular attraction and physical adhesion.
When applied to a clean, dry surface, the wax spreads in a very thin layer and fills the tiny pores and surface irregularities in the clear coat.
As it dries or cures, the solvents evaporate, leaving behind protective ingredients that adhere tightly to the surface.
Synthetic sealants can form a stronger chemical bond than traditional waxes, so they generally last longer.
However, all wax layers are temporary and gradually break down due to heat, washing, UV exposure and environmental contamination.
That’s why regular maintenance and occasional removal of old wax is essential.
A clean, properly prepared surface helps new wax adhere better, last longer and provide stronger protection.
What are the Common Signs of Old Wax Should Be Removed
Old car wax doesn’t always wear out evenly.
Over time, it gradually deteriorates due to sun exposure, frequent washing, road dust, air pollution and humidity.
Instead of providing smooth protection, the wax layer can become thinner in some areas and thicker in others.
When this happens, the surface doesn’t look or function as it should.
Knowing the telltale signs of wax deterioration helps you protect your car’s clearcoat, a thin and sensitive layer designed to protect the paint underneath.
If old wax isn’t removed when needed, it can dull the shine, weaken the protection and make it difficult for new wax to adhere properly.
1. Patchy or Uniform Shine
One of the most common signs of old wax buildup is a patchy or uniform shine.
New wax reflects light evenly, giving the car a smooth and shiny appearance.
But when the wax is removed, it doesn’t look the same.
Some areas may still have wax, while others don’t.
This creates light spots near shiny areas.
In bright sunlight, you may notice that some panels appear hazy or less reflective.
This is because worn wax can scatter light instead of easily reflecting it.
When a surface loses its shine, it means the old wax layer is no longer as strong and should be removed before applying a new protective coat.
2. Streaks After Washing
If you notice streaks or marks after washing and drying your car, it could be due to old wax.
When wax ages, it can combine with road grime, traffic film and mineral deposits from water.
This combination creates a thin residue that doesn’t wash off easily.
Even after a thorough wash, streaks may appear when the surface dries.
These streaks are often more pronounced on darker-colored vehicles.
In many cases, the problem isn’t the shampoo or towel, but a rough layer of worn wax that reacts with moisture.
Removing old wax leaves the surface clean and smooth, reducing streaks during the next wash.
3. Yellowing or Discoloration
Another obvious sign of old wax is yellowing or discoloration, specially on white or light-colored vehicles.
As the wax oxidizes from sunlight and heat, its color may change slightly.
Over time, this oxidized wax can appear dull or dirty.
Instead of a clean, clear shine, the paint may appear faded or dull.
This discoloration can also occur if multiple layers of wax have been applied and the surfaces in between haven’t been properly cleaned.
Dirt trapped between the layers can make the clear coat appear dull.
When the paint no longer looks clear and reflective, removing the old wax can restore the clear coat’s original appearance.
4. Proper Absorption of Water Droplets
Fresh wax creates a hydrophobic surface, which means it repels water.
Water forms round beads that easily roll off the paint.
This is because wax reduces the surface energy of the clear coat.
However, when the wax begins to deteriorate, water no longer pools tightly.
Instead, it may spread, form flat depressions, or stick to the surface.
This is often the first sign that the protective layer is weakening.
Poor water absorption means the wax is no longer providing effective protection against moisture and dirt.
If water doesn’t pool properly or a layer doesn’t form, it’s usually time to remove the remaining wax and apply a new layer.
5. Wax Remains in Panel Gaps and Trim
Old wax often accumulates in small crevices, such as around badges, door handles, panel edges and plastic trim.
As wax dries and ages, it can leave white or chalky marks in these tight spaces.
This is specially noticeable on black plastic trim, where dried wax appears as white spots.
These marks not only affect the car’s look but can also harden over time, making them even more difficult to remove.
If you notice deposits near panel gaps or rubber seals, it’s a sure sign that the previous wax layer wasn’t completely removed and is starting to deteriorate.
Cleaning and removing old wax keeps the finish looking clean and stain-free for longer.
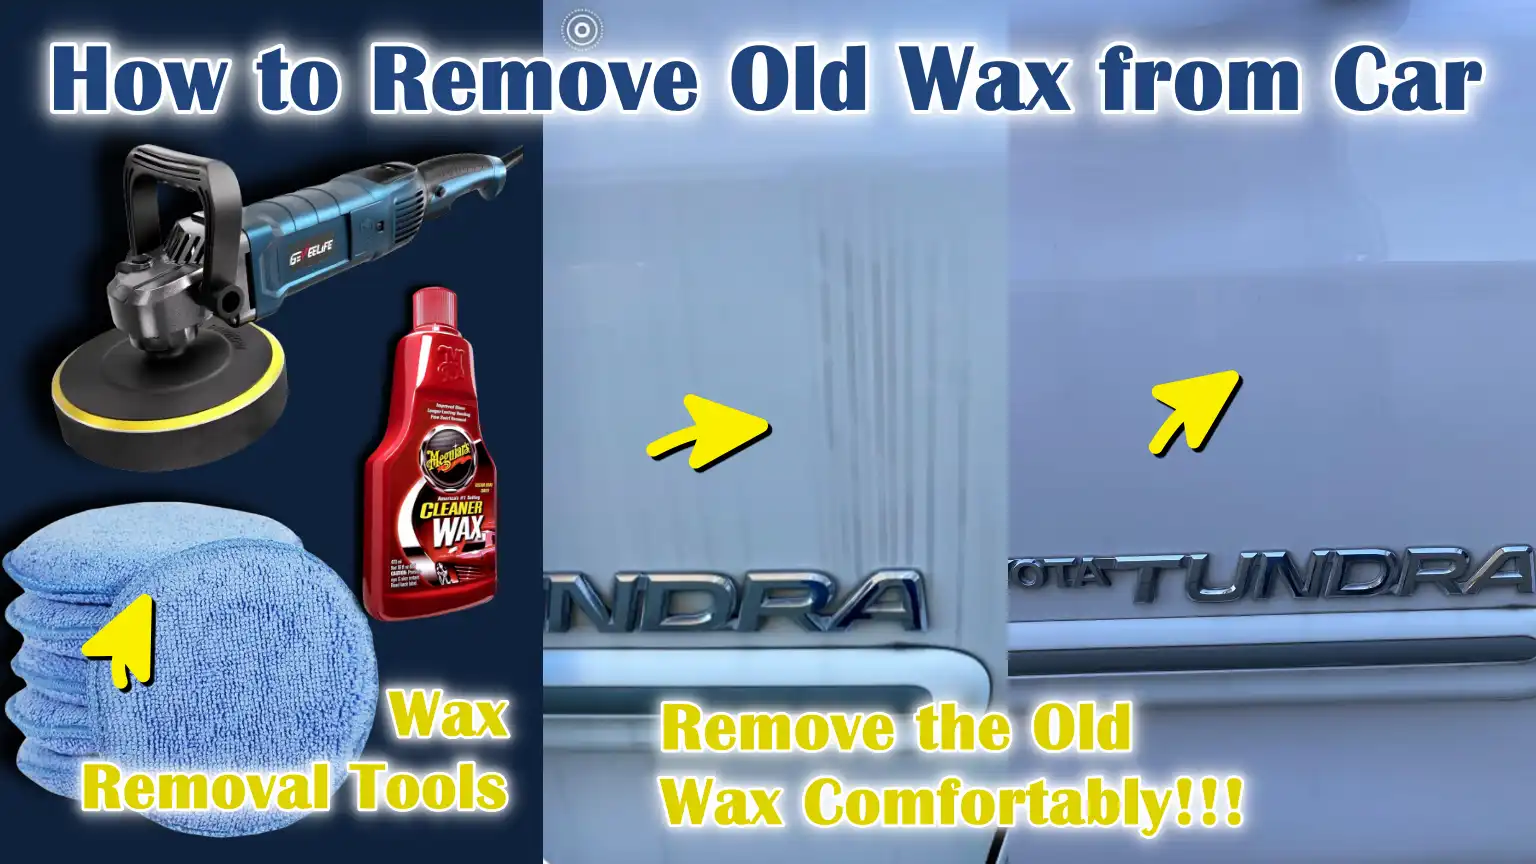
Tools
| Tool or Material | Know, Why You Need It |
|---|---|
| Car Wash Shampoo – Wax-Free | It safely removes dirt, dust and old surface oils without applying a new wax layer. This is important because you want a completely clean surface before removing the old wax. Wax-free shampoo ensures that the removal process is free of any obstacles. |
| Microfiber Towels | These towels absorb water well and remove dirt without scratching the clear coat. They are safe to wipe with cleaners and alcohol solutions. Using clean microfiber towels prevents swirl marks and protects the paint. |
| Clay Bar or Clay Mitt | It removes grime, light wax residue and small dirt that cannot be removed with normal washing. When used with proper lubrication, it leaves the surface smooth and clean. This step prepares the paint for better wax removal or polishing. |
| Isopropyl Alcohol/IPA Solution | It helps break down and remove any remaining wax oil and polishing residue. IPA evaporates quickly, leaving the surface clean without leaving a large amount of residue. This helps you check if the old wax has been completely removed. |
| Wax Remover or Pre-Wax Cleaner | It is specially designed to safely remove wax without damaging the clear coat. These products clean more deeply than regular shampoo. They create a fresh surface so that new protection can adhere properly. |
| Polishing Compound – If Needed | It removes stubborn wax layers and light paint stains at the same time. It is useful when the wax is too thick or uneven. It also improves shine by correcting minor surface imperfections. |
| Dual-Action Polisher – Optional | It helps distribute the polishing compound evenly and removes wax faster than manual work. The dual-action movement reduces the risk of paint damage, saving time and achieving more consistent results. |
| Masking Tape | It protects rubber seals, plastic trim and edges from polish or chemicals. This prevents white streaks or product buildup on sensitive areas. It also helps keep the job clean and under control. |
What are the Basic Safety Precautions You Need To Take Before You Begin
Removing old wax from a car may seem simple, but it’s crucial to do it safely.
Modern vehicles have a clear coat system that protects the colored paint underneath.
This clear coat is thin and sensitive to heat, friction and harsh chemicals.
Excessive heat or the wrong product can cause streaks, stains, or even minor damage.
Taking basic safety steps before you begin protects both the car and you.
Proper preparation also improves results, as many cleaning products work best in controlled areas.
Understanding these precautions makes the wax removal process easy, safe and effective.
1. Work in a shady or cool area
Always work in a shady area or when the car’s surface is cool to the touch.
Heat can cause cleaning products and alcohol solutions to dry too quickly, leaving marks or rough spots.
When the paint is hot, chemicals can evaporate before the old wax can properly break down.
A cool surface allows the product to spread evenly and work as intended.
You can check the temperature by placing your hand on the paint; if it feels warm, wait until it cools down.
The best time to work is usually early morning or late afternoon.
Keeping the surface cool reduces the risk of streaks and makes wiping easier.
2. Avoid Direct Sunlight
Direct sunlight quickly raises the surface temperature, specially on dark-colored cars.
When sunlight hits the paint, it can raise the temperature significantly higher than the surrounding air.
This heat accelerates the evaporation of water and cleaning agents.
If products dry too quickly, they can leave marks instead of properly removing old wax.
Sunlight can make marks difficult to see until the surface is completely dry.
Working in direct sunlight gives you better control, more work time and clearer visibility.
It also prevents uneven results from rapid drying.
3. Wear gloves when using chemicals
Many wax removers, alcohol solutions and polishing products contain solvents that can dry or irritate the skin.
Wearing simple protective gloves protects your skin from contact with these chemicals.
Even mild products can strip your skin of its natural oils with repeated use.
Gloves also improve grip when handling wet microfiber towels or tools.
If the product is accidentally spilled, gloves prevent direct contact.
Protecting your hands makes the detailing process safer and more comfortable, specially if the job takes longer than expected.
4. Test the product on a small area first
Before applying any wax remover, alcohol solution, or polishing compound to your entire car, always test it on a small, inconspicuous area.
This allows you to see how the paint reacts and ensure the product is safe for your car’s finish.
Paint condition can vary from vehicle to vehicle, specially in older cars or repainted panels.
A small test spot allows you to check for unwanted effects like discoloration, streaking, or excessive dullness.
It also helps you understand how much pressure or product is needed.
Taking a few extra minutes to test first can prevent costly mistakes and yield the best results.
How to Remove Old Wax Using Dish Soap – 1st Method
Using dish soap is one of the easiest and most common homemade methods for removing old wax.
It’s often used when the wax layer is thin, uneven, or already starting to wear off.
Dish soap is designed to break down grease and oil on kitchen surfaces and car wax contains oily and fatty substances that contribute to shine and water repellency.
Because of this, dish soap can weaken and remove some types of wax.
However, it’s important to understand that this method is best for light wax deposits, not heavy layers or long-lasting synthetic sealants.
When used correctly and not over-applied, it can safely prepare the surface for new protection.
1. Why Dish Soap Helps Remove Wax
Most dish soaps contain strong surfactants, which are cleaning agents that break down grease and oily substances.
Car wax is made up partly of natural oils, synthetic polymers, or a mixture of both.
These substances form a smooth, water-repellent layer on the clear coat.
Dish soap works by loosening and lifting these oily particles so they can be washed away with water.
It also reduces surface tension, helping to loosen the bond between the wax and paint.
However, dish soap is stronger than regular car shampoo and is not designed for automotive paint.
Repeated use can dry out plastic trim and remove the natural oils in rubber seals.
Therefore, it should not be used as a regular car wash solution, but only occasionally when removing old wax.
2. Correct Dilution Ratio
Using the correct dilution ratio is crucial.
Dish soap should never be poured directly onto the paint.
A safe and practical ratio is to mix approximately one to two tablespoons of dish soap with a full bucket of warm water, which is usually about four to five gallons.
Warm water helps dissolve the oil more effectively than cold water.
The mixture should feel slightly slippery but not too thick or foamy.
Too much soap can remain and be difficult to rinse off.
Proper dilution ensures the soap is strong enough to weaken the old wax, but not so strong that it hardens the clear coat.
After washing, it’s important to rinse thoroughly to remove all traces of soap.
3. Washing Method
Proper washing reduces the risk of scratches and swirl marks.
Always rinse the car first to remove loose dirt and dust.
This prevents particles from rubbing into the paint.
Use a clean wash mitt and wash one small area at a time, starting at the top and working downward.
The top panels are usually cleaner than the bottom panels.
Rub gently, using straight, circular motions rather than circular motions.
Rinse the mitt frequently with clean water to prevent spreading dirt.
After washing the entire car, rinse thoroughly to remove all traces of soap.
Finally, dry the car with a clean microfiber towel.
Once dry, you can test the surface by spraying water to see if the strong water droplets have reduced, which indicates that the wax layer has weakened.
4. When is this method sufficient?
This method works best when the wax is already old and slightly worn.
If the surface shows a few drops of water, light streaks, or a slightly patchy sheen, washing with dish soap may be enough to remove most of the remaining wax.
It’s also useful before applying a new coat of wax, when you want a clean base but don’t need deep corrections.
However, if the vehicle has multiple heavy wax layers, strong synthetic sealants, or visible residue in the trim area, dish soap alone may not completely remove the protection.
In such cases, a stronger pre-wax cleaner, alcohol solution, or light polishing may be needed.
Dish soap is considered an easy initial method for removing light wax, specially for beginners who want a basic and inexpensive solution.
How to Remove Old Wax Using Isopropyl Alcohol – 2nd Method: IPA Wipe Down
Isopropyl alcohol wipe down is a more precise and controlled way to remove old wax residue from a car surface.
Isopropyl alcohol, often referred to as IPA, is a solvent that dissolves oil, light grease and leftover polishing residue.
Because most car wax products contain oily or polymer-based ingredients, IPA can help weaken and remove these substances from the clear coat.
This method is commonly used by professional detailers before applying new wax, paint sealant, or ceramic coating because it keeps the surface clean and free of residual oil.
When used correctly and diluted properly, IPA is safe for modern automotive clear coat finishes.
1. Correct Mixing Ratio – 70%–91% IPA diluted in water
Isopropyl alcohol should always be diluted before using it on car paint.
A safe and effective mixture is usually one part IPA and one part clean water, specially if you’re using 70% IPA.
If you’re using a higher concentration of 91% IPA, you can dilute one part IPA with one to two parts water.
The goal is to create a solution that’s strong enough to break down any remaining wax, but not so strong that it dries out or stresses the clear coat.
Distilled water is preferable because it doesn’t contain minerals that can cause stains.
A properly diluted solution reduces the risk of drying out or streaking the surface and it’s also effective in cleaning.
2. How IPA Breaks Down Remaining Wax
Car wax contains oils, solvents and protective ingredients that are slightly attached to the clear coat.
Over time, these ingredients can leave a thin film, even after washing.
IPA works by dissolving these oily substances and loosening their grip on the surface.
Because alcohol evaporates quickly, it removes any remaining residue, leaving the surface clean without losing its shine or protection.
This is useful for checking whether the old wax has been completely removed.
If water no longer adheres tightly after wiping with IPA, it means the wax layer has been removed.
IPA does not physically scratch the surface; rather, it chemically breaks down the remaining protective layer so it can be wiped away safely.
3. Safe Wiping Practices
Proper method is crucial when using IPA.
First, ensure the vehicle is clean and dry before starting.
Instead of spraying directly onto the paint, spray a small amount of diluted IPA solution onto a microfiber towel to avoid over-applying.
Work on a small area at a time using light, straight wiping motions.
Don’t press too hard, as much pressure isn’t needed.
After wiping, use another clean microfiber towel to gently dry the area.
This two-towel method helps prevent streaks and ensures that any remaining residue is completely removed.
Always work in a shaded and cool area, as alcohol evaporates quickly in heat, which can cause streaks.
4. When to Use the IPA Method
The IPA wipe-down method is best when you need to thoroughly clean a surface before applying new protection.
It’s specially useful after washing, claying, or light polishing.
If the vehicle has light wax deposits, streaks, or small water droplets, IPA can remove soap residue.
It’s also helpful when preparing a surface for paint correction or ceramic coating, where proper bonding is crucial.
However, IPA isn’t just for removing thick layers of hardened wax or thick sealants.
In such cases, a special wax remover or polishing step may be required.
When used correctly, IPA is a safe, easy and effective way to ensure that the paint surface is completely clean and ready for new protection.
How to Remove Old Car Wax Using a Clay Bar – 3rd Method
Using a clay bar is a deep cleaning method that removes stuck-on dirt and wax residue that normal washing can’t remove.
Even after washing a car, the paint surface isn’t completely clean.
Brake dust, industrial fallout, road tar, tree sap smoke and leftover old wax particles can cling tightly to the clearcoat.
These particles are often too small to see, but can be felt by gently stroking the paint.
A clay bar is made of a soft, elastic resin material that, when used correctly, is designed to safely grab and lift these stuck-on dirt without damaging the clearcoat.
This method is widely used in professional detailing because it creates a smooth, clean surface that improves shine and prepares the paint for polishing or new protection.
1. How Clay Removes Stuck-On Wax and Dirt
A clay bar works with a gentle mechanical action.
When you roll it over lubricated paint, the clay gently adheres and removes any dirt or debris from the clear coat.
Old wax can trap dirt and particles and over time, this mixture can harden.
When used correctly, clay safely removes these surface impurities without removing healthy paint.
It doesn’t rub into the paint; instead, it glides over the surface and catches anything above the clear coat level.
When you roll the clay, it collects these particles.
This is why the clay becomes dirty as you use it.
The result is a smooth and clean surface that feels almost glass-like to the touch.
2. Proper Lubrication
Lubrication is the most important safety factor when using a clay bar.
Clay should never be used on a dry surface, as rubbing can cause scratches or marks.
A mixture of clay lubricant or car wash shampoo and water creates a slippery layer between the clay and the paint.
This reduces friction and allows the clay to glide easily.
Spray the surface thoroughly so the clay glides smoothly without sticking.
If you feel any obstruction, apply more lubricant immediately.
Properly lubricating the surface ensures that dirt is safely removed without damaging the clear coat.
3. Know, Proper Claying Process
The vehicle should be washed and thoroughly dried.
Working on a clean surface prevents scratches from loose dirt.
Take a small piece of clay and flatten it into a soft disc that fits comfortably in your hand.
Spray lubricant on a small area of paint.
Move the clay back and forth with light pressure.
Do not press too hard.
Initially, you may feel some obstruction as the clay removes dirt.
As the surface becomes cleaner, the clay will glide more easily.
After finishing a section, wipe it dry with a clean microfiber towel.
Check the clay frequently and when it becomes dirty, flip it over to reveal the clean side.
This process is repeated panel by panel until the entire vehicle is treated.
4. Benefits of Claying Before Polishing
Claying before polishing has several benefits.
Polishing evens out the clear coat, removes small scratches and enhances the shine.
If there’s still dirt on the surface, polishing pads can drag it onto the paint, increasing the risk of scratches.
By removing trapped particles, claying creates a clean and smooth surface, allowing polishing compounds to work more evenly and securely.
It also improves the bonding of new wax or sealant because no trapped residue is left behind.
Simply put, claying prepares the paint so that each subsequent step works better and produces a clearer, deeper shine.
How to Remove Old Car Wax Using a Pre-Wax Cleaner or Wax Stripper – 4th Method
The most effective way to safely and completely remove old wax is to use a pre-wax cleaner or specialized wax stripper.
These products are specifically designed for automotive paint systems and are formulated to clean the surface without damaging the clear coat.
Unlike dish soap, which is a household cleaner, pre-wax products are balanced for car paint and often contain mild cleaning agents and mild polishing ingredients.
They help dissolve the old wax layer, remove minor oxidation and prepare the paint so that new protection can adhere properly.
This method is often used by professional detailers when they want a completely clean surface before applying fresh wax, sealant, or ceramic coating.
1. What’s in a Pre-Wax Cleaner
Pre-wax cleaners typically contain mild solvents, mild abrasives and surface cleaning agents.
Solvents help dissolve old wax and oily residue.
Mild abrasives gently smooth the top layer of the clear coat to remove light stains or oxidation.
These abrasives are very fine and not meant for removing heavy scratches, but they do help clean and enhance the shine.
Some products also contain polishing oils that temporarily enhance the shine while cleaning.
Formulas are carefully balanced to avoid excessive harshness and are easy to clean.
Because automotive clear coat is thin, approximately 30 to 50 microns, products specifically designed for car paint are safer than harsh household chemicals.
2. How Dedicated Wax Removers Work
Dedicated wax removers work primarily through chemical action.
They break the bond between the wax layer and the clear coat.
Wax adheres to the paint through mild molecular attraction and surface tension.
When wax remover is applied, its active ingredients soften and dissolve the wax film so it can be easily wiped away.
Unlike mechanical methods like claying or polishing, chemical strippers don’t rely on friction.
This reduces the risk of scratching when used correctly.
Some stronger wax removers are designed to remove both natural carnauba wax and synthetic sealants, which can be more durable.
After the wax dissolves and is wiped away, the surface is clean and ready for new protection.
3. How to Apply
The car should be washed and dried before applying any pre-wax cleaner or wax remover.
This removes loose dirt and prevents scratching during cleaning.
Apply a small amount of product to a clean microfiber applicator pad or soft cloth.
Apply to small areas with light and even pressure.
Spread the product evenly and let it work for the manufacturer’s recommended time.
Then, wipe the area clean with a new microfiber towel.
To ensure all residue has been removed, it’s important to inspect the surface in good light.
If necessary, a second application can be made.
Always work on a cool surface and in the shade to prevent the product from drying too quickly.
4. Best Places for Chemical Strippers
Chemical wax removers are best used when multiple layers of wax have accumulated or when synthetic sealants have been repeatedly applied.
They’re also helpful when preparing a vehicle for paint correction or ceramic coating, where a completely clean surface is crucial.
If water remains after rinsing and wiping with alcohol, it means a strong protective layer remains and a specialized wax remover may be needed.
This method is ideal for car owners who want to completely remove wax without extensive mechanical polishing.
When used correctly, pre-wax cleaners and wax strippers provide a safe and effective way to treat the paint surface and prepare it for long-lasting protection.
How to Remove Old Car Wax By Machine Polishing – 5th Method: Deep Removal
Machine polishing is the best way to remove old wax, specially when the wax layer is thick, uneven, or has minor paint defects.
Unlike chemical stripping, polishing physically levels a very thin layer of clear coat to remove surface dirt, oxidation and remaining protection.
Modern automotive paint systems use a clear coat that is typically 30 to 50 microns thick, so polishing should be done carefully and only when necessary.
When done correctly with the right tools and products, machine polishing not only completely removes old wax but also improves the clarity, gloss and smoothness of the paint.
1. When Polishing Is Necessary
Polishing is necessary when other methods, such as washing, alcohol wipe-downs, or pre-wax cleaners, fail to completely remove the old protection.
If the surface still shows heavy water droplets, stubborn residue, haziness, or multiple layers of deposits, polishing may be necessary.
Polishing is also recommended if the paint has light marks, fine scratches, or mild oxidation from old wax.
In these cases, polishing solves two problems simultaneously by removing wax and repairing minor imperfections.
However, polishing should not be done too often, as it removes a little clear coat each time.
It is best used as a remedial measure rather than a regular cleaning method.
2. Choosing the Right Compound
Polishing compounds come in different strengths, often referred to as cutting levels.
A light polishing compound is usually sufficient to remove wax and slightly repair the paint.
These contain fine abrasive particles that gently smooth the surface without removing too much clear coat.
Heavier compounds are designed for deeper scratches and are not always necessary for easy wax removal.
Choosing a light or medium compound maintains the thickness of the clear coat while also effectively removing old protection.
It’s important to match the compound to the correct polishing pad, as the pad material also affects the degree of retouching.
3. Dual-Action vs Rotary Polisher
Two types of polishing machines are commonly used for automotive paint.
Dual-action polishers operate in both a rotating and oscillating motion.
This random movement generates heat and reduces the risk of paint damage.
They are considered safer and easier for beginners.
Rotary polishers rotate in a single circular motion and generate more heat and cutting power.
While they can quickly repair imperfections, they require more skill to control and, if used incorrectly, pose a greater risk of paint damage.
For most car owners who remove old wax and make light retouches, a dual-action machine is a safer and more practical option.
4. How Polishing Removes Both Wax and Minor Imperfections
Polishing works by using microscopic abrasives that smooth the top layer of the clear coat.
As wax sits on top of the paint surface, polishing automatically removes it during repair.
Furthermore, abrasives also correct minor imperfections like swirl marks and light scratches.
These imperfections scatter light and reduce shine.
When a surface is smoothed, light is reflected more evenly, resulting in a clearer and deeper shine.
Simply put, polishing cleans, smooths and repairs a surface all in one step.
After polishing, a new layer of protection is necessary because the previous wax layer will be completely removed, exposing the clear coat.
How to Remove Wax Residues from Trim and Edges
Remnants of wax on the edges of plastic trim, rubber seals and tight panels are a very common problem, specially when paste or liquid wax is applied without masking sensitive areas.
Unlike painted surfaces, exterior trim pieces are typically made of textured plastic, rubber, or vinyl materials that are more porous.
This means they can absorb wax and polishing oils more easily.
When wax dries inside these small pores, it often leaves white or chalky stains.
These stains can make a vehicle appear old and poorly maintained, even if the paint is shiny.
Removing wax from trim requires a gentle and controlled approach, as harsh chemicals can dry out the plastic and fade its color over time.
1. Cleaning Plastic Trim Safely
Plastic trim is more delicate than painted metal panels.
It doesn’t have a clear coat layer for protection, so excessive use can cause it to fade or weaken.
When removing remaining wax, always start with the gentlest method.
A diluted all-purpose cleaner safe for vehicle surfaces can help break down the wax without damaging the trim.
To avoid over-saturation, apply the cleaner to a microfiber cloth instead of spraying it directly on the trim.
A light wipe is usually enough to loosen surface dirt.
Avoid using harsh solvents like paint thinner or harsh degreasers, as they can strip the protective coating from the plastic and permanently discolor it.
2. Using Trim-Safe Cleaners
Trim-safe cleaners are specifically formulated to clean plastic and rubber without drying them out.
These products are designed with balanced formulas that remove wax and dirt while maintaining the material’s natural look.
Many trim cleaners contain mild surfactants and conditioning agents that help restore a darker, more uniform finish.
Using a product labeled safe for exterior trim reduces the risk of streaking or damage.
After cleaning, some detailers apply a trim protectant to restore moisture and improve the look.
This step helps protect the trim from UV rays, which are a major cause of discoloration and cracking over time.
3. Avoiding White Wax Stains
White wax stains occur when dried wax builds up on textured plastic surfaces.
These stains are more visible on black or dark brown trim.
To further prevent this problem, it’s helpful to place masking tape around the trim before applying wax to painted panels.
Applying wax carefully and avoiding over-applying also reduces the risk of buildup.
If stains already exist, gently brushing with a soft brush can remove any dried residue.
It’s important not to scratch the trim with hard tools, as this can leave permanent scratches on the surface.
It’s always easier to prevent this by applying carefully rather than having to make major repairs later.
4. Soft Brush Technique
A soft detailing brush is useful for cleaning remaining wax from tight spaces like panel gaps, emblems, rubber seals and textured trim.
The brush’s bristles should be soft enough not to scratch, but firm enough to loosen dried wax.
Apply a small amount of trim-safe cleaner to the brush and gently brush the affected area in circular or back-and-forth motions.
This allows the cleaner to reach small spaces and remove trapped debris.
After brushing, wipe the area dry with a microfiber towel.
Apply light pressure, as excessive pressure can damage the surface.
Proper brushing technique ensures that trim and edges look clean and uniform without damage.
How to Check if the Wax Has Completely Removed or Not
After removing old wax, it’s important to ensure the surface is completely clean before applying new protection.
Residual wax will prevent the new wax or sealant from adhering properly and can reduce durability.
Car wax creates a hydrophobic surface, which means it repels water and collects it in tight droplets.
When the wax is completely removed, the paint behaves differently.
Instead of flowing droplets, water may spread more evenly or form sheets across the surface.
Because modern clearcoats are smooth by design, understanding how they react to water and touch can help you accurately determine if the wax layer has been removed.
Proper inspection can prevent layering problems and provide better protection in the long run.
1. Water Sheet Test vs Beading Test
The beading test is one of the easiest ways to check for remaining wax.
Spray a small amount of clean water onto the paint and observe how the water reacts.
If tight, round beads form quickly and settle on the surface, it indicates a hydrophobic layer is still present.
Fresh wax forms stronger beads because it reduces surface energy and repels water.
However, beading alone isn’t always conclusive evidence, as some clearcoats may also form light beads.
The water sheet test provides further confirmation.
Spray a regular stream of water onto the panel and observe how it flows.
If the water spreads and forms a smooth sheet with no tight droplets, it means most or all of the wax has been removed.
Strong, tight beads usually indicate remaining protection, while a uniform flow of water indicates a bare surface.
2. IPA Wipe Confirmation
A reliable way to confirm removal is with an isopropyl alcohol wipe.
After completing your initial cleaning or stripping process, spray a diluted IPA solution on a microfiber towel and wipe a small area of the panel.
The IPA dissolves any remaining oil and light wax residue that may not be visible.
After wiping, repeat the water test.
If the water behavior clearly changes and beads decrease, it means there was some residue even before the alcohol wipe.
If the water spreads evenly and there are minimal grains visible after the IPA wipe, there is probably no old wax left on the surface.
This method is commonly used by professional detailers because it removes hidden residue and leaves a clean, neutral surface.
3. Surface Feel Test
The surface feel test is a simple but helpful method.
After rinsing and drying, gently run your clean hand or finger over the paint.
A thoroughly cleaned surface should feel smooth, but not excessively slippery.
Waxed paint often feels very slippery because the wax reduces friction.
When the wax is removed, the paint may feel slightly less slippery, but it will still be smooth if properly cleaned.
If the surface feels greasy, excessively slippery, or bumpy, there may still be residual dirt on it.
For a more sensitive test, you can place your hand inside a thin plastic bag and gently rub it over the surface.
This increases sensitivity and helps detect any remaining dirt.
A clean and thoroughly cleaned panel should feel even and uniform.
What to Do After Removing Old Wax
After the old wax is completely removed, the clear coat is left clean but unprotected.
This is an important step because the paint is now exposed to sunlight, moisture, pollution and other environmental factors.
The clear coat is a thin, transparent layer that protects the underlying color coat and it’s only 30 to 50 microns thick.
Without a protective layer on top, it can gradually oxidize, lose its shine and become more vulnerable to minor scratches.
Taking the right next steps ensures that the paint remains healthy, shiny and protected for a long time.
1. Check the Paint’s Condition
After removing the old wax, examine the paint carefully in good lighting.
Natural daylight or bright white LED lighting works best because it reveals fine swirls, light scratches, water spots and oxidation.
When wax is present, it can temporarily hide minor imperfections by filling in small surface imperfections.
After removal, these imperfections may become more visible.
View the paint from different angles and check high-contact areas such as door handles, hood edges and trunk panels.
If the surface appears dull, faded, or lightly scratched, further repairs may improve the finish.
This inspection step helps you determine whether the paint needs only new protection or minor repairs first.
2. Perform Paint Repair – If Necessary
If you notice swirl marks, small scratches, or mild oxidation, paint repair may be beneficial.
Paint repair involves polishing the clear coat to correct minor surface imperfections.
A mild polishing compound can remove a small, controlled amount of clear coat to smooth the surface.
Because clear coat is thin, repairs should always be done carefully and only when necessary.
Removing imperfections improves light reflection, which increases clarity and gloss.
Simply put, smooth paint reflects light more evenly, making the car appear deeper and shinier.
If the paint’s condition is already good, no major repairs are necessary.
The goal is to preserve as much of the clear coat as possible while also improving the appearance.
3. Apply New Wax or Sealant
After inspection and necessary repairs, the paint must be reprotected.
Applying new wax or paint sealant creates a new barrier between the clear coat and the environment.
Natural carnauba wax provides a warm, deep shine but typically lasts only a few weeks to a few months.
Synthetic sealants often last longer, sometimes up to four to six months, because they form a stronger chemical bond with the paint.
The new protective layer blocks water droplets, enhances shine and makes future cleaning easier.
It’s important to apply protection immediately after waxing, as untreated paint is more susceptible to warping and UV damage.
4. Consider Ceramic Coatings
For longer-lasting protection, some car owners consider ceramic coatings instead of traditional waxes.
Ceramic coatings are liquid polymer solutions that form a chemical bond with the clear coat, creating a stronger, more durable layer of protection.
Unlike wax, which is applied over the paint, ceramic coatings form a semi-permanent bond and can last from one to several years, depending on the product.
They repel water well, resist chemicals better and are more environmentally durable.
However, proper surface preparation is crucial before applying a ceramic coating.
For a good bond, the paint must be completely clean and free of any traces of oil or wax.
Ceramic coatings require more careful application, but they offer greater protection and easier maintenance.
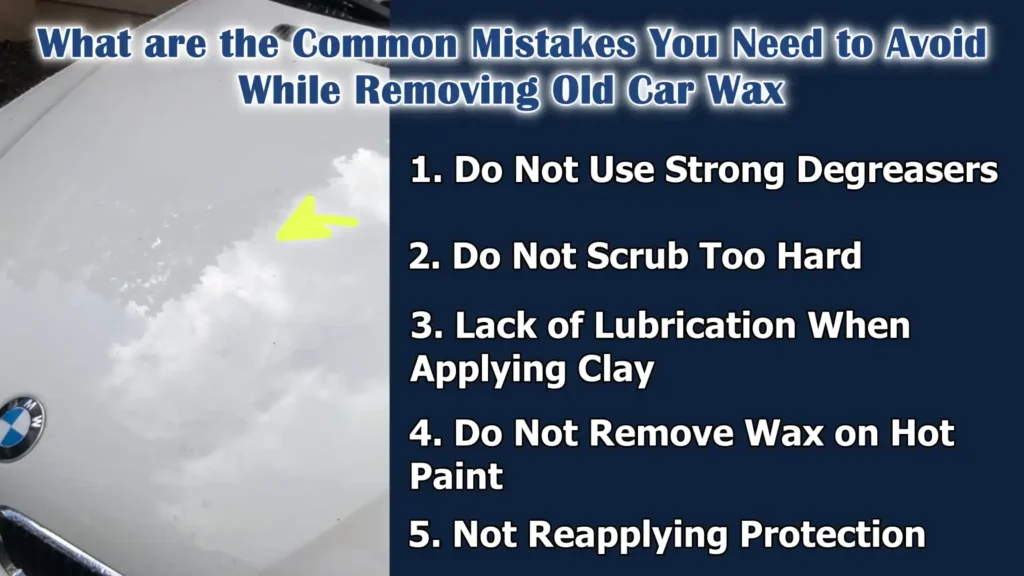
What are the Common Mistakes You Need to Avoid While Removing Old Car Wax
Also, there’s polymer science research on automotive coating materials that shows that the traditional car waxes functions by lowering the surface energy and creates a hydrophobic barrier that makes the water and other contaminants roll off the paint surface easily. So, these wax layers actually lose their effectiveness over the period of time as they degrade through the sunlight, abrasion and weather exposure as well, which is why the residual wax must be fully removed before going to apply the new protection so that it can maintain the high water repellency and durability as well.[¹]
Removing old wax from a car may seem easy, but several small mistakes can damage the clear coat or diminish the final result.
Modern automotive paint systems are designed with a thin clear coat layer that protects the paint underneath.
This layer is strong, but its thickness is not unlimited and improper application can cause scratches, stains, or long-term wear.
Avoiding common mistakes maintains paint health, enhances shine and ensures proper application of new protection.
Understanding these mistakes before you begin will save time, money and later repairs.
1. Do Not Use Strong Degreasers
A common mistake is using strong household degreasers or industrial cleaners to remove wax.
These products are designed for cleaning engines, floors, or other high-grease surfaces, not automotive paint.
These often contain harsh chemicals that can dry out plastic trim, damage rubber seals and weaken the clear coat over time.
While they can remove wax quickly, they can also strip the surface of essential protective oils and cause it to fade.
Automotive paint is sensitive to high-alkaline or solvent-heavy cleaners.
It’s always safer to use products specifically formulated for car detailing, as they are balanced to clean without damaging the finish.
2. Do Not Scrub Too Hard
Another common mistake is applying too much pressure when washing, wiping, or applying clay.
Many people believe that scrubbing hard removes wax quickly, but excessive pressure can cause marks and fine scratches.
These small scratches may not be immediately visible but become visible in sunlight.
The clear coat is thin and vigorous scrubbing increases friction and heat, which can damage the surface.
Proper wax removal depends more on the right product and technique than force.
Light, controlled motions with a clean microfiber towel or soft pad are always safer and more effective.
3. Lack of Lubrication When Applying Clay
Lubrication is essential when using a clay bar.
Lack or insufficient lubrication increases friction between the clay and paint.
Without proper lubrication, the clay can drag across the surface and leave marks, which appear as light spots or fine scratches.
Lubricant creates a smooth barrier that allows the clay to glide safely and removes dirt.
Using more product may seem excessive, but it greatly reduces the risk of surface damage.
Proper lubrication protects the paint and makes the claying process safe and effective.
4. Do Not Remove Wax on Hot Paint
Working on a hot surface is another common mistake.
When paint is exposed to direct sunlight, its temperature can increase significantly, specially on dark-colored vehicles.
Heat causes cleaning products and alcohol solutions to evaporate quickly.
This rapid evaporation can leave streaks, uneven spots, or residue.
It also shortens the product’s working time, reducing the effectiveness of wax removal.
In extreme cases, the chemical drying too quickly can cause light stains.
Always work in the shade and ensure the paint feels cool to the touch before starting.
Controlled temperatures improve safety and final results.
5. Not Reapplying Protection
One of the most important mistakes to avoid is leaving the paint unprotected after removing old wax.
After waxing, the clear coat is exposed to sunlight, moisture, air pollution, bird droppings and road salt.
Without a protective layer, oxidation and dirt can quickly accumulate.
Even though the paint may appear clean and shiny after removal, it lacks protection.
Applying a new wax, sealant, or ceramic coating restores its hydrophobic properties, improves shine and protects the surface from environmental damage.
To maintain the long-term health of the paint, always apply protection after wax removal.
Read More:
How Often Should You Remove Old Wax?
Knowing how often to remove old wax is essential for maintaining both the look and long-term health of your car’s paint.
Car wax isn’t permanent.
It’s designed as a temporary protective layer that gradually deteriorates due to sun, rain, washing, heat, air pollution and road grime.
The clear coat underneath is thin and constantly exposed to atmospheric pressure, so the wax acts as a protective shield.
However, over time, this shield weakens, breaks down poorly and can even trap dirt if not properly maintained.
Removing old wax at the right time ensures that the new protection bonds properly and continues to protect the surface effectively.
1. Typical Wax Lifespan
The lifespan of car wax depends on the type of product used.
Natural carnauba wax typically lasts four to eight weeks under normal driving conditions.
Synthetic sealants often last longer, typically four to six months, because they form a stronger chemical bond with the paint.
Hybrid waxes fall somewhere in between.
However, these timeframes are general estimates.
Frequent washing, harsh detergents and exposure to harsh weather can reduce the wax’s durability.
Regular washing with a pH-balanced car shampoo extends the wax’s life, while automatic car washes with harsh chemicals can cause it to fade faster.
It’s important to understand that wax doesn’t disappear all at once.
It fades gradually and may not be consistent across different panels.
2. Consider the Weather
Weather plays a major role in how long the wax will last.
In hot and sunny areas, strong ultraviolet rays can cause the wax to break down faster through oxidation and heat exposure.
High temperatures also soften wax layers, causing them to deteriorate faster.
In rainy or humid weather, constant moisture can weaken the hydrophobic properties over time.
Winter snow and road salt can also reduce wax durability, as salt is corrosive and can gradually erode protective layers.
Coastal areas with salty air can accelerate surface contamination.
For these reasons, drivers in harsh weather may need to remove and reapply wax more frequently than in milder weather.
3. Signs That It’s Time to Remove and Reapply Wax
Instead of following a fixed calendar schedule, it’s better to monitor whether the wax is deteriorating.
One of the most visible signs is the loss of water droplets.
If water no longer forms tight, round droplets and instead spreads flat across the surface, the protective layer is weakening.
A dull or patchy sheen is another sign that the wax hasn’t broken down properly.
Streaks or a slightly rough surface after washing can also be signs of buildup or fading.
When these signs appear, it’s usually a good time to remove any remaining wax and apply a new coat.
Removing old wax before applying new protection results in better bonding, improved shine and longer-lasting results.
Know, Difference Between Professional Wax Removal VS DIY
Choosing between professional wax removal and DIY depends on your experience level, the condition of your vehicle’s paint, the tools you have and the results you expect.
Removing old wax can be easy when the layer is light, but it can become more difficult when there are multiple layers, excessive buildup, oxidation, or paint defects.
Modern vehicles have a thin clear coat system that protects the colored paint underneath and improper handling can reduce its thickness over time.
Understanding when to do it at home and when to seek professional help can save your investment and ensure long-term paint health.
1. When to Visit a Detailing Shop
When your vehicle has excessive wax buildup, stubborn stains on trim areas, visible swirl marks, oxidation, or paint defects that need repair, visiting a professional detailing shop is recommended.
Professional detailers use specialized lighting, paint thickness gauges, machine polishers and high-quality compounds that aren’t always available to the average car owner.
They are trained to understand paint hardness, clear coat thickness and proper polishing techniques.
If you’re planning to apply a ceramic coating, professional preparation is specially important, as the coating requires a clean and perfect surface for proper adhesion.
If you’re unsure about using a machine polisher, a detailing shop is a safe bet, as improper use can cause holograms or burn marks on the paint.
2. Cost Comparison
The cost of professional wax removal and paint preparation depends on the size of the vehicle, the condition of the paint and the services involved.
Basic wax stripping and surface preparation may cost a small amount, while a full paint job with polishing can cost significantly more.
On the other hand, DIY wax removal requires purchasing products like wax remover, microfiber towels, clay bars and possibly a machine polisher.
While the initial cost of the tools may be higher, these items can be reused many times, making DIY more economical over time.
However, DIY also requires time, patience and careful technique.
The actual cost comparison depends on whether you value convenience and professional results over effort and savings.
3. Advantages and Disadvantages
Professional wax removal offers better results, expert handling and a reduced risk of damage.
Detailers can fix minor imperfections during wax removal, improving shine and cleanliness.
The main disadvantages are higher expense and the need to schedule an appointment.
DIY removal offers flexibility, lower long-term costs and the comfort of maintaining your vehicle yourself.
However, if the right method is not followed, there’s a risk of mistakes like over-polishing, using harsh chemicals, or creating streaks.
Simply put, professional services offer convenience and expertise, while DIY offers affordability and control.
Choosing the right option depends on your skill level, the tools you have and the current condition of your car’s paint.
Conclusion – How to Remove Old Wax from Car
Now, you have understand about the fact that: there are many car owners only focuses on applying the wax layer after layer, but the real secret to having the long-term gloss is you need to properly remove and make the vehicle’s surface ready for new wax.
Car wax is designed as a temporary protective layer, but over time sun, heat, rain, pollution, washing and road grime gradually wear it down.
When wax isn’t applied regularly or is repeatedly removed without proper removal, it can dull the shine, reduce water repellency and prevent new protection from adhering properly.
As well as, modern automotive paint systems use a thin clear coat layer to protect the underlying paint.
Also, each method works differently depending on the level of buildup and the condition of the paint.
Once the old wax has been removed, the surface should never be left unprotected.
Which is why, you should apply the fresh wax, synthetic sealant, or ceramic coating restores hydrophobic properties, improves shine and protects the paint from UV rays, moisture, dirt and environmental contaminants.
So, that’s all from this guide and let us know unsolved queries in the comment section below this.
Frequently Asked Questions
Q1. How long does car wax last before it needs to be removed?
Answer: Car wax typically lasts from six weeks to three months, depending on the type of wax, the weather and how often you wash your car. Natural carnauba wax typically lasts less, while synthetic waxes and sealants can last longer because they’re made from stronger polymers. If your car is parked outside in strong sunlight, heavy rain, pollution, or dust, the wax can break down faster. You can test if the wax is still working by pouring a little water on the surface. If the water forms round beads, the wax is still active. If the water spreads flat and doesn’t form beads, it means the protection is weak or worn off and it’s probably time to remove the old wax and apply a new layer.
Q2. Why should I remove the old wax instead of applying a new layer?
Answer: Many people think that applying more wax over old wax is always better, but this isn’t true. Over time, old wax can trap dirt, road grime, pollution and even small metal particles from brake dust. Repeatedly applying new wax over this layer can roughen and dull the surface, reducing shine and causing the paint to fade. Removing the old wax first gives you a clean, smooth surface. This allows the new wax to bond better to the clear coat, increasing durability and shine. A clean surface also makes it easier to see if there are any scratches or swirls that need to be repaired.
Q3. What is the safest way to remove old wax from car paint?
Answer: The safest way to remove old wax is to first wash it thoroughly with a strong but paint-safe car shampoo, sometimes called a wax-stripping shampoo. These shampoos are designed to break down the wax without damaging the clear coat. After washing, you can use a properly lubricated clay bar to remove any remaining dirt. If the wax layer is too thick or uneven, a light polish using a dual-action machine or hand applicator can remove any remaining wax and improve the shine. Avoid regular use of harsh household cleaners like dish soap, as excessive use can dry out rubber seals and damage the protective coating.
Q4. Can removing old wax damage my car’s paint?
Answer: If you use the right methods and products, removing old wax won’t damage the paint. Car paint is protected by a clear coat, which is designed to withstand washing and light polishing. Damage usually occurs when people use harsh degreasers, harsh chemicals not designed for cars, or scrub vigorously with rough sponges or brushes. These actions can cause scratches and dents. If you use clean microfiber towels, proper lubrication when applying clay and a gentle polishing technique, you can safely remove wax without damaging the paint surface.
Q5. Do I need to polish my car after removing old wax?
Answer: Polishing isn’t always necessary, but it’s often recommended. When you remove old wax, you may notice small dents, light scratches, or oxidation underneath. Polishing helps smooth the clear coat and restore its shine. A light polish can remove minor imperfections and enhance the paint’s shine. If your paint already looks smooth and shiny after removing the wax, you can skip heavy polishing. However, applying at least a light finishing polish can improve the final result and make the new wax or sealant last longer.
Q6. What happens if I don’t reapply protection after removing the old wax?
Answer: If you remove old wax and don’t apply new protection, your paint will be exposed to sun, rain, bird droppings, tree sap and road salt. Modern cars have a clear coat that protects the underlying color layer, but it still needs extra protection. Without wax, sealant, or ceramic coating, the clear coat can oxidize over time, lose its shine and become more prone to stains. Applying a new protective layer creates a barrier that makes washing easier and protects the surface from environmental damage.
Q7. How do I know if my car has wax deposits?
Answer: Wax deposits often appear as streaks, hazy spots, or uneven shine, specially in direct sunlight. You may also notice white marks around badges, trim and panel gaps. If the surface still feels rough after washing, it could be due to dirt trapped in the old wax layer. Another sign is poor water absorption, which means water droplets appear in some areas while others don’t. In such cases, removing the old wax and applying new wax can result in a more uniform and shiny finish.
References:
[1] Development of Car Coating Materials over the Past Decade for Paint Protection Applications – An Overview on the Different Types of Paint Protections
https://pmc.ncbi.nlm.nih.gov/articles/PMC12694507/

Guys, I’m a car audio enthusiast and customization expert and I love clear sound and clean installation. Plus, I have spent years helping people build their dream audio setups. And whenever I’m working on cars, I probably listen to music and thinks about the next big upgrade.