
Written By: Don Dodi
Fact Checked By: Kristen Brown
Reviewed By: Diego Rosenberg
A backup camera is actually need of the hour, as nearly 30% of all the vehicle accidents happens while reversing the vehicle and that’s where it actually helps you to see what’s behind you and that prevent these kinds of accidents easily.
And these are the extremely essential safety features that literally helps the drivers to avoid accidents and protect the pedestrians, specially children and pets, as they may be difficult to see when you reverse the vehicle.
Not only this, according to the NHTSA when you install the backup camera in your vehicle then it is actually makes you more safe when you reverse the vehicle and also it reports that backup cameras literally reduces the back over crashes by nearly 17% that actually helps to prevent injuries to pedestrians and damage to property as well.
So, basically these cameras actually provides you the clear view of the area behind your car, that eliminates the blind spots and they provide you the view which rearview mirrors can’t cover.
And in the tight parking spaces or crowded areas these backup cameras will increase your vehicle’s safety and add the value and lot convenience.
That’s why this guide actually tells you everything about How to Install a Backup Camera and yes you can do it by yourself as it will save you money as well.
Types of Backup Cameras
Backup cameras come in a variety of styles and designs and these suit different types of vehicles and driver needs.
The most common types include license plate cameras, which are mounted around the license plate area; bumper-mounted cameras, which are mounted directly on the rear bumper; and flush-mounted cameras, which provide a more distinctive look by fitting snugly into the vehicle’s bodywork.
Some backup cameras also come with wide-angle lenses that provide a wider view of the rear of the vehicle, helping to see objects that might otherwise be missed.
Understanding the types of backup cameras available helps you choose the most appropriate camera to suit your vehicle’s design and your personal preferences.
1. Wired vs. Wireless Backup Cameras
Backup cameras can be primarily classified into wired and wireless systems. Wired backup cameras are connected by cables to a monitor or head unit mounted in the car.
This type usually provides a more stable and clearer video signal because the connection is direct and without interference.
However, wired cameras can take longer to install because wires need to be run through the vehicle’s interior panels and connected to the reverse light power source.
Wireless backup cameras, on the other hand, send the video signal to the monitor via radio frequencies, without the need for long cables.
This makes installation faster and less intrusive, specially in older cars that don’t have built-in display systems.
But wireless systems can sometimes suffer interference from other electronic devices, sometimes causing signal drops or reduced video quality.
Choosing between wired and wireless depends on your vehicle, budget and your comfort with installation work.
2. Choosing the right camera for your vehicle
Choosing the right backup camera means considering several important factors.
First, think about the size and shape of your vehicle; cameras with a wider viewing angle or higher resolution may be more beneficial for better clarity in larger vehicles like trucks and SUVs. You also need to consider the monitor or display system installed in your car.
Some backup cameras come in a kit with their own monitor, while others connect directly to an existing screen, such as a factory-installed infotainment system.
Another factor is night vision capability, which is very helpful when reversing in low light or darkness.
Weather resistance is also important as the camera will be exposed to rain, dust and extreme temperatures.
Finally, consider your budget and decide whether you want a simple setup or one with extra features like parking guidelines or motion detection.
By considering these factors carefully, you can find a backup camera that is perfect for your vehicle and improves your driving safety.
Tools
| Item | Purpose / Description |
|---|---|
| Screwdrivers (Phillips & Flathead) | To remove and tighten the screws on the panel and camera mount. |
| Wire Strippers | Removing insulation from wires for electrical connection. |
| Drill | Drilling holes to install cameras or run wires through. |
| Drill Bits | Different sizes to match screw or cable holes. |
| Pliers | For holding wires, bending connectors and cutting small wires. |
| Electrical Tape | To safely insulate wire connections and prevent short circuits. |
| Multimeter (optional) | To test voltage and ensure correct wiring. |
| Cable Ties (Zip Ties) | To secure and organize cables. |
| Panel Removal Tool | To carefully remove car interior panels without damaging them. |
| Backup Camera Unit | Main camera that records the rear view. |
| Video Cable (for wired) | Connects the camera to the display screen. |
| Wireless Transmitter/Receiver (for wireless) | Wirelessly sends video signal from camera to monitor. |
| Power Cable | Connects the camera to the car’s reverse light power source. |
| Monitor or Display Unit | Screen for viewing the camera feed (can be built-in or separate). |
| Mounting Brackets or Screws | To securely attach the camera to the vehicle. |
| User Manual | Instructions for installation and wiring. |
How to Preparing Your Vehicle
Before installing a backup camera, it’s important to properly prepare your vehicle to ensure a smooth and successful process.
Taking the time to prepare your car can prevent damage and make the installation easier and safer.
This preparation includes identifying the right spot to install the camera and cleaning it thoroughly to provide a safe surface to mount it on.
1. Selecting the Appropriate Camera Mounting Location
Choosing the most appropriate location for your backup camera is important to get a clear and detailed view of the area behind your vehicle.
The most common location to mount the camera is near the license plate, usually on or just above the plate frame.
This location is popular because it provides enough height and angle to see obstacles behind the car without being too high or too low.
Some vehicles may allow the camera to be mounted on the bumper or tailgate, depending on their design.
When choosing the correct location, make sure the camera lens is not blocked by dirt, spare tires, or other parts. It is also important that the camera is protected from damage, so avoid locations where it could easily be hit or scratched.
2. Cleaning and Preparing the Installation Site
After you have chosen a mounting location, carefully clean the area to remove dust, dirt, or grease.
If the camera has an adhesive mount, dirt may prevent the camera from being properly installed, or if there is grease or rust on the surface, the screws may not fit properly.
Use a clean cloth dampened with a little rubbing alcohol or a mild cleaner to wipe the surface and allow it to dry completely.
Preparing the surface this way ensures that the camera stays firmly in place and works reliably for a long time. Also, if you need to drill holes for the mounting screws, check behind the panel for any wires or parts to prevent damage.
Following these simple preparation steps can save time and prevent problems during and after installation.
Backup Camera Installation
Properly mounting the backup camera is one of the most important steps in the installation process. The camera should be mounted in a location that gives the best view of the area behind your vehicle while also being protected from damage and weather.
The most common locations include the license plate area, rear bumper, or tailgate. Depending on your vehicle type and personal preference, each location has its own advantages.
The license plate mount is popular because it typically provides a central, stable position and an ideal height for capturing a wide-angle view. If your vehicle has a wide bumper, mounting the camera there can provide a lower perspective, which can help see objects near the ground.
Tailgate mounting is often used on trucks and SUVs, where it can provide a good field of view without obstructions.
1. Mounting the Camera on the Rear of a Vehicle
When mounting the camera, it is important to make sure the surface is clean and dry to provide a firm grip. Most cameras come with mounting brackets or adhesive pads designed to fit these common locations.
If the camera has screws, you may need to carefully drill small holes to avoid damaging any wires or parts behind the panel.
For better picture quality, position the camera so that the lens is straight and level. Do not position the camera so low that dust or water can easily get on the lens, which can reduce visibility.
It is also important to tilt the camera slightly downward to take pictures of the ground just behind the vehicle, as this is where objects or children may be most difficult to see.
2. Fixing the Camera Firmly
After mounting the camera, it is important to secure it firmly to avoid vibration or movement while driving. A loose camera can produce shaky or blurry pictures, making it difficult to judge distances.
If there are screws, tighten them carefully, but avoid overtightening, as this can break the camera housing or the vehicle panel.
For adhesive mounts, press the camera firmly to the surface before driving and allow enough time for the adhesive to adhere well.
Also, check the camera regularly to ensure it stays safe and clean for optimal performance.
Properly securing the camera not only results in clear images, but also extends the life of your backup camera system.
Wiring (for wired cameras)
For wired backup cameras, proper wiring is essential for reliable and safe system operation.
The camera cable must run from the rear of the vehicle, where the camera is mounted, to the front dashboard or display monitor.
This often requires the cable to be placed under a vehicle body panel, carpet or door frame so that the wires are hidden and protected.
Careful placement of cables can help prevent any damage from sharp edges, heat sources or moving parts inside the vehicle.
1. Installing camera cable inside the vehicle
Installing the cable means finding a safe route for it inside the vehicle.
Typically, installers begin by removing some interior panels or trim to access existing wiring channels or gaps.
These spaces are designed to hold the wiring and protect it from fraying. The cable must be held tight and secured with clips or cable ties so that it does not come loose or interfere with pedals or seats.
Using the vehicle’s factory wiring paths not only conceals the cable, but also reduces the chance of damage over time.
2. Protecting Wires and Vehicle Parts from Damage
When routing the cable, it is important to avoid sharp bends or twists in the cable, as this can break the wires inside and cause the camera to stop working.
Also, avoid placing the cable near hot parts, such as the engine or exhaust, as the heat can melt the insulation and cause a short circuit.
For safety, it is important to take special care not to pierce hidden vehicle parts, such as fuel lines, brake lines, or airbags.
It may be helpful to look inside tight spaces with a flashlight and a small mirror before pulling the cable through.
3. Connecting to Reverse Light Wiring for Power
The backup camera needs power to turn on automatically when the vehicle is put into reverse. This power usually comes from the reverse light circuit.
To connect, you’ll find the reverse light wires at the rear of the vehicle, often inside the tail light assembly.
Using a multimeter or test light can help correctly identify the positive and negative wires.
Connecting the camera’s power cable to the reverse light wiring ensures that the camera only turns on when the car is reversing.
Proper insulation by electrical tape or heat shrink tubing around the connections prevents moisture and corrosion, keeping the wiring safe and reliable.
Connecting the Camera to a Display Unit
After installing and wiring the backup camera, the next important step is to connect it to a display unit inside the vehicle.
This display allows you to view the video feed from the camera when you shift into reverse gear.
Depending on your vehicle and backup camera system, you may need to install a new monitor or use an existing head unit that supports video input.
1. Installing or Using an Existing Monitor or Head Unit
Some backup cameras come with their own separate monitor that can be mounted on the dashboard or rearview mirror.
Installing this monitor usually requires placing it in a visible location and connecting it to the vehicle’s power supply.
Other vehicles already have a built-in screen or head unit that can display the camera’s video feed. In such cases, you simply need to connect the camera’s video output to the monitor’s video input, often using RCA connectors or special plugs.
It’s important to check your vehicle’s manual or camera kit’s instructions to ensure compatibility and the correct connection points.
2. Connecting the Video Cable Correctly
The video cable transmits the camera’s live image to the monitor. For wired systems, this cable is usually an RCA or similar connector that plugs directly into the monitor’s video input port.
Ensuring a strong connection without interference is important because a poor connection can cause the image to flicker, stutter, or not appear at all.
Sometimes, an extension cable is needed if the monitor is far from the camera or the wiring path is long.
Using high-quality cables can improve signal clarity and reduce interference, resulting in a clearer and more stable video picture.
3. Powering the Monitor and Ensuring Signal Transmission
The display monitor needs its own power source, usually from the vehicle’s fuse box or a switched power line that turns on with the ignition.
Powering the monitor correctly ensures that it turns on when the car is started or shifted into reverse.
For wireless backup cameras, both the camera and monitor must have power and the video signal is transmitted via radio waves rather than cables.
In wired systems, making sure power connections are secure and testing the video feed before reassembling the panel helps prevent problems later on.
Ensuring smooth power delivery and clear signal transmission is the key to a reliable backup camera system that works every time you need it.
Read More:
Testing the Backup Camera
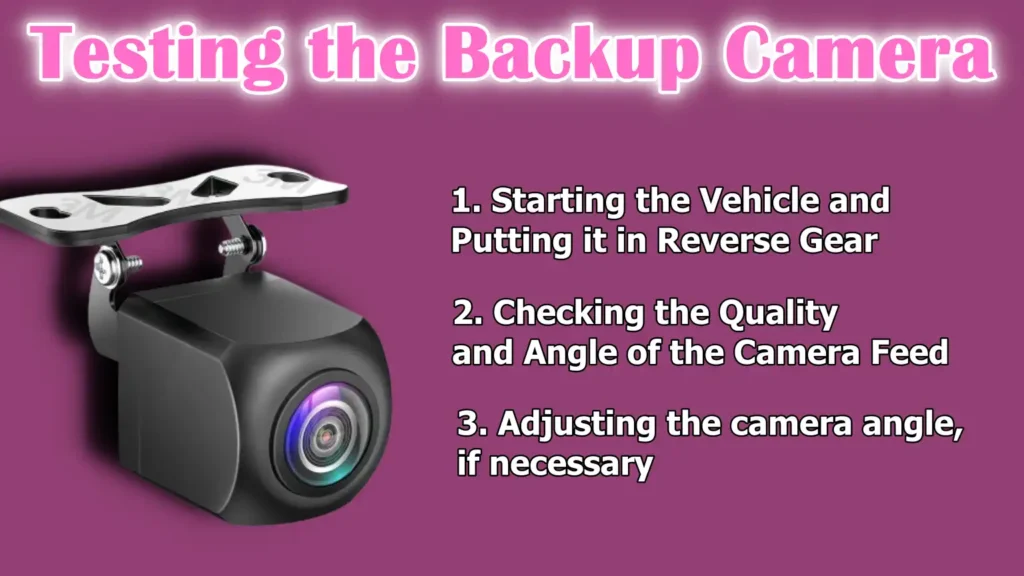
After you have completed the installation of your backup camera, it is very important to carefully test the system to make sure everything is working as expected.
This testing step helps you to spot any problems early and make adjustments before you drive regularly with the camera.
1. Starting the Vehicle and Putting it in Reverse Gear
To begin the test, start your vehicle and put the gear in reverse gear. Most backup cameras are designed so that they turn on automatically when the car is put into reverse gear, using power from the reverse light circuit.
As soon as you put it in reverse gear, check that the monitor or display screen turns on and is showing the live video feed from the camera.
If the screen does not turn on or shows a blank image, double-check the power connections and video cable connections to make sure everything is secure.
2. Checking the Quality and Angle of the Camera Feed
When the camera feed appears on the monitor, carefully check the video quality. The image should be clear, bright and not flickering or static.
Make sure the camera’s view covers a large area behind your vehicle, including potential obstacles such as low-height sidewalks, pedestrians, or other vehicles. If the image is blurry or dark, cleaning the camera lens may help.
Also, if your camera system includes parking guidelines or grid lines, check if they are visible on the monitor, as these can help you better judge distances when backing away.
3. Adjusting the camera angle, if necessary
If you think the camera angle is too high, too low, or tilted to one side, it’s important to adjust it before completing the installation.
The camera should be tilted slightly downward to capture the ground just behind the vehicle. This angle helps drivers see small objects or children that may not be visible through the mirrors.
Many cameras can be adjusted manually by loosening the mount and tilting the camera until you get the best view.
After adjustment, test the camera feed again to make sure the view is optimal and clearly covers the desired area.
Secure and Final Installation
After successfully installing the backup camera and connecting all the wires, the next important step is to properly secure all the components and complete the installation to ensure safety and reliability.
Proper management of cables and repair of the vehicle’s interior will ensure smooth system operation and maintain the look of the car.
1. Taping and securing all cables
Securing cables is important to prevent them from getting bent, pinched, or damaged by sharp edges or moving parts.
Wrap any loose connections with electrical tape and protect them from moisture and corrosion.
Also, secure the cables along their routing path using cable ties or clips so they stay neat and well attached to the vehicle’s frame or existing wiring channels.
Loose cables can cause noise, wear out quickly, or even disconnect, causing the camera to malfunction, so take the time to make sure every wire is firmly installed.
2. Reassembling Removed Panels or Trim
During installation, it is common to remove interior panels, door trim or other parts to access wiring routes and mounting points.
After all connections are secure and the camera has been tested, carefully reinstall these panels, making sure they fit properly without pinching or breaking any clips.
Reassembling panels not only improves the look of the vehicle, but also protects wiring from exposure, dust and damage.
It is a good idea to double-check that all screws, fasteners and clips have been replaced and tightened to factory standards.
3. Final Inspection for Cleanliness and Safety
Before considering the job complete, perform a thorough final inspection. Check for any loose wires, open connections or misplaced parts.
Make sure the camera and monitor are working properly without flickering or signal loss. Make sure the camera lens is clean and free of obstructions.
Also, make sure that none of the cables are interfering with vehicle functions, such as door closing or seat movement.
A neat, secure installation not only looks professional, but it also guarantees that the backup camera system will provide reliable service for years to come, giving you confidence and safety every time you reverse.
Troubleshooting Common Problems
Even after careful installation, backup cameras can sometimes experience common problems that affect their performance.
Knowing how to identify and resolve these problems can save you time and keep your system working smoothly.
1. Video feed not coming in or image quality poor
If your backup camera is not getting video or the image quality is poor, the problem may be caused by loose or bad cable connections.
Check all video cables and connectors to make sure they are securely plugged in and not damaged.
Dirt or moisture on the camera lens can also cause a blurry or unclear picture, so gently clean the lens with a soft cloth.
Additionally, if the image appears blurry or distorted, the camera’s position or angle may need to be adjusted. In some cases, low-quality cables or long cables without a signal booster can reduce image quality.
2. Power problems or flickering screen
Power problems are a common cause of a flickering or blank screen. Make sure the camera and monitor are receiving the correct power from the vehicle’s electrical system.
Loose or corroded wire connections, specially at the reverse light power source, can cause intermittent power loss.
Using a multimeter can help check if the wires are providing a steady voltage. Screen flickering can also be caused by interference from other electrical devices in the car or a weak ground connection.
Ensuring all wires are properly insulated and grounded often resolves these power-related problems.
3. Interference or Signal Loss in Wireless Models
Wireless backup cameras send video signals over radio frequencies, which can sometimes experience interference or signal loss.
Other electronic devices, such as Wi-Fi routers, mobile phones, or even some car alarm systems, can interfere with wireless transmission and cause the video feed to slow down or freeze.
To minimize interference, keep the camera and monitor antennas away from metal objects and avoid running electrical wiring across the wireless signal path.
Placing the receiver and transmitter closer to each other can also improve signal strength. In environments with heavy wireless traffic, switching to a wired system may be a more reliable option.
What Are the Basic Maintenance Tips
Proper maintenance of your backup camera system helps it work effectively and extend its life. Simple routine care can prevent common problems and ensure you always have a clear view when reversing.
1. Cleaning the Camera Lens Regularly
The camera lens is exposed to dust, dirt, rain and road debris, which can quickly accumulate and obscure the view.
Cleaning the lens regularly with a soft, damp cloth helps maintain a clear and sharp image. Avoid using harsh chemicals or abrasive materials that can scratch or damage the lens surface.
In winter or wet conditions, wipe away snow, ice or water droplets to avoid distorted or blurry images.
Keeping the lens clean is the easiest way to ensure your backup camera provides a reliable and accurate picture every time you use it.
2. Checking Cable Connections Periodically
Over time, vibration from driving and temperature changes can cause wire connections to loosen or cables to fray.
It’s important to periodically inspect all wiring to make sure plugs and splices are secure and free from corrosion or damage.
Pay particular attention to connections near the reverse light power source and monitor.
If you see any frayed wires, exposed metal, or signs of moisture, repair or replace the affected cables immediately.
Well-maintained wiring prevents intermittent power outages and signal problems, keeping your camera system working smoothly.
3. Update or upgrade the system when needed
Technology changes quickly and backup camera systems get better over time, including improved resolution, better night vision and wireless options.
If your current system starts to show signs of obsolescence, such as poor image quality or outdated features, consider updating or upgrading it.
Many newer cameras offer improved durability, wider viewing angles and easier installation.
Check the manufacturer’s website regularly or consult your vehicle service provider to learn about the latest camera models or software updates that improve your system’s performance and security.
Conclusion – How to Install a Backup Camera
So, now-a-days backup cameras as no longer actually luxury features: as they have become literally must have tools that does saves lives and also it prevents the costly accidents every day.
Installing a backup camera is one of the smartest upgrades you can make to increase safety and convenience while driving.
These cameras have been proven to reduce accidents by providing a clear view of what’s behind your vehicle, specially in blind spots that traditional mirrors don’t cover.
By choosing the right camera, installing it correctly and maintaining the system, you can enjoy years of reliable performance that helps protect pedestrians, pets and property.
Whether you choose a wired or wireless system, understanding every step—from mounting to wiring and testing—ensures your camera will work without a problem every time you reverse.
An NHTSA shows that the backup cameras must actually deliver a view of at least a 10-foot by 20-foot zone behind the vehicle and a screen size must be at least 3.5 inches diagonal that actually helps the drivers to recognise small obstacles as well: and particularly it becomes really important when there’s children nearby.[¹]
Now, that’s all from this guide and now we are waiting for your unsolved questions.
Frequently Asked Questions
Q1. Can you install a backup camera in a car that does not have one?
Answer: Yes, you can install a backup camera on a car that doesn’t already have a backup camera. Many people choose to install backup cameras on older vehicles to increase safety and make parking easier. Installing a backup camera usually involves mounting the camera to the rear of the car, running wires into the vehicle to connect it to a monitor or display screen and connecting power to the reverse lights so the camera turns on automatically when reversing. Wireless backup camera systems are also available that may be easier to install as they don’t require long video cables. Although it may take some time and careful work, most people with basic tools and patience can install a backup camera themselves, or you can have a professional install it for you.
References:
[1] Vehicle Rearview Image Field of View and Quality Measurement
https://www.nhtsa.gov/sites/nhtsa.gov/files/811512.pdf

Guys, I’m a car audio enthusiast and customization expert and I love clear sound and clean installation. Plus, I have spent years helping people build their dream audio setups. And whenever I’m working on cars, I probably listen to music and thinks about the next big upgrade.