Written By: Don Dodi
Fact Checked By: Kristen Brown
Reviewed By: Diego Rosenberg
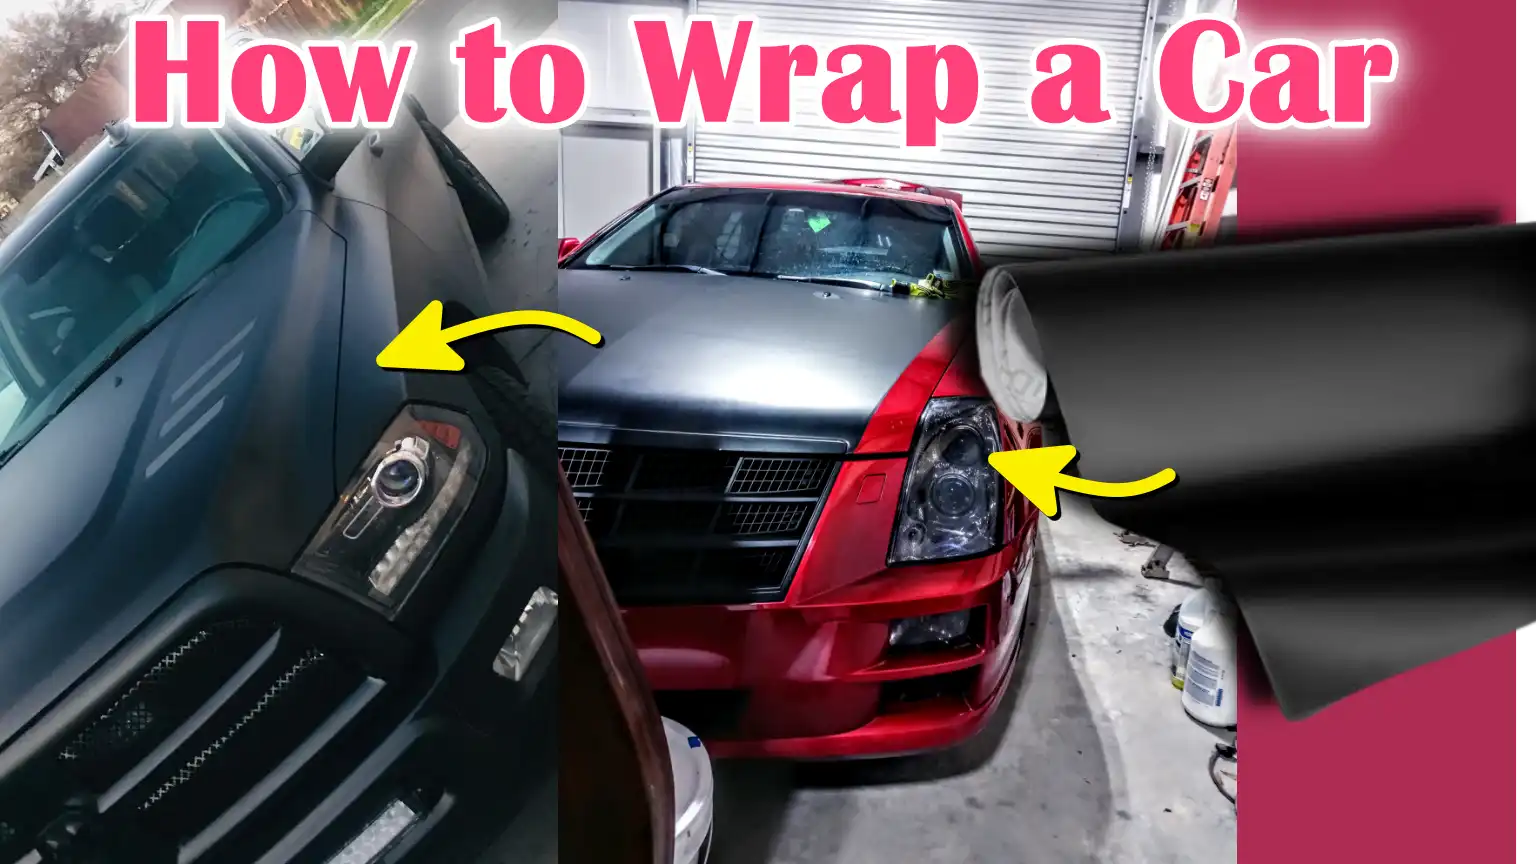
Wrapping a car is just like you have changed the clothes of your car to more stylish, protective and totally reversible as well and with this you can give your car a completely new identity and that also in just a day.
Not only this, car wrapping is also one of the fastest-growing trends in vehicle customisation now-a-days, as with global demand for vinyl wraps which is expected to exceed $23 billion by 2030 according to the market research.
Basically a car wrap is a thin, durable vinyl film which is applied over a vehicle’s paint to change its appearance without the need for a full respray as well.
And unlike like the traditional paint: as it can take days to cure and permanently alters the vehicle, as wraps are truly removable, reversible and offer endless design possibilities: so you can have solid colors to textured finishes such as: matte, gloss, carbon fiber and chrome.
As it is the fact that if you have done this process correctly and by using professional-grade vinyl wrap then it can even last 5 to 7 years that protect the factory paint from UV rays, minor scratches and weather damage.
Now, it is the guide which shows you all about How to Wrap a Car, so that you can be really creative with your car.
Tools
| Item | What It Is | Why It’s Needed |
|---|---|---|
| Vinyl Wrap | A thin, flexible film that comes in a variety of colors, patterns and textures. | Key cover that changes the look of your car and protects the paint. |
| Edge Sealer | A clear or matching liquid or tape that seals vinyl edges. | This prevents the vinyl from peeling off at the corners and extends the life of the cover. |
| Knifeless Tape | A special tape that has a built-in filament. | This lets you cut vinyl cleanly without scratching the paint. |
| Squeegee | A flat, smooth instrument made of plastic or rubber. | Expels air bubbles and makes the vinyl smooth on the car’s surface. |
| Heat Gun | A hand-held device that blows hot air. | Softens the vinyl so it can stretch and fit around curves or corners. |
| Gloves | Soft, lint-free gloves. | Protects the vinyl from fingerprints and helps smooth it out by hand. |
| Cutting Knife | A sharp, precise blade. | For trimming vinyl edges and cutting off excess material. |
| Isopropyl Alcohol | A liquid cleaner (usually 70% or higher). | Removes grease, wax and dirt so vinyl sticks well. |
| Microfiber Cloths | Soft, scratch-free fabric. | Cleans the car without leaving any marks. |
| Infrared Thermometer | A device that measures the temperature of a surface without touching it. | This ensures that the vinyl is heated to the correct temperature to stretch and set. |
| Magnets | Strong, flat magnet. | Holds vinyl in place while you adjust position before pasting. |
| Wrap Rollers | Small rollers with soft edges. | Helps smooth out vinyl in narrow spaces and around edges. |
Preparing the Car
1. Thorough Cleaning
Before applying a vinyl wrap, the car must be completely clean.
Any dirt, dust or grease left on the surface can cause the wrap to adhere unevenly or create raised bumps.
Start by washing the entire car with a pH-neutral car shampoo to remove road grime, oil and other contaminants.
Avoid using wax or polish at this step, as these create a slippery layer that can prevent the vinyl from sticking properly.
Once the car is dry, wipe the surface where the vinyl wrap will be applied with isopropyl alcohol, ideally at a concentration of 70% or higher.
This step ensures that the surface is free of invisible residues such as silicone or tar, which are common causes of vinyl deterioration.
2. Surface Inspection
After cleaning, the next step is to carefully inspect the car’s body.
Vinyl wraps are very thin, typically 2 to 4 millimeters thick, which means imperfections underneath them will be visible.
Scratches, dents, rust spots and chipped paint can be more visible after wrapping and the wrap may have less grip.
Inspect each panel carefully in good light, specially near edges and bends.
If you notice any damage, it’s a good idea to repair it first.
For example, sanding away rust, filling small dents, or touching up chipped paint can create a smooth, even surface that will help the vinyl lay flat and last longer.
3. Removing parts
Removing parts of the car before wrapping makes the job look cleaner and more professional.
Parts such as side mirrors, trim, emblems, door handles, headlights and taillights often get in the way and can make it difficult to smoothly spread the vinyl around the edges.
Removing these parts allows the vinyl to be applied more precisely to the gaps, which not only improves the look but also prevents peeling at the edges over time.
If it is not possible to remove a part, carefully wrapping around it is also an option, but will require additional precision to achieve a flawless finish.
How to Plan Your Wrap
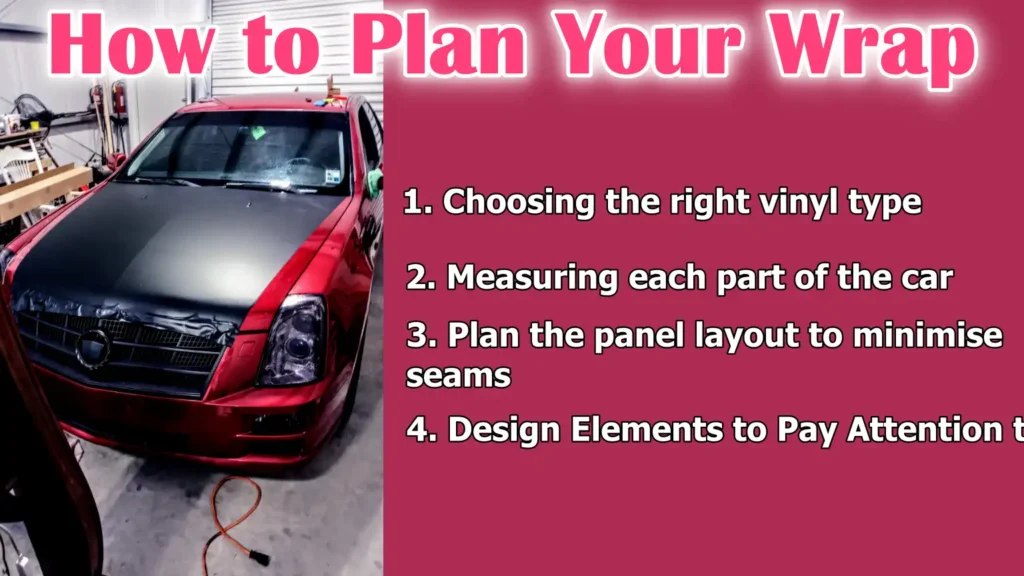
1. Choosing the right vinyl type
The first and most important decision when planning a wrap is choosing the right type oaf vinyl.
There are two main types: cast vinyl and calendered vinyl.
Cast vinyl is made from a process that yields a thinner, more flexible and more durable material.
It is often preferred for full car wraps because it molds easily to curved and complex shapes, does not shrink and can last five to seven years with proper care.
Calendered vinyl is thicker, less flexible and more economical, making it more suitable for short-term wraps such as flat surfaces or temporary advertisements.
Knowing the difference between these two materials can save money and prevent premature wear or peeling.
2. Measuring each part of the car
Accurate measurements are important to avoid running out of material or buying too much.
Each part of the car that will be wrapped should be measured separately, including doors, fenders, bumpers, hood and roof.
It’s important to add extra length and width to each measurement to account for errors during stretching, trimming and application.
For example, bumpers and curved panels often require more vinyl than their flat measurements.
Accurate measurements not only prevent material waste, but also help with budgeting, as vinyl wrap is sold in rolls that can be expensive depending on the finish and brand.
3. Plan the panel layout to minimise seams
Vinyl wraps look most professional when seams are minimal or hidden.
This requires careful planning of where each sheet of vinyl will be placed.
Large panels, such as hoods or roofs, should ideally be covered with a single piece to avoid visible lines.
When seams are unavoidable, they should be applied in places that are naturally less visible, such as body lines or panel edges.
It’s also important to align patterns or textures across seams for a clean, continuous look.
Poor seam placement can disrupt the flow of the design and make the wrap look plain, even if the installation is neat.
4. Design Elements to Pay Attention to
The design of a wrap isn’t just about color; it’s also about how the shape of the car blends with patterns, textures and branding elements.
Solid colors like matte black or gloss white create a uniform look, while special finishes like carbon fiber or chrome can make certain parts stand out.
For commercial vehicles, branding elements like logos and contact information should be placed in the most visible location, without any bends or panel gaps.
Digital mock-ups are useful for seeing how the design will look on the actual vehicle and for adjusting elements before cutting the vinyl.
A well-thought-out design plan not only makes the wrap more appealing, but also ensures that the installation process goes smoothly.
How to Wrap a Car – Easy Method
1. Cutting the Vinyl
When beginning the application, it’s important to cut the vinyl panels slightly larger than the area you want to cover.
This extra material gives you room to work and makes it easier to stretch and apply the vinyl without creasing at bends and edges.
Cutting too close to the exact measurements can cause difficulties during installation and lead to mistakes or ruined vinyl.
Always leave at least a few inches of extra material on each side for trimming later.
2. Applying the Vinyl
After cutting, the next step is to apply the vinyl to the car’s surface.
Using magnets or painter’s tape can help hold the vinyl in place temporarily, allowing you to adjust and align it correctly before gluing it down.
Correct alignment is important to maintain symmetry across all panels and keep any design elements or patterns consistent.
A misaligned wrap can look unprofessional and disrupt the visual flow of the vehicle.
3. Squeegeeing the Surface
After the vinyl is positioned, smooth it over the car’s surface with a squeegee.
Start at the center of the panel and work your way outward, pressing the vinyl lightly to remove any air bubbles or creases.
This technique ensures even adhesion and prevents trapped air, which can cause bubbles or peeling over time.
A light touch is important at this stage to prevent the vinyl from overstretching.
4. Heating and Stretching
Vinyl wrap becomes more pliable when heated.
Using a heat gun, heat the vinyl carefully when applying it to bends, edges and corners.
The heat softens the material, allowing it to stretch evenly without tearing or distorting the design.
It’s important to avoid overheating, as this can damage the vinyl or cause it to shrink too much.
By heating and stretching slowly, the wrap will easily mold into intricate shapes, creating a seamless look.
Actually post-heating is really critical, so wherever the film was stretched and that’s where the film should be heated to at least 93°C and make sure that it should not rise more than 107°C, and you can even check the surface temperature by using an infrared thermometer; so basically this guidance will definitely be helpful that prevent edge lift and it again keeps stretched vinyl stable on deep channels and curves as well.[¹]
5. Tucking and Trimming
After applying and smoothing the vinyl, carefully tuck the edges under trims, seams or other parts of the car to hide the raw edges and prevent fraying.
It is important to use tape rather than a knife to cut the vinyl along edges or body lines, as this reduces the risk of scratching the paint and provides a clean, precise cut.
Proper tucking and trimming not only improves the look of the wrap, but also increases its strength by preventing fragile edges from fraying or being damaged.
Final Steps
1. Apply Edge Sealer for Durability
After the vinyl wrap has been properly applied and trimmed, it is important to apply an edge sealer to all exposed edges.
Edge sealer is a special liquid or tape designed to protect vinyl edges from damage, fraying or peeling from water, dirt and everyday use.
This step significantly increases the life of the wrap by creating a strong barrier to hold the edges firmly in place, specially in areas where the wrap may be exposed to abrasion or harsh weather conditions.
Skipping this step can cause premature wear of the wrap’s edges, reducing both its beauty and durability.
2. Heat the wrap to set the adhesive
After the entire wrap has been applied and the edges sealed, a process called post-heating is necessary.
Using a heat gun, the vinyl is heated evenly to the temperature recommended by the manufacturer.
This allows the adhesive behind the vinyl to fully activate and set, improving its adhesion to the car’s surface.
Post-heating also helps to reduce any stress on the vinyl due to stretching during installation, reducing the chance of shrinkage or wrinkling later on.
Proper post-heating ensures that the wrap sticks firmly and lasts for many years with minimal problems.
3. Reinstall Removed Parts
If parts such as mirrors, trim, badges, headlights or taillights were removed prior to wrapping, they should now be carefully reinstalled.
Reattaching these parts after wrapping allows the vinyl to adhere well under the edges, providing a clean and professional finish.
Make sure all screws and clips are secure and that no vinyl has been compressed or damaged during reassembly.
Taking the time to properly reinstall parts not only improves the look of the vehicle, but also helps maintain the integrity and durability of the wrap.
Common mistakes to avoid
1. Not preparing the surface properly
One of the most common and costly mistakes when wrapping a car is not preparing the surface properly.
Dirt, grease, wax or any residue left on the paint can prevent the vinyl from sticking properly.
This can cause the wrap to bubble, peel or peel prematurely.
A thorough cleaning with soap and water followed by a wipe down with isopropyl alcohol is a must to create a clean, smooth surface for the vinyl to adhere to.
Skipping this step greatly reduces the quality and lifespan of the wrap.
2. Over-stretching the vinyl
Vinyl wrap is flexible, but over-stretching it can weaken the material and permanently warp or tear it.
Over-stretching also damages the adhesive backing, which can lead to poor adhesion and premature peeling.
The correct way is to heat the vinyl evenly with a heat gun and slowly pull it off.
To maintain the texture and durability of the vinyl, do not apply more force than the vinyl can handle, specially on tight curves or corners.
3. Cutting directly on car paint
Cutting vinyl wrap directly on a car’s painted surface is risky and can easily cause scratches or damage.
Using tools like knifeless tape is a safer option as this allows the blade to make a clean cut without touching the paint.
If a knife must be used, it should be done very carefully and with a sharp blade to reduce pressure.
Paint protection is important as the whole purpose of wrapping is to protect and preserve the car’s original finish.
4. Ignoring the manufacturer’s temperature guidelines
Each vinyl wrap product has specific temperature limits for both application and after heating, which must be strictly followed.
Applying vinyl at too low a temperature can reduce adhesion, while overheating can cause the vinyl to melt or shrink, ruining the finish.
Ignoring these guidelines can often result in bubbles, wrinkles or premature wear of the wrap.
Using a thermometer to monitor the surface temperature and carefully controlling the heat gun helps ensure the wrap sets correctly and lasts a long time.
Read More:
Maintenance and Care
1. Hand wash only, avoid high pressure washing
To keep vinyl car wrap looking fresh and lasting as long as possible, it is best to hand wash the vehicle rather than using an automatic car wash or high pressure washer.
High pressure water jets can push water under the edges of the wrap, causing it to lift or peel prematurely.
Hand washing offers gentle cleaning and better control over pressure, which protects the integrity of the vinyl.
2. Use pH-neutral soap
Selecting the right cleaning products is also important.
Harsh chemicals, strong detergents or acidic soaps can discolor vinyl and damage its finish over time.
Using a mild, pH-neutral soap designed specifically for vehicles maintains the color and texture of the wrap while safely removing dirt and grime.
Avoid household cleaning products or abrasives that can scratch or discolor the vinyl surface.
3. Avoid prolonged exposure to sunlight as much as possible
Although high-quality vinyl wraps are designed to resist UV rays and weathering, repeated and intense exposure to direct sunlight can cause the material to fade and weaken over the years.
Parking in a shaded area or using a car cover, if possible, can protect the wrap from sun damage.
Regular maintenance and prompt cleaning of bird droppings, tree sap or other contaminants also keep the wrap from deteriorating.
4. Inspect the edges periodically
Regular inspection of the wrap’s edges and joints is important to catch any early signs of fraying, peeling or damage.
Minor problems, such as small bubbles or light wear along the edges, can often be repaired quickly before they worsen and require complete replacement.
Paying attention to problem areas, specially around door handles, mirrors and bumpers, extends the life of the wrap and keeps the vehicle looking professionally finished.
Cost and Time Estimates
1. Average Cost of Do-It-Yourself vs. Professional Wrapping
The cost of car wrapping varies widely depending on factors such as the size of the vehicle, the type of vinyl used and the complexity of the design.
For those who choose to wrap their car themselves, the main expense is the vinyl wrap material, which can range from about $300 to $1,000 for the entire car, depending on the quality and finish.
Do-it-yourself tools and materials can cost from $100 to $200, making it a more affordable option overall.
However, professional wrapping services typically charge between $2,000 and $5,000 for the entire wrap.
Professionals offer expert installation, high-quality materials and guarantee a flawless finish, which often justifies the higher cost.
It’s important to take into account time, experience and the risk of mistakes when deciding between doing it yourself and hiring a professional.
2. Time for the entire wrap (do it yourself vs.at the shop)
The time it takes for the entire car wrap depends largely on experience and preparation.
A professional shop typically takes two to five days to complete the wrap, including the preparation, installation and finishing stages.
Professionals work efficiently with the right tools and environment to ensure high-quality results.
For DIY enthusiasts, the process can take several days to more than a week, specially for first-time DIY wrappers.
This includes time for cleanup, measuring, cutting, application and correcting mistakes.
Rushing can lead to mistakes like bubbles or uneven edges, so patience and careful work are essential to a successful DIY wrap.
Conclusion – How to Wrap a Car
Now, you definitely know that when you wanted to change your car’s look then it doesn’t always mean to be expensive paint jobs only, but you can also wrap it up to completely new stylish, protective layer that can be updated whenever you like.
Whether you do it yourself or hire a professional, understanding the entire process—from proper cleaning and surface preparation to choosing the right vinyl and carefully applying it—is essential to a successful and long-lasting wrap.
High-quality vinyl films not only give your car a new, customized look, but also protect it from sun damage, scratches and minor wear and tear.
By avoiding common mistakes like careless preparation or over-stretching the vinyl and following proper maintenance tips like light washing and regular inspection, you can extend the life of your wrap by many years.
Ultimately, wrapping your car is a flexible and cost-effective option compared to repainting, allowing you to change the style whenever you want and maintain your vehicle’s value.
With patience, attention to detail and the right tools, anyone can achieve a professional-quality finish and enjoy the benefits of a beautifully wrapped car.
So, that’s it from this guide and just comment down below for more information about it.
Frequently Asked Questions
Q1. Can you wrap your own car?
Answer: Yes, if you have the right tools, materials and patience, you can wrap your own car. Car wrapping involves cleaning the surface thoroughly, measuring and cutting the vinyl correctly and carefully applying it without trapping air bubbles or creases. Although beginners can do simple wrapping, full car wrapping can be tricky because the vinyl needs to stretch and fit smoothly over curves, edges and intricate shapes. Many people prefer to hire professionals because they have experience and special equipment that make the process faster and give a better finish. However, if you take the time, follow instructions carefully and practice on small areas first, a DIY car wrap can be a profitable and cost-effective project.
Q2. Is it cheaper to paint or wrap a car?
Answer: Car wrapping is usually cheaper than full painting, but costs can vary depending on the type of vinyl or paint and the size of the vehicle. A professional paint job, which includes sanding, priming and multiple coats of paint, can cost several thousand dollars, especially if you want a high-quality finish or custom color. A full car wrap, on the other hand, typically costs less, often ranging between $2,000 and $5,000 depending on the quality of the vinyl and the complexity of the design. Wraps are also quick to apply and can be removed later without harming the original paint, which makes them a good option if you want to temporarily change the look of your car or protect the paint underneath. Paint work lasts longer, but it is permanent and more expensive, so wrapping is often a more affordable and flexible option.
Q3. How long does car wrapping last?
Answer: A good quality car wrap, when properly applied and well cared for, can last 5 to 7 years. Its lifespan depends on many factors such as the type of vinyl used, the skill of the installer and how well the wrap is maintained. Cast vinyl wraps are the most durable and flexible, lasting a long time and holding up well to sun, rain and other weather conditions. Taking care of your wrap by washing it gently, avoiding harsh chemicals and parking in shady areas will make it last longer. Improper application, exposure to extreme heat or cold and physical damage can shorten the life of the wrap. Regularly checking the edges and fixing minor issues in a timely manner will keep your wrap looking good and your car protected for a long time.
References:
[1] Installation Guide | Tips & Tricks. 3M™ Print Wrap Film IJ280 with 3M™ Gloss Wrap Overlaminate 8428G
https://multimedia.3m.com/mws/media/2009119O/3m-print-wrap-film-ij280-with-3m-gloss-wrap-overlaminate-8428g-tips-and-tricks.pdf

Guys, I’m a car audio enthusiast and customization expert and I love clear sound and clean installation. Plus, I have spent years helping people build their dream audio setups. And whenever I’m working on cars, I probably listen to music and thinks about the next big upgrade.