Written By: Don Dodi
Fact Checked By: Kristen Brown
Reviewed By: Diego Rosenberg
It is basic fact that if your engine can breathe better then it will automatically perform stronger and that’s how a supercharger becomes game-changer as it increases the performance and that can easily turn your everyday driving experience into an exciting one.
It is not like the turbocharger, which actually uses the exhaust gases to spin a turbine, instead of this a supercharger is directly connected to the engine’s crankshaft, that literally provides the instant boost and better throttle response as well.
So, Yes when you install a supercharger that can surely increase the horsepower, improve the acceleration and it enhances the overall vehicle performance as well and because of this you’ll see that your car feel way more faster and more responsive than ever.
Additionally, it can be see more technical process, but believe it or not when you truly understand the steps, tools and safety measure then it can be achievable for enthusiasts with basic mechanical skills as well.
Not only this, it is also important to choose the right supercharger for your car, otherwise it won’t be that reliable, efficient and can cost long-term engine health as well, that’s why you need to choose the right one that tunes with the engine perfectly.
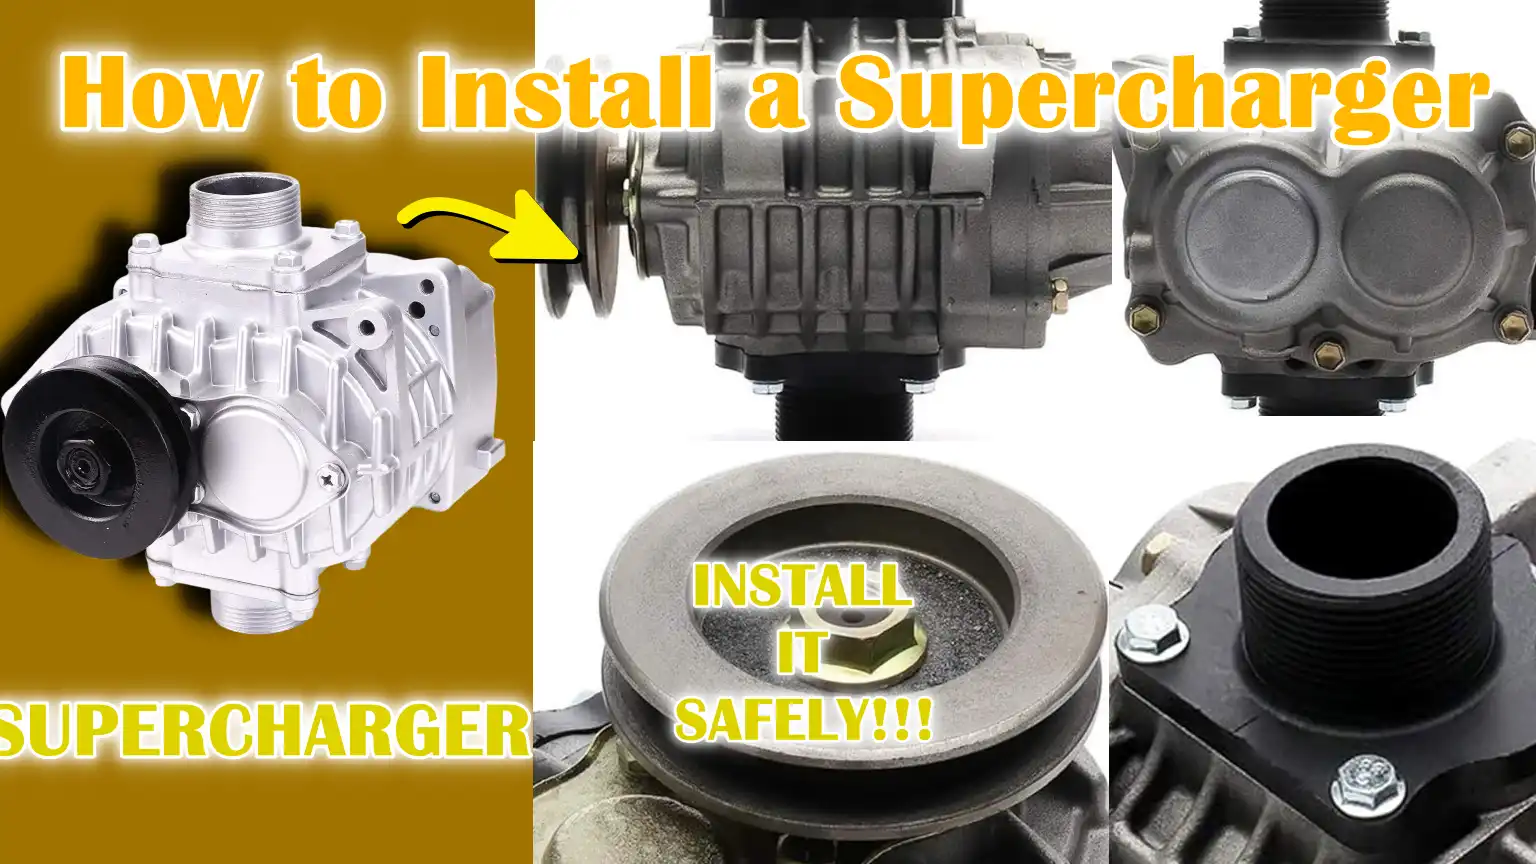
And this guide shows you all these kinds of things with ease about How to Install a Supercharger – Achieve Maximum Engine Performance.
Tools
| ITEM | DESCRIPTION | PURPOSE / WHY NEEDED |
|---|---|---|
| Supercharger Kit | Complete kit designed for your car model. | The main components for increasing engine power. |
| Socket Kit | Collection of sockets in various sizes. | For removing and tightening bolts and nuts. |
| Wrench | Open-end and box wrenches. | For loosening and tightening bolts in tight spaces. |
| Screwdriver | Flathead and Phillips head. | For removing or securing screws and small fasteners. |
| Torque Wrench | Adjustable wrench that measures force. | This ensures that the bolts are tightened to exact specifications. |
| Belt Tensioner Tool | Tool for adjusting serpentine or auxiliary belt. | Properly tensions the belt that drives the supercharger. |
| Intercooler (if required) | Heat exchanger that cools the compressed air. | Helps the engine run efficiently and prevents overheating. |
| Gaskets, hoses, clamps | Rubber seals, flexible pipes and metal clamps. | Ensures proper sealing and secure connections. |
| Engine oil | Lubricants for engine parts. | Reduces friction and protects the engine during operation. |
| Coolant | A fluid that removes heat from the engine. | Prevents overheating during operation. |
| Other fluids | Brake fluid, power steering fluid (if affected). | Keeps all systems working smoothly after installation. |
| Safety equipment | Gloves, goggles and protective clothing. | Protects hands, eyes and body during installation. |
How to Prepare Before Installation
1. Check the compatibility of the supercharger with the vehicle
Before starting the installation, it is important to make sure that the supercharger is fully compatible with your specific car model.
Superchargers come in different sizes and designs and using the wrong type of supercharger can cause engine damage or poor performance.
Check the manufacturer’s specifications for your car’s engine type, model year and any necessary modifications.
This step ensures that the supercharger fits properly and works efficiently, saving you time and avoiding costly mistakes.
2. Disconnect the battery to avoid electrical hazards
For safety, always disconnect the car’s battery before working on the engine.
This can prevent accidental electrical shocks, short circuits, or damage to sensitive electronic devices.
The safest way is to disconnect the negative terminal first and then the positive terminal.
Taking this precaution keeps both you and your vehicle safe during installation.
3. Drain Necessary Fluids
Before removing or installing components, it is important to drain certain fluids, such as engine oil, coolant and sometimes power steering fluid.
Removing these fluids can prevent leaks and keep the work area clean.
This allows you to safely remove engine parts without any leaks or damage.
Be sure to collect the fluids in a proper container and dispose of them according to local environmental regulations.
4. Remove Engine Covers and Accessories for Access
To access the engine parts where the supercharger will be installed, you will need to remove engine covers, belts and other obstructing accessories.
This may include the air intake system, alternator bracket, or other components, depending on your car model.
Carefully remove and install each component, taking care to locate all bolts, nuts and screws.
Proper arrangement during this step will make reassembly easier and faster.
5. Ensure a Proper Workspace with Good Ventilation and Lighting
A safe and organized workspace is important for any car modification.
Make sure the area is clean, level and well-lit so you can see all the parts clearly.
Good ventilation is also important to prevent inhaling harmful fumes, specially when handling fuel, oil or other chemicals.
Having the right environment not only makes installation easier, but also reduces the risk of accidents or mistakes.
How to Remove the Necessary Parts
1. Removing the Intake Manifold or Stock Air Intake System
The first major step in preparing the engine for supercharger installation is removing the intake manifold or stock air intake system.
The intake system is responsible for delivering air to the engine for combustion and it often obstructs access to the parts where the supercharger will be installed.
Carefully remove all hoses, sensors and clamps attached to the intake.
Removing it properly ensures you have enough room to install the supercharger and prevents damage to delicate parts like the throttle body or mass airflow sensor.
2. Removing the Serpentine Belt or Accessory Belt
Next, the serpentine belt or accessory belt must be removed to access the front of the engine.
This belt drives essential parts like the alternator, water pump and air conditioning compressor.
Use the belt tensioner tool to safely loosen the tension and remove the belt from the pulley.
Removing the belt prevents any obstructions in the supercharger installation and allows you to properly align the new belt system that will drive the supercharger once it is installed.
3. Remove any obstructing parts
Some additional engine components, such as the alternator, power steering pump or mounting brackets, may obstruct the installation area.
Carefully remove these parts and note their position so they can be reinstalled correctly later.
Removing these obstructions creates a clear work space, which reduces the risk of accidental damage to the engine or newly installed supercharger parts during assembly.
4. Carefully label and place bolts, nuts and small parts
When removing these parts, it is important to organize all bolts, nuts and small parts.
Label each item or place it in separate bins according to its location.
This step prevents confusion during reassembly and saves time by ensuring that each part is returned to the place it came from.
Organized storage also prevents any parts from getting lost, which could impact the safety and performance of the installation.
How to Install the Supercharger
1. Fix the Supercharger Bracket Securely on the Engine
The first step in installing a supercharger is to securely install the supercharger bracket on the engine.
This bracket serves as the main support for the supercharger and must be firmly mounted to prevent vibration or movement during operation.
Use the bolts provided in the kit and tighten them according to the manufacturer’s instructions.
Ensuring the bracket is installed correctly is important for alignment of the supercharger and protection of the engine.
A loose bracket can cause misalignment, belt slippage, or even damage to engine parts.
2. Fix the Supercharger Unit on the Bracket
Once the bracket is secured, the supercharger unit can be installed.
Carefully install the supercharger so that it fits snugly on the bracket, making sure that no hoses or wires are pinched.
Most supercharger kits include spacers or adapters for proper alignment.
Correct positioning is essential to the supercharger operating efficiently and preventing stress on the drive belt and pulley.
Double-check that the unit is installed correctly and that all mounting points are tightened to the recommended torque values.
3. Connect the drive belt system to the crankshaft pulley
After the supercharger is installed, the next step is to connect it to the engine’s crankshaft via the drive belt system.
The drive belt transfers power from the engine to the supercharger, causing it to compress air and increase engine output.
Make sure the belt is installed correctly around the pulley according to the manufacturer’s instructions.
Misalignment or incorrect routing can cause the belt to slip, produce abnormal noises, or reduce performance, so attention to detail is important.
4. Align and adjust belt tension to manufacturer’s specifications
Proper belt tension is critical to smooth operation and longevity of both the supercharger and engine.
Use a belt tensioner tool to adjust the tension according to the specifications in the installation manual.
A belt that is too tight can put stress on bearings and reduce efficiency, while a loose belt can slip and fail to drive the supercharger effectively.
Proper tension ensures optimum performance, reduces wear and prevents potential damage to the system.
5. Install the intercooler (if part of the kit)
Some supercharger kits include an intercooler, which cools the compressed air before it enters the engine.
Cold air is denser, allowing the engine to safely produce more power.
Install the intercooler in the recommended location and connect all associated piping.
Tighten all brackets and clamps to prevent leakage, as leakage can reduce performance or damage the engine.
6. Install the hoses, piping and clamps
Finally, install all the hoses, piping and clamps of the supercharger system.
This includes vacuum lines, intake pipes and, if necessary, coolant or oil lines.
Make sure every connection is tight and properly installed to avoid leaks, interference with moving parts, or contact with hot engine surfaces.
Properly installed hoses and clamps ensure that the supercharger system operates efficiently, safely and reliably over time.
How to Do Fuel and Air Management
1. Install upgraded fuel injectors (if necessary)
When installing a supercharger, your engine will require more fuel to keep up with the increased airflow and maintain the correct air-fuel ratio.
Standard fuel injectors may not supply enough fuel at high boost, which can lead to engine burn and engine damage.
Advanced fuel injectors are designed to consistently deliver more fuel, ensuring the engine runs safely and efficiently.
Installing the correct injectors helps prevent misfiring, improve throttle response and get maximum power from the supercharger.
2. Upgrade the fuel pump, if necessary
A stock fuel pump cannot always keep up with the extra demand created by a supercharger, specially at higher performance levels.
Upgrading to a higher-capacity fuel pump ensures that fuel pressure remains constant under all conditions.
This prevents fuel starvation during acceleration and keeps the engine running smoothly.
A properly functioning fuel pump is essential to maintaining engine reliability and achieving the full performance potential of a supercharged setup.
3. Connect New Intake Piping and Filter
Proper intake piping and high-flow filters are essential to delivering clean, high-volume air to the supercharger and engine.
Replacing stock intake piping with larger or stronger pipes reduces airflow obstruction, while high-quality air filters remove dust and debris to protect the engine.
Correct installation of intake components ensures that the engine receives the maximum amount of oxygen, which is critical for efficient combustion, increased horsepower and long-term engine health.
4. Ensure Proper Airflow Path
The airflow path is a key factor in maximizing supercharger performance.
Air must flow smoothly from the filter through the supercharger to the engine without any sharp turns, leaks or obstructions.
Properly set airflow increases engine efficiency, improves throttle response and reduces heat buildup.
Checking for strong connections, avoiding contact with hot engine parts and ensuring a straight, unobstructed path are essential steps for optimal operation.
How to Do Electrical and Tuning Setup
1. Reconnect the Sensors and Wiring Harnesses
After installing the supercharger and related components, it is important to reconnect all sensors and wiring harnesses that were disconnected during the installation process.
These sensors monitor engine conditions such as air pressure, temperature and fuel flow and provide critical data to the engine control unit (ECU).
Proper reconnection ensures that the ECU receives accurate information, allowing the engine to run efficiently and safely.
Bad or loose connections can cause poor performance, a check engine light or even engine damage.
2. Install the ECU tuner or piggyback system (if included in the kit)
Many supercharger kits include an ECU tuner or piggyback system for adjusting engine performance parameters.
Installing these devices allows the engine to safely handle the increased air and fuel flow, optimizing power and efficiency.
Tuners or piggyback systems modify engine settings without permanently altering the stock ECU, providing flexibility and the ability to revert back to factory settings when needed.
This step is extremely important to prevent engine knocking, maintain safe boost levels and ensure reliable operation under all driving conditions.
3. Program the ECU for fuel-air ratio, ignition timing and boost control
Proper tuning of the ECU is one of the most critical steps in supercharger installation.
The ECU must be programmed to balance the fuel-air ratio, ignition timing and boost control according to the new air flow coming from the supercharger.
Correct programming ensures that the engine produces maximum power without too little or too much power, as both can damage the engine.
Adjusting these parameters also improves fuel efficiency, throttle response and overall engine life.
4. Check for error codes or warning lights
After the ECU is programmed and all electrical connections are secured, it is important to check for any error codes or warning lights.
Modern vehicles have onboard diagnostics that monitor the engine’s health and performance.
Finding and correcting any problems before driving prevents potential damage and ensures the supercharged engine operates safely.
This final check confirms that all systems are working correctly and the vehicle is ready for testing and regular driving.
Read More:
Finally, How to Do Assembly
1. Refill Engine Fluids
After installing the supercharger and related parts, it is necessary to fill all engine fluids to their proper levels.
This includes engine oil, coolant and power steering fluid, if affected during installation.
Engine oil lubricates moving parts and prevents friction, while coolant regulates temperature and prevents overheating.
Replacing these fluids ensures that the engine continues to run smoothly and reliably.
Using the correct type and amount of fluid recommended by the manufacturer is critical to maintaining the best performance and longevity of the engine.
2. Reinstall Removed Accessories and Covers
All accessories, brackets and engine covers removed during the installation process must be carefully reinstalled.
Proper reassembly ensures that all parts remain secure and the engine bay remains organized.
This step not only protects engine parts from dust, dirt and debris, but also maintains the correct routing for belts, hoses and wires.
Ensuring that each accessory is in its correct position reduces the risk of interference with the supercharger or other engine systems.
3. Reconnect the Battery
After all parts and fluids are in place, reconnect the battery to restore electrical power to the vehicle.
Reconnecting the battery allows the ECU and all electronic systems to operate normally.
Make sure the connections are strong and corrosion-free to avoid electrical problems.
This step is extremely important to safely start the engine and keep all sensors and monitoring systems functioning correctly.
4. Double-check the Tightness of All Bolts, Clamps and Fittings
Before starting the engine, it is important to double-check every bolt, clamp and fitting.
Ensuring that all fasteners are properly tightened prevents leaks, misalignment, or malfunction of parts during operation.
Proper torque specifications provided in the installation manual must be carefully followed.
This final inspection protects both the supercharger and engine, ensuring safe, efficient and reliable performance after installation.
How to Do Adjustment & Test It
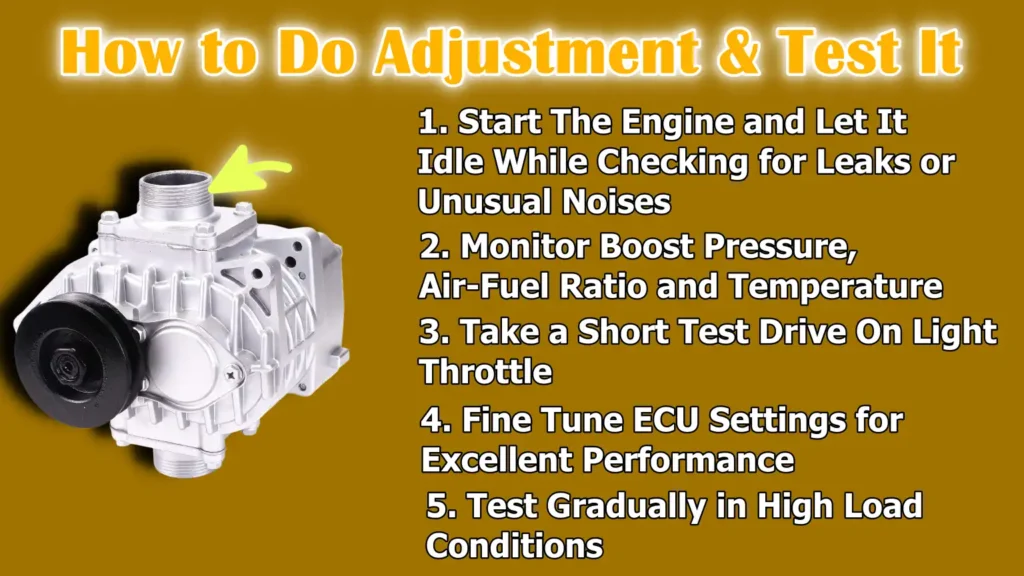
1. Start the engine and let it idle while checking for leaks or unusual noises
After the supercharger installation is complete, start the engine and let it idle for a few minutes.
During this time, listen carefully for any unusual noises such as rattles, knocks or hisses, which may indicate loose parts or air leaks.
Inspect all hoses, clamps and fittings for signs of fluid leaks, including oil, coolant or fuel.
Early detection of problems at idle prevents potential damage and ensures the engine and supercharger are operating safely before any load is applied.
2. Monitor boost pressure, air-fuel ratio and temperature
Monitoring key engine parameters is essential to ensure the supercharger system is functioning properly.
Check the boost pressure to ensure the supercharger is delivering the correct level of compressed air.
The air-fuel ratio must remain balanced to prevent the engine from running too lean or too hot, which can cause damage or reduced performance.
Additionally, monitor the engine and intake temperatures to ensure that the cooling system and intercooler (if fitted) are working properly.
Maintaining these parameters within safe limits keeps the engine safe and produces maximum power.
3. Take a short test drive on light throttle
After making sure everything is safe at idle, take the vehicle on a short test drive using light throttle.
This allows the engine and supercharger to run at a lower load and also gives an idea of performance and drivability.
Pay attention to engine response, unusual vibrations, or warning lights on the dashboard.
A light test drive helps identify any problems in a controlled manner before putting the engine under high-stress conditions.
4. Fine Tune ECU Settings for Excellent Performance
After initial testing is complete, adjust ECU settings as needed to optimize fuel delivery, ignition timing and boost levels.
Fine tuning ensures that the engine is running efficiently and safely with the new supercharger setup.
Proper tuning improves acceleration, throttle response, fuel efficiency and overall reliability.
Making these adjustments carefully can prevent engine knocking, overheating or other problems caused by incorrect settings.
5. Test Gradually in High Load Conditions
After ensuring that the vehicle is running properly in light conditions, gradually increase throttle and load the next time you drive.
Continuously monitor all engine parameters, including boost, temperature and air-fuel ratio, to ensure that the system remains within safe operating limits.
Gradual testing enables the engine to adapt to the increased pressure while minimizing risk.
This step ensures the supercharger system delivers safe and reliable performance at its full potential over time.
How to Do Maintenance and Care
As well as, study also shows that supercharging actually does more than just adding the horsepower to your vehicle, as it literally changes how the engine uses heat and fuel, by improving the engine’s thermal efficiency and net power output. But you need to tune it properly as it also affects the emissions such as NOx, which is why proper tuning, emission control steps are really essential to be in the safe side.[¹]
1. Regularly check belt tension and condition
The supercharger’s drive belt is a critical component that transfers power from the engine to the supercharger.
Over time, belts can stretch, fray or break, causing reduced performance or malfunction.
Regularly inspecting the belt for signs of wear and adjusting its tension according to the manufacturer’s specifications ensures that the supercharger operates efficiently.
Maintaining the proper condition of the belt protects the engine from potential damage and keeps the system running smoothly.
2. Monitor boost level and engine parameters
Constant monitoring of boost level, air-fuel ratio and engine temperature is essential to maintaining engine health.
Fluctuations in boost or abnormal readings may indicate leaks, tuning problems or mechanical problems.
Keeping an eye on these parameters allows you to quickly resolve problems, ensuring that the supercharger system continues to provide safe and reliable performance.
Regular monitoring helps prevent engine knocking, overheating and other common problems associated with forced induction systems.
3. Change the oil frequently
High-performance engines equipped with superchargers operate under greater pressure and heat, which can cause engine oil to deteriorate faster than naturally aspirated engines.
Changing the oil at shorter intervals with a high-quality oil designed for forced induction engines helps maintain proper lubrication, reduce wear on moving parts and prevent engine overheating.
Regular oil maintenance is critical for engine longevity and reliability, specially when running a supercharged setup.
4. Periodically inspect hoses and clamps
The hoses and clamps in a supercharger system are responsible for safely flowing air, coolant and other fluids.
Over time, hoses can leak or crack and clamps can come loose due to vibration.
Inspecting these components periodically ensures that all connections remain secure and prevents leaks that can reduce performance or damage the engine.
Maintaining the integrity of hoses and clamps is essential to safe and efficient supercharger operation.
5. Keep the Tuning Software Updated
The ECU or tuning software controls critical aspects of engine performance, including fuel delivery, ignition timing and boost levels.
Software updates made by the manufacturer or tuner can include improvements in reliability, efficiency and safety.
Keeping the tuning software updated ensures that your supercharged engine continues to perform optimally, adapts to any new settings and avoids potential problems caused by outdated or incorrect programming.
Basic Safety and Legal Considerations
1. Check local regulations for emissions compliance
Before installing a supercharger, it’s important to check local and national regulations regarding vehicle emissions.
Some areas have strict rules about modifications that affect exhaust gases, air quality and noise levels.
Installing a supercharger may require additional certification or inspection to remain roadworthy.
Ensuring compliance with these laws can help avoid fines, penalties or the risk of your vehicle being declared unlawful on the road.
Understanding and following the rules is essential for safe and responsible performance upgrades.
2. Inform your insurance provider about modifications
Vehicle modifications, specially performance enhancements like superchargers, can affect your insurance coverage.
It’s important to inform your insurance provider about upgrades to ensure your policy remains valid.
Failure to disclose modifications could result in claims being denied or coverage being voided in the event of an accident.
Being transparent with your insurer helps protect your investment and ensures peace of mind when driving a high-performance vehicle.
3. Always use high-octane fuel for forced induction engines
Supercharged engines compress air to increase power, which also increases combustion temperatures and the risk of engine knocking.
Using fuel with a higher octane than recommended by the manufacturer helps prevent pre-ignition and detonation, which can cause serious engine damage.
High-quality fuel enables the engine to safely handle increased boost levels and maintain optimal performance.
Following fuel recommendations is a simple but important step in ensuring the longevity and reliability of a supercharged engine.
Conclusion – How to Install a Supercharger
It is really simple way to boost your engine’s speed, combining precision, power and that even makes it reliable as it creates a truly elevated driving experience as well.
Although the process involves many steps, such as careful preparation, part removal, installation, tuning and testing, following each step precisely ensures a safe and reliable upgrade.
Proper maintenance, regular monitoring of engine parameters and adherence to safety and legal guidelines are extremely important for long-term performance and engine health.
By understanding each step, taking the necessary precautions and using the right tools and parts, enthusiasts can enjoy the thrill of a supercharged engine without compromising reliability or safety.
Ultimately, a well-installed supercharger transforms your driving experience, making your car more responsive, powerful and exciting, while keeping it safe and efficient for daily use.
Also, you can ask questions in the comment section.
Frequently Asked Questions
Q1. What is a supercharger and how does it work?
Answer: A supercharger is a device that forces more air into your car’s engine than normal. More air helps the engine burn more fuel, produce more power and increase acceleration. Unlike a turbocharger, which uses exhaust gases to spin a turbine, a supercharger is connected directly to the engine’s crankshaft and provides instant boost, allowing for faster throttle response.
Q2. Do I need special tools to install a supercharger?
Answer: Yes, specific tools are needed to install a supercharger. You’ll need a socket set, wrenches, screwdrivers, torque wrenches and sometimes a belt tensioner tool. Additional tools may include tools for handling fluids and safely disconnecting electrical components. Using the right tools is important to ensure a safe and accurate installation.
Q3. Can I install a supercharger myself, or do I need a professional?
Answer: If you have basic mechanical skills and follow the instructions carefully, you can install a supercharger yourself. The process involves removing engine parts, installing the supercharger, connecting hoses and belts and tuning the ECU. However, if you are not confident working with engines or electrical systems, it is safer to seek help from a professional mechanic, as incorrect installation can cause engine damage or safety hazards.
Q4. Do I need to upgrade other parts of my car when installing a supercharger?
Answer: Yes, the supercharger increases the pressure on your engine, so auxiliary upgrades are often recommended. Upgrading the fuel injectors and sometimes the fuel pump ensures proper fuel delivery. High-quality intake piping, air filters and in some cases, intercoolers are essential for smooth air flow. Proper tuning of the ECU is necessary to balance fuel, timing and boost levels for safe performance.
Q5. How do I maintain a supercharged engine?
Answer: Maintenance is extremely important for supercharged engines. Regularly check the tension and wear on the supercharger belt, monitor the boost level and engine parameters and change the engine oil more often than usual. Periodically inspect hoses and clamps to prevent leaks. Keeping your ECU or tuning software updated also ensures optimal engine performance and long-term engine reliability.
Q6. Is it legal to install a supercharger?
Answer: This depends on your local laws and regulations. Some areas have strict regulations regarding emissions, noise and performance changes. You should check local regulations and make sure your car complies with them before installing a supercharger. Also, it is important to inform your insurance provider about this change to ensure coverage in case of an accident.
Q7. What type of fuel should I use for a supercharged engine?
Answer: Supercharged engines typically require high-octane fuel to prevent engine noise and maintain performance. Using the manufacturer’s recommended fuel helps the engine handle the increased boost safely and ensures consistent power output. Low-quality or low-octane fuel can cause pre-ignition, reduce efficiency and even damage the engine.
Q8. How long does it take to install a supercharger?
Answer: The time to install a supercharger depends on your experience, the specific kit and your tools. For beginners, it can take a full day or more, including preparation, removal of parts, installation and initial testing. Experienced professionals can complete the installation in just a few hours. Proper planning and arrangement of tools and parts can make this process faster and safer.
Q9. Will installing a supercharger damage my engine?
Answer: If installed correctly and with the correct tuning, a supercharger will not damage your engine. However, incorrect installation, poor maintenance, or running the engine at improper fuel or boost levels can cause serious engine problems. Following the manufacturer’s instructions, maintaining auxiliary components and carefully tuning the ECU are important to avoid damage.
References:
[1] Effect of supercharging on improving thermal efficiency and modifying combustion characteristics in lean-burn direct-injection near-zero-emission hydrogen engines
https://www.sciencedirect.com/science/article/pii/S0360319921040386

Guys, I’m a car audio enthusiast and customization expert and I love clear sound and clean installation. Plus, I have spent years helping people build their dream audio setups. And whenever I’m working on cars, I probably listen to music and thinks about the next big upgrade.