Written By: Don Dodi
Fact Checked By: Kristen Brown
Reviewed By: Diego Rosenberg
From the transponder keys were introduces in the 1990s, the car theft actually has dropped by nearly half in some countries that makes the key programming a hidden hero on the vehicle security.
Also, it’s not just you have to cut a piece of metal and that’s it to program a car key, now-a-days you need to sync with advanced electronics that communicates directly with your vehicle’s computer.
There’s not doubt about the security is enhanced when cars used transponder chips or remote keyless entry systems, that’s why you need to pair your new key electronically with the car’s immobilizer system so that it can start the engine.
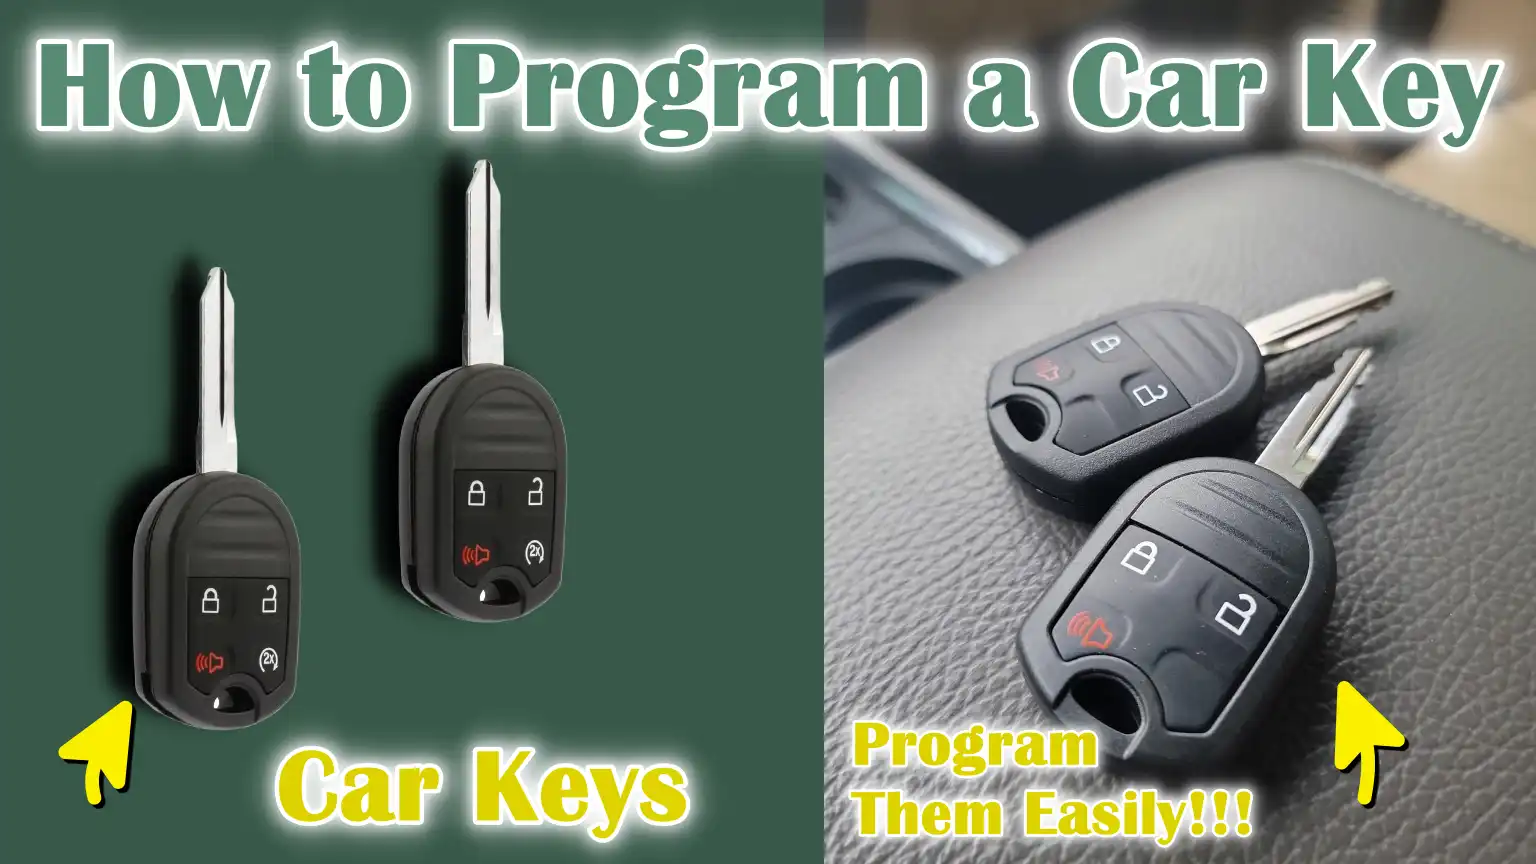
As this guide specifically focuses on How to Program a Car Key, you’ll easily understand the type of key your car uses: as it can be basic remote, a chip key or a push-button smart key and with this simple guide you can easily save you time, money and frustration when you need an extra or replacement of it.
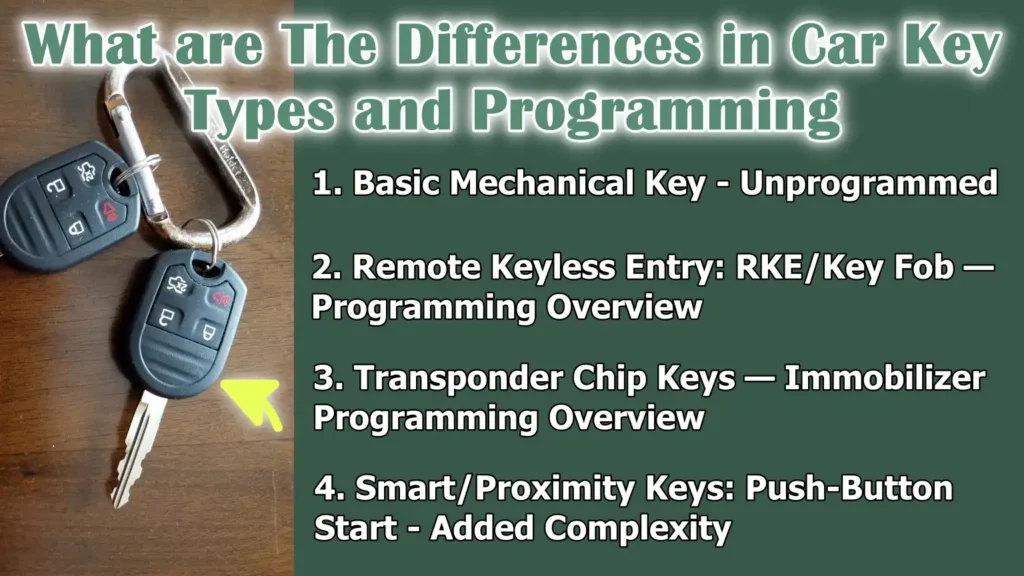
What are The Differences in Car Key Types and Programming
Car keys have changed a lot over the past few decades and understanding the type of key used in your vehicle is important to program it correctly.
Different keys have varying levels of security, complexity and programming requirements.
Knowing these differences can help you save time, avoid mistakes and protect your vehicle from theft.
1. Basic Mechanical Key – Unprogrammed
The most traditional car key is the basic mechanical key.
This key is made entirely of metal and is cut to fit the car’s lock and ignition.
It has no electronic components or chips, meaning it does not require programming.
All you have to do is cut a new key that matches the original key and it will start the car and the doors will work as long as it is cut correctly.
Vehicles with only mechanical keys are usually older models and it is usually easy and inexpensive to replace or duplicate them.
2. Remote Keyless Entry: RKE/Key Fob — Programming Overview
Remote keyless entry keys, commonly called key fobs, allow drivers to lock and unlock their car doors without inserting the key.
These keys contain a small electronic transmitter that communicates with the car via radio signals.
Programming these keys often involves several steps, such as turning the ignition on and off, pressing buttons in a specific sequence, or using the vehicle’s menus.
Programming ensures that the car recognizes the fob and can control the locks, trunk and sometimes the alarm system.
Although RKE programming is more complicated than mechanical keys, many vehicles allow owners to program the fob themselves without the need for additional professional equipment.
3. Transponder Chip Keys — Immobilizer Programming Overview
Transponder keys, also called chip keys, have a small microchip inside the key that communicates with the vehicle’s immobilizer system.
The car’s computer will start the engine only when it recognizes the correct code from the chip, preventing theft.
Programming a transponder key is more complicated than programming an RKE.
Some vehicles allow onboard programming when a working key is available, while others require special diagnostic or OBD2 equipment.
Correct programming is important because an incorrectly programmed transponder key will not start the car and can sometimes disable all existing keys.
4. Smart/Proximity Keys: Push-Button Start – Added Complexity
Smart keys or proximity keys are the most advanced type of car keys and are used in vehicles with push-button start systems.
These keys allow the driver to start the car without having to insert the key, simply by inserting the key fob inside the vehicle.
Smart keys are more complicated to program because they are encrypted and constantly communicate with the vehicle’s security system.
Most smart keys require dealer-level diagnostic equipment or a professional locksmith with special tools to program them.
In addition to starting the engine, smart keys often control other features such as keyless entry, personalized driver settings and remote start functions, making their programming more complex than other types of keys.
Prerequisites – What You Need Before You Actually Begin
Before you can program a car key, it’s important to gather all the necessary information and tools.
Proper preparation ensures that the process goes smoothly, reduces the risk of mistakes and keeps both the vehicle and the new key safe.
Understanding the prerequisites helps drivers and DIYers make their plans and determine when professional help may be needed.
1. Vehicle Information You Should Have: Make, Model, Year, VIN & Trim
It’s important to know the exact information on your vehicle before you begin key programming.
This includes the make, model, year, trim level and vehicle identification number, or VIN.
The VIN is a unique 17-letter code that identifies your car and is often required for dealer-level or professional programming.
This information ensures that the correct programming method is used and that the key is compatible with your vehicle’s security and immobilizer system.
2. Working Key(s) Required – Master Key Required
Many vehicles require at least one existing working key, often called a master key, to program additional keys.
This is specially true for transponder or smart keys.
The master key serves as an authentication device that enables the vehicle’s computer to accept new keys.
Without a working key, some cars may require dealership intervention or special diagnostic equipment to program a replacement key, making it necessary to verify which keys are available before beginning the process.
3. Tools and Equipment
To program a car key, you may need a combination of basic and specialty tools, depending on the type of key.
For a standard remote or transponder key, a new blank key or a pre-cut key is required.
Some transponder keys may come pre-programmed, simplifying the process.
Other items include the vehicle’s owner’s manual to follow the manufacturer’s instructions, a screwdriver to open panels or compartments and in some cases an OBD2 programmer or diagnostic tool for vehicles that do not support onboard programming.
Having the right tools ensures that the key can be programmed safely and efficiently.
4. Battery Check
Before programming any remote key or smart key, it is important to check the batteries.
New or fully charged batteries ensure that the key can properly communicate with the vehicle during programming.
Weak or bad batteries can hinder successful pairing, cause errors, or require the programming process to be repeated.
Confirming the battery’s condition is an easy step that prevents unnecessary hassle.
5. Safety – Parking, Ignition Off, Parking Brake Engaged
Finally, safety is a key prerequisite.
Always ensure the vehicle is parked on a level surface, the ignition is off and the parking brake is engaged.
This prevents accidental movement of the vehicle during programming and reduces the risk of injury or damage.
Following proper safety steps ensures a safe environment for working on the car key programming process.
Basic General Method – So Which Method to Use
Programming a car key depends on the type of key, the age of the vehicle and its security system.
Different cars support different programming methods and understanding which method to use can save time, prevent errors and protect the vehicle’s electronic systems.
Selecting the correct method is essential because using the wrong procedure may cause the key to not work or even temporarily lock out all existing keys.
1. Onboard (Ignition/Button) Programming – When It is Available
Onboard programming is a method that allows the vehicle to recognize and add a new key by itself without any additional equipment.
It usually involves a specific sequence of ignition cycles, button presses or door movements that puts the car into programming mode.
Onboard programming is usually available for remote keyless entry keys and some transponder keys in older or mid-range vehicles.
This is usually simple and can be done by the car owner, but the exact order varies by make and model.
It is necessary to check the owner’s manual or manufacturer’s guidelines before attempting this method.
2. Remote Sequence Programming (Button/Door Cycle) — Specific to Many RKEs
Many remote keyless entry keys can be programmed using the remote sequence method.
This method involves pressing buttons on the new key fob as well as operating the vehicle’s doors or ignition in a specific pattern.
This process allows the car to register the new remote without any special tools.
This type of programming is typically used for key fobs that control locks, trunk releases, or panic alarms.
While relatively simple, it requires careful attention to the timing and order of the steps, as the wrong order can prevent the key from being registered.
3. OBD2/Diagnostic Tool Programming — For Many Transponders and Smart Keys
Modern transponders and smart keys often require special diagnostic tools or OBD2 programmers for proper programming.
These devices connect to the vehicle’s onboard computer and allow technicians or owners to securely add, erase, or configure keys.
This method is typically necessary for encrypted systems, smart proximity keys, or vehicles where onboard programming is not supported.
Using the right diagnostic equipment ensures that the key is fully compatible with the car’s immobilizer system and can reliably start the engine.
4. Dealer or Locksmith Programming — When Needed: Encrypted Systems, Keyless Go
In some vehicles, particularly those with advanced encryption or Keyless Go systems, programming cannot be completed without dealer-level equipment or a professional locksmith.
These systems are designed to prevent unauthorized key copying and ensure maximum security.
Dealers and qualified locksmiths have access to the manufacturer’s database and tools that allow secure programming while maintaining the integrity of the car’s electronic security systems.
Programming these keys without the proper tools is often impossible and may result in the vehicle’s security locks being activated.
5. Flowchart/Decision
Choosing the right method depends on the type of key and the vehicle’s capabilities.
If the key is a simple remote keyless entry device and the car supports onboard programming, this is usually the fastest and easiest option.
If the key is a transponder or smart key, or if onboard programming is not supported, using an OBD2 tool or consulting a dealer or professional locksmith is the safest method.
Understanding the decision flow before you begin ensures that the programming process is efficient, safe and successful.
How to Do Remote Keyless Entry Programming – Common Onboard Method
Programming a remote keyless entry (RKE) key using the onboard method allows the vehicle to recognize the new key fob without requiring any special tools.
This process is available for many vehicles and is usually suitable for standard key fobs that control door locks, trunk releases, or panic alarms.
Following each step carefully ensures that the key will work reliably and avoids common programming errors.
1. Check the status of the batteries and blank key
Before you begin the programming process, check that the batteries in both the existing key fob and the new remote are new and fully charged.
Weak or dead batteries can prevent proper communication between the key and the vehicle, causing programming to fail.
Additionally, make sure the new key is a blank or compatible fob that matches your vehicle’s make, model and year.
Using an incompatible key may cause the remote to not be recognized, wasting time and effort.
2. Enter programming mode
Entering the vehicle’s programming mode is the next step.
This usually involves a sequence such as closing all doors, inserting the existing key into the ignition and turning it on and off a certain number of times.
Some vehicles may require several buttons to be pressed inside the car during the ignition cycle.
It’s important to check the owner’s manual or manufacturer’s instructions to find the exact sequence for your make and model.
The car will usually give a visual or audible signal, such as flashing lights or beeps, indicating that it is in programming mode and ready to accept a new remote.
3. Press the button on the new remote to register
Once the vehicle is in programming mode, press the appropriate button on the new remote key to register it in the car’s system.
This usually involves holding the button down for several seconds until the car confirms the registration, often through flashing lights or sound.
This step ensures that the vehicle’s computer recognizes the new key and allows it to perform all intended functions.
4. Exit Programming Mode and Test All Remote Functions
After successfully registering the new remote, exit programming mode by following the specific instructions provided for your vehicle, such as turning off the ignition or opening and closing the driver’s door.
After programming is complete, test all functions of the remote, including locking and unlocking doors, opening the trunk and turning on the panic alarm.
Making sure each function is working correctly prevents surprises and confirms that the key is fully functional.
5. Repeat for Additional Remotes and Verify Range
If you have additional remotes that need programming, repeat the registration process for each one while the vehicle is in programming mode.
After all remotes are programmed, verify that each key works consistently in the normal operating range.
Testing multiple remotes ensures that all family members or drivers can use their keys without issue and confirms that the vehicle has successfully stored all programmed keys.
How to Program a Transponder Key – Common OBD2/Onboard Method
Transponder keys contain a small chip that communicates with the vehicle’s immobilizer system, making them more secure than standard mechanical or remote keys.
Programming these keys ensures that the car’s computer recognizes the key and starts the engine.
This process can be done using the vehicle’s onboard programming system (if supported), or using a diagnostic OBD2 tool for modern vehicles.
Following each step carefully helps avoid errors, key lockouts, or immobilizer problems.
1. Confirm Transponder Type and Compatibility
Before programming, identify the type of transponder chip used in your new key, such as ID46, ID4C, or other manufacturer-specific chips.
Make sure the key is compatible with your vehicle’s make, model and year.
Using an incompatible chip will cause the key to not communicate with the immobilizer, meaning the car will not start even if the key fits mechanically.
Confirming compatibility beforehand saves time, effort and cost.
2. Obtain the required working key(s)
Most vehicles with transponder systems require at least one working key, often called a master key, to program additional keys.
The existing key serves as authentication, allowing the vehicle’s computer to accept new keys into the system.
If no working key is available, some vehicles cannot be programmed without a professional locksmith or dealer-level equipment.
Ensuring you have the required key(s) is essential to the successful programming process.
3. Use the vehicle’s onboard key learning – If Supported
For vehicles that support onboard key learning, you can program a transponder key without additional equipment.
This usually involves a specific sequence of ignition cycles, door operations, or button presses that put the vehicle into key learning mode.
Follow the exact steps outlined in the owner’s manual or manufacturer’s instructions to ensure that the new key is registered correctly.
The vehicle usually indicates successful registration through indicator lights or sounds.
4. Connect the OBD2 programmer if the onboard key is not supported
If the vehicle does not support onboard programming, an OBD2 diagnostic tool or programmer will be needed.
Connect the device to the car’s OBD2 port and follow the on-screen instructions to add the new key.
The programmer communicates directly with the immobilizer system and allows the vehicle to safely accept the transponder key.
Using the correct tool ensures that the key is recognized and prevents problems with engine start or security functions.
5. Engine Start and Test the Immobilizer Light
After programming, test the new transponder key by starting the vehicle.
Watch the immobilizer light on the dashboard; it should turn off once the key is recognized.
Additionally, verify that all previously programmed keys are still starting the car and working properly.
Ensuring that all keys are working properly confirms that the programming process was successful and prevents starting problems in the future.
How to Program Smart/Proximity Keys
Smart keys, also called proximity keys, are the most advanced type of car keys and are commonly used in vehicles with push-button start systems.
These keys allow the driver to unlock and start the car without inserting the key and communicate wirelessly with the vehicle’s security system.
Programming smart keys is more complex than programming standard remote or transponder keys because they often involve encryption and additional vehicle features.
Understanding the correct process ensures that the keys work reliably and maintain vehicle security.
1. Check if the vehicle supports user-level programming
Before attempting programming, it is important to determine if your vehicle allows user-level programming.
Most modern vehicles do not support DIY programming for smart keys due to advanced security measures.
Attempting to program the key without confirmation may cause programming to fail or the system to lock up.
Looking at the owner’s manual or manufacturer’s guidelines will clarify whether the vehicle allows user-level programming or requires professional assistance.
2. Pairing using diagnostic tools or dealer-level equipment
For most smart keys, pairing requires special diagnostic tools or dealer-level equipment.
These devices connect to the vehicle’s onboard computer and ensure secure communication between the car and the smart key.
Using the correct equipment is important because the vehicle will only accept keys that come after a proper electronic handshake, ensuring the key can operate push-button start, lock/unlock and other remote functions.
3. VIN lock or authentication step
Many smart key systems include additional security steps, such as VIN locking or online dealer authorization.
This process verifies that the key is authorized for use with the specific vehicle and prevents unauthorized duplication.
Some vehicles require an online connection to the manufacturer’s database to authenticate the key before programming.
Completing these verification steps is necessary to ensure the key works properly and maintain the integrity of the vehicle’s security systems.
4. Verify Proximity Function and Start/Stop
After programming and verification, it is important to thoroughly test the smart key’s functions.
This includes verifying that the vehicle recognizes the key when it is nearby, push-button start works consistently and remote functions such as door lock, unlock and trunk release work correctly.
Ensuring that all proximity functions work reliably confirms successful programming and ensures that the key is fully integrated with the vehicle’s security and convenience systems.
Read More:
How to Use an OBD2 Key Programmer – Quick Guide
OBD2 key programmers are specialized devices that allow vehicle owners and professionals to program, add, or erase keys by communicating directly with the car’s onboard computer.
These devices are particularly useful for transponder and smart keys, as many modern vehicles do not support onboard programming.
Understanding how to use an OBD2 programmer correctly ensures a safe, efficient and successful key programming process.
1. Recommended Types of Programmers – Basic vs Dealer-Level
There are two main types of OBD2 key programmers: basic and dealer-level.
Basic programmers are often affordable, portable and suitable for standard transponder keys and some remote keyless entry systems.
Dealer-level programmers are more advanced, support encrypted smart keys and can perform complex functions such as erasing all keys or completing authentication steps.
Selecting the correct programmer depends on the type of key, the vehicle model and the level of access required for programming.
2. General Connection Steps – OBD Port Location, Power On
To use an OBD2 programmer, locate the vehicle’s OBD2 port, usually located under the dashboard on the driver’s side.
Connect the programmer to the port and make sure the vehicle’s ignition is on, following the manufacturer’s instructions for power mode.
Proper connection is necessary for the device to effectively communicate with the vehicle’s immobilizer and key system.
Improper connection may prevent key programming or generate error messages.
3. Selecting the Vehicle Brand, Model and Year in the Device
Once the programmer is connected, it’s important to select the correct brand, model and year of vehicle in the device menu.
This ensures that the device uses the correct communication protocol and programming sequence for the car.
Selecting the wrong vehicle information may cause programming to fail or even lock out existing keys, so accuracy is critical in this step.
4. Adding vs Erasing Keys – Warnings About Erasing All Keys
OBD2 programmers allow users to add new keys or erase existing keys.
Adding a key registers only one new key to the vehicle, while erasing all keys removes all registered keys from the system.
This action must be performed with extreme caution, as it may put the vehicle in a state where no key can start it until at least one key is reprogrammed.
Understanding this difference and following the proper instructions can prevent accidental lockouts and unnecessary costs.
5. Save/backup the original key list if the device supports it
If the OBD2 programmer supports saving or backing up the original key list, it is highly recommended to do so before making any changes.
Backing up ensures that all previously programmed keys can be restored if a problem occurs during the programming process.
This precaution reduces the risk of permanent key loss and provides a safer and more controlled programming experience.
How to Do Troubleshoot and Common Problems
Despite careful preparation, problems with car key programming can sometimes occur.
Understanding common problems and their causes helps drivers and self-made car key makers resolve them efficiently and avoid unnecessary hassle, delays, or additional costs.
Recognizing the signs early ensures that the key will function properly and the vehicle’s security system will remain intact.
1. The remote is not working
If the remote keyless entry device is not working, the problem is often due to batteries, frequency mismatch, or the remote not being properly programmed.
Weak or dead batteries prevent the fob from sending a signal to the vehicle.
Frequency mismatch occurs when the remote is designed for a different region or vehicle system.
An unprogrammed remote may physically fit the vehicle but cannot communicate with it until it is registered through the proper programming method.
Checking the battery condition, ensuring compatibility and carefully following the programming sequence usually resolves these problems.
2. Key Won’t Start Engine
A transponder or smart key that fits mechanically but won’t start the engine usually indicates a bad transponder or a need for an immobilizer reset.
Transponder keys must be properly programmed into the vehicle’s immobilizer system.
If the key’s chip isn’t recognized, the car won’t start, even if the key can turn the ignition or operate the doors.
Resetting or reprogramming the key with the correct procedure or diagnostic tool is necessary to restore normal functioning.
3. “All keys removed” or immobilizer light stays on
When messages such as “All keys removed” appear on the dashboard or the immobilizer light stays on, the vehicle needs to be reprogrammed by the dealer or a professional diagnostic tool is used.
This situation can occur if keys are accidentally erased, a programming attempt fails, or the key is lost.
To avoid having to exit the vehicle and ensure that the security system is working properly, professional intervention is advised immediately.
4. Error Codes
Some vehicles generate error codes related to problems with the keys or immobilizer.
Common codes may indicate battery problems, bad antennas, or problems in the engine control unit (ECU).
Understanding these codes and consulting the user’s manual or diagnostic device helps to quickly determine the cause.
Quick solutions often include replacing the key’s battery, adjusting or repairing the antenna, or resetting the ECU, making normal operation possible without replacing major components.
5. When Programming Erases Existing Keys – How to Avoid Accidental Lockouts
Accidentally erasing all previously programmed keys is one of the most common and costly mistakes when programming keys.
To avoid this, it is important to follow the programming instructions exactly, know whether the process adds or erases keys and use devices that allow for backing up the original key list.
Ensuring that at least one working key is registered in the system before you begin programming prevents accidental lockouts and ensures that all keys continue to work even after adding a new key.
How to Ensure Safety, Legal and Security
Programming car keys involves interaction with the vehicle’s security and electronic systems.
It is not only a technical process, but also comes with legal and security responsibilities.
Being aware of potential risks, requirements and best practices ensures that the vehicle remains safe, the process is legal and all keys work correctly.
Following these considerations protects both the owner and the vehicle from unnecessary problems or liabilities.
Not only this, there’s a research tat shows that fitted engine immobilisers actually lowers the vehicle theft estimate roughly a 40%, which is why you need to have correctly programming transponder keys that isn’t about to start your car; but rather it is a proven anti-theft measure that literally protects your vehicle.[¹]
1. Proof of Ownership and Locksmith/Dealer Policies
Before programming a new key, locksmiths or dealers usually ask for proof of ownership of the vehicle, such as ownership, registration or driver’s license.
This is a legal security measure to prevent unauthorized copying of car keys and reduce vehicle theft.
Knowing these requirements beforehand ensures a smooth interaction with professionals and avoids delays during key programming.
It also protects the owner from inadvertently violating security policies or vehicle manufacturer regulations.
2. Risks of Buying Untrusted Aftermarket Keys
Purchasing keys from unverified or untrusted sources carries considerable risks.
Aftermarket keys may not be compatible with the vehicle’s security system, may contain faulty chips, or may not follow the manufacturer’s programming protocols.
The use of such keys can cause programming malfunctions, errors in the immobilizer, or even permanent damage to the car’s electronic systems.
Always purchasing keys from reputable dealers or certified locksmiths ensures proper vehicle operation and maintains security.
3. Data/Time Stamp and Key Traceability
Many modern vehicles record key programming events, including the date, time and the specific key added or removed.
This traceability helps manufacturers, dealers and law enforcement agencies track key usage and ensures that unauthorized programming attempts can be detected.
Understanding the existence of these systems reinforces the importance of using legitimate procedures and prevents tampering or fraudulent copying of keys.
4. When Warranty or Insurance Is Affected
The use of unauthorized keys, improper programming techniques, or unlicensed locksmith services can sometimes affect a vehicle’s warranty or insurance coverage.
Manufacturers may void warranty claims if damage occurs due to incorrect key programming and insurers may question coverage in the event of theft if unverified keys were used.
Following the manufacturer’s recommendations and professional guidelines maintains the validity of both warranty and insurance and ensures that the owner is fully protected under all circumstances.
What Are The Costs and Where to Get Help
The cost of programming a car key can vary considerably, depending on the type of key, the make and model of the vehicle and the owner’s choice to do it themselves or seek professional assistance.
Understanding the potential costs and options helps drivers make informed decisions and avoid unnecessary expenses, while ensuring the key works properly and safely.
1. Do-It-Yourself Costs
For those who prefer a do-it-yourself approach, costs typically include purchasing a blank or pre-cut key, obtaining a transponder chip if needed and possibly renting or purchasing an OBD2 programmer or diagnostic tool.
Basic remote keys can cost from $20 to $50, while transponder or smart keys can cost from $50 to $200 for the hardware alone.
Renting or purchasing a programmer costs extra, but it allows owners to program many keys themselves without making frequent trips to the dealer, which can save money in the long run.
2. Locksmith vs Dealer Prices and Agreements
Professional locksmiths and dealerships offer key programming services at varying prices and convenience levels.
Locksmiths typically charge less than dealers, ranging from $70 to $200 depending on the type and complexity of the key and can often provide faster service at the vehicle’s location.
However, dealers may charge $150 to $400 or more for smart key or encrypted transponder programming but guarantee compatibility and maintain warranty compliance.
The choice between locksmith and dealer depends on cost, vehicle complexity and the need for professional guarantees.
3. How to Select a Reputable Locksmith
When selecting a locksmith for key programming, it is important to verify licenses, read customer reviews and confirm that they require proper identification to ensure legal and safe service.
A reputable locksmith should have experience with your specific vehicle make and model and use certified equipment for programming.
Checking credentials and customer feedback reduces the risk of faulty programming, damaged keys or security breaches and ensures the service is reliable and trustworthy.
Conclusion – How to Program a Car Key
Literally, you have to program your key in a proper way as it is the crucial part of your car’s security system, as it protects both your vehicle and your peace of mind as well.
Whether you’re using a basic remote, a transponder key, or a modern smart/proximity key, following the correct steps ensures your key functions properly, your car remains secure and you avoid unnecessary expenses.
Preparation is crucial—gathering the right tools, checking key compatibility and understanding whether your vehicle requires onboard programming or an OBD2 device can prevent errors and frustration.
For more complex systems, a professional locksmith or dealership offers a safe and reliable solution, specially when dealing with encrypted keys or advanced smart key technology.
With proper planning, accurate information and careful execution, car owners can successfully program their keys, maintain vehicle security, avoid lockouts and ensure all functions, from engine start to remote entry, work seamlessly.
Now, that’s all from this guide and you can also ask questions in the comment box for more information.
Frequently Asked Questions
Q1. What is car key programming?
Answer: Car key programming is the process of syncing a new key with your vehicle’s security system so that the car can recognize it and start the engine. Modern vehicles use electronic systems such as transponder chips or smart keys, which means the key must communicate with the car’s immobilizer to work. Without proper programming, even a key that fits mechanically may not start the car or operate remote functions.
Q2. Why do I need to program a new car key?
Answer: Programming is necessary because modern keys have electronic components that talk to the car. When a new key is made, it has to be registered with the vehicle so that the engine and security systems can recognize it. Without programming, the car will not start and remote or smart key functions will not work. Programming ensures that only authorized keys can operate the car.
Q3. Can I program a car key myself?
Answer: Yes, for many vehicles, it’s possible to program a car key yourself, specially basic remote keyless entry keys or some transponder keys, if the car supports onboard programming. However, smart or encrypted keys usually require a dealer or professional locksmith with special tools. To do it yourself, you must understand your vehicle’s system, follow the exact procedure and use compatible keys.
Q4. What do I need before I program a car key?
Answer: Before programming, you need specific information about your vehicle, including the make, model, year, trim and VIN. You may also need at least one working key, a new blank or pre-cut key, new batteries for the remote, the user manual and, for some keys, possibly an OBD2 programmer. Safety precautions such as parking the car on a level surface, turning off the ignition and applying the parking brake are also important.
Q5. How many types of car keys are there?
Answer: There are mainly four types of keys. Basic mechanical keys are made entirely of metal and do not require programming. Remote keyless entry keys or key fobs use radio signals to control locks and alarms. Transponder or chip keys contain a microchip that communicates with the car’s immobilizer. Smart or proximity keys feature push-button start and often include encrypted signals and additional vehicle features. Programming requirements are different for each type of key.
Q6. How does a transponder key work?
Answer: A transponder key contains a small microchip that sends a code to the vehicle’s immobilizer. The car’s computer will start the engine only when the code matches. This prevents theft by making it impossible for unauthorized keys to start the car. Programming a transponder key ensures that the vehicle recognizes the chip.
References:
[1] van Ours, J., & Vollaard, BA. (2016). The Engine Immobiliser: A Non‐starter for Car Thieves. The Economic Journal, 126(593), 1264-1291.
https://pure.eur.nl/ws/portalfiles/portal/194765661/ej1264.pdf

Guys, I’m a car audio enthusiast and customization expert and I love clear sound and clean installation. Plus, I have spent years helping people build their dream audio setups. And whenever I’m working on cars, I probably listen to music and thinks about the next big upgrade.