Written By: Don Dodi
Fact Checked By: Kristen Brown
Reviewed By: Diego Rosenberg
It is really interesting that by not having a tweeters, you actually miss out on almost 30% of the musical detail in your car’s audio system, would you believe this?
So, basically tweeters are small speakers which is specifically designed to produce high-frequency sounds typically from 2,000 Hz up to 20,000 Hz, which is basically the upper range of the human hearing.
And without tweeters, you can feel that music feels flat and lifeless as the regular car speakers which has woofers and midrange drivers actually can’t reproduce such crisp details such as cymbals, vocals or string instruments accurately.
As well as, according to the audio engineering studies, tweeters actually plays a key role in creating a balanced sound stage, as it also helps the listeners feel as if the music is surrounding them instead of just coming from the doors.
Now-a-days, car manufacturers often place the tweeters in A-pillars, dashbaords or door sail panels as to ensure that the sound is directed toward the ear level and that clearly makes listening more natural for obvious reasons.
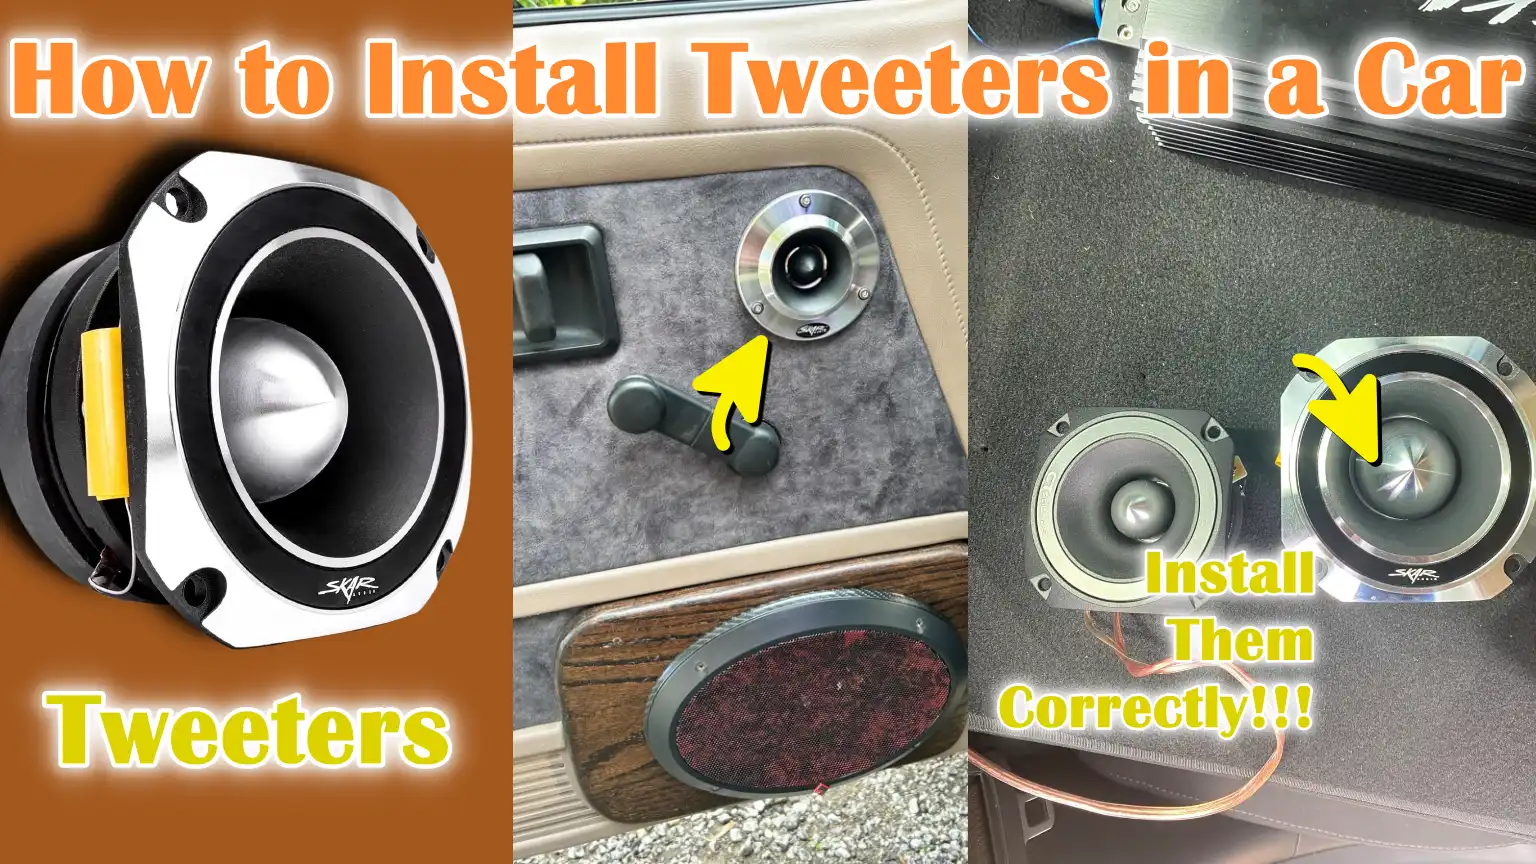
Now, it is the guide which specifically focuses on How to Install Tweeters in a Car, so that you can sharp vibrant and professional-quality sound by having perfectly installed tweeters as this guide shows you straightforward process that works.
Tools
| Tools/Materials | Easy Explanation | Why It’s Important |
|---|---|---|
| Tweeter (Component Set or Separate) | Small speakers that play high-pitched sounds like cymbals, vocals and guitars. | An important part of an upgrade – making music play clear and loud. |
| Mounting Hardware (Flush, Surface, or Angled Mount) | Brackets or holders to fix the tweeter in place. Flush mounts fit inside the panel, while surface and angled mounts produce better sound. | Helps you position the tweeter securely and in the right direction. |
| Screwdriver Set | A set of tools with different tips for loosening or tightening screws. | Essential for removing car panels and fitting the tweeter correctly. |
| Wire Strippers and Crimpers | Small hand tools for removing plastic covers from wires and installing connectors. | Ensures clean, secure and strong wire connections. |
| Electrical tape or heat shrink tubing | Insulating material to cover and protect wires. | Prevents wires from touching each other and causing short circuits. |
| Drill (if custom mounting required) | Power tool to drill holes in panels for flush mounting. | Useful if your car doesn’t already have space for a tweeter. |
| Crossover (if tweeter isn’t built-in) | A small device that splits sound into high and low frequencies. | Sends only high sound to the tweeter and low sound to the woofer, preventing damage and improving clarity. |
Do Preparation Before Installation
1. Disconnect the Car Battery (Safety is Paramount)
The first step before any installation is to disconnect the car battery.
This is done to avoid the risk of electric shock, short circuits, or accidental damage to your car’s electrical system.
Although tweeters don’t draw much power, the wiring process still involves handling live connections.
Automotive safety studies show that leaving the battery connected while working on electronics can cause accidental sparks, blown fuses, or even damage to the vehicle’s computer system.
By removing the battery’s negative terminal, you ensure a safe work environment and protect both yourself and the car’s electronics.
2. Identify the Tweeter Installation Location
The next step is to carefully determine where the tweeters will be installed.
Common factory and aftermarket locations include the A-pillar, dashboard, door panel, or sill panel near the side mirror.
Each location affects sound differently.
For example, tweeters mounted on the A-pillar or dashboard typically project sound toward the listener’s ears, providing a more natural and clear effect.
Mounting them on door panels, on the other hand, can be easier, but sometimes block or absorb sound.
Research on car audio design shows that placing tweeters closer to ear level improves stereo imaging and makes music sound more realistic.
Taking a little time to choose the right location ensures better sound quality after installation.
3. Check Compatibility with Your Existing Car Audio System
Before proceeding, it’s important to check whether the tweeters you purchase are compatible with your existing sound system.
Some cars have factory-installed crossovers, while others may require you to add an external crossover to properly split the sound frequencies.
If tweeters are connected directly without checking, they may receive low-frequency signals that could damage them.
It’s also important to ensure that the tweeters match the power output of your head unit or amplifier.
Installing tweeters that don’t match the system can cause distortion or even permanent damage.
Checking compatibility at this stage saves time and money and can prevent future problems.
4. Plan the wiring route from the tweeter to the crossover or amplifier
The final step in preparation is planning the wiring route for the tweeter.
Depending on your setup, the wires will need to run from the tweeter to the crossover or directly to the amplifier.
It’s important to lay the wires in a way that avoids sharp bends, moving parts and areas where they could be pinched.
Car audio experts recommend keeping audio wires separate from the power cables to reduce the potential for electrical noise or interference.
Planning the wiring route before starting the installation also helps keep the interior tidy and avoid unnecessary panel removal.
A well-planned wiring route not only improves safety but also ensures the long-term reliability of your new tweeter.
What are the Mounting Options for Tweeters
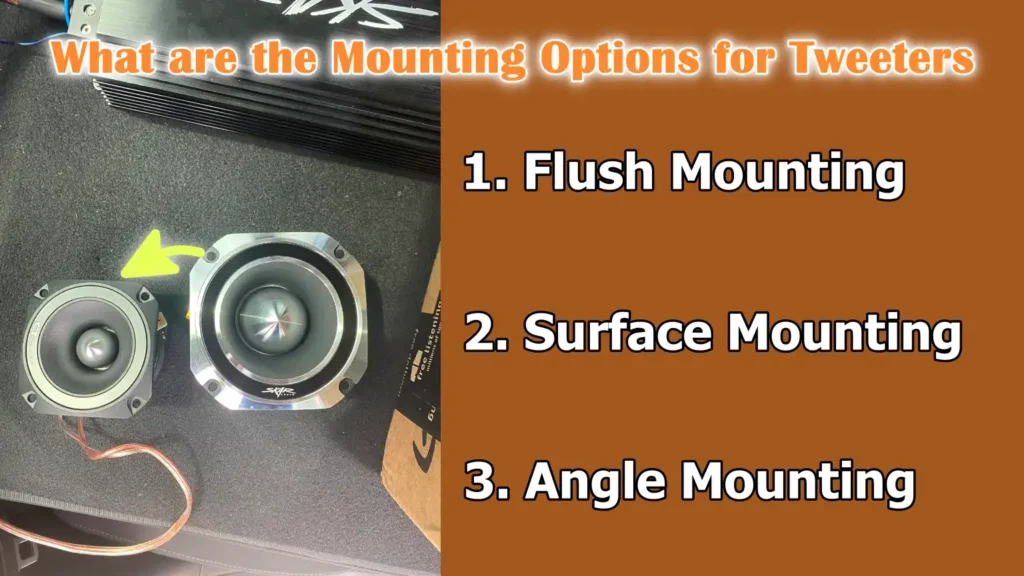
1. Flush Mounting
Flush mounting is a method in which the tweeter is embedded within the surface of a panel so that it lies flat and blends seamlessly with the car’s interior.
This creates a clean and professional look, often seen in factory-installed premium sound systems.
However, it typically requires drilling or cutting into the door panel, dashboard, or A-pillar, making it more permanent.
Car audio experts recommend flush mounting when you want a long-term installation and the best possible integration into your vehicle’s design.
The advantage of this method is that the tweeter looks neat, avoids obstructions and is less likely to be accidentally damaged.
The disadvantage is that once the hole is drilled, it cannot be easily reversed, so careful measurement and placement are essential before cutting.
2. Surface Mounting
Surface mounting is the easiest way to install tweeters because it doesn’t require cutting or drilling large holes.
In this method, the tweeter is mounted to a panel using brackets or adhesive pads.
This option is extremely easy for beginners and can be installed quickly with minimal changes to the car’s interior.
It’s also easy to reinstall if you want to test different sound directions before final installation.
The main limitation of surface mounting is that tweeters are more visible and can sometimes seem like an add-on rather than a built-in feature.
Furthermore, because they protrude from the surface, they are more prone to being touched, bumped, or damaged.
3. Angle Mounting
Angle mounting is a flexible option where tweeters are mounted using angled pods or brackets that allow them to point in a specific direction.
This method is popular among car audio enthusiasts because it helps control the direction of sound waves, also known as sound staging.
Acoustics research shows that placing the tweeter at ear level provides a clear and balanced listening experience, specially for vocals and high-pitched instruments.
Angled mounting works well on dashboards, A-pillars, or sill panels, where adjusting the direction of sound can significantly improve clarity.
The only drawback is that angled mounts can be more noticeable than flush mounts, but the audio improvement often makes it a worthwhile choice.
Advantages and Disadvantages of Each Method
Each mounting style has its own strengths and weaknesses and the right choice depends on your preferences.
If you want a permanent, factory-like finish that blends seamlessly with the car’s interior, flush mounting is best.
If you want easy, reversible installation without major modifications to your vehicle, surface mounting is ideal.
If your main goal is to improve sound direction and get the best audio quality for your seating position, angled mounting is recommended.
Most importantly, maintain a balance between appearance and performance, because where and how you place the tweeter directly impacts the naturalness and enjoyment of your music.
How to Do Tweeter Wiring
1. Connecting to a Crossover (Separate Crossover vs Built-in)
When wiring tweeters, the first step is to understand how they connect to a crossover.
A crossover is a small device that splits sound frequencies, sending high frequencies to the tweeter and low frequencies to the midrange or woofer speaker.
Some tweeters come with a built-in crossover, often in the form of a small capacitor connected to the wire, which simplifies the process by automatically blocking low frequencies.
In contrast, tweeters with separate components usually have an external crossover box that must be wired between the amplifier or head unit and the speaker.
External crossovers generally provide better sound control and protection because they allow for more precise filtering of frequencies.
Installing tweeters without a proper crossover can cause them to receive bass signals, which can lead to distortion or even permanent damage.
2. Running Wires Safely Through the Panel
Once you know where the tweeters will be connected, the next important step is routing the wires.
Wires should be carefully routed through the door panel, dashboard, or A-pillar, regardless of location and kept away from sharp edges, heat sources, or moving parts like window regulators.
Professional installers often recommend using factory wiring channels or grommets whenever possible, as these routes are already designed to protect the cables.
Laying the wires correctly not only prevents damage but also prevents unwanted electrical interference, which can cause buzzing or humming in your sound system.
A well-organized wire setup streamlines the installation and ensures long-term reliability.
3. Proper polarity connections (+ to +, – to -)
Polarity is one of the most important details when wiring tweeters.
Each speaker has a positive and negative terminal and connecting them correctly is crucial to ensuring they match the rest of the system.
If the polarity of a tweeter is reversed, it will be out of phase with the other speakers, causing the sound waves to cancel each other out.
This results in weak bass response, unclear vocals and an overall imbalance in audio quality.
Research in sound engineering shows that phase alignment directly affects stereo imaging—whether music sounds focused and realistic or hollow and distorted.
Double-check polarity by following the markings on the tweeter and crossover to ensure that positive is connected to positive and negative to negative.
4. Securing wires with clips or ties to prevent rattling
After connecting and routing the wires, the final step is to secure them properly.
Loose wires behind panels or under the dashboard can move around while driving and create rattling noises, which not only affect sound quality but can also be distracting.
Using wire clips, zip ties, or adhesive mounts ensures that wires stay in place and don’t interfere with other components.
A secure wiring setup also reduces the chance of wires becoming pinched, cut, or disconnected over time.
Taking a little extra effort to securely tighten wires improves both the safety and durability of the installation.
A professional-looking finish always comes from careful attention to these small but important details.
How to Install Tweeters in a Car – Step-by-Step
1. Disconnect Battery Power
The installation process begins by disconnecting the battery power, specifically the negative terminal.
This step is essential because it prevents accidental short circuits, sparks, or damage to the car’s electrical system while wiring.
Although tweeters use low voltage, there’s always a risk of damaging sensitive electronic components like the vehicle’s ECU or blowing fuses while the battery is connected.
Automotive safety experts emphasize this as the first and most important precaution before working on any electrical equipment inside a car.
2. Remove Necessary Panels or Trim
Once the power is safely disconnected, the next step is to remove the panels or trim where the tweeters will be installed.
Depending on the mounting location, this may involve removing the A-pillar cover, dashboard trim, door panels, or sill panels.
It’s best to use proper trim removal tools to avoid damaging clips or scratching the interior.
Carefully removing the panel provides access to the wiring channels and provides enough space to securely mount the tweeter.
This step is also a good opportunity to check how much space is available behind the panel for installing hardware.
3. Prepare the Mounting Location
After removing the panel, it’s important to prepare the mounting area.
If you’re choosing flush mounting, you may need to drill or drill holes to fit the tweeter’s size.
For surface or angled mounting, cleaning the surface and ensuring it’s smooth is usually sufficient.
Accurate measurements are essential here, as an incorrect cut can cause permanent damage to the car’s interior.
Many professionals recommend test-fitting the tweeter in the location first to ensure it provides the best sound direction and doesn’t interfere with other parts of the car.
4. Install the Tweeter Using the Chosen Mounting Method
With the location prepared, the tweeter can now be installed using the chosen mounting style.
Flush mounting provides a factory-like finish, surface mounting allows for easy installation with minimal modifications and angled mounting provides better control over sound direction.
Each method requires the use of screws, clips, or adhesive mounts to securely hold the tweeter in place.
Secure installation ensures that the tweeter will not move or vibrate during movement, which is important for both sound quality and durability.
5. Connect the Tweeter Wiring to a Crossover or Amplifier
The next step is to connect the tweeter wiring to a crossover or directly to the amplifier, depending on your setup.
If you’re using an external crossover, connect the input wires from the amplifier or head unit and then the output wires to the tweeter terminals.
Always double-check the polarity to ensure the positive and negative connections are correct.
Incorrect wiring can cause phase issues, which can reduce sound clarity and make music sound unbalanced.
Taking extra care during this step ensures that the tweeters perform their best without damage.
6. Reassemble the Panels Securely
After mounting and wiring the tweeters, the previously removed panels and trim must be reinstalled.
This must be done carefully to ensure there are no gaps that could compress the wires or cause rattling.
Proper reassembly not only restores the interior’s original appearance but also protects the wiring behind the panels.
Ensuring that the clips and screws are fully engaged helps prevent vibrations, which can affect both sound quality and the driving experience.
7. Reconnect the Battery
The final step is to reconnect the car’s battery to the negative terminal.
Once power is restored, the tweeters can be tested by turning on the car’s audio system.
Reconnecting the battery at the very end ensures that the installation is secure, all wiring is complete and there are no accidental sparks or short circuits.
At this point, you can check the sound performance and make adjustments if necessary.
How to Test the Tweeters
1. Turn on the Stereo System
After installation is complete, the first step in testing the tweeters is to turn on the stereo system.
This allows you to ensure that the wiring is properly connected and that the tweeters are receiving a signal.
During this step, it’s best to keep the volume at a low or medium level to avoid sudden loud noises, as incorrect wiring can damage the speakers.
Carefully turning on the stereo ensures that the tweeters and the rest of the sound system activate safely without straining the amplifier or head unit.
2. Check the Sound Clarity and Balance
Once the system is turned on, the next step is to listen carefully for sound clarity and balance.
Tweeters are designed to pick up high-frequency sounds such as vocals, cymbals and stringed instruments, which typically range in frequency from 2,000 to 20,000 hertz.
If the installation is done correctly, these sounds should be clear, detailed and distortion-free.
It’s also important to check that the tweeters are well-matched with the midrange and woofer speakers and are producing a smooth and balanced sound.
Any muffled, crackling, or uneven sound may indicate a problem with the placement, wiring, or crossover settings.
3. Confirm that the left and right tweeters are working
To ensure proper operation, it’s necessary to test each tweeter individually.
This can be done by separating the left and right channels by adjusting the balance and fade controls on the stereo system.
By doing this, you can confirm that both tweeters are producing sound and that their wiring is not out of phase.
If one tweeter is quiet, it could indicate a loose wire, a faulty connection, or a problem with the crossover.
Ensuring that both tweeters are working correctly guarantees a full stereo effect and prevents delays in sound levels.
4. Adjust Crossover Settings or EQ for Perfect Sound
The final step is to fine-tune the sound by adjusting the crossover settings or equalizer.
The crossover ensures that only high frequencies are sent to the tweeters, preventing them from receiving harmful bass signals.
Many external crossovers allow you to select a cutoff point, such as 3,000 Hz or 5,000 Hz, depending on your audio setup.
Similarly, the equalizer on a stereo system can be used to increase or decrease high frequencies until the sound sounds natural and comfortable.
Audio research shows that proper tuning improves stereo imaging, making the sound appear to be coming from in front of you rather than from separate speakers.
Adjusting these settings ensures that the tweeters deliver clear, balanced and pleasant sound for everyday driving.
Common Mistakes to Avoid
1. Placing the Tweeter Too Far From the Mid-Range Speaker
One of the most common mistakes in car audio installation is placing the tweeter too far from the mid-range speaker.
When the tweeter and mid-range driver are placed too far apart, the sound becomes unbalanced because the high and mid frequencies reach the listener at different times.
This problem is called poor timing alignment and can cause music to sound disjointed or unnatural.
Acoustics research shows that placing the tweeter near the mid-range speaker creates a smooth transition between frequencies and provides a more realistic soundstage.
Ideally, the tweeter should be placed at an appropriate distance from the mid-range speaker so that the listener can hear all frequencies simultaneously.
2. Wrong Wiring Polarity
Another common mistake is connecting the tweeter wires in reverse polarity, meaning the positive and negative wires are interchanged.
This creates a phase problem, where one speaker cone moves inward while the other moves outward, causing the sound waves to cancel each other out.
The result is weak bass, a hollow sound and overall poor sound quality.
Many beginners overlook this step because the system produces sound, but clarity and balance are greatly diminished.
Following the markings on both the tweeter and crossover or amplifier ensures correct polarity and keeps the system in perfect phase alignment.
3. Not Securing Wires Properly
Failing to properly secure wires after installation is another mistake that can lead to long-term problems.
Loose wires inside panels or under the dashboard can rattle when the car is moving, creating unwanted noise that interferes with the listening experience.
Furthermore, unsecured wires are more likely to become pinched, stretched, or worn over time, which can cause short circuits or sound disruption.
Using simple tools like wire clips, zip ties, or adhesive mounts keeps wires neat and prevents movement.
A well-organized wiring setup not only improves reliability but also reflects a more professional-quality installation.
4. Placing Tweeters in Obstructed Areas
Some installers mistakenly place tweeters in locations where sound is blocked, such as inside door panels, behind heavy mesh grilles, or too low near the ground.
As tweeters produce high-frequency sounds that travel in a straight line, obstructions can significantly reduce clarity and detail.
For example, if tweeters are installed too low in doors, sound may be absorbed by seats or carpets before reaching the listener’s ears.
Car audio research shows that placing tweeters at or near ear level provides the best stereo imaging and sound quality.
Avoiding obstructed locations ensures that high frequencies reach the listener clearly and directly.
Read More:
Tips for Best Sound Quality
As well as, to achieve the best sound quality, you can just add the tweeters at the ear level and it should be within 15 to 20 degree angle from the listener’s position, as this placement actually to ensure that high-frequency sounds to delivered directly to the listener: and in that way it enhances the clarity and stereo imaging as well. And according to research, the positioning tweeters on the dashboard facing the center of the seats ideally provides an optimal listening experience.[¹]
1. Place the tweeter at the listener’s ear level
High-frequency sounds produced by tweeters travel in a straight line and are highly directional, while low-frequency sounds are easily scattered.
This means that the position and angle of the tweeter play a crucial role in the music experience in the car.
Placing the tweeter at the listener’s ear level provides a natural and balanced sound level, making vocals and instruments sound more vibrant.
Studies on acoustic design show that properly aimed tweeters improve stereo imaging, creating the illusion that the music is coming from in front of the listener, rather than from separate speakers.
Placing them too low or too far away can muffle sound or lose detail, so careful alignment is essential.
2. Use High-Quality Wiring for Better Sound
The quality of wiring used for tweeters directly affects performance.
Thin, poor-quality wire can create resistance, reduce signal strength, or even produce unwanted noise.
High-quality wire with proper shielding ensures that high-frequency signals reach the tweeter clearly and without distortion.
Automotive audio experts recommend using oxygen-free copper wire, as it transmits signals more efficiently and prevents corrosion over time.
Choosing the correct wire gauge is also important, as too thin a wire can overheat or reduce sound quality.
Reliable wiring not only means better audio, but also ensures long-term durability and safety.
3. Test the Mount Before Finalizing
Before permanently installing the tweeter, it’s helpful to test different positions and angles to find the setup that provides the clearest and most enjoyable sound.
Even small adjustments in angle or height can make a big difference in the music experience inside the car.
For example, some listeners may prefer tweeters angled slightly toward the center of the vehicle for a wider soundstage, while others may prefer tweeters with a more direct path toward the driver’s seat.
Temporary mounting with adhesive pads or tape allows for experimentation without making permanent changes.
Testing before finalizing ensures that the tweeters are placed in the most effective position for your personal listening preferences.
4. Consider Professional Tuning for Premium Audio Systems
For those seeking the highest sound quality, professional tuning can make a significant difference.
Audio experts use tools like real-time analyzers, tuning software and measurement microphones to adjust crossover points, equalizer settings and time alignment with extreme precision.
These adjustments help eliminate harsh tones, balance frequencies and optimize sound levels for the unique acoustics of your vehicle’s interior.
While ordinary users can achieve good results with basic adjustments, professional tuning ensures that every detail of the music is heard clearly and naturally.
It transforms an average installation into a premium sound experience that rivals high-end factory or aftermarket systems.
Conclusion – How to Install Tweeters in a Car
Basically music in a car should not just be heard anyway, but it should be felt and that’s exactly you can achieve by having professional-level clarity by adding tweeters to the audio system.
While regular speakers handle low and mid frequencies, tweeters are responsible for reproducing the high tones that give music its sparkle and realism.
When placed correctly, tweeters improve stereo imaging, create a more natural soundstage and make vocals, cymbals and instruments sound clear and vibrant.
The process of adding tweeters isn’t overly complicated, but achieving the best results requires careful preparation, correct wiring and proper placement.
By avoiding common mistakes, securing all connections and experimenting with positioning, even beginners can create a sound system that sounds balanced and immersive.
For car owners who value audio quality, investing time in proper tweeter installation is a small effort that significantly improves everyday driving enjoyment.
With the right approach, your vehicle can become a personal concert hall, delivering clear, vibrant sound on every trip.
Just comment down below you thoughts on this guide.
Frequently Asked Questions
Q1. Do I need tweeters in my car’s audio system?
Answer: Yes, tweeters are essential if you want your car’s music to sound clear and natural. Regular speakers, also known as mid-range or full-range speakers, can handle low and middle frequencies, but they struggle to handle louder sounds like cymbals, violins, or female vocals. Tweeters are designed to handle these louder sounds, adding sparkle and nuance to music. Without tweeters, sound can sound muffled or muffled and you may miss many of the nuances in your favorite songs.
Q2. Where is the best place to install tweeters in your car?
Answer: The best place to install tweeters depends on your car and how you want the sound to reach your ears. Tweeters are typically mounted on the A-pillar near the windshield, the dashboard, the sill panel near the side mirror, or above the door panel. Ideally, tweeters should be at ear level as this helps create a natural sound level. Placing them too low or in hidden locations can muffle sound and reduce clarity.
Q3. Do tweeters need crossovers to function properly?
Answer: Yes, tweeters generally need crossovers because crossovers filter out sound frequencies and send only high tones to the tweeter. If you connect the tweeter directly to the entire audio signal, it could be damaged by low or mid frequencies, which it is not designed to handle. Some tweeters come with built-in crossovers, while others use separate external crossovers that are placed between the amplifier and the tweeter. Using the correct crossover ensures that the tweeter functions safely and delivers clear sound.
Q4. Can I install tweeters in my car without professional help?
Answer: Yes, many people install tweeters themselves, specially if they already have some experience with car audio or basic equipment. This process typically involves disconnecting the car’s battery, preparing the mounting spot, laying wires, connecting them to a crossover or amplifier and then testing the sound. However, if you’re not comfortable with wiring or cutting panels, it may be safer to have a professional do the installation. Incorrect connections or poor mounting can degrade sound quality or even damage the speaker.
Q5. What if tweeters are installed incorrectly?
Answer: If tweeters are installed incorrectly, several problems can arise. Incorrect wiring can cause polarity-phase issues, making music sound weak or unbalanced. If the tweeter is installed too far from the mid-range speaker, the sound may sound disjointed, with highs coming from one spot and mids from another. Incorrectly placed wires can cause rattling and noise while driving. Additionally, if the tweeter is installed in an obstructed area, the sound will be unclear. This is why planning and careful installation are crucial for best results.
Q6. Do high-quality tweeters really make a big difference?
Answer: Yes, high-quality tweeters can make a big difference in sound. Cheap or poor-quality tweeters often sound harsh or thin and may not last long. On the other hand, good tweeters reproduce high notes smoothly and naturally without distortion. They also feature better construction materials, such as silk, aluminum, or titanium domes, which improve sound accuracy. For those who love music and want a balanced system, investing in good tweeters is worthwhile.
Q7. Can tweeters improve the bass in my car?
Answer: No, tweeters do not improve bass because they are not designed for low frequencies. Their job is only to handle high-pitched sounds. If you want more powerful bass, you’ll need a subwoofer. However, tweeters can make bass feel more balanced because they cover the entire sound range. When high-pitched sounds are clear, low-pitched and mid-pitched sounds also sound more powerful and natural, improving the listening experience.
References:
[1] Your Installer Should Aim Your Car Audio Tweeters
https://www.bestcaraudio.com/your-installer-should-aim-your-car-audio-tweeters/

Guys, I’m a car audio enthusiast and customization expert and I love clear sound and clean installation. Plus, I have spent years helping people build their dream audio setups. And whenever I’m working on cars, I probably listen to music and thinks about the next big upgrade.