Written By: Don Dodi
Fact Checked By: Kristen Brown
Reviewed By: Diego Rosenberg
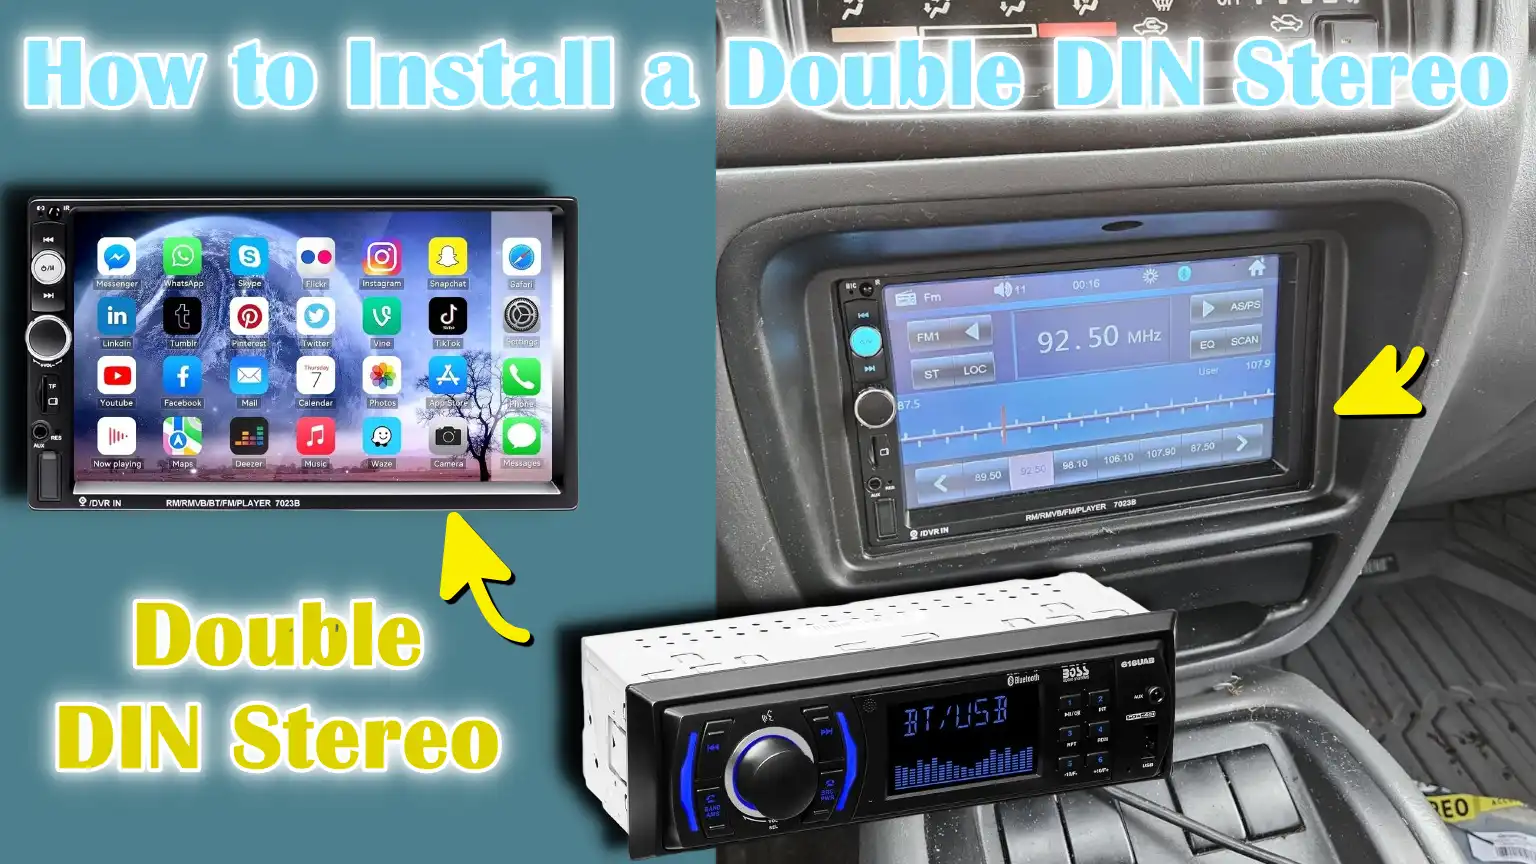
Basically you’ll have big touchscreens, better sound controls and smarter features right in your dashboard such as: navigational instructions, Bluetooth connectivity and smartphone integration as well.
Yes, indeed the double DIN stereo upgradation is one of the most popular modifications that car owners make as it improves the sound quality and in-car technology all at ones.
Plus, a “DIN” is actually a standard which is created by the German Institute for Standardization and a double DIN unit actually measures 4 inches in height, which makes it larger than the traditional signal DIN which are usually 2 inches stereos.
And this extra space allows you to have touchscreen displays, better Bluetooth connectivity, precise GPS navigation, smartphone integration with the help of Apple CarPlay or Android Auto and there’s advanced equalizer controls are available as well to make your ride convenient.
Additionally, according to the consumer automotive reports, there are more than 70% of the aftermarket car stereos sold in the U.S. today double DIN units, that reflects the demand for the bigger screens and integrated features.
And this guide is specifically focuses on How to Install a Double DIN Stereo, so that you can have proper step-by-step guide with right tools, proper wiring guide for correct installation.
Tools
| Tools/Contents | Purpose / Why You Need It | Easy Description |
|---|---|---|
| Screwdriver (Phillips and Flathead) | For removing the screws holding the dashboard and old stereo in place. | A standard tool for loosening and tightening screws. A Phillips head has a cross-shaped tip; a flathead head has a flat tip. |
| Panel Removal Tool | For safely removing dashboard panels without damaging them. | A plastic tool that helps easily remove trim pieces without scratching the car’s interior. |
| Wire Harness Adapter | For connecting the new stereo to your car’s wiring without cutting the factory wires. | A plug-and-play connector that matches your car’s wiring to the stereo’s wires. |
| Dash Kit (Vehicle-Specific) | To securely mount the new stereo to your dashboard. | A frame or bracket made for your specific car model so the stereo fits perfectly. |
| Electrical Tape or Heat-Shrink Connectors | To securely cover and secure wired connections. | Electrical tape wraps wires; heat-shrink connectors shrink onto wires when heated to secure them. |
| Wire Crimpers/Strippers | To remove insulation from wires and connect them securely. | A tool that removes the plastic covering from wires and helps keep them tightly connected. |
| Socket Wrench Set | To remove bolts securing the old stereo or dashboard components. | A tool with interchangeable sockets for bolts of different sizes. |
| New Double DIN Stereo | The main unit that will replace your old stereo. | An upgraded stereo with a larger screen, touchscreen, Bluetooth and other modern features. |
How to Prepare Before Installation
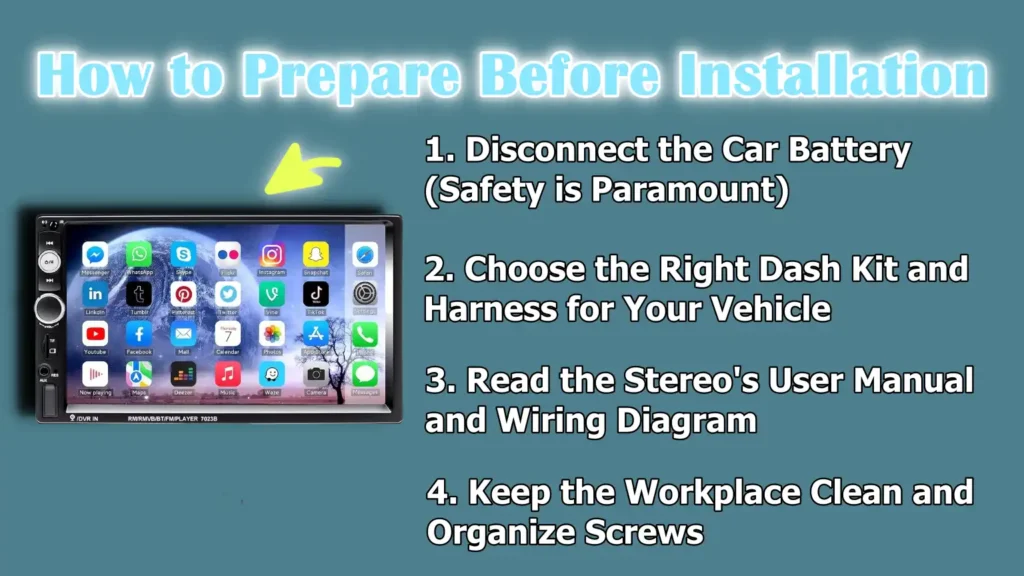
1. Disconnect the Car Battery (Safety is Paramount)
Before beginning any work on your car stereo, it’s essential to disconnect the car battery.
This step prevents accidental short circuits, electrical shocks and damage to the vehicle’s electronic systems.
Most modern cars contain sensitive electronic components and even a minor electrical fault can blow a fuse or damage the stereo.
Disconnecting the battery’s negative terminal ensures that electricity doesn’t flow while you’re working, keeping both you and your car safe during the installation process.
2. Choose the Right Dash Kit and Harness for Your Vehicle
Using the right dash kit and wiring harness is essential for a smooth and safe installation.
Dash kits designed specifically for your vehicle model ensure that the new double DIN stereo fits snugly into the dashboard without any gaps or looseness.
A wiring harness connects your car’s factory wiring to your new stereo safely and without cutting or damaging the original wiring.
Using the wrong kit or harness can damage the stereo system, loosen connections, or even cause it to malfunction.
3. Read the Stereo’s User Manual and Wiring Diagram
Before connecting any wires, it’s important to carefully read the stereo’s user manual.
The manual provides a wiring diagram that shows which wires control power, speakers, antenna and additional features like Bluetooth or steering wheel controls.
Understanding the diagram can prevent mistakes that could distort sound, blow fuses, or even cause the stereo to malfunction completely.
Spending a few minutes reading the manual can save hours of troubleshooting later.
4. Keep the Workplace Clean and Organize Screws
Keeping the workspace clean is an important step for efficiency and safety.
Removing an old stereo involves many small screws, clips and panels.
Keeping these parts organized in a tray or container ensures you don’t lose them and can reinstall the dashboard correctly.
A clean work area also reduces the risk of scratching your car’s interior or dropping tools in hard-to-reach places.
Proper preparation makes the entire installation easier and faster.
How to Remove the Old Stereo
1. Carefully remove the dash trim with panel removal tools
The first step in removing your old stereo is to carefully remove the dash trim.
Using a panel removal tool is essential because it allows you to gently remove the trim without scratching or breaking the dashboard.
Dash trim is often attached with clips that can easily break if too much force is applied.
Taking time with this step ensures that the surrounding interior remains intact, which is specially important if you plan to reinstall it after installing the new stereo.
2. Open and Remove the Factory Stereo
After removing the dash trim, the factory stereo is usually secured with several screws or bolts.
Using the correct screwdriver or socket wrench, carefully open the stereo and gently pull it out of the dash.
Rushing this step could damage the stereo or dashboard frame.
Pulling the unit out slowly gives you enough room to access the wires behind the stereo.
3. Disconnect the Factory Wiring Harness and Antenna Cable
After removing the old stereo, you’ll see the factory wiring harness and antenna cable connected to the back of the unit.
Carefully disconnect both by pressing or gently pulling on the release tabs.
Avoid pulling on the wires, as this could damage the connector or the car’s wiring.
Disconnecting them properly ensures a smooth start to the process of connecting your new double DIN stereo.
4. Check for any damage to the wiring
Before installing the new stereo, check the factory wiring for any damage, such as frayed wires, corrosion, or loose connections.
Damaged wiring can cause poor sound quality, short circuits, or even completely damage the stereo.
If any problems are found, it’s best to repair or replace the wiring before proceeding.
Ensuring the wiring is in good condition protects your new stereo and helps it perform optimally.
How to Wire a New Stereo
1. Matching Wires: Stereo Harness to Vehicle Harness (Color-Coded)
The first step in wiring a new stereo is matching the wires in the stereo harness to the wires in your vehicle harness.
Most modern stereos and vehicles use color-coded wires to simplify the connection process.
For example, red typically represents accessory power, yellow represents constant power, black represents ground and other colors indicate different speaker channels.
Correctly matching colors ensures that each speaker works properly, the stereo turns on and off at the appointed time and all additional functions, such as lights, function correctly.
Carefully matching wires can prevent common problems such as no sound, blown fuses, or malfunctioning features.
2. Use a wiring harness adapter to avoid cutting factory wires
A wiring harness adapter is a plug-and-play connector that allows you to connect a new stereo without cutting your car’s factory wiring.
Using an adapter maintains the integrity of your vehicle’s electrical system and makes it easy to revert to the original stereo in the future if needed.
It also reduces the risk of electrical faults that can occur if wires are connected incorrectly.
Investing in a good adapter saves time and protects your car’s wiring, while ensuring a secure connection to the new stereo.
3. Secure Connections with Crimp Connectors or Soldering
Once the wires are matched, it’s important to secure the connections with crimp connectors or soldering.
Crimp connectors are quick and reliable to use when properly installed with a crimping tool, while soldering provides a permanent and highly secure connection.
Properly secured connections prevent wires from loosening due to vibration during driving, which can cause intermittent noise, power loss, or even short circuits.
Ensuring strong and stable connections is crucial for the long-term reliability of your new stereo.
4. Wrap the connections with electrical tape or heat-shrink tubing
After connecting the wires, it’s essential to cover any exposed areas with electrical tape or heat-shrink tubing for safety and durability.
Electrical tape insulates the wires and prevents accidental contact with other wires or metal surfaces, while heat-shrink tubing provides a tighter, more permanent seal when heated.
Proper insulation prevents short circuits, corrosion and other electrical problems, ensuring your stereo runs safely and reliably for years to come.
5. Connect the steering wheel control adapter (if applicable)
If your vehicle has steering wheel controls, connecting the steering wheel control adapter is the final step in the wiring process.
This adapter allows you to connect the new stereo to your steering wheel buttons, allowing you to adjust the volume, change tracks, or answer calls without taking your hands off the steering wheel.
Proper installation of this adapter ensures both convenience and safety, as it maintains the functionality of your car’s integrated controls while using your upgraded stereo.
How to Install the Dash Kit and Stereo
1. Installing the Vehicle-Specific Mounting Bracket or Dash Kit
The first step in installing your new stereo is securing the vehicle-specific mounting bracket or dash kit.
Dash kits are designed to fit the contours and mounting points of your car’s dashboard, ensuring a perfect and professional look.
Using the correct bracket prevents movement or vibration during driving and provides a sturdy base for the stereo.
Always double-check that the brackets are securely installed and aligned with the dashboard before proceeding to the next step, as incorrect installation can cause rattling or uneven gaps around the stereo.
2. Installing the Stereo in the Dash Kit Frame
After installing the bracket or dash kit, carefully install the new double DIN stereo into the frame.
Ensure the stereo fits snugly and aligns with the dash kit’s mounting holes.
This step is crucial because an incorrectly installed stereo can move over time, potentially damaging wiring or dash components.
Take the time to install the unit in the correct location, ensuring that no wires are tangled or pinched behind the stereo.
3. Connect the wiring harness and antenna to the new stereo
Before fully securing the stereo, connect the wiring harness and antenna cable to the back of the unit.
Proper connections ensure that all speakers, power functions and additional features like Bluetooth or navigation work properly.
The antenna connection is specially important for clear radio reception.
Double-check that all plugs are securely in place and that there are no loose wiring, which could cause intermittent power or sound problems later.
4. Installing the stereo in the correct location and securing with screws
Once the wiring is connected, carefully install the stereo into the dash kit frame and align it with the mounting points.
Use the screws provided with the dash kit or stereo to secure it.
Tightening the screws properly ensures that the stereo will not move during driving and will remain level with the dash.
Avoid overtightening, as this may crack the plastic frame and ensure all screws are in place to prevent rattling or loosening in the future.
Proper installation of the stereo at this stage guarantees a clean, professional look and stable performance.
How to Test the Stereo
1. Reconnect the Car Battery
After the stereo is installed, the first step in testing it is to reconnect the car battery.
This restores power to your vehicle and allows you to safely test all the electrical functions of the new stereo.
To avoid any loose connections or electrical problems during testing, always ensure that the battery terminals are properly connected and free of corrosion.
Properly reconnecting the battery is crucial to prevent blowing fuses or damaging the stereo and other electronic systems.
2. Turn on the Stereo
After the battery is reconnected, turn on the stereo to ensure it powers on properly.
A properly installed stereo should immediately display the brand logo or home screen.
If it doesn’t power on, double-check all wiring connections, fuses and harness adapters to ensure everything is installed correctly.
Confirming that the stereo powers on is the first sign that the installation was successful.
3. Check the sound output from all speakers
Next, check the sound output from each speaker in your vehicle.
Play music at different volumes and listen carefully to ensure each speaker is functioning properly.
Check for any distortion, static, or uneven sound, which could indicate a loose wire, incorrect speaker connection, or a setting that needs adjustment.
Checking all speakers ensures that your stereo delivers clear and balanced audio throughout the car.
4. Check Bluetooth, radio, USB & CarPlay/Android Auto
After checking the speakers, check all the stereo’s additional features.
Pair your smartphone via Bluetooth to check call and media functionality.
Connect it to the radio to confirm clear reception and check the USB port for proper media playback.
If your stereo supports Apple CarPlay or Android Auto, connect a compatible phone to ensure the interface works smoothly.
Checking all features ensures that every function of your stereo is operational and ready for daily use.
5. Check the Steering Wheel Controls (if connected)
Finally, check the steering wheel controls, if your vehicle supports them.
The volume, track selection and phone call buttons should work smoothly with the new stereo.
Proper functionality ensures you can safely operate the stereo without taking your hands off the steering wheel, maintaining both convenience and safety while driving.
Verifying these controls is the final step to ensure your installation is a complete success and all features are functioning as expected.
Read More:
Now, It’s Time for Final Assembly
1. Carefully Reattach the Dash Trim
Once the stereo has been tested and all functions are confirmed to be working properly, the next step is to reattach the dash trim.
This should be done carefully to avoid breaking the plastic clips or scratching the dashboard.
Align the trim with the original mounting points and press it gently until all clips are firmly in place.
Taking time in this step ensures that your car’s interior looks professional and retains its original appearance.
2. Ensure the Stereo is Level and Secure
After reattaching the trim, check that the stereo is level and firmly attached to the dashboard.
A properly installed stereo dash kit should fit evenly into the frame without any gaps or loose edges.
Securing the stereo prevents vibrations during driving, which can cause noise or damage the unit over time.
Flush installation also gives your vehicle a clean, factory-like finish that enhances the overall appearance of the interior.
3. Clean the area of fingerprints and dust
Finally, clean the area around the stereo and dashboard trim to remove fingerprints, dust, or debris that may have accumulated during installation.
Use a soft cloth to gently wipe the surfaces and avoid harsh chemicals that could damage the dashboard or screen.
Keeping the area clean not only improves visual appeal but also ensures that the touchscreen, buttons and display remain fully functional and easy to use.
A clean final assembly completes the installation process and gives your car a polished and professional look.
Common Troubleshooting
1. No Power – Check Wiring Connections and Fuses
If your new stereo isn’t turning on, first check all wiring connections and the car’s fuses.
Loose or incorrectly connected wires can prevent power from reaching the stereo, while a blown fuse can completely disrupt the circuit.
Carefully check that the stereo harness is fully plugged in and that all wires match the correct color code.
Inspect the vehicle’s fuse box and replace fuses with the correct rating.
Ensuring proper power connections is essential for safe and reliable stereo operation.
2. Poor Sound – Check the Speaker Wiring Polarity
If the sound coming from the stereo is weak, uneven, or distorted, it could be due to incorrect speaker wiring polarity.
Each speaker has a positive and a negative wire and reversing them can muffle sound or reduce audio quality.
Double-check that all speaker wires are connected according to the stereo’s wiring diagram and maintain the correct polarity.
Correcting the wiring ensures balanced sound output and a clear, enjoyable listening experience.
3. Radio Not Working – Check the Antenna Connection
When the radio cannot receive stations or has poor reception, the antenna connection is often the cause.
Ensure the antenna cable is properly plugged into the stereo and is not damaged or loose.
A secure and intact antenna connection is essential for consistent radio signal reception and clear audio, specially in areas with weak signals.
4. Loose Fit – Recheck the Alignment of the Dash Kit
If the stereo feels loose or rattling while driving, the problem may be with the dash kit or mounting brackets.
Double-check that the dash kit is correctly aligned and that all screws and brackets are properly tightened.
A properly aligned dash kit holds the stereo firmly in place, prevents vibration and potential damage and ensures a professional-looking installation.
Solving this problem guarantees both the stability and long-term performance of your stereo.
Conclusion – How to Install a Double DIN Stereo
So, when you go for upgrading to a double DIN stereo then it isn’t just about the having the better music, but it actually brings your car into the modern era of connectivity and it gives more control and comfort of course.
With a larger screen, touchscreen controls, Bluetooth connectivity, smartphone integration like Apple CarPlay or Android Auto and advanced equalizer settings, your vehicle becomes more enjoyable and safer to use.
As well as, the double DIN is not just a marketing term but it is an ISO-defined size which is ISO 7736 and you should always check the physical opening in their dash against the ISO dimensions before buying a unit or a dash kit, also you should note that if a unit claims to be “double DIN” but you feel that is off-size, then you actually need a custom spacer or a different kit as well so better to check everything about size.[¹]
Following the correct steps—such as removing the battery, preparing the dash kit and wiring harness, carefully removing the old stereo, properly wiring and securing the new unit and checking all features—ensures a professional-quality installation without damaging your car’s electronics.
Attention to details like securing connections, maintaining speaker polarity and checking steering wheel controls ensures long-lasting performance.
Overall, a well-installed double DIN stereo not only improves your audio experience, but also increases the value of your vehicle and gives you the confidence to handle future upgrades or troubleshooting with ease.
You can comment down your queries and related questions now.
Frequently Asked Questions
Q1. What is a double DIN stereo and why should I get one?
Answer: A double DIN stereo is a car stereo that’s approximately four inches taller than a standard single DIN stereo. It provides more space for features like a larger touchscreen, Bluetooth connectivity, GPS navigation, and smartphone integration like Apple CarPlay or Android Auto. Upgrading to a double DIN stereo improves sound quality, makes your car more convenient to use, and provides modern technology not available in most factory stereos.
Q2. Do I need special tools to install a double DIN stereo?
Answer: Yes, you’ll need some basic tools like a screwdriver, a panel removal tool, wire crimpers or strippers, a socket wrench set, and electrical tape or heat-shrink tubing. You’ll also need a dash kit and wiring harness adapters for your vehicle. These tools and accessories make the installation process safer, easier, and more professional, and they help prevent damage to your car’s dashboard or wiring.
Q3. Can I install a double DIN stereo myself, or do I need a professional?
Answer: Most car owners can install a double DIN stereo themselves by carefully following the instructions and using the right tools. It’s a step-by-step process that involves removing the old stereo, wiring the new stereo, and installing it in the dash kit. However, if you’re unfamiliar with wiring or electronics, consulting a professional installer can help avoid mistakes and ensure a fully functioning stereo.
Q4. How long does it take to install a double DIN stereo?
Answer: On average, a person with basic mechanical skills and the right tools takes about one to two hours to install a double DIN stereo. The exact time can vary depending on your vehicle model and additional features like steering wheel controls or a backup camera. It’s important to take the time to ensure all connections are strong and secure.
Q5. What should I do if the stereo doesn’t turn on after installation?
Answer: If the stereo won’t turn on, first check the wiring connections and make sure the harness adapter is properly installed. Then, check the car’s fuses to see if any have blown. Loose wires or blown fuses are the most common causes of power outages. Ensuring all connections are secure and the battery is properly connected usually resolves this problem.
Q6. How do I ensure all speakers are working properly?
Answer: To ensure all speakers are working properly, check that each speaker wire is connected with the correct polarity according to the wiring diagram. Reversed wires can cause weak or distorted sound. Play audio at different volumes and listen to each speaker in the car. Correct wiring and testing during installation will ensure you get clear, balanced sound from each speaker.
Q7. Can I keep my steering wheel controls after installing a new stereo?
Answer: Yes, you can keep your steering wheel controls using a steering wheel control adapter. This adapter connects your vehicle’s control buttons to your new stereo, allowing you to adjust the volume, change tracks, or answer calls without taking your hands off the steering wheel. Installing this adapter ensures safety and convenience while driving.
References:
[1] wikipedia.org, ISO 7736
https://en.wikipedia.org/wiki/ISO_7736

Guys, I’m a car audio enthusiast and customization expert and I love clear sound and clean installation. Plus, I have spent years helping people build their dream audio setups. And whenever I’m working on cars, I probably listen to music and thinks about the next big upgrade.