Written By: Don Dodi
Fact Checked By: Kristen Brown
Reviewed By: Diego Rosenberg
It is the harsh fact that every car actually loses its shine with time, but you can simply bring back that showroom glow by just polishing it.
Indeed, polishing car paint is one of the most effective ways to restore a vehicle’s original shine and also it actually provide protection from any kind of long-term damage as well.
The exposure to sunlight, road dust, acid rain, bird dropping and even if you uses improper washing techniques can be the cause of its faded shine.
Plus, the studies in automotive detailing also shows that polishing can safely remove scratches, swirl marks and oxidation by gently levelling the clear coat, which is basically a transparent protective layer above the paint.
Yes, waxing is another way but it only provides a temporary glossy shield and apart from this polishing actually improves the paint surface itself by smoothing the imperfections and that enhance the light reflection as well that looks smooth and shiny.
If you wanted to bring back that mirror-like shine then it does actually, but additionally it also helps to extend the life of the paint by preparing it for protective coatings such as: wax or ceramic sealants.
Also, most of the detailing experts recommend polishing once or twice a year so that it keep the paintwork in top condition.
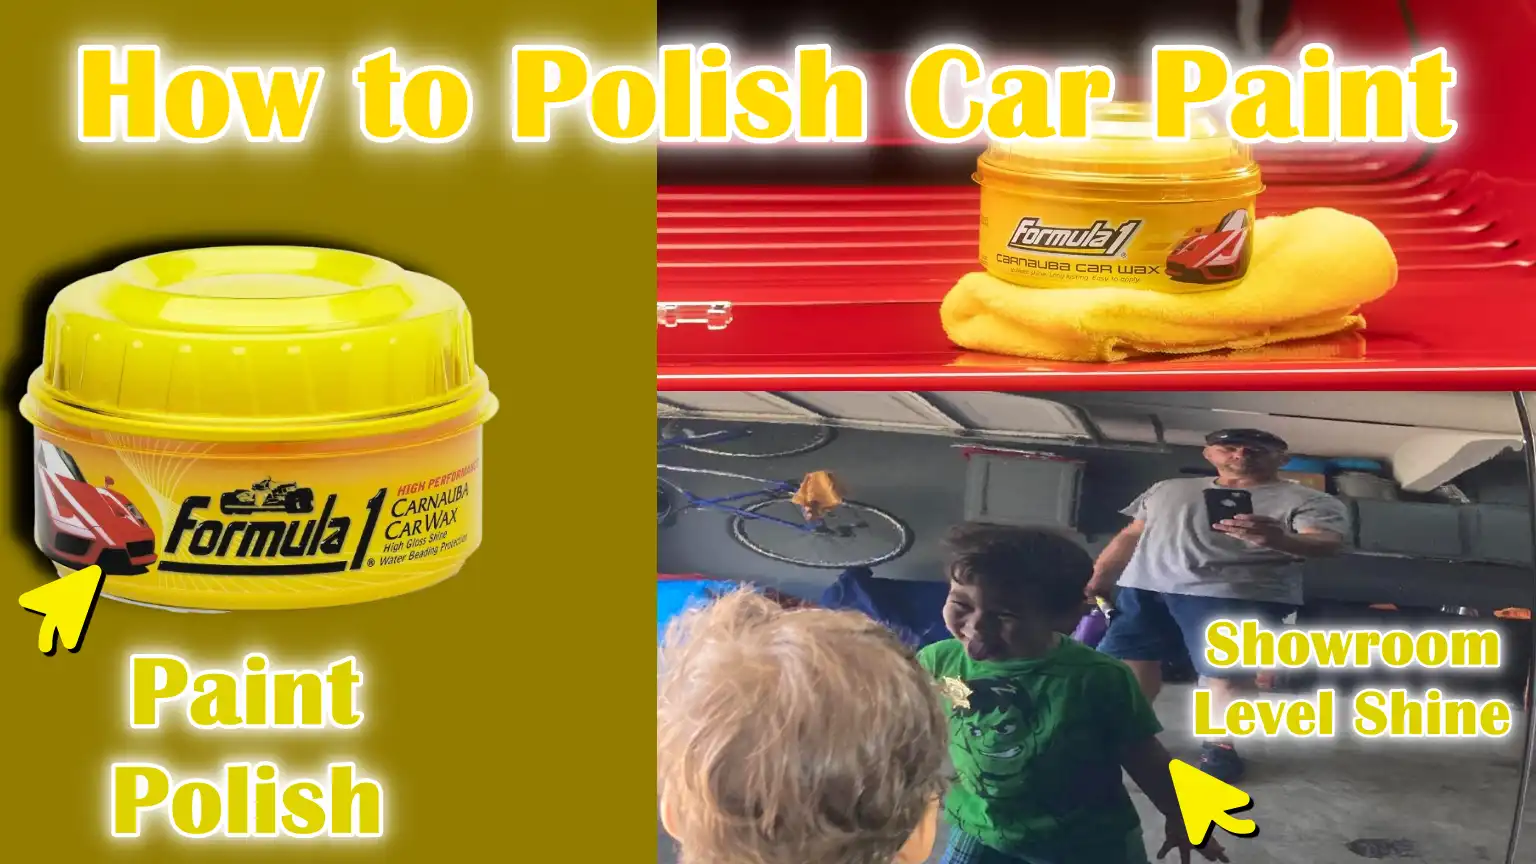
So, this guide is all about How to Polish Car Paint, so that you can keep your car looking years younger than its actual age.
Tools
| Tool / Material | Why It’s Important | Extra Tips |
|---|---|---|
| Car Polish (Abrasive or Finishing) | Removes minor scratches, swirl marks and dullness. | Use an abrasive polish for rough paint and a finishing polish for light marks and shine. |
| Polishing Pads or Microfiber Applicators | Helps apply polish evenly without scratching the surface. | Foam pads work well with machines, microfiber pads are great for hand polishing. |
| Dual-Action Polisher or Rotary Buffer (Optional) | Saves time and delivers a professional-level shine. | Double action is safer for beginners, rotary gives better results, but requires skill. |
| Microfiber Towels | Used to wipe away polish and leave a clean, shiny finish. | Always use clean towels and fold them repeatedly while wiping. |
| Car Wash Soap, Buckets and Clean Water | Removes dirt and dust before polishing to avoid scratches. | Use two buckets—one for soapy water, one for rinsing. |
| Clay Bar (for Deep Cleaning Before Polish) | Removes hidden dirt, tar and debris left behind after normal washing. | Use with clay lubricant or quick detailer spray for smooth results. |
How to Prepare Before Polishing
1. Wash the Car Thoroughly to Remove Dirt and Debris
Before polishing, it’s important to thoroughly wash your car with car-safe shampoo and clean water.
Washing removes loose dirt, dust and road grime that can get trapped under the polishing pad and cause scratches.
Regular household detergents should never be used, as they strip away protective wax and damage the clear coat.
Detailing experts widely recommend the two-bucket method, in which one bucket is filled with soapy water and the other with detergent.
This method prevents dirt from returning to the car’s surface and reduces the likelihood of swirl marks.
2. Dry Thoroughly with a Microfiber Towel
After washing, the car must be thoroughly dried before polishing.
Residual water can seep into the polish and reduce its effectiveness.
Microfiber towels are the best choice for drying because they are extremely soft and absorbent, meaning they can absorb water without leaving streaks or scratches on the paint.
Unlike regular towels or cloths, microfiber cloths have tiny fibers that safely remove water and dust from the surface.
The dry surface also makes it easier to clearly inspect the condition of the paint.
3. Inspect the Paint Surface for Scratches, Oxidation and Swirl Marks
Once the car is clean and dry, it’s time to carefully inspect the paint.
Look at the car in bright sunlight or a bright light to check for swirl marks, water spots, or faded spots caused by oxidation.
Scratches are often visible when light is reflected from different angles.
Oxidation occurs when paint loses its shine over time due to exposure to oxygen and sunlight, causing the surface to become chalky or dull.
Identifying these problems before polishing helps you choose the right type of polish and determine how much polishing is needed.
4. Use a clay bar to remove stuck-on contaminants
Even after thorough washing, many invisible particles remain stuck to the paint.
These include tar, brake dust, industrial waste and tree sap.
Clay bars are designed to remove hidden contaminants that cannot be removed by washing.
When used with a clay lubricant or quick detailer spray, the clay glides easily over the surface and traps dirt.
This step makes the paint feel very smooth to the touch, ensuring that the polish can work directly on the paint instead of on the contaminants.
Skipping this step often results in uneven polishing and a reduced shine.
5. Cover sensitive areas with painter’s tape
Before beginning the polishing process, it’s important to cover sensitive areas of the car with painter’s tape.
Parts like rubber trim, plastic edges, badges and emblems are not designed to withstand polish and can be stained or damaged if polish seeps into them.
Painter’s tape creates a safe boundary so the polisher or applicator pad doesn’t rub into areas it shouldn’t.
This simple step saves time during cleanup and keeps the overall detailing job looking professional.
How to Choose the Right Polish
1. Difference Between Cutting Compound and Finishing Polish
Polishes are designed to enhance the appearance of car paint, but not all polishes work the same way.
Cutting compounds are stronger and more abrasive, making them ideal for removing deep scratches, deep swirls and oxidation that has damaged the clear coat over time.
They work by gently removing a very thin layer of paint or clear coat to smooth the surface and restore shine.
Finishing polishes, on the other hand, are more gentle and are designed to remove only very light imperfections or minor swirls.
They enhance shine and smooth the paint without removing excessive layers.
It’s important to understand this difference because using the wrong polish can either be too strong and damage the paint, or too weak and fail to achieve the desired shine.
2. Choosing a Polish Based on the Condition of the Paint
The condition of your car’s paint is an important factor in choosing the right polish.
If the paint has light swirls, minor scratches, or light water spots, a finishing polish is usually sufficient.
Older cars or vehicles that have been exposed to harsh weather, sunlight and pollution for many years may have heavy oxidation, deep scratches, or discoloration.
In such cases, a cutting compound or a more effective polish is required to restore the surface.
Experts recommend starting with a less abrasive option and using a stronger polish only when necessary, as this reduces the risk of unnecessary paint removal and protects the car’s clear coat.
3. Compatibility with Clear Coat Finishes
Most modern cars have a clear coat layer that protects the colored paint underneath.
It’s important to choose a polish that is compatible with clear coat finishes, as harsh chemicals or aggressive abrasives can damage this layer, causing permanent stains or discolorations.
Polishes specifically formulated for clear coats are designed to safely remove imperfections while maintaining the protective layer.
Always check the product label or consult the manufacturer’s guidelines to ensure the polish is safe for your car’s specific paint type.
Using compatible products not only improves shine but also helps maintain long-term protection from environmental damage.
How to Polish Car Paint – Complete Process
1. Apply a small amount of polish to a pad or applicator
Start by applying a small amount of polish to a polishing pad or microfiber applicator.
Applying too much polish at once will not produce the best results and can be difficult to control, leading to streaks or an uneven shine.
A small amount ensures that the polish spreads evenly across the paint surface and doesn’t get wasted.
Detailing experts recommend applying a few pea-sized drops to each area so the pad can easily apply without overloading the surface.
2. Work on one area at a time
Polishing should be done in small sections, usually about a 2×2-foot area.
Focusing on one area at a time ensures the polish is applied evenly, resulting in a uniform finish across the entire car.
Working on large areas at once can cause the polish to dry before it fully sets, making it difficult to remove and reducing its effectiveness.
Carefully treating each area also helps identify areas that need more attention, such as scratches or swirl marks.
3. Spread the polish evenly before turning on the polisher
Before turning on the machine polisher or polishing by hand, spread the polish evenly over the surface.
This step ensures that the product isn’t concentrated in one spot, which can cause uneven abrasion or streaks.
Even distribution also reduces friction as the pad moves over the paint, preventing unnecessary heat buildup that can damage the clearcoat.
4. Use overlapping passes with light to moderate pressure
When polishing, use slow, overlapping passes to completely cover the area.
Light to moderate pressure is usually sufficient, as excessive force can remove too much clearcoat and increase the risk of swirl marks.
Overlapping passes ensure that no areas are missed and the polish is applied evenly to the paint.
Professionals emphasize that consistent speed is crucial to achieving a smooth, shiny finish without creating uneven areas.
5. Keep the pad flat and avoid high RPMs to prevent burning the paint
If you’re using a machine polisher, always keep the pad flat on the surface and avoid excessive speed.
Keeping the pad flat distributes pressure evenly and prevents hot spots that can burn or discolor the paint.
High RPMs generate excessive heat, which can damage the clearcoat or cause visible marks that are difficult to repair.
Dual-action polishers are recommended for beginners as they produce better results than rotary buffers and reduce the risk of heat damage.
6. Wipe off residue with a clean microfiber towel
After polishing a part, wipe off any remaining polish residue with a clean microfiber towel.
Residue left on the surface can dry and create streaks or fade the paint.
Using a soft, clean towel ensures that the surface remains smooth and shiny and it also allows you to more accurately inspect the paint to determine if additional polishing is needed.
7. Repeat for deeper imperfections if necessary
Some scratches or oxidation may not be completely removed in one go.
If deeper imperfections remain, it’s safe to repeat the polishing process on the affected area.
Start again with less polish and lighter pressure, focusing only on the areas that need improvement.
Careful repetition avoids over-polishing and ensures that the paint retains its protective transparent layer and maintains its best shine.
Give Final Touch
1. Inspect the Polished Surface in Natural Light
After completing the polishing process, it’s important to carefully inspect the car’s surface in natural light.
Sunlight or bright daylight helps you see imperfections, swirls, or haze that may not be visible in artificial light.
Inspecting in natural light ensures that every part of the paint is evenly polished and no areas are missed.
Professional detailers often recommend walking around the vehicle and viewing it from different angles, which helps identify subtle imperfections and ensure a smooth and uniform finish.
2. Apply Finishing Polish for Extra Shine (Optional)
After inspecting the surface and ensuring no major imperfections remain, a finishing polish can be applied to enhance the shine and depth of the paint.
Unlike cutting compounds or heavy polishes, finishing polish is very gentle and gives the surface a mirror-like shine.
This step is optional, but extremely beneficial for cars that require maximum reflectivity and a showroom-quality look.
Finishing polish helps smooth out small marks left from previous steps and gives the paint a shiny finish.
3. Seal the paint with wax or a ceramic coating to maintain shine
The final and most important step is to protect the polished surface.
Applying wax or a ceramic coating seals the paint and maintains its shine for months.
Wax provides a temporary protective layer that repels water, dust and dirt, while a ceramic coating creates a more durable protective layer that lasts longer and offers better resistance to scratches, UV rays and environmental damage.
Sealing the paint not only preserves the polish’s shine but also reduces the frequency of future polishing, keeping the car looking newer longer.
Automotive experts consider proper sealing essential to save time and effort on polishing.
Read More:
Common Mistakes to Avoid While Polishing a Car Paint
1. Polishing a Dirty Car
Polishing an unwashed or uncleaned car is one of the most common mistakes.
Dirt, dust and debris on the surface can act like sandpaper when rubbed with a polishing pad, causing scratches and marks on the paint.
Experts always emphasize the importance of a clean surface because polishing smooths the paint, not removes dirt.
Skipping this step can damage the paint and reduce the effectiveness of the polish.
2. Using Too Much Polish at Once
Applying too much polish at once is also a common mistake.
Applying too much polish doesn’t improve results and can ruin the process, leaving streaks and uneven coverage.
Using only the recommended amount ensures that the product spreads evenly and works efficiently without wasting material.
This provides better control over the polishing process and helps prevent buildup, which can be difficult to remove later.
3. Failing to Prepare the Surface
Surface preparation, which includes washing, drying, removing dirt and coating sensitive areas, is a crucial step that should never be skipped.
Failure to prepare can trap contaminants beneath the polish, resulting in an uneven finish, scratches, or a poor shine.
Proper preparation ensures that the paint surface is smooth, clean and ready to accept the polish, maximizing results and preventing unnecessary damage to the clear coat.
4. Over-polishing
Over-polishing occurs when paint is polished too often or with too much force.
This can thin the clear coat, the protective layer over colored paint, making it more susceptible to scratches, discoloration and environmental damage.
Experts recommend polishing only as needed, usually once or twice a year and using the least abrasive polish possible, depending on the condition of the paint.
Controlled, careful polishing improves the appearance of the clear coat while maintaining its integrity.
5. Using a dirty or worn pad
Using a dirty, worn, or previously polished pad can cause scratches or uneven marks on the paint.
A clean, well-maintained pad ensures even distribution of polish and prevents accidental damage.
Microfiber or foam pads should be washed or replaced regularly and care should be taken to remove any remaining dirt or old polish before starting each section.
This simple step significantly improves the final result and protects the car’s paint.
How to Maintain After Polishing
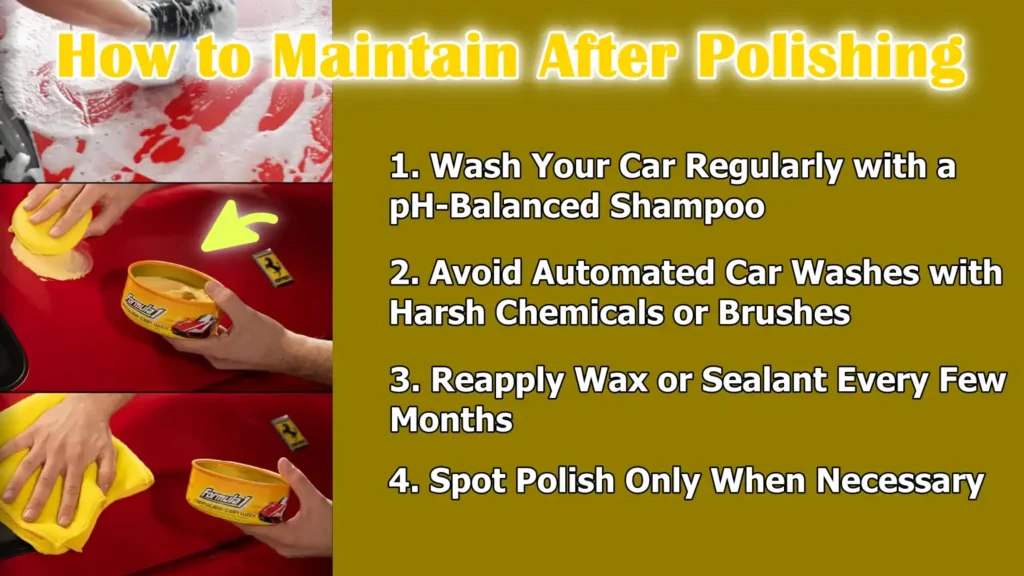
1. Wash Your Car Regularly with a pH-Balanced Shampoo
After polishing, it’s important to wash your car regularly with a pH-balanced car shampoo.
These shampoos are specially formulated to clean the surface without removing the protective wax or ceramic coating applied during polishing.
Regular washing removes dirt, dust and contaminants that can gradually fade the paint or cause minor scratches.
Using gentle, pH-balanced products helps maintain shine and keeps the polished surface smooth and reflective over time.
2. Avoid Automated Car Washes with Harsh Chemicals or Brushes
To protect polished paint, avoid harsh chemicals like household detergents, degreasers, or acidic cleaners, which can damage the clear coat.
Similarly, automated car washes with harsh brushes can leave swirl marks or scratches on even well-polished surfaces.
Experts recommend hand-washing the car with a soft microfiber cloth and gloves.
This precaution prevents unnecessary damage and extends the life of polish and protective coatings.
3. Reapply Wax or Sealant Every Few Months
The protective layer applied after polishing, whether wax or ceramic sealant, deteriorates over time due to exposure to sun, rain and road grime.
Reapplying wax or sealant every few months replenishes this layer, maintaining a shiny finish and providing continued protection from environmental damage.
Regular maintenance with protective coatings also reduces the frequency of polishing, protecting the clear coat and keeping the car looking new for longer.
4. Spot Polish Only When Necessary
Despite proper polishing and maintenance, minor imperfections such as minor scratches or mild oxidation may appear over time.
It’s best to address these with spot polishing rather than re-polishing the entire vehicle.
Spot polishing is done only on the affected area, saving time and preventing excessive wear on the clear coat.
Experts recommend regularly assessing the condition of the paint and polishing only when necessary to ensure the car remains protected and maintains a professional-like shine.
Plus, the scientific tests also shows that most of the light scratches actually just sit in the top micrometres of the clearcoat, and you can easily remove them without harming the base paint as you carefully polish it. As well as, it also warns about that if you apply the heavy polishing again and again then it can actually lowers the clearcoat thickness, which is not a good sign so recommendation is just start with the least abrasive method and you should polish only when needed the most otherwise avoid it.[¹]
Conclusion – How to Polish Car Paint
Basically a polished car is not about having the shiny exterior, but it shows how carefully you have maintained and it provides long-term protection as well.
By removing minor scratches, swirl marks and oxidation, polishing restores the smoothness of the clear coat, a protective layer that protects your paint from environmental damage.
Properly done, polishing enhances light reflection, giving your car a mirror-like finish that highlights its true color and beauty.
Regular maintenance, including washing with a pH-balanced shampoo, applying a protective wax or ceramic coating and spot polishing as needed, ensures long-lasting results and prevents premature paint deterioration.
Understanding the correct techniques, using the right products and avoiding common mistakes are essential to safely achieving professional-quality results.
With careful preparation, attention to detail and consistent care, polishing can extend the life of your car’s paint.
Now, comment section is open for you, if you still have confusion about this guide.
Frequently Asked Questions
Q1. What is car polishing and why is it important?
Answer: Car polishing is the process of smoothing the paint surface to remove minor scratches, swirls, oxidation and other imperfections. It enhances the beauty of a car by restoring its original shine and depth of color. Polishing differs from waxing in that it works directly on the paint surface, rather than simply applying a protective layer. Doing it correctly not only keeps the car looking new but also prepares the paint for protective coatings like wax or ceramic sealant.
Q2. How often should I polish my car?
Answer: Most experts recommend polishing once or twice a year, depending on how often you drive and the condition of the paint. If the car is exposed to intense sunlight, pollution, or harsh weather, it may require more frequent polishing. Frequent polishing can thin the clear coat, so it’s important to check the condition of the paint and polish only when necessary.
Q3. Can I polish my car myself or should I have it polished by a professional?
Answer: You can polish your car yourself, provided you follow the correct methods and use the right tools and products. Beginners may prefer a dual-action polisher as it is safer than a rotary buffer. If you are unfamiliar with this technique or have very deep scratches on your paint, seeking professional help can ensure the paint is polished safely without causing any damage.
Q4. What is the difference between cutting compound and finishing polish?
Answer: Cutting compound is stronger and more abrasive, used to remove deep scratches, swirl marks and oxidation. It gently removes a thin layer of paint or clear coat to smooth the surface. Finishing polish is more gentle and is used to remove very light imperfections or haze. It enhances shine and provides a smooth, reflective finish without removing much paint. Choosing the right type depends on the condition of your car’s paint.
Q5. Should I use a clay bar before polishing?
Answer: Yes, using a clay bar is recommended because it removes dirt, tar and other contaminants that washing alone can’t remove. Polishing these hidden particles can scratch the paint. Clay baring smooths the paint and ensures the polish works directly on the paint surface, resulting in better results and protecting the clear coat.
Q6. Can I polish a dirty car?
Answer: Polishing a dirty car is not recommended because any dirt or debris left on the surface can act like sandpaper, causing scratches and swirls. Always wash the car thoroughly with a pH-balanced shampoo and dry it completely before polishing. Clean preparation is essential for a smooth, shiny finish.
Q7. How do I protect my car after polishing?
Answer: After polishing, it’s important to apply a protective layer, such as wax or ceramic coating. Wax provides temporary protection from dirt and water, while ceramic coating provides long-term protection from UV rays, scratches and pollution. Regular washing with a mild, pH-balanced shampoo and reapplying the protective coating every few months helps maintain shine and protect the paint.
References:
[1] Scratch Durability of Automotive Clear Coatings: A Quantitative, Reliable and Robust Methodology
https://www.paint.org/wp-content/uploads/2021/09/AUG00_Scratch-Durability-of-Auto-Clear-Coatings.pdf

Guys, I’m a car audio enthusiast and customization expert and I love clear sound and clean installation. Plus, I have spent years helping people build their dream audio setups. And whenever I’m working on cars, I probably listen to music and thinks about the next big upgrade.