Written By: Don Dodi
Fact Checked By: Kristen Brown
Reviewed By: Diego Rosenberg
It is true that car badges are actually the ones that clarifies the world what you drive, but when you remove them that gives your vehicle a fresh, sleek identity and modern look.
So, debadging a car simple means you removes the manufacturer’s emblems, logos or model designations and now-a-days it becomes a popular customization trend among car owners all-over the world.
Not only this, according to the automotive stylish reports, the minimalist car design is increasingly preferred more as it truly enhances the vehicle’s appearance and that makes detailing, waxing or vinyl wrapping easier as well.
As well as, debadging does not affect the performance of the car at all, but yes it does affect slightly on resale value of your car which again depends on the buyer preferences completely, as some of the peple view the factory emblems as the part of the car’s originality factor.
Plus, most of the regions it is completely legal to remove the badges as long as it does not remove the safety labels or VIN identification.
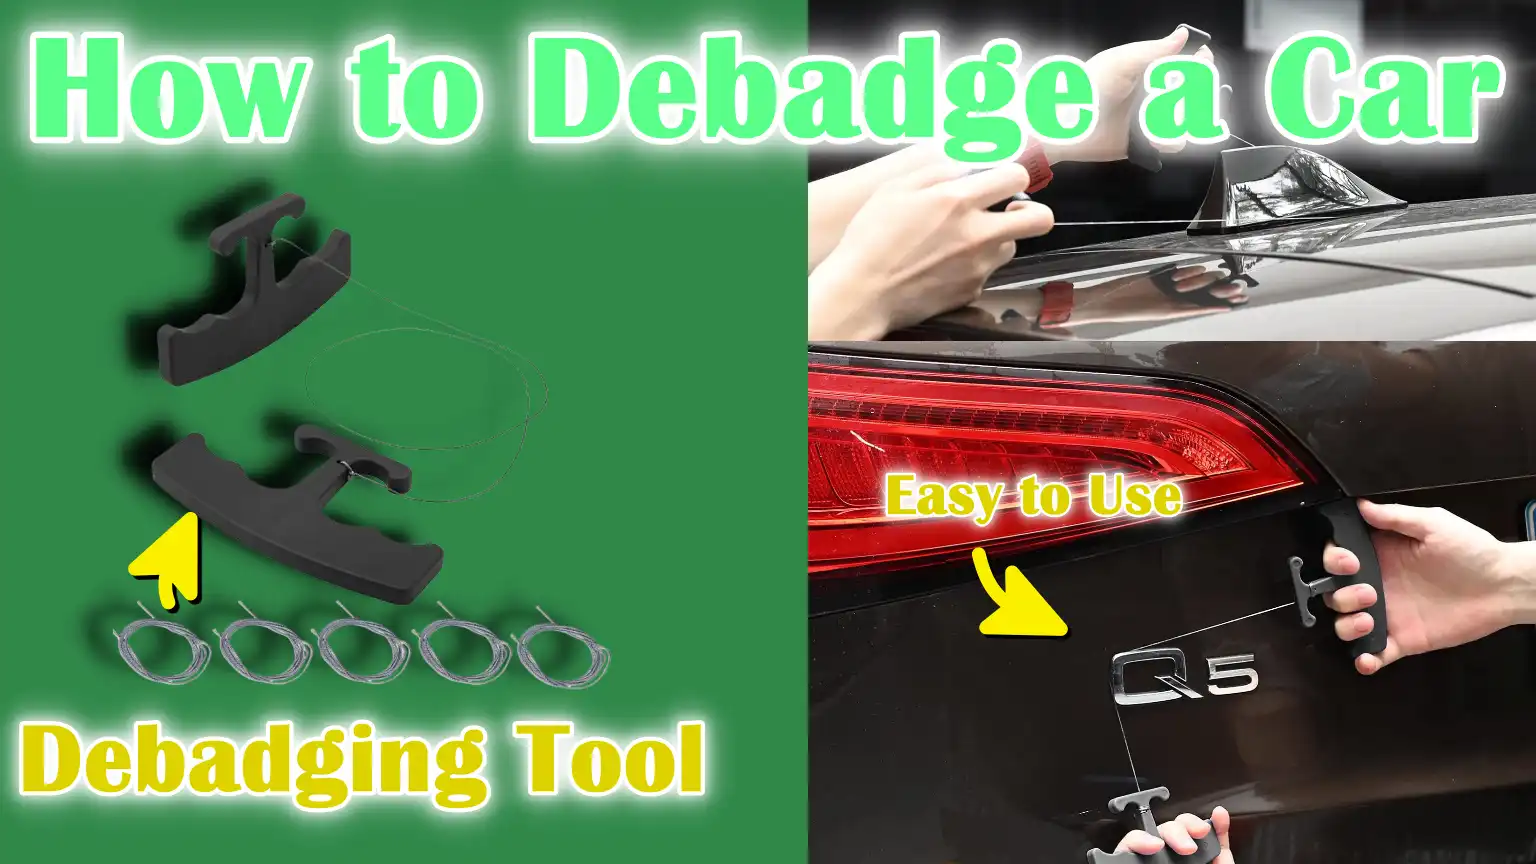
So, this is the guide which will shows you How to Debadge a Car and give it a premium look.
Tools
| Tools/Materials | Suggested Use | Notes |
|---|---|---|
| Heat source (heat gun or hair dryer) | Keep the heat on; don’t focus on one spot for too long to avoid damaging the paint. | A hair dryer is safer for beginners; a heat gun works faster. |
| Plastic trim removal tool | Using even pressure, gently slide the tool under the badge. | Avoid metal tools as they may scratch the surface. |
| Dental floss/fishing line | Use a sawing motion, be gentle and steady. | Dental floss works well for small badges; fishing line is better for larger emblems. |
| Adhesive remover (Goo Gone, rubbing alcohol, or a car-safe product) | Apply a small amount, let it sit for a minute, then gently rub with a microfiber towel. | Test on an inconspicuous area first to ensure paint protection. |
| Microfiber towel | Use a soft, clean towel to avoid scratching the paint. | Avoid paper towels or rough cloths. |
| Car wax or polish | Apply a thin layer evenly, then gently polish. | Optional, but recommended for a smooth, finished look. |
| Safety gloves (optional) | Wear gloves when handling adhesive removers or using a heat gun. | Not mandatory, but helps prevent skin irritation. |
How to Prepare the Car for Debadging
1. Park in a shaded area
Before beginning the debadging process, it’s important to park your car in a shady area.
Direct sunlight can heat the paint, increasing the risk of damage when using a heat source like a hair dryer or heat gun.
Working in the shade helps maintain a consistent temperature across the car’s surface, reducing the risk of paint bubbling, discoloration, or peeling.
A cool, shady environment ensures both the equipment and your car remain safe throughout the process.
2. Washing the Car Thoroughly
Cleaning the car before debadging is essential, as dirt, dust and debris can scratch the paint when removing the badge.
Wash the entire area around the badge with mild car shampoo and water, ensuring all dirt is removed.
Pay special attention to the edges and corners of the badge, where dirt is likely to accumulate.
A thoroughly cleaned surface not only protects the paint but also helps the adhesive remover and tools work more effectively.
3. Drying Thoroughly
After washing, it’s important to thoroughly dry the car before removing the badges.
Water left on the surface can mix with adhesive residue, making the process messy and causing water spots on the paint.
Use a clean, soft microfiber towel to gently and thoroughly dry the surface.
Keeping the surface dry also helps the heat source soften the adhesive evenly, making the badge removal experience easier and safer.
How to Soften the Adhesive

1. Warm The Badge
Softening the adhesive behind a car badge is a crucial step in safely and effectively removing it.
You can use a hair dryer or a heat gun for this.
A hair dryer is safer for beginners because it provides gentle heat, reducing the risk of damaging the paint.
A heat gun produces more heat and works faster, but requires more caution to avoid overheating the surface.
Choosing the right tool ensures that the adhesive loosens without damaging the car’s finish.
2. Maintain Safe Distance
To avoid damaging the paint, keep the heat source at a safe distance of about six to eight inches from the badge.
Apply heat in slow, circular motions, rather than focusing on a single spot for a long time.
Concentrated heat can cause bubbles or discoloration in the paint, specially on older vehicles.
Evenly heating softens and pliable the adhesive, allowing the badge to be removed easily without excessive force.
3. Check the Adhesive’s Flexibility
After heating for one to two minutes, gently check to see if the badge is slightly flexible or loose.
This is a clear sign that the adhesive has softened and is ready for removal.
Trying to remove the badge before the adhesive has sufficiently heated may result in scratches, peeling paint, or damage to the emblem.
Patience is essential during this step, as thoroughly softened adhesive ensures a smooth and clean debadging process.
How to Remove a Badge
1. Slide dental floss or fishing line
To safely remove a car badge, dental floss or fishing line are the most effective tools.
These materials are thin, flexible and strong, allowing them to cut through the soft adhesive without scratching the paint.
Unlike metal tools, they reduce the risk of damaging the car’s surface.
Choosing the right tool ensures that the removal process is gentle and effective, protecting both the badge and the surrounding paint.
2. Keep steady tension
Carefully slide the dental floss or fishing line behind the badge and move it lightly, like a saw.
Maintain even and steady tension as you move it back and forth to separate the adhesive.
This slow and controlled approach prevents sudden jerks that could scratch the paint or bend the badge.
Patience and precision are essential; instead of forcibly removing the badge, let the tool do the work.
3. Dealing with Resistance
Sometimes, even after heating, the adhesive doesn’t loosen completely.
In such cases, apply more heat using a hair dryer or heat gun and wait a few seconds.
Before trying again, recheck the badge’s flexibility to ensure the adhesive is soft enough to remove without damaging the paint.
Repeating this step carefully will avoid applying unnecessary pressure to the vehicle’s surface.
4. Carefully remove badde
When the adhesive has softened sufficiently and the badge moves easily, carefully remove it by hand.
Avoid pulling forcefully, as even a slight jerk can damage the surrounding paint.
After removal, inspect the area to ensure no adhesive or logo residue remains.
Patiently following these steps will keep the badge looking clean and professional.
How to Remove Residual Adhesive
1. Apply Adhesive Remover
After removing a badge, it’s common for adhesive to remain on the car’s surface.
Using a car-safe adhesive remover or rubbing alcohol is the most effective way to dissolve the sticky residue.
These products, when used correctly, are designed to break down the adhesive without damaging the paint.
Choosing the right remover ensures that the area can be cleaned safely and the car’s surface remains smooth.
2. Remove Residue Gently
Apply a small amount of adhesive remover to a clean microfiber towel and gently rub the sticky area.
Microfiber towels are soft and effective at removing residue without scratching the paint.
Work slowly and carefully, checking frequently to see if the adhesive is coming off.
Constant but gentle rubbing ensures that the surface is completely cleaned and doesn’t damage the surrounding paint.
3. Avoid Harmful Tools
It’s important to avoid using metal scrapers, knives, or other sharp tools to remove adhesive.
These tools can easily scratch or peel the paint, causing permanent damage that’s much more difficult to repair than the remaining adhesive.
By using safe products and soft materials, this process remains both effective and risk-free, leaving the stained area smooth and ready for the final finishing steps.
How to Clean & Give It Finishing Look
Now-a-days, it is the increasing trend that everyone likes the minimalist exterior design, that’s why designers and some manufactures intentionally favor fewer visible badges and trim them to create a more cleaner, higher-end and modern look.[¹]
1. Washing and Drying the Area
Once the badge and adhesive are completely removed, it’s important to thoroughly wash the area.
Use a mild car shampoo and water to remove any remaining residue or dust that may have accumulated during the removal process.
After washing, thoroughly dry the area with a soft microfiber towel.
Proper washing and drying ensures the surface is clean and smooth, preventing water spots and preparing the area for polishing and protection.
2. Using Polish or Compound
Even after carefully removing the adhesive, the paint on the badge area may remain slightly stained or discolored.
Using a mild car polish or rubbing compound can restore the surface to its original smoothness.
Apply the polish with a soft cloth, in small sections, slowly and evenly.
This step not only removes minor imperfections but also helps the paint blend thoroughly, maintaining a uniform finish on the car’s surface.
3. Applying Wax or Sealant
After polishing, it’s recommended to apply a coat of car wax or paint sealant to the blemish-free area.
Wax provides a protective layer that protects the paint from UV rays, dirt and moisture, while also enhancing shine.
Sealants provide long-term protection and can further enhance the surface’s uniformity.
Applying this final coat ensures that the blemish-free area remains attractive and well-protected, completing the process with a professional finish.
Read More:
What are the Common Mistakes to Avoid
1. Overheating the Paint
One of the most common mistakes during debadging is applying too much heat from a heat gun or hair dryer.
Excessive heat can cause the paint to bubble, flake, or even peel, specially on older vehicles or areas with thin paint.
Maintaining an even heat flow across the surface and maintaining a safe distance is crucial to avoid localized damage.
Understanding the correct temperature and duration ensures that the paint remains intact and the adhesive softens properly.
2. Using Sharp or Metal Tools
Another common mistake is using metal scrapers, knives, or other sharp objects to remove badging.
These tools can easily scratch, chip, or dent the paint, leaving permanent marks that are difficult and expensive to repair.
Using safe tools, such as plastic trimming tools or dental floss, reduces the risk of damage and ensures a smooth and clean removal process.
3. Hurrying
Many people make the mistake of removing badging by pulling it off forcefully.
This can damage both the badge and the car’s paint.
Patience is essential; softening the adhesive and working carefully ensures that the badge comes off cleanly and the surrounding paint remains intact.
A slow and methodical approach always yields better results than rushing.
4. Not Applying Polish and Wax
After removing the badge and adhesive, it’s a common mistake to skip the polishing and waxing steps.
Failing to polish can leave behind light marks or an uneven surface.
Wax or sealant is essential to protect the paint, restore shine and give the area a uniform appearance.
Skipping this final step can lead to fading or discoloration.
How to Care and Maintain
1. Paint Protection
After de-badging, it’s important to protect the new paint to maintain its beauty and durability.
Regularly applying car wax or ceramic coating creates a protective layer that protects the surface from UV rays, dirt, moisture and other environmental factors.
Wax requires periodic reapplication, while ceramic coating provides long-term protection.
Regular maintenance ensures that the de-badging area remains smooth, shiny and damage-resistant over time.
2. Resolving Paint Disparities
The de-badging area may sometimes appear slightly newer or shinier than the surrounding paint, specially on older vehicles.
This disparity occurs because the area beneath the badging is protected from sunlight and environmental damage.
Understanding this helps car owners manage their expectations and take additional steps to even out the surface if necessary, ensuring a consistent appearance throughout the vehicle.
3. Repaint Blending for Older Vehicles
For cars with old or faded paint, repaint blending may be considered to achieve a uniform finish.
This involves lightly polishing or repainting the damaged area to match the surrounding color and texture.
For older vehicles, professional assistance may be recommended to maintain a uniform and natural surface.
Proper care and alternative blending combine to result in a polished, high-quality finish that enhances the car’s overall appearance.
Conclusion – How to Debadge a Car
When you removes the badges to your car then you’ll see that it completely transformed the look of it, as it turns ordinary designed into sleek simplicity.
While this process may seem simple, it requires attention to detail, the right tools and patience to avoid damaging the paint.
From preparing the car, softening the adhesive, removing the badge, cleaning off any remaining adhesive and applying polish and wax, every step is crucial to achieving professional results.
Using safe methods like a heat gun or hair dryer, plastic trim tools and adhesive removal tools ensures that the paint remains intact and the emblem is easily removed.
Proper care, including waxing or ceramic coating, not only protects the paint but also maintains the polished and uniform appearance of the removed area.
For older vehicles, considering paint blending can enhance the beauty and ensure a flawless look.
Overall, badge removal is a practical DIY modification that can dramatically improve a car’s style and with the right approach, it can be done safely and effectively without professional assistance.
Now, it is time to ask some uncovered questions in the comment section.
Frequently Asked Questions
Q1. What does car debadging mean?
Answer: Car debadging involves removing logos, emblems, or model names from a vehicle’s exterior. These badges are typically made of metal or plastic and are affixed with adhesive. Car owners often remove them to create a clean and modern look, simplify details, or enhance the appearance of their vehicle. Debadding does not affect a car’s performance and can be done safely at home with the right tools.
Q2. Is debadging a car safe to do yourself?
Answer: Yes, debadging can be done safely at home if done correctly and with the appropriate equipment. It’s important to avoid using sharp metal objects that could scratch the paint and to use heat carefully to soften the adhesive without overheating the surface. Patience and proper technique are essential. Using tools like a hair dryer, plastic trimming tools and dental floss or fishing line can help achieve professional results without damaging the paint.
Q3. Will removing badges damage the paint?
Answer: If done carefully, debadging shouldn’t damage the paint. The most common hazards are applying too much force, using sharp tools, or overheating the surface with a heat gun. Using soft tools, applying gentle heat and properly removing adhesive residue will protect the paint. After removing the badge, applying polish, wax, or sealant will restore the shine and create a protective layer over the area.
Q4. Do I need any special tools to remove car badges?
Answer: You don’t need any special tools, but using the right tools makes the process safe and easy. Common tools include a hair dryer or heat gun to soften the adhesive, dental floss or fishing line to cut the glue, plastic trim removal tools to gently remove the badge, adhesive remover to clean up any remaining glue, microfiber towels for cleaning and wax or polish to protect the surface after removal. Safety gloves are optional, but helpful when working with heat or chemicals.
References:
[1] Minimalist Design and Brand Perception in Automotives
https://www.ijfmr.com/papers/2025/2/40266.pdf

Guys, I’m a car audio enthusiast and customization expert and I love clear sound and clean installation. Plus, I have spent years helping people build their dream audio setups. And whenever I’m working on cars, I probably listen to music and thinks about the next big upgrade.