 Skip to content
Written By: Don Dodi
Fact Checked By: Kristen Brown
Reviewed By: Diego Rosenberg
If you feel that your car seat’s color actually faded away or you just wanted to change the color of your car seats then dye is one of the easiest and actually affordable option to make your interior look brand new at a fraction of the cost of re-upholstery.
And it is really natural thing to become faded, stained or simple outdated in style, as seats often take the impact of daily use.
So, instead of spending hundreds of even thousands of dollars on brand-new upholstery, you can just dye as a cost-effective and really practical solution.
Basically, dying is not just changing the color: but it actually helps you to restore that vibrancy and it extends the life of the upholstery as well and that just improves the overall look of the interior easily.
Not only this, according to the automotive upholstery specialists: a well-applied dye can actually last for several years if you maintain it in a proper way and you can dye different seat materials such as: Leather, Vinyl and Fabric as well.
But you need to understand the natural of your seats materials is: as Leather Dye bonds with the natural fibers to create a long-lasting finish and while fabric dye actually penetrates deep into the material to cover stains and discoloration as well.
Now, this guide included How to Dye Car Seats so that you can transform and extend your car seats life.
First, Understand About Seat Materials
Before attempting to dye car seats, it’s important to understand the type of material your seats are made of.
Car seats are typically made of leather, vinyl, or fabric and each of these materials reacts differently to dyes.
Leather is a natural material that absorbs dyes well when properly cleaned and prepared, resulting in long-lasting and shiny results.
Vinyl is a synthetic material that is smoother and less porous, meaning it may require a special type of dye or surface preparation for the dye to adhere.
On the other hand, fabric seats are made of woven fibers and can absorb dye deeply, but the process can take longer and the dye may smear if applied unevenly.
Understanding your seat material helps determine the right products and techniques for best results.
1. Differences Between Leather, Vinyl and Cloth Seats
Leather seats are known for their luxurious feel and durability, but they are also susceptible to discoloration, cracking and scratching over time.
Vinyl seats are easy to clean and stain-resistant, but they are less breathable and can crack if exposed to harsh chemicals or direct sunlight for extended periods.
Fabric seats are the most common in everyday vehicles because they are affordable and comfortable, but they are more prone to stains, odors and wear quickly.
Knowing these differences helps you choose the appropriate color and method to effectively restore or change seat color.
2. Which materials are easily dyed and which require special care?
Leather and fabric seats generally absorb color more easily than vinyl.
Leather responds well to special leather dyes that penetrate the natural fibers, resulting in a uniform and lasting color.
Fabric can be effectively dyed using liquid or spray dyes designed for upholstery, but careful cleaning and even application are necessary to avoid streaks.
Vinyl, despite being dyeable, requires products specifically formulated for non-porous surfaces and seats often need to be lightly sanded or primed for the dye to adhere.
Ignoring these material-specific requirements can result in uneven color, peeling, or damage to the seat surface.
3. Check the manufacturer’s guidelines before applying dye
Before applying any dye, it’s important to check the vehicle manufacturer’s guidelines or seat care instructions.
Some seats may have coatings or finishes that are sensitive to chemicals and using the wrong dye could void the warranty or damage the material.
Manufacturer recommendations often include information on approved cleaning products, dye types and ways to ensure the seats are safe for treatment.
Following these guidelines not only keeps the seats safe, but also ensures that the dyeing process produces professional-looking results that last a long time.
Tools
| Tools/Materials | Purpose/Use | Tips for Best Results |
|---|---|---|
| Fabric/Leather/Vinyl Dye | Used to change or restore the color of car seats. The type of dye should match the seat material. | Always test the dye on a small, inconspicuous area first to check for color and adhesion. |
| Cleaning Supplies (Vacuum, Upholstery Cleaner, Microfiber Cloth) | Remove dust, dirt, grease and stains from the seats before dyeing. A clean surface ensures the dye adheres evenly. | Vacuum first to remove loose debris, then use upholstery cleaner to remove deeply embedded dirt or oil. |
| Sandpaper or Scuff Pad | Lightly roughen smooth leather or vinyl surfaces to help the dye adhere better. | Use fine-grit sandpaper and gently sand only the areas to be painted. Avoid excessive sanding, as this can damage the seat. |
| Masking tape and plastic sheeting | Protect areas around the seats, such as plastic trims or seat belts, from accidental spills or excessive paint spills. | Ensure edges are properly sealed and cover all surrounding surfaces you don’t want paint to get on. |
| Applicator (sponge, spray gun, or brush) | Tool used to apply paint evenly to the seat surface. The choice depends on personal preference and the seat material. | Use thin, even coats rather than thick coats and follow the manufacturer’s instructions for the applicator. |
| Protective gloves and safety equipment | Protect your hands, skin and eyes from chemicals in the paint. | Always wear gloves and if spraying, wear a mask to avoid breathing in the fumes. Safety glasses are recommended for added protection. |
Let’s Prepare the Seat First
1. Clean the seats thoroughly to remove dirt, oil and residue
Before applying any paint, it’s important to thoroughly clean the seats.
Dirt, dust, grease and skin oils can prevent the paint from adhering properly, leading to uneven color or spots.
Use a vacuum cleaner to remove loose debris, then use an upholstery cleaner appropriate for your seat material.
For fabric seats, deep cleaning solutions that remove dirt are beneficial, while leather and vinyl require cleaners that remove oil and protect the surface.
Thoroughly cleaning the seats ensures that the paint adheres well to the material and provides a smooth, long-lasting finish.
2. Repair cracks, tears, or worn areas before painting
Any damage to the seats, such as cracks, tears, or worn areas, should be repaired before painting.
Leather and vinyl repair kits can fill small cracks or scratches, repairing the surface so the paint can adhere evenly.
For cloth seats, small tears can be patched or stitched and worn areas can be reinforced.
Repairing the seats first not only improves their appearance but also prevents paint from absorbing unevenly in damaged areas, making imperfections even more obvious.
3. Sanding/Scuffing Smooth Surfaces (Leather/Vinyl) for Better Adhesion
The surface of leather and vinyl seats is smooth and non-porous, which can make paint adhesion difficult.
Lightly sanding or rubbing the surface with fine-grit sandpaper or a scuff pad creates small scratches that help the paint adhere better.
This step ensures that the paint is absorbed evenly and reduces the risk of peeling or fading over time.
Sanding slowly and evenly is essential to avoid excessive pressure that could damage the material.
4. Masking Trims, Seat Belts and Unpaintable Areas
To prevent accidental paint stains from appearing on other parts of the car’s interior, it’s important to carefully mask trims, seat belts, plastic panels and other unpainted areas.
Use masking tape and plastic sheets to cover these surfaces, ensuring only the seat material is visible.
Proper masking protects the car’s interior and provides a clean, professional-looking finish without unwanted overspray or splatters.
How to Apply the Dye
1. Testing the Dye on a Hidden Area First
Before applying the dye to the entire seat, it’s important to test the dye on a small, inconspicuous area.
This will allow you to see how the color will appear on the fabric and ensure it will react well without causing any damage.
Testing also helps determine whether to mix or dilute the dye and can help prevent major mistakes on visible areas.
By starting with an inconspicuous area, you can be confident that the final color will meet your expectations and adhere well to the seat fabric.
2. Applying Methods: Sponge, Spray, or Brush
There are several methods for applying the dye, all suitable for different materials and desired finishes.
Sponges are good for small, delicate areas or small seats, allowing for a controlled application.
Spray guns or aerosol spray guns provide an even, smooth coat, ideal for large surfaces or fabric seats.
Brushes can be used for touch-ups or textured surfaces where more control is needed.
Choosing the right method depends on the seat material, the size of the area and the type of finish you want.
3. Applying thin, even layers instead of heavy coats
It’s important to apply the dye in thin, even layers instead of one thick coat.
Thick coats can cause streaks, uneven color and take longer to dry, leading to cracking or peeling.
Applying multiple light coats allows the dye to absorb evenly into the fabric, creating a uniform and professional look.
Allowing each coat to dry before applying the next coat is essential to ensure proper adhesion to the seat surface.
4. Allowing proper drying time between coats
Drying is an essential part of the dyeing process.
Each coat of dye needs adequate time to dry completely before applying the next.
Drying times vary depending on the material, dye type, temperature and humidity, but skipping this step can result in uneven color, spots, or discoloration.
Proper drying also strengthens the dye’s adhesion, making the finish last longer and look more professional.
5. Tips for a Smooth, Professional Finish
For a smooth, professional finish, it’s important to work systematically and patiently.
Apply with even speed to avoid streaks or spots.
Keep the applicator clean and avoid over-applying paint.
For leather and vinyl, a light polish between coats can enhance smoothness.
Proper preparation, even application and patience during drying will result in a durable, uniform and attractive seat color that resembles a professional restoration.
Read More:
How to Dry and Cure Car Seat
1. How Long Does Paint Usually Take to Dry
The drying time for car seat paint depends on the type of material, the paint used and the number of layers applied.
Leather and vinyl paints typically take about one to two hours to dry to the touch, while fabric paints may take a little longer due to their ability to absorb water into the fibers.
It’s important to let each layer dry completely before applying the next, as applying paint over a wet or partially dried layer can result in streaks, uneven color, or spots.
Patience during the drying process ensures the paint sets properly and results in a professional finish.
2. The Importance of Proper Ventilation and Avoiding Direct Sunlight
Proper ventilation is essential when drying colored car seats, as it helps the solvents in the paint evaporate evenly, preventing a sticky or uneven finish.
Working in a well-ventilated area also reduces the buildup of fumes, which can be harmful if inhaled.
Avoid direct sunlight during the drying process, as excessive heat can cause the paint to dry too quickly, leading to cracking or discoloration, specially on leather and vinyl seats.
A shady, well-ventilated environment allows the paint to dry evenly and increases the durability of the finish.
3. Recommended drying period before reusing the seats
The drying process is when the paint fully bonds with the seat material, creating a long-lasting and durable finish.
Although the seats may feel dry to the touch after a few hours, it’s recommended to wait at least 24 to 48 hours before using them.
Cloth seats may take a little longer to dry, while leather and vinyl may set faster when dried under controlled conditions.
Allowing them to dry completely can prevent premature wear, scratches, or uneven discoloration, ensuring that painted seats maintain their vibrant appearance for years.
How to Give Final Touch to Car Seat Dye
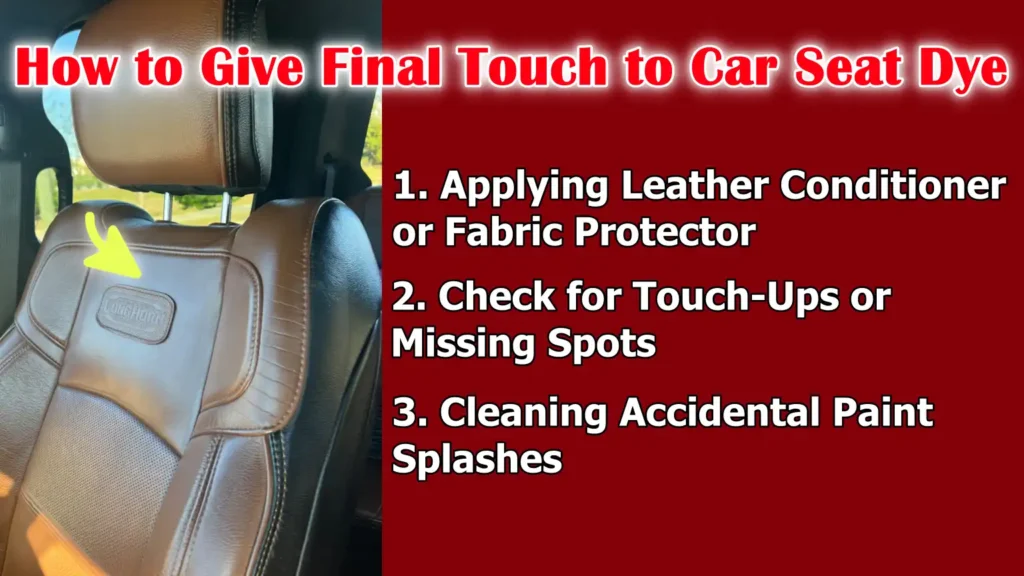
1. Applying Leather Conditioner or Fabric Protector
After the paint has completely dried and cured, it’s important to apply leather conditioner or fabric protector to care for the seats and extend the life of the new paint.
Leather conditioner helps restore moisture, keeping the leather soft and supple and preventing cracking or drying out over time.
For fabric seats, fabric protector provides protection against stains, spills and dirt, making cleaning easier.
Using these products not only maintains the beauty of painted seats but also increases their durability and overall comfort.
2. Check for Touch-Ups or Missing Spots
After applying the conditioner or protector, carefully inspect the seats for any missing or uneven paint.
Minor imperfections can be corrected by lightly repainting, ensuring a uniform and professional finish.
Touch-ups immediately after painting can minimize noticeable irregularities and leave the seats looking fresh and well-maintained.
3. Cleaning Accidental Paint Splashes
During painting, it’s common for small paint splashes or overspray to land in areas that should be hidden or on other parts of the seat.
To avoid permanent stains, these should be cleaned immediately with a damp cloth or a cleaner suitable for the seat material.
Carefully removing accidental paint splashes ensures that the car’s interior remains clean, polished and attractive, leaving the seats looking as if they’ve been professionally repaired.
How to Maintain the Car Seat After Dyeing
1. How to Keep Dyeing Seats Fresh
After car seats have been dyed, proper maintenance is crucial to keeping the color vibrant and the material in good condition.
Regular cleaning with gentle seat-appropriate products removes dirt, oil and stains that can fade the color or cause stains.
Leather seats should be conditioned periodically to maintain their softness and prevent cracking, while fabric seats require periodic fabric protector spray to protect against stains and wear.
It’s important to avoid harsh chemicals, abrasive cleaners, or excessive scrubbing, as these can remove the color, damage the material and shorten the finish’s lifespan.
Regular care ensures that the seats look new and professionally restored for years.
2. Expected Durability of Dyeing with Proper Care
The longevity of dyed car seats depends largely on both the quality of the material and color and the maintenance.
Leather and vinyl seats, properly prepared, painted and conditioned, can retain their color for three to five years or more under normal use.
Cloth seats may require more frequent touch-ups, but if protected from excessive wear and stains, they can retain their shine for many years.
With proper care, including regular cleaning, conditioning and avoiding prolonged exposure to direct sunlight, painted seats will remain attractive, durable and an economical option for reupholstery.
Common Mistakes You Should Avoid
1. Missing Cleaning and Preparation
One of the most common mistakes when dyeing car seats is neglecting proper cleaning and preparation.
Dirt, dust, oil and previous stains on the seats can prevent the paint from adhering evenly, leading to spots or streaks.
For leather and vinyl, rubbing or scratching the surface can also reduce adhesion, while dirt can accumulate on cloth seats, hindering paint penetration.
Thorough cleaning and preparation are essential for a smooth, professional-looking finish and long-lasting results.
2. Applying Too Much Dye at Once
Applying thick layers of dye at once is another common mistake.
Thick layers can cause uneven color, streaks, longer drying times and even cracks or peeling on leather and vinyl seats.
It’s always better to apply multiple thin layers, allowing each layer to dry completely before applying the next.
This technique ensures uniform color, stronger adhesion and a more durable, professional finish.
3. Using the Wrong Type of Paint for the Seat Material
Using paint not designed for the specific seat material can produce poor results or even damage it.
Leather, vinyl and fabric all require dyeing according to their specific properties.
For example, leather dye penetrates natural fibers to create long-lasting color, while vinyl requires dye that adheres to non-porous surfaces.
Fabric dye must be absorbent enough to penetrate woven fibers without leaving any stains.
Selecting the right type of paint is crucial for achieving vibrant, uniform and durable results.
4. Not Allowing Adequate Drying/Cooking Time
Rushing the drying or curing process is a mistake that can affect the durability and appearance of the paint.
Even if the surface feels dry to the touch, the paint needs adequate time to fully adhere to the material.
Skipping or shortening this time period can cause the seats to fade, stain, or peel during use.
To ensure that painted seats retain their color, smoothness and professional appearance for a long time, it is essential to allow adequate drying and curing time.
Conclusion – How to Dye Car Seats
Having a fresh coat of dye can actually enhance the aesthetics and also it extends the life of your upholstery and now-a-days dying is really important as car seats are one of the first things that people notice inside a vehicle.
Not only this, you need to first understand the properties of car seat fabrics as it is actually crucial for having a effective dyeing, also there’s a study which shows that velvet, flock and flat woven fabrics reveals that polyester-based materials offers strength and velvet and flock fabrics actually provides enhanced in comfort, basically you need to select appropriate fabrics and dyes to achieve durable and comfortable car seats.[¹]
By understanding the type of seat material, properly preparing the surface, carefully applying the paint and allowing for adequate drying and hardening time, you can achieve results superior to professional upholstery work.
Proper post-paint maintenance, including regular cleaning, conditioning and avoiding harsh chemicals, ensures vibrant colors last for years and seats remain comfortable and durable.
Avoiding common mistakes like skipping prep work, over-applying paint, using the wrong color, or rushing the drying process is crucial to achieving a smooth, uniform and long-lasting finish.
With patience, attention to detail and the right tools and techniques, even beginners can transform worn, faded, or old car seats into a new and stylish interior that enhances both the comfort and appearance of their vehicle.
Now, it is time to ask unsolved questions in the comment section.
Frequently Asked Questions
Q1. What materials can be dyed on car seats?
Answer: Car seats are typically made of leather, vinyl, or fabric. Leather is easy to dye because its natural fibers absorb dye well, leaving the surface smooth and durable for a long time. Vinyl is a synthetic material, so special dyes and sometimes surface preparation, such as sanding, are required for the dye to adhere well. Fabric seats are woven and absorb dye deeply, but they need to be cleaned carefully and applied evenly to avoid stains. Choosing the right dye for the seat material is crucial for a professional-looking result.
Q2. Do I need to clean my car seats before dyeing?
Answer: Yes, cleaning is one of the most important steps before dyeing. Dirt, oil, grease and old stains can prevent the dye from adhering evenly. Cloth seats require deep cleaning to remove built-up dirt, while leather and vinyl seats require cleaners that remove oils without damaging the surface. A clean seat ensures paint adhesion and a smooth, even finish.
Q3. Can I paint my car seats myself, or should I hire a professional?
Answer: If you do the job correctly, use the right tools and have patience, you can paint car seats yourself. Painting your own is cost-effective and allows you to change the color to your liking. However, leather and vinyl require careful preparation and uneven coloring can ruin the look. If you want a perfect and guaranteed finish, professional services are an option, but with the right guidance, a beginner can achieve excellent results at home.
Q4. How do I apply paint evenly?
Answer: It’s important to apply thin, even layers rather than a single coat. You can use a sponge, brush, or spray gun, depending on the seat material and your comfort level. Allow each coat to dry completely before applying the next. Continuous motion, attention to edges and creases and testing on an inconspicuous area first help achieve a smooth, professional-looking finish.
Q5. How long should I wait before using the seats after painting them?
Answer: Although the seats feel dry to the touch, it takes time for the paint to fully dry and adhere to the fabric. Leather and vinyl typically take 24 to 48 hours, while fabric may take a little longer. Rushing this process can cause the color to fade, stain, or peel. Proper drying and washing ensures long-lasting color and a durable finish.
References:
[1] Investigation of the basic properties of car seat fabrics applied in automotive textiles
https://www.researchgate.net/publication/357269074_Investigation_of_the_basic_properties_of_car_seat_fabrics_applied_in_automotive_textiles

Guys, I’m a car audio enthusiast and customization expert and I love clear sound and clean installation. Plus, I have spent years helping people build their dream audio setups. And whenever I’m working on cars, I probably listen to music and thinks about the next big upgrade.
