 Skip to content
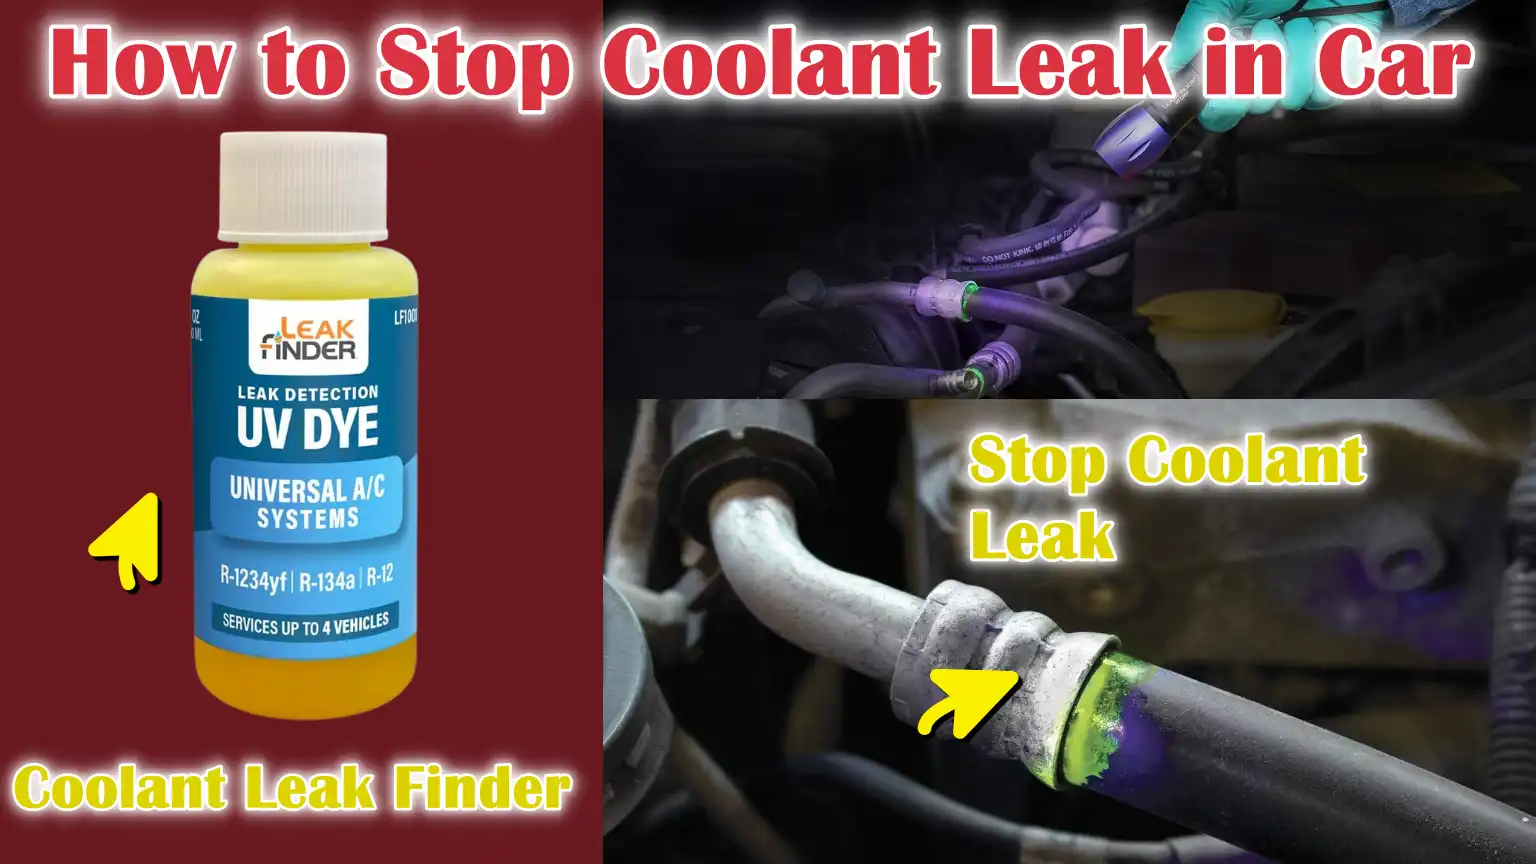
Written By: Don Dodi
Fact Checked By: Kristen Brown
Reviewed By: Diego Rosenberg
You should be aware and make sure to count every drop of coolant as it should not leak in any condition, otherwise it can harm your engine and that can be cause of roadside engine failures as well if you won’t fix it early.
Basically, your car’s cooling system is actually designed to keep your car’s engine always at a safe operating temperature and that’s what coolant literally means and that’s why it is also known as anti-freezer and believe it or not it plays a huge role in cooling process.
It absorbs the heat and prevent overheating by circulating through the radiator, hoses and engine, that’s why it becomes really important during the long drives or in the hot weather to maintain sufficient coolant in your vehicle.
So, whenever the coolant begins to leak then you’ll notice that the engine is struggling to stay cool and that leads to the overheating problems, poor fuel efficiency and even it can result it to failed engine completely and that would be huge loss.
Plus, according to the National Highway Traffic Safety, a large number of vehicle breakdowns each year are even linked to the cooling system problems.
Just don’t think that it is just small drop leak here and there, as most coolant leaks start small such as: loose clamp, cracked hose or because of worn-out gasket and it can turn into expensive one real quick if you ignore it.
So, that’s the guide that’ll shows you How to Stop Coolant Leak in Car, so that you can apply the right repair method to save time, money and that extends the engine life as well.
Common Symptoms of a Coolant Leak
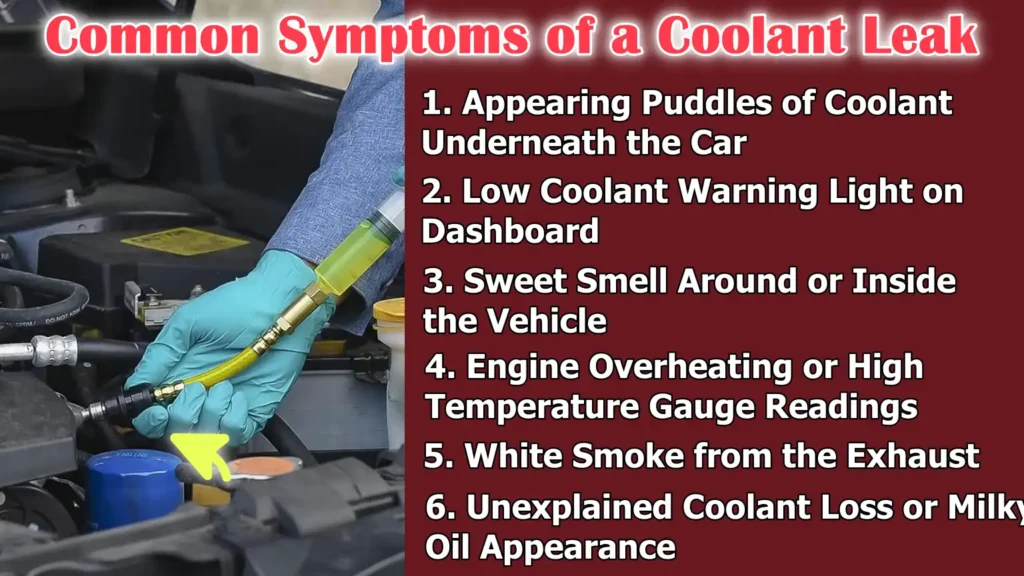
1. Appearing Puddles of Coolant Underneath the Car
Appearing puddles or wet spots under your car after parking is one of the most obvious signs of a coolant leak.
Coolant is typically brightly colored—green, yellow, pink, or orange—depending on the type used in your vehicle.
If you notice a slippery, sweet-smelling liquid under the front of your car, it’s likely a coolant leak from the radiator, water pump, or connecting hose.
This is often an early warning sign of a small leak and fixing it quickly can prevent major problems.
2. Low Coolant Warning Light on Dashboard
Modern cars are equipped with sensors that monitor coolant levels.
When the fluid drops below a safe point, a low coolant light appears on your dashboard.
This light should never be ignored as it means your cooling system is losing the fluid needed to regulate engine temperature.
If you continue driving with low coolant, your engine may overheat and cause serious internal damage, such as warped cylinder heads or a blown head gasket.
3. Sweet Smell Around or Inside the Vehicle
Coolant contains chemicals like ethylene glycol or propylene glycol, which have a distinctive sweet odor.
If there’s a leak, you may notice this odor near the hood or even inside the cabin after turning off the engine.
If the odor is felt inside the car, it could be due to a leaking heater core.
The heater core is located behind the dashboard and helps keep the interior warm in cold weather.
When it leaks, it can release coolant vapor into the air vents, causing a sweet odor and sometimes fogging up the windows.
4. Engine Overheating or High Temperature Gauge Readings
Another obvious sign of a coolant leak is when your engine temperature starts to rise higher than normal.
Coolant’s job is to carry heat away from the engine, so when it leaks, the cooling system can’t function effectively.
If your temperature gauge shows a high reading or your car starts overheating during normal driving, this is a clear sign that the coolant level is low or that a leak has caused the cooling system to lose pressure.
5. White Smoke from the Exhaust
If you notice thick white smoke or steam coming from your exhaust, it could be a sign that coolant is leaking into the combustion chamber and burning with the fuel.
This usually indicates a blown head gasket or a cracked cylinder head—both serious problems that require professional attention.
In such cases, you may also notice bubbles in the coolant reservoir or a drop in coolant level without any visible leaks on the ground.
6. Unexplained Coolant Loss or Milky Oil Appearance
Sometimes a coolant leak can occur internally, meaning you won’t see any fluid dripping under your vehicle.
The coolant may be leaking into the engine oil or evaporating within the system.
Milky or foamy oil is a clear warning sign, indicating that coolant and oil are mixing.
This is a serious sign of a gasket or internal engine problem.
Regularly checking your oil and coolant levels can help catch these hidden leaks before they cause major engine damage.
What Actually Causes the Coolant Leaks
Coolant leaks can occur for many different reasons and understanding these causes can help you correctly diagnose the problem and prevent it from recurring.
Each part of the cooling system plays a vital role in controlling engine temperature and even a minor malfunction can cause a coolant leak.
By knowing the common causes of leaks, car owners can quickly identify the source of the problem and take appropriate action before engine damage occurs.
1. Cracked Radiator or Radiator Hose
The radiator and its hoses are among the most common sources of coolant leaks.
Over time, exposure to high heat and pressure can weaken and break the metal or plastic parts of the radiator.
Similarly, rubber radiator hoses can dry out, become brittle and crack due to constant temperature changes and vibration.
A cracked radiator or hose can cause a coolant leak, forming pits under the car and gradually reducing coolant.
These leaks can also cause the engine to overheat, specially during long drives or heavy traffic.
Regularly inspecting the radiator and hoses for cracks, bulges, or soft spots is an easy way to detect this problem early.
2. Loose or Damaged Hose Clamps
Hose clamps are small but essential devices that hold radiator and heater hoses securely in place.
Over time, vibration or corrosion can loosen these clamps, causing coolant to slowly leak.
In some cases, old clamps can rust or lose their grip completely, causing hoses to leak continuously even when they are in good condition.
This type of leak often occurs around the ends of the hoses, near the radiator or engine fittings.
Tightening or replacing these clamps is usually a quick and inexpensive solution that can immediately stop the leak and restore pressure to the system.
3. Bad Water Pump or Gasket
The water pump circulates coolant throughout the engine, preventing the engine from overheating.
A bad water pump or damaged gasket can cause coolant to leak into the front of the engine.
Over time, constant motion and pressure wear down the pump’s internal seals and bearings.
When the gasket between the pump and the engine block wears out, coolant can leak from the mounting area.
You may notice a small dent under the front center of the car or hear a grinding sound from the pump before it completely fails.
To prevent the engine from overheating, it’s important to replace the water pump or gasket at the first sign of a leak.
4. Heater Core Leak
The heater core acts like a small radiator inside the dashboard that helps warm the cabin air.
Because it contains hot coolant, any cracks or corrosion in the heater core can cause coolant to leak into the car.
This can cause a sweet smell inside the cabin, foggy windows, or wet carpet on the passenger side.
A leaking heater core not only reduces your heater’s performance but can also reduce the coolant level throughout the system, leading to overheating.
Replacing the heater core can be difficult because it’s located deep within the dashboard, but it’s essential for maintaining both comfort and engine safety.
5. Damaged Coolant Reservoir
The coolant reservoir, also known as the overflow tank, stores excess coolant that expands when the engine heats up.
Over time, the reservoir’s plastic material can become brittle and crack due to constant heat exposure or pressure changes.
Damaged reservoir joints or caps can cause coolant to leak, specially when the engine is hot.
You may notice coolant stains or small puddles near the reservoir.
Replacing the reservoir is usually a simple repair that helps maintain proper coolant levels and pressure in the system.
6. Worn Radiator Cap or O-Ring
The radiator cap is more than just a cover—it keeps the system sealed at a specific pressure to prevent boiling and maintain coolant circulation.
Inside the cap is a rubber O-ring that creates an airtight seal.
Over time, this seal can wear, crack, or harden, allowing coolant or steam to escape.
A worn radiator cap can cause a loss of pressure, leading to overheating or overflow of coolant from the reservoir.
Inspecting and replacing a worn radiator cap is one of the easiest ways to prevent leaks and ensure the cooling system is operating at the correct pressure level.
How to Perform Initial Inspection and Detect Leak
Before attempting any repairs, it’s important to determine the exact source of a coolant leak.
A careful and systematic inspection not only saves time and money, but also prevents unnecessary replacement of parts that are still in good condition.
The cooling system is made up of many components that work together under high heat and pressure, so even a small leak can have serious consequences if overlooked.
By following step-by-step inspection methods, car owners can detect leaks early, maintain proper engine temperature and prevent major engine damage.
1. Check for pits or stains under the car
The first and easiest way to detect a coolant leak is to examine the area underneath your vehicle.
Coolant is usually bright colors such as green, orange, pink, or yellow, making it easily recognizable on a driveway or garage floor.
Check for new pits, wet spots, or dry stains on the front of the car, near the radiator, or under the engine.
The location of the pit may indicate the origin of the leak—for example, a pit in the center often points to the water pump, while a pit on the side may indicate a problem with the hoses or radiator.
2. Inspecting the Radiator, Hose and Water Pump
After identifying visible signs, the next step is a careful visual inspection of key components.
Check for cracks, corrosion, or leaks around the radiator joints.
Look for signs of wear on the hoses, such as cracks, soft spots, or bulges and ensure that the clamps are tight and rust-free.
Inspect the water pump area for any wet spots, coolant residue, or signs of a leak from the gasket.
Even small drops or stains on these parts are early warning signs that, if addressed promptly, can prevent major system failures.
3. Using UV Dye and Leak Detection Kits
For leaks that aren’t immediately visible, UV dye and leak detection kits can be extremely effective.
This process involves injecting a small amount of fluorescent dye into the coolant system and running the engine for a period of time.
Under ultraviolet light, the coolant leak will glow, making it easier to identify hidden leaks in hoses, the radiator, the water pump, or even the heater core.
This method is specially helpful for detecting internal leaks or slow leaks that don’t leave any holes underneath the car.
4. Checking Pressure Using a Cooling System Pressure Tester
A cooling system pressure tester is a professional tool that can simulate engine operating pressure even when the engine is off.
By connecting the tester to the radiator or coolant reservoir, you can pressurize the system and see if the pressure decreases over time.
A drop in pressure indicates a leak somewhere in the system.
This method helps detect leaks that can only occur under pressure, such as small cracks in the radiator or minor gasket failures.
Combining pressure testing with visual inspection ensures that all leaks, whether visible or hidden, are identified before repair work begins.
Basic Temporary Solutions for Coolant Leaks
Sometimes, it’s necessary to fix a coolant leak immediately to prevent the engine from overheating, but a full repair may not be immediately possible.
Temporary solutions provide a short-term solution that allows you to safely transport the vehicle to a workshop or drive a limited distance.
These solutions aren’t a substitute for permanent repairs, but they can prevent serious damage, reduce the risk of overheating and give car owners time to take appropriate action.
Understanding these emergency measures is important for every vehicle owner, specially during long trips or when professional help isn’t immediately available.
1. Adding a Commercial Radiator Leak-Repellent Product
Radiator leak-repellent products are designed to seal small leaks or cracks in the cooling system.
They usually come in liquid form and are poured directly into the coolant reservoir.
As the coolant flows, the product reaches the leak and temporarily seals it, preventing further fluid loss.
While these products can be effective for minor leaks in hoses, radiators, or heater cores, they are not a permanent solution.
They should only be used to safely transport the car to a repair shop and should be cleaned during permanent repairs to prevent clogging of the cooling system.
2. Tightening Loose Hose Clamps or Fittings
Many coolant leaks are caused by loose hose connections or worn clamps.
Checking and tightening these clamps can immediately stop small leaks.
If a hose has slipped slightly from its connection, carefully repositioning it and securing it with a clamp can stop the coolant leak.
This method is simple, safe and inexpensive, making it one of the quickest ways to temporarily control a leak.
Slight tightening can restore system pressure and reduce coolant loss until a permanent repair is made.
3. Applying High-Temperature Epoxy or Sealant to Small Cracks
High-temperature epoxy or sealant can be used on small cracks or holes in the radiator, reservoir, or hoses.
These compounds are designed to withstand engine heat and pressure for a short period of time.
Before applying, ensure the area is clean and dry for the sealant to adhere properly.
Once applied, it can provide a temporary barrier that prevents coolant from escaping.
This method is best suited for visible, small cracks and the appropriate part should be replaced as soon as possible.
4. Refilling the Coolant and Monitoring Its Level Until a Permanent Repair
It is important to keep the coolant level topped up during the temporary repair.
Refill the reservoir with the recommended type of coolant and monitor it regularly to prevent the engine from overheating.
If you notice a rapid drop in the coolant level, it indicates a more serious leak and requires immediate professional attention.
Regular monitoring allows the driver to maintain engine temperatures within safe limits while preparing for a permanent solution.
How to Repair Coolant Leak with Permanent Repair Methods
Temporary solutions can help you deal with a coolant leak in the short term, but to ensure your engine remains safe and runs efficiently, permanent repairs are necessary.
Permanent repair methods address the root cause of the leak and restore the integrity of the cooling system.
These repairs prevent recurrent leaks, overheating and potential engine damage, making them essential for the vehicle’s long-term health.
Depending on the source of the leak, different repair strategies may be required and using the right approach ensures the cooling system operates at the correct pressure and temperature.
1. Replacing Radiator Hoses, Caps, or Clamps
One of the simplest yet most effective permanent solutions is replacing worn or damaged radiator hoses, caps, or clamps.
Radiator hoses that have become brittle or broken over time should be removed and replaced with high-quality, heat-resistant hoses.
Rusty or loose clamps should also be replaced to maintain a secure connection and prevent future leaks.
Additionally, replacing worn or damaged radiator caps ensures the system maintains proper pressure, which is crucial for optimal coolant flow and preventing boiling.
These replacements are relatively inexpensive and can significantly improve cooling system reliability.
2. Installing a New Radiator if the Radiator is Broken
If the radiator itself is broken, rusted, or leaking from the joints, replacing it is the most reliable permanent solution.
A damaged radiator cannot cool the engine efficiently and repairing it can only provide a short-term solution.
Installing a new radiator restores the system’s full cooling capacity, prevents coolant loss and prevents the engine from overheating.
Modern radiators are designed with durable materials that can withstand high heat and pressure, making them a long-lasting solution with proper installation and maintenance.
3. Replacing a Bad Water Pump or Gasket
The water pump is essential for circulating coolant throughout the engine.
If the pump is leaking or the gasket is worn, the engine can overheat quickly.
Replacing a faulty water pump or gasket restores proper coolant flow and stabilizes engine temperature.
During this repair, it’s important to use manufacturer-recommended parts and ensure proper installation to avoid premature failure.
This repair not only stops the leak but also prevents secondary damage from engine overheating.
4. Repairing or Replacing a Damaged Heater Core
A leaking heater core can cause coolant loss, leakage into the cabin and a sweet odor inside the vehicle.
Depending on the severity of the damage, the heater core can be repaired or replaced entirely.
Replacement is generally preferred because it guarantees a long-term solution and restores proper heating performance in the vehicle.
Although repairing or replacing a heater core is laborious due to its location inside the dashboard, it is crucial to maintaining cabin comfort and the overall health of the cooling system.
5. Professional Pressure Testing and System Flushing After Repair
After any permanent repair, professional pressure testing and a thorough flushing of the system is highly recommended.
Pressure testing ensures that the cooling system is properly sealed and leak-free.
Flushing the system removes debris, rust, or leak-stopping chemicals, allowing coolant to circulate efficiently.
This step is essential to restore the cooling system to its best condition, extend the life of new parts and prevent future leaks or overheating.
How to Refill and Bleed the Cooling System
After repairing a coolant leak, it’s important to properly refill the cooling system and remove any trapped air.
Air pockets within the system can prevent smooth coolant circulation, causing the engine to overheat.
Following a careful refilling and bleeding procedure ensures the engine maintains a safe operating temperature, protects internal components and keeps the cooling system functioning at full capacity.
Understanding each step in this process helps prevent recurring problems and maximize the effectiveness of the repair.
1. Selecting the Right Coolant Type
The first step in refilling the cooling system is selecting the correct coolant type for your vehicle.
Coolant is available in various formulations, including ethylene glycol-based and organic acid technology (OAT) types.
The vehicle owner’s manual contains the manufacturer’s recommended coolant specifications, which must be followed to prevent corrosion, chemical reactions, or damage to hoses and gaskets.
Using the wrong type of coolant can reduce heat transfer efficiency and shorten the lifespan of cooling system components.
2. Mixing Coolant with Distilled Water
In many vehicles, coolant is supplied as a concentrated liquid that must be mixed with distilled water before use.
Distilled water is preferred because it does not contain minerals that can cause scaling or corrosion inside the radiator and engine.
The typical mixing ratio is 50 percent coolant and 50 percent distilled water, although some vehicles may have different recommendations.
Mixing coolant correctly ensures proper freezing and boiling point protection and maintains optimal heat transfer throughout the system.
3. Bleeding Using a Bleeder Valve or Manual Method
Once the system is filled, it is important to remove trapped air.
Air pockets can block the flow of coolant and create overheating zones in the engine.
Many vehicles are equipped with a bleeder valve, which allows air to escape while maintaining system pressure.
If a bleeder valve is not available, the engine can be run at idle by removing the radiator cap and gently pressing the upper radiator hose to expel air.
This manual method ensures that coolant completely fills the system and flows to all hoses, the radiator and the engine block.
4. Running the Engine and Rechecking for Leaks
After bleeding the system, run the engine to normal operating temperature and inspect coolant flow.
Check for any leaks in all repaired parts, hoses, the radiator and fittings.
The temperature gauge should remain within normal limits and the coolant reservoir level should remain stable.
This final check ensures that the system is sealed, coolant is flowing properly and the engine is protected from overheating.
Any drop in coolant level or abnormal temperature increase should be corrected immediately to prevent damage.
Keep Safety In-Check As Well
Working on a car’s cooling system can be dangerous if proper safety measures are not followed.
Coolant is under pressure when the engine is hot and it contains chemicals that can be harmful if swallowed or come into contact with the skin.
Following strict safety precautions protects you from burns, chemical exposure and environmental hazards.
Understanding and implementing these safety measures ensures that repairs and maintenance are performed safely and effectively.
1. Never Open the Radiator Cap When the Engine is Hot
One of the most important safety rules is to never remove the radiator cap when the engine is hot.
The cooling system operates under high pressure and opening the cap can release hot coolant and steam, which can cause serious burns.
Always let the engine cool completely before checking the coolant level or performing any repairs.
If the radiator cap must be removed, use a thick cloth and gently twist it to release any remaining pressure, but only when the engine is cool.
2. Wear gloves and eye protection
Coolant contains chemicals like ethylene glycol and propylene glycol, which can irritate the skin and be harmful if in contact with the eyes.
It’s important to wear protective gloves and safety glasses when handling coolant, opening the radiator, or working on hoses and water pumps.
Gloves protect skin from burns and chemical exposure, while eye protection prevents serious injury from accidental splashes.
Even small amounts of coolant can be dangerous, so these precautions should never be forgotten.
3. Proper Disposal of Coolant
Used coolant is highly toxic to humans, pets and wildlife.
Never pour it into drains, soil, or water sources.
Instead, collect old or excess coolant in a sealed container and take it to a certified recycling or hazardous waste disposal center.
Proper disposal not only protects the environment but also ensures compliance with local regulations.
By handling and disposing of coolant responsibly, you prevent accidental poisoning and contamination while maintaining a safe work environment.
When You Should Go To the Mechanic
Although some coolant leaks can be fixed at home with basic tools and knowledge, some situations require professional attention.
Ignoring a serious leak or attempting repairs beyond your own capabilities can result in serious engine damage, costly repairs, or even complete engine failure.
Knowing when to seek help ensures that your vehicle remains safe, reliable and properly maintained.
Recognizing these warning signs early can prevent major problems and ensure effective cooling system repair.
1. Large or Recurring Leaks
If you notice a significant coolant leak, or if small leaks persist despite temporary repairs, it’s time to see a mechanic.
Recurring leaks may indicate that the underlying problem is more complex than a loose hose or a small crack.
Persistent leaks can reduce cooling system pressure, rapidly lower coolant levels and increase the risk of engine overheating.
A professional technician can determine the root cause and perform permanent repairs to prevent further damage.
2. Leaks near the engine block or head gasket
Leaks near the engine block or head gasket are particularly serious and should always be repaired by a professional.
The head gasket seals the engine cylinders and keeps coolant separate from the engine oil.
Leaks in this area can cause the engine to overheat quickly and cause internal damage.
Symptoms may include coolant visible outside the engine block, white smoke from the exhaust, or unexplained coolant leaks without any external leaks.
These repairs require specialized tools and expertise to ensure the engine remains sealed and functional.
3. Overheating Even After Repairs
If the engine continues to overheat even after repair attempts, it indicates a problem with the cooling system.
This could be caused by a hidden leak, trapped air in the system, or a faulty component such as the radiator or water pump.
Persistent overheating can damage engine components, damage the cylinder head, or even destroy the engine completely.
A mechanic can perform thorough diagnostics, pressure testing and professional repairs to restore proper cooling and prevent catastrophic engine damage.
4. Coolant Mixing with Oil (Milky Oil Sign)
When coolant mixes with engine oil, a thick, milky substance forms, indicating a serious internal leak, often caused by a blown head gasket or a cracked engine block.
This situation requires immediate professional attention, as driving with contaminated oil can cause serious damage to engine parts, reduced lubrication and even complete engine failure.
Early detection and professional repair of milky oil can prevent irreversible damage to the engine and maintain vehicle performance.
Read More:
How to Prevent & Maintain Coolant from Leaks
Preventing a coolant leak is always easier and more cost-effective than repairing one after it occurs.
By following regular maintenance procedures and carefully inspecting the cooling system, car owners can avoid common problems that lead to leaks, overheating and engine damage.
Preventive maintenance not only extends the lifespan of cooling system components but also ensures that the engine operates efficiently, safely and reliably under all driving conditions.
Implementing these tips helps prevent minor problems from becoming serious and reduces the risk of costly repairs.
Basically, in many antifreeze products there is toxic ingredients are available such as: Ethylene glycol which is actually toxic to people, pets and wildlife and that’s why it is your responsibility to handle it carefully. Also, EPA guides that you should dispose the used coolant at an approved facility whenever you change coolant, always wear gloves and catch the old fluid in a sealed container for everyone’s safety.[¹]
1. Regularly Checking Coolant Levels and Condition
One of the easiest ways to prevent leaks is to regularly check coolant levels.
Low coolant can indicate leaks or other system problems before they become serious.
When checking levels, also pay attention to the condition of the coolant.
Discolored, rusty, or debris-filled coolant may indicate internal corrosion or contamination.
Promptly replacing old or deteriorated coolant helps maintain proper heat transfer, prevent internal damage and reduce the risk of leaks caused by corrosion.
2. Inspect hoses and clamps every few months
Hoses and clamps are exposed to high heat and pressure, which can cause them to deteriorate over time.
Checking hoses for cracks, bulges, or soft spots and ensuring that the clamps are tight and rust-free helps prevent unexpected leaks.
Performing this inspection every few months can fix minor problems before they become major issues.
Regularly monitoring these components is a proactive measure that maintains pressure in the system and prevents sudden coolant loss.
3. Flush the cooling system according to the manufacturer’s schedule
Flushing the cooling system removes accumulated rust, grime and old coolant that can damage internal components and reduce efficiency.
Most manufacturers recommend flushing the system every 2 to 5 years or at a specific mileage interval.
A system flush ensures proper circulation of new coolant, prevents blockages and extends the life of the radiator, hoses, water pump and heater core.
Regular flushing also reduces the risk of leaks caused by corrosion or deposits within the cooling system.
4. Use only the recommended coolant type
Different vehicles require specific types of coolant based on their engine materials and design.
Using the manufacturer’s recommended coolant ensures chemical compatibility, proper heat transfer and corrosion protection.
Using the wrong coolant can cause chemical reactions that can damage hoses, gaskets, or the radiator, leading to leaks over time.
Always consult the vehicle owner’s manual and adhere to the recommended coolant type; this helps maintain a reliable and long-lasting cooling system.
Conclusion – How to Stop Coolant Leak in Car
It is your responsibility to prevent even a small leak today as it can prevent a costly engine failure as well, that is why even this simple maintenance is a powerful investment of time and money as well.
By understanding the causes, recognizing warning signs and conducting proper inspections, car owners can identify leaks early and take appropriate action.
Temporary solutions can help address the problem in an emergency, but permanent repairs, such as replacing hoses, the radiator, the water pump, or the heater core, are essential for long-term reliability.
Preventive maintenance, such as proper refilling and bleeding of the cooling system, as well as regular inspections, flushing and using the recommended coolant type, ensures the engine runs at the correct temperature, is protected from overheating and runs efficiently for years.
Following safety precautions when working on the cooling system protects you from burns and chemical hazards and knowing when to consult a professional mechanic ensures that serious problems are addressed correctly.
In short, maintaining a healthy cooling system not only prevents leaks but also protects the heart of your vehicle—its engine—keeping it strong, reliable and efficient for every journey.
So, that’s all from this guide and if you still have questions regarding this guide just let us know by commenting below.
Frequently Asked Questions
Q1. What are the main causes of coolant leaks?
Answer: Coolant leaks usually occur because parts of the cooling system wear out or become damaged over time. Common causes include broken radiator hoses, loose or damaged hose clamps, a bad water pump or gasket, a leaking heater core, a damaged coolant reservoir and a worn radiator cap or O-ring. Heat, pressure and vibration can weaken these parts, leading to coolant leaks. Regular inspections can help identify these problems before they become serious.
Q2. How can I tell if my car has a coolant leak?
Answer: There are several signs that your car is leaking coolant. Look for green, orange, pink, or yellow puddles under the car. Check your dashboard for a low coolant warning light. You may notice a sweet smell around or inside the vehicle, the engine may overheat, or white smoke may be coming from the exhaust. Sometimes coolant can mix with the engine oil, causing a milky or foamy appearance. Recognizing these signs early helps prevent serious engine damage.
Q3. Can I temporarily fix a coolant leak myself?
Answer: Yes, sometimes small leaks can be temporarily fixed until you can make a permanent repair. You can use a commercial radiator stop-leak product to seal minor cracks, tighten loose hose clamps, apply high-temperature epoxy or sealant to small leaks, or refill the coolant and carefully monitor its level. These measures help prevent overheating in the short term but should not replace permanent repair, which is essential for long-term reliability.
Q4. How do I permanently fix a coolant leak?
Answer: Permanent repairs depend on the source of the leak. This may include replacing radiator hoses, clamps, or the radiator cap; If the radiator is broken, this may include installing a new radiator; replacing a faulty water pump or gasket; or repairing or replacing a damaged heater core. After repair, it’s important to have a professional pressure test and flush the cooling system to remove debris and ensure proper operation. Permanent repairs restore the reliability of the entire system and prevent future leaks.
Q5. How do I refill and bleed my cooling system?
Answer: After repairing the leak, fill the system with the correct type of coolant as directed in your owner’s manual. Dilute concentrated coolant with distilled water if necessary. Next, with the engine running at idle and without removing the radiator cap, expel trapped air using the bleeder valve or by gently squeezing the hose. Finally, check the system for leaks and ensure the temperature gauge remains within normal limits. Proper refilling and bleeding helps prevent overheating and ensure proper coolant circulation.
References:
[1] Ethylene Glycol
https://www.epa.gov/sites/default/files/2016-09/documents/ethylene-glycol.pdf

Guys, I’m a car audio enthusiast and customization expert and I love clear sound and clean installation. Plus, I have spent years helping people build their dream audio setups. And whenever I’m working on cars, I probably listen to music and thinks about the next big upgrade.
