Written By: Don Dodi
Fact Checked By: Kristen Brown
Reviewed By: Diego Rosenberg
It is the fact that your car battery really does more than just start the engine: as it powers everything from headlights to the infotainment systems.
Yes, the most of the car batteries actually last somewhere between 3 to 5 years of time, but the lifespan could be shorter in the extreme temperatures.
So, when you check your car battery’s health at the regular time interval then it literally helps you to avoid any unexpected breakdowns and expensive repairs as well.
As well as, a weak battery not only prevent the car from start but it also strain your alternator and actually it reduces the efficiency of other components as well.
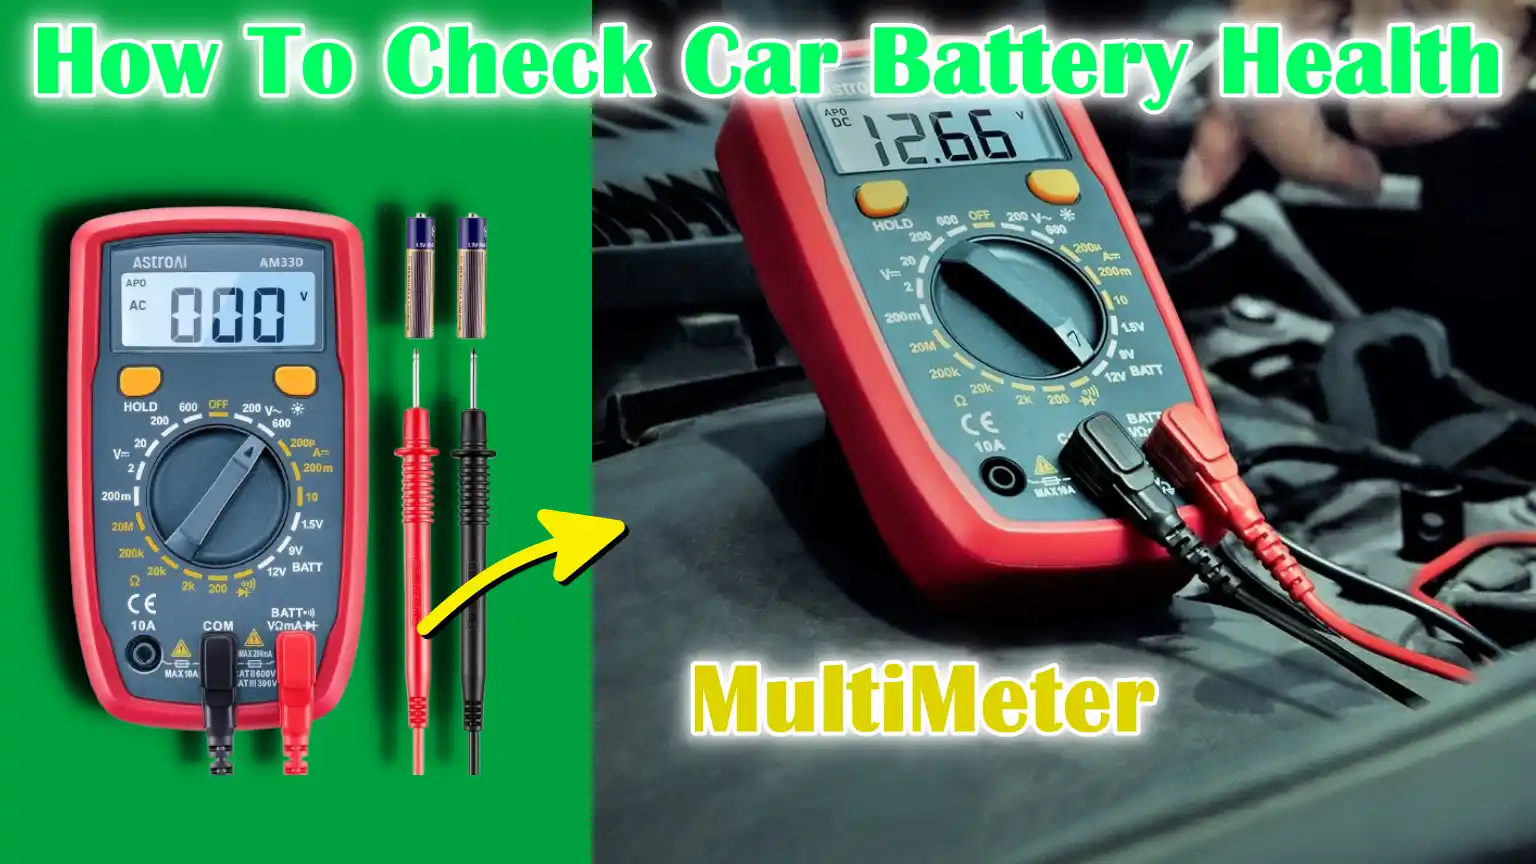
Which is why you need to check the battery health at the regular time: as you can easily check it with digital multimeter and step-by-step instructions about How To Check Car Battery Health.
Why Battery Health Matters
1. Preventing Unexpected Breakdowns
A good battery keeps your car ready to start every time you turn the key. Automobile clubs around the world report that battery failure is one of the biggest reasons for roadside assistance, often accounting for 20-30% of calls.
By checking the voltage and keeping the terminals clean, you can identify weaknesses early, so you can recharge or replace the battery before you get stranded in a parking lot or on a busy highway.
2. Extending Battery Lifespan
Most modern car batteries are designed to last 3-5 years, but this period can be reduced due to heat, frequent short trips and heavy electrical loads.
Regular inspection lets you spot problems like low electrolyte levels or rust, both of which accelerate internal corrosion.
Keeping the battery fully charged and the case clean can extend its service life by a year or more, saving you money and reducing wastage.
3. Saving on Long‑Term Repair Costs
A weak battery forces the alternator to work harder and can damage sensitive electronics if voltage spikes occur.
Replacing an alternator can cost several times more than a new battery and calling a tow truck can cost even more.
By investing a few minutes in monthly battery checks (and replacing the battery when it loses its charge) you can avoid those inflated bills and wasted time caused by unexpected repairs.
4. Supporting Optimal Performance of Electronics and Ignition Systems
Modern vehicles rely on a steady 12.6-volt supply for everything from fuel injection to infotainment screens.
When battery voltage drops below 12.2V, headlights become dim, the electric power steering may feel heavy and on-board computers may reset or show error codes.
Keeping the battery healthy ensures strong, consistent power for faster engine starts, brighter lights, clear audio and accurate sensor readings – all of which make driving safer and more enjoyable.
Tools
| Tool Name | What It’s For | Why It Matters / How It Helps |
|---|---|---|
| Digital Multimeter | Measures the voltage of the battery. | This helps you quickly check if the battery is fully charged, weak, or needs to be replaced. |
| Voltmeter (Manual Option) | Also checks battery voltage. | Easier to use than a multimeter but less detailed; still useful for basic testing. |
| Battery Load Tester | This tests how the battery performs under stress. | Simulates engine starting conditions to check if the battery can hold power properly. |
| Safety Gloves | Protects your hands from acid or sparks. | Battery acid and corrosion can cause skin irritation; gloves keep your hands protected. |
| Safety Goggles | Protects your eyes from splashes or sparks. | Important for safety when checking or cleaning battery terminals. |
| Wire Brush | Used to remove corrosion from battery terminals. | Keeps connections clean for better electrical flow and reliable starting. |
| Terminal Cleaner Tool | Cleans the inside and outside of battery terminal clamps. | This ensures that the connections are tight and clean, preventing voltage drops. |
| Baking Soda & Water Mix | Cleans battery corrosion (safe DIY method). | A simple home solution to neutralize the acid and clean the white or green deposits on the terminals. |
| Clean Rag or Paper Towels | Wipes away dirt, moisture or leftover cleaner. | Keeps the battery area neat and prevents dirt from affecting the connections. |
| Wrench or Socket Tool | Used to loosen or tighten terminal clamps. | Required to safely disconnect or secure battery cables during cleaning or testing. |
Precautions Before Starting
1. Turn Off the Vehicle and Remove the Key
Always make sure the engine is off and the key is removed from the ignition before checking or touching anything near the battery.
This prevents accidental electrical contact or short circuits while working. Many modern cars send small electrical currents even when the engine is off, so turning off the power completely can prevent sparks or battery drain.
2. Park in a Well-Ventilated, Flat Area
Car batteries can release harmful gases such as hydrogen, specially if they are damaged or overcharged. These gases are flammable and dangerous in enclosed spaces.
That’s why you should always check your battery in a well-ventilated area, preferably outside or in an open garage.
Also, make sure the car is parked on level, stable ground and that the parking brake is engaged so the vehicle stays securely in place while you work.
3. Wear Protective Gloves and Eyewear
Battery acid is extremely corrosive and can cause skin irritation or serious eye injury. Corrosion deposits around the terminals can also create airborne dust when brushed off.
To be safe, always wear rubber or latex gloves and safety glasses. Even if you don’t expect a leak, it’s still better to protect yourself from any sudden splashes or particles.
4. Keep Metal Objects Away from the Battery Terminals
Never place tools such as wrenches or screwdrivers directly on the battery, specially near the terminals.
High current flows across the battery terminals and if a metal object connects the positive and negative terminals, it could cause dangerous sparks, burns, or even an explosion of the battery.
Keep any metal objects at a safe distance and handle tools with care to avoid accidental contact.
How To Check Car Battery Health – Visual Inspection
1. Check for Corrosion on Terminals
Start by looking carefully at the battery terminals, which are metal poles (usually marked “+” for positive and “–” for negative).
If you see white, blue or green powdery deposits around them, it is corrosion caused by battery acid vapors reacting with air and metal.
Rust can impede the flow of electricity and make it harder to start your car. It also increases resistance, which can put a strain on the battery and charging system.
Cleaning this build-up with a wire brush or a solution of baking soda and water may restore a better connection and improve performance.
2. Look for Swelling, Leaks, or Cracks in the Battery Casing
Examine the battery’s outer casing carefully. If it looks swollen or bulged, it could mean the battery has overheated or been overcharged, which often shortens its life.
Any visible leaks or cracks in the casing are a serious problem.
Acid leaking from a battery is dangerous and corrosive and is a sign that the battery should be replaced immediately. A healthy battery should be solid and rectangular in shape, with no deformation, damage, or wetness.
3. Inspect Battery Cables and Connectors for Damage or Looseness
Check the cables connected to the battery terminals – they should be tight, secure and free of breaks or cracks.
If the cable ends move easily or appear damaged, the battery may not be sending full power to the starter and electrical systems.
Loose or damaged cables are a common cause of starting problems and in rare cases can cause sparks or even fire. Ensuring a strong, clean connection improves both safety and battery efficiency.
Read More:
How To Check Car’s Battery Life – Voltage Check with a Multimeter
1. How to Properly Set Up the Multimeter
The digital multimeter is the most accurate and affordable tool for checking the condition of your car battery.
First, make sure your car is completely off and the multimeter is set to DC voltage (V with a straight line) – usually in the 20V range.
This setting allows you to measure voltage between 0 and 20 volts, which covers the entire range of car battery readings.
If your multimeter is analog or doesn’t have an auto-range feature, check the manual to make sure you’re on the correct setting.
2. Connect Red Probe to Positive Terminal and Black to Negative
When your multimeter is ready, place the red probe on the positive terminal of the battery (which is marked “+”) and the black probe on the negative terminal (which is marked “–”).
Hold the probe firmly in place or use a clamp clip if available. Be careful not to let the metal ends of the probes touch each other, as this could cause a short circuit or inaccurate readings.
Your multimeter’s display will show your battery’s voltage level.
3. Voltage Reading Guide – What the Numbers Mean
It is important to understand the readings of your multimeter. Here is a simple guide to understanding voltage levels:
- 12.6V to 12.8V: Fully charged battery
This means that your battery is in good condition and you don’t need to do anything. It is ready to start your car with full power. - 12.4V to 12.6V: Slightly charged but okay
This level is still acceptable, specially if the car hasn’t been driven for a while. A short drive may allow the car to fully charge. - 12.2V to 12.4V: Low charge – consider recharging
The battery is getting weak. To recharge it, it is a good idea to use a battery charger or take the car for a long drive. - Below 12.2V: Battery is weak
This level usually indicates that the battery is having trouble maintaining power. It may still work, but may fail sooner—specially in cold weather. - Below 11.8V: Battery needs to be replaced
This is a sure sign that the battery is either completely discharged or nearing the end of its life. It is better to test it under load or consult a professional before it starts bothering you.
Optional: Load Testing the Battery
1. What a Load Test Is and Why It Helps
Load testing checks how your car battery performs under stress – just like it does when you start the engine.
Voltage testing shows how much charge is left, while load testing shows whether the battery can provide power continuously under actual working conditions.
This is important as some batteries still show good voltage, but fail when asked to start the car.
Load testing helps you spot weak or dying batteries before they cause you trouble. This is specially useful for batteries that are over 3 years old, or if your car has been slow to start recently.
2. Steps to Perform a Load Test (Manual or with a Tester)
You can perform a load test in two ways: with a dedicated battery load tester (available at auto stores) or by using a multimeter and your car’s starter.
Method 1: Using a Load Tester
- Connect the tester’s clamps to the battery terminals – red to positive (+) and black to negative (-).
- Follow the instructions on your tester to apply the load (usually for 10-15 seconds).
- Read the voltage when applying a load.
Method 2: Using a Multimeter and Car Starter
- Set up the multimeter the same way you would for a regular voltage check.
- Ask someone to start the engine while you monitor the voltage.
- During crank, the voltage of a healthy battery should not drop below 9.6 volts.
Make sure the car is off before connecting any devices and never test a frozen battery or one that is obviously damaged.
3. What the Results Mean for Battery Health
- Above 9.6V during crank or under load: The battery is in good condition and can provide strong power when needed.
- Between 9.0V and 9.6V: The battery has become weak and may not work during cold weather or high loads. Consider replacing it soon.
- Less than 9.0V: This usually means the battery is failing or nearing the end of its life. It may not be able to start your car reliably and should be replaced as soon as possible.
- Immediate voltage drop + slow recovery: This could be a sign of internal damage or sulfation (a common aging problem in which battery plates become coated with lead sulfate).
Load testing gives you a complete picture of your battery’s actual performance – not just whether it’s holding a charge, but whether it’s strong enough to do its job.
Check Charging System (Alternator Health)
1. Why Checking the Alternator Is Essential
Your car’s alternator keeps the battery charged while the engine is running. It converts mechanical energy into electrical energy and supplies it to the battery and all of your car’s electrical systems.
Even if your battery is brand new, if the alternator isn’t working properly, it will drain quickly. A bad alternator can cause dim headlights, drained battery, slow starts and warning lights on the dashboard.
In fact, many battery problems do not start with the battery, but with a bad alternator. That’s why checking the charging system is just as important as checking the battery.
2. How to Test the Voltage with the Engine Running
To check if your alternator is working correctly, you will need a digital multimeter:
- Start your engine and let it idle.
- Set your multimeter to DC voltage (20V range is best).
- Place the red probe on the positive (+) terminal of the battery and the black probe on the negative (–) terminal – just as in a normal voltage test.
- Read the voltage on the display while the engine is running.
This test shows whether the alternator is sending the correct amount of power back to the battery.
3. Healthy Charging System: 13.7V to 14.7V
If your alternator is in good condition, your multimeter will show a reading between 13.7 volts and 14.7 volts when the engine is running.
This means the alternator is working correctly and recharging the battery properly.
- If the voltage is below 13.5V, your alternator may be undercharging, which means the battery will slowly lose its power.
- If it’s higher than 15V, the alternator may be overcharging, which could damage the battery and other electrical parts.
- If the voltage is the same as it was when the engine was off (around 12.6V or lower), your alternator may be completely damaged.
With this simple test you can confirm whether your charging system is in working order or needs professional attention – allowing you to avoid electrical problems or sudden battery failure in the future.
When to Replace the Battery
1. Signs It’s Time: Age, Slow Cranking, Dim Lights, Dashboard Battery Light
The most obvious sign that your car battery needs to be replaced is its age. Most batteries are designed to last 3 to 5 years, even under ideal conditions.
After this, their ability to hold and deliver power begins to diminish. If you find the engine cranking more slowly than usual when you try to start the car, this is a warning sign that the battery is getting weak.
Dim headlights, flickering interior lights, or a battery warning light on your dashboard are other telltale signs that your battery is struggling and nearing the end of its life.
2. Repeated Need for Jump-Starts
If you’ve needed to jump-start your vehicle more than once or twice in recent weeks, this is a clear sign that your battery is no longer reliable.
Although the occasional jump-start may be caused by accidentally leaving lights on or weather-related issues, repeated jump-starts mean the battery can no longer hold a charge on its own.
Even if the car starts after a jump, the battery does not have enough power to restart the vehicle after being idle for a short period of time.
3. Irregular Voltage Even After Recharging
A healthy battery should return to 12.6-12.8 volts after a full charge. If you’ve recently recharged your battery but it’s still getting low or unstable voltage readings, this is a major red flag.
For example, if your voltage continues to drop below 12.2V even after charging, or if the voltage is inconsistent, it’s possible that the internal battery cells are damaged or worn out.
This type of battery will not deliver consistent performance and can fail at any time, specially during cold weather or inclement weather.
Pro Tips for Extending Battery Life
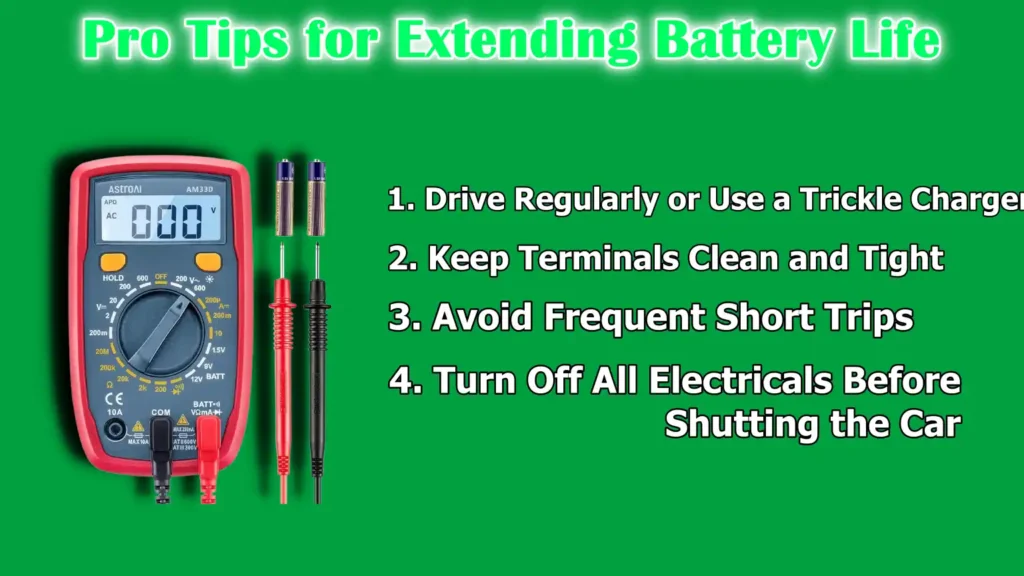
1. Drive Regularly or Use a Trickle Charger
Your car battery naturally loses charge over time, even when you’re not driving.
To keep it healthy, try to drive your vehicle at least once every few days, preferably for 20 minutes or more, so the alternator can fully recharge the battery.
If your car sits unused for long periods of time (such as during holidays or in storage over the winter), use a trickle charger or battery maintainer.
These small devices provide a low, steady charge and protect the battery from draining, resulting in longer battery life.
2. Keep Terminals Clean and Tight
Corrosion on the battery terminals obstructs the smooth flow of electricity.
To prevent this, inspect the terminals regularly for any accumulation of white, green, or blue powder, usually caused by acid leakage.
You can clean the terminals using a wire brush and a baking soda-water mixture, which safely neutralizes the acid.
Also, make sure the terminal clamps are tight and secure, as loose connections can cause starting problems, voltage drops, or stress on the battery.
3. Avoid Frequent Short Trips
Short drives (less than 10-15 minutes) don’t give your alternator enough time to recharge the battery after a cold start.
Doing this repeatedly leaves your battery partially charged, leading to a condition called sulfation, in which lead sulfate crystals accumulate and reduce the battery’s ability to hold a charge.
Whenever possible, try to combine errands or plan longer trips to give your battery a chance to properly recover.
4. Turn Off All Electricals Before Shutting the Car
Before you turn off your engine, make sure all lights, radio, heater, AC and accessories are turned off.
Leaving electrical appliances running could drain the battery the next time you start your car, specially if it’s already weak.
Also, double-check that interior lights and headlights are completely off after you get out of the car. Even a small dome light left on overnight can drain the battery completely by morning.
Conclusion – How To Check Car Battery Health
Actually most drivers only think about their battery when it’s completely drained, but if you check it regularly you’ll rarely encounter battery-related problems.
A healthy battery ensures that your car starts reliably, your electronics operate smoothly and prevents unexpected breakdowns.
Although most batteries are built to last 3 to 5 years, their actual lifespan depends on how well they’re maintained, how often the car is driven and environmental factors such as temperature and humidity.
Not only that, a study by Lumingue explains how battery testers accurately detect degradation in health and also reveals that a capacity drop below 80% is a sign of rapid aging.[¹]
By following the steps outlined in this guide – visual inspection, voltage test, load test and alternator check – you can confidently monitor the condition of your battery without needing professional help for every little problem.
Simple measures such as keeping the terminals clean, avoiding frequent short trips and using a trickle charger during long periods of idle can add months or years to your battery’s life.
Don’t wait for the dreaded clicking sound of a stalled engine on a busy morning.
You can now comment down your thoughts below.
FAQ’s
Q1. What shortens car battery life?
Answer: Extreme temperatures, specially very hot or very cold weather, can shorten the life of a car battery. Not driving your car often or only making short trips can also prevent the battery from fully charging. Leaving lights or electronic devices on when the engine is off drains the battery faster. Other causes include corrosion on the terminals, loose connections, a bad alternator, or simply an old battery—most batteries last about 3 to 5 years. Regular maintenance and proper use can help them last longer.
References:
[1] Analysis and Research Based on Automobile Battery Tester
https://www.researchgate.net/publication/351498492_Analysis_and_Research_Based_on_Automobile_Battery_Tester

Guys, I’m a car audio enthusiast and customization expert and I love clear sound and clean installation. Plus, I have spent years helping people build their dream audio setups. And whenever I’m working on cars, I probably listen to music and thinks about the next big upgrade.