 Skip to content
Written By: Don Dodi
Fact Checked By: Kristen Brown
Reviewed By: Diego Rosenberg
Actually, clutch should always have to feel smooth and the smoothness is dependent on clean hydraulic pressure, which is why bleeding the clutch slave cylinder is the main thing to neglect clutch’s soft, spongy or slow engagement.
Also, it is the sign of trapped air in the hydraulic line that bleeding can easily and safely remove it.
Now-a-days, clutch in most of the modern vehicles actually works by using hydraulic pressure; which is created by the clutch master cylinder and transferred through the brake fluid and in that way it engage and disengage the transmission in the smooth way.
And it is also true that, over the period of time; there can be entry of the tiny air bubbles or moisture in this hydraulic line, specially it is seen more often after component replacement, low fluid levels or small leaks can be the reason as well.
Basically, these air pockets compress under pressure, in that way it prevents full clutch engagement and that cause the pedal to feel soft or spongy kind of.
Plus, when you bleed the slave cylinder, then you basically removes this kind of trapped air and restore that solid, consistent fluid pressure again, that actually allows the clutch pedal to feel and act in the firm and precise way again.
So, this guide is all about How Do You Bleed a Clutch Slave Cylinder, as with this guide you can easily deal with poor clutch pedal performance, wanted shifting smooth and dependable or just wanted to ensure the hydraulic fluid remains clean and free of contaminants.
Tools
| Item Name | Purpose / What It Does | Helpful Notes or Tips |
|---|---|---|
| Wrench Set | Used to loosen and tighten bleeder screws and other small fittings. | Make sure the wrench fits snugly so the bleeder screw doesn’t loosen. Usually, a small box-end wrench works best. |
| Brake Fluid (DOT 3 or DOT 4) | It acts as hydraulic fluid that transfers pressure from the clutch pedal to the slave cylinder. | Always use the amount recommended in your vehicle’s manual. Never mix old and new fluids, or DOT 3 with DOT 5. |
| Clear Plastic Tubing | This allows you to see air bubbles and fluid as the blood is removed from the body. | A properly fitted bleeder valve prevents air from getting in. Usually, about 2 feet of tubing is sufficient. |
| Catch Container or Bottle | Collects old brake fluid during the bleeding process. | Use a clean, transparent container so you can easily see air bubbles and the color of the liquid. Dispose of old liquid safely. |
| Bleeder Kit (Optional) | Helps create pressure or suction to rapidly remove air from the system. | It can be manual or vacuum type. Useful for one-person bleeding operations. |
| Funnel | Used to add new brake fluid to the master cylinder reservoir without spilling. | A small, clean funnel keeps the liquid free of dirt or dust. |
| Clean Rags or Paper Towels | It wipes up spills and keeps the work area clean. | Brake fluid can damage paint, so wipe up any spills immediately. |
| Safety Gloves | This protects your hands from contact with brake fluid, which can cause skin irritation. | Use chemical-resistant gloves made of nitrile or latex. |
| Safety Glasses | Protects your eyes from accidental splashes of brake fluid. | Always wear these when opening bleeder valves or handling fluids under pressure. |
| Jack and Jack Stands (if needed) | If the slave cylinder is located at the bottom, it lifts the vehicle and moves it towards itself. | Always use jack stands for safety – never rely solely on the jack. |
| Shop Light or Flashlight | Helps you see the bleeder screw and fluid lines clearly. | Bright, focused light makes the process easier and prevents mistakes. |
How to Prepare It to Bleed a Clutch Slave Cylinder
1. Park the vehicle on a level surface
Before beginning the bleeding process, always ensure the vehicle is parked on a flat and level surface.
This step is crucial as it maintains the brake fluid level inside the master cylinder and prevents air pockets from circulating in the system.
A level surface also allows you to safely access the slave cylinder without the vehicle unexpectedly rolling or shifting.
If the ground is uneven, the clutch fluid will not flow correctly and trapped air may remain in the hydraulic lines.
It is also advisable to firmly engage the parking brake and, if possible, place wheel chocks behind the tires for added safety and stability during the process.
2. Turn off the engine and allow it to cool
Before touching any part of the clutch system, always turn off the engine and allow ample time for it to cool completely.
The clutch slave cylinder and surrounding transmission parts can become very hot after driving.
Working on hot components can pose a burn hazard and the fluid will also not bleed properly as heat causes the fluid to expand and affects the pressure inside the system.
Waiting for the engine to cool ensures your safety and helps maintain the correct hydraulic fluid pressure when you begin the bleeding process.
3. Locate the clutch master cylinder reservoir and ensure it is filled with clean brake fluid
Once the engine has cooled and it is safe to work on, open the hood and locate the clutch master cylinder reservoir.
It is usually located near the brake master cylinder and is often labeled or connected to the clutch pedal assembly.
Check that the reservoir is filled with clean brake fluid – preferably DOT 3 or DOT 4, depending on what your vehicle’s manual recommends.
If the fluid is dirty, dark, or contains floating particles, it should be replaced before bleeding.
It’s crucial to keep the reservoir full throughout the entire process because if it runs dry, new air can enter the system, forcing you to start the entire process over again.
4. Identify the Clutch Slave Cylinder Bleeder Valve
The clutch slave cylinder is typically located on or near the transmission bell housing and has a small metal nipple called a bleeder valve.
This valve is the main point where air and old fluid are expelled during the bleeding process.
Clean around this valve and clearly identify it before beginning.
Dirt or debris near the bleeder can fall into the system and contaminate the new fluid.
You will need a small wrench to loosen and tighten this valve during the process.
Knowing the exact location of the bleeder valve helps you work quickly, cleanly and with more control and also ensures that all trapped air is removed from the hydraulic line during the bleeding process.
How to Access the Slave Cylinder
1. Where is the slave cylinder typically located?
The clutch slave cylinder is a crucial part of the hydraulic clutch system and is almost always located on or near the transmission bell housing.
The bell housing is a large metal case that connects the engine to the transmission and houses the clutch assembly.
In most vehicles, you can find the slave cylinder either on the outside of the bell housing or, in some models, inside the housing where it directly applies pressure to the clutch release bearing.
If it’s externally mounted, it will look like a small metal cylinder with a fluid line attached and a bleeder valve on the side or top.
Vehicles with an internal slave cylinder may require removing the transmission to access it, which is a more complex task and usually performed by experienced mechanics.
Consulting your vehicle’s service manual or online diagrams is very helpful in locating the correct position, as different car makes and models have slightly different slave cylinder locations.
Understanding its location before you begin saves time and helps you plan how to access it safely and easily.
2. Ensure the bleeder screw is visible and easily accessible
Once you’ve located the slave cylinder, the next step is to find and inspect the bleeder screw.
This small screw, usually made of metal, is the main component used to release trapped air and old fluid from the system.
It’s often located on the top or side of the slave cylinder because air naturally rises to the highest point in the hydraulic line.
Before starting the bleeding process, ensure the bleeder screw is clean, free of rust and can be easily turned with a wrench.
If the bleeder is covered in dirt, clean it with a rag to prevent any debris from entering the fluid system when it’s opened.
You should also ensure there is enough space to attach a clean hose and comfortably fit your wrench without any obstructions.
On some vehicles, you may need to slightly raise the front end using a jack and secure it on jack stands to easily access the bleeder screw.
Clear access to the bleeder valve is crucial because working in a cramped space can lead to accidentally spilling fluid, damaging the threads, or not completely removing all the air.
Checking for adequate access beforehand makes the entire bleeding process easier, cleaner and safer.
How to Attach the Bleeder Hose
1. Connecting a Clear Plastic Tube to the Bleeder Screw
After locating the bleeder screw on the clutch slave cylinder, the next crucial step is to securely attach a clear plastic tube to it.
This clear tube serves a vital function during the bleeding process – it allows you to clearly see air bubbles and fluid movement, indicating when all the air has been purged from the hydraulic system.
The tube should fit snugly onto the bleeder screw nipple to prevent any air from entering or fluid from leaking.
A loose or improperly fitted tube can compromise the process by allowing new air to re-enter the system.
Most people use a tube that is approximately two feet long and about a quarter-inch in inner diameter, matching the outer diameter of the bleeder valve.
Before attaching it, ensure the tube is clean, dry and free from any cracks or debris.
If the tube has been used before, wash it to remove any old brake fluid or contaminants that could compromise the new fluid.
A tight, airtight fit helps maintain proper suction and ensures you can clearly observe the fluid flow while bleeding the clutch.
2. Submerging the Other End of the Hose in a Container Half-Filled with Brake Fluid
Once the clear tube is securely attached to the bleeder screw, place the other end of the tube into a small, clean container that is half-filled with fresh brake fluid.
This step may seem simple, but it plays a crucial role in the entire bleeding process.
The fluid inside the container acts as a one-way barrier – it allows the old fluid and air to exit the slave cylinder while preventing air from being drawn back into the hydraulic line when the clutch pedal is released.
The container should be placed on a flat, stable surface where it won’t easily tip over.
Using clean brake fluid in the container makes it easier to see the air bubbles coming out of the system, which helps you determine when the bleeding process is complete.
Avoid using dirty or old brake fluid, as even a small amount of contamination can affect the clutch’s performance.
It’s also crucial that the end of the tube never comes out of the fluid during the process, as this will immediately allow air back into the system.
By keeping the hose submerged in the fluid and maintaining a clean setup, you create a safe and effective flow path that allows trapped air to escape and prevents the clutch’s hydraulic system from becoming contaminated again.
How Do You Bleed a Clutch Slave Cylinder – Multiple Methods In Simple Way
How to Bleed a Clutch Slave Cylinder Manually – Two-Person Method
1. Press and hold the clutch pedal
The manual bleeding method is the most traditional and widely used method because it provides direct control over the flow of fluid and air through the hydraulic system.
In this method, one person sits inside the vehicle and slowly and steadily presses the clutch pedal all the way to the floor.
Pressing the pedal creates hydraulic pressure inside the clutch line, pushing the brake fluid and trapped air towards the slave cylinder.
It’s crucial to press the pedal slowly and steadily rather than pumping it rapidly, as rapid pumping can create small air bubbles and make bleeding the system more difficult.
Once the pedal is fully depressed and held down, the person should keep it in that position until instructed otherwise by the person handling the bleeder valve.
This constant pressure helps the fluid move smoothly through the system and prevents air from re-entering.
2. Slightly loosen the bleeder screw to allow air and fluid to escape
While the pedal is held down, the second person working under the vehicle or under the hood should carefully loosen the bleeder screw on the clutch slave cylinder slightly using a small wrench.
When the screw is slightly loosened, a mixture of brake fluid and air bubbles will begin to escape from the clear plastic tube attached to the bleeder valve.
This step allows the trapped air to escape from the hydraulic system.
It’s important to only loosen the screw slightly—just enough for the fluid to flow steadily—as loosening it too much can cause the fluid to leak uncontrollably or allow more air to enter.
The escaping fluid should be collected in a clean container that already contains some brake fluid, which prevents air from being drawn back into the line.
3. Close the Bleeder Screw Before Releasing the Pedal
Once the fluid and air have been expelled for that cycle, the person under the car should tightly close the bleeder screw before the person inside the car releases the clutch pedal.
This timing is crucial because if the pedal is released while the bleeder screw is open, air will be drawn back into the system, negating the progress made during the bleeding process.
Closing the screw before the pedal rises seals the hydraulic line and ensures that the new fluid entering the master cylinder pushes the air out rather than drawing it back in.
This coordination between the two people—one pressing the pedal and the other controlling the valve—is essential for successful manual bleeding.
4. Repeat this process until only clear fluid comes out
This entire process should be repeated several times until only clear brake fluid flows from the tube without any air bubbles.
Each repetition gradually removes more of the trapped air from within the hydraulic line.
Between each cycle, it’s important to check the fluid level in the clutch master cylinder reservoir and refill it as needed.
Allowing the reservoir to run dry will introduce air back into the system, requiring you to start over.
Typically, after several cycles, the clutch pedal will feel firmer and more responsive, indicating that the air has been completely removed.
Once the fluid flows smoothly and consistently, the system is properly bled.
This method requires patience, but it is very effective and provides immediate feedback through the pedal feel and the appearance of the fluid, helping to ensure that the clutch system is fully functional.
How to Perform Gravity Bleeding
1. Open the bleeder screw and allow the fluid to drip slowly until it flows continuously without air bubbles
Gravity bleeding is the easiest and best way to remove air from a clutch hydraulic system and anyone can do it without any special tools.
In this method, gravity is used to draw the brake fluid down through the clutch line and out of the slave cylinder.
To begin, the bleeder screw on the clutch slave cylinder is opened slightly, just enough for the fluid to begin dripping slowly from the attached clear hose.
Because brake fluid is heavier than air, it pushes trapped air upwards as it flows down, forcing the air out of the system.
This process can take several minutes, depending on how much air is in the line and how the system is designed.
During this time, you will see air bubbles coming out of the clear hose – these bubbles indicate that air is being expelled from the hydraulic system.
Eventually, the fluid will flow in a smooth, continuous stream without any bubbles, indicating that all the air has been removed.
Gravity bleeding works best when there is a small amount of air in the system or after minor repairs, such as replacing a slave cylinder or hose and it is a low-risk way to bleed the clutch without applying excessive pressure that could damage older seals or fittings.
2. Continuously Check and Refill the Master Cylinder Reservoir
While performing gravity bleeding, it is crucial to keep a close eye on the clutch master cylinder reservoir.
The reservoir holds the brake fluid that feeds the hydraulic system and if the fluid level drops too low during this process, air will be drawn back into the line, rendering all the effort useless.
To avoid this, always keep the reservoir at least half full by adding fresh, clean brake fluid as needed.
Use the correct fluid type recommended for your vehicle—typically DOT 3 or DOT 4—and prevent dirt, dust, or moisture from entering the reservoir.
Even a few drops of contaminated fluid can compromise hydraulic pressure and subsequently lead to poor clutch performance.
It’s also a good idea to gently tap the clutch line or slave cylinder with a light tool while bleeding; this can help dislodge small air bubbles clinging to the walls of the hydraulic line.
Once the fluid flows freely and you’ve confirmed there are no air bubbles, tighten the bleeder screw securely and wipe up any spilled fluid, as brake fluid can damage painted surfaces.
By carefully monitoring the fluid level and ensuring a continuous flow, gravity bleeding is a simple yet effective way to restore full clutch performance and smooth pedal operation.
How to Do Vacuum or Pressure Bleeding
1. Use a bleeder kit or vacuum pump to remove air and fluid from the system
Vacuum or pressure bleeding is a more advanced but highly effective method used to remove air and old fluid from the clutch hydraulic system.
This method uses an external tool, such as a bleeder kit, vacuum pump, or pressure bleeder, to force fluid through the system, eliminating the need for a second person.
In vacuum bleeding, a hand-operated vacuum pump is attached to the bleeder screw on the clutch slave cylinder.
When the pump is activated, it creates suction that draws the brake fluid and trapped air out of the system through the attached hose and into a collection container.
This process is faster and more consistent than manual bleeding because it draws fluid continuously rather than in small pedal strokes.
In pressure bleeding, a pressure bleeder is attached to the clutch master cylinder reservoir and uses gentle air pressure to push new fluid through the system from top to bottom.
This constant pressure forces air and old fluid out of the slave cylinder, ensuring the hydraulic lines are completely filled with fresh, bubble-free fluid.
Both vacuum and pressure bleeding methods are commonly used by professional mechanics because they provide consistent results, reduce the risk of human error and prevent excessive wear on the clutch pedal and seals.
They are specially useful when replacing a major hydraulic component such as the clutch master cylinder or slave cylinder, where a significant amount of air can become trapped in the system.
2. Maintain the fluid level to prevent excessive air from entering
When performing vacuum or pressure bleeding, it is crucial to constantly monitor the fluid level in the clutch master cylinder reservoir.
As the vacuum or pressure tool extracts fluid from the system, the reservoir level can drop rapidly and if it gets too low, new air will be drawn into the hydraulic lines.
This can ruin all the work done during the bleeding process and create new air pockets that can weaken clutch pedal pressure.
To prevent this, always keep the reservoir properly filled with the correct type of brake fluid—either DOT 3 or DOT 4, as specified in your vehicle’s service manual.
Adding fresh fluid before it reaches the minimum level ensures the system remains sealed and free of air.
It’s also crucial to use clean, unused brake fluid, as exposure to moisture or contaminants can degrade its performance over time and cause internal corrosion.
After completing the bleeding process, tighten the bleeder screw securely and check for any leaks around the fittings or connections.
Maintaining the correct fluid level throughout the entire process ensures a solid and consistent clutch pedal feel, prevents future air intrusion and guarantees that the hydraulic system will operate smoothly and reliably under all driving conditions.
How to do Fluid Monitoring and Refilling
1. Check the Clutch Master Cylinder Fluid Level Frequently During Bleeding
During the clutch bleeding process, one of the most crucial steps is continuously monitoring the fluid level in the clutch master cylinder reservoir.
The master cylinder is the heart of the clutch hydraulic system and it relies on a constant supply of brake fluid to build pressure and properly actuate the slave cylinder.
As air and fluid are expelled from the bleeder valve, the fluid level inside the master cylinder gradually decreases.
If not carefully monitored, the level can drop too low, allowing new air to enter the system.
This will render all your efforts useless and cause the clutch pedal to feel soft or spongy again.
It’s best to pause the bleeding process after every few pedal strokes or pressure cycles and check the fluid level.
Most reservoirs are made of clear plastic, allowing you to easily see the fluid level against the “MIN” and “MAX” markings.
Consistent checking ensures continuous hydraulic pressure throughout the system and guarantees that the clutch will operate smoothly once the bleeding is complete.
2. Never Let It Run Dry
Letting the clutch master cylinder run dry is one of the most common and serious mistakes people make when bleeding a clutch system.
When the fluid level drops below the minimum mark, air enters the hydraulic line through the master cylinder’s inlet port.
Even a small amount of air can cause significant problems because air compresses under pressure, while brake fluid is non-compressible.
This means the clutch pedal will lose its firmness and travel further down before engaging, making gear changes difficult.
If this happens, you’ll have to restart the bleeding process from the beginning.
To avoid this, make it a habit to check the reservoir frequently and refill it before it gets low.
This step only takes a few seconds, but it saves a lot of time and effort later.
Maintaining the correct fluid level keeps the hydraulic system sealed and ensures that only clean fluid and not air, circulates through the clutch line.
3. Top Up with the Correct Brake Fluid Type
When refilling the clutch master cylinder, always use the correct type of brake fluid specified by the vehicle manufacturer – typically DOT 3 or DOT 4.
These fluids are specifically designed to handle the high heat and pressure inside the hydraulic system.
Using the wrong type of fluid can damage the rubber seals, reduce system performance and cause corrosion inside the master and slave cylinders.
It’s also crucial to use fresh fluid from a sealed container, as brake fluid absorbs moisture from the air, which can lower its boiling point and lead to corrosion or poor clutch response.
Carefully pour the fluid using a clean funnel to avoid introducing dirt or debris.
Ensure the reservoir is filled to the “MAX” line, but do not overfill, as excess fluid can expand and leak when the system heats up.
After adding the fluid, securely close the reservoir cap to keep the fluid clean and maintain system pressure.
By using the correct type of brake fluid and properly maintaining the level throughout the process, you ensure the longevity of your clutch components, smooth gear shifting and consistent pedal performance in all driving conditions.
Read More:
How to Test the Clutch Pedal
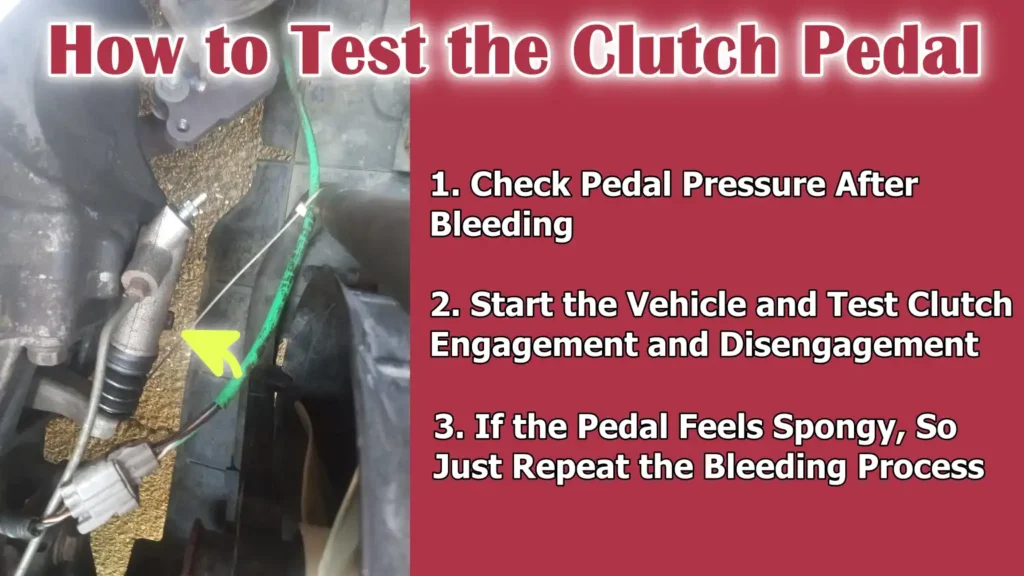
1. Check Pedal Pressure After Bleeding
After completing the bleeding process, the first step is to test the clutch pedal to ensure it feels firm and consistent under your foot.
The pedal should offer smooth resistance when pressed and return to its resting position without delay.
A properly bled clutch system will have very little free play at the top of the pedal’s travel and a solid hydraulic feel throughout the entire range.
This firmness indicates that all air has been successfully removed from the hydraulic lines and that the master and slave cylinders are working together correctly to actuate the clutch fork.
If the pedal feels soft or spongy when pressed, it means there is still air trapped in the system, preventing full hydraulic pressure from being built.
Always check this before starting the engine, as it allows you to safely experience the correct pedal response without the risk of gear grinding or sudden engagement.
2. Start the Vehicle and Test Clutch Engagement and Disengagement
After confirming that the clutch pedal feels firm, the next step is to start the vehicle and test how well the clutch engages and disengages.
With the engine running, fully depress the clutch pedal and shift through each gear to ensure smooth transitions.
The gears should engage smoothly without any grinding or resistance.
A properly bled clutch will completely disengage the transmission when the pedal is pressed and smoothly re-engage when released.
If you hear grinding noises, experience difficulty shifting gears, or the vehicle still seems to be moving even with the clutch pedal fully depressed, it indicates that there may still be air in the system or that the clutch hydraulic travel is incomplete.
Testing under engine power helps verify that both the hydraulic pressure and clutch plate movement are functioning correctly.
This is also a good time to check for any external leaks around the master or slave cylinder fittings, which could cause pressure loss during driving.
3. If the Pedal Feels Spongy, So Just Repeat the Bleeding Process
If you find that the clutch pedal still feels soft, springy, or spongy even after the initial bleeding, it’s a clear indication that air pockets are still trapped in the hydraulic system.
Air can sometimes get trapped in high points or bends in the clutch line, specially in systems with long or vertically mounted hoses.
In such cases, it’s necessary to repeat the bleeding process.
You can use manual, gravity, or vacuum bleeding methods again to remove any remaining air bubbles.
Sometimes, gently tapping the clutch line or slave cylinder while bleeding can help dislodge trapped air.
During this process, keep checking the fluid level in the master cylinder reservoir to prevent it from running dry.
After re-bleeding, the clutch pedal should feel firm and gear shifts will be smooth and precise.
A properly bled clutch system not only provides better driving comfort but also extends the life of the clutch components by preventing uneven wear caused by incomplete disengagement.
How to Check for Leaks After Bleeding a Clutch Slave Cylinder
1. Check both the master and slave cylinders for any leaks
After bleeding the clutch system, one of the most crucial steps is to carefully inspect the entire hydraulic system for leaks.
A clutch system relies on hydraulic pressure to transfer force from the pedal to the clutch fork and even a small fluid leak can cause a drop in pressure, leading to poor clutch performance or complete failure.
First, inspect the clutch master cylinder, which is typically located on the firewall near the brake master cylinder.
Carefully examine the base of the cylinder, the reservoir and the connections where the fluid lines attach.
Any signs of dampness, dripping, or dirt mixed with brake fluid indicate a leak.
Then move on to the clutch slave cylinder, which is usually mounted near the transmission bell housing.
Check around the pushrod area, the bleeder valve and the line connections.
A properly functioning slave cylinder should be dry, with no signs of fluid seepage.
Leaks from either cylinder often mean that the internal seals have failed, requiring replacement rather than simply tightening the connections.
Detecting leaks early prevents air from re-entering the system, ensuring the clutch pedal remains firm and reliable.
2. Tighten bleeder screws and fittings as needed
Once the inspection is complete, pay close attention to the bleeder screws and fluid line fittings.
These points are common sources of slow leaks, specially after the bleeding process if they are not properly tightened.
The bleeder screw on the slave cylinder should be snug but not overtightened, as excessive force can strip the threads or crack the housing.
Using the correct wrench, gently tighten it until it feels secure and leak-free.
Also check the fluid line fittings on both the master and slave cylinders, ensuring they are properly seated and sealed.
If you see any moisture after cleaning them, it means the connection is not tight enough.
In some cases, you may need to replace old or damaged copper washers or seals to ensure a proper seal.
After tightening, wipe all surfaces with a clean cloth to remove any remaining brake fluid, as it is corrosive and can damage paint or rubber components.
Once everything is secure and dry, recheck the firmness of the clutch pedal and ensure the fluid level in the reservoir remains constant.
A leak-free system guarantees that your hydraulic pressure will remain consistent, allowing the clutch to engage and disengage smoothly every time you drive.
Final Steps After Bleeding Clutch Slave Cylinder
1. Clean Up Spilled Fluid
After the bleeding process is complete, it’s crucial to clean up any brake fluid spilled during the process.
Brake fluid is highly corrosive and, if not cleaned up, can damage painted, rubber and plastic surfaces.
Even a small drop can remove paint from the car body or corrode metal parts over time.
Immediately wipe up spilled fluid with a clean cloth or paper towel and if the fluid has come into contact with painted surfaces, thoroughly rinse the area with plenty of water.
In some cases, you can use a mild soap solution to neutralize the fluid and prevent further damage.
Always ensure that the master cylinder, slave cylinder and surrounding area are completely clean and dry.
This not only keeps the workspace clean but also makes it easier to detect any future leaks or problems in the hydraulic system.
Cleaning at this stage ensures the long-term reliability of your clutch system and prevents unwanted corrosion in the engine bay.
2. Replace the Reservoir Cap Securely
After ensuring that the clutch hydraulic system is completely bled and free of air bubbles, the next step is to securely replace the reservoir cap on the clutch master cylinder.
The cap plays a vital role in keeping the brake fluid clean and preventing moisture or dirt from entering the hydraulic system.
Because brake fluid is hygroscopic, meaning it absorbs moisture from the air, an improperly sealed reservoir can cause the fluid to deteriorate quickly, leading to corrosion inside the lines and reduced clutch efficiency.
Ensure the rubber seal on the cap is intact and fits snugly over the opening.
Tighten it gently but firmly to create a perfect airtight seal.
This simple step helps maintain the quality of the brake fluid, ensuring consistent hydraulic pressure and smooth clutch performance over time.
3. Dispose of Old Brake Fluid Properly
Finally, always dispose of old or contaminated brake fluid responsibly.
Brake fluid is a hazardous chemical and should never be poured down drains, onto the ground, or into regular household waste.
It should be taken to an authorized recycling center, hazardous waste facility, or automotive service station that accepts used fluid.
Many local garages and parts stores offer free or low-cost disposal services for fluids like brake fluid, engine oil and coolant.
When storing used fluid before disposal, keep it in a clean, labeled and sealed container to prevent leaks or accidental spills.
Handling brake fluid responsibly protects the environment and complies with waste management regulations.
Proper disposal also prevents contamination of water sources and soil, which can be harmful to both humans and wildlife.
By completing the job with careful cleaning, proper sealing and safe disposal, you ensure that the clutch bleeding process is completed in a professional and environmentally conscious manner, keeping your vehicle reliable and safe to drive.
Basic Troubleshooting Tips
Now, it is also shows by the technical studies that over the period of time DOT3/DOT 4 fluids actually absorb moisture, that basically lowers the boiling point and changes how the fluid even behaves under heat. That’s why it is really important to bleed the clutch system with fresh, manufacturer-specified fluid so that it keeps the reservoir sealed should be intact as it prevents reduction in hydraulic performance and internal corrosion as well.[¹]
1. If the clutch still feels soft, there may be air trapped in the system or a faulty seal
Even after completing the bleeding procedure, if the clutch pedal still feels soft, spongy, or fails to maintain consistent pressure, it often indicates that there is still air trapped inside the hydraulic system.
Air bubbles prevent the proper transfer of fluid pressure between the master and slave cylinders, resulting in erratic or weak clutch response.
In such cases, it’s best to repeat the bleeding procedure slowly and carefully to remove all remaining air.
Sometimes, gently tapping on the clutch line or slave cylinder during bleeding can help dislodge small air bubbles clinging to the walls of the hydraulic lines.
Another common cause of a soft clutch pedal is a faulty internal seal in the master or slave cylinder.
If these seals are worn or damaged, brake fluid can leak internally, causing a loss of pressure without an external leak.
Replacing or repairing the faulty component usually resolves this issue.
Checking the pushrod travel on the slave cylinder is also helpful to ensure it’s moving through its full range – limited movement can indicate internal hydraulic problems.
A properly functioning and fully bled system should provide a firm, predictable pedal feel without any sinking or sponginess when depressed.
2. Check for damaged hoses, loose fittings, or worn slave/master cylinders
If the clutch exhibits erratic performance even after multiple bleeding attempts, the problem may lie in the physical components of the hydraulic system.
Inspect all hoses for cracks, bulges, or leaks, specially near fittings and bends where wear is most common.
Over time, rubber clutch hoses can deteriorate from heat and contamination from brake fluid, leading to small leaks or internal swelling that restricts fluid flow.
Any damaged hoses should be immediately replaced with a high-quality, pressure-rated replacement.
Also, ensure all fittings and connections are tight but not overtightened, as even a slightly loose fitting can draw air into the system during clutch operation.
Inspect the slave and master cylinders for signs of external fluid leaks, corrosion, or residue around their seals.
If fluid is visible around the pushrod or mounting points, it’s likely the internal piston seals are worn.
Replacing or repairing these cylinders restores hydraulic integrity and prevents pressure loss.
By carefully inspecting each component, you can address minor issues before they lead to a major clutch failure.
If the clutch pedal feel is consistent, gears shift smoothly and there are no fluid leaks, it’s a clear indication that your clutch system is functioning correctly and free from hydraulic problems.
Conclusion – How Do You Bleed a Clutch Slave Cylinder
Yes, it is true that most powerful engine itself depends on a properly working clutch in terms to provide the strength, that’s that actually bleeding the slave cylinder actually ensures that connection stays strong during journey.
A properly bled clutch ensures smooth gear shifting, correct pressure on the pedal and reliable engagement between the engine and transmission.
When air becomes trapped in the hydraulic lines, it can lead to a spongy pedal, delayed engagement and, if left unaddressed, complete clutch failure.
By carefully following each step, from preparation and safety checks to fluid inspection and testing, drivers can restore proper hydraulic pressure and extend the life of both the clutch and transmission.
Using the correct brake fluid type (typically DOT 3 or DOT 4), ensuring all fittings are tight and regularly checking for leaks can prevent future problems.
It’s also important to remember that brake fluid is hygroscopic, meaning it absorbs moisture over time, so it’s crucial to replace it every two to three years to prevent corrosion and internal damage.
A successfully bled clutch system not only improves performance but also gives you greater control and confidence while driving.
The clutch pedal should feel smooth yet firm, allowing for precise shifting and better synchronization with engine power.
Performing this procedure correctly also helps prevent premature wear of expensive parts like the master and slave cylinders.
For DIY enthusiasts, understanding how the hydraulic clutch system works can make troubleshooting much easier and reduce reliance on professional service.
Taking the time to maintain your clutch system results in an overall longer-lasting, safer and more responsive driving experience.
Now, that’s it from this guide and you can now ask questions regarding this questions.
Frequently Asked Questions
Q1. What does it mean to bleed a clutch slave cylinder?
Answer: Bleeding a clutch slave cylinder means removing air bubbles from the clutch’s hydraulic system so that the clutch pedal can operate smoothly and correctly. The hydraulic clutch system relies on brake fluid to transfer pressure from the pedal to the clutch fork. When air gets into the system, it compresses and prevents full pressure from building up. This causes the pedal to feel soft or spongy and makes shifting gears difficult. Bleeding removes the trapped air from the system, replacing it with clean, solid fluid pressure. Once properly bled, the clutch pedal becomes firm and responsive again, allowing for smooth gear changes.
Q2. Why is bleeding the clutch slave cylinder necessary?
Answer: Bleeding the clutch slave cylinder is necessary because air inside the hydraulic system interferes with the proper pressure needed for the clutch to function correctly. Without this process, your clutch pedal may not fully disengage the gears, leading to problems such as grinding, slipping, or difficulty shifting gears. Over time, trapped air and moisture can also cause corrosion inside the master and slave cylinders, potentially damaging seals and leading to fluid leaks. Regular bleeding keeps the system clean, ensures proper hydraulic pressure and extends the life of your clutch components. It’s also an important safety measure, as a weak clutch can lead to poor gear response, specially when driving uphill or in traffic.
Q3. How often should I bleed my clutch system?
Answer: It’s generally recommended to bleed the clutch system every two to three years or whenever you notice any changes in the pedal feel, such as softness, sponginess, or delayed response. Whenever the clutch master or slave cylinder is replaced, you should also bleed the clutch system, as new components often introduce air into the system during installation. Some vehicles may require more frequent bleeding if they are driven in high-humidity areas, as brake fluid absorbs moisture from the air over time. Regularly checking and maintaining the brake fluid level can help prevent the need for frequent bleeding.
Q4. What type of fluid is used to bleed the clutch system?
Answer: Most clutch systems use the same fluid as the braking system, typically DOT 3 or DOT 4 brake fluid. The correct type can usually be found on the master cylinder cap or in the vehicle owner’s manual. Using the correct type is crucial because different fluids have different boiling points and chemical properties. Using the wrong fluid can damage seals or impair system performance. Always ensure the fluid is clean, uncontaminated and fresh before using it for bleeding, as old or contaminated fluid can create new problems instead of fixing existing ones.
Q5. What are the signs that indicate your clutch system needs bleeding?
Answer: The most common signs that your clutch system needs bleeding include a soft or spongy pedal, difficulty shifting gears, the clutch pedal sticking to the floor, or a grinding noise when shifting gears. You may also notice that the clutch engagement point feels inconsistent, meaning it engages either too high or too low compared to normal. In some cases, you may see a low fluid level or leaks near the clutch master or slave cylinder. All of these symptoms indicate that air has entered the hydraulic system, which can only be corrected by properly bleeding the system.
References:
[1] Measurement of Brake Fluid Boiling Point
https://www.researchgate.net/publication/391853765_Measurement_of_Brake_Fluid_Boiling_Point

Guys, I’m a car audio enthusiast and customization expert and I love clear sound and clean installation. Plus, I have spent years helping people build their dream audio setups. And whenever I’m working on cars, I probably listen to music and thinks about the next big upgrade.
