Written By: Don Dodi
Fact Checked By: Kristen Brown
Reviewed By: Diego Rosenberg
Whenever you makes every turn in a smooth way then it is possible because of powerful part known as CV joint, as it actually balance your drive by transferring engine power to your wheels without even losing motion or control.
In most simple way: the CV joint known as Constant Velocity Joint actually allows the wheels to move smoothly at the different angles and still maintain a consistent speed as well.
So, basically it connects the transmission to the wheels and that’s how it makes possible for your car to turn and move without any kind of jerks or power loss.
But it is again true that over the period of time and usage, the CV joints also wear out due to the constant rotation, exposure to the road debris and grease leakage from damaged CV boots.
Not only this, the studies actually shows that torn CV boots are the most common reasons for joint failure, because once the grease starts to escape, then dirt and moisture quickly cause the internal damage.
Plus, according to the automotive repair data, the worn CV joint can severely affects the steering stability, creates clicking or popping noises during turns and even it leads to the axle failures if you ignore it completely.
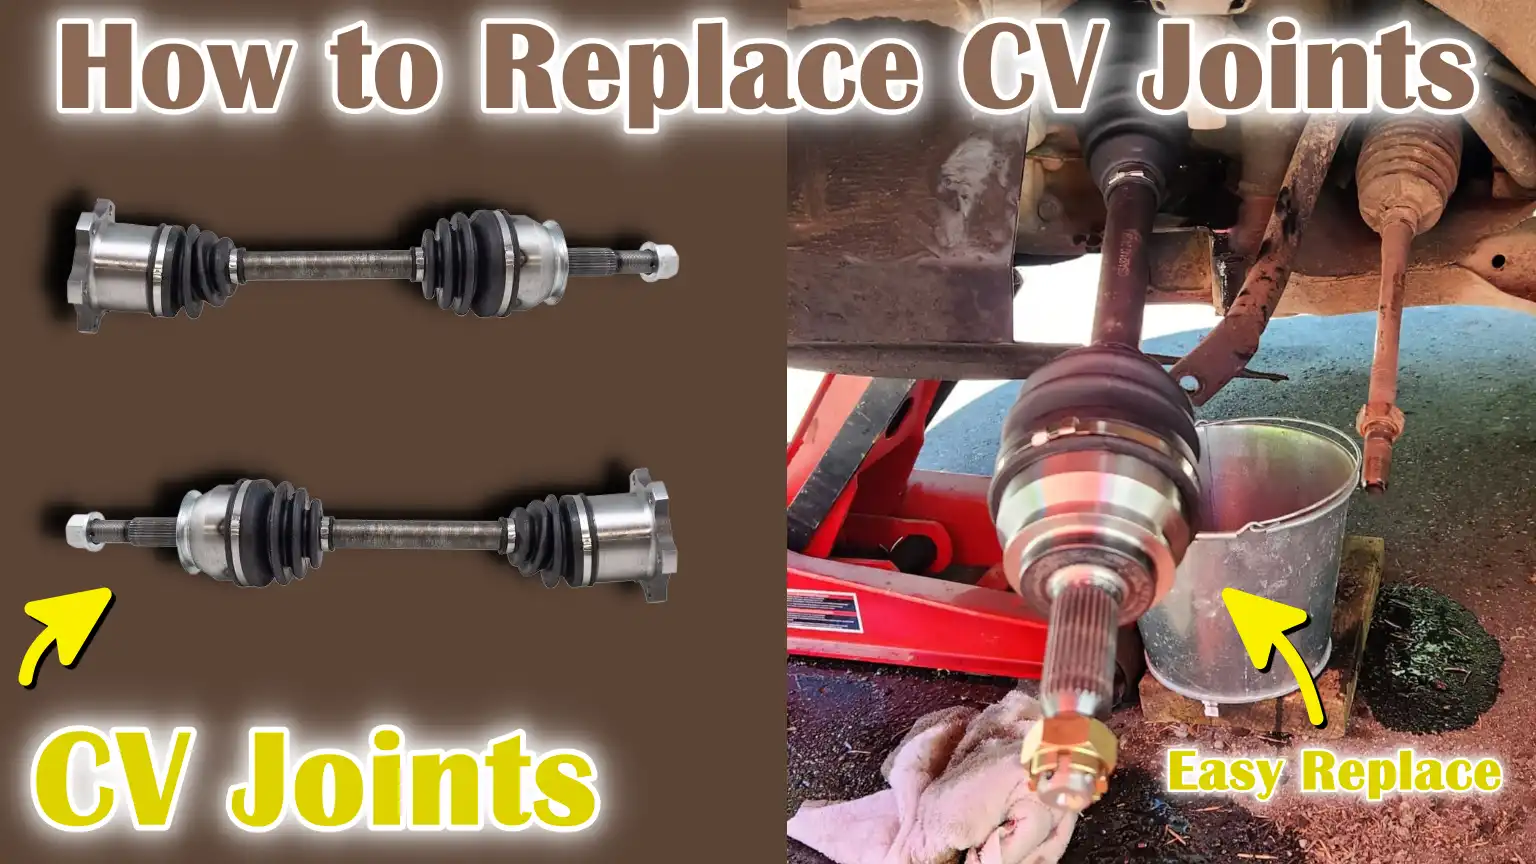
But with this guide you’ll know How to Replace CV Joints, as you’ll understand how actually CV joints work, also will be able to recognize early sign of wear as well.
What is a CV Joint and How Does It Actually Works?
A constant velocity (CV) joint is a crucial part of a modern vehicle’s drivetrain, specially in front-wheel drive and all-wheel drive systems.
Its primary purpose is to smoothly transmit power from the transmission to the wheels, even when the wheels are turning or moving up and down with the suspension.
This allows the vehicle to maintain consistent speed and stable power delivery without any jerks or loss of motion.
The CV joint’s ability to accommodate varying angles and maintain constant rotation is what makes driving smooth, controlled and efficient, particularly when turning corners or driving on uneven surfaces.
Without this component, the wheels would not be able to rotate independently while receiving power from the engine.
1. The Purpose of CV Joints in Front-Wheel and All-Wheel-Drive Vehicles
In front-wheel-drive vehicles, CV joints are essential because they allow the front wheels to simultaneously propel and steer the car.
Each front axle has two CV joints – one connected to the transmission and the other to the wheel hub.
The CV joint ensures that power from the engine is delivered evenly to the wheels, regardless of their position.
In all-wheel-drive vehicles, CV joints are used on both the front and rear axles, delivering power to all four wheels.
This ensures better traction and handling, specially on slippery or rough roads.
Without CV joints, the drivetrain would struggle to maintain power delivery when the suspension moves or the wheels turn, leading to vibrations, power loss and even mechanical failure.
2. The Difference Between Inner and Outer CV Joints
There are two main types of CV joints in a vehicle: the inner CV joint and the outer CV joint.
The inner CV joint connects the drive shaft to the transmission or differential and is designed to accommodate changes in axle length as the suspension moves up and down.
It primarily helps the axle slide slightly in and out while maintaining a constant power flow.
The outer CV joint, on the other hand, connects the axle to the wheel hub and allows the wheel to turn freely left and right while still receiving power from the engine.
This outer joint is typically the first to fail, as it operates under more movement and stress, specially during turns.
Understanding the difference between these two helps in accurately diagnosing problems when you hear clicking or vibrating noises while driving.
3. How the CV Boot Protects the Joint and Why Damage Occurs
Each CV joint is covered by a flexible rubber or plastic boot called a CV boot.
This boot is filled with a special grease that lubricates the joint and prevents the metal parts from rubbing against each other.
The CV boot also acts as a protective barrier, keeping dirt, dust and moisture away from the joint.
However, over time, due to road debris, heat and age, the CV boot can crack, tear, or become loose.
Once the boot is compromised, the grease leaks out and dirt gets into the joint.
This causes the CV joint to wear out prematurely, often resulting in clicking noises, difficult steering and even complete axle failure if not addressed promptly.
Regularly inspecting and replacing a torn CV boot can prevent costly CV joint replacements and significantly extend the lifespan of the drivetrain.
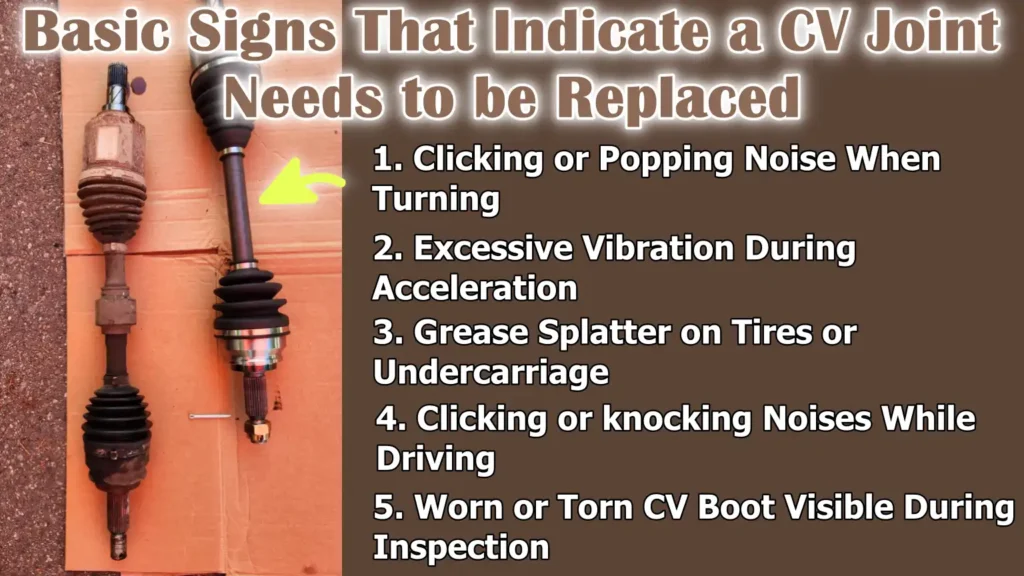
Basic Signs That Indicate a CV Joint Needs to be Replaced
Recognizing the early warning signs of a failing or damaged CV joint can save you from costly repairs and potential safety issues on the road.
CV joints play a crucial role in smoothly transferring power to the wheels and when they begin to fail, your car will often exhibit noticeable symptoms.
These signs are typically more pronounced when turning, accelerating, or driving at higher speeds.
Understanding what to look for helps you identify the problem before it causes further damage to the drivetrain or suspension system.
Below are the most common and significant symptoms that indicate a CV joint may need replacement.
1. Clicking or Popping Noise When Turning
One of the earliest and most easily identifiable signs of a failing CV joint is a clicking or popping noise when turning, specially during sharp or slow turns.
This noise occurs because the failing joint loses its ability to rotate smoothly, causing the internal metal components to move unevenly.
The clicking sound often becomes louder when accelerating or making tight turns in a parking lot.
This symptom usually points to a problem with the outer CV joint, which handles most of the movement during steering.
If left unattended, the joint can eventually break, leading to a sudden loss of power to the wheel.
2. Excessive Vibration During Acceleration
When a CV joint wears out or fails, it can cause the axle shaft to rotate unevenly, resulting in noticeable vibrations while driving.
These vibrations are most pronounced during acceleration or at higher speeds.
Unlike regular tire imbalance vibrations, which are constant, vibrations caused by a failing CV joint often worsen as speed increases or more power is applied.
This happens because the bearings inside the joint no longer rotate smoothly, causing the axle to wobble.
If the vibration continues unchecked, it can affect surrounding components like the transmission or suspension, making repairs more difficult and expensive.
3. Grease Splatter on Tires or Undercarriage
If you notice dark or sticky grease splattered on your front wheels, wheel wells, or the underside of your car, it could be a sign of a leaking CV boot.
The grease inside the CV boot lubricates the joint and protects it from dirt.
When the boot cracks or tears, the rotating axle slings the grease out.
This visible grease is often the first physical clue of a CV joint problem.
Once the grease leaks out, the joint’s lubrication is compromised and dirt or moisture can get in, leading to accelerated wear.
Spotting grease splatter is an easy way to detect early damage to the CV joint or boot before it becomes an expensive replacement.
4. Clicking or knocking Noises While Driving
A repetitive clicking or knocking sound that increases with vehicle speed can also indicate a failing CV joint.
Unlike clicking noises heard while turning, the knocking sound can be heard even while driving straight.
This occurs when the bearings or cage inside the joint become excessively worn, causing uneven rotation.
The noise may be louder during acceleration or when shifting gears between drive and reverse.
If ignored, the CV joint can eventually seize or separate, rendering the car undrivable and creating a dangerous situation.
5. Worn or Torn CV Boot Visible During Inspection
During a visual inspection, a damaged or torn CV boot is a clear indication that the joint is at risk of failure.
The CV boot is made of flexible rubber or thermoplastic material and should remain sealed to protect the joint’s grease and internal components.
Over time, road heat, debris and age can cause the boot to dry out, crack, or become loose around the clamp.
Once the boot is compromised, contaminants such as water, dirt and small stones can enter the joint, causing the bearings to wear down and fail prematurely.
Regularly inspecting your CV boots during oil changes or tire rotations can help you detect early damage and prevent complete joint failure.
Tools
| Tool / Material | What It Does | Why You Need It |
|---|---|---|
| Jack and Jack Stands | The jack raises the car and the jack stands hold it securely in the air. | They give you safe and stable access under the vehicle while working on the CV joint. |
| Lug Wrench | A wrench designed for loosening and tightening wheel nuts. | You’ll need this to remove the wheel before you can access the axle and CV joint. |
| Socket Set and Breaker Bar | The socket set contains various socket sizes and the breaker bar provides extra strength for tightening bolts. | They help remove stubborn bolts, specially axle nuts, which are usually too tight. |
| Pry Bar | A long, strong metal bar used to apply leverage. | This allows you to gently pull the CV axle out of the transmission or differential. |
| Torque Wrench | A wrench that tightens bolts to a specific pressure level. | This ensures that bolts such as axle nuts are tightened correctly for safe driving. |
| CV Joint Kit or Replacement Axle | Kit includes new CV joint, boot, grease and clamps. Replacement axle includes complete shaft. | This is the main part you will install to replace the damaged CV joint. |
| Grease and Replacement Boot Clamps | Grease keeps the joint moving smoothly. Boot clamps seal the CV boot. | They prevent dirt from getting in and keep the joints lubricated to prevent wear. |
| Hammer and Punch (If Needed) | Hammers and punches help loosen or reposition parts without damaging them. | They are useful for removing old parts or securing new components when the fit is tight. |
| Safety Gear: Gloves and Safety Glasses | Protective gloves keep hands safe and clean. Glasses protect the eyes from dust and dirt. | They help prevent injuries from grease, metal parts and dust during repairs. |
How to Ensure Safety During This Process
Before replacing a CV joint, safety should always be the top priority.
Working under a vehicle is inherently risky and even a small mistake can lead to serious injury or costly damage.
Properly setting up your workspace and following basic safety steps helps prevent accidents and ensures the repair goes smoothly.
Many DIY mechanics overlook safety measures in their haste to finish the job quickly, but proper preparation and safety can make all the difference.
Below are the most important safety precautions to keep in mind before and during CV joint replacement.
1. Always Work on a Level Surface
When you lift your vehicle, it’s crucial that you work on a flat, solid and stable surface.
A level surface keeps the car balanced and reduces the risk of it rolling or shifting while you’re working underneath.
Avoid working on sloped driveways or soft ground, as jacks or jack stands can easily sink or tip over.
A garage floor or paved area is ideal as it provides a sturdy base for your tools and helps you stay organized.
Taking a few minutes to confirm the workspace is level can prevent the vehicle from slipping or falling, which is one of the most common causes of injury during car repairs.
2. Use Jack Stands—Never Rely Solely on the Jack
A hydraulic or scissor jack is only meant to lift the car, not to hold it.
Once the vehicle is lifted, it should be securely supported by jack stands placed at strong points on the frame or suspension.
Jack stands are designed to safely support the weight of the car for extended periods, while a jack can gradually lose pressure or fail without warning.
Always double-check that the stands are firmly in place before going under the vehicle.
You can also gently shake the car to ensure it is stable.
This step is one of the most important in any repair job and can prevent serious accidents or injuries.
3. Wear gloves when handling greasy parts
Replacing a CV joint involves dealing with a lot of grease, metal parts and sometimes sharp edges.
Wearing durable mechanic’s gloves not only keeps your hands clean but also protects them from cuts, burns and chemical irritation.
The grease used in CV joints is thick and can be difficult to remove from the skin, so wearing gloves makes the process much cleaner and safer.
They also improve grip, which is helpful when handling slippery parts or tightening bolts.
Good quality gloves provide comfort and confidence while working, allowing you to focus on the repair without worrying about getting injured or dirty.
4. Disconnect the vehicle’s battery if necessary
Before working near electrical or moving parts, it’s a good idea to disconnect the car’s battery.
This prevents accidental short circuits, sparks, or unintended activation of electronic systems while you’re working.
Some modern vehicles have sensors and electronic controls near the axle area and disconnecting the battery ensures these systems remain inactive.
It’s a simple step that provides an extra layer of safety, specially if you’re removing parts near wiring or metal contacts.
After completing the repair, reconnect the battery and check that all electrical systems are functioning normally.
How to Replace CV Joints – Easy Method
Replacing a CV joint may seem like a daunting task, but with careful attention and the right tools, it becomes manageable.
Each step serves a crucial purpose and following them in the correct sequence ensures the job is done safely and correctly.
The first part of the process involves preparing the vehicle, creating a stable work environment and gaining proper access to the CV joint area.
Proper preparation is the foundation of any successful repair, as it helps prevent accidents, damage to parts, or incomplete installation later on.
First You Have to Prepare the Vehicle for CV Joint Replacement
Preparing the vehicle is one of the most crucial stages in replacing a CV joint, as it ensures safety and accuracy throughout the entire repair process.
Taking the time to properly set up your workspace and stabilize your car minimizes the risk of accidents and damage to parts.
Each step in this stage builds a secure foundation before you begin removing heavy components like the axle or CV joint.
1. Park on a Level Surface and Engage the Parking Brake
To begin, park your car on a completely flat and solid surface, such as a garage floor or paved driveway.
A level surface keeps the vehicle balanced and prevents it from rolling or shifting after it’s lifted.
Avoid soft ground or uneven surfaces, as the jack and stands could sink or tip over, creating a dangerous situation.
Once parked, fully engage the parking brake to lock the wheels that remain on the ground.
This prevents any sudden movement while loosening bolts or lifting the car.
For added safety, place sturdy wheel chocks or heavy wooden blocks behind the rear tires to ensure the car remains securely in place during the repair.
2. Slightly Loosen the Wheel Lug Nuts Before Lifting
Before lifting the car, while the tires are still touching the ground, slightly loosen the wheel lug nuts.
This step is easier and safer because the wheel’s contact with the ground prevents it from spinning while you apply force.
Don’t remove the nuts completely yet—just turn them enough to loosen them.
Always use the correct size socket or lug wrench to avoid damaging the edges of the nuts.
Many people make the mistake of loosening the nuts after lifting the car, which can cause the wheel to spin or the car to slip off the jack.
3. Jack up the car and secure it with jack stands
After loosening the lug nuts, use a reliable floor jack to lift the car.
Consult your vehicle’s owner’s manual to locate the correct jacking points—these are reinforced areas designed to safely support the weight.
Once the car is lifted to a comfortable height, carefully place jack stands under the frame or designated support points on both sides.
Slowly lower the car onto the stands, ensuring they are stable and locked in place.
Never rely solely on the jack to support the car, as hydraulic jacks can lose pressure or slip without warning.
Gently shake the car to double-check its stability before working underneath it.
4. Remove the wheel
With the vehicle safely supported, completely remove the lug nuts and take off the wheel.
Place the wheel in a safe location where it won’t be scratched or damaged.
It’s a good idea to place the lug nuts in a small tray or container so they don’t roll away and get lost.
With the wheel removed, you now have easy access to the brake system, axle hub and CV joint area.
This open space allows you to clearly see the parts you’ll be working on and ensures that tools can reach all the necessary components without obstruction.
How to Remove the Axle Nut
One of the most challenging tasks when replacing a CV joint is removing the axle nut and it requires both strength and the right tools.
The axle nut connects the drive axle to the wheel hub, securing the entire assembly.
Because this nut holds critical drivetrain components together, it is typically tightened to a very high torque – sometimes between 150 and 250 foot-pounds depending on the vehicle.
This high torque ensures the axle doesn’t loosen while driving, which could lead to loss of wheel control or damage to the hub bearings.
However, this same tightness makes it difficult to remove, so using the correct technique is essential to avoid damaging the nut or surrounding components.
1. Use a Breaker Bar or Impact Wrench to Remove the Axle Nut
The best way to remove the axle nut is to use a breaker bar or an impact wrench.
A breaker bar is a long, sturdy handle designed to give you increased leverage, making it easier to loosen very tight nuts.
When using a breaker bar, ensure the socket fits snugly onto the axle nut; a loose fit can round off the corners of the nut and make removal even more difficult.
Keep the socket straight on the nut and apply steady anti-clockwise pressure.
If the nut doesn’t budge, try gradually increasing the torque by using your body weight or a slight, controlled bounce on the bar.
An impact wrench, on the other hand, uses bursts of rotational force to quickly loosen stubborn fasteners.
This is specially useful if you have an air compressor or a cordless power tool designed for automotive work.
Impact wrenches save time and effort and reduce the risk of damaging the nut or your tools.
However, it’s still essential to wear gloves and safety glasses when using power tools, as small metal fragments or debris can sometimes fly off during the process.
2. Considerable torque may be required – use penetrating oil if necessary
If the axle nut is rusted or has been in place for many years, it may require considerable force to remove.
Rust can cause the nut to seize tightly onto the axle threads, specially in areas exposed to moisture or road salt.
To make removal easier, apply a generous amount of penetrating oil – such as WD-40 or PB Blaster – to the threads and surrounding area.
Allow the oil to soak in for at least ten to fifteen minutes before attempting to remove it again.
The oil helps to loosen the rust and reduce friction, making it easier to turn the nut with a breaker bar or impact wrench.
Sometimes, you may notice a small indentation or metal tab on the edge of the axle nut.
This is called a staked or crimped nut and it’s designed to lock the nut in place to prevent it from loosening during driving.
Before removing this type of nut, you’ll need to carefully pry the staked portion out of its groove using a small punch or chisel.
This will allow the nut to turn freely without damaging the axle threads.
Skipping this step can cause permanent damage to the threads, potentially requiring expensive repairs or even a complete axle replacement.
Once the nut begins to loosen, continue turning it slowly until it’s completely removed.
Set it aside in a clean and safe place as you will need it again during reassembly.
After removing the axle nut, the axle shaft is now separated from the hub, allowing you to proceed to the next step of disconnecting the suspension parts or removing the axle from the transmission.
How to Disconnect Suspension Components
After removing the axle nut, the next crucial step is to disconnect certain suspension components to allow the axle to be separated from the wheel hub.
The suspension system connects the wheel to the vehicle’s frame and facilitates movement, steering and shock absorption.
Because the CV joint and axle are intimately connected to this system, it needs to be partially disassembled to create enough space to safely remove the axle.
This step should be performed with care and patience, as the suspension contains many sensitive parts that can be damaged if not handled properly.
Working systematically will prevent unnecessary stress on connected components such as the control arm, steering knuckle, or brake assembly.
1. Separating the Axle from the Hub by Removing the Lower Ball Joint or Control Arm
To separate the axle from the wheel hub, depending on the vehicle’s design, you will typically need to either remove the lower ball joint or disconnect the lower control arm.
The ball joint acts as a pivot point that allows the wheel to move up, down and side to side while remaining in contact with the road.
It connects the steering knuckle to the control arm and when loosened, it allows the knuckle to pivot outward, creating space for axle removal.
To begin, locate the ball joint where it attaches to the bottom of the steering knuckle.
You may see a castellated nut secured with a cotter pin.
Carefully remove the cotter pin using pliers and then loosen the castellated nut with the correct size wrench or socket.
Do not completely remove the nut until you are ready to separate the joint.
Once the nut is loosened, use a ball joint separator tool or a pry bar to gently separate the joint.
If the joint is stuck, lightly tapping the edge of the knuckle with a hammer may help loosen it, but do not strike the threaded portion directly as this can damage the stud.
On some vehicles, it may be easier to remove the bolts holding the lower control arm instead of disconnecting the ball joint.
This allows the suspension to drop slightly, providing enough clearance to remove the axle from the hub.
Always support the suspension with a jack or stand while doing this to prevent it from suddenly dropping, which could put stress on other parts.
Once the ball joint or control arm is disconnected, the steering knuckle can swing freely outward, creating the necessary space to remove the axle from the hub assembly.
2. Be careful not to damage the ABS sensor wires or brake lines
When working around the suspension, it is crucial to pay close attention to nearby components such as the ABS sensor wires and brake lines.
These are delicate and often run close to the wheel hub and axle.
The ABS sensor wire monitors wheel speed for the anti-lock braking system and even a small cut or stretch can trigger the ABS light or cause a system malfunction.
Brake lines, which carry hydraulic fluid to the brakes, should also be handled gently to prevent kinking or breaking, as any damage can lead to fluid leaks and brake failure.
Before moving the steering knuckle or axle, carefully observe the routing of the ABS wire and brake line.
If possible, unclip them from their brackets to avoid putting tension on them while working.
Do not leave the brake caliper hanging from the hose—if the brake assembly needs to be moved, support it with a wire hanger or rope.
Working slowly and paying attention to these small parts will not only ensure your vehicle’s safety systems function correctly but will also prevent costly repairs down the road.
Once all these components are safely disconnected or removed, the axle is now separated from the hub assembly and ready to be removed from the transmission or differential in the next step.
How to Remove the CV Axle
Removing the CV axle is one of the most crucial steps in the replacement process because it connects the wheel hub to the transmission or differential and transmits power to the wheels.
This step requires careful handling, as incorrect force or technique can damage the transmission seal or internal gears.
The CV axle is designed to fit snugly inside the transmission or differential using splines and a retaining clip that holds it securely in place while the vehicle is in motion.
Over time, dirt, rust and grease buildup can cause the axle to seize, so patience and precision are essential when removing it.
Working too quickly or applying excessive force can easily damage delicate components, specially the seals that prevent transmission fluid leaks.
1. Gently Separate the Axle from the Transmission or Differential
Once the suspension components and hub are disconnected, the CV axle must be separated from the transmission or differential.
First, locate the inner end of the axle where it enters the transmission housing.
This area is typically secured by a snap ring or retaining clip that holds the axle shaft in place.
To remove it, take a sturdy pry bar or a large flat-head screwdriver and carefully insert it between the transmission casing and the inner CV joint housing.
Apply gentle, even pressure to pry the axle out.
Sometimes, a quick, sharp tap is more effective than applying constant force, as it helps dislodge the retaining clip from its groove.
It’s crucial to ensure the pry bar is positioned correctly on a solid part of the joint housing rather than on the thin edges or seals.
Avoid inserting the tool too far or prying at an angle, as this can crack the aluminum transmission casing or damage the joint.
If the axle seems stuck, try rotating it slightly or apply a small amount of penetrating oil to help loosen the connection.
In cases where the axle is severely seized, using a specialized CV axle puller or slide hammer tool may make removal safer and easier.
Always take your time – forcing the axle can cause expensive damage.
2. Be careful to avoid damaging the transmission seal
One of the most common mistakes when removing a CV axle is accidentally damaging the transmission seal.
The seal is located where the axle meets the transmission and prevents fluid leaks.
Even a small scratch or cut can cause a transmission fluid leak, leading to slipping gears, difficulty shifting, or even transmission failure if not addressed promptly.
When removing the axle, be careful that the tip of your tool never touches the rubber portion of the seal.
If any transmission fluid begins to drip during this process, carefully inspect the seal for any tears or damage.
After removing the axle, inspect the splines and retaining clip for any dirt or damage.
Clean off any old grease or debris before installing the new axle.
This will ensure a clean and secure fit, preventing future leaks or vibrations.
If the seal appears worn or damaged, it’s wise to replace it before installing the new CV axle.
Doing so will save time and prevent future transmission fluid issues.
Once the CV axle is safely removed and the area around the transmission is clean, you are ready to install the new axle, ensuring it fits snugly and is perfectly aligned with the splines and hub.
How to Replace or Rebuild the CV Joint
The fifth step in the CV joint replacement process focuses on either installing a completely new axle assembly or rebuilding the existing axle by replacing the damaged CV joint.
This decision depends on the condition of the axle and the extent of wear and tear or damage.
In most modern vehicles, replacing the entire CV axle is often easier and more reliable than rebuilding the joint, as new axles come pre-assembled, fully greased and balanced for smooth operation.
However, if the axle shaft is still in good condition, rebuilding only the CV joint can be a cost-effective option.
This process involves removing the old joint, thoroughly cleaning the shaft and installing a new joint and protective boot with fresh grease.
This is a more detailed process that requires care and cleanliness to ensure the smooth operation and longevity of the new joint.
1. Replacing the Entire Axle
If you are replacing the entire axle, this step can be quite straightforward.
Once the old axle is removed from the transmission and wheel hub, you can proceed directly to the installation process.
New axle assemblies are typically pre-lubricated and sealed with factory-fitted boots, minimizing the risk of contamination and saving considerable time.
This method ensures long-term reliability as both CV joints and the shaft are new, eliminating the possibility of future wear-related problems from old parts.
Replacing the entire axle is also recommended if the original axle shows signs of corrosion, excessive wear, or bent splines that could prevent proper alignment during reassembly.
2. Rebuilding the CV Joint
If you choose to rebuild the CV joint instead of replacing the entire axle, this section requires careful attention.
This process involves cleaning, installing and re-lubricating the components to ensure smooth operation.
It’s crucial that you work on a clean surface and use high-quality replacement parts to prevent any contamination from dust or dirt, which can cause premature failure of the joint.
a. Remove the Old Boot and Clean the Axle Shaft
First, cut and remove the old CV boot, which protects the joint from dirt and moisture.
Use a sharp utility knife or boot cutter to carefully remove the clamps and slide the boot away from the joint.
Once it’s open, you’ll see the old grease inside the joint.
Over time, this grease thickens, becomes dirty and is often contaminated with small metal particles from wear and tear.
Thoroughly clean the axle shaft and joint area using a solvent or brake cleaner, ensuring that no traces of the old grease remain.
Pay close attention to the splines and grooves on the shaft, as any remaining debris can prevent the new joint from seating properly.
After cleaning, thoroughly dry the parts with a lint-free cloth before proceeding to the next step.
b. Install the New CV Joint and Fill with CV Grease
After cleaning, slide the new CV joint onto the axle shaft, carefully aligning the splines so it fits correctly.
You may need to use a soft mallet to gently tap it into place, but avoid excessive force to prevent damage to the splines.
Once it’s in place, the most crucial step is applying the correct type and amount of CV grease.
This special grease is designed to handle high-pressure movement inside the joint and protect the bearings from friction and heat.
Use the entire packet of grease provided in the CV joint kit, applying it evenly inside the joint housing and around the bearings.
This ensures smooth movement and prevents premature wear.
Proper lubrication is one of the biggest factors determining how long a CV joint will last.
c. Slide on the new boot and secure it with the clamps
After greasing, place the new CV boot over the joint.
The boot acts as a protective cover, shielding the joint from water, road debris and dust that can cause rapid deterioration.
Slide the narrow end of the boot onto the axle shaft, ensuring the wider end covers the outer edge of the joint housing.
Once the boot is in place, use the provided metal clamps to tightly seal both ends.
These clamps prevent grease from escaping and dirt from entering.
Ensure the boot is not twisted or unevenly stretched, as this can cause it to tear prematurely when the suspension moves.
Rotating the axle slightly after securing the boot helps distribute the grease evenly inside.
3. Final inspection before installation
Once the joint is reassembled and the boot is secured, carefully inspect your work.
Ensure all clamps are tight, the boot is properly seated and there are no leaks or gaps.
The CV joint should rotate smoothly when you turn or flex it by hand, indicating that the bearings are properly aligned and lubricated.
Taking the time to check every detail at this stage can prevent future problems and ensures the CV joint will perform reliably under real driving conditions.
How to Reinstall the Axle
Once the CV joint or axle has been replaced or repaired, the next crucial step is to reinstall it into the vehicle.
This process requires precision, patience and attention to alignment, as the CV axle connects two main components – the transmission and the wheel hub – and must be perfectly fitted for the drivetrain to function correctly.
The goal is to insert the new or repaired axle into the transmission or differential until it securely locks into place, then reconnect all suspension parts and tighten everything to the correct torque specifications.
Reinstallation isn’t just about putting the parts back together – it’s about ensuring the entire system operates safely, efficiently and without any vibrations or leaks.
1. Insert the new or repaired axle into the transmission until it locks into place
To begin, carefully position the inner end of the axle near the transmission or differential opening.
Ensure the splines on the axle shaft are clean, free of dirt or grease clumps and perfectly aligned with the splines inside the transmission.
Gently push the axle in, rotating it slightly as you do so.
This helps the splines engage correctly and prevents damage to the internal gears.
You will typically hear or feel a small “click” when the retaining ring on the end of the axle firmly seats into its groove inside the transmission.
This click confirms that the axle is locked into place.
It’s crucial not to force the axle in with excessive pressure, as this can damage the transmission seal or cause spline misalignment.
If the axle doesn’t seat properly, pull it back slightly and try again, rotating it gently as you do so.
Once the axle locks into place, check that there is no movement when you pull on it.
If the axle pulls out easily, it is not fully seated and will need to be pushed further in until it clicks firmly into place.
A properly locked axle will have a small amount of in-and-out play due to normal tolerances, but it will not be loose.
After confirming proper seating, inspect the transmission area for leaks or misalignment.
A clean, tight fit ensures that no transmission fluid leaks and that the axle transmits power smoothly without any movement.
2. Reassemble the Hub and Suspension Components
Once the inner end of the axle is secure, the next step is to guide the outer end of the axle shaft back into the wheel hub.
Carefully align the splined end with the center hole of the hub and gently slide it in until it protrudes enough to allow the axle nut to be reinstalled later.
Sometimes, a slight adjustment to the steering knuckle or control arm may be necessary to get the axle into the correct position.
After inserting the axle into the hub, reconnect the lower ball joint, control arm, or other suspension components that were previously disconnected.
Be sure to clean the contact areas before tightening the bolts to ensure a solid connection.
Carefully reconnect the ABS sensor wires and brake lines, ensuring they are not kinked, stretched, or rubbing against moving parts.
Correct alignment at this stage helps prevent uneven tire wear, vibrations, or suspension noise later on.
3. Torque all bolts and nuts to the manufacturer’s specifications
One of the most critical steps in reassembly is torquing all bolts, nuts and fasteners to the correct torque values specified by the vehicle manufacturer.
This ensures that the axle, suspension and hub components are securely fastened without overtightening, which can strip threads or damage parts.
Using a torque wrench is essential as it provides precise control compared to using only hand tools.
Begin by tightening the axle nut that connects the CV axle to the hub.
This nut is typically torqued to a high specification—often between 150 and 200 foot-pounds, depending on the vehicle.
Correct torque prevents the wheel hub bearing from becoming loose or failing prematurely.
Next, tighten the control arm bolts, ball joint fasteners and any other hardware that was removed.
Be sure to follow the tightening sequence specified in the repair manual, if applicable.
Once all parts are properly torqued, rotate the hub by hand to ensure it spins freely and verify that nothing is binding or misaligned.
Double-check that all clips, brackets and sensors are securely attached in their original positions.
Correct torque and alignment at this stage are crucial to ensure the vehicle tracks straight, the suspension functions correctly and the CV axle operates smoothly without noise or vibration.
How to Reassemble and Test CV Joints Working
The final stage of replacing a CV joint or axle involves reassembling all the components and carefully testing to ensure everything is functioning correctly.
This step is just as crucial as the preceding mechanical work because it confirms that the repair has been performed correctly, safely and effectively.
Even if the installation appears perfect, this testing phase verifies that there are no hidden issues, such as misalignment, incorrect torque, or fluid leaks.
Taking the time now to check every detail helps prevent future problems and ensures the vehicle operates smoothly and safely once it’s back on the road.
1. Reinstall the Wheel and Torque the Lug Nuts
First, place the wheel back onto the hub.
Align the wheel holes with the lug studs and slide it into place.
Initially, hand-tighten the lug nuts to ensure they thread easily and prevent cross-threading, which can damage both the lug nuts and studs.
Once all the nuts are finger-tight, use a wrench to snug them down slightly, working in a crisscross or star pattern to ensure the wheel seats evenly against the hub surface.
This pattern prevents the wheel from being mounted unevenly, which can cause vibrations while driving.
Next, lower the car slightly so the tire touches the ground but the full weight of the vehicle is not resting on it.
This will prevent the wheel from spinning while torquing the lug nuts.
Using a calibrated torque wrench, tighten the nuts to the manufacturer’s specified torque specifications, which are typically found in the vehicle owner’s manual.
Correct torque ensures the wheel is securely fastened without overstressing the wheel studs.
Over-tightening can damage the threads or warp the brake rotor, while under-tightening can cause the wheel to loosen over time.
After properly torquing the nuts, lower the vehicle completely to the ground.
2. Lower the Car and Take a Test Drive
Once the vehicle is safely on the ground, remove the jack stands and slowly lower the car using the jack.
Before driving, quickly perform a visual inspection to confirm that all components have been reassembled, tools have been removed from underneath and the area around the wheels is clear.
Start the engine and let it idle for a minute.
Shift through the gears to ensure there are no unusual noises coming from the transmission or axle area.
Then, take the car for a short test drive on a smooth, open road.
During the drive, pay close attention to how the car feels.
Steering should be smooth, acceleration should be consistent and there should be no jerking or pulling to one side.
Listen carefully for any clicking, knocking, or grinding noises when turning or accelerating – these noises may indicate that the axle is not fully seated or a component is not properly tightened.
If the car feels stable and quiet, your repair was successful.
3. Check for Noises, Vibrations, or Grease Leaks
After the test drive, park the vehicle and carefully inspect the repaired area.
Look for any signs of grease or transmission fluid leaks around the CV joint boots and axle seals.
A small amount of residue may be present initially due to handling, but continuous dripping or splashing indicates a sealing problem.
Also, check that the boots are not twisted or compressed, as this can lead to premature wear or tearing over time.
After the test drive (once the components have cooled), gently touch the axle and suspension components to check for any excessive vibration or looseness.
Any unusual vibration, specially during acceleration, could indicate that the axle is not properly seated or that the wheel lugs need to be re-torqued.
Tighten them if necessary and re-check the torque values after driving a few miles to ensure everything is secure.
By the end of this step, the vehicle should be running smoothly, quietly and without any leaks or movement issues.
Carefully completing this process ensures that replacing the CV joint or axle has restored proper power transfer, ride comfort and overall driving safety.
Read More:
Common Mistakes You Should Avoid Always
While replacing a CV joint or axle may seem like a straightforward mechanical task, several small but crucial mistakes can lead to significant problems down the road.
Paying attention to these common errors ensures your repair lasts and your vehicle remains safe and smooth to drive.
Most of these mistakes stem from rushing the job, skipping essential steps, or failing to follow manufacturer specifications.
Understanding why each mistake occurs and how to avoid it will save you time, money and frustration.
1. Failure to Tighten the Axle Nut to the Correct Torque Specifications
One of the most common and serious mistakes when replacing a CV joint is failing to tighten the axle nut to the manufacturer’s specified torque.
The axle nut plays a critical role in securely holding the CV joint in place and maintaining the correct pressure on the wheel hub bearing.
If the nut is too loose, it can cause play in the axle, leading to vibrations, knocking noises, or even the wheel hub coming loose while driving.
Conversely, overtightening the nut can put excessive stress on the wheel bearing, resulting in premature wear, friction and overheating.
The precise torque settings are specified in each vehicle’s service manual, often measured in foot-pounds or Newton-meters.
The only reliable way to achieve this precise tension is by using a torque wrench.
Relying on guesswork or using a regular wrench can lead to incorrect tightening, compromising the vehicle’s safety and performance.
A properly torqued axle nut ensures smooth rotation, correct bearing preload and the longevity of the entire drivetrain assembly.
2. Failing to Replace a Damaged CV Boot During This Process
A CV boot is a flexible rubber or thermoplastic cover that protects the CV joint from dust, dirt and moisture and seals the grease inside.
One of the biggest mistakes during CV axle work is neglecting a torn or damaged CV boot.
Even a small tear allows grease to escape and dirt to enter, causing the joint to wear prematurely and eventually fail.
Many people assume that because the joint has just been replaced or inspected, the boot will be fine.
However, if the boot shows any signs of cracking, hardening, or leakage, it should always be replaced.
Replacing the boot is far easier and less expensive than replacing the entire CV joint.
A new boot ensures that the fresh grease remains clean and the bearings are fully protected.
Regularly checking the CV boots after installation – specially after driving in harsh conditions such as mud, snow, or gravel – significantly extends the life of the CV joint.
3. Mixing Up the Left and Right CV Axles
Another common mistake, specially among novices or when repairs are rushed, is accidentally swapping the left and right CV axles.
While they may look similar, each axle is designed with slightly different lengths, spline counts, or joint angles to fit the specific side of the vehicle.
Installing the wrong axle can lead to misalignment, vibrations, or binding in the suspension and drivetrain.
To avoid this mistake, always label or note which axle came from which side before removal.
Compare the new axle to the old one before installation, paying close attention to the length, spline ends and joint design.
Even a small difference can affect how the axle seats in the transmission or hub.
Using the correct side-specific axle ensures proper fitment, smooth power transfer and even load distribution while driving.
4. Forgetting to top up transmission fluid if a leak occurs
When replacing a CV axle, specially in front-wheel-drive vehicles, it’s common for a small amount of transmission fluid to leak out when removing the old axle.
This fluid is essential for lubricating and cooling the gears inside the transmission.
Forgetting to check and refill this fluid can lead to serious damage, including rough shifting, slipping, or overheating.
After reinstalling the new axle, always check the transmission fluid level and top it up if necessary.
Use the correct type of fluid specified by the manufacturer – automatic transmission fluid (ATF) for automatic transmissions or gear oil for manual transmissions.
Ensure the level is checked with the vehicle parked on a level surface and, if required by the manufacturer’s procedure, with the engine running.
Even a slight deficiency in fluid can affect transmission performance and lead to premature wear and tear in the long run.
How Much Does It Cost To Replace a CV Joint?
The cost of replacing a CV joint depends on several factors, including the make and model of the vehicle, whether only one joint needs replacing or the entire axle and whether you perform the work yourself or hire a professional mechanic.
CV joints are critical components of the drivetrain and because they are constantly in motion and subjected to harsh road conditions, they are manufactured with high-quality materials and precision engineering.
This makes them somewhat expensive to replace, but it’s essential for maintaining your vehicle’s safety and performance.
Understanding the parts and labor costs helps car owners decide whether to repair or replace the joint themselves or rely on a professional repair service.
1. DIY Cost vs Professional Repair
Replacing a CV joint yourself can save you a significant amount of money, specially if you already have the necessary tools and some mechanical experience.
A do-it-yourself (DIY) repair typically only involves the cost of the parts, grease and perhaps a few new tools like a torque wrench or pry bar if you don’t already own them.
While DIY repairs eliminate labor costs, they require time, patience and a good understanding of how the drivetrain works.
Mistakes during installation, such as incorrect torque or damaged seals, can lead to leaks or premature failure, potentially costing even more to fix later.
On the other hand, professional repair ensures the job is done correctly and efficiently.
Experienced mechanics have the right tools, knowledge of vehicle-specific torque settings and the expertise to handle potential problems like seized axle nuts or damaged transmission seals.
The added cost covers their labor, expertise and often a warranty on both parts and workmanship, providing peace of mind.
The choice between DIY and professional service depends on your confidence, mechanical skills and willingness to dedicate the time to the project.
2. Typical Parts Cost – $50 to $300 per joint
The cost of CV joint parts depends on the type of vehicle, the brand of replacement parts and whether you are purchasing a single joint or a complete axle assembly.
For most passenger cars, a single outer CV joint typically costs between $50 and $150, while inner CV joints may be slightly more expensive due to their design and proximity to the transmission.
Many manufacturers and auto parts suppliers sell complete CV axle assemblies that come pre-assembled with both inner and outer joints, boots and grease for easier installation.
These assemblies typically range in price from $100 to $300, depending on quality and brand.
Premium or heavy-duty vehicles such as trucks, SUVs and all-wheel-drive models often require more robust and complex CV axles, which can drive parts costs up to $400 or more.
While cheaper aftermarket options are available, investing in high-quality components provides better durability and smoother performance, specially if the vehicle is frequently driven or operated in challenging conditions.
3. Estimated Labor Cost – $150 to $400
When having CV joints professionally replaced, labor costs are typically the largest portion of the total cost.
On average, labor costs range from $150 to $400 per axle, depending on the vehicle design and the complexity of the job.
Replacing a single CV axle in a front-wheel-drive car typically takes one and a half to three hours, while all-wheel-drive or rear-wheel-drive vehicles may take longer due to more complicated drivetrain layouts.
In some cases, shops may charge extra if the axle is difficult to remove due to rust, corrosion, or damage to surrounding components such as the suspension or hub.
Additionally, if transmission fluid leaks during the process, there may be a small extra charge to top it up or replace damaged seals.
Many professional garages offer warranties on their repairs, providing added value despite the higher cost.
How to Maintain & Extend the Life of Your CV Joints
As well as, according to the NTN: the common causes of CV joint degradation is because of grease loss from a damaged boot, contamination of the dirt and grease and work load as well, that’s why you should consider replacement of the boot early or fit a complete repair kit like: joint, clamps and grease it to prevent the fractures, wear and tear seen in the failed joints.[¹]
Properly maintaining your CV joints is the easiest and most effective way to avoid costly repairs and keep your vehicle running smoothly.
Constant velocity (CV) joints are designed to transfer power from the transmission to the wheels, while also maintaining flexibility and consistent speed even as the suspension moves up and down.
Because they operate under considerable stress and are located near the road surface, they are constantly exposed to dirt, moisture and debris.
Regular maintenance ensures the joints remain properly lubricated, free from contaminants and can function efficiently for thousands of miles.
Good maintenance habits can significantly extend their lifespan beyond the average 70,000 to 130,000 miles that CV joints typically last.
1. Regularly Inspect CV Boots for Cracks or Leaks
CV boots are rubber covers that protect the CV joints by sealing in the grease and keeping out dirt and moisture.
Over time, these boots can crack, dry out, or tear due to age, heat, or poor road conditions.
Once a boot is compromised, grease begins to leak out and dirt can quickly enter the joint, leading to friction, clicking noises, or complete joint failure.
Regularly inspecting the boots, specially at every oil change or tire rotation, helps catch problems early.
Look for any signs of grease splatter on the inside of the wheel or near the suspension, as this usually indicates a leaking boot.
Replacing a damaged boot immediately is far cheaper and easier than replacing the entire CV joint or axle.
2. Avoid driving with torn CV boots – get them repaired immediately
Driving with a torn or leaking CV boot is one of the most common causes of premature CV joint failure.
When the protective boot is compromised, the grease that lubricates the joint leaks out and road grime or water can get in.
Even driving for a short time in this condition can cause significant wear and tear on the internal parts.
The metal parts inside the joint begin to rub against each other without sufficient lubrication, leading to pitting, corrosion and eventual failure.
Once this happens, the joint can no longer rotate smoothly, potentially causing vibrations, steering problems, or even a loss of control of the vehicle.
Repairing or replacing a damaged boot as soon as it’s detected is a smart way to avoid the much greater expense and hassle of replacing the entire CV joint later on.
3. Keep your suspension components aligned and lubricated
Your suspension system plays a crucial role in the health of your CV joints.
Misalignment, worn shock absorbers, or damaged control arms can put excessive stress on the CV joints, forcing them to operate at sharper angles or under uneven loads.
This accelerates wear and tear and can cause the boots to tear or crack.
Ensuring your vehicle’s suspension and steering systems are properly aligned reduces this stress and helps maintain the correct geometry between the transmission and the wheels.
Regular lubrication of suspension joints, bushings and bearings also reduces vibration and mechanical strain on the CV joints.
A smooth and well-balanced suspension not only extends the life of your CV joints but also improves overall ride comfort, tire life and fuel efficiency.
Conclusion – How to Replace CV Joints
Basically, the CV joints are the silent connectors that truly keeps your car’s movement graceful, totally balance and efficient as well.
Plus, it’s true that CV joints play a crucial role in efficiently transferring power from the transmission to the wheels, while also providing flexibility during turns and suspension movement.
Neglecting their maintenance can lead to uneven tire wear, vibrations and even a sudden loss of drive power, compromising safety and potentially resulting in costly repairs.
Whether you’re replacing the entire axle or just repairing the joint, paying attention to details like correct torque settings, applying clean grease and properly installing the boot makes a significant difference in your vehicle’s long-term performance.
Understanding how a CV joint works helps drivers understand why regular inspections and timely repairs are so important.
Most CV joints are designed to last well over 100,000 miles with proper care, but exposure to dirt, moisture and harsh driving conditions can shorten their lifespan.
By following the correct steps, using high-quality replacement parts and taking necessary safety precautions, even a novice can successfully complete this repair with confidence.
For now, if you still have confusion related to this guide, then just let us know by commenting below this guide.
Frequently Asked Questions
Q1. What is a CV joint and why is it important?
Answer: A CV joint, which stands for Constant Velocity joint, is a crucial part of a vehicle’s drivetrain system. It helps transfer power smoothly from the transmission to the wheels, specially when the car is turning or driving on uneven surfaces. The CV joint maintains a constant wheel speed regardless of suspension movement or steering angle. This means your car can drive smoothly without jerks or vibrations, even on rough roads. If the CV joints are not functioning correctly, your car won’t be able to transfer power efficiently, leading to loss of control, noise and reduced performance.
Q2. How long do CV joints typically last?
Answer: Most CV joints are designed to last between 70,000 and 130,000 miles, depending on driving habits and maintenance. Cars driven on smooth roads with regular maintenance often see their CV joints last well over 150,000 miles. However, if you frequently drive on rough roads, in wet or dusty conditions, or neglect torn CV boots, their lifespan can be significantly reduced. Regular inspections and prompt replacement of damaged boots can greatly extend their life.
Q3. What are the most common symptoms of a bad CV joint?
Answer: The most common symptom of a bad CV joint is a clicking or popping noise when turning, specially during sharp turns at low speeds. You might also experience vibrations during acceleration or notice grease splattered around the wheel or suspension area, indicating a torn boot. In more severe cases, you might hear a knocking sound while driving straight or feel the car pulling to one side. These symptoms should not be ignored, as a completely failed CV joint can cause the axle to disconnect, rendering the vehicle undrivable.
Q4. Can I drive with a bad CV joint?
Answer: Driving with a bad CV joint is not recommended. However, if the damage is minor, you may be able to drive for a short distance, but continuing to do so will only worsen the problem. As the joint deteriorates, it will lose lubrication and begin to wear internally, eventually leading to failure. A broken CV joint can completely cut off power to the wheels, leaving you stranded. For safety reasons, it’s best to have the CV joint inspected and replaced as soon as any symptoms appear.
Q5. How much does it cost to replace a CV joint?
Answer: The cost of replacing a CV joint depends on the type of vehicle and whether you are replacing just the joint or the entire axle assembly. On average, parts cost between $50 and $300 per joint. If you hire a professional mechanic, labor costs can range from $150 to $400 depending on the vehicle model and local labor rates. Doing it yourself can save you a significant amount of money, but it requires the right tools and mechanical knowledge.
Q6. What tools will I need to replace a CV joint at home?
Answer: To replace a CV joint yourself, you will need a jack and jack stands to lift and secure the car, a lug wrench, a socket set, a breaker bar and a torque wrench to tighten the bolts to the correct specifications. A pry bar is helpful for removing the axle from the transmission and you will also need grease, new boot clamps and a replacement CV joint kit or axle. Safety gear such as gloves and safety glasses are also essential to protect yourself during the process.
Q7. Why do CV joints fail?
Answer: Most CV joint failures begin with a damaged CV boot. When the rubber boot tears or cracks, grease leaks out and dirt or water enters the joint. Without adequate lubrication, the metal parts rub against each other, leading to wear and corrosion. Other causes include poor driving conditions, frequent off-roading and carrying heavy loads that put stress on the suspension system. Maintaining the boots and inspecting them regularly helps prevent premature failure.
Q8. Is it better to replace just the CV joint or the entire axle?
Answer: In many cases, replacing the entire axle (also called a half-shaft) is more practical and cost-effective than replacing just the CV joint. Modern vehicles often have axles sold as complete units with both CV joints already installed. Replacing the entire assembly ensures that both joints and the shaft are in good condition, reducing the risk of future problems. However, if the axle itself is in good condition and only one joint is faulty, replacing only the joint can save money.
Q9. How can I prevent CV joint failure?
Answer: Preventing CV joint failure primarily involves maintaining the CV boots. Inspect them regularly for cracks, leaks, or grease buildup. Avoid driving through deep water, mud, or areas with heavy debris that can damage the boots. Keep your suspension components properly aligned and replace worn parts promptly, as misalignment or excessive movement can stress the CV joints. Cleaning the undercarriage after driving on rough roads also helps prevent dirt buildup and damage to the boots.
References:
[1] POSSIBLE CV JOINT DEGRADATION
https://www.ntn-snr.com/sites/default/files/2022-03/DOC_RA_FAILURE_CVJ_P1_2021.GBa_web.pdf

Guys, I’m a car audio enthusiast and customization expert and I love clear sound and clean installation. Plus, I have spent years helping people build their dream audio setups. And whenever I’m working on cars, I probably listen to music and thinks about the next big upgrade.