Written By: Don Dodi
Fact Checked By: Kristen Brown
Reviewed By: Diego Rosenberg
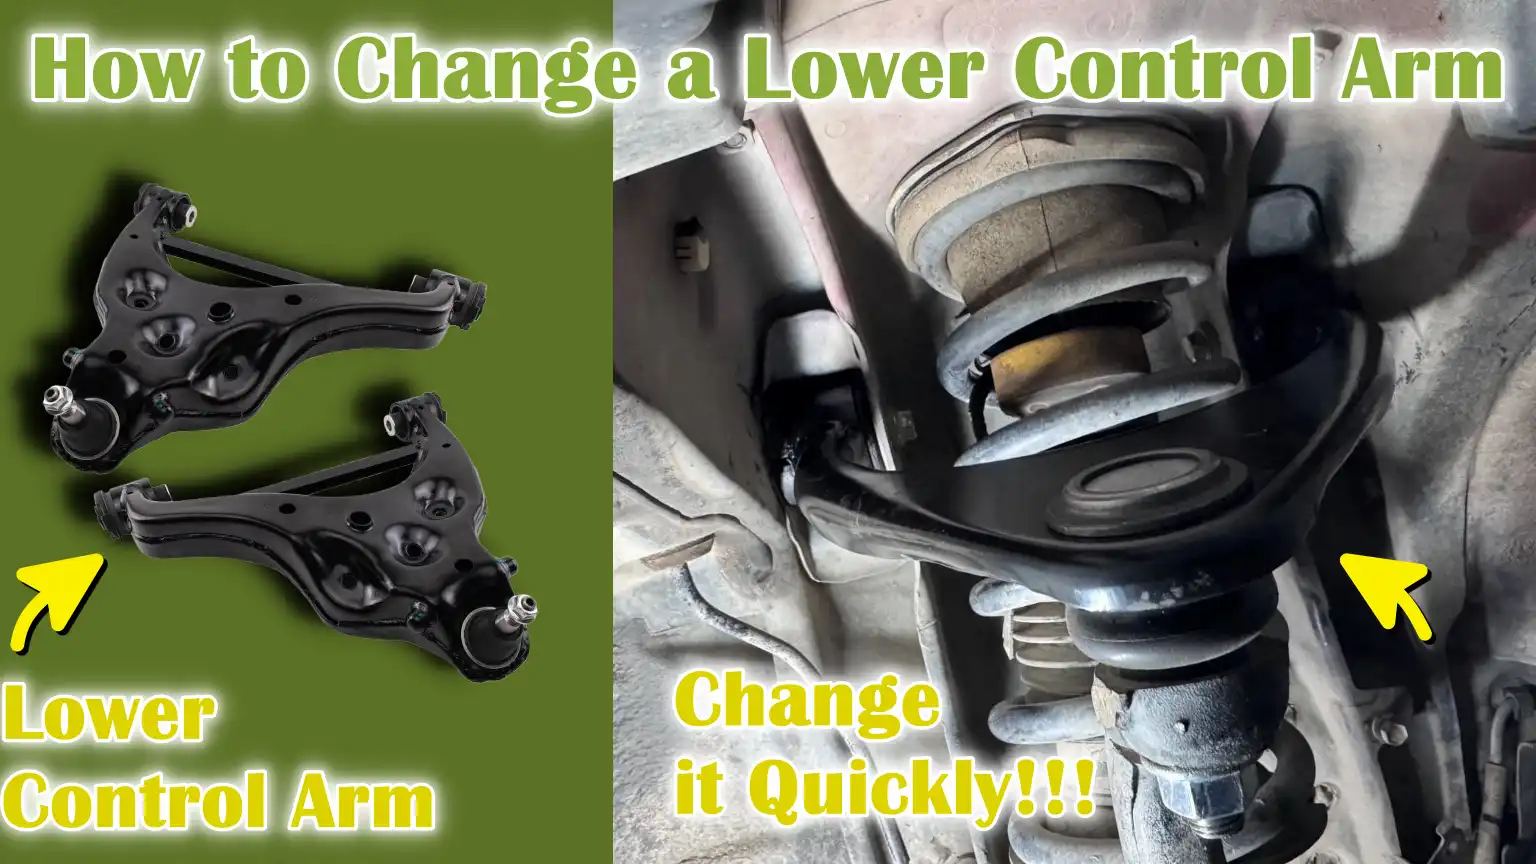
The Lower Control Arm is actually crucial link between your wheels and your car’s frame, as it literally absorbs every bump, turn and vibration on the road.
Actually, it connects the wheel hub and steering knuckle to the vehicle’s frame, which actually helps it to keep the tires firmly on the road while it also allows smooth up-and-down movement as well so that you can drive over bumps comfortably.
And whenever the control arm or its bushings wear out, then you can notice clunking noises, uneven tire wear, steering vibrations and leads to the poor handling as well, which basically means that it affects safety and comfort both.
Along with this, studies shows that worn control arm bushings actually increases tire wear by up to 20% and reduces braking stability which result to the uncontrollable sudden stops.
Plus, you should be aware of that most of the vehicles actually uses either a “Wishbone” or “A-Shaped” lower control arm which is made from the steel or aluminum materials, because it is meant to handle the thousands of a miles or road stress.
However, it is seen that over the time the Lower Control Arm gets exposure to the road salt, potholes and general wear that can cause metal fatigue or rubber bushing deterioration as well.
Because of all these safety and comfort factor you should know How to Change a Lower Control Arm so that it restores that smooth suspension movement and also protects tires, wheel alignment and other suspension parts from further damage as well.
Tools
| Tool or Material | Purpose / Description (Easy to Understand) |
|---|---|
| Jack | It is used to safely raise the car off the ground so you can access the suspension area. |
| Jack Stands | Support the car securely after raising it; never rely solely on the jack for safety. |
| Lug Wrench | Helps loosen and tighten wheel nuts when removing or reinstalling tires. |
| Socket Set and Ratchet | A set of sockets and handles used to loosen or tighten nuts and bolts of various sizes. |
| Breaker Bar | A long-handled tool that provides extra power for loosening tight or rusted bolts. |
| Torque Wrench | Used to tighten bolts to the exact pressure recommended by the car manufacturer. |
| Pry Bar | Helps gently move or position suspension parts during removal or installation. |
| Hammer or Ball Joint Separator | Used to separate the ball joint from the steering knuckle without damaging the parts. |
| Penetrating Oil | Helps To Easily Remove Old, Rusted Or Stuck Bolts. |
| Safety Gloves | Protect your hands from cuts, grease and sharp metal edges. |
| Safety Goggles | Protect your eyes from dirt, rust, or metal fragments while working. |
| New Lower Control Arm (OEM or Aftermarket) | The main part to be replaced; the suspension, connects the wheel hub to the vehicle frame for movement. |
| New Bolts or Bushings (if required) | Replacing worn parts with new hardware or rubber parts ensures a strong and stable installation. |
How to Do Preparation and Ensure Safety
1. Park the vehicle on a level, stable surface
Before beginning any work, always ensure your vehicle is parked on a level and solid surface, such as a concrete driveway or garage floor.
A level surface prevents the vehicle from rolling or shifting while you are working underneath it.
Working on uneven ground is unsafe as the jack or jack stands may become unstable and collapse.
It’s also a good idea to turn off the engine and remove the key from the ignition to prevent the vehicle from accidentally moving.
2. Engage the parking brake and block the rear wheels
Once the vehicle is in place, firmly engage the parking brake to prevent the rear wheels from moving.
For added safety, place wheel chocks or heavy wooden blocks behind the rear tires.
This creates a solid barrier that keeps the vehicle completely stable while you are lifting the front end.
Even a slight movement can be dangerous when working on suspension parts, so this step adds a strong layer of safety.
3. Loosen the lug nuts slightly before lifting the vehicle
Before lifting the vehicle, while the tires are still touching the ground, use a lug wrench to slightly loosen the lug nuts on the wheel.
This makes it easier to remove the wheel after the vehicle is lifted.
Trying to loosen them after the wheel is off the ground can cause the tire to spin, making the process difficult and risky.
Loosening them gently beforehand makes removal much easier later.
4. Safely lift the vehicle with a jack and secure it on jack stands
Next, position the jack under the correct lifting point specified by your vehicle manufacturer – this is usually indicated in the owner’s manual or marked on the underside of the vehicle.
Slowly raise the vehicle until the wheel is completely off the ground.
After lifting the vehicle, place jack stands under the solid frame points beneath the car and carefully lower the vehicle onto them.
Never rely solely on a hydraulic jack to support the vehicle; it could fail unexpectedly.
Before working underneath, give the vehicle a slight push to double-check that it is stable.
5. Remove the wheel to access the control arm
Once the vehicle is safely supported, completely remove the lug nuts and take off the wheel.
Place the wheel and nuts in a safe, clean place nearby so they don’t get lost.
Removing the wheel provides full access to the lower control arm, ball joint and suspension mounting points.
With clear visibility and working space, you can safely begin the replacement process.
How to Locate the Lower Control Arm
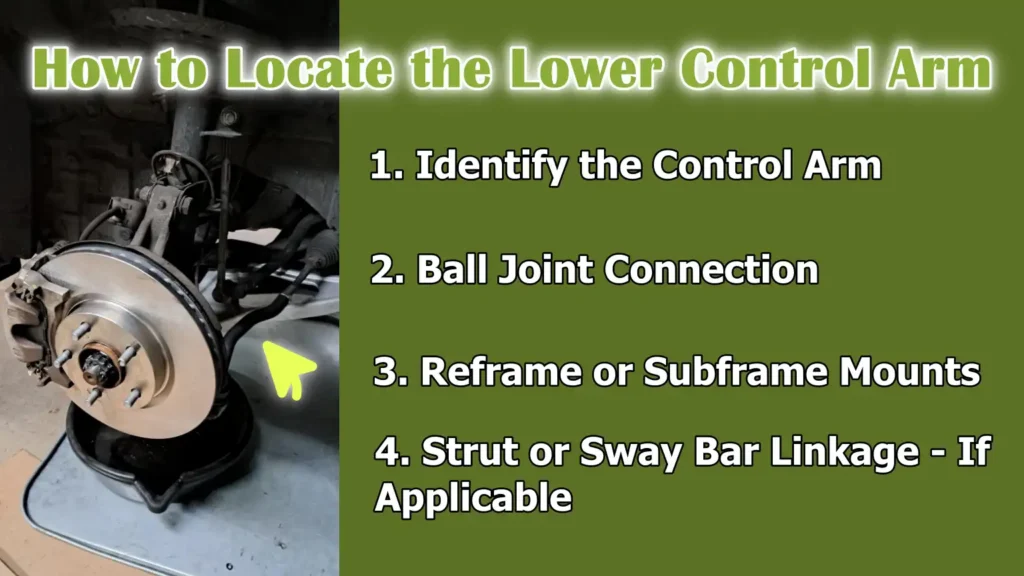
1. Identify the Control Arm
The lower control arm is located underneath your vehicle, forming part of the front drop system.
It connects the wheel hub and arm neck to the car’s main frame or subframe.
This component acts as a portable metal link that raises and lowers, keeping the vehicle properly aligned with the road.
Brands often use a triangular or A-shaped design, often called an “A-arm”.
You can usually see it after the wheel is installed – it’s located horizontally between the frame and the wheel assembly.
Some trolleys have one lower control arm on each side, while others have two if they use a double-wishbone drop.
Locating its location is the first step before unscrewing or removing any bolts, as it’s necessary to cleanly remove the bolts, depending on the style of installation.
2. Ball Joint Connection
One end of the lower control arm connects to a ball joint.
The ball joint acts like a primitive hinge that allows the wheel to move up and down, as well as to rotate left or right.
This is a component that provides the driver with vehicle support and smooth play.
The ball joint is located at the standard time, a round, joint near the wheel hub.
Look for a notch above—this is the connection that connects the arm to the steering system.
Over time, the ball joint can wear out, causing a rattle or creaking sound, so check this part for wear during the control arm’s operation.
3. Reframe or Subframe Mounts
The other end of the lower control arm is rigidly fixed to the vehicle’s frame or subframe.
These mounting points hold the control arm in place and provide support for vertical pivot bases to withstand shocks and road pressure.
Each mount has a rubber bushing that reduces vibration and minimizes metal-to-metal contact.
These bushings are called rubber because they absorb shock and create quiet, smooth drop operation.
To locate these mounts, look for the large bolts that go directly from the control arm to the frame.
If these bushings appear to be cracked, worn, or detached, it’s often best to replace them along with the control arm for a better long-term installation.
4. Strut or Sway Bar Linkage – If Applicable
In some cases, the bottom control arm also breaks from another drop component, such as the sway bar or strut assembly.
The sway bar link helps control body roll during turns, while the strut connection helps stabilize vertical lift.
These connections are typically found near the outer parts of the control arm and can be criticized by small rods or grit attached to the bolts or bushings.
If your passenger vehicle has these attachments, first note their correct locations so you can install them in the correct alignment later.
Marking all these points ensures that when you start the item up, each part will fit back securely and work safely.
How to Remove the Old Lower Control Arm
1. Apply penetrating oil to all bolts and allow it to soak in
Before beginning the removal process, it’s crucial to prepare the bolts and nuts that hold the control arm in place.
Over time, these bolts can become seized due to rust, dirt and road grime.
Spraying a good quality penetrating oil on every bolt, nut and joint connected to the control arm will loosen the rust and make them easier to remove later.
It’s best to let the oil soak in for at least ten to fifteen minutes, or even longer, specially if the bolts are heavily rusted.
This small step can save you a lot of effort and prevent the bolts from breaking or stripping during removal.
Using penetrating oil is particularly beneficial for older vehicles that have been exposed to moisture, salt, or harsh road conditions.
2. Disconnect the sway bar link – if it’s attached to the control arm
In some vehicles, the sway bar link is directly attached to the lower control arm.
The sway bar helps control body roll during turns and its link keeps the suspension balanced.
Before removing the control arm, you must carefully disconnect this link.
Use a wrench or socket to loosen the nut connecting it.
If the sway bar link starts to rotate while loosening, hold it in place with another wrench.
Once removed, place the link in a clean, safe place.
This step prevents any tension on the sway bar and protects its bushings or threads from damage while removing the control arm.
3. Remove the ball joint nut and separate it using a ball joint separator or pry bar
The ball joint is one of the main connection points between the control arm and the steering knuckle.
To disconnect it, first remove any cotter pin if present, then use a socket or wrench to loosen and remove the ball joint nut.
After removing the nut, you will need to separate the ball joint from the steering knuckle.
This can be done using a ball joint separator, also known as a pickle fork, or a sturdy pry bar.
If it’s stuck, a few light taps with a hammer may also help loosen it.
Be careful not to damage the ball joint’s rubber boot or any surrounding components.
This step requires patience, as ball joints are often tightly fitted.
Once separated, the control arm will be free from the wheel assembly.
4. Unbolt the control arm from the frame or subframe mount
After disconnecting the ball joint and sway bar link, the next step is to remove the bolts that attach the control arm to the frame or subframe.
These bolts typically pass through metal brackets or bushings that securely mount the control arm.
Use a socket wrench or breaker bar to remove them, as they are often very tightly torqued from the factory.
If a bolt is difficult to move, apply penetrating oil to it again and let it work for a few minutes.
While removing these bolts, it’s helpful to support the control arm with your hand or a small jack to prevent it from suddenly dropping.
Remembering which bolt goes where will make reinstallation easier later.
5. Carefully remove the old control arm from the vehicle
Once all the bolts and connections are removed, you can now remove the old lower control arm.
Carefully maneuver it out of the mounting area, keeping an eye on any surrounding wires, hoses, or parts.
It may require some wiggling or gentle prying to remove it, specially if the bushings are seized in place.
Once the control arm is out, inspect it carefully.
Check the old control arm for cracks, rust damage, or worn bushings and compare it to the new part to ensure the replacement is an exact match in size and shape.
This facilitates an easier installation process and ensures the new control arm will fit correctly.
Removing the old control arm safely and properly is one of the most crucial steps, as it prepares the suspension area for the secure and accurate installation of the new component.
How to Install the New Lower Control Arm
1. Position the New Control Arm Correctly
After removing the old control arm, carefully position the new one in the same location.
Before installation, ensure the new part matches the old one in shape, size and mounting points.
The lower control arm should fit precisely between the frame or subframe and the steering knuckle.
Gently slide it into place without forcing it, as bending or misaligning it can cause suspension problems later.
If necessary, use a small jack to slightly raise or lower the wheel hub to properly align the holes.
Correct positioning ensures the new control arm will function properly and provide smooth, controlled movement during suspension travel.
2. Insert Mounting Bolts Loosely for Alignment
Once the control arm is in place, insert all mounting bolts by hand and tighten them just enough to hold the arm in place.
Do not fully tighten the bolts yet, as the suspension components may require some flexibility for proper alignment.
Inserting the bolts loosely allows the bushings and joints to settle into their correct positions under the weight of the vehicle.
Tightening them too soon can twist the bushings and reduce their lifespan.
By leaving them slightly loose, you ensure everything aligns easily, avoids stressing the rubber components and allows the control arm to seat properly when the car is back on the ground.
3. Reconnect and Torque the Ball Joint to Manufacturer Specifications
After loosely tightening the mounting bolts, reconnect the ball joint to the steering knuckle.
Carefully insert the ball joint stud into the hole and hand-tighten the nut to avoid cross-threading.
Once it’s seated, tighten it with a wrench or socket to the torque specified in your vehicle’s service manual.
Torque specifications are crucial because under-tightening can cause the joint to loosen over time, while over-tightening can damage the threads or the ball joint housing.
Using a torque wrench ensures the correct tightness, guaranteeing safety and longevity.
If your ball joint has a cotter pin, insert a new pin through the castle nut and bend it securely to lock it in place.
4. Tighten the Frame or Subframe Mounting Bolts to the Correct Torque
Once the ball joint is secure, it’s time to tighten the frame or subframe bolts.
Use a torque wrench and follow the manufacturer’s specifications for each bolt.
These bolts are responsible for securely holding the control arm to the vehicle’s structure, so their tightness directly impacts suspension performance and alignment.
Always tighten these bolts when the suspension is at its normal ride height – meaning the weight of the car should be on the wheels or the control arm should be supported in its natural position.
Tightening the bolts while the suspension is hanging can twist the rubber bushings and cause premature wear or noise.
Tightening each bolt to the correct torque ensures a solid and long-lasting installation.
5. Reinstall the Sway Bar Link if Necessary
If your vehicle’s control arm is connected to a sway bar link, reinstall it after the main control arm bolts are tightened.
Carefully align the link with its mounting point and tighten the nut securely.
The sway bar link helps reduce body roll and improve stability during turns, so proper installation is essential.
Before reinstalling them, inspect the bushings in the links for cracks or wear, as worn sway bar links can cause rattling noises or uneven handling.
After everything is reconnected, carefully check all mounting points to ensure that no bolts are loose or misplaced.
Properly completing this step ensures that your suspension system functions correctly and the vehicle handles safely and smoothly on the road.
Read More:
How to Reassemble and Check It Finally
1. Reinstall the wheel and hand-tighten the lug nuts
Once the new lower control arm and its associated parts are securely in place, it’s time to reinstall the wheel.
Carefully lift the wheel onto the hub and align it with the bolt holes.
Hand-tighten the lug nuts onto the wheel studs to ensure they are straight and not cross-threaded.
Hand-tightening first prevents damage to the threads and ensures the wheel is seated evenly.
This step gives you better control over how the wheel seats before applying full pressure with tools.
If your vehicle has wheel locks, remember to reinstall the locking nut in its original position to maintain proper wheel security.
2. Lower the vehicle slowly and fully tighten the lug nuts in a crisscross pattern
Once the wheel is properly seated, slightly raise the vehicle using the jack and remove the jack stands.
Then, slowly lower the car until the tires are fully touching the ground.
Once the weight of the vehicle is on the wheels, you can safely fully tighten the lug nuts.
Always tighten them in a crisscross or star pattern, not in a circular motion.
This ensures the wheel is evenly seated on the hub, preventing vibrations, uneven pressure and potential warping of the brake rotor.
Using a torque wrench, tighten each lug nut to the manufacturer’s specified torque setting.
Correct torque is crucial because over-tightening can damage the threads or the wheel, while under-tightening can cause the wheel to loosen while driving.
3. Double-check all bolts and connections for correct torque
Before considering the job complete, take a few minutes to double-check every bolt and nut that was touched during the installation.
Inspect each mounting point of the control arm, including the frame bolts, ball joint nut and sway bar link bolts, to ensure they are tightened to the correct specifications.
This step adds an extra layer of safety and ensures that the suspension components are securely fastened.
It’s also a good idea to inspect surrounding components such as the tie rods, bushings and brake lines to confirm that nothing was damaged or compromised during the process.
Properly tightened bolts maintain alignment, stability and ride comfort and they prevent noise or looseness in the suspension system.
4. Perform a test drive to confirm smooth handling and the absence of noise
Once all parts are reassembled and inspected, take the vehicle for a short, cautious test drive.
First, drive slowly in a straight line to feel for any unusual movements or noises.
Gradually increase speed and take gentle turns to detect any issues such as knocking sounds, vibrations, or pulling to one side.
A properly installed lower control arm will provide smooth steering, improved handling and good ride comfort.
If you notice any noises or unusual behavior, stop immediately and recheck the bolts and connections.
This test drive not only verifies the success of the repair but also helps identify if any adjustments are needed.
These final checks ensure that your car’s suspension system is operating safely and efficiently before returning to normal driving conditions.
How to Align It and Perform After-Service Steps
1. The Importance of Professional Wheel Alignment After Replacing a Control Arm
After installing a new lower control arm, one of the most crucial final steps is getting a professional wheel alignment.
The control arm directly affects your wheel angles, including camber, caster and toe, which determine how your tires contact the road.
Even a slight deviation in these angles can lead to uneven tire wear, poor steering response and instability while driving.
A professional alignment ensures the wheels are positioned correctly according to the manufacturer’s specifications, resulting in longer tire life and safer handling.
Without an alignment, your steering wheel may not be centered and your car may pull to one side.
Modern alignment machines use lasers or digital sensors to measure and adjust wheel angles with great precision, ensuring your suspension geometry is returned to its correct setup after any control arm replacement.
2. Check for Other Suspension Wear – Bushings, Ball Joints & Tie Rods
Replacing the lower control arm is a good opportunity to inspect other surrounding suspension components for wear or damage.
As the control arm works in conjunction with parts like ball joints, tie rods, sway bar links and rubber bushings, any weakness in these areas can affect the performance of the entire suspension system.
Check the rubber bushings for cracks or deterioration, as worn bushings can cause vibrations, rattling noises, or a loose steering feel.
Inspect the tie rods for looseness, which can lead to poor steering alignment.
Check the ball joints to ensure they are tight and have no play.
Identifying and addressing these issues promptly saves money in the long run and prevents more serious damage to the suspension.
A healthy suspension system works together to keep your tires in proper contact with the road, resulting in better control and comfort.
3. Recheck Bolts After a Few Days of Driving
After replacing the control arm and driving for a few days, it’s a good idea to recheck all the bolts and fasteners.
As the suspension settles under normal driving conditions, the bushings and bolts may shift slightly, potentially causing some looseness.
Rechecking and tightening the bolts to their correct torque ensures everything remains secure and prevents unwanted movement or noise.
You can perform this check yourself with a torque wrench or have a technician do it during an alignment check.
Regular checks also confirm that the bushings are properly seated and there is no unusual wear.
This simple step adds an extra layer of safety and extends the life of your new control arm and other suspension parts, keeping your vehicle stable and comfortable on the road.
Basic Troubleshooting Tips
Plus, there a engineering study that shows that the control arm’s shape and material actually controls that how long it lasts, which is why it becomes really important to use a correct-sized part from a trusted maker: as a cheap, wrong-shaped parts can actually wear out faster and causes trouble as well.[¹]
1. Common Mistakes to Avoid
One of the most common mistakes when replacing a lower control arm is tightening the bolts while the suspension is hanging in the air.
When the vehicle is lifted and the wheels are not touching the ground, the control arm hangs at an unnatural angle.
Tightening the bolts in this position twists the rubber bushings, which can cause them to wear prematurely or lead to creaking and stiffness in the suspension.
The correct way to tighten the control arm bolts is with the suspension at its normal ride height – either by lowering the vehicle onto ramps or by supporting the control arm with a jack to simulate the car’s natural weight distribution.
Another common mistake is forgetting to torque the bolts to the manufacturer’s specifications.
Under-tightened bolts can loosen over time and cause rattling noises or misalignment, while over-tightening can strip the threads or break the bushings.
Using the correct torque wrench ensures a secure and balanced installation.
Failing to get a professional alignment after replacing the control arm is another serious mistake that leads to uneven tire wear and poor steering control.
Paying attention to these details guarantees long-term performance and safety.
2. What to Do If Bolts Are Seized or Rusted
Rusted or seized bolts are common, specially on older vehicles or those exposed to moisture, road salt and dirt.
If a bolt is stuck, avoid applying excessive force, as this can break the bolt or damage the mounting threads.
Instead, apply a penetrating oil and let it soak for at least ten to fifteen minutes.
The oil works by breaking down the rust and allowing the metal to expand slightly, making it easier to loosen.
If the bolt is still stuck, gently heat the surrounding area with a heat gun or torch to expand the metal and loosen the bolt, but be careful around flammable areas or rubber components.
For particularly stubborn bolts, use a breaker bar for added leverage or an impact wrench if available.
Always replace any bolts that are damaged or worn during removal, as reusing weakened hardware can lead to loose connections and unsafe driving conditions.
Prevent future corrosion by applying a light coat of anti-seize compound to the new bolts during installation.
3. Symptoms of Incorrect Installation
After installing a new lower control arm, it’s crucial to recognize any signs of improper fitment.
If you hear knocking, rattling, or popping noises while driving over bumps or turning, it may indicate that a bolt or ball joint is not properly tightened.
Vibrations in the steering wheel or uneven tire wear can also be signs of incorrect torque or poor alignment.
If the steering feels loose or the car pulls to one side, it may mean that the control arm bushings were not properly preloaded or the control arm is not seated correctly in its mounts.
Additionally, if the ride feels unusually rough or the suspension height appears uneven, the control arm or bushings may have been tightened while the suspension was not in its normal position.
Whenever you notice these symptoms, stop driving and recheck all connections, bolts and torque settings.
Addressing these issues promptly can prevent further damage to suspension components and ensure your vehicle remains safe, stable and comfortable to drive.
Conclusion – How to Change a Lower Control Arm
When you go for replacement of that worn out or damaged lower control arm then you’ll notice something great as it holds your wheels perfectly and it improves the car’s handling together.
But remember, this requires attention to detail, the right tools and a thorough understanding of how your entire suspension system works.
The lower control arm doesn’t just hold the wheel in place—it’s the pivot point that allows the wheel to move smoothly up and down, helps maintain alignment and directly impacts steering precision and ride comfort.
When this component fails, it can lead to uneven tire wear, vibrations and instability while driving, all signs that your vehicle’s handling and safety are compromised.
Properly performing this repair involves more than simply replacing the old parts with new ones.
It also includes inspecting surrounding suspension components such as bushings, ball joints and tie rods to ensure everything is working correctly together.
Using the correct torque specifications, tightening bolts at the proper suspension height and getting a professional wheel alignment afterward are crucial steps—essential for the longevity and performance of both the new control arm and the entire suspension system.
After installation, you’ll likely notice an immediate difference in how your vehicle drives.
A properly installed lower control arm restores stability in a straight line, improves cornering response and reduces noise or rattling caused by worn joints or bushings.
More importantly, it enhances your car’s overall safety and reliability, giving you confidence on every drive.
Doing this job correctly also helps prevent premature wear and tear on tires and other suspension parts, saving you money and maintenance headaches in the long run.
Now, if you still confused about something, then just let us know by commenting down below.
Frequently Asked Questions
Q1. What is a lower control arm and what does it do?
Answer: The lower control arm is a crucial part of your car’s front suspension system. It connects the wheel hub and steering knuckle to the vehicle’s frame, allowing the wheels to move up and down smoothly over bumps and uneven surfaces while driving. It also helps keep the tires properly aligned with the road, maintaining your car’s handling, comfort and stability. In simple terms, it helps keep your car stable and prevents the tires from wobbling or wearing unevenly. When the lower control arm or its bushings fail, you may experience vibrations in the steering wheel, knocking noises, or the car pulling to one side.
Q2. How do I know if my lower control arm is bad?
Answer: You can often tell if a lower control arm is bad by some common warning signs. You might hear knocking or rattling noises, specially over bumps or when turning. The steering may feel loose or less responsive and the car might drift or pull to one side when driving straight. Uneven tire wear is also a major indicator that the control arm bushings or joints have failed. In severe cases, you may also feel vibrations in the steering wheel. If you experience any of these symptoms, it’s important to have your suspension checked immediately, as driving with a faulty control arm can affect both safety and tire life.
Q3. How long does it take to replace a lower control arm?
Answer: On average, replacing a single lower control arm takes approximately one to two hours for most vehicles. However, the exact time depends on your car’s make and model, how rusted or seized the bolts are and whether other suspension parts need to be removed for access. For a professional mechanic with the right tools, this job is usually straightforward. Doing it yourself might take a little longer, specially if you’re doing this type of work for the first time. It’s always a good idea to allow some extra time so you can work carefully without rushing.
Q4. Is an alignment necessary after replacing the lower control arm?
Answer: Yes, a wheel alignment is absolutely necessary after replacing the lower control arm. The control arm directly affects the angle and position of the wheel, so even a slight misalignment during installation can throw off your alignment. Driving without proper alignment can lead to uneven tire wear, poor handling and reduced fuel efficiency. A professional alignment ensures your wheels are pointing in the correct direction and that your car will drive straight and smoothly again. It’s a simple but crucial step after any suspension repair.
Q5. Can I replace just one lower control arm, or should I replace both sides?
Answer: If only one lower control arm is damaged or worn, you can replace just that one. However, many experts recommend checking both sides because control arms typically wear at a similar rate. If one is already worn, the other is likely to wear out soon as well. Replacing both sides at the same time saves you time and ensures balanced handling and suspension performance. It also prevents uneven tire wear or steering problems that can result from having one new and one worn control arm.
Q6. What tools will I need to replace the lower control arm?
Answer: Replacing a lower control arm requires basic mechanic’s tools such as a jack and jack stands to safely lift the car, a socket set and ratchet to remove bolts, a breaker bar for tight fasteners and a torque wrench to tighten everything to the correct specifications. You may also need a pry bar, hammer, or ball joint separator to remove the old control arm. Penetrating oil is helpful if the bolts are rusted or seized. Wearing safety gloves and goggles for personal protection is also essential. These tools make the job easier and safer.
Q7. Is it safe to drive with a bad lower control arm?
Answer: Driving with a bad lower control arm is not safe as it can lead to serious handling problems. A worn or damaged control arm affects how your wheel maintains contact with the road, resulting in poor steering control, uneven tire wear and the risk of losing control in an emergency. If the ball joint or bushing completely fails, the wheel can go out of alignment or even separate from the suspension. For your safety and to prevent further damage, it’s best to have a damaged control arm repaired or replaced as soon as possible.
Q8. How much does it cost to replace a lower control arm?
Answer: The cost of replacing a lower control arm varies depending on the car model and whether you’re doing the work yourself or hiring a professional mechanic. On average, parts typically cost between $50 and $200 per arm, while labor can add another $100 to $300 per side. Luxury or high-performance vehicles may cost more due to specialized parts. Doing this work yourself can save you money on labor costs, but you should make sure you have the right tools and that you carefully follow safety procedures.
References:
[1] Design and Analysis of Lower Control ARM
https://www.ijirset.com/upload/2016/april/260_DESIGN_NEW.pdf

Guys, I’m a car audio enthusiast and customization expert and I love clear sound and clean installation. Plus, I have spent years helping people build their dream audio setups. And whenever I’m working on cars, I probably listen to music and thinks about the next big upgrade.