
Written By: Don Dodi
Fact Checked By: Kristen Brown
Reviewed By: Diego Rosenberg
So, whenever you press that clutch pedal, then it is the powerful hydraulic part which is known as Master Cylinder that has the responsibility and capability to execute this job in really smooth way.
Yes, its main job is to send the brake fluid pressure from the clutch pedal to the slave cylinder, which then actually engages and disengages the clutch properly.
Over the time, it can possibly happens that air can enter this system through worn seals, low fluid levels or during the part replacement, which is why that trapped air makes the clutch soft, spongy or even it can stop working altogether which is really concerning.
That’s the basic reason that you need to bleed the clutch master cylinder to remove that unwanted air so that the hydraulic pressure works smoothly again.
Not only this, according to the automotive service manuals and manufacturer guidelines: it is important to bleed in the careful way as even a small air bubble can prevent full clutch engagement which causes improper working.
So, most of the vehicles actually uses DOT 3 or DOT 4 brake fluid, which must be clean and moisture-free as even slight contamination affects clutch performance as well.
Now, in this guide you’ll know proper method about How Do You Bleed a Clutch Master Cylinder, by understanding this process you can save costly repair bills and that improves safety and extends the life of your clutch systems as well.
First, You Should Understand the Clutch Hydraulic System
1. How the Clutch Hydraulic System Works
The clutch hydraulic system is a crucial part of a vehicle’s transmission operation as it transmits the movement and pressure from your foot on the clutch pedal to the clutch assembly inside the transmission.
It’s a closed system that uses hydraulic fluid to generate pressure, which helps move components smoothly without direct mechanical linkages.
This system consists of three main parts – the clutch master cylinder, the slave cylinder and the connecting fluid lines.
When you press the clutch pedal, it pushes a small piston inside the master cylinder, which forces hydraulic fluid through the lines.
This fluid then travels to the slave cylinder, where another piston is pushed outward.
This outward movement disengages the clutch pressure plate, separating the engine from the transmission so you can easily change gears.
2. How Hydraulic Pressure Transfers Movement
Hydraulic pressure works on the principle that fluids are incompressible.
This means that the pressure applied at one end of the system (the clutch pedal) is instantly transferred through the fluid to the other end (the slave cylinder).
Because of this, even a slight push on the clutch pedal results in precise and smooth action in the transmission.
This design provides consistent performance and eliminates the need for direct mechanical connections, which are prone to wear and require more effort from the driver.
3. Why Trapped Air Reduces Hydraulic Efficiency
When air enters the clutch hydraulic system due to leaks, loose fittings, or low fluid levels, it creates a significant problem.
Unlike hydraulic fluid, air is compressible, meaning it absorbs some of the pressure instead of transferring it completely.
As a result, the clutch pedal feels soft, spongy, or unresponsive and the clutch doesn’t fully disengage.
This leads to grinding noises when shifting gears, difficulty shifting and premature clutch wear.
Therefore, bleeding the system to remove air is crucial whenever air is suspected.
Removing trapped air restores full pressure, improves pedal response and ensures the clutch continues to function correctly.
4. Maintaining a Healthy Hydraulic System
A healthy clutch hydraulic system should always have the correct type of brake fluid – typically DOT 3 or DOT 4 – filled to the proper level and there should be no leaks or air bubbles in the lines.
Regular inspections and fluid changes help prevent moisture buildup, corrosion and seal deterioration.
Understanding how this system works helps drivers recognize early warning signs, such as low fluid levels, leaks, or a soft pedal and take timely action.
This not only results in smoother gear shifting but also extends the life of the entire clutch system.
Tools
| Tool / Material | Purpose | Helpful Tips |
|---|---|---|
| Wrench Set | To loosen and tighten the bleeder valve. | A wrench helps unscrew the small bleeder screw on the slave cylinder, allowing air and old fluid to escape. |
| Bleeder Hose | Drains fluid safely from the bleeder valve into a container. | A transparent rubber or plastic hose that connects to the bleeder screw and shows air bubbles escaping from the system. |
| Catch Container | To collect old brake or clutch fluid. | A small clean bottle or jar to collect the fluid that comes out of the hose. |
| Brake Fluid (DOT 3 or DOT 4) | To refill the clutch master cylinder. | A special hydraulic fluid that transfers pressure to the clutch system. |
| Safety Gloves | To protect your hands from chemicals. | Gloves keep your hands safe from harmful brake fluid, which can cause skin irritation. |
| Safety Goggles | To protect your eyes from splashes. | Glasses prevent fluid from entering your eyes during blood circulation. |
| Clean Rags or Paper Towels | To wipe up spills and keep the area clean. | Helps clean around the reservoir and remove any spilled fluid. |
| Funnel | Pouring new brake fluid without leaks. | A small funnel helps you fill the reservoir neatly and safely. |
| Jack and Jack Stands | To raise and secure the vehicle. | It is used when you need to access the slave cylinder from under the car. |
| Shop Towels or Cloth | To cover and protect the surrounding areas. | Prevents brake fluid from dripping onto painted or sensitive surfaces. |
| Assistant (Optional) | To help depress the clutch pedal during manual bleeding. | A helper can make it easier to depress and release the clutch pedal while you open and close the bleeder screw. |
| Vacuum or Pressure Bleeder Tool (Optional) | Clutch bleeding without an assistant. | A special device that uses suction or pressure to automatically remove air and fluid. |
How to Maintain Safety During Bleeding Process of Clutch Master Cylinder
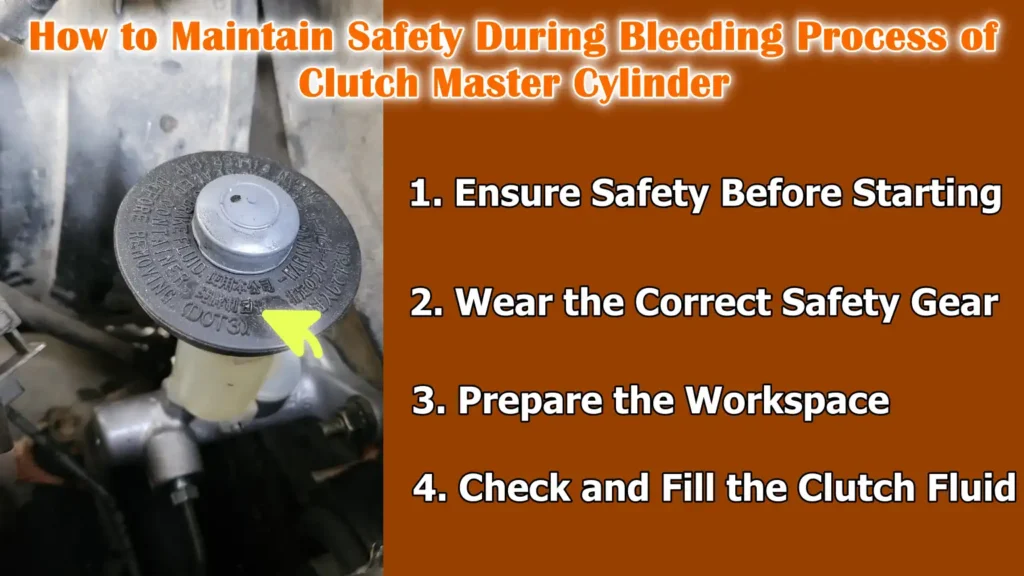
1. Ensure Safety Before Starting
Before you begin bleeding the clutch master cylinder, it’s crucial to ensure you are working safely.
The clutch system uses hydraulic fluid which can be harmful if it comes into contact with your skin or eyes and it can also damage painted surfaces.
Always start by parking your vehicle on a flat, level surface to prevent it from moving or rolling during the procedure.
Fully engage the parking brake to keep the vehicle stable.
Ensure the engine is off and has cooled down, as hot components near the transmission or engine can cause burns.
Never work on a car that is still running or hot, as even a small mistake near moving parts can cause serious injury.
2. Wear the Correct Safety Gear
Wearing the correct safety equipment protects you from injury and also prevents contaminants from entering the clutch system.
You should wear safety gloves made of nitrile or latex to protect your hands from brake fluid, as it can irritate the skin and damage some materials.
Safety goggles are equally important as sudden releases of fluid pressure can cause splashes.
Wearing old clothes or a protective apron is also a good idea as brake fluid can remove paint and stain clothing.
Having some clean rags or paper towels nearby will help you quickly wipe up any spills and keep your workspace clean.
3. Prepare the Workspace
A clean and organized workspace is essential for safe and efficient work.
Before you begin, ensure all your tools, including wrenches, bleeder hose and catch container, are easily accessible.
Avoid working on sloped or uneven ground as this can cause the vehicle to move unexpectedly.
If you need to lift the car to access the slave cylinder, use a proper jack and securely support it with jack stands—never rely solely on the jack.
Cover any painted or delicate surfaces around the engine bay with a clean cloth to protect them from brake fluid drips.
A well-prepared workspace makes the entire process easier and helps prevent accidents or messes.
4. Check and Fill the Clutch Fluid
Before beginning the bleeding procedure, check the clutch master cylinder reservoir under the hood.
It’s usually located near the brake fluid reservoir and consists of a clear or translucent container with “MIN” and “MAX” lines.
Ensure the fluid level is between these two marks.
If it’s low, add the correct type of brake fluid, typically DOT 3 or DOT 4 as specified in your vehicle’s owner’s manual.
Always use new, sealed brake fluid, as old or opened fluid can absorb moisture, reducing hydraulic performance and potentially causing corrosion within the system.
Never overfill the reservoir and take care to prevent dirt or air from entering while refilling.
Maintaining the correct fluid level ensures there will be enough hydraulic pressure to effectively expel air from the system when you begin bleeding.
How to Locate the Bleeder Valve
1. Understanding the Purpose of the Bleeder Valve
The bleeder valve is a small but crucial part of the clutch hydraulic system because it allows air and old fluid to be expelled when you bleed the system.
It is typically located on the clutch slave cylinder, which is the component that moves the clutch release fork when the clutch pedal is depressed.
The bleeder valve acts like a small screw with a hole in it – when loosened slightly, hydraulic fluid and trapped air are forced out under pressure.
Locating this valve and accessing it correctly is the first essential step in performing a proper clutch bleed.
2. Finding the Clutch Slave Cylinder
The clutch slave cylinder may be located inside or outside the transmission housing, depending on your vehicle’s design.
In most cars and light trucks, it is mounted externally on the transmission where the clutch fork enters the bell housing.
In some newer or compact vehicles, the slave cylinder is located inside the bell housing and acts directly on the clutch pressure plate.
In these cases, it may not be visible from the outside and bleeding is usually done through a small external bleeder line or port connected to the system.
To locate it, trace the metal or rubber hydraulic line that runs from the clutch master cylinder towards the transmission.
The end of this line will lead you to the slave cylinder, where the bleeder valve is located.
3. Safely Accessing the Bleeder Valve
Access to the bleeder valve depends on the design and location of the transmission in your vehicle.
In many models, you will need to jack up the front of the car and safely support it on jack stands to access the slave cylinder from underneath.
Some vehicles have enough room for access from above in the engine bay, specially if the slave cylinder is externally mounted.
Before going underneath, always ensure the vehicle is on a level surface and fully supported.
If the bleeder screw is difficult to access, use a wrench with a flexible extension or a line wrench for a more secure grip.
Taking the time to find the best angle for access will help prevent stripping or breaking the bleeder screw threads.
4. Cleaning Around the Bleeder Valve
Before you begin loosening the bleeder valve, it’s crucial to clean the surrounding area.
Over time, dirt, oil and debris can accumulate around the valve and slave cylinder.
If this debris enters the hydraulic system during bleeding, it can cause serious problems such as fluid contamination, seal wear, or blockages in the internal passages.
The best way to clean the area is to gently wipe it with a clean cloth and use a small brush or compressed air to remove any loose debris.
Some technicians also spray a small amount of brake cleaner to remove stubborn grease before starting the bleeding process.
This ensures that when the valve is opened, only clean fluid and air are expelled from the system, not dust or dirt that could later affect clutch performance.
5. The Importance of Proper Identification and Cleaning
Properly identifying the bleeder valve and keeping the area clean helps maintain a healthy and reliable clutch system.
A clean bleeder valve ensures a proper seal when tightened and prevents air from re-entering the hydraulic lines.
It also helps prevent corrosion or thread damage that can occur if dirt or rust accumulates around the screw.
Taking a few minutes to clean and inspect the valve before bleeding not only makes the job easier but also extends the life of the clutch hydraulic system and ensures smooth, safe clutch operation.
The Overview of Bleeding Methods
1. Introduction to Clutch Bleeding Methods
Bleeding the clutch system is a crucial process that removes trapped air and restores the correct hydraulic pressure necessary for smooth clutch operation.
There are several methods for bleeding the clutch system and each method works slightly differently depending on the tools you have available and the design of your vehicle.
The main goal of all bleeding methods is the same – to remove air from the clutch hydraulic lines and replace it with clean fluid.
Air in the system causes the clutch pedal to feel spongy and makes shifting gears difficult.
The four most common methods of clutch bleeding are the manual method, gravity method, pressure method and vacuum method.
Understanding how each method works will help you choose the best method for your situation, whether you’re working in your garage or using professional tools.
2. Manual Bleeding – Needs a Helper
Manual bleeding is the most traditional and commonly used method for removing air from the clutch system.
It typically requires two people – one to depress the clutch pedal and the other to open and close the bleeder valve.
When the helper depresses the pedal, pressure builds inside the master cylinder, pushing fluid and air towards the bleeder screw.
When the valve is opened, the air and old fluid are expelled through a hose into a container.
Once the valve is closed, the pedal is released, allowing fresh fluid to be drawn back into the master cylinder.
This process is repeated until no air bubbles are visible in the stream of fluid.
Manual bleeding is very effective and provides good control, but it is time-consuming and requires coordination between both people to prevent air from re-entering the system.
3. Gravity Bleeding
Gravity bleeding is the simplest method and doesn’t require any special tools or a second person.
It works by using the natural pull of gravity to slowly draw brake fluid from the master cylinder, through the lines and out of the bleeder valve.
Once the bleeder screw is slightly opened, the fluid will begin to drip out slowly, along with any trapped air.
This method is slow but very gentle on the hydraulic system and is often used after replacing small components or when only a small amount of air has entered the system.
Gravity bleeding requires patience and careful monitoring to ensure the master cylinder reservoir never runs dry.
If the fluid level drops too low, new air can enter and ruin the work done.
4. Pressure Bleeding
Pressure bleeding uses a special pressurized tool that forces brake fluid through the master cylinder and hydraulic lines.
This tool connects directly to the reservoir and applies constant pressure, forcing the air and fluid out through the bleeder valve at the other end.
This method is fast, consistent and ideal for professional workshops as it guarantees complete air removal without the need for an assistant.
The pressure applied by the tool is typically kept around 15 to 20 psi, which is sufficient to efficiently expel the fluid without damaging the seals.
Pressure bleeding is particularly useful for systems that are difficult to access or those with internal slave cylinders where air can easily become trapped.
However, it requires the correct equipment and caution to avoid over-pressurizing the system.
5. Vacuum Bleeding
Vacuum bleeding works by drawing the fluid out of the system rather than pushing it out.
A hand-operated or electric vacuum pump is connected to the bleeder valve, creating suction and drawing out air and old fluid.
This method is convenient because it can be done by one person and is very effective at removing small air pockets trapped in complex systems.
Vacuum bleeding also reduces the risk of introducing new air into the system because the system remains closed while the fluid is being extracted.
The main thing to watch out for is that some inexpensive vacuum tools may leak slightly around the hose connections, creating false air bubbles.
For best results, always use a tight seal and keep the master cylinder full throughout the entire process.
6. Choosing the Right Bleeding Method
The best bleeding method depends on the tools available, your level of experience and the design of the clutch system in your vehicle.
Manual bleeding is reliable and works for most cars, but it requires two people.
Gravity bleeding is the easiest for beginners, although it takes longer.
Pressure and vacuum bleeding are faster and more precise but require specialized tools that may not be readily available to everyone.
Regardless of the method used, the most important steps are to keep the master cylinder reservoir full at all times and ensure that no new air enters the lines.
Proper bleeding results in correct pedal feel, smooth gear shifting and overall clutch reliability.
How Do You Bleed a Clutch Master Cylinder – Manual Bleeding Method
1. Setting Up the Bleeding Equipment
Before beginning the manual bleeding process, ensure all necessary tools and materials are prepared and readily accessible near your workspace.
You will need a clean plastic hose, the correct wrench for the bleeder valve, a clean catch container and fresh brake fluid that matches your vehicle’s specifications, typically DOT 3 or DOT 4.
First, locate the clutch slave cylinder and its bleeder valve.
Carefully clean the area around the valve to prevent dirt or debris from entering the system when the valve is opened.
Then, securely attach one end of the clean hose to the bleeder valve and place the other end securely inside the catch container.
The transparent hose will allow you to clearly see air bubbles and fluid flow as you work, confirming that the system is fully bled.
2. Building Hydraulic Pressure with a Helper
In the manual bleeding method, it is advantageous to have a second person assist you.
Instruct your helper to sit in the driver’s seat and pump the clutch pedal several times to build pressure in the system.
On the final pump, your helper should hold the pedal firmly down.
This builds hydraulic pressure inside the master cylinder and forces fluid towards the slave cylinder.
It is crucial that the helper does not release the pedal until you have closed the bleeder valve again, as releasing it prematurely can allow air to re-enter the system.
Communication between both individuals is essential for a smooth and efficient process.
3. Opening the Bleeder Valve to Release Air and Fluid
Once the clutch pedal is held down, gently open the bleeder valve slightly using the wrench – typically about a quarter turn.
As soon as the valve is opened, air and old fluid will begin to flow through the hose into the catch container.
You will initially see bubbles in the fluid, indicating that air is being expelled from the hydraulic lines.
Allow the fluid to flow for a few seconds, then tightly close the valve before signaling your helper to release the pedal.
This prevents air from re-entering the system through the open valve.
It is crucial to only open the valve briefly each time and always close it before the pedal is released.
4. Repeating the Bleeding Cycle
Repeat this process several times – press the pedal, hold it down, open the valve to release air and fluid, close the valve and then release the pedal.
With each cycle, you should see fewer air bubbles in the clear hose and the stream of fluid should become steady and smooth.
The number of repetitions depends on how much air is trapped in the system, but it usually takes several cycles to achieve a clear, bubble-free flow.
Patience is key here, as rushing or skipping steps can leave small pockets of air in the lines, resulting in a soft or inconsistent clutch pedal later on.
5. Checking and Refilling the Master Cylinder Reservoir
During the bleeding process, it’s essential to regularly check the clutch master cylinder reservoir.
As fluid is expelled from the bleeder valve, the level in the reservoir will drop.
If it gets too low, new air will enter the system, undoing all your previous work.
Keep the fluid level between the “MIN” and “MAX” lines at all times by adding clean, fresh brake fluid whenever necessary.
Never reuse old or contaminated fluid, as it may contain moisture, dirt, or air bubbles that can damage the hydraulic system.
Once you are satisfied that all the air has been expelled and the clutch pedal feels firm, tighten the bleeder valve securely and remove the hose.
Finally, clean up any spilled fluid from the surrounding area, as brake fluid can damage paint and rubber parts.
6. Confirming a Properly Bled Clutch System
After completing the bleeding process, test the clutch pedal several times.
It should feel firm, consistent and smooth without any spongy feeling or delay in engagement.
Start the engine and test the gear shifting to ensure the clutch is properly disengaging and re-engaging.
If the pedal still feels soft or you are experiencing difficulty shifting gears, there may still be some air in the system and you should repeat the bleeding process.
A properly bled clutch master cylinder ensures smooth pedal operation, reliable gear shifting and long-term protection for your clutch components.
The Alternative Bleeding Techniques
1. Understanding the Need for Alternative Bleeding Methods
While the manual bleeding method is the most traditional and widely used technique, there are several other effective ways to remove air from a clutch hydraulic system.
These alternative techniques are particularly helpful when you are working alone, when access to the bleeder valve is difficult, or when a vehicle’s internal hydraulic design is more complex.
The main objective of these methods remains the same – to remove air from the system so that only clean, air-free fluid remains inside.
However, each method employs a slightly different approach to moving the fluid through the system.
The three most common alternatives are gravity bleeding, vacuum bleeding and pressure bleeding.
Each has its own advantages and disadvantages depending on the tools available, the type of vehicle and the user’s level of experience.
1. Gravity Bleeding
Gravity bleeding is the simplest and easiest method for beginners to bleed a clutch system because it relies entirely on the natural force of gravity to move the fluid.
To perform this, the bleeder valve on the slave cylinder is slightly opened and fluid from the master cylinder slowly drips down the line and out of the bleeder.
As the fluid flows, it also pushes air bubbles along with it, eventually clearing the entire system.
This method takes longer – sometimes thirty minutes or more – because the flow is slow and steady.
However, it is very gentle on the hydraulic components and minimizes the risk of putting excessive pressure on the seals or introducing new air.
Gravity bleeding works best when only a small amount of air is trapped in the system or after replacing a small component.
Most importantly, always remember to keep the master cylinder reservoir full during this process, as allowing it to run dry will introduce new air into the lines.
2. Vacuum Bleeding
Vacuum bleeding removes fluid and air from a hydraulic system using a simple scientific principle – creating negative pressure.
This technique is accomplished with the help of a vacuum pump, which can be either hand-operated or electrically powered.
The pump connects to the bleeder valve with a tight-fitting hose and creates suction that pulls the fluid from the line into a container.
As the vacuum pulls the fluid down, it also draws out any trapped air from the system.
The biggest advantage of vacuum bleeding is that it can be done by one person, making it very convenient for home mechanics.
It also provides quick results and is specially effective in systems with long or complex lines where air can get trapped in small pockets.
However, one potential drawback is that if the hose connection is not completely sealed, outside air can leak into the system and create false bubbles, making it difficult to determine if all the air has been removed.
To prevent this, it’s crucial to ensure all connections are tight and the bleeder valve area is clean and free of leaks.
3. Pressure Bleeding
Pressure bleeding works in the opposite way to vacuum bleeding.
Instead of pulling the fluid, this method uses a controlled source of pressurized fluid to push the fluid through the system.
A pressure bleeder tool connects directly to the master cylinder reservoir and introduces clean fluid into the system at a constant pressure – typically between 15 and 20 pounds per square inch.
As the fluid flows through the lines, it pushes out the air and old fluid through the bleeder valve on the slave cylinder.
This method is highly effective and commonly used by professional mechanics because it completely replaces the old fluid while removing every trace of air.
It’s specially useful for modern vehicles with internal slave cylinders or complex clutch designs.
The main advantage of pressure bleeding is its speed and thoroughness.
However, it requires a specialized tool and if the pressure is set too high, it can damage seals or fittings.
Therefore, using the correct pressure setting and following the manufacturer’s recommendations is crucial.
4. Comparing the Methods and Choosing the Best Approach
Each bleeding technique has its strengths and is best suited for different situations.
Gravity bleeding is the easiest, safest and most economical option for small jobs or beginners, but it is time-consuming.
Vacuum bleeding is ideal for a one-person operation and works quickly, although it requires careful sealing.
Pressure bleeding is the most thorough and professional method, capable of clearing even the most stubborn air pockets, but it requires the right tools and experience to avoid over-pressurization.
Regardless of the method used, the most important steps remain the same – use only clean brake fluid, keep the reservoir full and ensure no new air enters the lines.
By understanding these alternative techniques, you can choose the method that best suits your tools, skill level and vehicle design, ensuring a firm clutch pedal and reliable operation every time.
Read More:
How to Check for Correct Operation
1. Testing the Clutch Pedal Feel
After completing the bleeding process, it’s crucial to check that the clutch system is functioning correctly before driving the vehicle.
The first step is to test the feel of the clutch pedal under your foot.
When pressed, the pedal should feel firm, consistent and smooth, without any spongy or soft movement.
A soft or loose pedal usually indicates that there is still air trapped in the hydraulic system or that the fluid level is low.
Press and release the pedal several times to see if it builds pressure and maintains consistent resistance.
A properly bled clutch system will have a responsive pedal that returns quickly and easily to its original position, allowing the clutch to fully engage and disengage when shifting gears.
This test is a reliable way to confirm that hydraulic pressure has been properly restored and that there are no remaining air pockets affecting fluid movement.
2. Checking for Fluid Leaks
Once the pedal feels firm, the next essential step is to carefully inspect the clutch system for any signs of fluid leaks.
Start around the master cylinder, which is typically located on the firewall near the brake fluid reservoir and the slave cylinder, which is found near or on the transmission.
Carefully examine all connection points, fittings and rubber hoses for any wet spots or signs of leaking fluid.
Even a small leak can allow air to re-enter the system, eventually causing the pedal to feel soft again and reducing clutch performance.
If you find any wet areas or fluid residue, the affected component or seal should be replaced immediately before driving the vehicle.
Leaks not only reduce hydraulic pressure but can also damage paint or other engine components because brake fluid is highly corrosive.
A completely dry system indicates that the seals and fittings are in good condition and the bleeding process was performed correctly.
3. Confirming the Fluid Level and Securing the Reservoir Cap
The final step is to confirm that the fluid level in the clutch master cylinder reservoir is correct.
Carefully open the reservoir cap and check that the fluid reaches the “Full” or “Max” mark indicated on the side.
If the level is low, fill it with the correct type of brake fluid – typically DOT 3 or DOT 4 as specified in the vehicle’s manual.
Using the wrong type of fluid or mixing different types of fluid can damage the rubber seals and reduce system efficiency.
After topping up, clean the area around the reservoir opening to remove any spilled fluid and tightly close the cap to prevent moisture or dirt from entering.
The clutch hydraulic system is sensitive to contamination and keeping the reservoir properly sealed helps maintain long-term performance.
Once this step is complete, perform another quick pedal test to ensure the clutch engages smoothly.
If everything feels firm, consistent and leak-free, the bleeding process has been successfully completed and your clutch system is ready for normal driving.
Common Mistakes You Should Avoid
1. Allowing the Reservoir to Run Dry During Bleeding
One of the most common and serious mistakes when bleeding a clutch system is allowing the master cylinder reservoir to run dry.
The clutch hydraulic system relies on a continuous supply of fluid to build and maintain pressure and if the reservoir empties during the bleeding process, air will be drawn back into the lines.
This will not only undo all the work done so far, but it can also make it even more difficult to remove the air once it has re-entered the system.
To avoid this, it is crucial to regularly check and refill the fluid level during the bleeding process, specially after every few pedal cycles.
Keeping the reservoir filled to the “full” mark ensures that only clean, air-free fluid flows through the system.
This simple habit helps maintain consistent hydraulic pressure and prevents the need to repeat the entire bleeding procedure.
2. Using the Wrong Type of Brake Fluid
Another major mistake that can damage the clutch system is using the wrong type of brake fluid.
Most vehicles require either DOT 3 or DOT 4 fluid, which have specific boiling points and chemical compositions designed to handle the heat and pressure inside the hydraulic system.
Mixing different types of fluid or using substitutes like power steering fluid or engine oil can lead to seal damage, corrosion and system failure.
Both DOT 3 and DOT 4 fluids are glycol-based, but DOT 4 can handle higher temperatures, making it suitable for modern vehicles with heavier clutch loads.
Always consult your vehicle’s owner’s manual or the label on the reservoir cap to determine the correct specification.
Additionally, brake fluid absorbs moisture from the air over time, so always use a sealed, fresh container.
Contaminated fluid can cause corrosion in the master and slave cylinders, leading to poor clutch performance or internal leaks.
3. Over-tightening the Bleeder Valve
The bleeder valve is a small but delicate component that should be handled with care.
Over-tightening it after bleeding can damage its threads or seat, potentially causing fluid leaks later on.
It only needs to be tightened enough to properly seal the valve and prevent fluid from escaping under pressure.
Excessive force can even crack the slave cylinder housing, leading to costly repairs or replacement.
A good practice is to tighten the valve firmly but gently with a wrench, stopping as soon as resistance increases.
If you are unsure, consult your vehicle’s service manual for the correct torque specifications.
Keeping the valve clean and free from rust or debris also ensures that it can be easily loosened without damage for future maintenance.
4. Failure to Remove All Trapped Air
Trapped air inside the hydraulic system is one of the main reasons why the clutch pedal may feel spongy or unresponsive even after bleeding.
Unlike brake fluid, which transmits pressure directly, air is easily compressible.
This means that even a small amount of trapped air can cause inconsistencies in clutch engagement or make the pedal feel too easy to depress.
To avoid this problem, the bleeding procedure should be repeated until no air bubbles are visible in the fluid stream.
Gently tapping on the slave cylinder or hydraulic lines can also help dislodge any small bubbles trapped inside.
Keeping the bleeder hose submerged in fluid during bleeding is also crucial to prevent new air from entering the system.
Once all the air is removed, the clutch system should feel firm and reliable.
Taking the time to properly bleed the air from every part of the hydraulic line ensures smooth performance and prevents premature wear on clutch components.
5. Proper Care and Attention During Bleeding
Avoiding these common mistakes not only saves time and effort but also extends the lifespan of your clutch system.
Always work patiently, double-check every connection and use the correct materials and tools.
A clean, air-free hydraulic system facilitates precise clutch engagement, smooth gear shifting and safe driving.
Following the correct technique and paying careful attention during the bleeding process ensures your vehicle runs smoothly and reliably for many miles to come.
How to Maintain Clutch Master Cylinder
1. Regular Fluid Checks and Leak Inspection
Proper maintenance is crucial for ensuring the clutch hydraulic system operates smoothly and reliably over time.
The clutch system relies on clean brake fluid to transmit pressure between the master and slave cylinders, so regular fluid checks are one of the simplest yet most effective habits for maintaining its health.
It’s advisable to check the clutch fluid level at least once a month, specially if you frequently drive in heavy traffic or on hilly roads where the clutch is used extensively.
Always ensure the fluid is between the “Min” and “Max” marks on the reservoir and that its color is clear or light amber.
Dark or cloudy fluid may indicate contamination or moisture absorption.
While checking the level, also look for any signs of leaks around the master cylinder, slave cylinder and the fluid lines connecting them.
Even small leaks can gradually reduce pressure, leading to a soft or spongy clutch pedal.
Regular visual inspections can help detect problems early, before they lead to costly repairs or complete clutch failure.
2. Replacing Old or Contaminated Fluid
Brake fluid, which is also used in the clutch system, is hygroscopic – meaning it absorbs moisture from the air over time.
This property helps prevent freezing, but as it ages, the fluid’s boiling point also decreases.
When the boiling point becomes too low, the fluid can vaporize under heat and pressure, potentially causing clutch slippage or difficulty engaging gears.
For this reason, it’s recommended to completely flush and replace the clutch fluid every two to three years, or as specified in your vehicle’s maintenance schedule.
Regular fluid changes not only maintain proper hydraulic pressure but also prevent internal corrosion of the metal components inside the master and slave cylinders.
Always use the correct type of brake fluid—typically DOT 3 or DOT 4—and ensure the system is properly bled after refilling to remove any air bubbles.
Clean fluid helps ensure smooth pedal operation, consistent engagement and long-term reliability of the clutch system.
3. Recognizing Early Signs of Cylinder Failure
Detecting problems with the master or slave cylinder early can prevent sudden clutch failure while driving.
Common warning signs include a clutch pedal that feels spongy, sinks to the floor, or doesn’t return easily after being pressed.
You might also experience difficulty shifting gears, specially into first or reverse, or hear unusual noises when pressing the pedal.
In some cases, fluid may leak from the back of the master cylinder or around the slave cylinder area near the transmission.
Low fluid levels without any visible leaks can also indicate an internal seal failure, where fluid is leaking inside the cylinder instead of building pressure.
Ignoring these signs can lead to complete hydraulic function failure, preventing you from disengaging the clutch.
Regular inspections and timely repairs not only improve safety but also extend the life of other clutch components such as the release bearing and pressure plate.
4. Maintaining a Healthy Clutch System
Keeping your clutch hydraulic system in good condition requires regular inspections, fluid maintenance and timely replacement of worn parts.
By frequently checking the fluid level, changing it every few years and paying attention to early signs of leaks or weak pedal response, you can prevent most clutch problems before they become serious.
Proper maintenance leads to smoother gear shifting, extends the life of components and improves driving comfort.
Giving the clutch system the same attention as the brakes ensures reliable performance and maintains the overall reliability and safety of your vehicle.
The Troubleshooting After Bleeding
Not only this, AISIN shows that master cylinder must always have to be sealed, oil-filled environment so that the slave cylinder actually receives full pressure; and if there’s any leak or seal wear then it unfortunately lets air enter and that reduces clutch performance drastically that’s why you need to bleed the master cylinder, along with this you need to restore a seal and fluid-filled the path as well.[¹]
1. Identifying a Soft or Spongy Clutch Pedal
After bleeding the clutch system, the pedal should feel firm and respond easily when pressure is applied.
However, if the clutch pedal still feels soft, spongy, or doesn’t return to its normal height, it usually means that air, leaks, or internal wear are still affecting the hydraulic pressure.
A spongy pedal occurs when air bubbles are trapped somewhere inside the system because air compresses more easily than fluid, preventing the pedal from building proper pressure.
In some cases, the clutch may engage very close to the floor or fail to fully disengage the transmission, making gear changes difficult.
These symptoms should never be ignored, as they indicate that the hydraulic system is not functioning at full capacity and could fail while driving.
2. Checking for Leaking Seals in the Master or Slave Cylinder
Fluid leaks are one of the most common causes of poor clutch performance after bleeding.
The clutch hydraulic system operates under high pressure and any worn seals in the master or slave cylinder can allow fluid to escape or air to enter the system.
Check around the master cylinder, which is usually mounted near the firewall, for any moisture or streaks of fluid.
Also check the slave cylinder, typically located near the transmission bell housing, for wet spots or signs of leakage.
If the rubber seals are worn, cracked, or damaged, the system will not maintain pressure effectively, resulting in a weak clutch pedal or difficulty engaging gears.
A consistent drop in fluid level without any external leaks can also indicate an internal leak in one of the cylinders.
Replacing faulty components or rebuilding the cylinder with new seals is the only effective way to fully restore pressure and prevent further problems.
3. Checking for Blocked Fluid Lines or Faulty Connections
Sometimes, even after proper bleeding, the problem lies in the clutch fluid lines or fittings rather than the cylinder itself.
Over time, old fluid can thicken and create internal blockages in the narrow passages of the hydraulic lines.
Rust, debris, or deteriorated rubber from old hoses can also restrict fluid flow, preventing the system from building proper pressure.
This can cause the clutch to feel inconsistent or slow to respond.
It’s crucial to inspect the condition of the fluid lines, fittings and connectors for any signs of corrosion, cracks, or looseness.
Tightening loose connections and replacing damaged hoses can help restore consistent fluid flow.
When installing new parts, ensure all fittings are clean and properly sealed to prevent air or contaminants from entering the system.
4. Re-bleeding to Remove Remaining Air Bubbles
If the clutch pedal still feels soft after checking for leaks and blockages, there may be small air bubbles trapped inside the hydraulic lines.
These tiny bubbles often cling to the inner surfaces and don’t get expelled during the initial bleeding process.
Repeating the bleeding process, specially using a different method such as gravity or pressure bleeding, can help remove them completely.
When re-bleeding, always ensure the master cylinder reservoir remains full to prevent new air from entering.
Gently tapping the slave cylinder and lines with a wrench can also help dislodge stubborn bubbles.
Once all the air is removed, the pedal should feel firm and consistent again.
If the problem persists after several attempts, it may indicate more extensive wear or damage that requires inspection by a professional mechanic.
5. Ensuring a Fully Functional Clutch System
A properly bled clutch system should engage and disengage smoothly and the pedal feel should be firm and predictable.
If this is not the case, careful troubleshooting is necessary to identify the root cause.
Checking for leaks, cleaning fluid lines and thoroughly re-bleeding are essential steps to restore full hydraulic pressure.
By promptly identifying and addressing these issues, you can ensure your clutch system operates safely, prevent premature wear on transmission components and maintain consistent driving performance.
Regular maintenance and timely troubleshooting are key to keeping your vehicle’s hydraulic clutch system reliable and long-lasting.
Conclusion – How Do You Bleed a Clutch Master Cylinder
When you bleed that clutch then it eventually makes driving easier, as it protects the entire hydraulic system and also it increases components lifespan as well, plus it gives you complete control over every gear changes.
Basically, a properly bled clutch ensures that hydraulic pressure is transmitted correctly, allowing you to shift gears smoothly and silently.
Plus, this process removes trapped air, restores proper pedal feel and prevents premature wear on internal parts such as the master and slave cylinders.
It keeps the system free of air also reduces the risk of clutch failure under high temperatures or heavy loads, which is specially crucial for vehicles that frequently operate in stop-and-go traffic or on steep inclines.
Regular inspection and maintenance of the clutch hydraulic system help prevent costly repairs and unexpected breakdowns.
By regularly checking fluid levels, inspecting for leaks and replacing the brake fluid every few years, you maintain consistent hydraulic pressure and extend the lifespan of seals, hoses and cylinders.
Bleeding the clutch isn’t just about restoring pedal firmness—it’s about maintaining the precision and reliability of your vehicle’s drivetrain.
A clean and well-maintained clutch system not only enhances driving comfort but also improves safety by ensuring complete control with every gear change.
Whether you’re an experienced mechanic or a beginner learning about car maintenance, mastering this process gives you confidence, saves you money and ensures your vehicle performs at its best for years to come.
Now, you can just go and comment down this guide for more information about specific queries that bothers you.
Frequently Asked Questions
Q1. What does it mean to bleed a clutch master cylinder?
Answer: Bleeding a clutch master cylinder means removing trapped air bubbles from the hydraulic system that controls the clutch. This system uses brake fluid to transmit pressure from the clutch pedal to the clutch mechanism. When air enters this system, it compresses easily and prevents proper pressure from building up, resulting in a soft or spongy clutch pedal. Bleeding the system allows the fluid to flow freely and expels all the air, restoring firmness to the pedal and ensuring the clutch functions correctly. This process restores proper hydraulic pressure and makes gaar changes easier and smoother.
Q2. Why is bleeding the clutch important?
Answer: Bleeding the clutch is crucial because even a small amount of air inside the hydraulic system can affect clutch performance. Air bubbles reduce the pressure transmitted from the clutch pedal to the slave cylinder, preventing the clutch from engaging properly or making gear changes difficult. If left unaddressed, this problem can lead to clutch slippage, difficulty starting the car in gear, or even damage to the master and slave cylinders. Regular clutch bleeding ensures that only clean fluid remains in the system, helping to prevent wear, corrosion and hydraulic failure.
Q3. How do I know if my clutch master cylinder needs bleeding?
Answer: There are several clear signs that indicate your clutch master cylinder needs bleeding. The most common symptom is a soft, spongy, or depressed clutch pedal that doesn’t easily return to its normal position. You may also hear grinding noises when shifting gears, or experience difficulty engaging first or reverse gear. In some cases, the clutch may not fully disengage, causing the car to continue moving even when the pedal is pressed. Low clutch fluid levels or visible leaks around the master or slave cylinder also indicate that air has entered the system and bleeding is necessary.
Q4. How often should I bleed my clutch system?
Answer: Generally, the clutch hydraulic system should be bled every two to three years, or whenever you replace a major component like the master or slave cylinder. However, if you notice any changes in pedal feel, fluid leaks, or dirty fluid, it’s best to bleed it sooner. Regular bleeding keeps the fluid clean and ensures that moisture or contaminants don’t build up inside the system. Vehicles driven in more demanding conditions, such as heavy traffic or mountainous areas, may require more frequent clutch bleeding due to increased pressure and heat on the hydraulic system.
Q5. What type of fluid should I use to bleed the clutch?
Answer: Generally, the clutch hydraulic system should be bled every two to three years, or whenever you replace a major component like the master or slave cylinder. However, if you notice any changes in pedal feel, fluid leaks, or dirty fluid, it’s best to bleed it sooner. Regular bleeding keeps the fluid clean and ensures that moisture or contaminants don’t build up inside the system. Vehicles driven in more demanding conditions, such as heavy traffic or mountainous areas, may require more frequent clutch bleeding due to increased pressure and heat on the hydraulic system.
Q6. What type of fluid should I use to bleed the clutch?
Answer: Most vehicles use the same brake fluid for both the brake and clutch systems, typically DOT 3 or DOT 4. These fluids are glycol-based and designed to handle high pressure and heat. Always consult your vehicle’s owner’s manual or the label on the fluid reservoir to ensure you use the correct type of fluid. Never mix different types of fluids or use substitutes like power steering fluid or engine oil, as these can damage the rubber seals inside the system. Always use clean, fresh brake fluid from a sealed container to avoid moisture contamination, as water in the fluid lowers its boiling point and reduces system performance.
Q7. Can I bleed the clutch myself?
Answer: Yes, you can bleed the clutch yourself, although it’s easier with an assistant. There are several methods a person can use to bleed a clutch system, including gravity bleeding, vacuum bleeding and pressure bleeding. Gravity bleeding relies on the natural downward flow of the fluid, vacuum bleeding uses suction from a pump and pressure bleeding involves pushing the fluid through with a constant force. Each method has its advantages and the right method depends on your equipment and comfort level. With patience and attention to keeping the fluid reservoir full, even beginners can successfully bleed their clutch.
Q8. What happens if I don’t bleed the clutch system properly?
Answer: If the clutch system is not bled properly, air can remain trapped inside, resulting in low or inconsistent pedal pressure. The clutch may not fully engage or disengage, making driving difficult or unsafe. In severe cases, improper bleeding can cause internal damage to the master or slave cylinder as the system is forced to operate with air pockets instead of solid hydraulic pressure. This can lead to fluid leaks, overheating and premature component failure. For these reasons, it’s crucial to carefully follow each step and ensure there are no air bubbles remaining before completing the job.
References:
[1] Clutch Master Cylinder
https://www.aisinaftermarket.jp/en/toollibrary/pdf/HD100301HQ-1.pdf

Guys, I’m a car audio enthusiast and customization expert and I love clear sound and clean installation. Plus, I have spent years helping people build their dream audio setups. And whenever I’m working on cars, I probably listen to music and thinks about the next big upgrade.