Written By: Don Dodi
Fact Checked By: Kristen Brown
Reviewed By: Diego Rosenberg
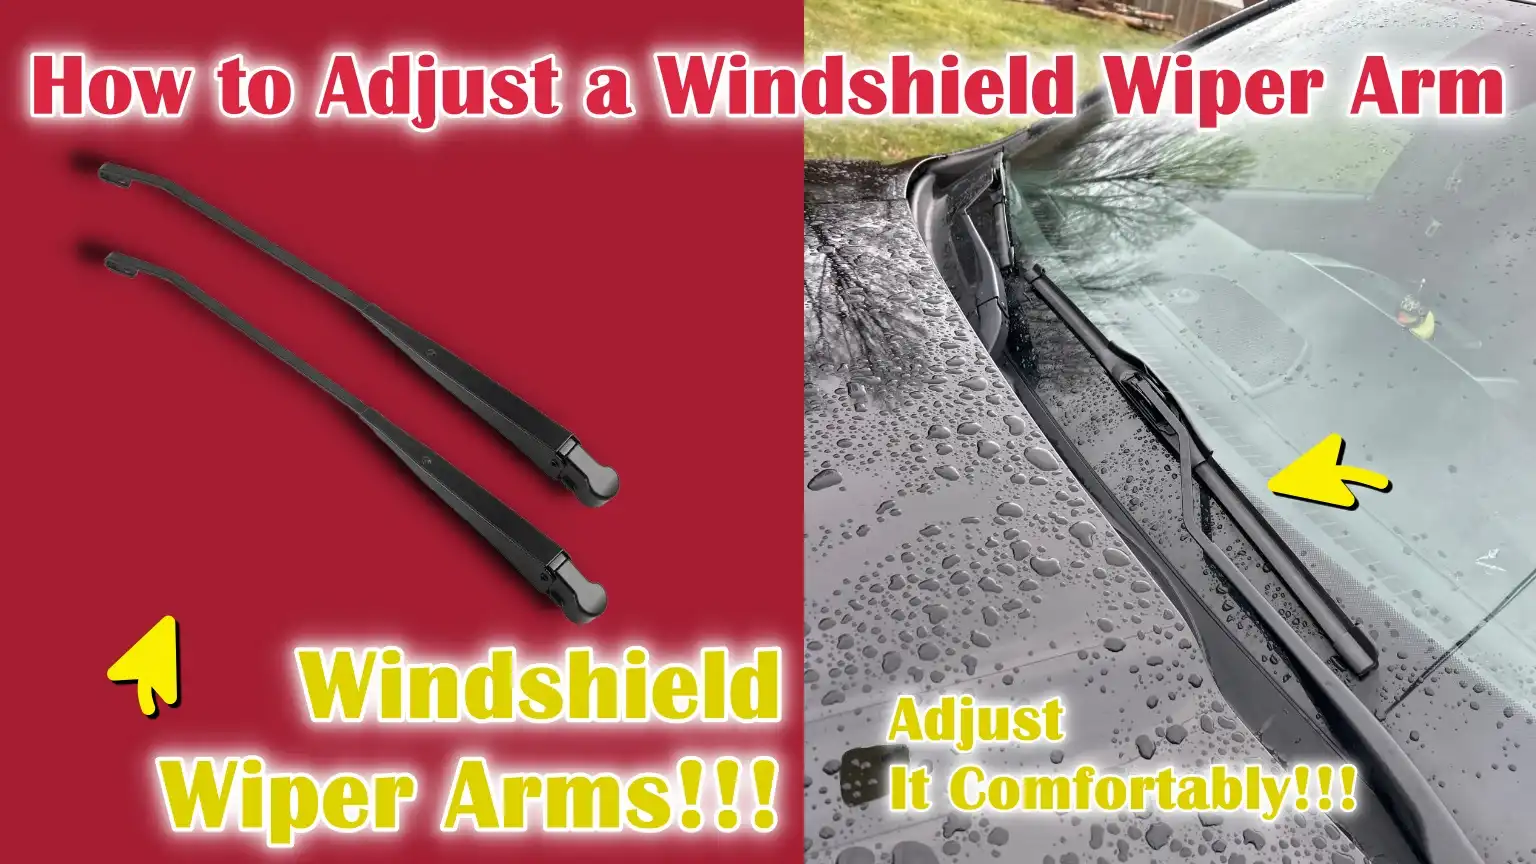
You literally need a ideally aligned wipers with your windshield, so that the wipers can give you clear wipes during bad weather condition.
You should always check and maintain your windshield wipers, if they look off or not providing the quality results, so basically alignment is the part of maintenance.
So, if it gets misaligned or just loosed up a little bit then it can cause streaks, miss several spots or it can even scrape the windshield as well, that literally affects the visibility during snow, fog or rainy time.
Plus, when you adjust the wiper arm then you make sure that the wiper blades actually makes full contact with the glass, basically that provides a clear view and safe driving condition as well.
Not only this, if wiper arms are properly aligned then they also prevents damage tot he wiper motor and linkage as well, which is why the alignment is important.
Now, in this guide you’ll learn everything about How to Adjust a Windshield Wiper Arm, so that you can easily extend the life of your wipers and maintain their performance.
Tools
| Tool / Material | Purpose / Use |
|---|---|
| Wrench | To loosen or tighten the nut that holds the wiper arm in place. |
| Socket Set | It provides different size sockets for different size wiper arm nuts. |
| Screwdriver | Useful for removing covers or small parts when necessary. |
| Marker or Tape | Mark the original position of the wiper arm before adjusting. |
| Gloves | To protect hands from dust, rust or sharp edges. |
| Torque Wrench | This ensures that the wiper arm nut is tightened to the correct strength without causing any damage. |
| Cleaning Cloth | To clean the windshield and wiper blades before or after adjustment. |
How to Ensure Safety
1. Turn Off the Car and Remove the Key
Before beginning any work on your windshield wiper arms, it is crucial to completely turn off the car and remove the key from the ignition.
This prevents the wiper system from accidentally activating while you are adjusting the arms.
Even a slight movement of the wiper motor can cause injury or damage to the windshield, so ensuring the car is completely off is the first and most important safety step.
2. Ensure the Wiper Switch is Off
In addition to turning off the car, double-check that the wiper switch inside the vehicle is in the off position.
Sometimes, if the wiper switch is left on, the electrical system can remain active and a sudden movement of the wipers could trap your hand or fingers.
Keeping the switch off provides added safety and peace of mind while you work.
3. Avoid Injury from Moving Parts or Tensioned Springs
Windshield wiper arms are connected to springs and metal linkages that can move suddenly if not handled carefully.
These springs are under tension and can snap back, potentially causing cuts or scrapes.
Always handle the wiper arms gently, keep your fingers away from pivot points and avoid forcing any parts to move.
Being aware of the mechanical tension in the system reduces the risk of injury and ensures the adjustment process is safe and smooth.
How to do Initial Inspection
1. Check for Worn or Damaged Wiper Blades
Before adjusting the wiper arms, it’s crucial to inspect the wiper blades.
Over time, the rubber on the wiper blades can crack, tear, or harden, preventing them from properly clearing the windshield.
Worn or damaged blades can cause streaking, smearing and reduced visibility, even if the wiper arms are perfectly aligned.
Replacing old or damaged blades ensures that any adjustments you make will be effective and that the wipers will perform optimally.
2. Check Wiper Arms for Bending or Corrosion
Next, carefully inspect the wiper arms for any signs of bending, warping, or corrosion.
A bent arm will not apply even pressure to the blade against the windshield, resulting in poor contact and uneven wiping.
Corrosion can weaken the metal, increasing the likelihood of breakage or seizing, which can lead to wiper system failure.
Ensuring the arms are straight, clean and in good condition is essential for successful adjustment and smooth operation.
3. Check Windshield for Debris or Scratches
Finally, inspect the windshield for any dirt, debris, or scratches.
Small particles like sand or leaves can get trapped under the wiper blades and scratch the glass as they move, impairing visibility and potentially damaging both the blades and the windshield.
Thoroughly cleaning the windshield before making any adjustments prevents unnecessary wear and tear on the wiper system and ensures clear visibility while driving.
Inspecting the glass also allows you to identify any existing scratches that may require repair to maintain optimal safety.
How to Loose the Wiper Arm
1. Locate the wiper arm nut at the base
The first step in adjusting the windshield wiper arm is to locate the nut that holds the arm in place.
This nut is typically found at the base of the wiper arm, where it connects to the pivot point on the car.
Identifying the correct nut is crucial, as loosening the wrong part can damage the wiper system.
Knowing the exact location of this nut makes the adjustment process easier and safer.
2. Use the correct wrench or socket to loosen
Once the nut is located, use the correct size wrench or socket to loosen it.
It’s important to loosen the nut carefully, without completely removing it unless necessary.
Over-loosening or unnecessarily removing the nut can cause the wiper arm to suddenly drop, potentially scratching the windshield or damaging the arm itself.
Using the correct tool and applying gentle pressure ensures a safe and controlled process.
3. Carefully lift the wiper arm away from the windshield
After the nut is loosened, gently lift the wiper arm away from the windshield.
This step allows you to adjust the arm’s position without putting excessive pressure on the glass, preventing cracks or scratches.
Carefully handling the arm also prevents damage to the internal spring and linkage system.
Lifting it correctly ensures that the arm can be repositioned accurately and safely, leading to effective adjustment and optimal wiper performance.
Read More:
How to Adjust the Wiper Arm Position
1. Determine the Correct Resting Position on the Windshield
The first step in adjusting the wiper arm is to determine the correct resting position.
This is where the wiper blade should be when not in use, typically near the bottom edge of the windshield.
Positioning the arm correctly ensures that the wiper covers the maximum possible area of the windshield when in operation and does not interfere with other parts such as the hood or cowl.
Proper positioning also helps prevent the wiper from lifting off the glass at high speeds or in heavy rain.
2. Align the Wiper Blade to Cover the Correct Sweep Area
Next, check that the wiper blade is aligned to cover the correct sweep area of the windshield.
The blade should move smoothly across the windshield from one side to the other without any gaps.
Correct alignment ensures that the wiper effectively clears water, snow, or debris, improving visibility and safety.
Incorrect alignment can lead to streaking, missed areas and reduced effectiveness even with new blades.
3. Adjust the Angle and Height to Ensure Even Contact with the Glass
Finally, adjust the angle and height of the wiper arm so that the blade maintains full and even contact with the glass.
Uneven pressure can cause streaking, wiper noise, or even scratching of the windshield.
Proper adjustment ensures that the wiper blade applies even pressure across the windshield, efficiently clearing water and debris.
This not only improves driving safety but also extends the life of the wiper blades and prevents unnecessary wear and tear on the wiper arm and motor.
How to Tighten the Wiper Arm

1. Hold the Arm in the Correct Position
Before tightening the wiper arm, ensure it is firmly held in the correct position on the windshield.
This ensures the blade is properly aligned and the arm rests at the correct angle when not in use.
Holding the arm steady during tightening prevents sudden movements, which could misalign the blade or scratch the windshield.
Correct positioning at this stage lays the foundation for effective wiper operation and long-term reliability.
2. Securely Tighten the Nut but Avoid Overtightening
Once the arm is in place, use a wrench or socket to tighten the nut that secures the wiper arm.
It’s crucial that the nut is tight enough to prevent the arm from slipping during operation, but not so tight that it damages the pivot, arm, or wiper motor.
Overtightening can strip threads, bend the arm, or put excessive stress on the wiper linkage, potentially leading to costly repairs.
The correct torque ensures secure, smooth and long-lasting performance.
3. Check for Smooth Movement and Proper Sweep
After tightening the wiper arm, test its movement by turning on the wipers.
Observe that the blade sweeps evenly across the windshield without sticking, lifting, or scratching.
Smooth movement indicates that the arm is properly aligned and the nut is tightened correctly.
Checking the sweep ensures optimal cleaning, clear visibility in all weather conditions and reduces wear and tear on both the wiper blade and motor.
This final check is essential to confirm that the adjustment was successful and the wipers are operating safely.
How to Do Wiper Testing
1. Turn on the wipers to check coverage and alignment
After adjusting and tightening the wiper arms, the next step is to turn on the wipers to test their performance.
Observe how the blades move across the windshield and check that they cover the entire area intended for cleaning.
Proper coverage ensures that no part of the windshield is left uncleaned, which is crucial for safe driving in rain, snow, or other weather conditions.
Testing the wipers at this stage confirms that the previous adjustments were made correctly.
2. Note any streaking, skipping, or scraping
While the wipers are operating, carefully observe for any streaking, skipping, or scraping.
Streaking indicates that the blade is not making full contact with the glass, skipping suggests uneven pressure or misalignment and scraping might mean the blade is too close to the edge or the arm is bent.
Identifying these issues early can prevent damage to the windshield and ensure clear visibility.
Careful observation allows for precise fine-tuning to achieve optimal wiper performance.
3. Repeat adjustments if necessary
If any issues such as streaking, skipping, or scraping are observed, repeat the adjustment process as needed.
Loosen the nut slightly, reposition the arm and retighten it while ensuring the blade remains straight.
Sometimes, even minor adjustments can make a significant difference in performance.
Repeating the adjustments ensures that the wipers operate smoothly, provide clear visibility and minimize wear and tear on the blades and wiper system, leading to safer driving in all weather conditions.
Not only this, there’s a study that shows that if the wiper arm and blade geometry are not properly aligned, then because of the airflow over a moving car can literally able to lift the wiper blade away from the windshield, so it basically reduces the contact pressure and that actually lead to the poor wiping performance at the high speed drive, which is why you should always maintain and adjust the windshield wiper arms.[¹]
Conclusion – How to Adjust a Windshield Wiper Arm
It is true, that even a small adjustment to your wiper arms then it can make a big difference, as it can provide you much clearer view in rain and bad weather.
Properly aligned wiper arms ensure that the blades clean the entire windshield evenly, effectively removing rain, snow, dirt and debris.
Regular checks and adjustments prevent streaking, sticking and scratching, which not only improves visibility but also protects the wiper system and windshield from damage.
By carefully following a few simple steps—such as checking the blades, loosening and repositioning the arms, tightening them securely and performing a performance test—you can extend the life of your wipers, maintain optimal performance and drive confidently in all weather conditions.
This type of simple maintenance saves money, prevents accidents and ensures that every swipe counts when you need it most.
Now, it is time to have your thoughts on the comment box.
Frequently Asked Questions
Q1. What is a windshield wiper arm and why does it need adjusting?
Answer: The windshield wiper arm is a metal or plastic component that holds the wiper blade and moves it across the windshield. Over time, due to regular use, weather conditions, or sudden impacts, the arm can become loose, bent, or misaligned. When the arm is not in the correct position, the wiper blade cannot properly clean the windshield, resulting in streaks or missed areas. Adjusting the wiper arm ensures that the blade maintains full contact with the glass, providing clear visibility while driving, which is crucial for safety.
Q2. How do I know if my wiper arm needs adjusting?
Answer: Several signs indicate that a wiper arm needs adjustment. If your wipers leave streaks on the windshield, miss certain areas, scratch the glass, or stop too high or too low when turned off, it’s a sign of misalignment. Another indicator is uneven pressure on the blade, preventing it from effectively clearing water or debris. Even with new blades, a misaligned arm can compromise performance, so regular alignment checks are essential.
Q3. What tools will I need to adjust a windshield wiper arm?
Answer: The most common tools needed are a wrench or socket set to loosen and tighten the nut at the base of the wiper arm, a screwdriver if any covers need to be removed and a marker or tape to mark the arm’s original position. Gloves can help protect your hands and a cleaning cloth can be used to remove any dirt or debris from the windshield before making adjustments. Optional tools like a torque wrench can help ensure the nut is tightened with the correct amount of force, preventing damage to the wiper arm or motor.
Q4. How do I safely adjust the wiper arm?
Answer: Safety is paramount when adjusting the wiper arm. Always turn off the car and remove the key from the ignition to prevent accidental movement. Ensure the wiper switch is off and keep your fingers away from moving parts or tensioned springs. Carefully loosen the nut, gently lift the arm, position it correctly and then tighten the nut without overtightening. Testing the wipers afterward ensures they move smoothly and cover the correct area of the windshield.
Q5. Can I adjust the wiper arm myself, or do I need a professional?
Answer: Yes, adjusting the wiper arm is usually a straightforward task that can be done at home with basic tools and caution. It doesn’t require specialized knowledge and following step-by-step instructions ensures proper alignment. However, if the wiper arm is severely bent, the motor is faulty, or the adjustment doesn’t resolve the issue, consulting a professional mechanic is recommended to prevent damage to the wiper system.
Q6. How often should I check or adjust my wiper arms?
Answer: It’s a good practice to check your wiper arms at least once or twice a year, or before the rainy or snowy season, to ensure they are functioning correctly. Regular checks prevent unexpected problems, improve visibility and extend the lifespan of both the wiper blades and arms. If you ever hear streaking, stuttering, or scraping noises, it’s recommended to have them checked and adjusted immediately.
Q7. Will adjusting the wiper arm improve the performance of old blades?
Answer: Adjusting the wiper arm can improve the blade’s contact with the windshield, allowing even older blades to function more efficiently. However, if the rubber on the blade is cracked, torn, or hardened, the improvement will be limited. For best performance, wiper arm adjustment should be combined with regular replacement of worn wiper blades.
Q8. What should I avoid when adjusting the wiper arm?
Answer: Never force the wiper arm into place or bend it by hand, as this can damage the arm, the wiper motor, or the linkage system. Avoid overtightening the nuts, which can strip the threads or put excessive stress on the components. Ensure the windshield is clean to prevent scratching and handle the arm gently to protect both the blade and the glass.
Q9. Can misaligned wiper arms damage the windshield?
Answer: Yes, if the wiper arm is bent or misaligned, it can cause the blade to rub against the windshield or apply uneven pressure. Over time, this can lead to scratches or cracks in the glass. Proper adjustment prevents such damage and ensures the wiper blade applies even pressure across the entire sweep area.
Q10. Does adjusting the wiper arms affect the performance of the wiper motor?
Answer: Proper adjustment of the wiper arms reduces stress on the wiper motor. Misaligned or loose wiper arms can cause the motor to work harder, leading to premature wear or even motor failure. By ensuring the arms are properly positioned, you help the motor operate smoothly and extend the lifespan of the entire wiper system.
References:
[1] Simulation of Aerodynamic Uplift Consequences on Pressure Repartition – Application on an Innovative Wiper Blade Design
https://saemobilus.sae.org/papers/simulation-aerodynamic-uplift-consequences-pressure-repartition-application-innovative-wiper-blade-design-2001-01-1043

Guys, I’m a car audio enthusiast and customization expert and I love clear sound and clean installation. Plus, I have spent years helping people build their dream audio setups. And whenever I’m working on cars, I probably listen to music and thinks about the next big upgrade.