Written By: Don Dodi
Fact Checked By: Kristen Brown
Reviewed By: Diego Rosenberg
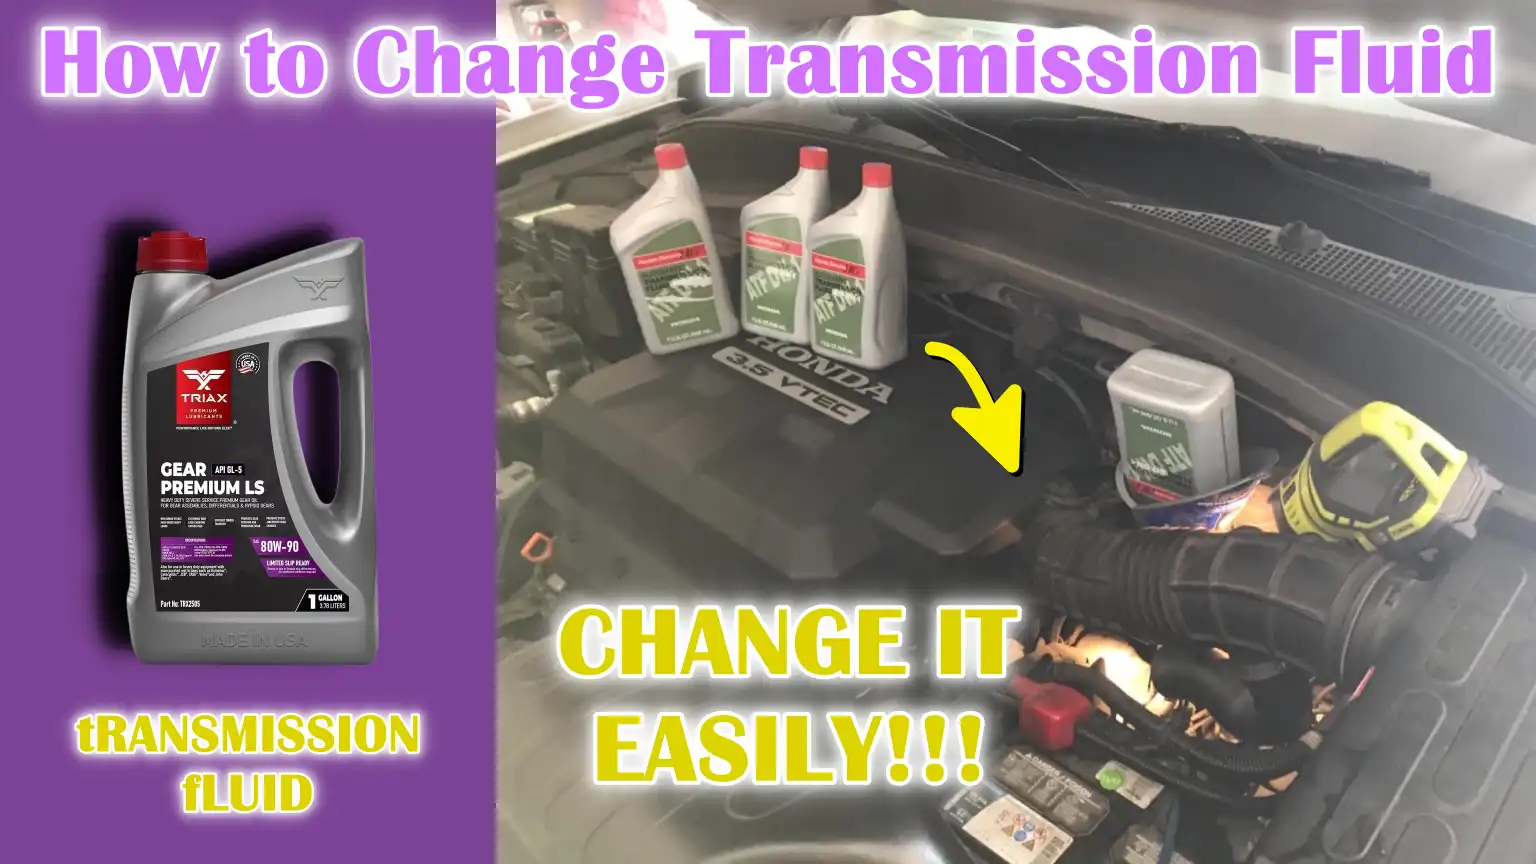
It is really important to change the transmission fluid if it become the contaminated and lose the effectiveness completely, otherwise it can cost you heavy costing on repairs.
Actually transmission fluid serves multiple crucial functions such as: basically it lubricates the moving parts within the transmission, that’s why it basically reduces the friction, prevents the overheating and that also ensures the smooth gear shifts.
And it is very much natural thing that over the time, this fluid degrades due to the head and contamination and that leads to the decreased performance and there can be potential transmission damage as well.
So, it is also recommended that you should change the transmission fluid on every 30,000 to 60,000 miles though it does vary actually based on your vehicle’s condition and your driving habits of course.
As it is seen that, vehicles which are subjected to heavy towing, frequent stop-and-go traffic or if they have to face some extreme temperatures then it may require more frequent changes as well.
And you should not neglect this maintenance task as it can result in issues such as slipping gears, rough shifting or even it can be complete transmission failure as well.
That’s why this guide covers everything about How to Change Transmission Fluid, so that you can fix this thing and avoid any possible costly repairs and maintain the vehicle performance as well.
Basic Safety Precautions
1. Park on a Level Surface and Apply the Parking Brake
Before beginning any work on the transmission, always make sure your vehicle is parked on a flat and level surface.
Applying the parking brake is important because it prevents the car from rolling or moving suddenly while you’re working under or around it.
This simple method is one of the most important ways to avoid accidents and keep yourself safe.
2. Use Jack Stands When Lifting the Car
If your vehicle needs to be lifted to access the transmission, don’t rely solely on a hydraulic jack.
Use sturdy jack stands to firmly support the car.
Jack stands provide stable and reliable support, reducing the risk of the car falling over while you’re working underneath it.
Proper use of jack stands is vital to safe maintenance and helps prevent serious injuries.
3. Wear Safety Gloves and Eye Protection
Always wear safety gloves to protect your hands from hot, dirty or potentially harmful transmission fluid.
Eye protection, such as safety glasses, is equally important to prevent any splashes from reaching your eyes.
Taking these precautions ensures that you can work safely and reduces the risk of injury when changing transmission fluid.
Tools
| Tool / Material | Description | Purpose / How to Use |
|---|---|---|
| Transmission Fluid | Special fluid that lubricates and cools the transmission. | Put the correct type of oil in your vehicle according to the manufacturer’s instructions. |
| Funnel | A cone-shaped device for pouring liquids. | Helps pour transmission fluid neatly without spilling. |
| Drain Pan | A container to hold liquids. | Old transmission fluid collects when you remove it from the vehicle. |
| Ratchet and Socket Set | Hand tools used for bolt removal. | Required to safely remove transmission drain plug or pan bolt. |
| New Transmission Filter (if applicable) | A filter that traps dirt and metal particles. | Replace old filters to keep transmission fluid clean. |
| Gasket or Sealant (if needed) | Rubber or silicone material that prevents leakage. | Place between the pan and the transmission to prevent fluid leakage. |
| Clean Rags | Soft cloths. | Wipe up any liquids spilled during the process and clean the parts. |
How to Locate the Transmission System
1. Find the transmission pan or drain plug
The transmission pan is usually located at the bottom of your vehicle’s transmission.
It holds the transmission fluid and can be removed to drain the old fluid.
Some vehicles have a drain plug instead of a fill pan, allowing the fluid to be drained without removing the pan.
Knowing the exact location of the pan or drain plug is important because it determines where you will place the drain pan to collect fluid.
Checking your vehicle’s manual or a reliable guide can help you identify the correct part.
2. Identify the transmission dipstick
The transmission dipstick is usually located under the hood, near the rear of the engine and is used to check the transmission fluid level.
Some newer vehicles have sealed transmissions without a dipstick, in which case checking the fluid level may require professional equipment.
For vehicles with a dipstick, it is important to identify it before beginning the procedure as it will be used later to fill the transmission with new fluid and ensure the correct level.
Correct identification can prevent overfilling or underfilling of fluid, which can cause transmission problems.
How To Drain the Old Fluid
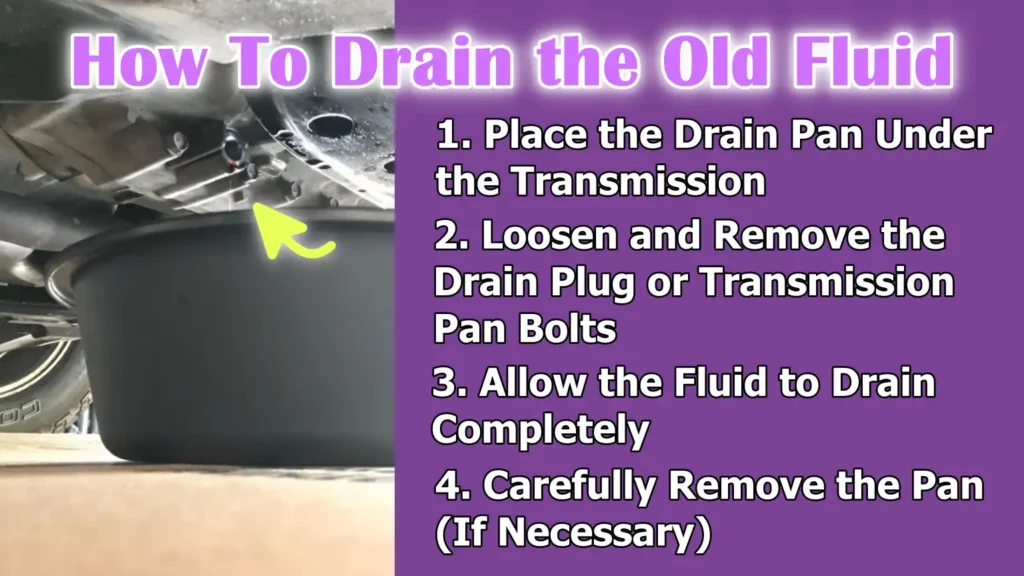
1. Place the Drain Pan Under the Transmission
Before you begin draining the transmission fluid, place a drain pan directly below the transmission pan or drain plug.
This ensures that the old fluid collects securely and does not spill onto the garage floor.
Using the drain pan also allows you to see how much fluid is draining, which is helpful when refilling the system later.
2. Loosen and Remove the Drain Plug or Transmission Pan Bolts
After you have the drain pan in place, carefully loosen the drain plug or bolts holding the transmission pan in place.
Doing so slowly will prevent the fluid from spilling out.
If your vehicle has a drain plug, removing it will allow the fluid to drain out.
If the transmission pan is full, loosening the bolts slowly will prevent the pan from warping or being damaged.
3. Allow the Fluid to Drain Completely
After removing the plug or loosening the pan, allow the old transmission fluid to drain completely.
This may take several minutes and draining it completely ensures that all contaminated or bad fluid is removed from the system.
Completely draining the fluid also reduces the risk of mixing old and new fluid, which can affect transmission performance.
4. Carefully Remove the Pan (If Necessary)
If your vehicle uses a removable transmission pan, carefully remove it after most of the fluid has drained.
Removing the pan provides access to the transmission filter and an opportunity to inspect the pan for debris or metal shavings.
Clean the pan thoroughly before reinstalling it to ensure that there are no dirt or particles left that could damage the transmission after refilling.
How to Replace the Transmission Filter (if applicable)
1. Remove the Old Filter
If your vehicle has a replaceable transmission filter, first carefully remove the old filter from the transmission.
This filter traps dirt, metal particles and other contaminants that can damage the transmission over time.
Removing the old filter allows you to check for signs of excessive debris, which can be a sign of wear or internal problems in the transmission.
Proper removal ensures that no pieces of the old filter remain in the system.
2. Install the New Filter Securely
After removing the old filter, install the new transmission filter according to the manufacturer’s instructions.
Make sure it is securely in place to prevent leakage or improper fluid flow.
A properly installed filter ensures that the transmission fluid circulation remains clean and the transmission runs smoothly without the risk of damage from debris.
3. Replace the Gasket or Apply New Sealant
When reinstalling the transmission pan, replace the gasket with a new one or apply new sealant if needed.
This step is necessary to prevent leaks once the system has been filled with fluid.
A properly sealed pan keeps the transmission fluid contained, maintains proper fluid pressure and ensures that the transmission continues to function efficiently over time.
How to Reinstall the Transmission Pan
1. Clean the pan thoroughly
Before reinstalling the transmission pan, clean it carefully to remove any old fluid, dirt or metal particles.
A clean pan ensures that no contaminants re-enter the transmission, ensuring smooth operation and preventing damage to internal components.
Inspect the pan for any signs of wear, cracks or warping, as damaged pans should be replaced to avoid future leaks.
2. Reinstall the pan with a new gasket or seal
Once the pan is clean, install a new gasket or apply fresh sealant before reinstalling the pan into the transmission.
The gasket or sealant forms a strong barrier that prevents transmission fluid from leaking out.
It is important to use the correct type of gasket or sealant recommended by the manufacturer to maintain proper sealing and pressure inside the transmission.
3. Tighten bolts evenly to avoid leaks
When securing the transmission pan, tighten the bolts evenly in a crisscross or star pattern.
This ensures that the pan is perfectly level with the gasket and prevents uneven pressure, which can cause leaks.
Avoid overtightening the bolts, as this can damage the pan or gasket, but make sure they are tight enough to maintain a secure seal.
Proper tightening is vital to maintaining a leak-free transmission system.
How to Refill with New Transmission Fluid
1. Insert a funnel into the dipstick tube
To refill the transmission, first insert a clean funnel into the transmission dipstick tube.
The funnel ensures that the fluid is poured directly into the transmission without spilling, keeping the engine bay clean.
Using a funnel also helps you control the flow of fluid and avoid accidentally overfilling.
2. Add the recommended amount of fluid
Using the type and amount recommended in your vehicle manual, slowly pour the transmission fluid into the funnel.
Different vehicles require different types of fluid and using the correct fluid is important for proper lubrication, cooling and smooth gear shifting.
Following the manufacturer’s recommended amount can help prevent underfilling and overfilling, which can cause transmission problems.
3. Start low, then slowly fill up
It’s important to add less than the full recommended amount of fluid at first.
After adding some fluid, start the engine and let it idle, then slowly shift all gears to circulate the fluid throughout the transmission system.
Check the fluid level with the dipstick and slowly add more fluid until it reaches the proper level.
This careful method ensures that the transmission operates efficiently and prevents possible damage from overfilling.
How To Check the Fluid Level
1. Start the Engine and Let it Idle
After you’ve filled the transmission fluid, start the engine and let it idle for a few minutes.
Idling warms up the fluid slightly, allowing it to circulate properly through the transmission system.
This step ensures that the fluid reaches all internal components, allowing for an accurate fluid level check.
2. Shift All Gears Slowly
While the engine is idling, shift all gears slowly from park to reverse, neutral, drive and any other gear your vehicle has.
This action keeps the transmission fluid flowing throughout the system, lubricating all moving parts and helping to distribute the new fluid evenly.
Proper circulation is important for smooth gear operation and prevents dry spots in the transmission.
3. Check the Dipstick Reading
With the engine still running and the car on a level surface in park, remove the transmission dipstick to check the fluid level.
Clean it first, then reinsert and remove it again to get an accurate reading.
Checking the fluid level while the engine is running ensures that the fluid measurement reflects normal operating conditions, which is important for maintaining correct fluid pressure.
4. Add More Fluid If Necessary
If the fluid level is below the recommended mark on the dipstick, slowly add more transmission fluid.
Add slowly to avoid overfilling and recheck the level after each small amount.
Maintaining the correct fluid level is essential to prevent damage to the transmission, ensure smooth gear shifts and extend the transmission’s life.
Now, Final Steps
1. Check for Leaks Around the Transmission Pan
After changing the transmission fluid, carefully inspect the area around the transmission pan for leaks.
Check the bolts, gaskets and edges of the pan to make sure all connections are tight and properly sealed.
Early detection of leaks can prevent fluid loss, which could cause the transmission to overheat, slip gears, or cause serious damage.
2. Proper Disposal of Old Fluid
Used transmission fluid is considered hazardous and should never be thrown on the ground or in drains.
Collect the old fluid in a sealed container and take it to a local recycling center, hazardous waste center, or related auto parts store.
Proper disposal protects the environment and complies with legal regulations for handling automotive fluids.
As well as, there is EPA’s used oil guidance available that shows how you should treat the spent engine and transmission oil: you have to treat the engine and transmission oils as a “used oil” and there are specific kinds of recycling rules for them, as you should not drop off used oil and similar types of fluids at service centers and recycling sites, as it stresses that improper disposal which means you are literally pouring on the ground or down the drains which is totally illegal and actually harmful to the environment.[¹]
3. Test Drive the Vehicle to Ensure Smooth Shifting
After checking the fluid and sealing the system, take the vehicle for a short test drive.
Shift all gears to make sure the transmission is running smoothly and quietly.
A proper test drive ensures that the new fluid is flowing correctly, the transmission is working efficiently and there are no leaks or unusual sounds.
This final check ensures that your vehicle is safe and ready for everyday use.
Read More:
Conclusion – How to Change Transmission Fluid
When you simply neglect the transmission fluid maintenance then it may not cause you the problem at the immediate manner, but it will definitely show the problems over the time and believe it or not it can have quiet expensive damage.
Transmission fluid not only lubricates moving parts, but also helps control heat, reduce friction and ensure smooth gear shifts.
Over time, fluid becomes contaminated or loses its effectiveness, which can lead to slipping gears, poor gear shifting and even costly transmission failure.
By following the proper steps—safely draining old fluid, replacing filters when needed, reinstalling the pan with the proper seal, filling with the correct type and amount of fluid and carefully checking levels—you can extend the life of your transmission, avoid major repairs and maintain optimal performance.
Taking the time to maintain your transmission fluid is a simple investment that ensures your car remains reliable, safe and efficient on the road for many miles to come.
You can ask the questions in the comment section below.
Frequently Asked Questions
Q1. How often should I change my transmission fluid?
Answer: The frequency of changing transmission fluid depends on your vehicle and driving habits. Most car manufacturers recommend changing it every 30,000 to 60,000 miles. Vehicles used in heavy traffic, extreme temperatures or for towing may require fluid changes more frequently. The best way to know the correct interval is to refer to your vehicle’s manual. Changing the fluid regularly can help keep transmission parts lubricated, prevent overheating and prevent costly repairs.
Q2. What type of transmission fluid should I use?
Answer: You should always use the transmission fluid specified in your vehicle’s manual. Different vehicles require different formulas and using the wrong fluid can cause poor gear shifting, overheating or damage to the transmission. The manual will tell you the right type of fluid, including the brand or specifications. Using the right fluid ensures smooth gear shifting, proper lubrication and longer transmission life.
Q3. Can I change the transmission fluid myself?
Answer: Yes, transmission fluid can be changed at home if you follow the right steps and take safety precautions. You will need basic tools such as a funnel, drain pan, ratchet and socket set. You should also know how to safely lift the car and use jack stands if needed. If your vehicle has a replaceable filter, you will need to replace it as well. Although this task can be done carefully by any beginner, some modern vehicles have sealed transmissions that may require professional service.
Q4. How much transmission fluid does my car need?
Answer: The amount of transmission fluid varies depending on the model and brand of your car. Your vehicle manual will tell you the amount needed to fully fill. It is important not to overfill or underfill the transmission. Overfilling can cause leaks, foaming or high pressure, while underfilling can cause poor lubrication and overheating. Always check the fluid level with the dipstick after filling and slowly top up if needed.
Q5. What are the signs that my transmission fluid needs to be changed?
Answer: There are several signs that indicate it is time to change the transmission fluid. Fluid that is dark in color or has a burnt smell is a clear indication that the fluid has gone bad. Other signs include irregular or delayed gear changes, gear slipping, unusual noises from the transmission or overheating. Regularly checking the color and level of the fluid helps prevent these problems and keep the transmission running smoothly.
Q6. How do I safely dispose of old transmission fluid?
Answer: Old transmission fluid is considered hazardous and should never be poured onto the ground or into drains. Collect used fluid in a sealed container and take it to a local recycling center, hazardous waste disposal center, or related auto parts store. Proper disposal protects the environment and ensures compliance with local laws. Many auto parts stores also accept used fluid for free recycling.
Q7. Can I fill my transmission fluid instead of replacing it?
Answer: Filling and replacing fluid are not the same thing. Over time, transmission fluid becomes dirty and loses its effectiveness. Simply adding new fluid to old fluid will not remove contaminants or restore proper lubrication. A complete fluid change ensures that old, worn fluid is completely replaced, keeping the transmission safe and shifting gears smoothly.
Q8. What tools do I need to change transmission fluid?
Answer: To change transmission fluid, you typically need the correct type of transmission fluid, a funnel, a drain pan, a ratchet and socket set, clean cloths and optionally a new transmission filter and gasket. These tools help you safely drain the old fluid, replace the filter if needed and refill the system without causing any leaks or damaging parts. Using the proper tools also helps prevent leaks and ensures that the transmission works properly.
References:
[1] EPA, Used Oil, Your guide to used oil collection, management and disposal.
https://www.epa.gov/system/files/documents/2025-06/used-oil_v8_508_0.pdf

Guys, I’m a car audio enthusiast and customization expert and I love clear sound and clean installation. Plus, I have spent years helping people build their dream audio setups. And whenever I’m working on cars, I probably listen to music and thinks about the next big upgrade.