Written By: Don Dodi
Fact Checked By: Kristen Brown
Reviewed By: Diego Rosenberg
Understand that: brakes are the only vehicle component which is specifically designed to help you to avoid any danger when literally seconds matter most.
Without a doubt, your vehicle’s brakes are one of the most important safety systems that you actually relies on every time you drive, so don’t overlook the brake inspection as most of the time drivers only focuses on checking the fuel levels, tire pressure and engine performance before a trip and that’s all they do.
But functioning brakes literally helps you to maintain the control of the vehicle, reduces the stopping distances and responds really effectively to unexpected situations such as: sudden traffic slowdowns, pedestrians crossing the road, animals entering the roadway or dealing with changing weather conditions.
As well as, even a small issues such as: worn out brake pads, low brake fluid, damaged rotors or a brake fluid that is leaking that can gradually reduces the braking performance and increases the risk of a collisions as well.
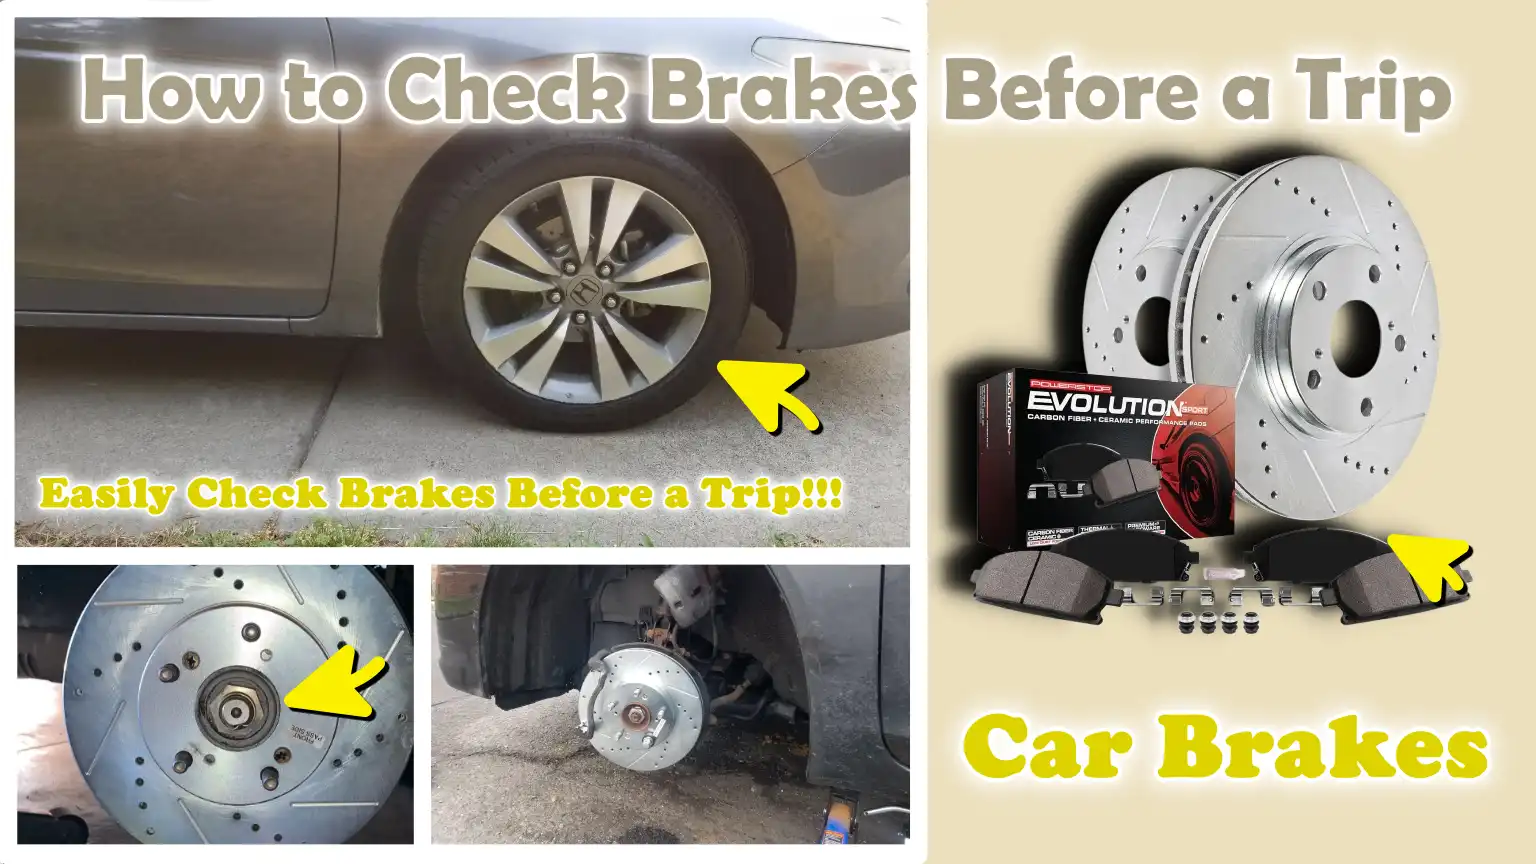
That’s why, in this guide you’ll learn How to Check Brakes Before a Trip so that you can stop the vehicle effectively whenever it is needed.
Tools
| Items | Why You Need It |
|---|---|
| Flashlight | It helps you clearly see brake components, specially in dark or hard-to-reach areas. |
| Clean Cloth or Rag | It is useful for cleaning surfaces and checking for any leaks or dirt. |
| Tire Pressure Gauge | It helps ensure that tires are properly inflated for safe braking. |
| Gloves | It protects your hands while inspecting vehicle components. |
| Vehicle Owner’s Manual | It provides essential information related to your vehicle. |
How to Check the Condition of the Brake Pedal
One of the easiest components of the braking system to inspect before a journey is the brake pedal.
As every braking action begins with the pedal, paying attention to its condition can provide you with vital insights into the overall health of your brakes.
A properly functioning brake pedal should feel firm, smooth and responsive when depressed.
Changes in the way the pedal feels are often among the earliest indicators of potential brake-related issues.
Taking a minute to check the brake pedal can help you identify problems early on and ensure that your vehicle is ready for a safe journey.
1. Check the Feel of the Brake Pedal
To begin, park your vehicle in a safe location and depress the brake pedal several times.
The pedal should feel firm and exert consistent resistance against your foot.
A healthy brake pedal should not feel excessively soft, loose, or difficult to control.
Consistent firmness generally indicates that the hydraulic braking system is functioning correctly and maintaining the necessary pressure for effective braking.
If the pedal feels spongy or softer than usual, it could be a sign of air in the brake lines, low brake fluid levels, or worn brake components, issues that may require attention before you set out on your journey.
2. Watch for Any Unusual Brake Pedal Behavior
Pay close attention to any unusual behavior while using the brake pedal.
If the pedal sinks lower than usual, requires excessive pressure before the brakes engage, or vibrates while braking, it could be a sign of a hidden issue within the internal components of the braking system.
These symptoms may be caused by worn brake pads, uneven brake rotors, low brake fluid levels, or issues within the hydraulic system.
Even if the brakes still appear to be functioning, any abnormal behavior of the brake pedal should not be ignored, as minor issues can escalate over time and compromise the vehicle’s ability to come to a stop.
3. When Brake Pedal Issues Require Immediate Attention
Certain brake pedal issues demand immediate action, as they can significantly impair your ability to bring the vehicle to a safe stop.
If the brake pedal consistently feels spongy, responds sluggishly, or suddenly loses pressure, the vehicle should be inspected as soon as possible.
These symptoms could indicate a brake fluid leak, problems with the master cylinder, or another serious malfunction within the braking system.
As the braking system is critical to vehicle safety, any significant change in the pedal’s operation should be repaired before embarking on long-distance travel or a road trip.
How to Check the Brake Fluid Level and Condition
Brake fluid is the most critical, yet often overlooked, component of any vehicle’s braking system.
Unlike brake pads and rotors, which generate the necessary physical friction to bring the vehicle to a halt, brake fluid transmits the force applied by your foot on the brake pedal to the braking components at each wheel.
Without the proper amount of clean brake fluid, even the finest brake pads and rotors cannot function effectively.
Modern vehicles feature hydraulic braking systems that rely on brake fluid to generate pressure throughout the entire system.
If the fluid level drops too low, becomes contaminated, or begins leaking from the system, braking performance can be severely compromised.
Therefore, checking the brake fluid before embarking on a journey is a simple yet effective safety measure that can help identify potential issues before they escalate into hazardous situations.
1. Locate the Brake Fluid Reservoir
The first step is to locate the brake fluid reservoir under the hood.
In most vehicles, the reservoir is a small, transparent plastic container situated toward the rear of the engine compartment, typically on the driver’s side.
It is usually connected to the master cylinder, the component responsible for generating hydraulic pressure when the brake pedal is depressed.
Most reservoirs feature clearly marked “MIN” (minimum) and “MAX” (maximum) lines, allowing drivers to check the fluid level without having to remove the cap.
Knowing the location of the reservoir simplifies the subsequent inspection process and enables drivers to quickly assess the condition of their braking system.
Taking a moment to identify this component makes the vehicle’s daily maintenance significantly easier.
2. Check the Brake Fluid Level
Once you have located the reservoir, carefully observe the fluid level.
The brake fluid level should typically fall between the “minimum” and “maximum” markings located on the side of the reservoir.
If the level is near the “maximum” mark, it indicates that there is sufficient fluid in the system for proper operation.
If the fluid level is near or below the “minimum” line, it may suggest that the brake pads are worn out, there is a fluid leak, or there is another issue within the braking system.
As brake pads wear down, the brake fluid level naturally drops slightly, as the system requires more fluid to compensate for the reduced thickness of the pads.
However, a sudden or significant drop in the fluid level should never be ignored.
Maintaining the correct fluid level ensures consistent braking performance and helps sustain proper hydraulic pressure.
3. Check the Brake Fluid Quality
The condition of the brake fluid is just as important as its level.
Fresh brake fluid is typically clear or light yellow in color and should appear quite clean inside the reservoir.
Over time, brake fluid absorbs moisture from the surrounding air, which can reduce its effectiveness and increase the risk of corrosion within the braking system.
Old or degraded brake fluid often appears dark brown, cloudy, or dirty.
This degradation can lower the fluid’s boiling point and compromise braking performance, particularly in situations requiring heavy braking, where significant heat is generated.
Regularly checking the quality of the fluid helps drivers determine when the brake fluid needs to be replaced, in accordance with the vehicle manufacturer’s recommended maintenance schedule.
4. Check for Brake Fluid Leaks
When inspecting the brake fluid system, it is crucial to look for signs of leaks around the reservoir, brake lines, hoses and other surrounding components.
A brake fluid leak can lead to a loss of hydraulic pressure, thereby diminishing braking effectiveness.
Common warning signs of a leak include wet spots, oily residue, fluid stains, or an unexplained drop in the brake fluid level.
If a leak is present, drivers may notice that the brake pedal feels soft when depressed, or they may perceive a distinct reduction in braking performance.
As brake fluid plays a critical role in transmitting braking force, even a minor leak, if left unaddressed, as it can pose a serious safety hazard.
Early detection of leaks can prevent brake failure, avoid costly repairs and avert potentially dangerous situations on the road.
How to Inspect Brake Pads and Brake Rotors
Brake pads and brake rotors are the primary components responsible for slowing down and stopping your vehicle.
Every time you depress the brake pedal, the brake pads press against the spinning brake rotors, generating friction that reduces the vehicle’s speed.
This process generates a significant amount of heat and over time, both of these components undergo wear.
Because brake pads and rotors are subjected to constant friction during normal driving, they are classified as “wear parts,” necessitating regular inspection and maintenance.
Worn or damaged brake components can result in increased stopping distances, diminished braking efficiency and potentially compromise the overall safety of the vehicle.
Inspecting these critical components before any journey, particularly a long-distance trip, ensures that your braking system is functioning correctly and safely.
1. Check Brake Pad Thickness
Through normal use, brake pads gradually wear down and become thinner.
As they are designed to absorb the friction generated during braking, a certain degree of wear over their operational lifespan is inevitable.
However, when brake pads become excessively thin, they lose their ability to generate the necessary force to stop the vehicle and may also cause damage to other brake system components.
Many vehicle manufacturers recommend that brake pads be replaced once they reach a specific minimum thickness limit.
During your inspection, if possible, visually examine the visible portion of the brake pads by looking through the spokes of the wheel.
Healthy brake pads should retain a substantial amount of friction-generating material.
If the pads appear excessively thin or show signs of uneven wear, they may need to be replaced.
Regularly monitoring the thickness of the brake pads helps maintain braking efficiency and can prevent costly repairs in the future.
2. Inspect the Brake Rotors for Any Damage
Brake rotors work in conjunction with the brake pads to generate the friction necessary to bring the vehicle to a stop.
To ensure consistent braking power, it is essential that these metal discs remain smooth and exhibit uniform wear.
During an inspection, look for visible signs of damage such as: deep grooves, scratches, cracks, excessive rust, or uneven wear patterns.
Rotors can also warp when exposed to extreme heat, which may cause vibrations while braking.
A smooth rotor surface helps the brake pads maintain uniform contact, thereby ensuring that the vehicle comes to a safe and comfortable stop.
If the vehicle has been stationary for some time, a small amount of surface rust is normal; however, if there is excessive rust or any visible physical damage, it is crucial to have the components inspected by a specialist.
Keeping the rotors in good condition enhances braking performance and extends the lifespan of the brake pads.
3. Signs Shows That Brake Components Need Replacement
There are several warning signs that can indicate when brake pads, rotors, or other brake components are nearing the end of their useful life.
Common symptoms include squealing, grinding, or scraping noises while braking; such sounds often occur when the brake pads have become excessively worn.
Vibrations felt in the brake pedal or steering wheel may indicate a defect in the rotors or an unevenness in their surface.
Drivers may also experience reduced stopping power, increased stopping distances, or a brake pedal that feels less responsive than usual.
In some instances, a visual inspection may reveal that the brake pads have worn down to a dangerously thin level, the rotors have developed cracks, or other severe signs of wear are present.
Ignoring these warning signs can lead to further damage to the vehicle and compromise its safety.
Timely replacement of worn brake components ensures reliable braking performance, minimizes the risk of costly repairs and guarantees that the vehicle remains safe to operate on all types of roads.
Now, Understand How to Pay Attention to Strange Sounds Coming from the Brakes
Your vehicle’s braking system often provides warning signs well before a major problem arises and strange noises are among the most common of these indicators.
As brake pads, rotors, calipers and other components work in tandem through friction, changes in their condition can generate sounds that are easily audible during normal driving.
Many brake-related issues develop gradually, beginning with faint noises that become louder and more frequent over time.
Paying attention to these sounds before embarking on a journey can help you identify worn or faulty components early on, allowing for repairs to be made before brake performance is compromised.
While not every sound emanating from the brakes signals a serious issue, any unusual noise should always be investigated, as it can provide crucial insights into the condition of the braking system.
1. Common Brake Noises and Their Meanings
Different sounds coming from the brakes can indicate various conditions within the braking system.
A faint squeak or chirping sound is often the first sign of worn brake pads.
Many brake pads are equipped with built-in “wear indicators”, designed specifically to generate a loud, distinct noise when the pads are nearing the end of their useful life and require replacement.
Grinding or scraping sounds are generally more concerning, as they may indicate that the brake pad material has completely worn away, causing metal components to rub directly against the rotors.
Sounds such as clicking, rattling, or knocking can sometimes be caused by loose brake hardware or components that are no longer properly tightened.
In some instances, moisture, light surface rust, or ambient environmental conditions may also cause temporary noises, particularly after the vehicle has been parked overnight.
However, any brake-related noise that recurs, intensifies, or becomes persistently louder should be investigated to identify the underlying cause.
2. When Do Brake Noises Indicate Serious Problems?
Certain types of brake noises should never be ignored, as they may signal excessive wear or deterioration of the braking system.
For example, grinding or scraping sounds are often considered among the most serious warning signs, as they may indicate direct metal-to-metal contact within the braking system.
Such contact can lead to rapid deterioration of the brake rotors and severely compromise the vehicle’s stopping capability.
A loud, persistent noise that persists for an extended period may indicate that the brake pads have reached the end of their useful service life.
If unusual noises are accompanied by other issues such as: vibrations, the vehicle pulling to one side during braking, reduced stopping power, or illuminated warning lights on the dashboard, the underlying cause may be more serious.
These symptoms could point to defective rotors, worn brake pads, loose components, or faults within the hydraulic system, all of which require immediate attention before driving the vehicle over long distances.
3. Why You Should Never Ignore Brake Noises Before a Trip
Ignoring brake noises before a journey can allow minor issues to escalate into major safety concerns.
A problem that begins as mere wear on the brake pads can eventually lead to damaged rotors, reduced braking efficiency and hefty repair costs.
As the braking system is a critical mechanism that enables drivers to slow down, stop and avoid accidents, it is essential to pay close attention to any unusual sounds.
Timely identification and repair of such issues can often prevent further damage and help ensure the continued reliability of the braking system.
Before embarking on a road trip or a long journey, taking a moment to listen for any strange noises coming from the brakes can provide vital insights into the condition of the braking system.
Addressing potential problems in a timely manner enhances safety, minimizes the risk of sudden vehicle breakdown and ensures that the vehicle remains capable of stopping effectively across a variety of driving conditions.
How to Check the Parking Brake
The parking brake is a critical safety feature that many drivers overlook during routine vehicle inspections.
While most people view the parking brake primarily as a means to keep the vehicle stationary when parked, it also serves as an essential backup system in the event of a primary braking system failure.
The parking brake is designed to prevent the vehicle from rolling unintentionally, particularly on inclines and uneven surfaces.
However, over time, the cables, brake shoes, brake pads and other components of the parking brake system can wear out or become less effective.
Checking the parking brake before setting out on a journey ensures that it can safely bring the vehicle to a halt if needed and provides the confidence that a vital safety system is functioning correctly.
1. Check the Parking Brake Engagement
To begin, park the vehicle on level ground and engage the parking brake.
The parking brake should engage easily and feel firm once activated.
Whether your vehicle features a hand lever, a foot pedal, or an electronic parking brake, the system should lock into place without requiring excessive force.
Once engaged, the brake should feel solid and secure, rather than loose or unstable.
A properly functioning parking brake is designed to prevent the vehicle from rolling while parked, even if the transmission is accidentally shifted or the vehicle is parked on a slight incline.
Regularly checking its engagement can help identify worn components before they develop into major issues.
2. Evaluate the Parking Brake’s Performance
After confirming that the parking brake engages correctly, check how effectively it performs its function.
When the parking brake is engaged, the vehicle should remain stationary and exhibit no movement whatsoever.
On a safe, gentle incline, a properly functioning parking brake should possess the capacity to securely hold the vehicle in place without allowing it to roll.
If the vehicle begins to slide, drifts from its position, or requires excessive force to remain stationary, the parking brake may be in need of adjustment or repair.
Consistent holding power is paramount, as it helps prevent accidents caused by the vehicle inadvertently rolling away.
Checking the brake’s performance before setting out on a journey ensures that the parking brake is ready to function effectively whenever the need arises.
3. Signs of Parking Brake Problems
There may be several warning signs indicating that the parking brake system requires attention.
A common symptom is “excessive brake travel,” wherein the hand lever or foot pedal must be moved significantly further than usual before the brake engages.
Drivers may also perceive that the parking brake feels loose, fails to hold the vehicle securely, or disengages unexpectedly.
Unusual noises such as: grinding, squeaking, or clicking sounds, when engaging or disengaging the brake may also signal that a component has worn out or become defective.
In vehicles equipped with electronic parking brakes, warning lights or error messages may indicate a problem within the system.
Ignoring these signs can compromise the effectiveness of the parking brake and increase the risk of the vehicle shifting position even while parked.
Timely repair of parking brake-related issues maintains vehicle safety, prevents excessive wear on associated components and ensures that this vital backup braking system remains reliable precisely when it is needed most.
How to Inspect the Braking System for Visible Issues
A visual inspection of the braking system can reveal numerous problems before they evolve into serious safety hazards.
Although some brake issues originate in components that are difficult to see, many warning signs are visible to drivers who take a few minutes to inspect their vehicle before setting out on a trip.
Cracked hoses, fluid leaks, damaged parts, abnormal wear and warning lights, all of these can indicate that the braking system requires attention.
As brakes are responsible for helping to bring the vehicle to a safe stop, both during routine daily driving and in emergency situations, early identification of visible issues can prevent compromised braking performance, costly repairs and potential accidents.
A careful visual inspection requires no specialized mechanical knowledge and can provide invaluable insight into the overall condition of the braking system.
Not only this, there’s vehicle safety experts that shows the importance of checking the brakes before every trip, according to the OSHA, the vehicle maintenance programs helps you to prevent the injuries and fatalities caused by the unsafe vehicle and brake systems are among the most important components that should be inspected every time whenever you wanted to go for the journey, so pre-trip brake inspection actually helps you to identify the worn out components, fluid leaks or performance issues before they develop into some serious safety hazards as well.[¹]
1. Inspect Brake Hoses and Lines
Brake hoses and lines play a critical role in conveying brake fluid throughout the entire hydraulic braking system.
Every time the brake pedal is depressed, fluid flows through these lines, transmitting braking force to the wheels.
Given their immense importance, any defect in these components can adversely affect braking performance.
During your inspection, look for visible cracks, breaks, bulges, corrosion, rust spots, or signs of wear on the hoses and metal brake lines.
Additionally, look for wet spots or oily residue, which may indicate a brake fluid leak.
Brake lines are constantly exposed to heat, moisture, road debris and fluctuating weather conditions, all of which can cause them to deteriorate over time.
Even a minor leak can reduce hydraulic pressure and render the brakes less effective; therefore, any malfunction should be repaired as soon as possible.
2. Check the Wheels for Brake-Related Issues
The wheels can often provide useful clues regarding the condition of the braking system.
Check around each wheel for fluid leaks, unusual accumulations of dirt or debris, or visible signs of damage to adjacent brake components.
Brake fluid may appear in the wheel area as a clear, yellowish, or light, oil-like substance.
An excessive buildup of brake dust on a single wheel, compared to the others, as it can sometimes indicate that the brake pads are not wearing evenly or that the brake caliper is not functioning correctly.
You should also look out for signs of rust, damaged hardware, or anything that appears loose or out of place.
As many brake components are mounted directly behind the wheels, a quick visual inspection can often reveal problems that might otherwise go unnoticed until brake performance begins to deteriorate.
3. Pay Attention to Dashboard Warning Lights
Modern vehicles are equipped with dashboard warning lights that monitor critical vehicle systems, including the brakes.
Before embarking on any journey, turn on the ignition and check whether any brake-related warning lights remain illuminated after the engine has started.
A brake warning light may signal low brake fluid levels, an issue with the parking brake, or a malfunction within the braking system itself.
The ABS warning light may indicate a malfunction within the Anti-lock Braking System, a system designed to help maintain vehicle control, even during hard braking.
While an illuminated warning light does not always signify that the brakes are on the verge of immediate failure, it should never be ignored; rather, it serves as an indication that the vehicle has detected a condition requiring attention.
Dashboard warning lights are designed to alert the driver before problems escalate into serious issues; as such, they constitute one of the most valuable tools for detecting problems within the braking system at an early stage.
Taking these warnings seriously can help ensure that your brakes remain safe and reliable throughout your entire journey.
Read More:
- How to Install Child Car Seat Correctly
- How to Keep Kids Safe In Car
- How to Drive Safely Around Trucks
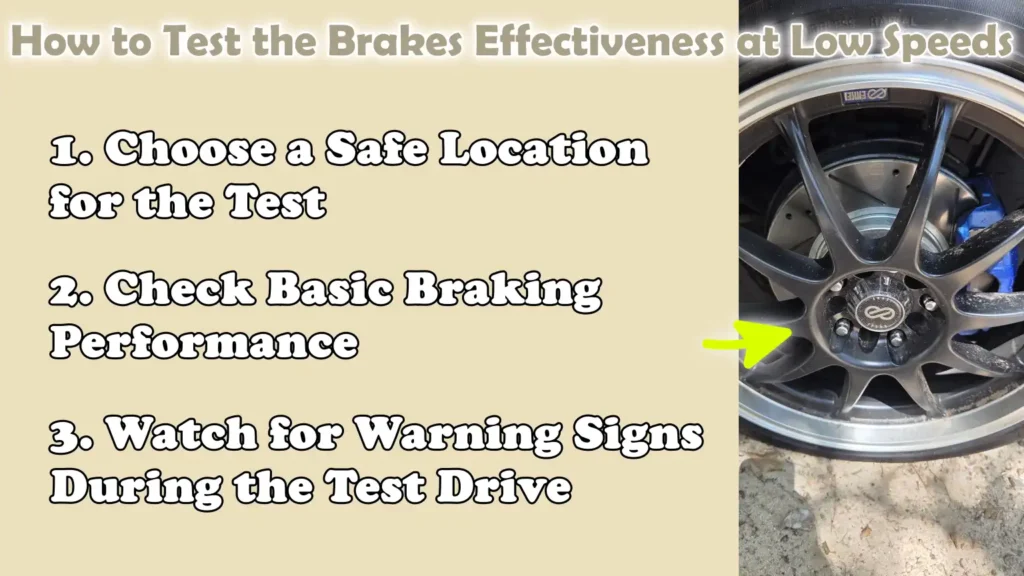
How to Test the Brakes Effectiveness at Low Speeds
Before setting out on a journey, the simplest way to assess your vehicle’s braking performance is to conduct a brake test at low speeds.
While a visual inspection can sometimes reveal worn-out components, a brief driving test offers you the opportunity to directly experience how the brakes function in real-world conditions.
Many brake-related issues such as: weak braking, strange noises, vibrations, pulling to one side, or delayed response, become clearly apparent when the vehicle is in motion.
Testing the brakes at low speeds minimizes risk while providing essential insights into the condition of the braking system.
This simple step helps drivers detect potential problems early on, ensuring that the vehicle is capable of stopping safely before venturing onto busy streets or highways.
1. Choose a Safe Location for the Test
Before conducting a brake test, select a safe location where you can drive slowly without disrupting the flow of traffic.
An empty parking lot, a quiet residential street, or any area with minimal traffic typically serves as the ideal setting for this purpose.
The objective is to create a controlled environment where you can focus your full attention on how the vehicle responds when the brakes are applied.
Avoid crowded streets, busy intersections, or areas with heavy pedestrian or vehicular traffic.
Testing in a safe location allows you to concentrate entirely on the brakes’ performance without any distractions.
Furthermore, it provides you with ample space to make multiple stops and observe the vehicle’s behavior under varying braking pressures.
2. Check Basic Braking Performance
Once you have reached a safe location, drive at a low speed and gently apply the brakes several times.
The vehicle’s speed should decrease gradually and it should come to a halt in a controlled manner, without any hesitation.
A properly functioning braking system should provide a consistent and reliable response every time the brake pedal is depressed.
Pay close attention to the amount of pressure required on the brake pedal and whether the vehicle comes to a stop in a perfectly straight line.
The brakes should feel responsive and stable, engaging immediately without requiring excessive force.
Consistent braking performance is a clear indication that the brake pads, rotors, hydraulic system and other associated components are working together effectively.
Any noticeable deviation from the vehicle’s normal braking behavior could be a sign that further investigation is required.
3. Watch for Warning Signs During the Test Drive
When testing the brakes at low speeds, keep an eye out for signs that may point to a potential issue within the braking system.
If the vehicle pulls to one side when the brakes are applied, this could indicate uneven wear on the brake pads, a seized brake caliper, or an imbalance in the hydraulic system.
Vibrations felt through the brake pedal or steering wheel may suggest that the brake rotors are uneven or warped.
Listen carefully for any squealing, grinding, clicking, or other unusual noises; these sounds could signal worn brake pads or a failing component.
Additionally, pay attention to any delay in braking response, excessive travel of the brake pedal, or if the pedal feels soft or spongy.
Never ignore warning lights that illuminate on the dashboard during a test drive, as they may indicate a malfunction in the braking system or the Anti-lock Braking System (ABS).
Recognizing these warning signs before commencing a journey enables drivers to rectify problems in a timely manner, thereby ensuring the safety and reliability of the braking system throughout the entire trip.
Conclusion – How to Check Brakes Before a Trip
So, every successful trip depends on the one important ability that many drivers take for granted: as the ability to stop safely whenever it is necessary or needed.
Although modern braking systems are robust and reliable, they still undergo some degree of wear and tear every time the vehicle is driven.
Brake pads gradually thin out, rotors may show signs of wear, brake fluid can absorb moisture, hoses may age and other components can also gradually lose their operational efficiency over time.
Many brake-related issues begin with subtle warning signs such as: strange noises, vibrations, low fluid levels, illuminated warning lights, or a change in the feel of the brake pedal when depressed.
Identifying these problems early on allows drivers to address them before they compromise the vehicle’s stopping capability or lead to costly repairs down the road.
Conducting a thorough brake check before a trip does not require specialized mechanical knowledge or tools.
By checking the brake pedal, monitoring brake fluid levels, visually inspecting brake components, testing the parking brake, listening for any unusual sounds and test-braking the vehicle at low speeds, drivers can gain a far better understanding of the condition of their braking system.
These simple checks take just a few minutes, yet they provide immense peace of mind before embarking on a journey.
So, this is all from this guide and comment down below for more information.
Frequently Asked Questions
Q1: How often should I check my brakes?
Answer: You should perform a basic inspection of your brakes at least once a month and before any long journey. Regular checks help detect worn brake pads, low brake fluid levels, unusual noises, or other issues before they pose a serious safety risk. Even if your vehicle’s brakes appear to be functioning normally, regular inspections can still help identify problems that may not be immediately apparent while driving.
Q2: What are the signs indicating that my brakes require immediate attention?
Answer: Some of the most common warning signs include grinding or scraping noises, a loose or spongy brake pedal, vibrations while braking, the illumination of the brake warning light on the dashboard, increased stopping distances and the vehicle pulling to one side when braking. If you notice any of these symptoms, it is crucial to have your braking system inspected as soon as possible, as they may indicate worn or faulty components.
Q3: Can I perform a visual inspection of my brakes without removing the wheels?
Answer: On many vehicles, you can view parts of the brake pads and rotors through the wheel spokes or openings. This allows you to perform a basic visual inspection for obvious issues, such as excessive wear, damage, or severe corrosion. However, a comprehensive inspection, which involves a thorough examination of all brake components, may require the removal of the wheels. Even a simple visual check can help identify potential problems before a trip.
Q4: Why is brake fluid so important for braking performance?
Answer: Brake fluid serves to transmit hydraulic pressure from the brake pedal to the braking components located at each wheel. Without an adequate supply of clean brake fluid, the braking system cannot generate the necessary pressure to effectively bring the vehicle to a halt. Low or degraded brake fluid can compromise braking performance and increase the distance required to stop the vehicle; therefore, regular inspection of the fluid is an essential part of vehicle maintenance.
Q5: What should a properly functioning brake pedal feel like?
Answer: A properly functioning brake pedal should feel firm, smooth and responsive. When depressed, it should offer consistent resistance and should not sink toward the floor when steady pressure is applied. If the pedal feels unusually loose or spongy, or if it must be pressed down excessively far before the brakes engage, there may be an issue within the hydraulic braking system that requires attention.
Q6: Is a loud noise coming from the brakes always a sign of a problem?
Answer: Not necessarily. In some cases, loud noises from the brakes may be caused by moisture, light surface rust, temperature fluctuations, or the specific materials used in the brake pads. However, persistent and loud noises can also indicate worn brake pads or other developing issues. If the noise persists or becomes louder over time, it is advisable to have the braking system inspected to identify the underlying cause.
Q7: How can I tell if my brake pads are worn out?
Answer: Worn brake pads often produce loud squealing or grinding noises when the brakes are applied. You may also notice a reduction in braking effectiveness, an increase in stopping distance, or visible thinning of the brake pad material. Many brake pads feature built-in wear indicators that generate an audible warning sound when the pads reach the end of their service life and require replacement. Regular inspections help ensure that brake pads are replaced before they become excessively worn.
References:
[1] Motor Vehicle Safety
https://www.osha.gov/motor-vehicle-safety/vehicle-safety-aspects

Guys, I’m a car audio enthusiast and customization expert and I love clear sound and clean installation. Plus, I have spent years helping people build their dream audio setups. And whenever I’m working on cars, I probably listen to music and thinks about the next big upgrade.