 Skip to content
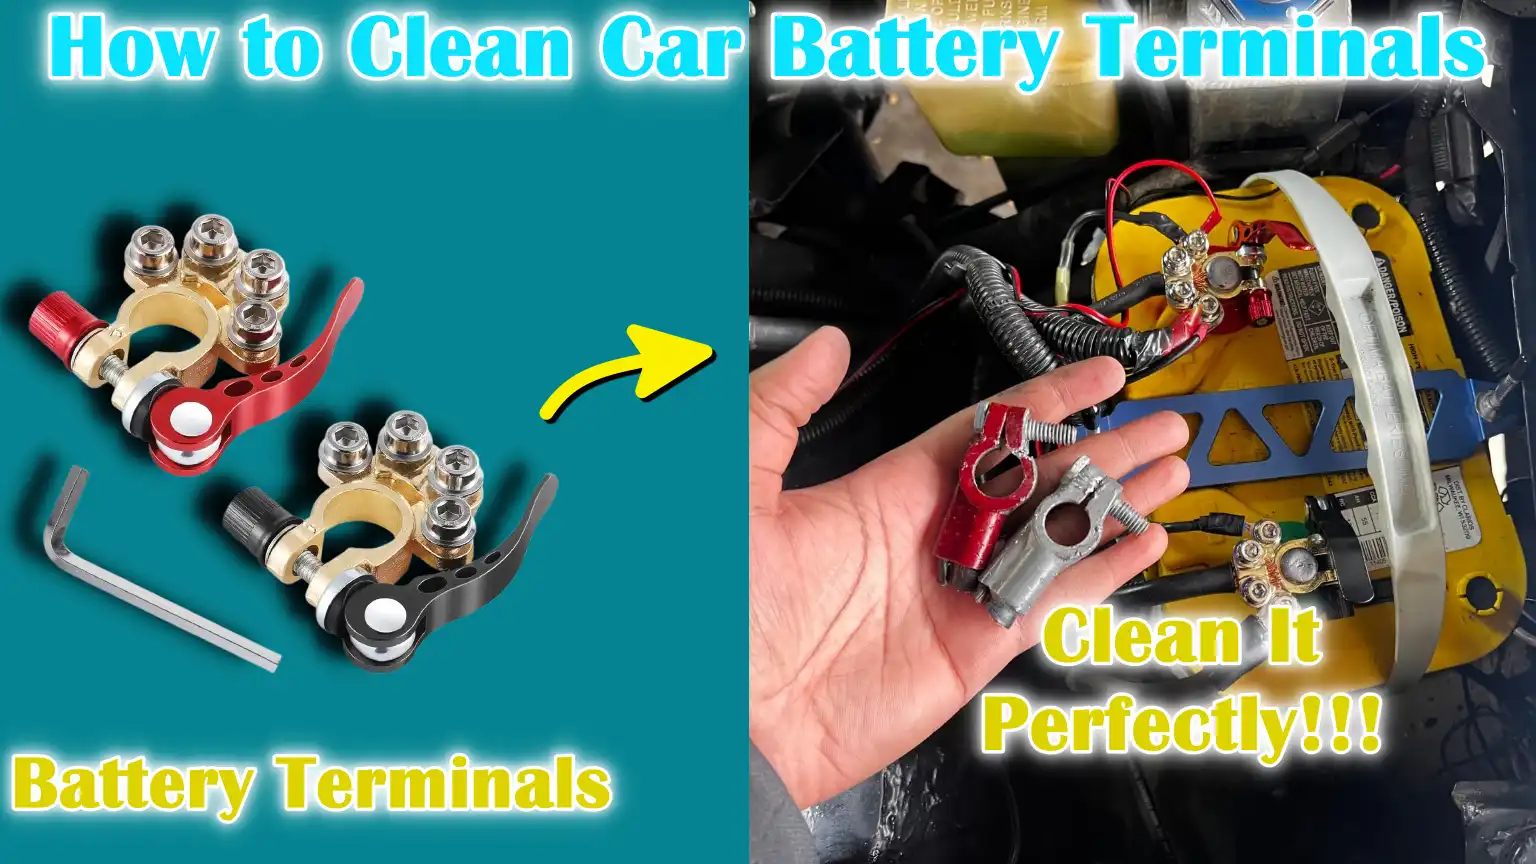
Written By: Don Dodi
Fact Checked By: Kristen Brown
Reviewed By: Diego Rosenberg
It is true that your car’s battery terminals can block by the think layer of corrosion and it can actually block as much electricity as a broken wire does and that’s where actually 50% of the car’s starting problems occurs.
As if the battery terminals are dirty or corroded then even the most powerful battery can fail to do the basic job.
And whenever the corrosion forms, then it usually can be seen as a white, green or bluish powdery substance that actually restricts the flow of the electricity between the battery and the cables and this is actually responsible for your dim headlights, slowing down your car’s engine or even it prevent your car from starting at all.
Not only this, research also shows that even a thin layer of corrosion can really reduce the current flow by up to the 30% and that way it puts really unnecessary strain on the alternator and it shortens the overall lifespan of the battery as well.
And because of all these reasons, this guide teaches you How to Clean Car Battery Terminals, which included simple and actually inexpensive maintenance task that not only just helps to improve the electrical conductivity but also it literally capable to extend the life of your battery as well.
What are the Basic Safety Precautions
1. Wear safety gloves and goggles
Car batteries contain sulfuric acid, which is highly corrosive and can cause severe skin burns or permanent eye damage if splashed.
Even a small drop of acid can irritate the skin or corrode clothing and gases released during charging or discharging can be harmful to the eyes.
Wearing rubber or nitrile gloves keeps your hands safe from accidental contact with acid or rust, while safety glasses protect your eyes from harmful splashes or small particles released during cleaning.
These simple protective items act as your first line of defense and ensure that you can work safely without injury.
2. Work in a well-ventilated space
Car batteries naturally release small amounts of hydrogen gas, specially when they are charged, discharged, or exposed to high temperatures.
Hydrogen is highly flammable and in poorly ventilated areas it can accumulate and create a dangerous situation where even a small spark can cause an explosion.
Cleaning your battery outside or in a garage with good air flow reduces the chances of inhaling harmful fumes and also prevents the accumulation of gases.
Proper ventilation is one of the easiest and most effective ways to make battery maintenance safe.
3. Make sure the engine is off and the keys are out
Before you begin working on the battery, it is important to turn off the vehicle completely.
When the engine is running or the keys are in the ignition, the car’s electrical system is active and touching the terminals can cause a spark or even a short circuit.
By turning off the engine and removing the keys, you eliminate the risk of unexpected electrical current and reduce the chance of accidental injury or damage to the car’s sensitive electronic equipment.
This simple step ensures that the battery is stable and safe to handle.
4. Avoid sparks or open flames near the battery
As car batteries can release hydrogen gas, which is highly explosive, it is extremely important to keep sparks, cigarettes or open flames away.
Even a spark near the battery is enough to ignite the gas, causing a fire or explosion that can cause serious injuries.
Static electricity from clothing or tools can also cause sparks, so it is advisable to use only insulated tools and keep the workplace free from fire hazards.
Being careful of fire and sparks is not only for your safety, but also prevents damage to your vehicle.
Tools
| Tool / Material | Purpose | Helpful Details |
|---|---|---|
| Wrenches | To loosen and tighten battery cable connections. | A small adjustable wrench or socket wrench works best. Always loosen the negative cable first to avoid sparks. |
| Wire Brush or Battery Terminal Cleaner | To remove corrosion from battery posts and cable ends. | A wire brush is designed to scrape away tough deposits. A special battery terminal cleaner has a round brush that fits better over the terminals. |
| Baking Soda and Water Solution | To neutralise battery acid and remove corrosion. | Mix one tablespoon of baking soda with a cup of water. This safe, homemade solution helps break down acid deposits easily. |
| Old Toothbrush or Small Cleaning Brush | For cleaning small or hard to reach areas. | The toothbrush is gentle and easy to use in tight spaces where a wire brush can’t reach. |
| Rag or Paper Towels | To wipe away dirt, moisture and remaining cleaning solution. | Use a clean, dry cloth to ensure the battery and terminals are completely dry before reassembling. |
| Petroleum Jelly or Dielectric Grease | To protect the battery terminals from future corrosion. | A thin layer prevents air and moisture from reaching the metal, slowing down corrosion and increasing battery life. |
How to Disconnect the Battery
1. Always disconnect the negative (-) terminal first
The negative terminal of a car battery is usually marked with a minus (-) sign and often covered with a black cable.
It is very important to disconnect this terminal first because it is directly connected to the car’s body and frame, which act as grounding.
If you remove the positive cable first and your tool accidentally touches a metal part of the car, this could cause a direct short circuit, causing sparks, burns or even damage to the battery and electrical system.
By removing the negative cable first, you cut the grounding connection and make the battery safer to handle.
This simple sequence of disconnects is one of the most important safety steps in battery maintenance.
2. Then disconnect the positive (+) terminal
After the negative cable is safely removed, the positive terminal, which usually has a plus (+) sign and a red cable, can be disconnected.
Removing the positive terminal after the negative terminal ensures that no current flows through the system, meaning the risk of accidental sparks or shocks is virtually zero.
The positive terminal is directly connected to major electrical components such as the starter and alternator, so it is important to handle it with care.
Using an insulated wrench when loosening the terminal can provide additional safety.
Doing this step second rather than first ensures that the disconnecting process is safe and controlled.
3. Keep the cables separate to avoid accidental re-connection
After removing both terminals, it is important to keep the cables away from the battery poles so that they do not accidentally bump into each other and reconnect.
Even a small accidental contact can cause a spark or restart the flow of electricity, which can be dangerous when cleaning the terminals.
Many people use cable ties or tuck the cables along the side of the engine bay to keep them secure and out of the way.
This step may seem small, but it provides added safety and makes the cleaning process much easier.
By keeping the cables away from the battery until you are ready to reconnect, you ensure a smooth and risk-free maintenance process.
How to Inspect the Battery and Terminals
1. Check for Cracks, Leaks, or Serious Damage to the Battery Case
A visual inspection of the battery case is one of the most important steps before you begin cleaning.
Car batteries are filled with sulfuric acid and if the case is cracked or leaking, that acid can escape and cause serious damage to both you and your vehicle.
Leaking acid can corrode nearby metal parts, damage wiring and even release dangerous fumes.
A healthy battery case should look solid and not have any bulges or soft spots.
Bulges usually mean the battery is overheating or corroding on the inside, which can cause sudden malfunctions.
If you see cracks, leaks, or swelling, the battery should not be cleaned or reused—it should be replaced immediately to prevent safety hazards and further damage to your vehicle.
2. Identify corrosion deposits (white, blue or green crust)
Battery terminals often develop a white, blue or green crust-like deposit around the ends of poles and cables.
This is called corrosion and it occurs when sulfuric acid vapors from the battery react with the metal of the terminals and the air around them.
Corrosion isn’t just an unsightly layer; it disrupts the smooth flow of electricity from the battery to the car’s electrical system.
Even a thin layer can cause problems such as dim lights, trouble starting the engine, or pressure on the alternator.
In severe cases, heavy corrosion can completely block electrical connections, preventing the car from starting.
By carefully checking for corrosion during an inspection, you can determine how much cleaning is needed and prevent these common problems.
How to Clean the Terminals
1. Make a Cleaning Solution by Mixing Baking Soda with Water
The safest and most effective way to clean car battery terminals is with a simple solution of baking soda and water.
Baking soda, also known as sodium bicarbonate, works by neutralizing the acidic residue that builds up on the battery.
This reaction not only makes it easier to remove corrosion, but also prevents the acid from corroding or further damaging battery parts.
A commonly used mixture is about one tablespoon of baking soda dissolved in one cup of water.
This solution is inexpensive, non-toxic and easy to prepare at home, making it a favorite choice for both professionals and everyday car owners.
2. Dip the Brush into the Solution and Clean the Terminals and Cable Ends
Once the cleaning solution is ready, dip a small brush, such as an old toothbrush or battery cleaning brush, into the solution to remove dirt and corrosion from the battery terminals and cable ends.
This action helps restore a clean metal surface, which is necessary for proper electrical contact.
The goal is to remove all deposits so that terminals and cables can transmit electricity without resistance.
Careful scrubbing ensures that the connection will remain strong, reducing the chance of starting problems and poor electrical performance.
3. For rust, allow the solution to sit for a few minutes
For thicker layers of rust, scrubbing alone may not be enough.
Allowing the baking soda and water mixture to sit on the affected areas for a few minutes gives the neutralizing reaction time to soften and dissolve the acidic deposits.
During this waiting period, you may notice some bubbling or fizzing as the baking soda reacts with the acid—this is a normal and safe phenomenon that indicates the solution is working effectively.
Giving the solution time to work reduces the effort required during scrubbing and ensures a deeper, more thorough cleaning.
4. Use a wire brush for more stubborn deposits
Some rust can be stubborn and difficult to remove, specially if it has been left untreated for a long period of time.
In these situations, using a wire brush provides the extra power needed to scrape off tough deposits.
Wire brushes are designed to etch away deposits to expose the clean metal underneath, which is necessary to restore full electrical conductivity.
When scrubbing, it is important to apply enough pressure to remove the layer without damaging the metal surface of the terminals.
Once the tough rust is removed, the battery is ready for washing and protection, improving the life and reliability of your car’s electrical system.
How to Rinse and Dry the Battery
1. Wipe off any remaining residue with a wet cloth
After scrubbing the terminals with the baking soda solution, it is very important to remove any remaining cleaning mixture and loose corrosion.
Using a wet cloth dipped in clean water helps remove all traces of residue from the battery poles and cable ends.
If residue remains, it can attract dirt and moisture and may also continue to react with the terminals, causing new corrosion.
Careful wiping also ensures that baking soda particles do not interfere with electrical connections after the cables are reconnected.
This step makes the surface clean, smooth and ready for proper contact between the battery and the terminals.
2. Dry thoroughly with a clean cloth or paper towel
After wiping the terminals and surrounding area, it is important to dry them completely before reconnecting the battery.
Remaining moisture can weaken electrical connections or allow a small amount of current to escape, called parasitic discharge.
Over time, this can shorten the battery’s life and reduce its efficiency.
Drying with a clean cloth or absorbent paper towel removes water marks, leaving the surface safe for reassembly.
A completely dry surface also prevents rust and helps the protective layer of petroleum jelly or dielectric grease, which will be applied later, adhere more effectively.
Taking the time to completely dry ensures that the battery remains strong, reliable and safe even after cleaning.
How to Apply a Protective Coating
1. Apply a light coat of petroleum jelly or dielectric grease to the terminals and cable ends
After thoroughly cleaning and drying the battery terminals and cable ends, applying a thin coat of petroleum jelly or dielectric grease creates an important protective layer.
These substances act as a barrier between the exposed metal and surrounding air, moisture and acidic vapors naturally emitted by the battery.
Without this coating, freshly cleaned metal is more likely to react with these elements, causing rust to form again in a short time.
Petroleum jelly is inexpensive and readily available, while dielectric grease is specifically designed for electrical use and provides long-term protection.
Both options are effective at keeping the terminals safe from environmental damage and maintaining a steady flow of electricity.
2. This helps prevent future corrosion
When battery acid reacts with the metal of the terminals and air, deposits form that block the free flow of electricity.
Once the protective layer is applied, this chemical reaction slows down dramatically, meaning your battery stays cleaner and lasts longer.
Preventing corrosion not only reduces the need for frequent maintenance, but also improves the efficiency of the electrical system.
A clean and secure connection helps the car’s starter, lights and other electrical components receive constant power without strain.
This simple step, which takes just a few seconds, can extend battery life by months or years and ensures your car runs reliably every time you turn the key.
How to Reconnect the Battery
1. Connect the Positive (+) Terminal First
When reconnecting a car battery, it’s important to start with the positive terminal, which is usually marked with a plus (+) sign and often covered with a red cable.
Connecting this cable first ensures that the circuit isn’t completed until the negative cable is connected, reducing the chance of sparks.
If you connect the negative side first, your tool could accidentally touch a metal part of the car while connecting the positive and cause a direct short circuit.
By starting with the positive terminal, you create a safe and controlled reconnection process that keeps both you and the vehicle’s electrical system safe.
2. Then Reconnect the Negative (-) Terminal
Once the positive terminal is securely in place, the next step is to reconnect the negative terminal, which is usually marked with a minus (-) sign and covered with a black cable.
The negative side connects directly to the car’s frame and serves as the ground for the entire electrical system.
Connecting it last completes the circuit in the safest way possible.
This method prevents accidental sparks and ensures that electricity flows evenly through the system once the connections are made.
By following this correct order, you protect sensitive components such as the alternator, fuses and onboard computer systems from electrical surges.
3. Make sure the connections are firm, but not too tight
After reconnecting the two terminals, it is important to make sure the connections are firm enough to prevent movement, but not so tight as to damage the battery posts or cable clamps.
Loose connections can cause intermittent electrical flow, causing lights to flicker, trouble starting the car and even long-term electrical system failure.
On the other hand, overtightening can break the battery posts or damage the clamps, which can be costly to repair.
The goal is to create a firm and stable fit that holds the cables in place without putting stress on the metal.
Properly secured connections provide stable electrical contact, ensuring your battery delivers maximum performance and reliability.
What are the Final Check Which is Mandatory
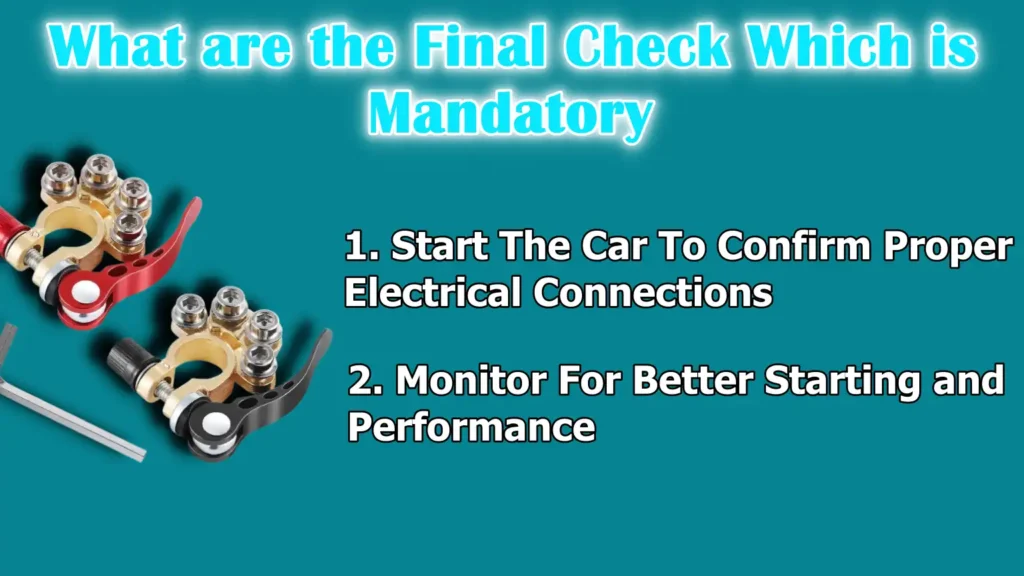
1. Start The Car To Confirm Proper Electrical Connections
After thoroughly cleaning, coating and reconnecting the battery terminals, the most important step is to start the car.
This check confirms that the battery is smoothly delivering power through the terminals to the starter and the rest of the electrical system.
Successful ignition with a loud and steady crank sound indicates that the electrical connections are clean and efficient.
If the car struggles to start or the lights keep blinking, it may be a sign that the connection is still loose or the rust has not been completely removed.
By starting the engine immediately after cleaning, you can be sure that the work you have done has restored proper electrical flow and resolved problems caused by dirty terminals.
2. Monitor For Better Starting and Performance
After confirming the car starts, it is equally important to pay attention to the overall performance of the electrical system.
Clean terminals allow the battery to supply power without resistance, which means headlights will shine brighter, dashboard electronics will work more reliably and there won’t be any strain on the starter motor.
Over time, this improved connection reduces the strain on both the alternator and battery, making them last longer.
Keeping an eye on your car’s performance over the next few days is a practical way to make sure the cleaning process was effective.
If you notice ease of starting and smooth electrical operation, it means the maintenance was successful and your car is now in better condition for daily use.
Read More:
Basic Maintenance Tips
1. Inspect Battery Terminals Regularly (Every 3-6 Months)
Car battery terminals are constantly exposed to heat, moisture and acidic vapors, making them more prone to corrosion over time.
Inspecting them every three to six months ensures that any early signs of deposits can be cleaned up before they cause a bigger problem.
Regular inspections also help you spot loose connections, cracks in cables or early signs of battery failure.
This routine inspection is specially important before extreme weather, such as hot summers or cold winters, when the battery is under the most stress.
Regular monitoring not only extends your battery’s life but also prevents unexpected malfunctions that can land you in trouble.
2. Keep the Battery Clean and Dry
Dirt, grease and moisture on the surface of a car battery may seem harmless, but they can actually create paths for electrical current to leak into the case.
This leakage is called parasitic drain and can slowly discharge the battery even when the car isn’t running.
Keeping the battery surface clean and dry reduces this risk and helps the battery maintain its full capacity.
Wiping the top of the battery with a dry cloth during routine maintenance can also make a big difference.
Clean and dry batteries are also less likely to have corrosion around the terminals, making the entire electrical system more reliable.
3. Replace severely corroded or damaged cables
Battery cables play a vital role in transmitting power from the battery to the starter and other electrical equipment.
If the cables are severely corroded, broken or worn, they will not be able to transmit electricity efficiently, no matter how clean the battery terminals are.
Severely damaged cables also pose safety risks, such as overheating or short circuits, which can damage sensitive electronics in the car.
Replacing worn cables keeps the flow of electricity smooth and continuous, allowing the battery to perform at its best.
Investing in new cables when needed is much less expensive than the potential cost of replacing the battery or repairing electrical damage caused by poor connections.
Conclusion – How to Clean Car Battery Terminals
Yes, cleaning the car battery terminals can be smallest habits but it can make the big difference, otherwise most people actually think that they need a new battery when their car struggles to start, but in many cases batteries just need a quick terminal cleanup and nothing else.
Rust, which looks like a white, blue or green powder, is more than just dirt—it can impede the flow of electricity by up to 30 percent, causing the alternator and battery to work harder than they should.
This stress not only shortens battery life but can also damage electrical components over time.
By following simple steps like inspecting the battery case, cleaning off the rust with a baking soda solution, thoroughly drying the terminals and applying a protective coating, you can restore strong and consistent power flow.
Reconnecting the terminals in the correct order and doing a final check ensures everything is working properly.
In addition to cleaning, regular checks every few months and replacing damaged cables can help you avoid costly repairs and unexpected breakdowns.
In the long run, this simple method will save you from costly repairs and unexpected failures.
And battery terminal corrosion is a really common issues which is caused by the release of hydrogen gas from the battery’s sulfuric acid and this particular gas reacts with the oxygen and moisture out there in the atmosphere and forms a corrosive substance that accumulates on the terminals. And then over the time, this buildup can interfere with the battery’s performance and which leads to the weak starts or electrical failures as well.[¹]
Now, it is the time to ask some quick questions in the comment section.
Frequently Asked Questions
Q1. How often should I clean my car battery terminals?
Answer: It’s a good idea to clean your car battery terminals every three to six months. Over time, acidic vapors, dirt and moisture can build up around the battery poles and cables, causing corrosion. If you live in an area with extreme heat, extreme cold or high humidity, you may need to check more often because corrosion occurs more quickly in these conditions. Regular cleaning ensures a strong electrical connection and helps your battery last longer.
Q2. What causes corrosion on car battery terminals?
Answer: Corrosion usually occurs when sulfuric acid vapors escape from the battery and react with the metal of the terminals and the air around them. This reaction creates a powdery layer that can appear white, green or blue. Corrosion can be made worse by overcharging, loose connections, extreme temperatures and even normal battery aging. Once it begins to solidify, it blocks the flow of electricity and can make it difficult to start your car.
Q3. Can I use baking soda to clean battery terminals?
Answer: Yes, baking soda is one of the safest and most effective cleaners for battery terminals. Mixing a tablespoon of baking soda with a cup of water creates a solution that neutralizes acid deposits. When you apply this mixture to the corroded parts, you may see fizzing, indicating that the acid is breaking down. This method is inexpensive, safe for most people, and extremely effective at removing rust.
Q4. Is it safe to touch car battery corrosion?
Answer: No, it is not safe to touch battery corrosion with bare hands. This powdery substance is a mixture of lead compounds and acid residues, which can irritate your skin and eyes. Always wear protective gloves and safety glasses when cleaning a battery. Although rust may seem harmless, it is a chemical deposit that can cause burns or skin irritation if handled carelessly.
Q5. Why should I remove the negative terminal first?
Answer: The negative terminal is connected to the car’s frame and acts as a ground. If you remove the positive side first and your tool accidentally touches a metal part of the car, it can cause a spark or even a short circuit. By disconnecting the negative side first, you cut the ground connection, making it safer to work with the battery. This easy disconnect method greatly reduces the chance of accidents.
Q6. What happens if I don’t clean my battery terminals?
Answer: If you ignore dirty or corroded battery terminals, the corrosion will continue to grow and interfere with the flow of electricity. At first, you may notice minor problems, such as dim headlights or a delay in cranking when starting the engine. Over time, this buildup can completely block the electrical connections, making the car unable to start at all. It can also put extra strain on the alternator and reduce the battery’s life. Regular cleaning is easier and cheaper than dealing with these problems later.
Q7. Can I use petroleum jelly or dielectric grease after cleaning?
Answer: Yes, applying a thin layer of petroleum jelly or dielectric grease after cleaning helps protect the terminals from future corrosion. These coatings act as a barrier that prevents moisture, dirt, and acidic vapors from reaching the metal. Petroleum jelly is easy to find and works well, while dielectric grease is specifically designed for electrical devices and lasts longer. Both options extend the time between cleanings and help maintain better battery performance.
Q8. How do I know if my battery needs to be replaced rather than cleaned?
Answer: If your battery case is cracked, swollen, or leaking acid, cleaning will not solve the problem and the battery will need to be replaced immediately. Also, if your battery is more than four to five years old and is still having trouble holding a charge after cleaning the terminals, it may be nearing the end of its life. Another sign is when your car repeatedly won’t start despite clean terminals, often indicating that the battery is weak.
Q9. Can I clean the terminals when the battery is connected?
Answer: Cleaning the terminals when the battery is connected is not recommended. Working on a live battery increases the risk of sparks, short circuits, or accidental shocks. The safest way is to always turn off the engine, remove the keys, and disconnect the battery cables, starting with the negative side first. After safely removing the cables, you can clean the terminals without any risk.
Q10. How long does it take to clean car battery terminals?
Answer: Cleaning car battery terminals usually only takes about 10 to 20 minutes, depending on the level of corrosion. A simple cleaning with a baking soda solution and a brush goes pretty quickly. If the build-up is heavy, you may need to let the solution sit for a few minutes before scrubbing, but the whole process is still worthwhile.
References:
[1] Battling Car Battery Corrosion: What It Is and How to Clean
https://www.jiffylube.com/resource-center/car-battery-corrosion

Guys, I’m a car audio enthusiast and customization expert and I love clear sound and clean installation. Plus, I have spent years helping people build their dream audio setups. And whenever I’m working on cars, I probably listen to music and thinks about the next big upgrade.
