Written By: Don Dodi
Fact Checked By: Kristen Brown
Reviewed By: Diego Rosenberg
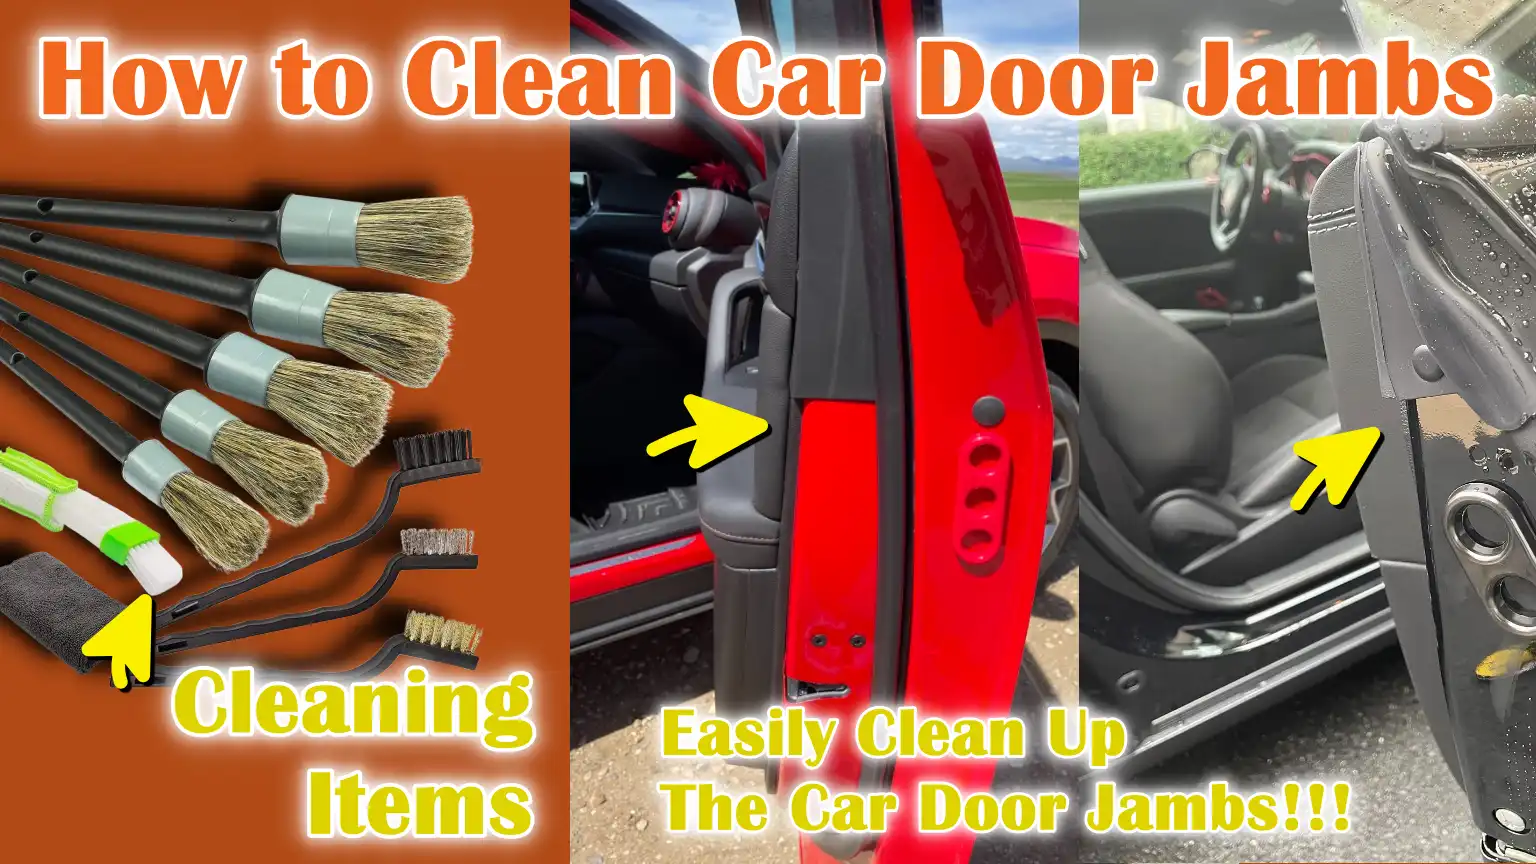
Literally, every time you open your car door, then there is possibility of having dust, dirt, water and other kinds of things that can trapped into the door jambs, that actually damage the paint and lead to the corrosion as well.
Basically, car door jambs are the painted metallic areas you see whenever you open your car doors: yes they are small, but actually plays a big roles in keeping your vehicle clean and always protected way.
As well as, these areas can collects dust, road salt, grease, water and mud every time you drive, specially it is huge during the rain or winter seasons.
Even, there’s corrosion research by NACE that shows that the corrosion singularly costs the global economy trillions of dollars each year; and vehicles are one of the most affected assets due to they have to be on the constant exposure to moisture and contaminants.
Understand this, whenever dirt and salt stay trapped inside the door jamb seams, hinges and rubber seals, then they literally damages paint and lead to the rust formation as well.
That’s why, we have come up with this guide on How to Clean Car Door Jambs, so that you can clean door jambs to reduce the wear on rubber weather stripping, which ultimately helps to block the water, wind noise and dust from entering the cabin.
Overall, this will helps you to keep your vehicle’s look fresh and improve the overall appearance and actually prevent corrosion, protects paint, extends seal life as well.
Tools
| Tool / Supply | Understand, Why These are Required |
|---|---|
| Microfiber Towels | Microfiber towels are soft and safe for car paint. They remove dirt without scratching the surface. For best results, keep separate towels for cleaning and drying. |
| Soft Detailing Brushes | These brushes reach small spaces around hinges and joints. The soft bristles loosen dirt without damaging the paint. They are useful for cleaning areas where a cloth cannot reach. |
| All-Purpose Cleaner – APC | APC safely removes dust, grime and light grease. It should be diluted according to the instructions. Spray lightly and wipe before it dries on the surface. |
| Degreaser | Degreaser breaks down heavy oil and sticky dirt. Use a small amount on dirty areas. Always wipe clean and avoid leaving it on for too long. |
| Spray Bottle with Water | A spray bottle helps control the amount of water used. This prevents electrical components from getting wet. A light mist is safer than a heavy spray. |
| Protective Gloves | Gloves protect your skin from harsh cleaners. They prevent dryness and irritation. They also keep your hands clean during the process. |
| Rubber Seal Conditioner or Silicone Spray | It keeps the rubber soft and flexible. This prevents cracking and drying over time. Apply a thin layer and wipe off excess product. |
Now, Ensure Safety By Taking Precautions Before You Begin
1. Turn Off the Engine and Remove the Keys
Before you begin cleaning your car’s door jambs, always turn off the engine completely and remove the key from the ignition.
This is important because modern vehicles have electronic systems, automatic locking features and sensors that can activate unexpectedly when the car is running or in accessory mode.
When the engine is running, cooling fans, internal electronics, or power locks can operate without warning, increasing the risk of injury.
Removing the key also prevents doors from accidentally locking while you’re working.
For vehicles with push-button start systems, make sure the ignition is completely off.
This simple step protects both you and your vehicle’s electrical system when cleaning around hinges, wiring and latches.
2. Work in a shady, well-ventilated area
Cleaning car door jambs in direct sunlight can cause cleaning products to dry too quickly, leaving stains or chemical marks on the paint.
Heat accelerates evaporation, which can cause streaks and reduce the effectiveness of the cleaner.
A shady area keeps the surface cool and allows the product to work properly for the recommended time.
Good ventilation is equally important, as many cleaning products emit mild fumes.
Working in an open garage or a shady area outside allows you to breathe fresh air and reduces the impact of the chemicals.
Proper airflow also helps surfaces dry naturally and prevents trapped moisture, which can lead to corrosion over time.
3. Avoid spraying directly on electrical parts
The door jamb area often contains exposed wiring, door sensors, locking mechanisms and small electrical connectors.
Spraying water or cleaner directly onto these parts can cause corrosion, short circuits, or damage power windows and central locking systems.
Instead of applying a heavy spray, apply the cleaner to a microfiber towel or spray lightly from a safe distance.
It’s crucial to control moisture, as water trapped inside connectors can cause long-term electrical problems.
Paying extra attention to wiring protects expensive parts and reduces future repair costs.
4. Protect Painted Surfaces from Harsh Chemicals
Car door jambs are painted just like the exterior of the vehicle, which means they can be damaged by harsh household cleaners, bleach, or highly acidic products.
Harsh chemicals can weaken the clearcoat, fade the color, or leave light spots on the surface.
It’s always safer to use an automotive-safe cleaner designed for painted metal.
If you’re using a degreaser, make sure it’s properly diluted according to the instructions.
Testing the product first on a small, inconspicuous area can help prevent accidental damage.
Protecting paint keeps the surface shiny and prevents rust.
5. Wear gloves when using degreasers
Degreasers are powerful products designed to break down thick grease and oil.
Despite their effectiveness, they can strip your skin of its natural oils and cause dryness, irritation, or mild chemical burns with prolonged contact.
Wearing protective gloves creates a barrier between your skin and the cleaning chemical.
Nitrile or latex gloves are commonly used because they resist most automotive cleaners.
Gloves also improve hygiene by keeping dirt and grime off your hands.
This simple precaution helps you work safely and comfortably when using strong cleaning products.
How to Clean Car Door Jambs – Easy & Effective Guide
Properly cleaning car door jambs isn’t just about making them look good.
These areas are exposed to water, road salt, dust and grease every time you drive.
Because they’re so hidden, dirt can go undetected for weeks or even months.
Over time, trapped moisture and salt can slowly corrode paint and lead to rust.
A careful, step-by-step approach helps safely remove dirt without damaging the paint, rubber seals, or electrical components.
When done correctly, this process protects the metal body, keeps the seals flexible and improves the overall look of your vehicle.
At First, Open the Doors and Inspect the Area
Fully opening all doors gives you easy access to the entire jam area, including the frame, hinges, latches and rubber seals.
This inspection is important because it helps you understand how dirty the surface is and what kind of cleaning it needs.
Some areas may only have light dust, while others may have thick grease or early rust spots.
1. Check for Excessive Grease, Mud, or Rust
Look carefully at the hinge and latch areas, as these areas often accumulate thick grease along with dust.
Mud from rainy roads can dry and stick to the lower parts of the door frame.
If you notice brown or orange spots, this could be early rust where the paint has peeled.
Identifying these problems early allows you to use the correct cleaner and prevent further damage.
2. Identify Rubber Seals and Electrical Wiring
The door frame has rubber weather seals that keep water and air out of the cabin.
These seals should be cleaned gently, as harsh chemicals can dry out or break them.
You may also notice small wires, sensors, or connectors near the door frame.
Identifying these areas before cleaning can help you avoid spraying too much water or cleaner directly onto sensitive parts.
Perform Dry Dust Removal First
Before using any liquid cleaner, it’s crucial to remove loose dust.
Dry dirt acts like sand and can scratch paint when rubbed with a wet cloth.
Starting with dry cleaning reduces the risk of swirl marks and surface damage.
1. Use a Dry Microfiber Cloth
A clean microfiber cloth is soft and safe for painted surfaces.
Gently wipe the jamb to remove loose dust and small debris.
The microfiber material traps dirt in its fibers instead of pushing it around, helping to protect the paint.
2. Loosen Debris with a Soft Brush
In tight corners and seams, dust often accumulates where the cloth can’t reach.
A soft detailing brush helps loosen dirt from edges and small gaps.
This gentle brushing prevents scratches and prepares the surface for deeper cleaning in the next step.
How to Apply the Cleaning Solution
After removing dry dust, you can apply a safe automotive all-purpose cleaner.
It’s important to use the correct amount, as too much liquid can drip onto electrical parts or get trapped in seams.
1. Lightly Spray the All-Purpose Cleaner
Apply a light spray of the cleaner directly to the surface or to a microfiber towel.
A light spray is enough to remove dirt without soaking.
Diluting the correct amount according to the product instructions makes the cleaner effective and safe.
2. Let it sit for 1-2 minutes
Letting the cleaner sit for one to two minutes loosens grease and grime.
This waiting time is called dwell time and it improves cleaning power without excessive scrubbing.
Do not let the cleaner dry on the surface.
3. Avoid over-wetting hinges and wiring
Too much liquid can build up around hinges and electrical connectors.
Excessive moisture can cause corrosion or electrical problems over time.
Keeping the area slightly damp, rather than wet, ensures safe and controlled cleaning.
How to Do Brush Away Dirt and Grime
Agitating means gently scrubbing to remove stubborn dirt.
This step helps remove dirt that can’t be easily wiped away.
1. Use a detailing brush for tight corners
A small brush helps you reach tight spaces around bolts, seams and edges.
Gently moving it in circular motions helps remove stuck-on dirt without damaging the paint.
Using soft bristles reduces the risk of scratches.
2. Pay attention to hinges and latch areas
Hinges often contain factory grease, which can thicken with dust.
Cleaning these areas carefully improves the appearance and allows you to check for wear.
Removing excess dirt also helps the hinges move more easily.
3. Gently clean the rubber weather stripping.
Rubber seals should be gently wiped with a damp cloth or cleaned with a soft brush.
Avoid vigorous scrubbing, as the rubber may crack or lose its flexibility.
Clean seals maintain proper insulation and prevent water leaks.
How to Wipe and Rinse
After scrubbing, loosened dirt and cleaner must be completely removed.
Any remaining residue can cause marks or new stains.
1. Wipe with a Wet Microfiber Cloth
Use a slightly damp microfiber cloth to remove cleaner and dirt.
Wipe gently to collect all residue.
Rinse the cloth frequently to prevent dirt from spreading back to the surface.
2. Repeat if necessary
If dirt remains, gently repeat the cleaning process.
Heavy buildup may require a second application, but always avoid vigorous scrubbing, which could damage the paint.
3. Ensure no cleaner remains
Cleaner left on the surface can dry and leave marks.
This can also weaken the paint’s protection over time.
Ensure all product is thoroughly wiped off before proceeding to the drying step.
How to Dry Thoroughly
Drying is one of the most important steps because trapped moisture can cause rust in metal seams.
1. Use a clean, dry microfiber towel
A fresh, dry microfiber towel quickly absorbs any remaining water.
Carefully dry around all corners, edges and hinges.
Pay attention to areas where water can accumulate.
2. Prevent water spots and rust
Water left to air dry can leave mineral stains on the paint.
In hidden seams, moisture can remain trapped and gradually lead to rust.
Thorough drying maintains both appearance and long-lasting durability.
How to Protect and Condition the Car Door Jambs
After cleaning and drying, applying protection keeps door jambs clean longer and prevents future damage.
1. Apply Wax or Spray Sealant to Painted Areas
A thin layer of wax or spray sealant creates a protective layer over the paint.
This layer makes it difficult for dirt and water to adhere.
It also adds shine and prevents rust.
2. Use Rubber Seal Conditioner
Rubber conditioner keeps seals soft and flexible.
Over time, heat and weather can dry out rubber.
Conditioning prevents cracking and helps maintain a proper seal against water and dust.
3. Lubricate Hinges If Needed
If hinges feel stiff or noisy, applying a little bit of the right lubricant can improve movement.
Smooth hinges reduce pressure on door parts and prevent wear.
Proper lubrication also protects metal parts from moisture and rust.
How to Remove Excessive Grease and Stubborn Stains
Excessive grease and stubborn stains are common in car door jambs because these areas are near hinges, road grime and moving metal parts.
Over time, factory-applied hinge grease combines with dust to form a thick, black layer.
Road tar, old wax residue and salt deposits can also stick to the surface and are difficult to remove with regular soap.
If not cleaned properly, this grime can weaken paint, trap moisture and increase the risk of rust.
Safe removal requires the right product, controlled application and gentle treatment to protect the paint, rubber seals and surrounding electrical components.
1. Using Degreasers Safely
Degreasers are designed to break down oil and thick grease that regular car shampoo cannot remove.
These products work by dissolving oily substances so they can be easily wiped away.
However, degreasers are stronger than basic cleaners, so they should be used with caution.
Always choose an automotive-safe degreaser and dilute it according to the label instructions.
Instead of soaking the entire jamb, apply a small amount to a cloth or lightly spray it on the affected area.
Let it sit for a while to loosen the grease, but don’t let it dry on the paint.
After cleaning, wipe the area thoroughly with a damp microfiber cloth to remove any remaining stains.
This prevents chemical stains and protects the clear coat layer of paint.
2. Cleaning Old Wax Buildup
Old wax buildup often appears as white or hazy marks on the seams and edges of door jambs.
This typically occurs when wax from the outside spills into small areas and dries there.
Over time, wax layers can trap dirt and discolor the surface.
To remove it safely, use a mild all-purpose cleaner or a special wax remover that’s safe for painted surfaces.
Apply the product gently and use a soft brush to reach fine seams.
Avoid vigorous scrubbing, as this can scratch the clear coat.
Removing old wax restores the paint’s original shine and allows new protective products to adhere properly.
3. Removing Tar and Road Grime
Tar and road grime are sticky substances that come from asphalt, oil and road debris.
These substances harden over time and become firmly embedded under doors.
Specialized tar removers are effective because they are designed to dissolve petroleum-based grime.
Apply a small amount to a microfiber cloth and gently rub the stained area until the tar softens and is removed.
It’s important to avoid using sharp tools or excessive force, as this can damage the paint.
After removal, clean the surface again with a mild cleaner and dry thoroughly.
Removing tar and dirt prevents stains and minimizes long-term damage to the paint.
4. Treating Initial Rust Spots
Initial rust usually appears as small brown or orange marks where paint has been chipped or scratched.
Rust forms when bare metal is exposed to oxygen and moisture, causing a chemical reaction called oxidation.
If treated promptly, rust can often be stopped before it spreads deeper into the metal.
First, clean the area thoroughly to remove dirt and moisture.
Sometimes, mild rust remover products designed for automotive use can reduce surface rust.
After treatment, the area should be thoroughly dried and protected with touch-up paint or a protective sealant to prevent further damage.
It’s important to act quickly, as rust spreads rapidly once it penetrates beneath the paint layer.
Proper treatment protects the strength of the metal and helps maintain the vehicle’s long-term value.
How Often Should You Clean Door Jambs?
How often you need to clean them depends on how often you drive, the weather in your area and the type of roads you use.
Dirt accumulates on door jambs without most people even realizing it because they’re between the outside and inside of the car.
Every time you open the door, wind carries dust into the joints.
Rainwater can run down the edges and road salt or mud can be kicked up while driving.
If this dirt remains trapped, moisture can remain in the small joints, increasing the risk of rust over time.
Establishing a simple cleaning routine helps prevent buildup, keep rubber seals flexible and keep painted surfaces in good condition.
1. Once a week for daily drivers
If you drive your car daily, specially in city traffic or on dusty roads, cleaning the door jams once a week is a good habit.
Daily driving exposes the car to pollution, road splashes and the frequent opening and closing of doors.
Every time the door moves, air and dust are drawn into the joints.
Cleaning once a week removes light dirt before it becomes a thick grime.
It also allows you to quickly check for rust or worn seals.
Regular weekly maintenance takes just a few minutes but prevents long-term problems that can be difficult and costly to fix.
2. Once a month for normal use
For vehicles that are driven less often or are mostly used for short, clean trips, cleaning the door jams once a month is usually sufficient.
Lighter use means less exposure to heavy dirt and road chemicals.
Cleaning doors once a month prevents the gradual buildup of dirt, which can happen even when the car looks clean from the outside.
It also protects the hinges from dust, which can combine with grease to form a sticky layer.
A simple monthly routine protects paint and keeps them clean and maintained.
3. After Rain or Muddy Areas
Rain and mud increase the risk of moisture trapping in seams and corners.
Water often seeps into the lower parts of the door frame and can carry fine dirt with it.
If the water doesn’t dry completely, it can create damp spots that can lead to rust.
Cleaning the door jamb after heavy rain, driving through potholes, or traveling on muddy roads removes wet debris before it dries and hardens.
This step is specially important when using road salt, as the salt combines with moisture to prevent metal rust.
4. During the entire detailing session
Whenever you perform a full car wash or detailing session, the door jamb should always be included.
Professional detailers clean these areas as part of the overall service because they understand that small, hidden areas can impact the overall look and condition of the vehicle.
Including the jamb during detailing ensures that dirt doesn’t get transferred back to the cleaning cloth or interior surfaces when the door is opened.
You can also regularly apply a protective wax or sealant, which protects against future dirt and moisture.
Making door jamb cleaning a part of your entire detailing routine ensures a well-maintained and professionally maintained vehicle.
Now, Understand What are the Common Mistakes to Avoid During Cleaning Car Door Jambs
Cleaning a car door jamb may seem simple, but small mistakes can cause long-term damage to paint, rubber and electrical parts.
Door jambs contain painted metal, factory grease, rubber weather seals and sometimes exposed wiring or connectors.
Using the wrong product or poor technique can fade paint, break seals, cause rust, or cause electrical problems.
Understanding common mistakes helps you protect your vehicle while cleaning it properly.
Avoiding these mistakes not only improves its appearance but also prevents costly repairs in the future.
1. Using Harsh Household Cleaners
Many people make the mistake of using harsh household cleaners like bleach, bathroom cleaners, or kitchen degreasers.
These products are not designed for automotive paint.
Car paint has a protective layer called a clear coat, which can be damaged by harsh chemicals.
Harsh cleaners can dull the shine, cause dull spots, or weaken the protective layer over time.
Some products are also too acidic or alkaline, which can gradually deteriorate the paint and metal protection.
It’s always safer to use automotive-specific cleaners that have been tested for use on painted surfaces.
Choosing the right product maintains shine, prevents rust and extends the life of the finish.
2. Neglecting Rubber Seals
Rubber weather seals around the door frames are essential because they prevent water, dust and wind noise from entering the cabin.
Many people focus only on the painted metal and forget to clean and protect these seals.
Dirt trapped on the rubber can cause it to dry out and crack.
Over time, cracked seals can leak water, damaging the carpet and electronics inside.
Gently cleaning the seals with a mild cleaner and applying a rubber conditioner keeps them soft and flexible.
Proper care of rubber parts can prevent costly replacements and maintain proper door sealing.
3. Excessive Wetness of Electrical Parts
Door frame parts often contain electrical connectors for power windows, central locking systems and interior lights.
Spraying too much water or cleaner directly onto these areas can cause moisture in the connectors.
Water entering electrical parts can cause corrosion, short circuits, or damage door controls.
Even a small amount of moisture can cause problems over time.
It’s safer to apply cleaner to a cloth rather than spraying heavily.
Controlled cleaning keeps wiring dry and protects the vehicle’s electrical system.
4. Skipping the Drying Step
Some people clean the area but forget to dry it properly.
Leaving water in joints and corners traps moisture.
When metal remains wet for long periods, the risk of rust increases because metal reacts with oxygen and moisture, causing it to rust.
Water droplets can also leave mineral stains on the paint as they air dry.
Using a clean, dry microfiber towel to remove all moisture can prevent these problems.
Proper drying is one of the easiest and most important steps to protect the door jamb.
5. Forgetting to Apply a Protective Coating
After cleaning, many car owners leave without applying any protection.
Unpainted paint is more prone to dirt buildup and is more exposed to moisture.
Applying a thin layer of wax or spray sealant creates a protective layer that repels water and reduces dirt buildup.
The protective coating also makes subsequent cleaning easier because dirt doesn’t adhere as strongly.
Regular protection improves shine, slows rust formation and makes the car look well-maintained.
Skipping this last step negates the long-term benefits of cleaning.
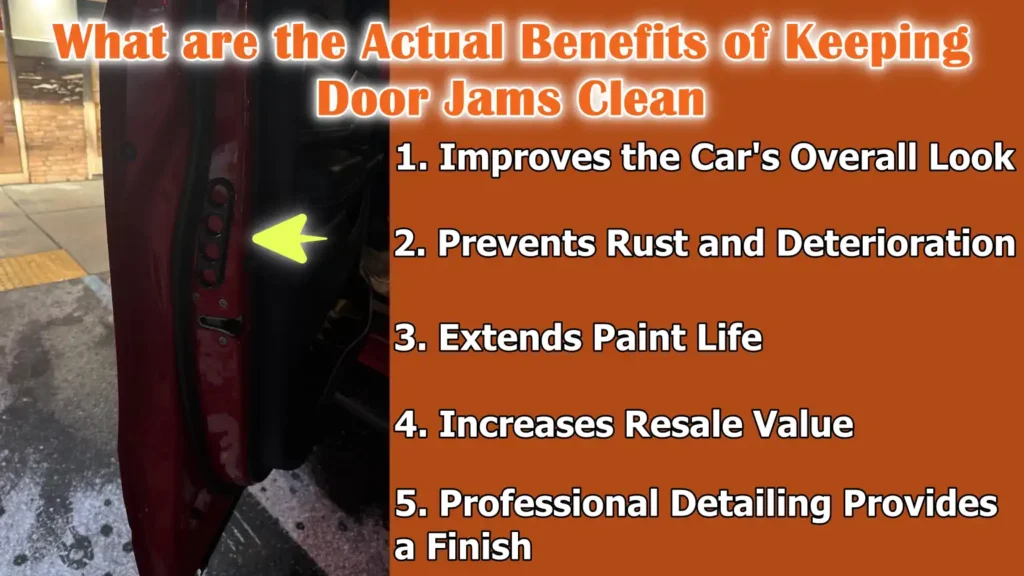
What are the Actual Benefits of Keeping Door Jams Clean
Keeping your car’s door jams clean may seem like a small task, but it has long-lasting benefits for both appearance and safety.
Door jams are exposed to water, dust, salt and grease every time you drive.
Because these areas are often hidden, dirt often remains trapped for extended periods.
When dirt remains near painted metal and seals, it can gradually damage the surface.
Regular cleaning removes harmful deposits before they lead to rust or permanent stains.
Clean door jams also indicate a well-maintained vehicle, demonstrating the owner’s care and responsibility.
Along with this, there’s researched in the CORROSION journal that shows how automotive corrosion actually develops most rapidly in the hidden areas, seams and crevices where contaminants and moisture tends to collect, so basically door jambs are exactly this type of environment, that means that you need to do regular cleanup and maintain them neat & clean as it is important to protect the factory coatings and to reduce the risk of the rust and prolong life of the painted metallic surfaces.[¹]
1. Improves the Car’s Overall Look
Even if the exterior paint is polished and shiny, dirty door jams can make the car look unappealing when the doors are opened.
These areas are clearly visible when passengers enter or exit the car.
Clean door jambs create a consistent and well-maintained look from inside to outside.
Removing grease and stains also restores the paint’s original color and shine.
When door frames are clean, the vehicle looks fresher and better.
This small detail makes a big difference.
2. Prevents Rust and Deterioration
Rust occurs when metal reacts with oxygen and moisture.
Water often gets trapped in door frames, specially after rain or washing.
Road salt increases the risk of rust because it accelerates the chemical reaction that causes rust.
Regular cleaning removes moisture, salt and dirt before they can damage the metal.
Properly drying the area further reduces the risk of rust.
Preventing rust keeps the vehicle’s structure strong and can prevent costly body repairs in the future.
3. Extends Paint Life
Automotive paint has a clear protective layer that protects the colored surface underneath.
Prolonged exposure to dirt, salt and chemicals can gradually weaken this layer.
Over time, this can cause the paint to fade, discolor, or peel.
Regularly cleaning door jambs removes harmful dirt that weakens the paint’s protection.
Applying wax or sealant after cleaning creates a further barrier against moisture and grime.
Proper maintenance keeps the paint shiny and intact for many years.
4. Increases Resale Value
When selling a vehicle, buyers often pay attention to small details, such as how well-maintained the vehicle is.
Clean door jambs indicate careful ownership and attention to maintenance.
Vehicles with fewer signs of rust and paint damage generally have higher resale values.
Even minor rust can diminish buyer confidence and lower the selling price.
Maintaining clean and secure door frames improves the overall condition rating and increases the likelihood of receiving higher resale offers.
5. Professional Detailing Provides a Finish
Professional detailers always clean door jambs as part of a complete service because they understand that true detailing involves hidden details.
When door jambs are spotless, the vehicle appears perfectly finished, not incompletely cleaned.
This attention to detail creates a high-quality, showroom-like appearance.
Clean jambs also prevent dirt from getting onto clothing when getting inside the car.
Incorporating this step into your regular cleaning routine helps your vehicle maintain a polished, professional look at all times.
Read More:
What are the Pro Tips for Getting Professional Results
Properly cleaning your car’s door jambs can make a huge difference in both appearance and long-term protection.
Professional detailers pay attention to small techniques that prevent scratches, reduce dirt and improve work efficiency.
Door jambs contain grease, dust and moisture, which, if not handled properly, can easily spread to other parts of the car.
By adopting a few smart practices, you can achieve results comparable to a professional detailing job.
These tips are simple, practical and based on how trendy detailers care for their cars.
1. Use a Separate Towel for the Jam
Door jams often have more dirt and grease than painted exterior panels.
Using the same towel for both areas risks transferring small dust particles to the clean paint.
These particles can cause small scratches called swirl marks.
Using a separate microfiber towel for the jambs helps keep dirt under control and also helps maintain the quality of your exterior finish.
This simple habit protects your paint and makes your cleaning process more organized and safe.
2. Clean the Jambs Before Washing the Exterior
Many professionals clean the door jambs before washing the rest of the car.
When the jambs are cleaned first, any dirty water or spills can be washed away during the main wash.
If you clean the jambs after finishing the exterior, dirty water may accidentally drip onto freshly cleaned panels.
Starting with the jambs keeps the job clean and tidy.
This prevents rework, saves time and results in better results overall.
3. Use Steam for Deep Cleaning
Steam cleaning is an effective way to remove grease and stubborn dirt without using harsh chemicals.
The hot steam softens oily deposits and loosens grime, making them easier to wipe away.
Steam also reaches tight corners and joints where brushes can struggle.
Because it uses less water, it reduces the risk of moisture accumulating on electrical parts.
Many professional detailers prefer steam for deep cleaning because it is effective, gentle on surfaces and environmentally friendly.
4. Match the cleaner’s strength to the level of dirt
Using a high-strength cleaner for light dirt can damage paint or rubber over time.
On the other hand, using a weaker cleaner on heavy grease can cause excessive rubbing, which can even cause damage.
Professionals always choose the right product based on the level of dirt.
Light dirt usually requires only a mild all-purpose cleaner, while thicker grease may require a properly diluted degreaser.
Matching the cleaner’s strength to the problem improves safety and cleaning efficiency.
5. Keep a small detailing kit in your garage
Having a small, ready-to-use detailing kit makes regular maintenance easier and more consistent.
A simple kit might include a microfiber towel, a soft brush, a mild cleaner and rubber conditioner.
When tools are readily available, you can clean small spots of dirt before they become too serious.
Regular, quick maintenance prevents long-term damage and keeps your vehicle looking well-maintained at all times.
This habit turns occasional deep cleanings into simple routine care that yields professional-level results.
Conclusion – How to Clean Car Door Jambs
So, it is really important to protect your vehicle even in the hidden spaces, otherwise that can quietly damage your vehicle because most of the time people forgot to clean those small areas and door jambs are one of them.
Basically, these hidden areas are constantly exposed to water, road salt, dust, grease and changing weather.
And, whenever dirt and moisture get trapped inside joints and around hinges, they gradually weaken the paint and create the perfect environment for rust to form.
Keep in mind that: rust doesn’t develop overnight, but it starts with small surface damage and spreads slowly if not treated quickly.
The key thing is, regular cleaning removes harmful dirt before it causes permanent damage.
So, that’s all from this guide and let us know if you wanted to know something more in the comment box.
Frequently Asked Questions
Q1. What are car door jambs and why do they get dirty so easily?
Answer: Car door jambs are the painted metal parts you see as soon as you open the door. They include the door frame, hinges, latch area and the rubber seals on the edges. These parts get dirty easily because they’re exposed to the outside air every time you drive. Dust, road salt, mud and water seep into small cracks and accumulate in corners. When it rains, water seeps into the joints and can remain there for a long time. Grease from door hinges also attracts dust and forms a thick layer. Because these parts aren’t always visible, they’re cleaned less often than the rest of the car.
Q2. How often should I clean my car door jambs?
Answer: How often you should clean them depends on how often you drive and road conditions. If you drive daily, specially in dusty or rainy conditions, cleaning once a week is appropriate. For normal driving in clean areas, cleaning once a month is usually sufficient. Cleaning door jambs is also important during heavy rain, muddy trips, or winter driving where roads are salted. Regular cleaning prevents dirt buildup and reduces the risk of rust.
Q3. Can I use regular household cleaners to clean door jambs?
Answer: Harsh household cleaners like bleach, bathroom cleaners, or kitchen degreasers are not recommended. These products are not designed for automotive paint and can damage the clear coat layer. Car paint has a protective finish that can dull or fade when exposed to harsh chemicals. It’s always safer to use an automotive all-purpose cleaner labeled safe for painted surfaces. Using the right product protects the paint and prevents long-term damage.
Q4. Is it safe to spray water directly onto the door jamb?
Answer: Washing gently is generally safe, but spraying large amounts of water directly onto electrical connectors or wiring is not recommended. Door jambs often contain small sensors, power lock wiring and electrical components. Excessive water can get into these components and cause them to rust or deteriorate. Instead of using high water pressure, it’s better to control rust by spraying with a damp microfiber cloth.
Q5. How can I prevent rust on my door jamb?
Answer: Rust forms when metal is exposed to moisture and oxygen for a long time. To prevent rust, clean the door jamb regularly to remove dirt and road salt. Always dry the area thoroughly after washing. Applying wax or a protective sealant creates a barrier that prevents water from penetrating. If you notice small chips of paint, repair them quickly to expose bare metal. Early attention is essential to prevent rust from spreading.
Q6. Should I wax or seal the door jamb?
Answer: Yes, it’s a good idea to apply wax or spray sealant to painted door jamb areas. Wax creates a thin protective layer that helps repel water, dust and road grime. This makes subsequent cleaning easier and prevents damage to the clear coat. As door jambs are painted just like the exterior body, they receive the same protection.
Q7. How do I clean the rubber seals around the door frame?
Answer: Rubber seals should be cleaned gently with a mild cleaner and a soft cloth. Avoid harsh chemicals as they can dry out the rubber and cause it to crack. After cleaning, apply a rubber conditioner to keep the material soft and flexible. Good seals prevent water leaks, reduce wind noise and protect the car’s interior.
Q8. What should I do if I notice grease buildup on door hinges?
Answer: Grease buildup on hinges is common because manufacturers apply grease to ensure proper operation. Over time, dust can stick to this grease and form a thick mess. Use a small amount of safe degreaser to reduce the buildup. Wipe it off and dry the area thoroughly. If necessary, apply a little new lubricant to ensure proper operation without pulling in more dirt.
References:
[1] Five Methods Suggested: Automobile Body Corrosion Control Problems
https://content.ampp.org/corrosion/article-abstract/17/2/9/46546/Five-Methods-Suggested-Automobile-Body-Corrosion

Guys, I’m a car audio enthusiast and customization expert and I love clear sound and clean installation. Plus, I have spent years helping people build their dream audio setups. And whenever I’m working on cars, I probably listen to music and thinks about the next big upgrade.