Written By: Don Dodi
Fact Checked By: Kristen Brown
Reviewed By: Diego Rosenberg
It is very common thing as the time goes by, the car headlights can become cloudy, yellow or hazy due that buildup of oxidation which also caused by the exposure to sunlight, UV rays, air pollution and harsh weather as well.
Also, according to the NHTSA the hazy headlights can actually reduce the nighttime visibility by up to 50% which actually puts both the driver and others on the road at serious risk.
And most of the modern headlights are made from poly-carbonate plastic and this is actually durable but it is also true that these are easily can be affected by oxidation when the protective coating wear off.
Along with this, dirt, grime and road salt can also worsen the appearance and performance of the headlights as well.
Plus, many people actually assume that dull headlights needs to be replaced straight away, but the truth is far away from that as you can easily restore them at home with simple tools and methods that actually cost very less than others will demand from you.
Plus, a joint AAA and Consumer Reports analysis actually revealed that the faded headlights can deliver only approximately 20 percentage of their original brightness; which basically means it dramatically reduces the visibility and that increases the crash risk that is why you should clean it for the sake of safety.[¹]
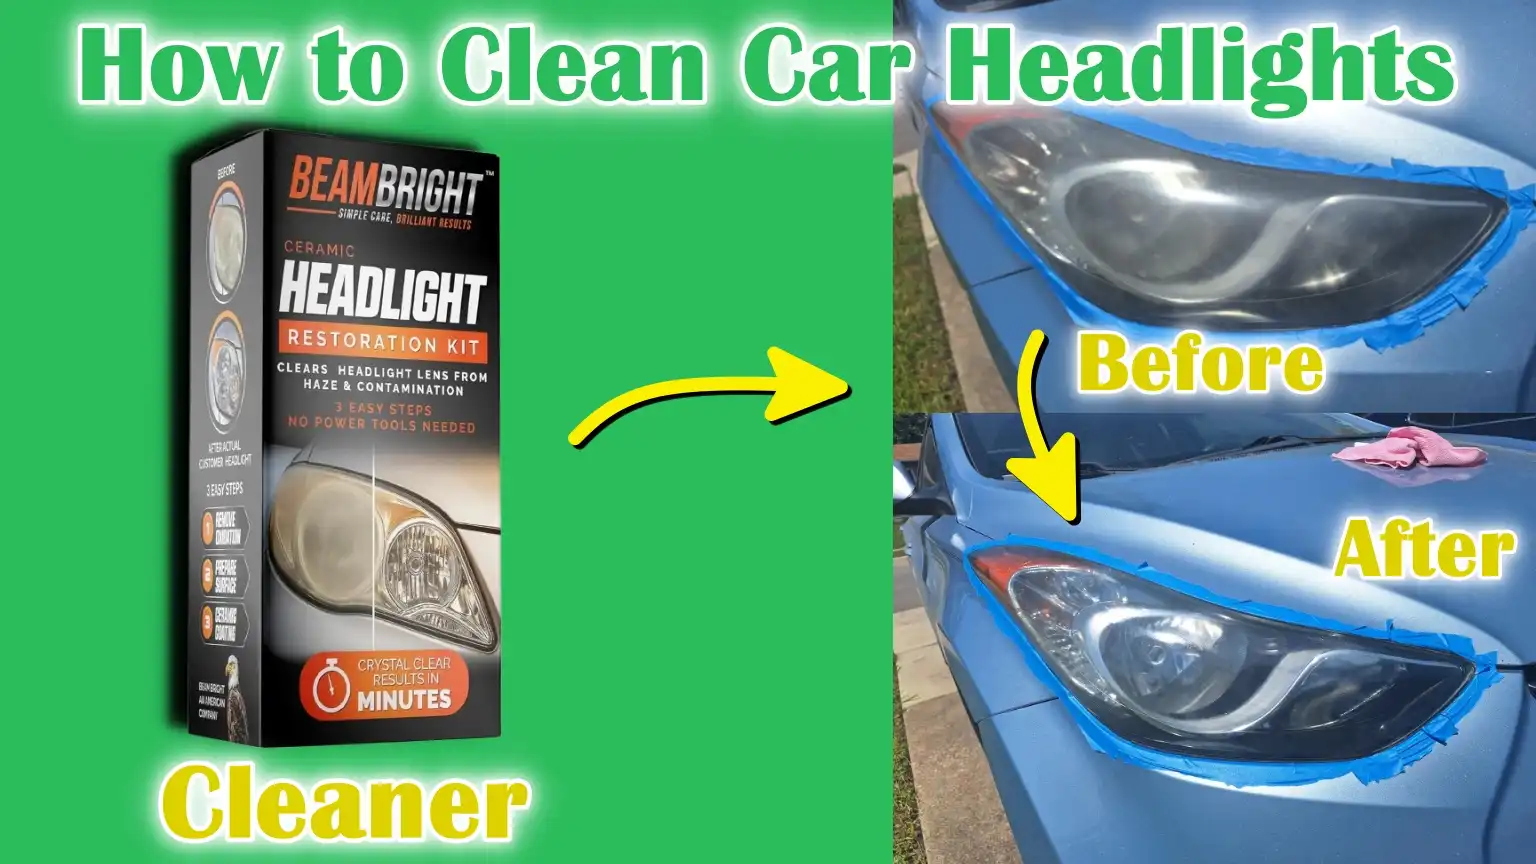
And that’s what this guide comes in play which is all about How to Clean Car Headlights, so that you can do this in more effective and affordable way.
Tools
| Item | What It’s For | Tips / Notes |
|---|---|---|
| Microfiber cloths | To clean and dry headlights without scratching the surface. | Use a soft, clean cloth to avoid swirl marks. |
| Masking tape | To protect the paint around the headlights while cleaning. | Painters tape also works well and is easy to remove. |
| Spray bottle with water | To wash away dirt, cleaning solution and sanding dust. | Use clean water to avoid making a mess. |
| Car-safe soap | To wash the headlights before applying any cleaner. | Avoid dishwashing soap—it can be too harsh on car surfaces. |
| Toothpaste (non-gel) | A mild abrasive that helps remove surface haze and oxidation. | White, non-gel toothpaste works best—avoid white or bright types. |
| Baking soda and vinegar | A natural cleaning blend that helps remove stains and grime. | Mix it to make a paste and apply it gently with a cloth. |
| Headlight restoration kit | All-in-one kit with sanding pad, polish and sealant. | Great for deep cleaning; follow instructions carefully. |
| Sandpaper (600 to 2000 grit) | Wet sanding the surface to remove heavy oxidation or scratches. | Use in stages: Start rough (600) → Finish smooth (2000). |
| UV sealant or protectant | To prevent cleaned headlights from yellowing or discoloring in the future. | For best results, apply after cleansing—use clear, UV-blocking formulas. |
Preparation before cleaning
1. Park the car in a shady and ventilated area
Before you begin any cleaning task, it’s important to park your car in a place that is out of direct sunlight. Shade helps keep the surface of your headlights cool, allowing cleaning solutions to work more effectively.
If the headlights are hot, some products can dry too quickly and leave streaks or spots.
A ventilated area is also important so you don’t breathe in strong chemical odors or fumes, specially if you plan to use a cleaning kit or sealant. An open garage or covered driveway works great.
2. Turn off the engine and make sure the headlights are cool.
Always turn off the car and let the headlights cool before you start.
Hot headlights can cause cleaning products to evaporate too quickly and may also cause them to react poorly with some substances.
Touch the headlight gently to make sure it’s not hot. Working on cool surfaces is safer and helps the cleaning agent stay on the surface longer, giving you better results.
3. Remove surface dirt with soap and water
Before using any special cleaning solution, you should wash off dust, dirt and road grime with soap and water suitable for the car.
This basic cleaning method prevents scratching the headlights when scrubbing or polishing. Use a soft sponge or microfiber cloth to gently clean the surface.
Rinse thoroughly with clean water and wipe dry with a clean towel. Removing surface dirt gives you an idea of the actual condition of the headlights, which will help you decide how much cleaning or sanding is needed.
4. Apply tape around the headlights to protect the paint
Once the headlights are clean and dry, the next important step is to protect the surroundings.
Apply masking tape or painter’s tape to the edges of the plastic headlight where it meets the painted surface of the car.
This tape acts as a barrier that prevents any cleaning solution, abrasive paste or sandpaper from touching your car’s paint.
This is specially useful when you’re planning on sanding or polishing, as it can easily damage the surrounding paint if you’re not careful.
Taking a few extra minutes to tape off the area can help you avoid unwanted scratches or extra repair work.
How to Clean Car Headlights – Toothpaste Method
1. Apply toothpaste to the headlight with a cloth
To start cleaning with toothpaste, choose a regular white toothpaste that is gel-free and doesn’t contain attractive ingredients like whitening strips, microbeads, or sparkles.
Toothpaste works well because it contains mild abrasives, like very fine sandpaper, that help scrub away the dull layer of oxidation from plastic headlight lenses.
Squeeze a little toothpaste onto a clean microfiber cloth or soft cotton cloth. Gently spread the toothpaste over the surface of the headlight until the entire area is covered with a thin layer.
2. Rub in a circular motion for a few minutes
After applying the toothpaste, rub it onto the headlight in small, circular motions with the cloth. Continue this rubbing motion for about three to five minutes.
The friction caused by the mild abrasives in the toothpaste helps remove the thin, cloudy top layer of the plastic lens.
Make sure you apply firm but gentle pressure and try to cover the entire headlight evenly.
This process helps reduce oxidation, light scratches and yellow spots that accumulate over time due to UV rays, road salt and dirt.
3. Rinse with water and dry.
After a few minutes of scrubbing, rinse the headlight thoroughly with clean water. You can use a spray bottle, wet sponge, or garden hose to rinse off all the toothpaste residue.
Make sure no paste is left behind, as particles left behind can cause scratches later on. After rinsing, use a fresh microfiber cloth or towel to wipe the headlight dry.
You will immediately notice that the headlight lens looks cleaner and brighter than before.
4. Results and Limitations of This Method
The toothpaste method is a quick, cost-effective and beginner-friendly way to clean headlights, specially when the oxidation is mild to moderate.
It is one of the easiest home remedies because most people already have toothpaste and a cloth in their home. However, it is important to understand that this method is not a permanent solution.
Depending on weather conditions and sun exposure, results can usually last from a few weeks to a few months.
Toothpaste may not be effective enough to remove deep scratches, intense yellowing, or stubborn fog.
In more severe cases, other methods such as sanding or a headlight restoration kit may be more effective. Still, it is a great way to improve visibility and appearance in a short amount of time, at almost no cost.
Method 2 – Baking soda and vinegar paste
1. Mix the paste and apply to the headlight
To use the baking soda and vinegar method, start by making a simple cleaning paste.
Baking soda is a natural abrasive, meaning it contains microscopic particles that help scrub away dirt and oxidation without scratching the surface.
Vinegar is a mild acid that helps break down grease, grime and cloudy deposits on plastic lenses.
To make the paste, mix about two tablespoons of baking soda with enough white vinegar to make a thick, spreadable mixture.
The vinegar will form slight bubbles as it reacts with the baking soda—this is normal. Once the mixture is ready, apply it directly to the headlight surface with a spoon or your fingers.
2. Rub gently with a microfiber cloth or sponge.
After applying the paste, take a clean microfiber cloth or soft sponge and begin rubbing the headlight in a circular motion.
This gentle scrubbing, combined with the natural cleaning power of the paste, helps remove oxidation stains and stuck-on dirt or road grime.
Be careful not to press too hard, specially if your headlights are very worn or scratched.
Continue scrubbing evenly over the entire headlight for about five minutes, specially in areas that show more yellowing or staining. Make sure the paste stays on the surface during this time and doesn’t dry completely.
3. Rinse and dry thoroughly
After scrubbing, rinse the headlight thoroughly with clean water.
This step is important as it removes all of the paste and any dirt or particles that may have been removed during cleaning.
You can use a spray bottle, a sponge filled with clean water, or a light spray from a hose. After rinsing, dry the headlight completely with a clean microfiber cloth or towel.
By this time, you should notice a noticeable improvement in clarity and brightness.
4. Advantages and Disadvantages of This Method
Using baking soda and vinegar is a safe, natural and cost-effective way to clean headlights.
This is specially helpful for those who want to avoid harsh chemicals and prefer an environmentally friendly solution.
This method is effective for mild to moderate oxidation and can be repeated as many times as needed without damaging the headlight lens.
However, its main disadvantage is that it may not be effective enough for headlights with deep yellowing, heavy oxidation or cracks on the surface.
Also, unlike professional kits, this method does not contain a UV sealant, which means the headlights may quickly become cloudy again.
For best results, it is recommended to apply a UV protectant afterward to keep the lens clean for a long time.
Method 3 – Sanding and Polishing (Advanced)
1. Use wet sanding technique with 600, 1000 and 2000 grit sandpaper
The sanding and polishing method is one of the most effective ways to fix extremely cloudy or yellowed headlights.
This method involves a process called wet sanding, which uses fine sandpaper with water to gently remove the top damaged layer of the headlight lens. You should start with 600 grit sandpaper to remove heavy oxidation and scratches.
After that, use 1000 grit sandpaper to further smooth the surface and finally use 2000 grit sandpaper to create a finer, more polished layer.
It is very important to keep both the sandpaper and the headlight wet during this process. The water acts as a lubricant to prevent scratches and helps the sandpaper glide smoothly over the surface.
Always sand in straight, even motions and try to keep the pressure constant to avoid uneven spots.
2. Wash and Polish with Rubbing Compound
After completing the sanding process, rinse the headlight thoroughly with clean water to remove all sanding dust and particles.
After drying, the lens will appear dull, which is normal at this stage. To bring back the shine, apply a little rubbing compound to the headlight.
This compound acts like a fine polish and helps smooth out any microscopic scratches left by the sandpaper.
Rub the compound onto the headlight in a circular motion with a clean microfiber cloth. This step is crucial for restoring clarity and improving light output.
3. Polish with a Clean Microfiber Towel
After the rubbing compound has been thoroughly applied and adhered to the surface, polish the headlight with a dry, clean microfiber towel.
Polishing removes any remaining polish, shines the lens and ensures an even finish.
Take your time in this step, because the better you polish, the clearer and more professional the results will look.
A good polishing session can make your headlights look almost brand new and greatly improve visibility when driving at night.
4. Apply UV sealant to protect against future oxidation
After your headlights are cleaned and polished, the final step is to apply UV sealant.
This is a very important part of the process that many people skip, but without it, your headlights can become cloudy again in just a few weeks.
The original protective coating from the factory wears off over time, so applying a new layer helps protect the plastic from UV rays, pollution and moisture. UV sealants come in spray or wipe-on forms and are available at auto parts stores or online.
Apply the sealant evenly according to the product instructions and allow it to dry completely.
This coating will help keep your headlights clean and bright for several months or longer, depending on the environment and the frequency of exposure of the car to the sun.
Method 4 – Headlight restoration kit
1. Follow the instructions on the commercial kit
Headlight restoration kits are pre-packaged solutions specifically designed to fix cloudy or yellowed headlights.
These kits are available at most auto parts stores and online and are designed to make the headlight cleaning process easier, specially for those who don’t want to mix their own products or use household items.
Each kit comes with different instructions and it’s important to follow them closely to avoid damaging the lens or getting poor results.
These steps usually include cleaning the headlight, using different sanding or scrubbing pads, applying a polishing compound and applying a protective coating or sealant.
Each kit is a little different, so it’s important to read the entire instructions before you begin.
2. This usually includes sanding pads, polish and sealant.
Most professional headlight restoration kits have everything you need in one box. They usually include sanding pads or discs with different grits to help remove oxidation and surface damage.
They also include a polishing compound, used to smooth out fine scratches and restore shine and a UV sealant or clear coat, which helps keep headlights from tarnishing again.
Some kits also come with a tool that can be attached to a household drill to make sanding and polishing faster and more efficient.
This all-in-one method makes the repair process easier and more consistent than using random household materials.
3. Compare cost-effective methods to DIY methods
Headlight repair kits are more expensive than simple DIY solutions like toothpaste or baking soda, but they are also more effective and usually produce longer-lasting results.
Most kits cost between $10 and $30, depending on the brand and the items included. While this may seem like a lot at first, it can save you money in the long run because the results last longer—specially when the UV protectant is applied correctly.
Using a kit is a much more cost-effective solution than replacing headlights, which can cost hundreds of dollars.
Kits are specially recommended if your headlights are severely oxidized, scratched, or if previous cleaning methods haven’t worked.
4. Recommended Brands (Optional)
Although there are many headlight restoration kits available, some brands have built a strong reputation for quality and reliable results.
Popular choices include the 3M Headlight Restoration Kit, the Sylvania Headlight Restoration Kit and Meguiar’s Heavy Duty Headlight Restoration Kit.
These brands are often recommended by both professional detailers and everyday drivers due to their ease of use, high-quality materials and long-lasting protection.
If you’re new to restoring headlights and want professional-level results without visiting a repair shop, choosing a trusted brand can make the process easier and more efficient.
Final Step – Motorcycle Sealants
1. Headlights are partnered with Konamale
Once your headlights are clean and restored, applying a sealant is one of the most important final steps. Headlights become cloudy primarily due to long-term exposure to ultraviolet (UV) light from the sun.
The original factory coating on headlights protects them from professional damage, but over time this decorative layer wears off, leaving the plastic exposed and exposed to technicians.
The cement sealant creates a new layer of protection that helps prevent the plastic from yellowing or deteriorating again.
Without this sealant, headlights can become cloudy within a few weeks or months, specially in sunny or hot weather.
Enterprise Sea Light not only keeps headlights clean, but also prolongs the results of any cleaning or restoration method you use.
2. Poison or Wipe-On Sealant
Floating sealants are available in two main forms: spray and wipe-on. Spray sealants are easy to apply and usually come in aerosol cans or pump bottles.
You simply dab a spray on the headlight surface, apply an even coat, let it sit for a few minutes and then wipe off any excess sealant residue.
Wipe-on sealants, on the other hand, are typically applied using a soap cloth or an epilator pad.
These preparations may require more maintenance from time to time, but they often provide a thicker and longer-lasting finish.
Some sealants may also come with headlight restoration kits and may include additional steps such as drying in an heating light or drying for a certain amount of time.
Whatever the type of sealant, always make sure the headlight is clean and dry before purchasing sealant for best results.
3. Periodic reapplying to maintain clarity longer
To maintain clear and bright headlights over time, professional sealant should be applied regularly to the sealant shop.
On average, a good quality sealant lasts three to six months, depending on how much time the car is driven, what the local weather is like and whether the vehicle is parked in average sunlight.
In areas with intense sunlight, such as the South or the tropics, reapplying sealant every three months is recommended to ensure the safety of the headlights.
If your car spends most of its time in a garage or in the shade, the sealant may last a little longer.
Regular reapplying sealant as part of your car’s routine care will help prevent future tarnishing, reduce the need for frequent sanding or sanding and keep your headlights looking newer longer.
Read More:
What are The Maintenance Tips
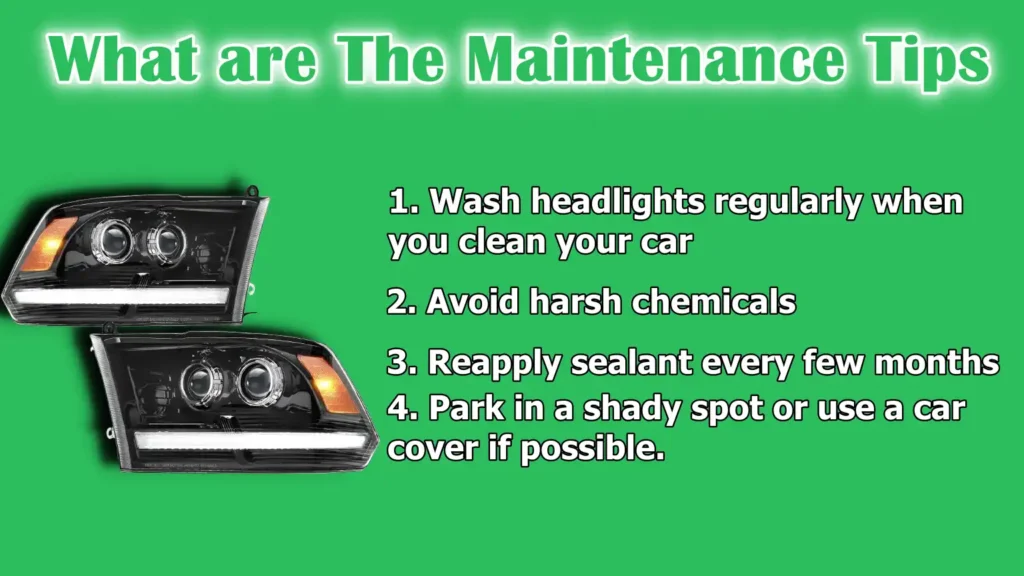
1. Wash headlights regularly when you clean your car
Keeping your headlights clean regularly is one of the easiest and most effective ways to prevent them from fogging up again.
Make it a habit to gently clean headlight lenses with car-safe soap and water every time you wash your car.
This removes dust, grime, road salt and insect residue that can slowly damage the surface if left untreated.
Regular cleaning helps maintain the clean appearance of headlights and keeps the protective coating intact for longer.
If dirt and debris are allowed to remain on the surface for too long, they can act like sandpaper and slowly wear down the lens, causing rapid yellowing of the lens and reduced visibility.
2. Avoid harsh chemicals
When cleaning or maintaining your headlights, it’s very important to avoid using harsh or abrasive chemicals such as ammonia, bleach or industrial degreasers.
These types of products can break down plastic and remove any previously applied UV coating or sealant. While these chemicals can clean stubborn stains or dirt, they often make headlights more vulnerable to sun damage and oxidation.
Use a mild, pH-balanced car wash soap or a specially formulated plastic cleaner that is safe for automotive surfaces. Using the right products can help your headlights last longer and stay clean without damage.
3. Reapply sealant every few months
UV sealant is not a one-time solution. Over time, exposure to sun, rain and road conditions can weaken the protective layer.
To prevent your headlights from turning dim or yellow again, you should reapply UV sealant every three to six months.
How often you should reapply depends on your climate. If you live in a sunny or coastal area, or your car is always parked outside, it may need to be reapplied more often.
Keeping up with this maintenance step ensures long-term clarity, better nighttime visibility and also saves you from having to do frequent deep cleanings or repairs.
4. Park in a shady spot or use a car cover if possible.
Sunlight is one of the biggest causes of headlight oxidation. Parking your car in a shady spot, inside a garage, or under a carport can make a big difference in keeping your headlights from deteriorating faster.
If you don’t have access to covered parking, using a car cover or a simple windshield sunshade can help reduce the effects of UV rays on your headlights.
Over time, less sunlight means gradual loss of light, less yellowing and less need for frequent repairs.
Taking small steps to protect your car from bad weather can significantly increase the life and brightness of your headlights.
When to Seek Professional Help
1. Deep Scratches or Interior Cloudiness
There are times when DIY remedies are not enough to completely repair your headlights, specially if the damage is more than superficial.
If your headlights have deep scratches, cracks, or cloudiness inside the lens, home remedies like toothpaste, baking soda, or sanding will not solve the problem.
Interior cloudiness is usually caused by moisture entering the headlight housing, which can be caused by broken seals or small holes.
This not only affects light output, but can also damage internal components like the bulb and reflector. In such cases, it is advisable to seek professional help.
An expert can open the headlight assembly, remove moisture, reseal the housing and polish the inside of the lens—something that cannot be done safely at home.
2. Persistent yellowing despite cleaning
If you’ve tried several cleaning methods and your headlights still look yellow, faded or cloudy, this could be a sign that the plastic has been permanently damaged or has lost structural clarity from exposure to UV rays. Some lenses, specially older ones, may be damaged even after surface repairs.
Their transparency may not be restored even after vigorous sanding and polishing. In such cases, professional equipment and commercial polishing compounds may produce better results.
Professionals also have high-quality sealants and coatings available that may last longer than consumer-grade products. If clarity doesn’t improve significantly after several do-it-yourself procedures, it’s a good idea to consult a certified auto detailing technician or mechanic.
3. Cost Comparison: Do-It-Yourself vs. Professional Services
Cost is often a major factor when deciding whether to try at home or consult a professional. Most do-it-yourself methods, such as using toothpaste or baking soda, cost less than a few dollars.
Even a complete headlight restoration kit typically costs between $10 and $30. Professional headlight restoration services, on the other hand, typically cost between $50 and $150 for both headlights, depending on the severity of the damage and the type of service provided.
However, professionals often provide more durable and long-lasting results, sometimes with a warranty.
If do-it-yourself methods aren’t giving you the results you want or you don’t have the time or tools for a full repair, paying for a one-time professional service can save money and effort in the long run, specially if it doesn’t require an expensive headlight replacement.
Conclusion – How to Clean Car Headlights
Actually foggy headlights impact on nighttime visibility and that can be surprisingly large as well and you can fix it very easily as we have mentioned in this guide.
As well as, keeping your car’s headlights clean and clear is not just about appearance—it’s a direct contribution to your safety and visibility on the road.
Over time, UV rays, road dirt, air pollution and weather conditions all work together to wear down the protective coating on your headlights, leading to cloudy, yellowed, or dull lenses.
This buildup of oxidation can reduce headlight brightness by more than 50%, making nighttime driving far more dangerous than it needs to be.
The good news is that restoring your headlights doesn’t always require expensive parts or professional help.
Whether you choose a simple method using household toothpaste, a natural mix of baking soda and vinegar, or a more advanced sanding and polishing approach, there’s a solution available for almost every level of damage.
Regular maintenance, such as washing your headlights when you clean your car, parking in shaded areas, avoiding harsh chemicals and reapplying UV sealant every few months, can significantly delay the return of fogginess and oxidation.
But if your headlights are showing signs of deep scratches, internal fogging, or severe yellowing that doesn’t respond to DIY efforts, it’s perfectly okay—and often smarter—to seek professional help.
In many cases, investing in a professional restoration can extend the life of your headlights and save you the cost of full replacements.
Now, you can comment down below for more information about this guide.
Frequently Asked Questions
Q1. How to Clean Cloudy Headlights?
Answer: Cleaning cloudy headlights involves removing the oxidation layer that forms on the plastic surface over time due to sunlight, dirt, air pollution and moisture. The easiest way to do this at home is to use common items like toothpaste or a mixture of baking soda and vinegar. These household ingredients act as mild abrasives that help clean the cloudy, discolored layer on the lens. Start by washing the headlight with car-safe soap and water to remove surface dirt. Then apply a little toothpaste directly to the headlight and rub in a circular motion with a soft cloth for about 3 to 5 minutes. Next, rinse it off with clean water and dry the surface completely. For better results, specially if the cloudiness is severe, you can try wet sanding with fine-grit sandpaper followed by a polishing compound. Always apply a UV sealant at the end to protect the lens from future damage. If these DIY methods don’t improve clarity, it’s time to use a headlight restoration kit or consult a professional. These kits usually contain everything you need, including sanding pads, polish and UV protectants and often produce longer-lasting results than common home remedies.
Q2. What is the best thing to clean car headlights?
Answer: The best thing to clean car headlights depends on how cloudy or damaged the lenses are. For mild cloudiness or slight yellowing, toothpaste is one of the easiest and most cost-effective remedies. It contains tiny particles that act like fine sandpaper to remove oxidation and surface dirt. Applied correctly, it can significantly improve headlight clarity with just a few minutes of effort. For more effective or long-lasting results, specially on headlights with moderate to heavy tarnishing, headlight restoration kits are often the best option. These kits usually include several grades of sandpaper, a polishing compound and a UV sealant. These are specifically designed to restore plastic lenses and can remove deep oxidation and fine scratches. Most are easy to use and come with step-by-step instructions. Some people also use a homemade paste made from baking soda and vinegar. This natural remedy is effective for cleaning lights and is safe for repeated use. However, it may not be effective enough for older or severely oxidized headlights. No matter which method you use, the most important thing to keep your headlights clean and transparent is to apply a UV sealant to them. This creates a protective layer that protects the plastic from sun damage and helps maintain shine for a long time.
References:
[1] Effect of Oxidation on Headlight Illumination
https://arcca.com/case-study/effect-of-oxidation-on-headlight-illumination/

Guys, I’m a car audio enthusiast and customization expert and I love clear sound and clean installation. Plus, I have spent years helping people build their dream audio setups. And whenever I’m working on cars, I probably listen to music and thinks about the next big upgrade.