Written By: Don Dodi
Fact Checked By: Kristen Brown
Reviewed By: Diego Rosenberg
It is true that if there’s dirty enter console then it can cause bad smells, the buttons becomes sticky and interior wear is possible over the period of time.
The center console is really useful in many ways as it literally holds: cup holders, storage bins, armrests, control buttons and there are charging ports as well, so these are the places where germs, food crumbs, drink spills, dust, skin oils and sweat can easily collect because of the frequency of use.
Not only this, over the period of time and use this buildup irritates the owner in many ways, as it makes the buttons sticky, can cause an unpleasant odor, it can discolor the surface as well.
Because, the dirt and sugar residue from the drinks literally have the capability to harden the inside of the cup holders, also there’s oils from the hands that can slowly does the breaking the plastic, vinyl and soft-touch coatings.
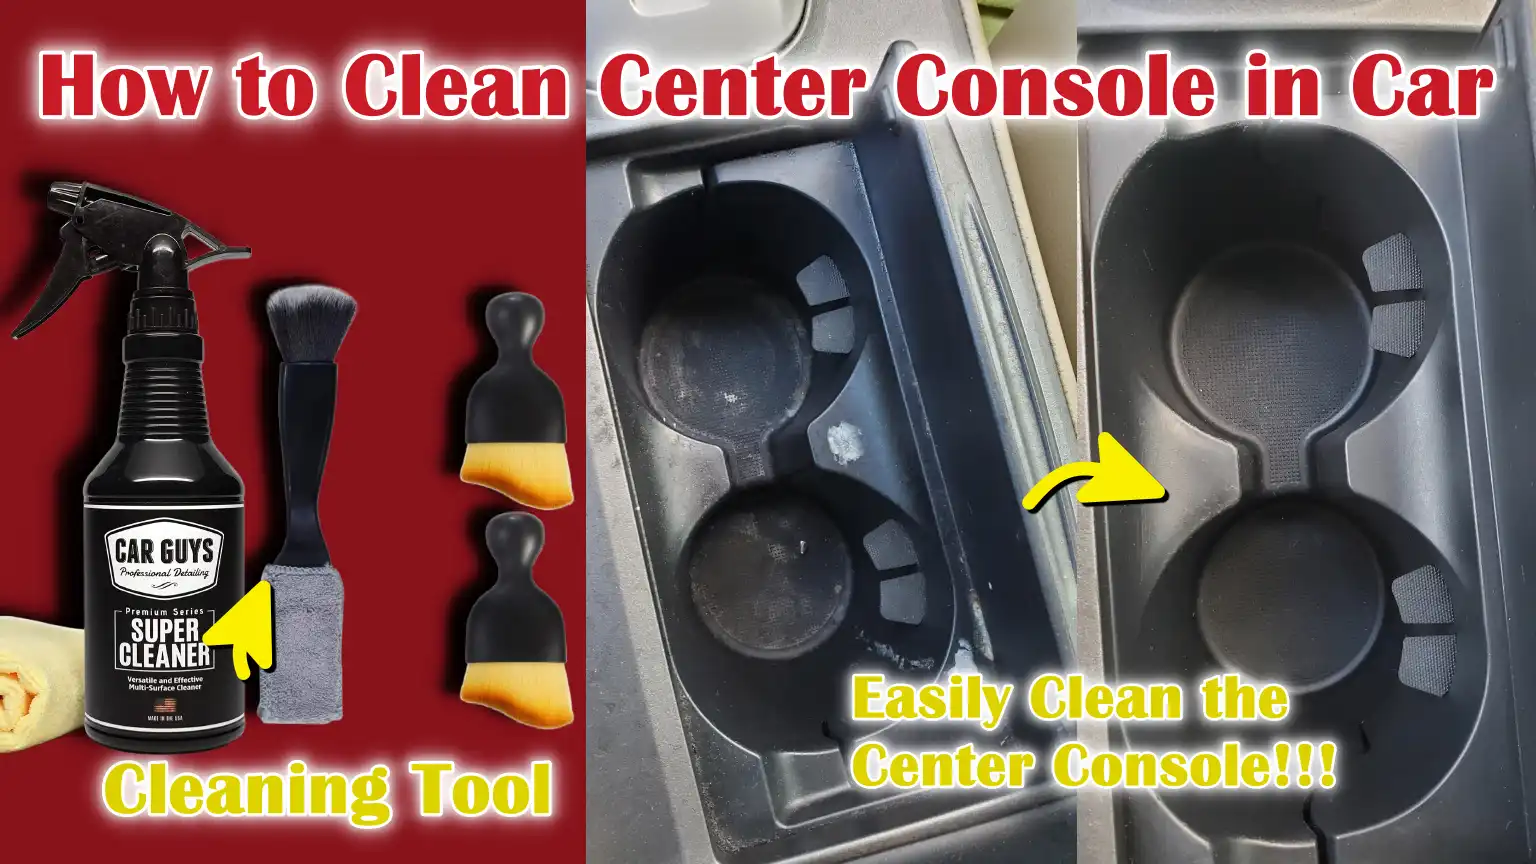
So, just simply learn How to Clean Center Console in Car to maintain the hygiene, protect the interior materials and keep the controls smooth working as well.
Tools
| Tool / Material | What It Is | Why It Is Important |
|---|---|---|
| Soft Microfiber Cloth (Lint-Free) | A soft cleaning cloth that absorbs dust without scratching. | It removes dust, hand oils and light dirt without leaving marks or fibers. |
| Soft-Bristle Detailing Brush or Old Toothbrush | A small brush with soft bristles. | Loosens dirt from corners, joints and tight spaces. |
| Vacuum with Crevice Attachment | It is a vacuum tool with a narrow nozzle. | It absorbs crumbs, dust and loose debris before wet cleaning. |
| Mild Interior Cleaner or Diluted Dish Soap | Safe and gentle cleaning fluid for car interiors. | It safely removes oil, stains and sticky residue. |
| Cotton Swabs or Detailing Sticks | Small cotton-tipped sticks for precise cleaning. | It reaches those small places that clothes cannot. |
| Warm Water Spray Bottle | The spray bottle is filled with clean water. | This helps loosen dirt and wash away mild cleaner residue. |
How to Prepare the Center Console for Cleaning
Preparing the center console before cleaning is a crucial step as it helps prevent damage, improves cleaning results and saves time.
The center console contains storage areas, electronic controls and various surface materials that can be damaged by moisture or excessive pressure.
Proper preparation ensures that dirt is safely removed and that no essential components are accidentally damaged during cleaning.
1. Remove All Personal Items and Accessories
Before beginning any cleaning, all personal items should be removed from the center console.
This includes coins, charging cables, bottles, papers, sunglasses and any other small accessories stored inside.
Removing these items provides complete access to every surface and prevents dirt from being pushed into corners and crevices.
It also reduces the risk of electronic items, such as chargers or adapters, coming into contact with liquids.
Cleaning the console after removing these items makes the cleaning process more effective and keeps personal belongings safe from water or cleaning solutions.
2. Remove Removable Trays, Liners and Cup Inserts
Many center consoles have removable trays, rubber liners and cup holder inserts designed to catch spills and food debris.
These components should be carefully removed before cleaning the main console.
Removing them provides better access to hidden dirt and makes it easier to clean sticky spills from drinks or food.
The removable parts can usually be cleaned separately with mild soap and water, maintaining cleanliness and preventing odors inside the console.
3. Identify the Materials Used in the Center Console
Center consoles are often made of various materials such as plastic, vinyl, leather, or glossy trim surfaces.
Each material reacts differently to cleaning products and moisture.
Taking a moment to identify the type of surface helps in choosing the safest cleaning method.
For example, glossy trim can be easily scratched, while soft-touch materials can be damaged by aggressive cleaning.
Knowing the material beforehand helps prevent discoloration, peeling, or surface damage during cleaning.
4. Turn off the car to prevent accidental button presses
Turning off the car before cleaning the center console is a simple yet crucial safety step.
Many consoles contain electronic buttons, gear selectors and touch controls that can be activated when pressed.
Cleaning with the car running can trigger warning alerts, system errors, or accidental changes to settings.
Turning off the engine minimizes the risk of electrical hazards and allows for safe cleaning around sensitive controls without interruptions or unwanted responses.
How to Removing Loose Dirt and Debris By Dry Cleaning Method
Dry cleaning is the first and most crucial stage of cleaning because it removes loose dirt before moisture is introduced.
Dust, food particles, sand and small debris act like tiny abrasive particles.
If rubbed with a wet cloth, they can scratch surfaces and push dirt into seams and crevices.
Starting with dry cleaning protects the center console materials and makes subsequent cleaning steps safer and more effective.
1. Thoroughly vacuum seams, gaps and cup holders
Vacuuming removes loose debris that accumulates in the tight and hidden areas of the center console.
Seams, gaps and cup holders often collect food crumbs, hand grime and outside dust.
These areas are rarely cleaned but tend to accumulate the most dirt.
Using a narrow vacuum attachment ensures thorough cleaning without spreading the dirt.
Proper vacuuming prevents odors, keeps surfaces smooth and prevents particles from scratching surrounding trim during wiping.
2. Use a soft brush to remove dust around buttons and knobs
Fine dust accumulates around the edges of buttons, knobs and controls, where cloths can’t easily reach.
A soft brush gently removes dust from these small areas without damaging the surface or pushing dirt into the gaps.
Gentle brushing keeps buttons functioning smoothly and prevents sticky buildup over time.
Light pressure is essential, as excessive force can damage labels or surface coatings.
3. Wipe flat surfaces with a dry microfiber cloth
After vacuuming and brushing, the flat surfaces of the center console should be wiped with a dry microfiber cloth.
This cloth traps leftover dust instead of spreading it around.
Dry wiping removes fingerprints, fine dirt and light grime without the need for moisture.
This also ensures that loose particles are completely removed, preparing the surface for subsequent cleaning steps.
4. Pay attention to joints, edges and sliding covers
Dust accumulates in joint lines, edges and sliding covers because these create small crevices where dirt easily collects.
These areas are often overlooked, but dirt can build up here over time.
Cleaning them during the dry stage prevents dirt from becoming embedded in the joints later.
Sliding covers should be gently opened and cleaned along their tracks to ensure smooth operation and prevent grinding noises caused by trapped debris.
How to Do Wet Cleaning of Plastic and Hard Surfaces
Wet cleaning is the step that removes oils, stains and sticky residues that dry cleaning cannot completely eliminate.
The plastic and hard surfaces on the center console are frequently touched, leaving behind sweat, skin oils and food residue.
Over time, this buildup can make the surfaces look dull and feel sticky.
Using moisture in a controlled manner breaks down this grime while protecting the finish and the electronic components inside the console.
1. Lightly spray the cleaner onto a cloth
The cleaning solution should always be applied to a cloth, not sprayed directly onto the center console.
Direct spraying can allow liquid to seep into gaps, seams and electronic controls, potentially causing damage.
A slightly damp cloth provides complete control over the moisture and distributes the cleaner evenly.
This method helps lift dirt without oversaturating the surface, keeping the plastic panels safe and clean.
2. Gently wipe buttons, panels and storage compartments
Buttons, panels and storage areas should be wiped gently and carefully to prevent wear and tear.
These surfaces often have printed labels or soft coatings that can fade or peel off with excessive scrubbing.
Gentle wiping removes oils and residues while preserving the original texture and appearance.
Cleaning storage compartments also removes hidden grime that can cause odors over time.
3. Use cotton swabs for tight spaces and crevices
Small gaps around buttons, trim lines and the edges of controls trap dirt that a cloth cannot reach.
Cotton swabs are useful for cleaning these tight spaces because they offer precision and control.
A slightly damp swab can lift dirt from crevices without spreading it.
This careful cleaning helps prevent buildup that can affect the movement and appearance of the buttons.
4. Avoid excessive moisture near the electronic controls
The electronic controls and charging area are sensitive to moisture.
Excessive liquid can cause malfunctions, warning lights, or long-term damage.
Using minimal moisture and keeping cloths only slightly damp protects these components.
Allowing the surfaces to dry completely after cleaning further reduces the risk and ensures the center console continues to function smoothly.
How to Clean Cup Holders and Storage Compartments
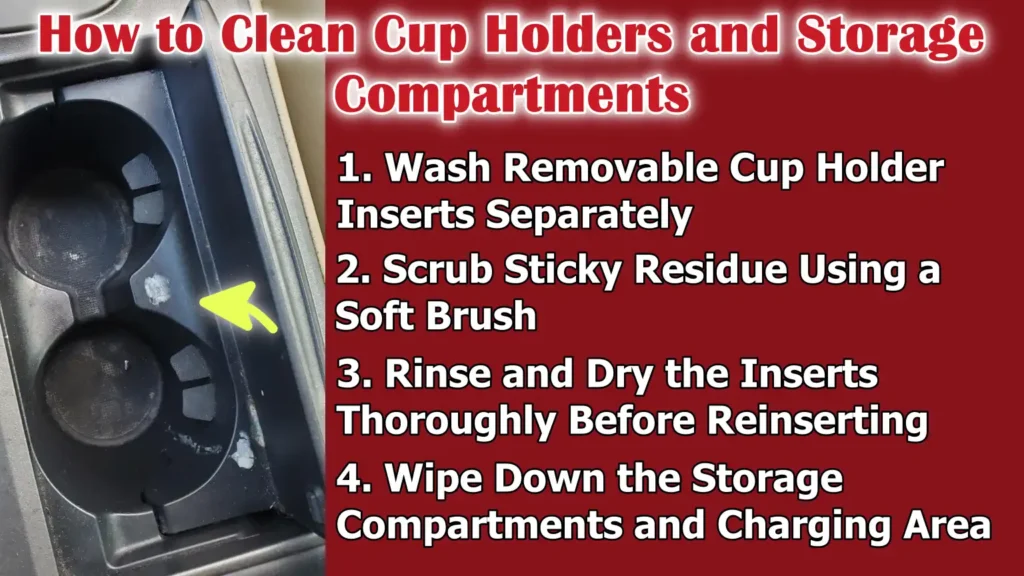
Cup holders and storage compartments tend to accumulate more dirt than most other parts of the center console because they are exposed to spills, food particles and constant use.
Sweet liquids can dry into a hard, sticky residue that attracts more dirt and creates odors.
Properly cleaning these areas helps prevent odor buildup, inhibits bacterial growth and keeps the console looking fresh and well-maintained.
1. Wash Removable Cup Holder Inserts Separately
Many vehicles have removable cup holder inserts designed to catch spills.
These inserts should be washed separately from the main console.
Washing them away from the vehicle allows for better cleaning and prevents water from reaching electronic components.
Mild soap and warm water help remove dried drink residue without damaging the material.
Washing them separately also ensures that hidden areas beneath the inserts are not missed during cleaning.
2. Scrub Sticky Residue Using a Soft Brush
Sticky residue forms when drinks dry and mix with dust and dirt.
A soft brush helps loosen this buildup without scratching the surface.
Gentle scrubbing removes stubborn layers that a cloth alone cannot remove.
It’s important to use light pressure, as aggressive scrubbing can damage the surface coating or leave marks inside the cup holder.
3. Rinse and Dry the Inserts Thoroughly Before Reinserting
After washing, the cup holder inserts should be rinsed thoroughly to remove any soap residue.
Leftover soap can attract dirt and make the surface slippery.
It’s crucial to thoroughly dry the inserts before putting them back, as trapped moisture can lead to mold, odors, or stains.
Completely dry inserts help keep the console cleaner for longer.
4. Wipe Down the Storage Compartments and Charging Area
Storage compartments and charging areas often accumulate food crumbs, dust and spilled liquids.
Wiping these areas removes dirt that can cause odors and potentially obstruct charging cables or ports.
A slightly damp cloth is best for cleaning these areas to avoid getting moisture into the electronics.
Clean storage areas help keep personal items clean and improve the overall comfort of the car’s interior.
How to Clean Armrests and Soft-Touch Areas
The armrests and soft-touch areas of the center console are constantly in contact with hands and arms while driving.
Because of this, they absorb sweat, skin oils and dirt much faster than hard surfaces.
Over time, this buildup can lead to deep stains, unpleasant odors and a worn or shiny appearance.
Proper cleaning keeps these surfaces comfortable, helps them last longer and maintains the original look of the interior.
1. Identify the Material Used on the Armrest
Before cleaning, it’s crucial to know what material the armrest is made of.
Some armrests are made of leather, some of vinyl and others use fabric or a soft-touch coating.
Each material reacts differently to moisture and cleaning products.
Leather can dry out if cleaned incorrectly, fabric can absorb water and develop odors and vinyl finishes can be damaged if harsh cleaners are used.
Identifying the material first helps prevent damage and ensures safe and effective cleaning.
2. Use the Correct Cleaner for the Surface Type
Using the right cleaner is essential to protect the armrest surface.
Mild cleaners designed for automotive interiors help remove dirt without damaging the material.
Harsh chemicals can strip natural oils from leather, stiffen fabric, or cause cracking in vinyl surfaces over time.
Applying the correct cleaner helps maintain softness, color and durability while effectively removing dirt and stains.
3. Gently Scrub to Remove Oil and Sweat Buildup
Sweat and body oils gradually accumulate on armrests due to frequent contact.
Gentle rubbing helps remove buildup without damaging the surface.
Soft cloths or soft brushes work best because they clean without harming the texture.
Regularly removing oil buildup prevents dark spots, slippery surfaces and long-term deterioration of the material.
4. Wipe Dry to Prevent Stains and Buildup
After cleaning, the armrests should be wiped dry with a clean cloth.
Lingering moisture can leave stains, attract dust and keep the fabric or leather damp.
Thoroughly drying the surface restores a clean, natural feel and prevents sticky residue from forming.
A dry finish also reduces the likelihood of odors and keeps the armrests comfortable to use.
How to Deal with Spills, Stains and Sticky Residues
Stains, spills and sticky residues are common problems in the center console due to frequent contact with drinks, food and hands in a small, enclosed space.
Sugary liquids and oils can soak into surfaces or harden when dry, making them difficult to remove over time.
Properly handling spills and stains helps prevent permanent marks, odors and damage to interior materials.
1. Blot Spills Immediately Before Rubbing
When something spills, it should be blotted up as quickly as possible.
Blotting means gently pressing a cloth onto the spilled liquid to absorb it without spreading it.
Rubbing too vigorously can push the liquid further into seams, stitching, or porous surfaces.
Immediate blotting minimizes the chance of staining and makes subsequent cleaning much easier.
2. Use a Mild Soap Solution for Sugar or Drink Stains
The sugar in drinks becomes sticky when dry and attracts more dirt.
A mild soap solution diluted with water helps break down this residue safely.
Stronger cleaners are unnecessary and can damage the surface finish.
Mild soap removes the sticky layer while keeping plastics, vinyl and soft-touch materials in good condition.
3. Repeat Gentle Cleaning Instead of Scrubbing Hard
Some stains require several gentle cleaning attempts to remove completely.
Scrubbing hard can scratch surfaces, remove color, or damage coatings.
Repeating gentle cleaning gradually loosens the stain without causing any damage to the material.
This approach is safer and more effective for long-term care of the center console.
4. Allow the surfaces to air dry completely
After cleaning, the surfaces should be allowed to air dry completely.
Trapped moisture can lead to odors, stains, or mold growth, specially in enclosed areas like storage compartments and cup holders.
Proper drying helps restore the original feel of the surface and prevents new dirt from sticking to damp areas.
How to Disinfect High-Touch Console Areas
The high-touch areas of the center console are the places where hands make the most contact during daily driving.
Buttons, knobs and the gear selector are touched numerous times in short periods, leading to a rapid buildup of germs, sweat and oils.
In a closed car cabin, heat and humidity can allow bacteria to survive on surfaces for extended periods.
Disinfecting these areas reduces germs, improves hygiene and creates a healthier driving environment without affecting the normal function of the controls.
1. Focus on Buttons, Knobs and Gear Selector Areas
Buttons, knobs and the gear selector accumulate more germs than flat surfaces because they are frequently touched.
These areas often have small crevices where dirt and bacteria can hide.
Careful disinfection keeps these controls clean and easy to use.
Regular attention to these areas also prevents buildup that can make buttons sticky or difficult to press over time.
2. Use Interior-Safe Disinfectant Sparingly
To avoid damage, disinfectants should be used sparingly.
Interior-safe products are designed to kill germs while protecting plastics and coated surfaces.
Using too much liquid can allow moisture to seep into gaps and electronic components.
A light application on a cloth is sufficient for effective cleaning and protects delicate parts.
3. Avoid Alcohol on Glossy or Delicate Trim
Glossy trim and soft-touch surfaces can be damaged by alcohol-based products.
Alcohol can cause discoloration, hazing, or peeling on these finishes.
Avoiding alcohol preserves the shine and smoothness of the console.
Choosing gentler disinfecting methods keeps the interior looking new for longer.
4. Dry with a clean microfiber cloth
After disinfecting, surfaces should be gently dried with a clean microfiber cloth.
This step removes any remaining moisture and prevents streaks or residue from forming.
Drying also restores a smooth finish and reduces the likelihood of dust clinging to the surface.
Completely dry controls feel better to the touch and are easier to use.
Now, Perform Final Wipe and Reassemble Them
The final wipe and reassembly step completes the entire center console cleaning process.
This stage ensures that no moisture, dirt, or loose dust remains on the surfaces.
A proper finish not only enhances the appearance but also helps prevent future dust buildup, odors and material damage.
Taking a few extra minutes at this stage ensures the console stays clean longer and all parts function correctly.
1. Final wipe with a dry cloth to remove any remaining residue
A final wipe with a dry cloth removes any remaining residue from cleaning products or moisture.
Even a small amount of residue can attract dust and make surfaces look dull.
Using a clean, dry cloth helps restore a smooth and natural finish.
This step also gives you a chance to check for any missed spots and ensures the console looks uniform and clean from all angles.
2. Reinstall trays, liners and accessories
Once everything is clean and dry, the removable trays, liners and accessories can be placed back into the center console.
Properly reinstalling these parts helps protect the console from future spills and dirt.
Clean liners also prevent items from sliding around and reduce noise while driving.
Correct placement ensures that compartments close properly and remain easy to use.
3. Ensure all surfaces are dry before closing compartments
Before closing lids or compartments, it’s crucial to ensure all surfaces are completely dry.
Trapped moisture can lead to unpleasant odors, mold growth, or water stains.
Allowing everything to dry thoroughly protects the materials and keeps the interior fresh.
Dry surfaces also prevent sticking and allow moving parts to operate smoothly.
4. Check that the buttons and lids are working smoothly
After reassembly, all buttons, lids and sliding covers should be tested.
Smooth operation ensures that no dirt or moisture is trapped inside.
This step helps confirm that the controls function correctly and that the compartments open and close without obstruction.
Checking the movement at the end helps detect minor issues early and ensures that the center console remains comfortable and reliable to use.
Read More:
How to Maintain Cleanliness of Your Center Console
Regular maintenance keeps your center console clean with minimal effort and prevents the buildup of stubborn grime.
The center console is used daily, meaning dust, oils and dirt accumulate over time.
A few simple habits can help protect the surfaces, reduce wear and tear and keep your interior looking fresh and organized for longer.
Also, there’s multiple scientific analyses that shows that the center console and nearby controls are not just dusty, but these are biologically active surfaces, as in a study they takes samples from different interior locations and researches found really significant bacterial contamination on the center console areas such as: near the cup holders, also there’s skin-associated bacteria available such as Staphylococcus and Propionibacterium which is common across these samples, that’s why regular cleaning and maintain hygienic is important for your comfort and heath as well.[¹]
1. Wipe down weekly to prevent buildup
A quick wipe-down once a week removes dust, hand oils and initial dirt before it hardens or spreads.
Frequent cleaning only takes a few minutes and eliminates the need for more vigorous scrubbing later.
Regular wiping also keeps buttons responsive and surfaces smooth, making the console easier and more comfortable to use.
2. Use liners in cup holders and storage compartments
Liners act as a protective layer, catching spills, crumbs and dust before they reach the console surface.
They are easy to remove and clean, reducing the likelihood of long-term stains and odors.
Using liners protects the original material and makes daily maintenance quicker and easier.
3. Avoid eating in the car whenever possible
Eating in the car increases the risk of spills, crumbs and sticky residue.
Food particles can easily fall into small crevices and storage areas, making them difficult to remove.
Minimizing eating in the car keeps the console cleaner and reduces odors from leftover food.
4. Clean up spills immediately to prevent stains and odors
Cleaning up spills immediately is one of the most effective maintenance habits.
Liquids left to dry can become sticky, attract dirt and cause permanent stains or odors.
Cleaning them up immediately prevents damage and keeps the center console looking clean and fresh with minimal effort.
What are The Common Mistakes to Avoid during Cleanup
Avoiding common cleaning mistakes is just as important as following the correct cleaning steps.
The center console contains delicate surfaces, coatings and electronic parts that can be easily damaged by improper cleaning.
Many problems, such as faded trim, sticky buttons, or malfunctioning controls, stem from seemingly minor cleaning errors.
Understanding what not to do ensures the console remains protected and in good condition for longer.
1. Spraying Cleaner Directly onto Electronic Components
Spraying cleaner directly onto the center console can allow liquid to seep into buttons, switches and electronic controls.
Moisture inside these components can cause electrical problems, warning lights, or delayed button responses.
Liquid trapped beneath the panels can also lead to corrosion over time.
Applying the cleaner to a cloth first provides better control and protects delicate parts.
2. Using Stiff Brushes or Abrasive Cloths
Abrasive cloths and stiff brushes can scratch surfaces and damage protective coatings.
Many center consoles feature soft-touch finishes and printed labels that are easily damaged by harsh tools.
Scratches make the console look worn and allow dirt to accumulate more easily.
Using soft materials preserves the texture, color and overall appearance.
3. Over-Wetting Seams and Joints
Seams, joints and stitched areas can trap moisture if over-wet.
Trapped water can lead to odors, mold and material degradation over time.
Excessive moisture can also seep into hidden electronic components.
Using lightly damp cleaning methods minimizes these risks and keeps the interior dry and safe.
4. Ignoring the Manufacturer’s Interior Care Guidelines
Car manufacturers provide interior care guidelines because the materials used vary depending on the model.
Some surfaces require specific care and using the wrong products can damage them.
Ignoring these guidelines can lead to discoloration, cracking, or peeling.
Following the recommended care instructions will maintain warranty coverage and ensure the center console remains in good condition.
Conclusion – How to Clean Center Console in Car
Without a doubt, if you maintain the cleanliness in your center console, then it is a clear sign that you care about your vehicle and prevents major interior damage as well.
Yes, center console is touched many times during every drive, that clearly means that it accumulates dust, oils, dirt and germs much faster than other interior surfaces.
So, the regular and proper cleaning maintains hygiene, prevents odors and minimizes long-term wear and tear on plastic, soft-touch and electronic components.
But, you need to use the gentle tools, controlling moisture and employing the correct cleaning techniques can protect sensitive controls and keep surfaces looking like new.
And, when the center console is clean and well-maintained, daily driving becomes more comfortable, controls function smoothly and the entire interior remains fresh and inviting.
The thing is, with just a few minutes of regular care can help preserve your vehicle’s value and prevent costly interior repairs in the future.
Now, ask the related questions in the comment box.
Frequently Asked Questions
Q1. What is the best way to safely clean a car’s center console?
Answer: The best way to safely clean a car’s center console is to start with dry cleaning and then gradually move to wet cleaning. First, remove loose dust and debris using a vacuum and a dry cloth. Then, instead of spraying the cleaner directly onto the console, apply a mild interior cleaner to a cloth and use that. This prevents moisture from getting into electronic parts and protects the surface finish. Cleaning gently and in stages keeps the console clean without causing any damage.
Q2. How often should the center console be cleaned?
Answer: The center console should be lightly cleaned once a week and thoroughly cleaned every few months. A weekly wipe removes hand oils, dust and light grime before it builds up. Deep cleaning removes grease, stains and germs that accumulate over time. Regular cleaning keeps the surface smooth, prevents odors and reduces wear and tear.
Q3. Can water damage the center console?
Answer: Yes, excessive water can damage the center console. Too much moisture can seep into cracks, buttons and electronic controls, causing malfunctions or corrosion. Water trapped in storage areas can also lead to odors or mold growth. Therefore, only lightly dampen the cloth and always thoroughly dry the surfaces after cleaning.
Q4. Is it safe to clean the buttons and electronic controls?
Answer: It is safe to clean the buttons and electronic controls if done carefully. The car should be turned off and the cleaning liquid should be applied to a cloth, not directly to the buttons. Gently wiping removes dirt and oil while preventing liquid from seeping inside. Using minimal moisture protects the sensitive electronics.
Q5. Why do cup holders and storage compartments become sticky?
Answer: Sticky cup holders and storage compartments are usually caused by spilled drinks, specially sugary ones. When sugar dries, it leaves a sticky residue that attracts dust and dirt. The heat inside the car further hardens this stickiness over time. Proper washing and gentle scrubbing will remove this buildup and eliminate odors.
Q6. Why do armrests get dirty faster than other parts?
Answer: Armrests get dirty quickly because they are constantly in contact with skin and clothing. Sweat, body oils and dirt gradually accumulate on the surface. Over time, this can lead to deep stains, discoloration and odors. Gentle and regular cleaning helps maintain comfort and appearance.
Q7. Does cleaning the center console reduce car odors?
Answer: Yes, cleaning the center console can reduce car odors. Spilled food, moisture and dirt in cup holders and storage areas often cause unpleasant smells. Removing dirt and thoroughly drying surfaces keeps the interior fresh. Clean surfaces also prevent the growth of bacteria and mold, which can cause unpleasant odors.
References:
[1] Elucidation of bacteria found in car interiors and strategies to reduce the presence of potential pathogens
https://pmc.ncbi.nlm.nih.gov/articles/PMC3962071/

Guys, I’m a car audio enthusiast and customization expert and I love clear sound and clean installation. Plus, I have spent years helping people build their dream audio setups. And whenever I’m working on cars, I probably listen to music and thinks about the next big upgrade.