Written By: Don Dodi
Fact Checked By: Kristen Brown
Reviewed By: Diego Rosenberg
When you keep your engine bay in the neat & clean way, then you can easily spot any possible oil leaks, worn out hoses and loose wires as well.
Otherwise, the heat from the engine that causes oil vapors and dirt that simply sticks to the surface for more messy kind of environment.
Even, the air enters through the grille actually brings dust that also builds up with these grime things and that makes the really sticky and grime all over the engine bay.
As well as, according to the automotive maintenance studies, the dirty engine bay can actually hide fluid leaks, cracked hoses, loose wires and worn out belts as well, that makes the problems even way more harder to detect them in early way.
Yes, now-a-days modern vehicles are designed with the sealed connectors and they have water-resistant components, but if you doesn’t clean them in proper way, then they can still cause electrical issues or other complex issues.
So, this is the guide about How to Clean Engine Bay of Car, so that you can learn what actually works and how to correctly use low water pressure, engine-safe cleaners and basic precautions as well.
Let’s Know, Is It Really Safe to Clean a Car’s Engine Bay?
1. Modern Engine Bay Design and Water Protection
Modern cars are designed with engine bays that can withstand limited amounts of water.
Manufacturers use sealed electrical connectors, weather-resistant sensor housings and protective covers to prevent moisture from reaching sensitive components.
Components like ignition coils, wiring looms and control modules are built to withstand rain, splashes and moisture during normal driving.
This is why cars can be driven safely in heavy rain or through puddles without damaging the engine.
However, this water protection is for light contact, not high-pressure water or careless soaking.
Understanding this design helps car owners understand that gentle and controlled cleaning is usually safe, while aggressive methods are not.
2. When Engine Cleaning is Safe and When It’s Not
Engine bay cleaning is generally safe when the engine is completely cool, the battery is secured or disconnected if necessary and only low-pressure water or a damp cloth is used.
It’s also safe when engine-safe degreasers are applied carefully and given sufficient time to work.
Engine cleaning is not safe when the engine is hot, as sudden temperature changes can damage components.
It’s also risky during electrical problems, warning lights, or visible wiring damage.
Older vehicles with worn seals or modified wiring require extra caution, as they may not have the same level of protection as newer cars.
3. Manufacturer Recommendations and Warnings
Most car manufacturers don’t prohibit engine bay cleaning, but they do advise caution.
Owner’s manuals and service guidelines often warn against using pressure washers, steam cleaners, or harsh chemicals directly on engine components.
The manufacturer advises against spraying water directly onto the alternator, fuse box, air intake and exposed sensors.
They also recommend covering sensitive components and ensuring the engine bay is completely dry before starting the vehicle.
Following these recommendations helps prevent electrical malfunctions and maintains warranty coverage.
4. Risks of Improper Cleaning
Improper cleaning of the engine bay can lead to serious problems.
High-pressure water can force moisture into electrical connectors, causing corrosion or short circuits.
Harsh chemicals can damage rubber hoses, plastic covers and wire insulation over time.
Water trapped in connectors can trigger warning lights, cause engine misfires, or lead to starting problems.
In severe cases, improper cleaning can damage sensors or control units, resulting in costly repairs.
These risks can be avoided when cleaning is done gently, carefully and with basic safety precautions.
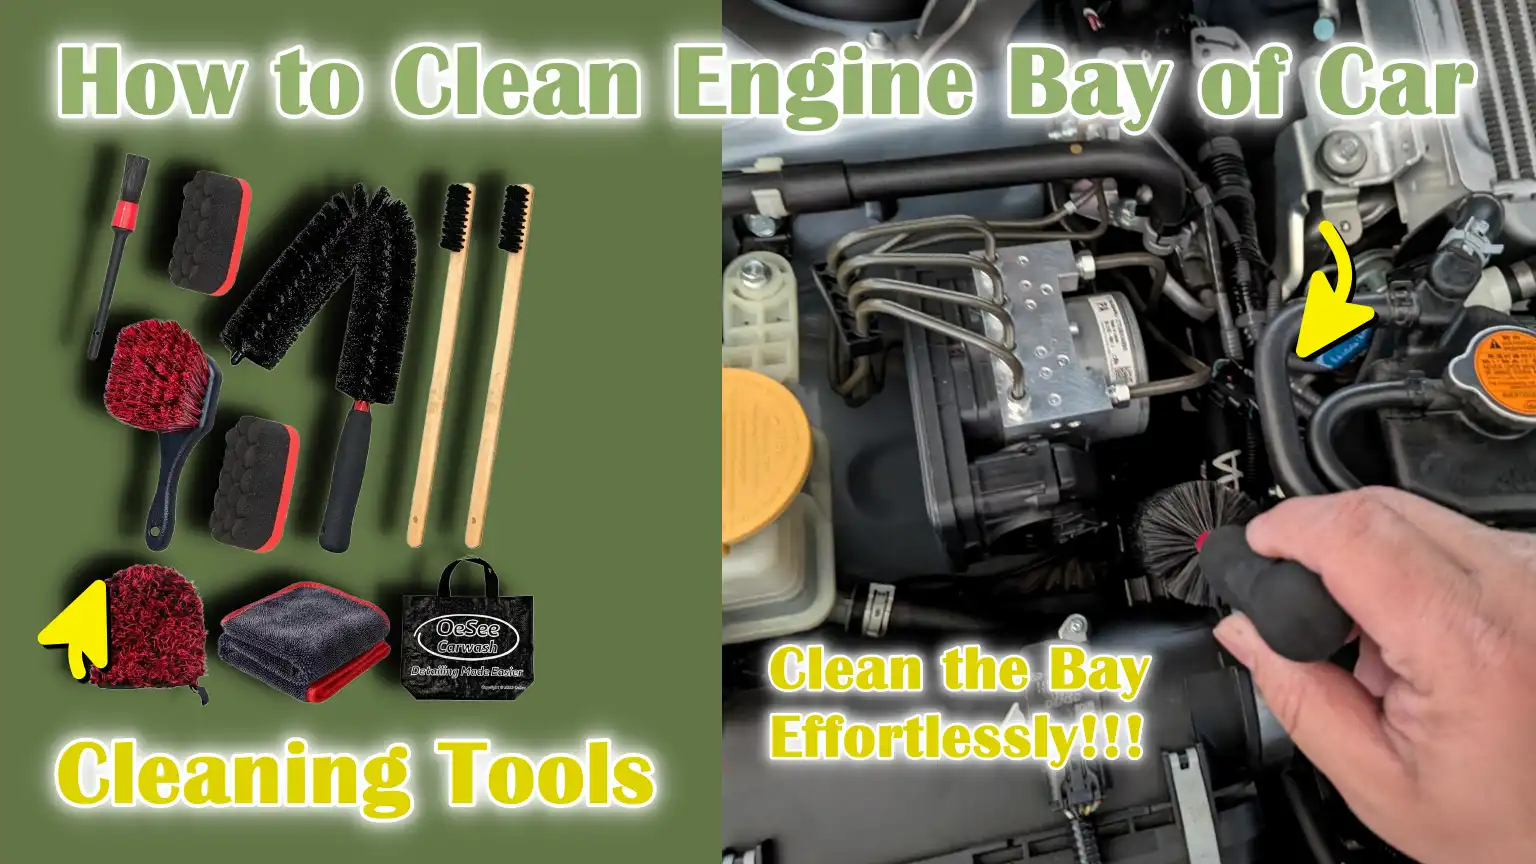
Tools
| Tool or Material | Why It Is Needed | How It Helps During Cleaning |
|---|---|---|
| Engine-safe degreaser | It breaks down oil, grease and sticky substances. | It loosens stubborn dirt so it can be easily removed by wiping or rinsing. |
| Soft detailing brushes | Cleans dust and light dirt from covers and hoses. | Reaches tight spaces without scratching surfaces. |
| Stiff detailing brushes | Removes thick grease and dirt. | Helps clean metal parts and hard surfaces. |
| Microfiber cloths | It cleans away dirt and dries surfaces safely. | It absorbs water without leaving fibers. |
| Plastic bags or aluminum foil | Protects sensitive engine parts. | This prevents water from entering the alternator, fuse box and sensors. |
| Low-pressure water source or spray bottle | Safely rinses away loose dirt. | Prevents water from entering the connectors. |
| Protective gloves | It protects the skin from oils and chemicals. | Improves grip and keeps hands clean. |
| Eye protection | Protects eyes from splashes. | This prevents cleaning agents or dust from entering the eyes. |
How to Prepare the Engine Bay Before Cleaning
1. Ensuring the Engine is Completely Cool
Before beginning any cleaning, the engine must be completely cool.
Cleaning liquids can dry very quickly on a hot engine, leaving streaks and residue.
More importantly, sudden exposure to cold water on hot metal parts can cause cracking, warping, or damage to plastic covers and rubber seals.
A cool engine also reduces the risk of burns to your hands and arms while working.
Allowing the vehicle to sit for at least one to two hours after driving allows the heat to dissipate evenly, making the cleaning process safer and more effective.
2. Parking the Vehicle in a Shady, Well-Ventilated Area
Parking the vehicle in a shady and open area helps control temperature and airflow during cleaning.
Direct sunlight can quickly heat engine components, even when the engine is off, causing cleaners to dry too quickly and reducing their effectiveness.
A well-ventilated area allows moisture to dry quickly after cleaning, minimizing the chances of water pooling around electrical components.
Open airflow also helps prevent the buildup of strong chemical fumes, making the process safer and more comfortable for the person cleaning the engine bay.
3. Disconnecting the Battery – If Advised
Disconnecting the battery is sometimes advised, specially for older vehicles or those with known electrical issues.
This step minimizes the possibility of short circuits or accidental electrical activity during cleaning.
Many modern cars do not require battery disconnection if proper precautions are taken, but consulting the owner’s manual is always a safe option.
If the battery is disconnected, it should only be reconnected once the engine bay is completely dry.
This simple step adds an extra layer of safety and peace of mind during the cleaning process.
4. Covering Sensitive Components – Alternator, Fuse Box, Sensors
Sensitive components in the engine bay should always be protected before cleaning.
Components such as the alternator, fuse box and electronic sensors are not designed to withstand direct contact with water.
Covering these components with plastic or foil helps prevent moisture from entering small cracks and connectors.
While many of these components are water-resistant, repeated exposure to water can lead to corrosion over time.
Proper covering maintains electrical reliability and prevents warning lights or starting problems after cleaning.
How to Dry Clean and Perform Initial Inspection
1. Removing Loose Debris like Leaves and Dust
Dry cleaning is the first and most crucial step before using any liquids in the engine bay.
Over time, leaves, sand, dust and small debris accumulate around edges, near the windshield and on flat engine covers.
If this loose debris isn’t removed first, it can turn into a muddy residue when wet and spread into tight spaces.
Gently brushing or wiping away dry debris keeps drains clear, prevents clogging and allows subsequently used cleaning products to work more effectively.
This step also reduces the risk of debris entering connectors or seals.
2. Identifying Oil Leaks or Damaged Hoses
A dry engine bay makes it easier to spot oil leaks and fluid stains.
Fresh oil often appears dark and wet, while older leaks look sticky and dusty.
Inspecting the engine area during a dry inspection helps identify potential problems such as leaking valve covers, loose caps, or cracked lines.
Hoses should be checked for swelling, hard spots, or surface cracks, which are signs of aging or heat damage.
Identifying these issues early can prevent sudden breakdowns and costly repairs.
3. Checking Wiring and Rubber Components
Wiring and rubber components are susceptible to heat and age, making a thorough inspection essential.
Wires should be clean, securely connected and free of exposed metal or cracked insulation.
Rubber components such as belts, seals and vacuum lines should be flexible, not stiff or cracked.
A dry inspection allows for the examination of these components without moisture concealing any damage.
Early detection of faulty wiring or rubber parts helps maintain engine safety and reliability.
4. Identifying areas that require more attention
Not all parts of the engine bay are equally dirty.
Areas around the oil cap, fluid reservoirs and airflow passages typically accumulate more grime.
During the inspection, these dirtier zones can be identified for more thorough cleaning later.
Lightly soiled areas may only require a simple wipe-down, while greasy spots might need a degreaser and a soft brush.
This step helps avoid unnecessary cleaning of sensitive components and allows for focused cleaning where it’s truly needed.
How to Apply Engine Degreaser
1. Choosing the Right Degreaser for Your Engine
Engine degreasers are designed to break down oil, grease and road grime without damaging engine parts.
It’s crucial to choose a product that is clearly labeled as safe for engine bays, as household cleaners or harsh solvents can damage plastic covers, rubber hoses and wire coatings.
Water-based and engine-specific degreasers are generally recommended because they clean effectively and rinse off easily.
Reading the product label ensures it’s suitable for modern engines and safe to use around electrical components when used carefully.
2. How and Where to Apply the Product
The degreaser should only be applied to dirty areas, not sprayed over the entire engine bay.
Common areas requiring degreasing include oily metal surfaces, grimy engine covers and areas around fluid caps.
The product should be sprayed lightly and evenly, maintaining a safe distance to avoid oversaturating parts.
Applying the degreaser in a controlled manner helps lift grease without allowing the liquid to seep into connectors, seals, or electrical openings.
3. Waiting for the Correct Time
After applying the degreaser, it needs time to work.
This waiting period, often called the dwell time, allows the cleaner to loosen the grease so it can be easily removed.
Most engine degreasers only require a few minutes to break down the grime.
Leaving the product on for too short a time may reduce its cleaning power, while leaving it on for too long can cause it to dry or leave residue.
Following the time instructions on the product ensures safe and effective cleaning.
4. Avoid excessive application in sensitive areas
Using too much degreaser can be harmful, specially near sensitive parts.
Never spray excessive amounts on electrical connectors, sensors, alternators, or fuse boxes.
Excess liquid can seep into small openings and cause corrosion over time.
Applying it sparingly and carefully minimizes risk and avoids unnecessary exposure to chemicals.
Controlled application not only protects engine components but also makes rinsing and drying easier, leading to safer results after cleaning.
How to Remove Dirt and Grease From Engine Bay
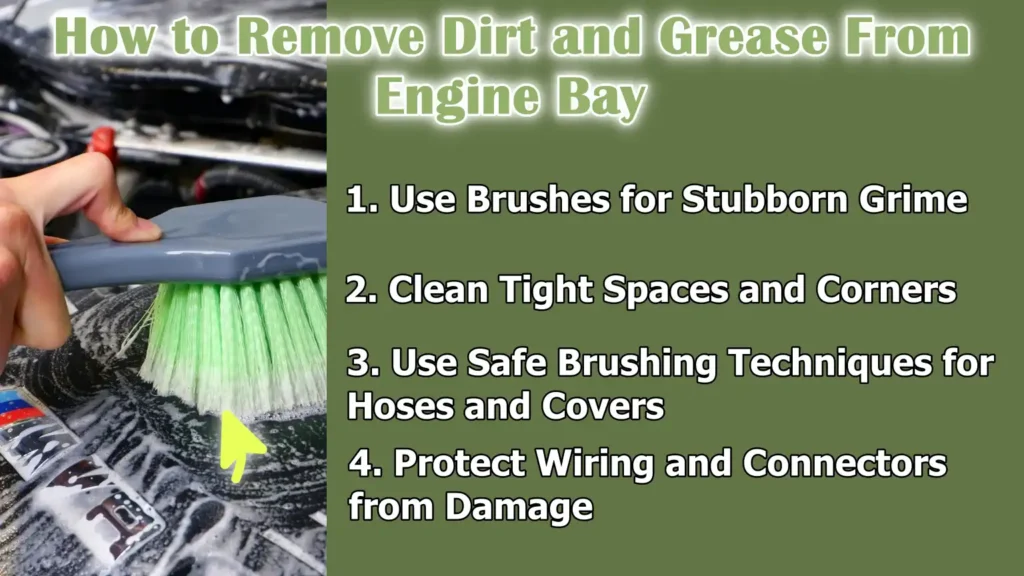
1. Use Brushes for Stubborn Grime
After the degreaser has loosened the dirt, using a soft brush helps remove grease that doesn’t easily wipe away.
Brushing allows for cleaning without excessive water pressure, reducing the risk of damage to engine parts.
Stubborn grime often accumulates on metal surfaces, brackets and textured engine covers where cloths cannot reach effectively.
Using the right brush helps dislodge this dirt from these surfaces so it can be easily rinsed or wiped away.
Controlled brushing yields better results and ensures a safer cleaning process.
2. Clean Tight Spaces and Corners
The engine bay contains many narrow gaps and hidden corners where dirt accumulates over time.
These areas include bolts, joints, hose connections and spaces between engine components.
Small or angled-head brushes are useful for reaching these areas without bending or removing parts.
Cleaning tight spaces improves airflow and helps prevent long-term dirt buildup that can trap moisture.
Paying attention to these areas also makes future inspections easier.
3. Use Safe Brushing Techniques for Hoses and Covers
Hoses, plastic covers and rubber parts require careful handling.
These components can be easily damaged if scrubbed too aggressively.
Light pressure and smooth movements help clean surfaces without scratching or weakening them.
Brushing should always be done along the contours of the part, not against the edges.
Gentle techniques protect the surface finish and reduce the likelihood of cracks or leaks later on.
4. Protect Wiring and Connectors from Damage
Wiring and electrical connectors are some of the most sensitive parts of the engine bay.
They should never be scrubbed or pulled forcefully during cleaning.
Any dirt near the connector should be carefully loosened with a soft brush around the connection points, not directly on them.
Avoid twisting or bending the wires, as this can loosen the internal contacts.
Careful handling helps prevent electrical malfunctions, warning lights and starting problems after the cleaning process is complete.
How to Wash the Engine Bay – Safe Method
1. Use Low-Pressure Water Only
The engine bay should always be washed with low-pressure water.
High-pressure water can force moisture into electrical connectors, seals and small openings that are not designed to withstand a strong spray.
A gentle stream of water is sufficient to rinse away loose dirt and degreaser without causing damage.
Low pressure also provides better control, allowing the person cleaning to stop the water immediately if it starts accumulating in unwanted areas.
This method keeps sensitive engine components safer during the washing process.
2. Correct Washing Direction and Distance
The direction and distance of the water spray play a crucial role in safe washing.
Water should be directed from top to bottom to allow dirt to flow downwards and away from components.
Maintaining the correct distance from the spray source prevents the water from hitting components with excessive force.
Washing slowly and evenly ensures that dirt is removed without forcing water into deep crevices.
This controlled approach minimizes the possibility of trapped moisture and makes drying easier afterward.
3. Areas to Avoid Direct Water Spray
Certain areas of the engine bay should never be directly sprayed with water.
Electrical connectors, sensors, the alternator, fuse box and air intake openings are highly sensitive to moisture.
Even though many of these components are water-resistant, repeated or direct contact can lead to corrosion or electrical problems over time.
Avoiding direct spray on these areas protects the engine’s electrical system and reduces the risk of warning lights or starting issues.
4. Alternative Washing Methods – Wiping Method
In some cases, water washing may not be necessary or appropriate.
A wiping method can be used instead, specially for lightly soiled engine bays or older vehicles.
This method involves using damp microfiber cloths to remove degreaser and dirt without the use of running water.
This provides more control and reduces the risk of water getting into sensitive areas.
Wiping is also helpful in cold weather or in confined spaces where washing is difficult.
Read More:
How to Dry the Engine Bay
1. Removing Protective Covers
After washing or wiping, all protective covers should be carefully removed.
The plastic or foil used to protect the alternator, fuse box and sensors can trap moisture if left in place for too long.
Removing these covers allows trapped water to evaporate and helps prevent moisture stains.
It’s crucial to ensure no covering material is left behind, as trapped moisture can lead to corrosion or electrical problems over time.
2. Using Microfiber Towels to Absorb Moisture
Microfiber towels are ideal for drying the engine bay because they quickly absorb water without leaving lint.
Gently dabbing and wiping surfaces helps remove moisture from engine covers, hoses and metal components.
This step is specially important around bolts, joints and edges where water tends to accumulate.
Thorough drying with a towel minimizes the likelihood of moisture remaining on surfaces, which can lead to rust or stains.
3. Air Drying vs Gentle Airflow
Allowing the engine bay to air dry naturally is safe, but it can take a considerable amount of time, specially in humid environments.
Gentle airflow can speed up this process without any risk.
Gentle airflow helps remove moisture from tight spaces and around wiring without forcing water deeper into components.
High-pressure air should be avoided, as it can push water into connectors.
Combining towel drying with gentle airflow provides the best balance of safety and effectiveness.
4. Preventing Water Spots and Corrosion
Proper drying prevents water spots and corrosion, which can damage metal components and affect the appearance of the engine bay.
Remaining water can cause mineral deposits or rust on exposed metal parts.
Thoroughly drying all surfaces reduces this risk and keeps the engine bay clean for longer.
A dry engine bay also ensures that electrical components remain reliable and that the engine starts easily after cleaning.
How to Give Engine Bay Finishing Touches and Dressing
1. Applying Plastic and Rubber Protectant
Once the engine bay is completely dry, a plastic and rubber protectant can be applied to protect the surfaces.
The engine bay contains numerous plastic covers, rubber hoses and seals that are exposed to heat and air every time the car is driven.
Over time, this exposure can lead to fading, drying and cracking.
A proper protectant helps slow this aging process by adding a light protective layer that minimizes moisture loss and surface degradation.
Using a product designed for automotive use ensures compatibility with the engine bay materials and provides long-lasting protection.
2. Restoring Shine to Engine Covers and Hoses
The protectant also helps give the engine covers and hoses a clean, fresh look.
Faded plastic and dull rubber can make even a clean engine bay look neglected.
Applying a thin, even layer restores the natural color and improves the overall appearance without making the parts greasy or overly shiny.
This restored finish makes it easier to inspect the engine bay and provides a clear view of any future leaks or dirt buildup.
3. Avoiding Slippery Residue
Using too much dressing can result in a slippery residue, which is undesirable in the engine bay.
Excess product can attract dust and dirt, quickly negating the cleaning effort.
Slippery surfaces can also make future maintenance work more difficult.
Applying the protectant sparingly and wiping away any excess helps maintain cleanliness while avoiding buildup.
The goal is protection, not a greasy finish.
4. Maintaining a Factory-Clean Look
A factory-clean look means the engine bay appears clean, natural and well-maintained, not overly shiny or greasy.
Manufacturers design engine bays with a clean, matte finish for practical reasons, including heat management and ease of inspection.
A light dressing helps maintain this original look while protecting the materials.
Keeping the finish subtle ensures that the engine bay remains professional-looking and functional, rather than merely decorative.
How to Perform Post-Cleaning Inspection
1. Reconnecting the Battery
If the battery was disconnected before cleaning, it should only be reconnected once the engine bay is completely dry.
Moisture around battery terminals or cables can lead to poor connections or corrosion.
Safely reconnecting the battery ensures proper electrical flow to all of the vehicle’s systems.
A secure battery connection is crucial as modern cars rely heavily on stable power for sensors, computers and safety systems.
2. Starting the Engine and Checking Warning Lights
After reconnecting the battery, the engine should be started and allowed to idle for a few minutes.
This allows the engine to warm up gradually and gives the systems a chance to perform self-checks.
Pay attention to any warning lights on the dashboard.
Warning lights appearing immediately after cleaning could indicate moisture in sensors or connectors.
In many cases, a small amount of moisture will dry on its own, but any persistent warnings should be investigated further to prevent long-term problems.
3. Listening for Unusual Noises
While the engine is running, listening carefully is a crucial part of the post-cleaning inspection.
Unusual noises such as clicking, misfiring, or rough idling could indicate loose connections, trapped water, or a malfunctioning component.
Engines typically produce consistent and smooth sounds at idle.
Any sudden changes after cleaning should be noted, as early detection helps prevent major mechanical or electrical issues.
4. Ensuring All Components are Dry and Secure
A final visual check helps ensure all parts are dry and properly secured.
Hoses, covers and wiring should appear secure and free of moisture.
Any protective covers used during cleaning should have already been removed.
Ensuring everything is dry and properly connected minimizes the risk of corrosion, electrical malfunctions, or loose parts while driving.
This final check completes the cleaning process and helps ensure safe and reliable vehicle operation.
Now, What are The Common Mistakes to Avoid Strictly
Plus, there’s preventive maintenance research that shows that the corrosion and neglected electrical systems actually makes up a large portion of roadside failures causes, which is why it becomes really important to clean and inspect it at the regular basis, specially in the engine bay area; as it literally help you to avert the many common breakdowns.[¹]
1. Cleaning a Hot Engine
Cleaning a hot engine is one of the most common and risky mistakes.
When engine parts are hot, the sudden contact with water or cleaners can cause rapid temperature changes, potentially leading to cracked plastic covers, damaged rubber seals, or warped metal parts.
The heat also causes cleaners to dry too quickly, leaving streaks and residue.
Waiting until the engine has completely cooled down makes the cleaning process safer, more effective and easier to control.
2. Using a High-Pressure Washer
High-pressure washers are not suitable for cleaning the engine bay.
The intense water pressure can force moisture into electrical connectors, sensors and seals that are only designed for minimal water exposure.
Once water gets into these areas, it can cause corrosion, electrical malfunctions, or starting problems.
A gentle stream of water or controlled wiping is sufficient for cleaning without damaging sensitive components.
3. Neglecting Electrical Components
Electrical parts require special care during engine bay cleaning.
Neglecting them or treating them like other engine parts can lead to serious problems.
Sensors, wiring connectors, fuse boxes and control units are crucial for the operation of modern vehicles.
Even a small amount of trapped moisture can trigger warning lights or impair engine performance.
Protecting these components and keeping them dry helps maintain reliable electrical function.
4. Using Harsh Household Cleaners
Household cleaners are not designed for the materials found in an engine bay.
Many contain harsh chemicals that can degrade plastics, dry out rubber and damage wire insulation over time.
These cleaners can remove dirt quickly, but they can shorten the lifespan of engine components.
Using products specifically designed for automotive engines ensures effective cleaning and protects the materials from long-term damage.
So, How Often Should You Clean Your Engine Bay?
1. Suggested Cleaning Intervals
The engine bay doesn’t need to be cleaned as frequently as the exterior of your car.
For most vehicles, a light cleaning once or twice a year is sufficient to keep the engine area in good condition.
This level of cleaning removes dust, oil residue and initial grime without causing excessive wear on the parts.
Vehicles driven regularly on city streets generally stay cleaner for longer, while regular inspections during routine servicing can help determine the appropriate cleaning schedule.
2. Factors Affecting Cleaning Frequency
How often your engine bay needs cleaning depends on several factors.
Vehicles driven on dusty roads, in heavy traffic, or in industrial areas accumulate dirt more quickly.
Oil leaks, fluid spills, or worn seals can also contribute to faster dirt buildup.
Vehicles parked in open areas are exposed to more dust, moisture and debris than those parked in covered spaces.
The age of the vehicle also matters, as older engines may accumulate dirt faster and require more frequent, albeit light, cleaning.
3. Weather Considerations – Rain, Snow, Dust
Weather plays a significant role in engine bay cleaning.
During rainy seasons, moisture combines with dust and oil to form a sticky residue that can adhere to engine parts.
In cold weather, road salt and slush can get into the engine bay and increase the risk of corrosion.
In dry and dusty conditions, fine dust settles quickly on engine surfaces and air intake areas.
Cleaning after periods of bad weather helps protect engine components and makes inspections easier.
Conclusion – How to Clean Engine Bay of Car
So, now you have understood about the fact that whenever the dirt gets removed, then the other essential parts are really easy to see and you can even spot the engine problems so that you can prevent them as well.
Additionally, dirt, oil and moisture gradually accumulate in the engine compartment, potentially concealing leaks, worn hoses and loose connections.
When done correctly—starting with a cool engine, using mild cleaners, protecting electrical components and thoroughly drying everything—cleaning the engine bay becomes a safe and beneficial maintenance practice.
Modern vehicles are designed to withstand light moisture, but careless methods such as using high-pressure water or harsh chemicals can cause damage.
Regular and careful engine bay cleaning improves inspection accuracy, reduces the risk of corrosion, promotes proper airflow and heat management and demonstrates that the vehicle has been well-maintained.
With basic tools, patience and common safety knowledge, car owners can confidently clean their engine bay and protect their vehicle’s long-term performance and value.
So, that’s all about this guide and if you still wanted to ask more questions then you can ask them on the comment box below.
Frequently Asked Questions
Q1. Is it safe to clean my car’s engine bay?
Answer: Yes, cleaning the engine bay can be safe if done carefully and using the correct methods. Modern engines are somewhat water-resistant, but excessive water or high-pressure washing can damage sensitive components like sensors, wiring and the alternator. Always follow the manufacturer’s recommendations and avoid cleaning a hot engine. Using protective coverings on essential parts and low-pressure water minimizes the risk.
Q2. How often should I clean my engine bay?
Answer: The frequency depends on driving conditions, weather and the amount of dust, oil and grime that accumulates in your engine. For most cars, cleaning once or twice a year is sufficient. If you drive in rainy, snowy, or dusty conditions, more frequent cleaning may be necessary. Regular inspections between cleanings can help detect oil leaks or faulty parts early.
Q3. Can I use just any degreaser on my engine?
Answer: No, it’s crucial to use a degreaser specifically designed for automotive engines. Household cleaners can be too harsh and may damage plastic, rubber, or painted surfaces. Engine-safe degreasers are formulated to effectively remove grease while remaining gentle on delicate engine parts. Always read product instructions carefully for safe use.
Q4. How do I prepare the engine bay before cleaning?
Answer: First, ensure the engine is completely cool to prevent burns or thermal shock to parts. Park the car in a shaded, well-ventilated area to prevent water or cleaning products from drying too quickly. Disconnect the battery if advised to avoid electrical issues and cover sensitive parts like the alternator, fuse box and sensors to protect them from water or chemicals.
Q5. Is it necessary to dry the engine bay after cleaning?
Answer: Yes, drying is crucial to prevent rust and water damage. Remove all protective covers and use microfiber towels to absorb moisture from exposed surfaces. Air drying or using a gentle air blower can help reach difficult areas. Prevent water from pooling in crevices to avoid rust, electrical problems, or mineral deposits.
Q6. Will cleaning my engine improve my car’s performance?
Answer: While cleaning the engine bay doesn’t directly increase horsepower, it can indirectly improve engine performance. Removing dirt helps prevent overheating, makes it easier to identify leaks or faulty parts and reduces the risk of corrosion or mechanical failure. A clean engine bay also contributes to the overall longevity and reliability of your vehicle.
Q7. Can engine cleaning help detect problems early?
Answer: Absolutely. During cleaning, you can inspect hoses, belts, wiring and seals for signs of wear and tear, leaks, or damage. Identifying these problems early allows you to address them before they become costly repairs. Regular engine bay maintenance contributes to the overall health and safety of your vehicle.
References:
[1] Preventive Maintenance, NEWSROOM.AAA.COM.
https://newsroom.aaa.com/wp-content/uploads/2019/06/Preventive-Maintenance-Fact-Sheet.pdf

Guys, I’m a car audio enthusiast and customization expert and I love clear sound and clean installation. Plus, I have spent years helping people build their dream audio setups. And whenever I’m working on cars, I probably listen to music and thinks about the next big upgrade.