Written By: Don Dodi
Fact Checked By: Kristen Brown
Reviewed By: Diego Rosenberg
When you don’t know the real process then finding a vacuum leak is just like solving a puzzle: as even if there’s a tiny crack in a vacuum hose can waste more fuel than a clogged air filter.
So, basically modern engines actually depends on a carefully balanced air-to-fuel mixture so that it run smoothly and even like a tiny leak in the vacuum system can disturb that balance drastically.
Not only this, studies also shows that vacuum leaks are actually one of the most commonly found issues that causes rough idling, poor acceleration and that increases the fuel consumption as well.
As an example: if there’s a small crack in a vacuum hose that can let in “unmetered air” through it and that the air is bypassing the mass airflow sensor: and because of that it actually cause the engine control unit which is also known as ECU to miscalculate how much fuel to inject.
So, it is not about it reduces the performance but it have the capability to trigger the check engine light, fail emissions tests and in some cases it is seen that it damages the sensitive components such as: catalytic converter as well.
And because of the U.S. Environmental Protection Agency also notes that vacuum-related problems contributes to the higher hydrocarbon emissions, that makes the detection important which is not just for your car’s health but also it affects the environment as well.
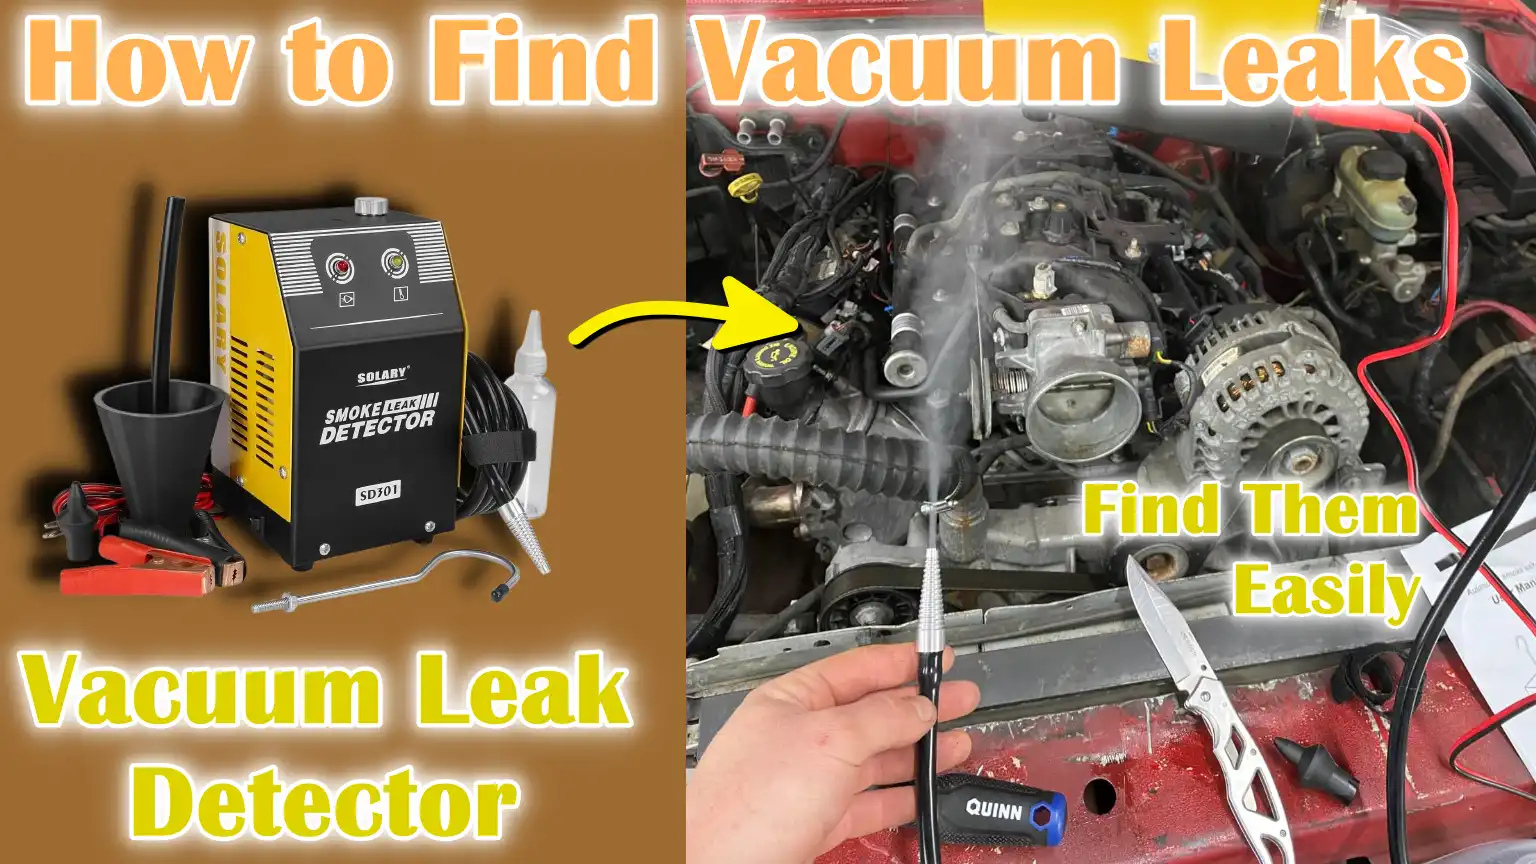
Now, it is the guide which shows all the things about How to Find Vacuum Leaks.
Understanding Vacuum Leaks
1. Definition of Vacuum in Engine Context
In car engines, the term “vacuum” refers to the pressure difference that is generated inside the intake manifold when the engine is running.
When the pistons move downward during the intake stroke, they produce a suction effect that draws air in through the throttle body.
This low-pressure area is important because it helps control how much air is mixed with the fuel before it enters the combustion chamber.
The engine control unit (ECU) relies on this controlled air flow to calculate the correct amount of fuel to inject.
Vacuum leaks occur when extra, unmeasured air enters the system from places where it shouldn’t be and bypasses the sensors that normally measure air flow.
This upsets the delicate balance of air and fuel that the engine needs to run properly.
2. How Vacuum Leaks Affect Engine Performance
Even a small vacuum leak can cause major problems with the way a car drives.
Because the engine gets more air than the sensor expects, the fuel mixture becomes too lean, meaning there is too much air and not enough fuel.
This often shows up as an uneven or erratic idle, frequent stalling at stoplights, hesitation when pressing the accelerator, or the engine misfiring.
Fuel efficiency can also drop sharply as the ECU tries to compensate by adding more fuel.
In severe cases, the car may have trouble starting or lose power under load, specially during acceleration or when climbing hills.
The check engine light usually comes on because the ECU detects irregular readings from the oxygen sensor or mass airflow sensor due to the leak.
Over time, driving with a vacuum leak can put stress on components such as the catalytic converter and spark plugs, leading to costly repairs.
3. Common Causes of Vacuum Leaks
Vacuum leaks can occur in many parts of an engine and many are related to the deterioration of older parts over time.
One of the most common causes is cracking or becoming brittle in the rubber hoses connecting various engine components.
These hoses are constantly exposed to heat, vibration and engine fluids, making them prone to cracking or bursting.
Loose connections, such as clamps or fittings, can allow air to get in.
Gaskets, which are used to seal surfaces such as the intake manifold or throttle body, can wear out and lose their flexibility as they age.
Another common source is the intake manifold itself, which can leak from its joints or bolts connecting it to the cylinder head.
Other parts that rely on vacuum, such as the brake booster or positive crankcase ventilation (PCV) system, can also leak.
Careful inspection is needed to identify the specific source, as even a small hole can cause major problems for the engine.
Basic Safety Precautions
1. Working with the Engine Off vs Working with the Engine On
When checking for vacuum leaks, it is important to understand when to work with the engine off and when to work with it on.
Visual inspections, such as checking for broken hoses or loose fittings, should always be performed with the engine off.
This prevents accidental injury from moving parts such as belts and fans.
However, some methods of leak detection, such as listening for a hissing sound or spraying carburetor cleaner near suspicious areas, require the engine to run at idle.
This is because signs of a leak will only be visible when the vacuum system is on.
In such cases, extra care must be taken to avoid touching hot parts or moving components.
The main rule is to start with the engine off for inspection and only turn it on if absolutely necessary for testing.
2. Proper Tools and Safety Equipment
Using the right tools and protective equipment makes leak detection safer and more accurate.
A good flashlight helps locate small cracks or worn gaskets.
Gloves protect hands from sharp edges, hot surfaces and chemical sprays.
It is important to wear safety glasses when using carburetor cleaner, brake cleaner, or even a smoke machine, as the vapors can irritate the eyes.
It is also advisable to keep a fire extinguisher nearby when working with flammable sprays around a running engine.
Using the right diagnostic tools like a vacuum gauge or smoke machine reduces the need for risky trial and error methods.
In simple terms, the better prepared you are with equipment and protective gear, the safer and more effective your job will be.
3. Preventing burns or injuries from hot engine parts
The engine generates a lot of heat and many parts become extremely hot within minutes of running.
The exhaust manifold, catalytic converter and radiator hoses can cause serious burns if accidentally touched.
This is why inspections that reach the engine bay should be done carefully and ideally after the engine has cooled down.
If the engine must be started for testing, avoid leaning on it or placing your arms near hot surfaces.
It is also important to stay away from moving parts such as serpentine belts and cooling fans, as these can cause injury by being cut or entangled.
Patience is important: waiting for the engine to cool before starting work greatly reduces the risk of injury.
Tools
| Tool / Material | Purpose | Why It Helps |
|---|---|---|
| Screwdrivers | Used to tighten or loosen clamps and fittings on vacuum hoses. | This makes it easier to secure or remove the hose when checking for leaks. |
| Pliers | Helps to hold, pull or adjust hoses and clamps. | Useful for removing old, stuck hoses without damaging them. |
| Flashlight | Provides strong light for inspecting dark or hidden parts of the engine. | Helps identify cracks, splits or loose connections that are hard to see. |
| Smoke Machine | Pushes harmless fumes into intake system to expose leak. | The leak is clearly visible as smoke coming out, making its detection very accurate. |
| Vacuum Gauge | Measures the vacuum pressure in the engine. | This helps confirm if the vacuum is low or unstable, which indicates a leak. |
| Carburetor Cleaner | Spray is used around suspected areas to check for leaks. | If the engine speed changes when you spray, this indicates a leak is present. |
| Automotive Stethoscope | An instrument with a sensitive tip for listening to hissing sounds. | Helps to locate the exact location of small leaks by amplifying the sound. |
| OBD-II Scanner | Plug into the car’s diagnostic port to read trouble codes. | This helps to determine if the Engine Computer has detected problems caused by a vacuum leak. |
How to Perform Visual Inspection
1. Check for cracks, wear and loose connections in vacuum hoses
Vacuum hoses are the most common source of leaks because they are usually made of rubber or plastic, which weakens over time from heat, vibration and exposure to fuel vapors.
A quick way to check them is to gently bend or press the hose to see if there are any small cracks or tears.
Hoses that look soft, brittle or swollen are also likely to leak.
Loose fittings where hoses connect to the intake manifold, throttle body or other parts should be tightened, as even a small gap can allow unmetered air to enter.
As most engines have multiple hoses connected to systems such as the brake booster, PCV valve and EGR valve, each one should be carefully inspected.
Even a small hole in a hose can disturb the air-fuel mixture and cause serious engine problems.
2. Check for leaks in the intake manifold and throttle body
The intake manifold and throttle body are key areas where vacuum leaks often appear.
The intake manifold delivers air to the cylinders and if its surface is cracked or bolts are loose, air can leak inside.
Signs of a leaking intake manifold include a whistling sound, poor idling, or a misfire.
The throttle body, which controls the flow of air into the engine, should also be closely inspected, specially its edges and where it connects to the intake manifold.
Carbon deposits can sometimes prevent seals from holding firmly and worn gaskets can allow air to escape through the throttle plate.
A flashlight can help check for dark spots or dust marks that often form around small leak points, providing visual indications before testing.
3. Check for Gasket and Seal Damage
Gaskets and seals are designed to create airtight connections between engine parts, but with age and heat cycles, they can lose flexibility, shrink or crack.
The intake manifold gasket, throttle body gasket and vacuum port seals are particularly vulnerable.
A damaged gasket may not always show obvious cracks, but oil or dust buildup along its edges is a clear sign of a leak.
Another sign is when the engine oil appears unusually dirty near the surface of the gasket, which may be a sign that air and contaminants are getting in where they shouldn’t.
Replacing bad gaskets and seals is often the only solution, because once damaged, no quick fix can restore their airtight function.
It’s important to keep these seals in good condition, because even a minor defect can impair engine performance and require costly repairs if ignored.
How to Find Vacuum Leak by Using a Vacuum Gauge
1. How to Connect a Vacuum Gauge
A vacuum gauge is a simple but powerful tool that measures the amount of vacuum pressure in an engine.
To use it, the gauge must be connected directly to a vacuum source, usually found on the intake manifold.
Most engines have a dedicated vacuum port that can be used for testing, or the gauge can be installed by temporarily disconnecting a hose, such as a brake booster.
It is important to make sure the connection is airtight so that readings are accurate.
Once connected, the engine should be started and left to idle while the gauge measures vacuum pressure.
This setup provides information about the suction being generated by the engine in real time.
2. Normal vs Abnormal Vacuum Level Readings
In most healthy gasoline engines, vacuum readings at idle should be between 17 and 22 inches of mercury (inHg).
This range indicates that the engine is drawing in the correct amount of air for a balanced air-fuel mixture.
If the gauge shows a reading much lower than 17 inches of mercury (inHg), it could indicate a vacuum leak, delayed ignition timing or worn piston rings.
If the reading is abnormally high, it could mean limited airflow or other tuning problems.
A steady, strong vacuum in the correct range usually indicates an engine working properly.
It’s important to know these normal values because they serve as a baseline for comparison for any abnormal conditions.
3. Interpreting needle fluctuations and what they indicate
The movement of the gauge needle can give important clues about what kind of problem may be going on in the engine.
If the needle is steady but lower than normal, it often indicates a vacuum leak or a problem with the intake manifold.
If the needle moves quickly, it could mean there’s a problem in one of the cylinders, such as a leaking valve or worn valve guide.
Slow, rhythmic up-down movements of the needle may indicate an ignition timing problem or a stuck valve.
If the needle drops rapidly when the throttle is opened and then rises rapidly when released, this usually indicates that the engine is operating normally.
It is important to learn to read these patterns, as they provide in-depth information about the health of the engine, not just a leak.
How to Find Leak By Using Carburetor Cleaner or Propane
1. Spray Method Around Potential Leak Areas
One of the most common and inexpensive ways to locate a vacuum leak is to use carburetor cleaner or propane.
This method works because when the cleaner or propane enters the intake system through the leak, it temporarily enriches the air-fuel mixture.
For this test, start the engine and let it idle.
Then, with a steady hand, spray a small amount of carburetor cleaner around suspicious areas such as the vacuum hose, the edges of the gasket, or the intake manifold.
If propane is being used, a simple unlit propane torch can be directed near those same areas to gently blow out the gas around potential leak points.
If a leak is present, the excess fuel from the spray or propane will be sucked into the engine, changing the way the engine operates.
2. Watch for changes in engine RPM to locate the leak
The main indication of a vacuum leak during this test is an obvious change in engine idle speed.
When carburetor cleaner or propane enters the engine through a leak, a thicker mixture is delivered to the engine, usually causing RPM to increase for a short time.
In some cases, the engine may also temporarily smooth out when idling due to a leak.
Watching the tachometer carefully or listening carefully to the engine speed will help locate the leak.
For the most accurate results, spray or direct the propane in a controlled and staged manner, rather than pouring it over the entire area all at once, so that the specific leak point can be identified.
3. Safety Tips When Using Flammable Substances
As both carburetor cleaner and propane are highly flammable, safety is extremely important when using this method.
Always perform the test in a well-ventilated area, away from open flames, cigarettes or sparks.
Keep a fire extinguisher nearby in case of an accidental fire.
Avoid spraying too much carburetor cleaner at once, as it can pool on hot engine parts and catch fire.
When using propane, never light the torch; just let the gas flow.
Wearing safety glasses and gloves is recommended to avoid chemical splashes or accidental contact.
Following these precautions allows this method to be performed safely and is one of the fastest and most effective ways to locate a vacuum leak.
How to Find Vacuum Leak By Using a Smoke Machine
1. How a Smoke Machine Works for Leak Detection
A smoke machine is one of the most reliable tools for detecting vacuum leaks because it makes even invisible leaks visible.
This machine often produces thick, low-pressure smoke by heating a special mineral oil or glycol-based liquid.
This smoke is then pumped into the intake system or vacuum lines.
As the engine must not be running during this test, the smoke will slowly fill the vacuum system and escape through any cracks, loose fittings, or damaged gaskets.
Unlike spray or sound-based methods that rely on indirect signs, a smoke machine provides clear visual confirmation of the exact location of a leak.
Professional automotive shops routinely use smoke machines because they not only locate leaks quickly, but can also detect multiple leaks at once.
2. What are the Best Step-By-Step Process for Visually Locating Leaks
To use a smoke machine, first make sure the engine is off and cooled down.
Next, remove the vacuum line or open the intake port to connect the smoke machine hose.
After securing the hose, turn on the machine and allow smoke to flow into the system.
In a matter of seconds, smoke will begin to fill the intake manifold, hose and connected vacuum circuit.
Look carefully at suspicious areas such as hose connections, the edges of the intake manifold, the throttle body seal and the gasket.
Where the smoke is coming from is the exact location of the vacuum leak.
For hard-to-reach areas, a flashlight can help illuminate the thin streams of smoke.
After identifying leaks, mark those locations so they can be repaired.
This process is simple, doesn’t damage engine parts and works for leaks of almost any size.
3. Advantages of Using a Smoke Machine Over Other Methods
The biggest advantage of using a smoke machine is its accuracy.
Unlike carburetor cleaners or propane, which rely on listening for RPM changes, a smoke machine requires no guesswork because leaks can be seen directly.
It is also safer, as it avoids the risk of working with flammable sprays or gases around a running engine.
Another advantage is that smoke testing can detect very small leaks that other methods often miss, such as holes in hoses or small cracks in gaskets.
In addition, smoke can detect leaks in systems beyond the intake, such as the evaporative emission (EVAP) system, which often cannot be detected by visual inspection alone.
For these reasons, many mechanics consider smoke testing to be the best standard for finding vacuum leaks.
How to Find Vacuum Leaks By Hearing and Feeling Techniques
1. Listening for Hissing Sounds Using an Automobile Stethoscope
An automobile stethoscope is a valuable tool for detecting faint noises produced by vacuum leaks.
When air escapes a pressurized or vacuum system, a slight hissing or whistling sound is usually produced.
By placing the stethoscope probe near a hose, gasket, or intake manifold, a mechanic can pick up these sounds even when they are so faint that they are difficult to hear with the ear alone.
Some people also use a long piece of rubber hose as a less expensive alternative, placing one end of it to their ear and moving the other end around suspected areas to amplify the sound of the leak.
This technique is specially useful in noisy environments or when the leak is very small and difficult to detect with normal hearing.
2. Feeling the flow of air with your hand near potential leak points
In some cases, vacuum leaks can be detected by touch.
With the engine idling, you can feel for a slight pull or movement of air by carefully placing your hand around the vacuum hose, gasket edges, or intake manifold.
This technique works best for large leaks that produce strong air flow, although sometimes small leaks produce subtle pulses of air that can be felt with practice.
Do not touch hot surfaces such as the exhaust manifold or moving parts such as belts and fans.
Although this method is simple and requires no tools, it works best when combined with auditory techniques to confirm the presence of a leak.
3. Identifying subtle leaks by sound or air movement
Not all leaks are loud or easy to feel, but subtle changes in sound or air flow can still provide important clues.
A very small leak may not produce a loud hiss but may change the overall sound of the engine idling, making it slightly uneven or rough.
Sometimes, leaks in the gasket surfaces produce a slight whistling sound that varies as the engine speed increases.
Under quiet conditions, listening carefully to the sounds around the engine with fans or other accessories turned off can help identify these small changes.
Identifying such leaks requires patience and attention to detail, but with practice, it becomes easier to distinguish between normal engine sounds and abnormal noises caused by air.
Read More:
What are The Common Locations of Vacuum Leaks
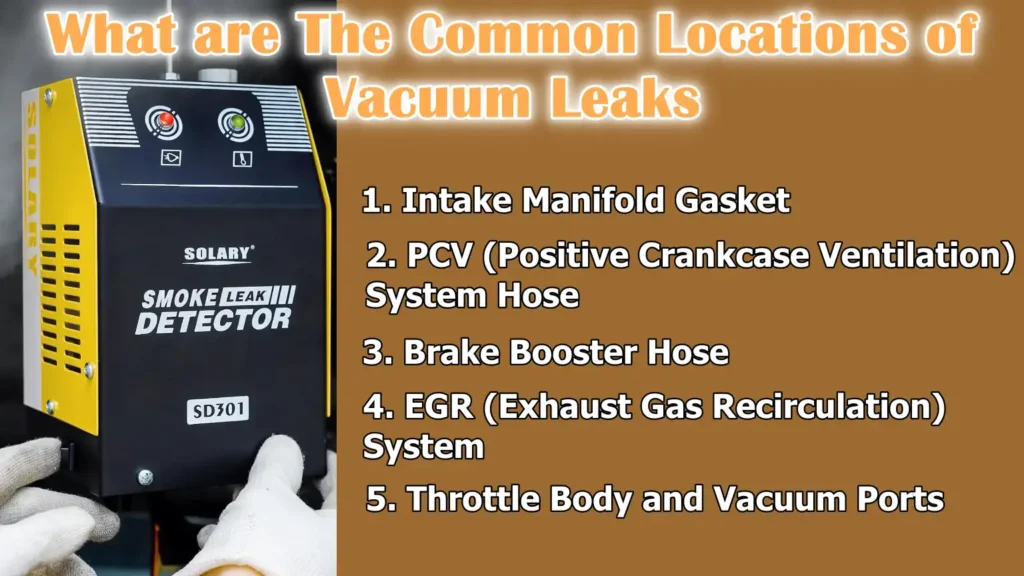
1. Intake Manifold Gasket
The intake manifold gasket is one of the most common sources of vacuum leaks because it seals the connection between the intake manifold and the cylinder head.
Over time, the constant heating and cooling can cause the gasket to wear, shrink, or crack.
When it wears out, unvented air can enter the engine, causing rough engine idling, misfires and poor acceleration.
In many cases, a leaking intake manifold gasket will also cause a whistling or hissing sound near the manifold.
As the intake manifold delivers air to all the cylinders, even a small gasket leak can affect the engine’s overall performance and fuel efficiency.
2. PCV (Positive Crankcase Ventilation) System Hose
The PCV system is designed to recycle gases from the crankcase back into the intake system to reduce emissions.
It relies on vacuum hoses and a PCV valve to function properly.
If the hoses break, become brittle, or separate, unmetered air enters the intake system and throws off the air-fuel balance.
A stuck or leaking PCV valve can also cause vacuum leaks.
As PCV hoses are often made of soft rubber that wears out more quickly than other parts, they are a common problem in older vehicles.
Problems with this system often result in erratic engine operation, oil contamination and higher emissions.
3. Brake Booster Hose
The brake booster uses engine vacuum to reduce the effort required to press the brake pedal.
It is connected to the intake manifold by a large vacuum hose.
If the fitting on this hose breaks or leaks, the engine will draw in extra air every time vacuum is applied to the brake booster.
A leaking brake booster hose can not only affect engine performance but also reduce braking effectiveness, making it a safety concern.
When this hose is leaking, drivers sometimes experience the engine stalling or erratic idling as well as a stiffening of the brake pedal.
4. EGR (Exhaust Gas Recirculation) System
The EGR system recirculates a small portion of the exhaust gases back into the intake to lower combustion temperatures and reduce harmful emissions.
It contains vacuum-operated valves and passages that can become leak points when seals, hoses or connections deteriorate.
Vacuum leaks in the EGR system can cause increased emissions, knocking or rattling noises and reduced fuel economy.
As the EGR system directly affects both performance and emissions, leaks in this area will often cause the Check Engine Light to come on and the vehicle to fail emissions tests.
5. Throttle Body and Vacuum Ports
The throttle body controls the amount of air entering the engine and it contains several small vacuum ports for various engine functions.
Over time, the gasket between the throttle body and the intake manifold can wear out, causing leaks around the edges.
The vacuum ports themselves can also leak if their fittings become loose or the hoses connected to them become worn.
As the throttle body plays a central role in air flow, even a small leak here can cause serious performance problems, such as unstable idle and hesitation during acceleration.
Careful inspection of this area is important because small leaks can easily be overlooked.
How to Fix a Vacuum Leak
1. Tightening or Replacing Hoses
Vacuum hoses are often the easiest and most cost-effective parts to replace in the event of a leak.
If the hose is loose at its connection point, tightening the clamp or replacing the fitting is usually sufficient to repair the seal.
However, if the hose is torn, brittle or swollen, it should be replaced entirely rather than patched, as damaged rubber is unable to reliably maintain vacuum under the heat and pressure of the engine.
It is advisable to use high quality silicone or reinforced hoses as these last longer and retain heat better than regular rubber hoses.
After replacing or securing the hoses, it is important to recheck the system to ensure that the leak has been completely repaired.
2. Replacing Gaskets and Seals
Gaskets and seals are critical to keeping the intake system airtight, but they naturally deteriorate over time due to constant heat cycles and exposure to fuel vapors.
Common problem areas include the intake manifold gasket, throttle body gasket and vacuum port seals.
If these parts are leaking, replacing them is the only real solution.
Modern gasket materials such as multi-layer steel or rubber composite provide better sealing than older designs, so upgrading to high-quality replacements can prevent future problems.
As replacing an intake manifold gasket or throttle body seal often requires partial disassembly of the engine, it is a more time-consuming job than replacing hoses, but it is necessary to restore proper vacuum levels.
3. When to Seek Professional Repair
While many vacuum leaks can be repaired at home with basic tools, there are some situations where professional help is a safer and more effective option.
If the leak is located inside the intake manifold, behind the throttle body, or within the brake booster system, repairs may require specialized tools and expertise.
Professional mechanics often use smoke machines, diagnostic scanners and pressure testing equipment to accurately identify and confirm leaks.
It’s also important to get professional repairs if the vehicle still exhibits poor idle, stalling, or poor fuel consumption after basic hose or gasket replacements.
Leaving a serious vacuum leak unresolved can damage expensive components like the catalytic converter, so in complex cases, professional diagnosis saves both time and money in the long run.
How to Test After Repair
1. Rechecking Vacuum With a Gauge or Smoke Machine
After repairing a vacuum leak, it is very important to make sure that the repair has completely resolved the problem.
Reconnecting the vacuum gauge to the intake manifold can be done to check if the reading has returned to the normal range of 17 to 22 inches of mercury at idle.
A steady needle within this range usually indicates that the leak has stopped.
For more accurate confirmation, the smoke machine can be used again by filling the intake system with smoke and checking if any smoke is coming out.
This step is important because some leaks can occur in multiple places and repairing one may not solve all problems.
By rechecking with the proper tools, you can ensure that the repair is effective and that the system is airtight.
2. Observing Engine Performance for Improvement
In addition to the use of tools, the overall behaviour of the engine gives a solid indication of whether the repair has been effective.
A previously erratic idle should now feel much smoother, acceleration should be more responsive and fuel efficiency should gradually improve.
In many cases, a significant reduction in misfires, hiccups, or stalling confirms that the air-fuel mixture has reached its correct balance.
The disappearance of hissing or whistling sounds coming from under the hood is also a practical way to confirm that leaks are gone.
Driving the vehicle for a while after repairs helps confirm improvements under actual driving conditions, including when the engine is loaded.
3. Clearing All Diagnostic Codes with an OBD-II Scanner
If the Check Engine light comes on due to a vacuum leak, the engine control unit may have stored trouble codes related to low fuel conditions, misfires, or the evaporative emissions system.
After repairs, these codes will need to be cleared using an OBD-II scanner.
This resets the system so that if a problem persists, new codes will be generated instead of the old ones appearing.
Clearing the code also turns off the check engine light, letting the driver know immediately that the problem has been resolved.
In addition, once the code is cleared, the car can complete its self-check cycle, which is specially important when emissions testing is required.
Basic Preventive Tips
1. Regular Inspection Program
One of the best ways to prevent vacuum leaks is to follow a regular inspection program for the engine’s vacuum system.
Over time, rubber hoses naturally become brittle due to heat, pressure and exposure to engine fluids.
By checking hoses, gaskets and fittings every few months or during regular oil changes, small cracks or loose connections can be detected before they turn into major leaks.
Timely detection not only saves money but also prevents problems such as poor fuel economy, engine misfires and check engine light warnings.
Regular monitoring of the system keeps engine performance stable and reduces the likelihood of unexpected malfunctions.
2. Use High-Quality Hose and Gaskets
The quality of the parts replaced plays a key role in preventing future leaks.
Low-quality hoses and gaskets deteriorate quickly when exposed to the high temperatures and vibrations of the engine.
Using parts made from durable materials like reinforced rubber or silicone can significantly extend the life of the vacuum system.
Similarly, gaskets made from reliable materials like multi-layer steel or high-grade rubber create a strong seal that is less likely to deteriorate over time.
Investing in high-quality parts may cost a little more up front, but it reduces the need for frequent repairs and results in more reliable engine operation in the long run.
3. Avoid modifications that affect vacuum integrity
Unnecessary or poorly executed modifications to the engine can easily impair vacuum integrity.
For example, installing aftermarket parts like performance intakes, turbochargers, or custom hoses without proper sealing can create new leak points.
Modifications that alter or remove vacuum lines can also confuse the engine’s sensors, leading to unstable idling and reduced fuel efficiency.
To avoid these problems, unless professional level modifications are being made, it is best to use only the parts and configurations recommended by the manufacturer.
If modifications are necessary, ensuring that all fittings, hoses and seals are properly installed and tested will help maintain vacuum stability and engine reliability.
Conclusion – How to Find Vacuum Leaks
You actually have to maintain the hidden balance of air, along with fuel or spark as it also have impact on smoothness working of the engine. And it is very much possible that vacuum leaks really disturbs that balance silently and often lead to the some major problems, so it is also clear to address them early which is again smart move.
Not only that, but research shows that vacuum leaks actually commonly occur at the intake manifold gasket, vacuum hoses and throttle body seals and you need to fix that normal idle vacuum reading that forms the baseline for locating a leak.[¹]
Finding and repairing vacuum leaks isn’t just about solving a minor engine problem—it’s about protecting your vehicle’s overall health, reliability and efficiency.
Vacuum leaks can cause a variety of problems, from erratic idling and poor acceleration to increased fuel consumption and, if ignored, long-term engine damage.
By learning how to inspect hoses, gaskets and intake components and using tools like a vacuum gauge or smoke machine, you can gain the ability to catch problems early, before they lead to costly repairs.
Preventive measures like safety precautions, the right diagnostic techniques and the use of high-quality replacement parts ensure that the engine maintains its designed airflow balance and runs smoothly.
Just as important, testing after every repair provides confidence that the leak has been successfully repaired and the vehicle is ready for reliable use.
After all, vacuum leaks may seem like a hidden problem, but with the right knowledge and methods, they are one of the easiest problems to identify and fix.
Whether you’re a new car owner or a more experienced mechanical engineer, following these steps can help you save money, extend the life of your engine and keep your vehicle performing at its best.
Prevention, regular inspections and careful repairs will always be key to avoiding vacuum problems in the future.
So, if you still have questions then you can check out our FAQ section, otherwise you can comment on this guide as well to ask some specific queries.
Frequently Asked Questions
Q1. What is a vacuum leak in a car?
Answer: A vacuum leak occurs when unwanted air enters the engine through a broken hose, bad gasket or loose connection instead of flowing through the proper air intake system. Since modern engines rely on a balanced mixture of air and fuel, this extra uncontrolled air confuses the engine computer and causes poor performance. Even a small crack in a hose can cause a vacuum leak and lead to erratic engine speed, poor acceleration or increased fuel consumption.
Q2. How do I tell if my car has a vacuum leak?
Answer: The most common symptoms of a vacuum leak are erratic speed, a hissing sound from under the hood, low fuel consumption, engine stalling when stopped and sometimes the check engine light coming on. You may also notice that the engine is having difficulty accelerating smoothly. In some cases, the OBD-II scanner will show error codes that point to a vacuum leak, especially if the sensors are detecting too much or too little air in the engine.
Q3. Is it safe to drive with a vacuum leak?
Answer: Even if a car with a vacuum leak continues to run, it’s not safe to ignore the problem. Driving for long periods of time with a leak can cause the engine to run lean, which means more air and less fuel than it needs. This condition can overheat engine parts, damage valves, or in severe cases, shut down the engine completely. It also reduces fuel efficiency and increases harmful emissions. It’s always better to have vacuum leaks repaired as soon as symptoms appear.
Q4. Where are vacuum leaks most likely to occur?
Answer: Vacuum leaks often occur in rubber hoses that have become old, brittle, or cracked due to heat and age. Other common places include the intake manifold gasket, throttle body connection, brake booster hose, EGR system lines, and the PCV valve system. Since many of these parts are exposed to high heat and vibration, over time they can wear out and cause a leak.
Q5. How do mechanics check for vacuum leaks?
Answer: Mechanics use several methods to detect leaks. One common method is to measure pressure with a vacuum gauge and see if it shows abnormal readings. Another method is to spray carburetor cleaner or propane in suspicious areas to see if there is a change in engine idle speed, which would indicate a leak. A more advanced method is to use a smoke machine, which fills the system with smoke that makes the leak appear as thin streams coming out of cracks or holes.
Q6. Can I find and fix vacuum leaks myself?
Answer: Yes, many vacuum leaks can be found and fixed at home if you have basic tools and a little patience. You can start by checking for cracks in hoses, listening for hissing sounds, and checking for any damage to gaskets. It is often easy and inexpensive to replace damaged hoses or tighten loose connections. However, leaks in the intake manifold or deeper engine parts may require professional repair.
Q7. How much does it cost to fix a vacuum leak?
Answer: The cost depends on where the leak is and its severity. If you replace a small hose yourself, it may cost just a few dollars. A shop may charge $100 to $200 to repair a simple vacuum hose. Complex leaks, such as an intake manifold gasket, can cost several hundred dollars because they require more labor to replace. Preventive care and regular inspections can help avoid these increased costs.
Q8. Can a vacuum leak cause the Check Engine Light to come on?
Answer: Yes, vacuum leaks are a common cause for the Check Engine Light to come on. Modern cars have sensors that constantly monitor the air and fuel mixture. If a leak causes the mixture to go out of the normal range, the engine control unit will set a fault code and turn on the warning light. An OBD-II scanner can help identify these codes and confirm whether the problem is caused by a vacuum leak.
Q9. How can I prevent vacuum leaks in the future?
Answer: Regular inspection of all hoses and connections under the hood is essential to prevent vacuum leaks. Replacing cracked, soft or worn hoses before they break is one of the best preventative measures. Using high-quality parts such as durable rubber hoses and reliable gaskets also increases the lifespan of these parts. Avoiding unnecessary modifications that could disrupt the vacuum system is another way to prevent leaks.
References:
[1] Engine Repair (A1)
https://www.pearsonhighered.com/assets/samplechapter/0/1/3/5/0135232864.pdf

Guys, I’m a car audio enthusiast and customization expert and I love clear sound and clean installation. Plus, I have spent years helping people build their dream audio setups. And whenever I’m working on cars, I probably listen to music and thinks about the next big upgrade.