
Written By: Don Dodi
Fact Checked By: Kristen Brown
Reviewed By: Diego Rosenberg
It is true that heat, time and pressure quietly wear down your valve cover gasket and later it becomes difficult to hold the oil where its place is.
Actually, the valve cover gasket is in between the valve cover and the engine cylinder head, which is basically sealing the top of the engine that to prevent oil from escaping while lubricating the internal components of vehicle.
Plus, over the time, with the constant exposure to engine heat, pressure and vibration: the gasket can be hardened, cracked or shrink that unfortunately leads to the oil seepage.
Also, according to the U.S. NHTSA: the oil leaks from components such as: valve cover gaskets actually responsible for large portion of vehicle service complaints which is basically related to the smoke or burning smells as well.
That’s why you need to know How to Fix a Leaking Valve Cover Gasket, as it is necessary to prevent oil wastage, reduces long-term damage and it even improves the engine performance as well.
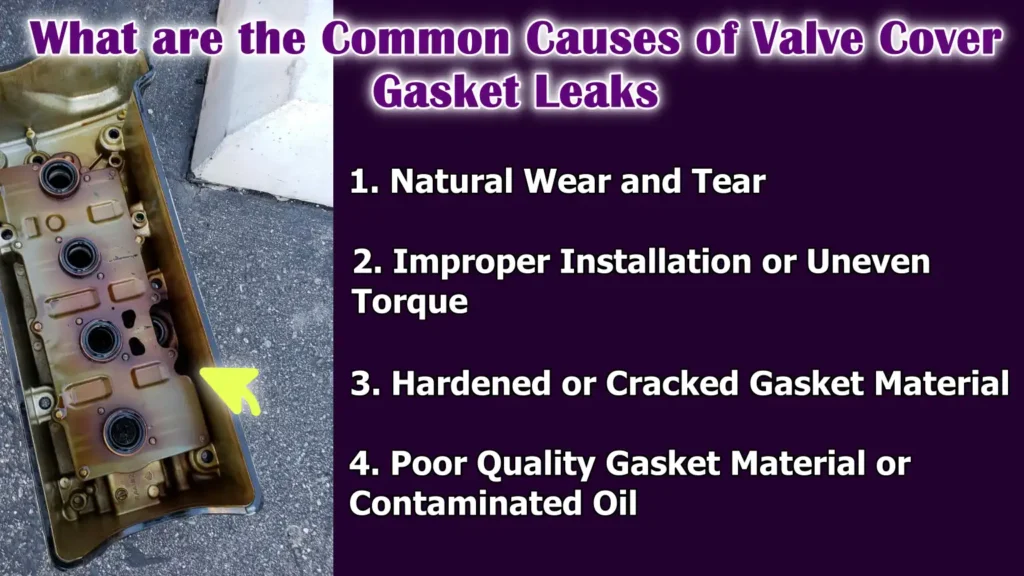
What are the Common Causes of Valve Cover Gasket Leaks
Basically, it is proven that rubber and silicone seals actually lose elasticity after repeated heating and oil exposure, this aging makes the gaskets shrink and unfortunately crack as well, that’s why you should always use quality gasket materials and replace them when they show hardening that single thing can prevent you most age-related leaks as well.[¹]
1. Natural Wear and Tear
Over time, every engine experiences heat, vibration and pressure during operation.
The valve cover gasket, which is a rubber or silicone seal, gradually loses its flexibility and begins to shrink or crack.
This natural aging process makes it less effective at sealing oil inside the engine, which is why older vehicles are more prone to leaks.
Even with proper car maintenance, normal engine operation can eventually cause the gasket to fail.
2. Improper Installation or Uneven Torque
When the valve cover gasket is not installed correctly or the bolts are tightened unevenly, it can create gaps or stress points.
These gaps allow oil to escape and often worsen over time with the engine’s heat cycles.
Many leaks are caused by bolts being either too tight or too loose, highlighting the importance of following the manufacturer’s specified torque specifications during installation.
3. Hardened or Cracked Gasket Material
Engines generate a lot of heat and repeated heating and cooling cycles can cause the gasket material to harden.
Once the gasket hardens, it can easily crack or lose its shape, leading to leaks.
This is more common in vehicles that experience extreme temperatures or frequent short trips, where the engine doesn’t reach a consistent operating temperature.
4. Poor Quality Gasket Material or Contaminated Oil
Not all gaskets are created equal.
Cheap or low-quality gaskets can fail much faster than high-quality, OEM parts.
Additionally, oil contaminated with dirt, sludge, or chemical additives can accelerate the gasket’s deterioration process.
Contaminated oil can damage gasket materials, increasing the likelihood of leaks even in relatively new engines.
Tools
| Tool / Material | Purpose / Use | Notes / Tips |
|---|---|---|
| Socket wrench set | Used to remove and tighten valve cover bolts. | Ensure it includes the correct sizes for your vehicle. |
| Torque wrench | Ensures bolts are tightened to the correct specifications. | Prevents over-tightening or under-tightening, which can cause leaks. |
| Screwdriver | Used to remove clamps, hoses, or small components blocking access. | Flathead or Phillips depending on your vehicle’s parts. |
| Gasket scraper or plastic razor blade | Removes old gasket material from the valve cover and cylinder head. | Use carefully to avoid scratching metal surfaces. |
| Replacement valve cover gasket (OEM recommended) | Replaces the old gasket to prevent leaks. | OEM or high-quality aftermarket parts last longer and fit better. |
| RTV silicone sealant (if required by manufacturer) | Used in corners or specific areas for extra sealing. | Apply only where specified by the manufacturer, not everywhere. |
| Clean rags and degreaser | Cleans oil, dirt and debris from surfaces before installing the new gasket. | A clean surface ensures proper sealing and prevents future leaks. |
How to Make Sure Safety While Fixing a Leaking Valve Cover Gasket
1. Park the Vehicle on a Level Surface and Allow the Engine to Cool
Before beginning any work on the valve cover gasket, it is crucial to park your car on a level and stable surface.
This ensures safety and provides easy access to the engine.
It is essential to allow the engine to cool completely, as engine parts, specially the valve cover, can become extremely hot.
Working on a hot engine can cause severe burns and make handling bolts and gaskets difficult.
For most vehicles, it is recommended to wait at least 30 to 60 minutes after turning off the engine.
2. Disconnect the Negative Battery Terminal
Disconnecting the negative battery terminal is a vital safety precaution.
It prevents accidental electric shocks, short circuits, or unintended engine starts while working on the engine.
This simple precaution protects both you and the vehicle’s electrical system from damage.
3. Remove Engine Covers, Air Intake Components, or Hoses
Many engines have covers, hoses and intake components that obstruct access to the valve cover.
Carefully removing these parts provides clear access to the gasket area.
It’s important to note the location of each component and take pictures if necessary to facilitate reassembly.
Do not force or break any parts, as this can cause cracks or damage.
4. Clean the Surrounding Area
Cleaning the engine area around the valve cover is crucial to prevent dirt, debris, or old oil from falling into the engine while replacing the gasket.
Using a clean rag and degreaser ensures the surface is free of contaminants, allowing the new gasket to seal properly and reducing the risk of engine damage or leaks.
A clean workspace also makes it easier to detect leaks and simplifies the installation process.
How to Remove the Valve Cover
1. Disconnect the Ignition Coil, Spark Plug Wires, or Breather Hose
Before removing the valve cover, it’s crucial to carefully disconnect any components attached to it.
The ignition coil, spark plug wires and breather hose are often directly connected to the valve cover.
Gently unplug or unscrew these parts without pulling or twisting them forcefully, as damaging them can impair engine performance or lead to costly repairs.
Taking pictures of their locations will simplify reassembly and prevent mistakes.
2. Loosen and Remove the Valve Cover Bolts
The valve cover is attached to the engine with bolts that need to be loosened evenly.
It’s recommended to remove the bolts in a crisscross pattern to prevent the valve cover from warping or cracking.
Using the correct socket size and hand tools ensures the bolts come out easily without damage.
This careful approach protects both the bolts and the engine’s mating surface from damage.
3. Gently Separate the Valve Cover
Once the bolts are removed, the valve cover may still be stuck to the gasket surface due to residual oil or hardened gasket material.
Gently pry the cover loose using a plastic or non-metallic tool to avoid scratching the engine surface.
Avoid excessive force, as warping or cracking the valve cover can lead to further repairs.
Lifting the cover slowly and evenly ensures that both the cover and the cylinder head surface remain undamaged for a proper seal when installing the new gasket.
How to Clean and Inspect
1. Carefully Scrape Off Old Gasket Material
After removing the valve cover, old gasket material often remains stuck to the mating surfaces.
It’s crucial to carefully scrape this off using a plastic or non-metallic tool.
Avoid using metal tools that could scratch or damage the surfaces of the valve cover or cylinder head.
Any scratches or uneven surfaces can prevent the new gasket from sealing properly, potentially leading to leaks even after replacement.
2. Clean the Valve Cover and Cylinder Head Surfaces
Once the old gasket material is removed, clean both the valve cover and cylinder head surfaces with a degreaser or mild cleaning solution.
Oil, dirt and leftover material can interfere with the sealing process, so a clean surface ensures the new gasket adheres correctly.
Wiping the surfaces with a clean cloth after degreasing ensures no debris remains that could cause future leaks.
3. Inspect the Valve Cover for Cracks or Warping
Before installing the new gasket, carefully inspect the valve cover for any cracks, warping, or other damage.
A damaged or warped valve cover will not seal properly and simply replacing the gasket will not solve the leak problem.
Even a small crack can lead to oil leaks or contamination of the engine over time.
4. Check Bolt Holes and Grommets for Damage
Inspect the bolt holes and any rubber grommets on the valve cover for signs of wear, damage, or tearing.
Damaged holes or grommets can prevent the bolts from tightening correctly and can cause uneven pressure on the gasket.
Ensuring all holes and grommets are in good condition is essential for a reliable seal and a long-lasting repair.
How to Install the New Valve Cover Gasket
1. Apply RTV Sealant to Specified Areas
Before installing the new gasket, it’s crucial to apply RTV silicone sealant only to the areas specified by the manufacturer, such as the corners or around the camshaft caps.
The RTV sealant provides extra sealing at potential leak points, but it should not be applied to the entire gasket surface.
Applying sealant in the wrong areas can cause it to enter the engine and potentially clog or damage internal components.
2. Position the New Gasket Evenly on the Valve Cover
Carefully place the new gasket onto the valve cover, ensuring it fits evenly around the edges.
The gasket should sit perfectly flat on the valve cover, without any twists or creases, as an improperly seated gasket can lead to oil leaks.
Taking the time to properly position it ensures a proper seal when reinstalling the valve cover.
3. Reinstall the Valve Cover and Hand-Tighten the Bolts
Once the gasket is in place, carefully lower the valve cover onto the cylinder head.
Hand-tighten the bolts first to secure the cover in place.
Hand-tightening prevents cross-threading or uneven pressure on the gasket, which could lead to leaks or damage to the valve cover.
4. Use a Torque Wrench to Tighten the Bolts in Sequence
Finally, use a torque wrench to tighten the valve cover bolts according to the manufacturer’s specified sequence and torque values.
Typically, the bolts are tightened in a criss-cross pattern to distribute the pressure evenly.
The correct torque ensures the gasket is properly compressed without overtightening, preventing damage to the gasket or warping of the valve cover and guaranteeing a long-lasting, leak-free seal.
How to Reassemble and Test
1. Reconnect Hoses, Ignition Components and Covers
After installing the new gasket and securing the valve cover, carefully reconnect all previously removed hoses, ignition coils, spark plug wires, or engine covers.
It’s crucial that every component is reinstalled in its correct location for the engine to function properly.
Misplaced or loose parts can lead to poor engine performance, vacuum leaks, or electrical problems.
2. Reconnect the Battery
Once all components are back in place, reconnect the negative battery terminal.
This restores power to the vehicle and allows you to safely start the engine.
Always ensure the terminal is tightly secured to prevent accidental disconnection during testing.
3. Start the Engine and Check for Oil Leaks
Start the engine and check the area around the valve cover for any signs of oil leaks.
Even a small leak can indicate that the gasket wasn’t installed correctly or that the bolts need slight adjustment.
Checking immediately after starting the engine helps catch potential problems before they worsen.
4. Allow the Engine to Reach Operating Temperature and Recheck
Let the engine run until it reaches its normal operating temperature.
Heat causes metal components to expand, which can affect the gasket’s seal.
Recheck the valve cover area for oil leaks.
A properly installed gasket should remain leak-free at operating temperature, ensuring the engine runs safely and efficiently.
Read More:
Basic Post-Repair Tips and Maintenance
1. Recheck Bolt Torque After Heat Cycles
After replacing the valve cover gasket, it’s crucial to recheck the bolt torque after the engine has gone through a few heat cycles.
As the engine heats up and cools down, the metal parts expand and contract, which can cause the bolts to loosen slightly.
Ensuring the bolts remain tightened to the manufacturer’s specified torque helps maintain a secure seal and prevents oil leaks over time.
2. Replace the PCV Valve if it’s Clogged
The Positive Crankcase Ventilation (PCV) valve plays a vital role in managing pressure inside the engine.
A clogged PCV valve can increase pressure under the valve cover, potentially forcing oil past the gasket and causing leaks.
Checking and replacing a faulty PCV valve after replacing the gasket ensures the engine maintains proper pressure and extends the life of the new gasket.
3. Monitor Oil Level and Watch for Early Signs of Leaks
Regularly checking the engine oil level and inspecting the area around the valve cover is an essential preventative measure.
Detecting any new leaks or oil stains early allows you to address potential problems before they escalate into serious leaks or engine damage.
Maintaining consistent monitoring habits also helps in the early detection of other engine issues, keeping your vehicle running smoothly and reliably.
Conclusion – How to Fix a Leaking Valve Cover Gasket
Even, if you notice a single drop of oil escapes from the engine then you should address that issue as it could save you hudreds of dollars in future repairs as for now it can just be new valve cover gasket that would be enough to fix that issue for now.
By carefully following each step—from preparing the engine and removing the old gasket to cleaning the surfaces, installing the new gasket and checking for leaks—you ensure your engine runs smoothly and efficiently.
Applying the correct torque, using high-quality parts and monitoring engine components like the PCV valve contribute to a reliable, leak-free repair.
Taking the time to perform this maintenance not only saves money on costly repairs in the future but also extends your engine’s lifespan, improves performance and keeps the engine bay clean.
With consistent inspections and good maintenance habits, a properly installed valve cover gasket can protect your engine for many years to come.
Now, you can comment down below your thoughts about this guide and other questions as well.
Frequently Asked Questions
Q1. What is a valve cover gasket and why is it important?
Answer: A valve cover gasket is a seal located between the engine’s valve cover and the cylinder head. Its main function is to keep engine oil contained while the engine is running. This is crucial because the oil lubricates all the moving parts inside the engine. If the gasket is worn or damaged, oil can leak, potentially leading to premature wear of engine parts, unpleasant odors, smoke, or even an increased risk of fire. A properly functioning gasket ensures the engine remains clean and safe.
Q2. Why do valve cover gaskets leak?
Answer: Valve cover gaskets can leak for several reasons. Over time, the gasket material, typically rubber or silicone, can dry out, shrink, or crack due to heat and engine pressure. Improper installation or loose bolts can also cause leaks. Using low-quality gaskets or incorrect oil can also lead to premature gasket failure. Engine overheating or frequent short trips that prevent the engine from reaching its optimal operating temperature can weaken the gasket and increase the likelihood of failure.
Q3. What are the signs of a leaking valve cover gasket?
Answer: Common signs include oil stains under the car, oil on the engine block, a strong burning oil smell, or smoke coming from the engine. The engine may also run slightly rough if oil leaks onto ignition components. If left unattended, a leaking gasket can lead to low oil levels and affect engine performance. Early detection is crucial to prevent more serious damage.
Q4. Can I replace a valve cover gasket myself?
Answer: Yes, you can replace a valve cover gasket at home if you follow the correct steps and have the necessary tools. You will need tools such as a socket wrench, torque wrench, screwdriver and gasket scraper. Working on a cold engine, carefully removing components, thoroughly cleaning surfaces and following the correct bolt tightening procedure are crucial. Using the correct gasket and following the manufacturer’s instructions ensures a reliable repair.
Q5. How long does a valve cover gasket last?
Answer: Valve cover gaskets typically last between 50,000 and 100,000 miles, depending on the vehicle, driving conditions and maintenance. Regular oil changes and proper engine care can extend its lifespan. Heat, vibration and poor oil quality can shorten its life, so it’s essential to check for leaks periodically and replace the gasket when necessary. What happens if I don’t fix a leaking valve cover gasket? If a leaking gasket is ignored, oil can continue to drip onto the engine or other parts. This can cause smoke, odors and in more severe cases, a fire hazard. Low oil levels can damage internal engine components, leading to costly repairs. Additionally, oil leaks can make the engine dirty, potentially hiding other problems and making maintenance more difficult.
Q6. Should I replace other parts when replacing the valve cover gasket?
Answer: It’s a good idea to inspect the PCV valve when replacing the gasket. A clogged PCV valve can increase engine pressure and cause leaks. It’s also important to check the valve cover, bolt holes and grommets for any damage. If any parts are cracked, worn, or damaged, replacing them along with the gasket will ensure a longer-lasting repair and prevent future leaks.
Q7. How can I prevent valve cover gasket leaks in the future?
Answer: Regular engine maintenance is essential to prevent leaks. This includes changing the oil on time, checking for early signs of leaks and replacing worn gaskets or PCV valves when necessary. Using high-quality gaskets and tightening bolts to the correct torque also helps prevent leaks. Avoiding engine overheating and keeping the engine clean will help gaskets last longer.
Q8. Is it safe to drive with a leaking valve cover gasket?
Answer: It is not advisable to drive for an extended period with a leaking gasket. Small leaks may seem harmless, but oil dripping onto hot engine parts can pose a fire hazard or cause smoke. Leaks can also lead to low oil levels, potentially causing engine damage. To avoid any safety hazards and maintain engine performance, it is safest to have the gasket repaired immediately.
References:
[1] Correlations between the Aging Behavior and Finite Element Method Simulation of Three Silicone Elastomers
https://www.mdpi.com/1996-1944/17/16/3961

Guys, I’m a car audio enthusiast and customization expert and I love clear sound and clean installation. Plus, I have spent years helping people build their dream audio setups. And whenever I’m working on cars, I probably listen to music and thinks about the next big upgrade.