Written By: Don Dodi
Fact Checked By: Kristen Brown
Reviewed By: Diego Rosenberg
Yes, a working windshield wiper motor is truly essential for maintaining clear vision that leads to safe driving in all-weather conditions.
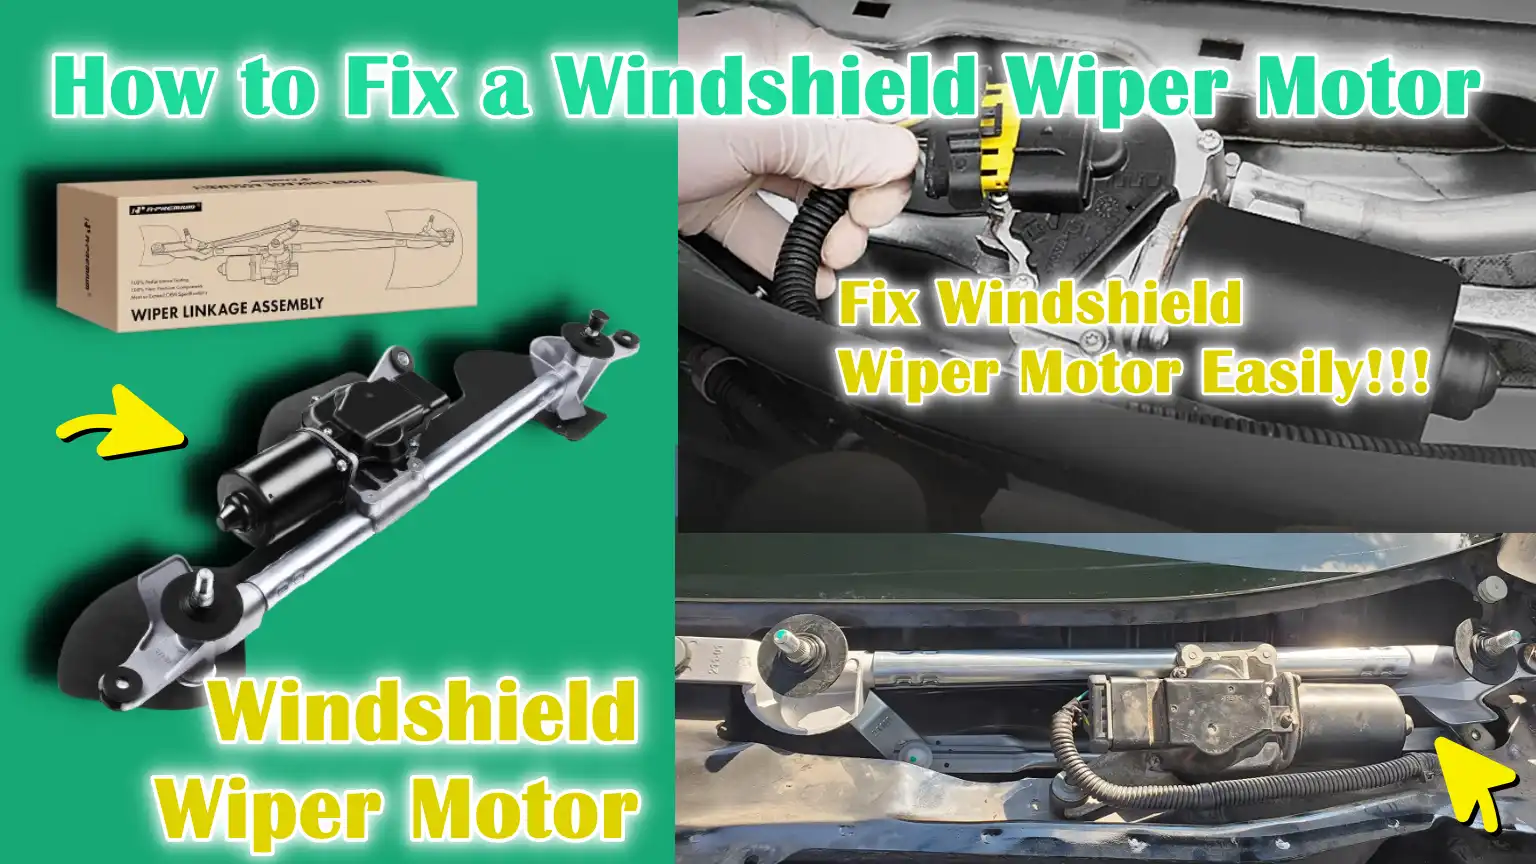
As, the windshield wiper motor is basically a small electric motor that powers the wiper arms and allows them to move smoothly across all the windshield, in that way it keeps the driver’s view crystal clear during, rain, dust, fog and even in snow.
Plus, this motor actually works together with the wiper switch, fuse, replay and mechanical linkage that converts electrical energy from the car’s battery into the steady back-and-forth movement of the windshield wipers.
So, whenever the wiper motor begins to fail, then the wipers may stop working completely, move in slow motion or they can just work only at one speed, because of these reasons it seriously reduces visibility and increase the risk of mishappenings.
Additionally, there’s studies that shows that the poor visibility is one of the leading factors in weather-related crashes, which makes a properly working wiper system a basic safety requirement, not just a comfort feature to be ok or not.
Yes, there’s can be lots of reasons why the wiper motor is not working properly, as there can be issues like: blown fuses, loose wiring, corrosion or jammed linkages as well.
So, this is the guide that shows How to Fix a Windshield Wiper Motor, so that you can easily understand how the windshield wiper motor actually works and ow to repair its common faults.
What are The Common Symptoms of a Faulty Windshield Wiper Motor
1. Wipers are not working at all
When the windshield wipers fail to move at all after the wiper switch is turned on, it’s often a strong indication that the wiper motor is not receiving power or has failed internally.
This can be due to a blown fuse, a faulty relay, damaged wiring, or worn motor brushes that are no longer conducting electricity properly.
In some cases, the motor may overheat and shut down completely as a safety measure.
This situation is particularly dangerous during rain or fog, as the driver’s forward visibility is immediately compromised, making immediate inspection and repair crucial.
2. Wipers are moving slowly or intermittently
If the wipers move much slower than normal or operate intermittently, there may be internal wear in the wiper motor, poor electrical connections, or excessive resistance in the wiper linkage.
Corrosion in the connectors can reduce the voltage reaching the motor, while dry or seized linkage parts can overload it.
When the motor is working harder than designed, it may shut down temporarily to prevent damage.
This problem is often exacerbated in heavy rain, when the motor requires more power to move the blades across a wet windshield.
3. Wipers are only operating at one speed
Windshield wipers that only operate at a single speed typically indicate a problem with the motor’s internal speed control circuit or the wiper switch signal.
Most modern wiper motors are designed with multiple windings or electronic controls to provide varying speeds.
When one of these components fails, the motor may default to a single speed or stop responding to speed changes altogether.
While the wipers may still function, the lack of speed control compromises visibility in varying rain conditions.
4. Strange Grinding, Clicking, or Humming Noises
Unusual noises coming from the wiper assembly are often a warning sign that the motor or linkage is under strain.
Grinding or clicking sounds can be caused by worn gears inside the motor or loose linkage joints, while a humming sound may indicate that the motor is receiving power but is unable to rotate due to a mechanical obstruction.
Ignoring these noises can lead to complete motor failure, as the internal components continue to wear down or overheat during operation.
5. Wipers Stopping in the Wrong Position
When windshield wipers stop in the middle of the windshield instead of returning to their normal resting position, it usually indicates a malfunction in the motor’s parking circuit.
The parking circuit is designed to automatically return the wipers to their correct position after they are turned off.
If this circuit fails due to worn contacts or electrical issues, the motor loses its self-aligning capability.
This problem can obstruct the driver’s view and may also indicate that the motor is nearing the end of its service life.
Tools
| Tool or Material Name | What It Is Used For | Why It Is Important |
|---|---|---|
| Screwdrivers | It is used to remove the screws holding the wiper arm, plastic cover and motor housing. | This allows parts to be removed safely without damaging the screws or panels. |
| Ratchet Set | It is used to loosen and tighten the nuts and bolts on the wiper motor and linkage. | This makes bolt removal faster and does not strain the hands. |
| Multimeter | It is used to measure voltage, power flow and ground connection at the motor. | This confirms whether the power is reaching the motor properly or not. |
| Test Light | It is used to check for the presence of electricity in wires and connectors. | Quick way to detect active flow of electric current. |
| Replacement Windshield Wiper Motor | It is installed if the original motor is damaged or worn out. | Restores full wiper functionality and precise speed control. |
| Electrical Contact Cleaner | Connectors were sprayed to remove dirt and corrosion. | Improves electrical flow to the motor. |
| Safety Gloves | Protect your hands from sharp objects and hot parts. | Reduces the risk of cuts and injuries. |
| Eye Protection | It protects the eyes from dust, dirt and cleaning spray. | Prevents eye irritation or injury. |
How to ensure Safety Before Starting
1. Disconnecting the Vehicle Battery
Disconnecting the vehicle battery is the most crucial safety step before working on the windshield wiper motor.
The wiper motor is an electrical component and if power is still connected, the motor could suddenly activate, potentially causing injury if your hands are near the linkage.
Removing the negative battery cable stops the flow of electricity and prevents accidental short circuits that could damage wiring, fuses, or the electronic control unit.
This step also protects the motor and other electrical components from voltage spikes when connectors are being unplugged or tested.
2. Parking the Vehicle on a Level Surface
Parking the vehicle on a level and flat surface ensures that the car remains stable and prevents unexpected movement while you are working.
A level surface helps ensure that the wiper arms and linkage remain in their natural resting position, making removal and reinstallation more accurate.
If the vehicle is parked on a slope, the wipers may shift slightly, potentially leading to alignment issues after the repair.
Stability also improves personal safety, specially when leaning over the engine bay or windshield area.
3. Marking the Wiper Arm Position Before Removal
Marking the position of the wiper arms before removing them ensures correct alignment during reinstallation.
Wiper arms are mounted on splined shafts and even a slight misalignment can cause the blades to stop too high, hit the windshield trim, or obstruct the driver’s view.
Simple marks or tape reference points on the windshield allow you to return the arms to the exact position they were designed to rest in.
This step saves time and prevents repeated adjustments after the repair is complete.
4. Avoiding Electrical Short Circuits
Avoiding electrical short circuits is crucial when working around wiring and connectors.
Short circuits can occur when metal tools touch exposed terminals or when connectors are forced into the wrong position.
Short circuits can instantly blow fuses, damage the wiper motor, or affect other connected systems.
Keeping connectors clean, using the correct tools and handling wires gently reduces the risk of electrical damage and ensures that the repair process is safe and controlled.
How to Diagnose Windshield Wiper Motor
1. Checking the Wiper Fuse and Relay
Checking the wiper fuse and relay is the first and easiest step in diagnosing a windshield wiper motor problem.
The fuse protects the wiper circuit from overload and if it blows, the motor will receive no power.
The relay acts as an electrical switch that sends power to the motor when the wiper switch is turned on.
If the relay is faulty, the motor may not run at all or may only work intermittently.
Replacing a blown fuse or a faulty relay is inexpensive and often restores the wipers to normal operation without any further repairs.
2. Checking the Wiper Switch Functionality
Checking the wiper switch helps confirm that the motor is receiving the correct signals from the driver controls.
The switch sends commands for low speed, high speed and intermittent operation.
If the switch is worn or the contacts inside are dirty, the motor may only respond at one speed or not at all.
A faulty switch can make the motor appear defective, even if it’s working correctly, so checking the switch functionality can prevent unnecessary motor replacement.
3. Checking for Damage to Wiring and Connectors
Checking the wiring and connectors is crucial because the wiper motor relies on a consistent power supply.
Broken wires, loose connectors, or corrosion can cause voltage drops and result in the motor operating weakly or erratically.
Connectors can accumulate moisture over time, specially near the windshield cowl area, leading to corrosion and poor contact.
Cleaning or repairing damaged wiring often resolves wiper problems without the need to replace major components.
4. Using a Multimeter to Check Motor Voltage and Ground
Using a multimeter allows for precise testing of the electrical power reaching the wiper motor.
When the wiper switch is turned on, the motor should receive a voltage close to battery voltage through the power wire and have a solid ground connection.
A low voltage reading typically indicates wiring resistance, a poor connection, or a weak relay.
If the correct voltage and ground are present but the motor doesn’t run, it clearly points to an internal fault in the motor.
5. Differentiating Between Motor Failure and Linkage Problems
Differentiating between motor failure and linkage problems can prevent misdiagnosis.
If the linkage is jammed, bent, or corroded, a perfectly good motor may fail to move the wipers.
In such cases, the motor may hum or strain but fail to move the arms.
Testing the motor alone by disconnecting the linkage confirms whether the motor is rotating freely.
If the motor runs smoothly without the linkage attached, the problem lies in the mechanical parts, not the motor itself.
How to Access the Windshield Wiper Motor
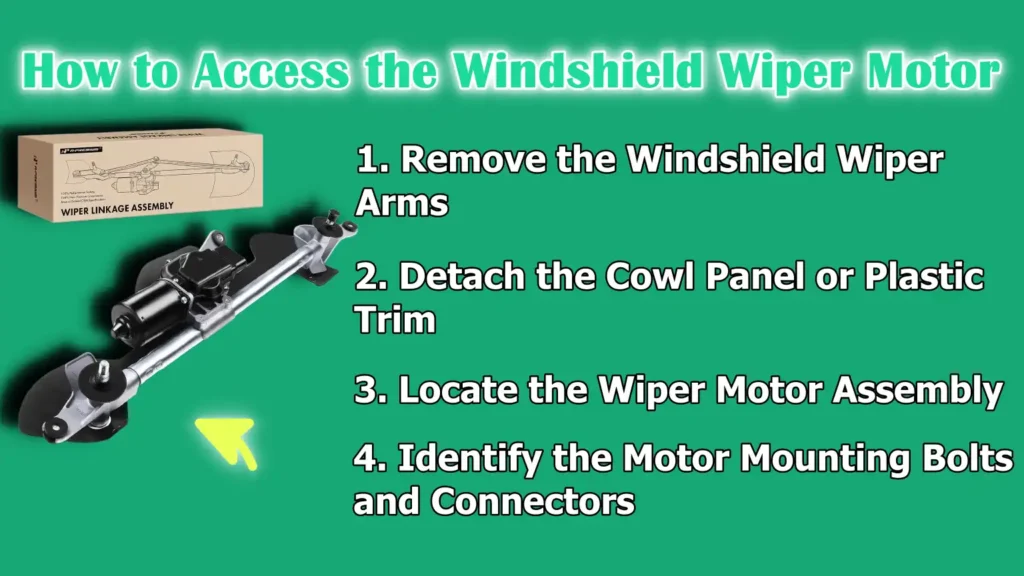
1. Remove the Windshield Wiper Arms
The first step in accessing the wiper motor is removing the windshield wiper arms, as the arms are mounted directly on top of the motor linkage.
The wiper arms are typically secured by nuts on a splined shaft, which locks the arms into a fixed position.
Over time, dirt and exposure to the elements can cause these splines to seize, making the arms difficult to remove.
Gently lifting the arm and applying steady pressure helps to remove it without bending.
Carefully removing the arms prevents damage to the windshield and ensures that the arms can be properly reinstalled later.
2. Detach the Cowl Panel or Plastic Trim
Detaching the cowl panel or plastic trim exposes the area where the wiper motor and linkage are located.
This panel is situated at the base of the windshield and protects the motor from water, dust and debris.
It is usually secured by screws, clips, or push fasteners that should be removed gently to prevent breakage.
Removing this panel also provides better visibility of the wiring and drain passages, which is helpful during inspection and reassembly.
Properly removing the cowl panel makes the entire repair process easier and more organized.
3. Locate the Wiper Motor Assembly
After removing the cowl panel, locating the wiper motor assembly becomes straightforward.
The motor is typically a round or oval metal unit connected to a set of metal arms called linkages.
It is mounted to the vehicle’s body or firewall and positioned to drive both wiper arms simultaneously.
Correctly identifying the motor helps avoid confusion with nearby components such as the cabin air intake or washer hose lines.
Knowing the exact location of the motor saves time and reduces the likelihood of disconnecting the wrong components.
4. Identify the Motor Mounting Bolts and Connectors
Before attempting removal, it is crucial to identify the motor mounting bolts and electrical connector.
The motor is typically secured by several bolts that hold it firmly in place to prevent vibration during operation.
The electrical connector supplies power and control signals to the motor and often has a locking tab that must be pressed before it can be unplugged.
Handling these bolts and connectors carefully prevents stripped threads and broken plugs.
Proper identification ensures that the motor can be easily removed and securely reinstalled after repair or replacement.
How to Troubleshoot Common Windshield Wiper Motor Problems
1. Cleaning Corroded Electrical Connectors
Cleaning corroded electrical connectors often restores proper wiper motor function without needing to replace any parts.
Over time, moisture and dirt can accumulate in the connector area, specially near the windshield where water contact is common.
This causes corrosion, which impedes the flow of power to the motor, resulting in slow, weak, or erratic wiper operation.
Using an electrical contact cleaner removes corrosion and dirt, allowing electricity to flow freely again.
Clean connectors help the motor receive full power and prevent future electrical malfunctions.
2. Tightening Loose Motor Mounting Bolts
Tightening loose motor mounting bolts is crucial because the wiper motor must be securely mounted for proper operation.
When bolts loosen due to vibration or age, the motor can shift slightly during operation.
This movement can cause noise, wiper misalignment, or uneven stress on the linkage.
A securely mounted motor efficiently transfers power to the wiper arms and reduces strain on the internal gears.
Proper tightening also prevents long-term damage caused by repeated vibrations.
3. Repairing Damaged Wiring
Repairing damaged wiring is essential when the wiper motor receives weak or intermittent power.
Wires can become frayed, stripped, or broken due to heat, vibration, or exposure to moisture.
Even a small break in the wiring can interrupt the flow of electricity and cause the motor to suddenly stop working.
Repairing damaged wires ensures a consistent voltage supply and prevents sudden wiper failure during rain or inclement weather.
Secure and insulated wiring also protects surrounding electrical systems from short circuits.
4. Lubricating Sticking or Jammed Linkages
Lubricating sticking or jammed linkages allows the wiper motor arms to move smoothly and with less effort.
The linkage is a set of metal joints that connect the motor to the wiper arms and these joints can dry out or corrode over time.
When the linkage becomes stiff, the motor has to work harder, which can lead to overheating or premature motor failure.
Proper lubrication reduces friction, improves wiper movement and extends the lifespan of both the motor and the linkage components.
5. Resetting Misaligned Wiper Arms
Resetting misaligned wiper arms ensures proper wiping coverage and the correct resting position.
Misalignment often occurs after repairs or when the arms are incorrectly installed on the spline shaft.
Misplaced wiper arms may stop too high, hit the windshield trim, or leave portions of the windshield unwiped.
Repositioning the arms to their correct location ensures smooth movement and complete windshield cleaning.
Correct alignment also reduces stress on the motor and linkage during operation.
How to Replace the Windshield Wiper Motor
1. Safely Disconnecting the Electrical Connector
Safely disconnecting the electrical connector is the first step when replacing a windshield wiper motor.
The motor connector carries power and control signals and pulling it incorrectly could damage the locking tab or bend the terminals inside.
Gently pressing the release tab and pulling the connector straight out prevents wire damage.
This step also protects the vehicle’s electrical system from accidental short circuits and ensures that the new motor can be properly connected without loose or damaged contacts.
2. Removing the Old Motor from the Linkage
Removing the old motor from the linkage requires careful work, as the linkage controls the movement of both wiper arms.
The motor is usually attached to the linkage by bolts or a drive arm, which must be gently removed.
Applying force to the linkage can bend the metal parts and cause future alignment problems.
Once the motor is free, it should be easily removed without bending the linkage.
Proper removal prevents damage and makes installing the new motor much easier.
3. Installing the New Motor Properly
Properly installing the new motor is crucial for smooth and reliable wiper operation.
The replacement motor’s size, mounting points and electrical connector design must match the original motor.
Positioning the motor correctly ensures that the linkage moves evenly and doesn’t become stuck during operation.
Tightening the motor bolts evenly keeps the unit stable and reduces vibration.
A properly installed motor delivers the correct speed, torque and long-term reliability.
4. Reconnecting the Wiring and Ensuring Secure Mounting
Reconnecting the wiring and ensuring secure mounting ensures that the motor receives full electrical power during use.
The connector should click firmly into place, indicating that it is fully locked.
Loose connections can cause the motor to suddenly stop working or only run at certain speeds.
Checking that all mounting bolts are tight prevents any movement that could damage the linkage or internal gears.
Secure mounting ensures the motor operates quietly and efficiently.
5. Aligning the Motor to the Park Position
Aligning the motor to the park position ensures that the wipers return to their correct position when turned off.
The park position is controlled by an internal switch inside the motor that stops movement at a specific point.
If the motor is installed without proper alignment, the wipers may stop in the middle or too high on the windshield.
Running the motor for a while without the wiper arms attached allows it to find its natural park position.
Proper alignment improves visibility and reduces stress on the wiper system.
How to Reassemble and Do Final Test
1. Reinstalling the Cowl Panel and Wiper Arms
Reinstalling the cowl panel and wiper arms completes the physical assembly of the windshield wiper system.
The cowl panel must be reinstalled in its original position to protect the wiper motor and linkage from water, dust and road debris.
Proper alignment of this panel also ensures that water drains correctly and does not accumulate near electrical components.
The wiper arms should be carefully reinstalled in their pre-marked positions to ensure they are at the correct height on the windshield.
Correct placement prevents the blades from hitting the windshield trim, overlapping each other, or leaving uncleared areas.
2. Reconnecting the Battery
Reconnecting the battery restores power to the vehicle and allows for final testing of the repair.
The battery cables should be securely tightened to ensure a stable power flow without sparking or power loss.
Loose connections can cause electrical problems that may manifest as wiper motor malfunctions, even if the motor is new.
Reconnecting the battery only after all parts have been reinstalled minimizes the risk of accidental movement or short circuits during testing.
3. Testing All Wiper Speeds and Washer Function
Testing all wiper speeds and the washer function verifies that the motor and control system are working correctly.
The wipers should move smoothly at low, high and intermittent settings without hesitation or delay.
Activating the washer should initiate both fluid spray and automatic wiper movement.
Correct operation at all speeds indicates that the motor, switches, wiring and linkage are functioning as designed.
This step ensures that the system will operate reliably in various weather conditions.
4. Checking for Smooth and Quiet Operation
Checking for smooth and quiet operation helps identify any remaining issues before driving.
The wipers should move evenly across the windshield without any jerking, hesitation, or uneven pressure.
There should be no grinding, clicking, or humming noises coming from the motor assembly, as these sounds could indicate loose bolts or a binding linkage.
Smooth and quiet movement ensures that the motor is properly aligned, securely mounted and operating efficiently.
This final check guarantees long-term reliability and safe visibility during rain or inclement weather.
Read More:
What are The Common Mistakes to Avoid
1. Replacing the Motor Without Proper Diagnosis
Replacing the windshield wiper motor without proper diagnosis is one of the most common and costly mistakes.
Many wiper problems are actually caused by blown fuses, faulty relays, bad switches, corroded connectors, or jammed linkages, rather than a faulty motor.
Installing a new motor without checking these basic things can result in the same problem persisting even after replacement.
Proper diagnosis saves money, prevents wasted time and ensures the root cause of the problem is addressed.
2. Forgetting to Properly Align the Wiper Arms
Forgetting to properly align the wiper arms after repair can lead to poor wiping performance and safety issues.
The wiper arms must be positioned at the correct resting point so they can sweep the entire windshield without hitting the trim or stopping too high.
Even one notch off on the spline shaft can result in uneven wiping or obstruct the driver’s visibility.
Correct alignment ensures smooth movement, proper blade pressure and full windshield coverage.
3. Ignoring Linkage Resistance or Binding
Ignoring resistance or binding in the wiper linkage can lead to premature failure of a new or existing motor.
When the linkage joints are corroded, dry, or bent, the motor has to work much harder to move the wiper arms.
This extra load can cause overheating, slow operation, or complete motor failure.
Checking and addressing linkage movement protects the motor and ensures the system operates smoothly and efficiently.
4. Overtightening Bolts and Damaging Components
Overtightening bolts can damage the wiper motor housing, mounting brackets, or linkage parts.
Applying excessive force can damage the threads, break plastic components, or bend metal parts, leading to misalignment and vibration.
Tightening the bolts firmly but to a controlled level ensures that the components are securely fastened without undue stress or damage.
Proper tightening helps maintain correct alignment and ensures the long-term reliability of the wiper system.
When You Should Consult to the Professional
1. Persistent Electrical Faults
Constant electrical faults are a sure sign that professional help is needed.
If the windshield wiper motor stops working even after checking fuses, relays, wiring and switches, the problem may be deeper within the vehicle’s electrical system.
Constant power loss, blown fuses, or intermittent operation indicate potential issues with wiring or circuits that are difficult to diagnose without advanced testing.
A professional technician has the experience to safely identify these faults and repair them without causing further damage.
2. Complex Electronics or Body Control Modules
Complex electronics or body control modules can control modern windshield wiper systems, specially in newer vehicles.
In many cars, the wiper motor receives signals directly from a switch rather than an electronic control unit.
If these systems fail or communication is interrupted, the wipers may behave erratically or stop working altogether.
Diagnosing these systems requires specialized scan tools and technical expertise.
A professional technician can read fault codes, test control signals and properly repair or reprogram the system.
3. Repeated Motor Failures
Repeated windshield wiper motor failures indicate an underlying problem that hasn’t been addressed.
Without fixing the root cause, multiple motor replacements may result in continuous breakdowns.
Common causes include excessive linkage resistance, incorrect voltage supply, or electrical overload from a faulty component.
A professional inspection can determine why the motor is repeatedly failing and prevent further damage.
Addressing the main problem ensures that new parts are protected and last longer.
4. Lack of Proper Diagnostic Tools
Lack of proper diagnostic tools can make repairs difficult and frustrating.
Testing voltage, ground connections and control signals often requires a multimeter, scan tool, or wiring diagrams.
Without these tools, repairs become guesswork, potentially leading to incorrect part replacements or electrical damage.
Professional repair shops are equipped with the right tools to accurately diagnose the problem and restore the wiper system’s proper function.
Using these resources saves time, money and frustration.
How to Maintain Windshield Wiper Motor
1. Keeping the Windshield and Wiper Blades Clean
Keeping the windshield and wiper blades clean significantly reduces the load on the wiper motor.
Dirt, dust, dried mud and road film increase friction between the blades and the glass, forcing the motor to work harder than designed.
Regularly cleaning the windshield and wiping the rubber edges of the blades removes abrasive particles that can slow down the wiper movement.
Less friction means smoother operation, less strain on the motor and a longer motor lifespan.
2. Avoiding Running Wipers on a Dry Windshield
It’s crucial to avoid running the wipers on a dry windshield because dry glass creates excessive friction.
Running wipers on a dry windshield forces the motor to work harder, which can overheat the internal components and lead to premature failure.
Always use washer fluid or wait for rain before operating the wipers.
Proper lubrication from water or washer fluid allows the blades to glide smoothly and protects both the motor and the linkage.
As well as, there’s studies on the wiper system that shows that the motor and linkage performance are actually influenced by the electrical power, mechanical design and also dynamic interactions with the glass surface as well, which means that how friction, vibration and noise between the wiper blades and windshield actually affects the overall system performance as well.[¹]
3. Replacing Worn Wiper Blades Promptly
Replacing worn wiper blades promptly maintains optimal motor performance.
Old blades become stiff, cracked, or uneven, increasing drag on the windshield.
This extra friction forces the motor to work harder to move the arms, specially at higher speeds or during heavy rain.
Installing new blades reduces strain, improves wiping quality and allows the motor to operate at normal load levels.
4. Regular Inspection of Fuses and Wiring
Regular inspection of fuses and wiring helps prevent sudden wiper motor failure.
Loose connections, frayed wires, or corroded terminals can reduce power flow and cause the motor to run weakly or stop completely.
Checking these parts during routine vehicle maintenance allows for the early detection and repair of minor problems.
A stable power supply protects the motor from voltage drops and extends its overall service life.
Conclusion – How to Fix a Windshield Wiper Motor
Yes, you need to take care of the wiper motor and give it proper maintenance as this small looking electric motor literally plays a big role in driving safety as it keeps the windshield clean in all-seasons.
This guide clarifies that many wiper motor problems don’t stem from a completely failed motor, but rather from minor issues such as dirty connectors, weak power supply, worn wiper blades, or jammed linkages.
Addressing these problems promptly reduces stress on the motor and prevents sudden breakdowns in inclement weather.
Simple steps like proper diagnosis, careful installation, correct alignment and regular maintenance can significantly extend the life of the wiper motor and improve overall wiping performance.
Understanding how the system works empowers car owners to make informed repair decisions, avoid unnecessary parts replacements and maintain a reliable wiper system that operates smoothly, quietly and safely when needed.
Now, that’s all from this guide, so if you still have confusion related to this guide, just let us know by commenting.
Frequently Asked Questions
Q1. What does a windshield wiper motor do and why is it important?
Answer: The windshield wiper motor is an electric motor that moves the wiper arms back and forth across the windshield. Its primary function is to keep the windshield clear during rain, fog, snow, or dust, allowing the driver to see the road properly. Without a functioning wiper motor, visibility is severely reduced, increasing the risk of accidents. Although the motor is small, it plays a crucial role in driving safety.
Q2. What are the most common signs of a faulty windshield wiper motor?
Answer: Common signs include the wipers not working at all, moving very slowly, stopping abruptly while in operation, or only working at one speed. Some drivers may also hear grinding, clicking, or humming noises coming from the wiper assembly. In some cases, the wipers may stop in the middle of the windshield instead of returning to their normal resting position. These signs usually indicate electrical, mechanical, or internal problems with the motor.
Q3. Can a windshield wiper motor be repaired, or does it always need to be replaced?
Answer: A windshield wiper motor doesn’t always need to be replaced. Many problems stem from simple causes, such as a blown fuse, loose wiring, dirty connectors, or a jammed linkage. Cleaning connections, tightening bolts, or lubricating the linkage often restores normal operation. The motor usually only needs to be replaced when the internal parts are worn or damaged and power is reaching the motor, but it still doesn’t work.
Q4. How can I tell if the problem is with the motor or something else?
Answer: The best way to determine this is through proper diagnosis. If the fuse, relay, switch and wiring are all functioning correctly and the motor is receiving the correct voltage and ground, but still not working, then the motor is likely faulty. If the motor is making a noise but the wipers aren’t moving, the linkage may be jammed. Testing the system step by step helps pinpoint the exact cause.
Q5. Is it safe to drive with a faulty windshield wiper motor?
Answer: Driving with a faulty windshield wiper motor is not safe, specially in inclement weather. Sudden rain or fog can reduce visibility in seconds, preventing the driver from seeing the road clearly. This increases the risk of accidents and makes emergency driving situations even more dangerous. It’s best to have wiper motor problems fixed as soon as they arise.
Q6. What tools are needed to repair a windshield wiper motor?
Answer: Basic hand tools such as screwdrivers and a ratchet set are usually sufficient to access the motor. A multimeter or test light is helpful for checking electrical power and ground. Electrical contact cleaner helps remove corrosion from connectors. Safety gloves and eye protection are also essential to prevent injuries during the repair.
Q7. Why is it important to disconnect the battery before starting repairs?
Answer: Disconnecting the battery stops the flow of electricity to the wiper motor and prevents sudden movement while your hands are near the linkage. It also protects the electrical system from short circuits that could damage the wiring, fuses, or control unit. This simple step enhances safety and prevents costly electrical problems.
Q8. Why do windshield wiper motors fail over time?
Answer: Wiper motors fail due to age, exposure to moisture, worn internal brushes, electrical corrosion, or excessive strain from stiff linkages and worn wiper blades. Operating the wipers on a dry or dirty windshield also increases the load on the motor. Poor maintenance can allow minor issues to escalate into major motor failures.
Q9. How long do windshield wiper motors typically last?
Answer: With proper maintenance, a windshield wiper motor can last for many years. Clean electrical connections, smooth linkage movement and good wiper blades reduce stress on the motor. Under normal conditions, a well-maintained motor can last the entire life of the vehicle. Neglect and misuse can significantly shorten its lifespan.
Q10. Can worn wiper blades damage the wiper motor?
Answer: Yes, worn wiper blades can damage the wiper motor over time. Old blades increase friction on the windshield, forcing the motor to work harder. This increased load leads to overheating and internal wear. Replacing worn blades promptly helps protect the motor and improves wiping performance.
Q11. Why do wipers sometimes stop in the wrong position?
Answer: Wipers stop in the wrong position when the motor’s parking circuit fails. This circuit is designed to return the wipers to their resting position after use. When it malfunctions due to wear or an electrical problem, the wipers may stop in the middle of the windshield. This usually indicates a problem with the motor.
Q12. Is replacing a windshield wiper motor difficult for a novice?
Answer: Replacing a windshield wiper motor is manageable for a novice with basic tools and careful attention to the steps. It requires proper diagnosis, correct alignment and secure installation. Following safety precautions is essential.
References:
[1] A Study on an Experimental System of Wiper–Windshield Friction Vibration and Noise
https://www.mdpi.com/2075-4442/13/7/296

Guys, I’m a car audio enthusiast and customization expert and I love clear sound and clean installation. Plus, I have spent years helping people build their dream audio setups. And whenever I’m working on cars, I probably listen to music and thinks about the next big upgrade.