Written By: Don Dodi
Fact Checked By: Kristen Brown
Reviewed By: Diego Rosenberg
Most of the time battery failures are not battery problems, but charging system can be the issue.
Basically, the alternator is literally responsible for generating the electricity while the engine is running, that actually powers essential systems such as: headlights, ignition, fuel injection and onboard electronics as well, also it recharges the battery as well.
So, if alternator doesn’t not charging battery then it can lead to system fails, because battery alone can only supply the power for a short period of time, that often leads to the dim lights, warning indicators or sudden engine stalling as well.
But, many drivers mistakenly replace the battery without realizing that the problem is with the alternator or related components such as: the drive belt, voltage regulator or wiring can cause the problem as well.
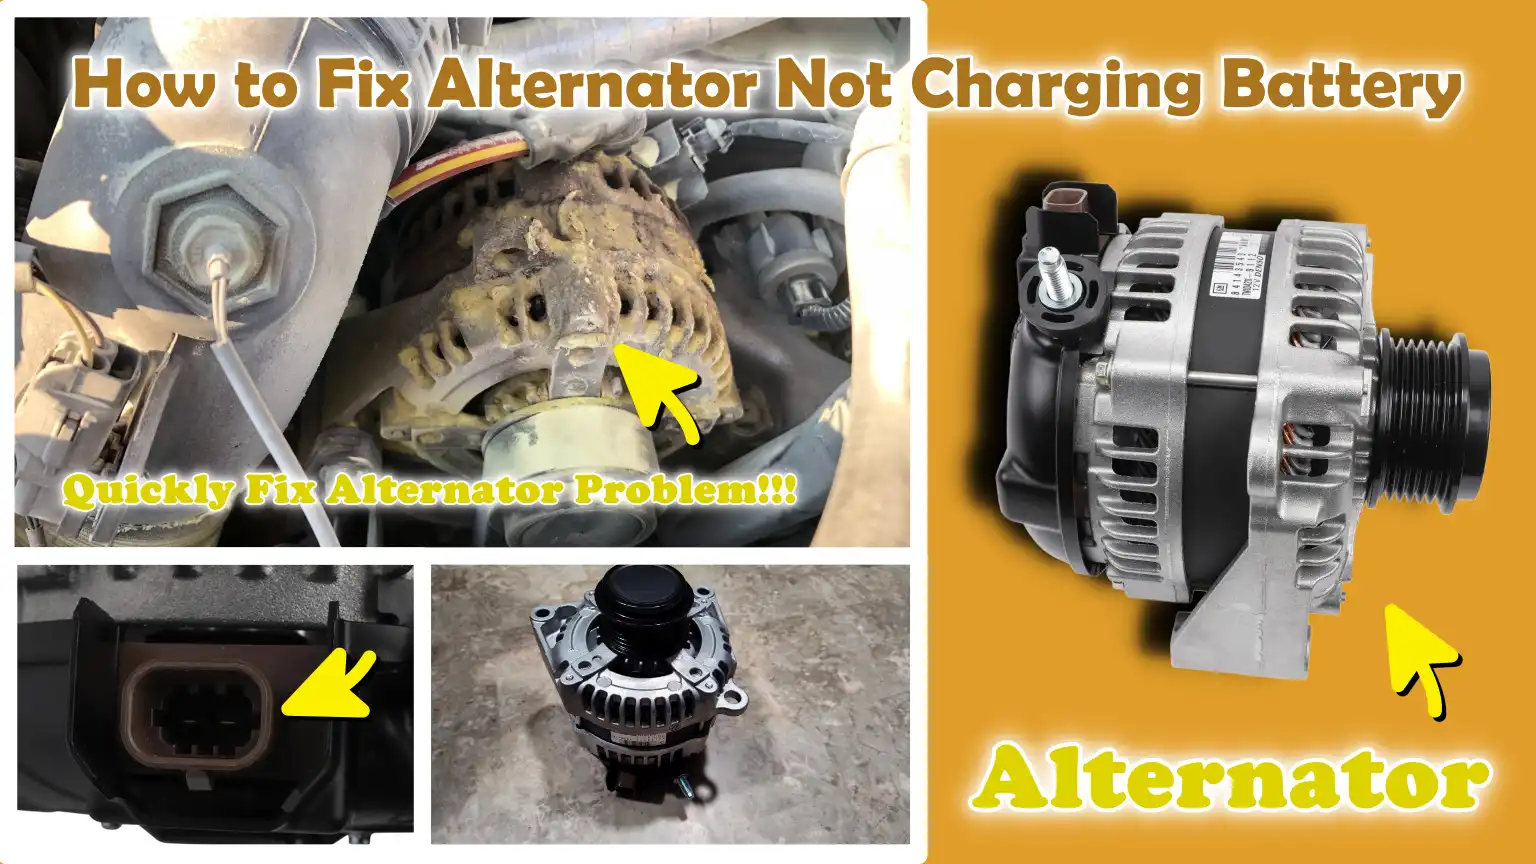
Now, in this guide you’ll learn How to Fix Alternator Not Charging Battery, so that you can recognize the early warning signs and apply the accurate diagnostic steps to prevent unexpected breakdowns.
Now, Let’s Understand About the Alternator System
The alternator system is a vital component of any vehicle, as it is responsible for generating and managing the electricity required to operate the vehicle.
If a fault develops within the charging system, the battery’s power will deplete rapidly, causing the vehicle to stop running.
Many modern vehicles rely heavily on electrical components such as: fuel injection systems, sensors, lighting, infotainment systems and control units, all of which require a continuous and stable supply of electricity.
The alternator ensures that this power remains available at all times while the engine is running and also keeps the battery charged.
Understanding the mechanics of this system helps drivers identify issues early, avoid replacing parts unnecessarily and maintain the vehicle’s reliable performance.
1. What is an Alternator?
Definition and Function
An alternator is a device installed in a vehicle that generates electricity and supplies it to the vehicle’s electrical system, while also recharging the battery.
It operates only when the engine is running and is designed to provide a continuous and reliable power supply.
The alternator replenishes the energy consumed by the battery during engine startup and ensures that all electrical components continue to function correctly.
Simply put, the battery starts the vehicle, while the alternator keeps it running by providing a continuous supply of power.
A properly functioning alternator prevents the battery from discharging and helps maintain the vehicle’s overall efficiency and performance.
How It Converts Mechanical Energy into Electrical Energy
The alternator converts the mechanical energy generated by the engine into electrical energy through a process based on electromagnetic principles.
As the engine runs, it drives a belt connected to the alternator’s pulley.
Due to this rotation, the internal components of the alternator such as: the rotor and stator, begin to spin.
As the rotor rotates, it generates a magnetic field, which induces an electric current within the stator windings.
This current is initially produced as Alternating Current (AC), which is subsequently converted into Direct Current (DC) with the aid of internal diodes, thereby enabling the vehicle’s electrical system to utilize it.
Thanks to this continuous process, the alternator is able to effectively supply power even while the engine is running.
2. Key Components of the Charging System
Alternator Unit
The alternator unit is the primary component responsible for generating electricity.
It houses internal parts such as the rotor, stator, diodes and brushes, all of which work in unison to generate and regulate the electric current.
A malfunction in any of these internal components can result in reduced power output or a complete cessation of power generation, leading to charging-related issues.
Battery
The battery stores electrical energy and provides the initial power required to start the engine.
It also serves as a backup power source when the engine is turned off.
Once the engine is running, the alternator takes over and recharges the battery to maintain its charge level.
A weak or defective battery can adversely affect the entire charging system and make it more difficult to diagnose faults.
Voltage Regulator
The voltage regulator controls the amount of electricity output by the alternator.
It ensures that the voltage remains within a safe operating range, typically between 13.5 and 14.5 volts.
If the voltage becomes excessively high, it can damage electrical components and overcharge the battery.
Conversely, if it drops too low, the battery will not charge properly, potentially leading to a power deficit.
Drive Belt (Serpentine Belt)
The drive belt connects the engine to the alternator and serves to transmit mechanical energy from one component to another.
When the engine runs, it rotates the belt, causing the alternator’s pulley to spin.
If the belt is loose, worn, or broken, the alternator will not rotate properly and power generation will either cease or become erratic.
Wiring and Connectors
Wiring and connectors transmit electrical current between the alternator, the battery and other components.
To ensure the proper flow of electricity, it is essential that these connections remain clean, tight and free of corrosion.
Faulty or loose wires can disrupt the charging process and cause malfunctions within the electrical system.
3. How the Charging System Works
The Engine Rotates the Belt and Drives the Alternator
When the engine is running, it generates mechanical motion that causes the drive belt to rotate.
This belt is connected to the alternator’s pulley, causing the alternator to spin.
This rotational action is the first step in generating electricity and is essential for the system to function correctly.
The Alternator Generates Electricity
As the alternator spins, it generates electricity through electromagnetic induction.
Its internal components work together to create a continuous flow of electric current, which powers the vehicle’s systems.
This electricity is continuously generated as long as the engine is running.
The Voltage Regulator Controls the Output
The voltage regulator monitors the amount of electricity generated by the alternator and adjusts it as needed.
It ensures that the output remains stable and stays within a safe operating range, thereby providing the correct amount of power to all electrical components.
It offers protection against both overcharging and undercharging conditions.
The Battery Stores and Distributes Electricity
The battery receives the electricity generated by the alternator and stores it for future use.
When needed, particularly during engine startup or when there is a high demand for power, it also supplies electricity to various components.
Together, the battery and the alternator maintain a balanced and reliable electrical system, ensuring that the vehicle operates smoothly and without interruption at all times.
Common, Signs That the Alternator Is Not Charging
Recognizing the early signs of an alternator failing to charge properly is crucial, as doing so can prevent sudden vehicle breakdowns and costly repairs.
When the engine is running, the alternator is responsible for continuously supplying electrical power; therefore, when it begins to malfunction, the vehicle’s entire electrical system starts to exhibit clear warning signs.
These signs often manifest gradually and may be mistaken for battery-related issues, but they are typically linked to a fault within the charging process itself.
As modern vehicles rely heavily on electronics, even a slight drop in charging voltage can impact performance, safety systems and driving comfort.
By understanding these symptoms in a simple and practical manner, drivers can take immediate action and avoid the inconvenience of being stranded.
1. Dashboard Warning Indicators
Battery Warning Light
The most common and reliable indicator of a charging issue is the battery warning light located on the dashboard.
This light typically illuminates when the system detects that the alternator is failing to generate the necessary voltage to charge the battery.
In most vehicles, the illumination of this light does not signify that the battery itself is defective, but rather indicates that the charging system is not functioning correctly.
If this light remains lit while driving, it means the vehicle is running entirely on battery power; if left unaddressed, the battery will eventually become completely discharged.
‘Check Engine’ Light – In Some Vehicles
In many modern vehicles, the ‘Check Engine’ light may also illuminate when there is a fault with the alternator or the charging system.
This occurs because the vehicle’s onboard computer monitors electrical performance and can detect irregular voltage levels.
Although the ‘Check Engine’ light can illuminate for various reasons, when it appears in conjunction with other electrical issues, it often signals a malfunction within the charging system, a problem that requires immediate attention.
2. Electrical Issues
Dim or Flickering Headlights
Dimming or flickering headlights are a clear indication that the alternator is failing to provide a consistent supply of power.
When the alternator is unable to maintain the necessary voltage, the headlights may dim or flicker, particularly when other electrical components of the vehicle are in use.
This occurs because the system is not receiving a continuous power supply; consequently, the lights react instantly to any fluctuations in voltage.
Poor Performance of Accessories
Another common symptom is the improper functioning of electrically powered accessories, such as the radio, air conditioning system and power windows.
You may observe that these components operate sluggishly or that their power cuts out intermittently.
This happens because the alternator is unable to generate sufficient energy to meet the vehicle’s electrical demands, forcing the system to rely more heavily on the battery, which, on its own, cannot sustain power for an extended period.
3. Battery-Related Issues
Frequent Battery Failure
If the battery repeatedly drains, even after being fully charged, it often signals a fault in the alternator rather than a defect in the battery itself.
If the alternator fails to recharge the battery while the engine is running, the energy stored within the battery will gradually deplete.
This may lead one to assume that the battery is defective; however, in reality, it is simply not being recharged properly.
Frequent Need for Jump-Starting
If your car requires frequent jump-starting, it is a definitive sign that the charging system is not functioning correctly.
While a one-time need for a jump-start may stem from a minor issue, recurring instances typically indicate that the alternator is failing to generate the necessary electricity to maintain the battery’s charge.
This condition can deteriorate over time and eventually lead to a complete failure of the vehicle’s electrical system.
4. Symptoms Related to Engine Performance
Engine Stalling While Driving
If the alternator fails to charge the system, the engine may stall while the vehicle is in motion, a matter of serious safety concern.
As the power stored in the battery depletes, critical systems such as fuel injection and ignition may cease to function, causing the engine to shut down abruptly.
This often occurs when the battery is completely drained and the alternator is unable to assume the responsibility of supplying power.
Difficulty Starting the Engine
Difficulty starting the engine is another key symptom of a charging-related issue.
As the battery provides the initial power required to start the car, a weak or undercharged battery, often resulting from a faulty alternator, struggles significantly to crank the engine.
Consequently, the engine may crank very slowly (slow cranking) or fail to start altogether, particularly after the vehicle has been parked for some time.
Common Causes of Alternator Charging Failure
It is crucial to understand why an alternator fails to charge, enabling accurate diagnosis and effective repair.
Many charging-related issues do not stem from the alternator itself, but rather from associated components that influence the overall functioning of the system.
The charging system relies on proper mechanical movement, secure electrical connections and the correct operation of internal components.
Even a minor issue such as: a loose wire or a worn belt, as it can disrupt the entire process and prevent the battery from charging.
By clearly and simply identifying the root cause of the problem, drivers can avoid unnecessary parts replacement and focus on resolving the actual issue.
Each of the causes listed below explains how and why the charging system might fail, utilizing practical and easy-to-understand information.
1. Worn or Defective Alternator
Failure of Internal Components
An alternator contains numerous internal components that must work in unison to generate electricity.
Over time, these components can wear out due to heat, friction and continuous use.
When internal components fail, the alternator generates little to no electricity, directly impacting the battery’s ability to charge.
Such issues are common in older vehicles or in cars that have been driven for long distances without proper maintenance.
Worn Brushes or Diodes
Inside the alternator, brushes and diodes play a pivotal role in generating and converting electrical current.
Brushes facilitate the transfer of electrical energy from one point to another, while diodes convert Alternating Current (AC) into Direct Current (DC), the form of electricity utilized by the vehicle.
If the brushes become worn or the diodes fail, the alternator is unable to provide a consistent supply of electricity.
Consequently, charging capacity often diminishes, voltage levels fluctuate, or the charging process ceases entirely.
2. Loose or Defective Drive Belt
Belt Slippage or Breakage
The drive belt, also known as the serpentine belt, connects the engine to the alternator and drives it.
If the belt is loose, worn, or broken, the alternator will not rotate properly and, as a result, will be unable to generate electricity.
If the belt is slipping, it may continue to rotate to some extent; however, this adversely affects its efficiency and leads to irregularities in the charging process.
Improper Belt Tension
For the alternator to function correctly, maintaining proper belt tension is crucial.
If the belt is too loose, it will slip and fail to transmit the necessary mechanical energy.
Conversely, if the belt is excessively tight, it can accelerate wear on the alternator’s bearings and other components.
Maintaining the correct tension ensures smooth operation and a consistent supply of electricity.
3. Defective Battery
Inability to Hold a Charge
If a battery is unable to hold a charge, diagnosing charging-related issues can be challenging.
Even if the alternator is functioning correctly, a weak battery will rapidly lose its power, potentially creating the misconception that the alternator is failing to charge.
Therefore, it is essential to assess the condition of the battery before replacing other components.
Sulfation or Aging
Over time, due to internal chemical changes, a battery naturally begins to deteriorate.
Sulfation occurs when lead sulfate crystals accumulate on the battery plates, thereby reducing the battery’s energy storage capacity.
As the battery ages, its capacity diminishes, preventing it from holding a charge effectively.
These conditions can impact the entire charging system and lead to poor performance.
4. Faulty Voltage Regulator
The voltage regulator controls the amount of electricity generated by the alternator.
If it malfunctions, it may allow either excessive or insufficient voltage to flow into the system.
Overcharging can damage the battery and electrical components, while undercharging prevents the battery from reaching a full charge.
Both scenarios can lead to serious issues; therefore, prompt repairs are essential to safeguard the vehicle’s electrical system.
5. Corroded or Loose Connections
Corrosion on Battery Terminals
Corrosion on battery terminals is a very common issue that can impede the flow of electricity.
It typically manifests as a white or green powdery substance surrounding the terminals, preventing proper contact between the battery and the cables.
This reduces charging efficiency and can result in power loss.
Loose Wiring
Loose or damaged wiring can disrupt the flow of electrical current between the alternator and the battery.
Even a slightly loose connection can cause voltage fluctuations and erratic charging.
Ensuring that all wires are securely connected and in good condition is crucial for the proper functioning of the charging system.
6. Blown Fuse or Broken Fusible Link
Fuses and fusible links are designed to protect a vehicle’s electrical system from damage caused by excessive current.
If a fuse blows or a fusible link breaks, it can completely interrupt the flow of electricity from the alternator to the battery.
Consequently, charging fails, even if the alternator itself is functioning properly.
Checking for and replacing blown fuses is a simple yet essential step in diagnosing charging-related issues.
Tools
| Tool / Material | Why These are Useful |
|---|---|
| Multimeter | A multimeter is used to check the voltage within your car’s electrical system. It helps you determine whether the battery and alternator are functioning correctly. You can easily measure whether the charging level falls within the proper range. |
| Wrench Set | A wrench set is used to loosen and tighten nuts and bolts. It assists you in safely removing battery cables and alternator bolts. Different parts of the car require wrenches of various sizes. |
| Screwdrivers | Screwdrivers are used to loosen or tighten screws attached to various components. They facilitate the easy removal of covers and small parts. Generally, both flat-head and Phillips-head (star) screwdrivers are required. |
| Battery Terminal Cleaner | This cleaner removes dirt and corrosion from the battery terminals. Clean terminals help ensure a smooth and uninterrupted flow of electricity. This improves charging performance and the reliability of electrical connections. |
| Replacement Alternator – If Needed | If the old alternator has failed completely, a new alternator is required. It restores charging functionality for both the battery and the vehicle’s electrical system. Always select the specific model that is compatible with your vehicle. |
| Safety Gloves and Goggles | These items protect your hands and eyes while you are working. They guard against injuries caused by sparks, dirt, or sharp components. Wearing safety gear is absolutely essential when working on a car’s electrical system. |
How to Fix Alternator Not Charging Battery – Proper Guide for Beginners
To resolve an alternator charging issue, it is essential to adopt a clear and systematic approach to accurately pinpoint the root cause and address it effectively.
Many charging-related problems are relatively simple and can be resolved without replacing the alternator; however, skipping even a single step can lead to a misdiagnosis and unnecessary expenses.
As the charging system functions as an integrated unit, every component, including the battery, belts, wiring and regulator, must be inspected with care.
By following each step in the correct sequence, you can determine whether the issue is mechanical, electrical, or internal to the alternator itself.
This step-by-step process is straightforward and practical, allowing even novices to follow along easily and resolve the problem with confidence.
1. Start by Checking the Battery
Inspect the Battery’s Condition
The first step is to carefully inspect the battery, as it plays a crucial role within the charging system.
Look for visible signs of damage on the battery, such as cracks, bulges, leaks, or corrosion around the terminals.
A damaged or weak battery can compromise the entire system, creating the false impression that the alternator is not functioning correctly.
Ensuring that the battery is in good condition helps prevent misdiagnosis.
Check the Voltage – Should be Approximately 12.6V When Off
Using a multimeter, measure the battery’s voltage with the engine turned off.
A healthy, fully charged battery should register a voltage reading of approximately 12.6 volts.
If the reading is significantly lower than this, it indicates that the battery is weak or has discharged.
In such cases, the battery should be charged or replaced before inspecting the alternator, as a faulty battery can skew diagnostic results.
2. How to Check the Drive Belt
Check for cracks, looseness, or wear
It is essential to inspect the drive belt for any visible defects, such as cracks, frayed edges, or looseness.
A worn or loose belt cannot drive the alternator effectively, resulting in reduced power generation or a complete loss of output.
Even minor signs of wear can cause the belt to slip, leading to poor performance.
Adjust or replace the belt if necessary
If the belt is loose, it must be adjusted to the correct tension to ensure proper mechanical energy transfer.
If the belt is damaged or worn out, it should be replaced immediately.
A properly fitted belt ensures that the alternator rotates smoothly and generates consistent power.
3. How to Check Alternator Output
Start the engine and check the voltage
Start the engine and use a multimeter once again to measure the voltage across the battery terminals.
This test indicates whether or not the alternator is supplying power while the engine is running.
This is one of the most critical steps in diagnosing issues within the charging system.
Normal Reading: 13.5V–14.5V
A properly functioning alternator should generate a voltage between 13.5 and 14.5 volts.
If the reading is low, it indicates that the alternator is not charging correctly.
If the voltage is excessively high, it may signal a fault in the voltage regulator.
This step helps confirm whether the alternator is operating as expected.
4. How to Check Wiring and Connections
Tighten Loose Connections
All electrical connections between the alternator, battery and other components should be checked to ensure they are tight.
Loose connections can disrupt the flow of electricity and cause charging malfunctions.
Ensuring secure connections helps maintain the stability of the electrical system.
Clean Corrosion from Terminals
Corrosion on battery terminals or connectors can impede the flow of electricity and reduce charging efficiency.
Cleaning the terminals with an appropriate cleaner improves contact and allows electricity to flow freely.
This simple step can often resolve charging issues without the need for any further repairs.
5. How to Check Fuses and Fusible Links
Locate the Fuse Box
The fuse box should be located using the vehicle’s owner’s manual, as it houses the fuses associated with the charging system.
These fuses protect the electrical circuits from damage caused by excessive current.
Replace Any Blown Fuses
If a fuse or fusible link has blown, it will interrupt the flow of electricity from the alternator to the battery.
Replacing a faulty fuse restores the circuit and allows the charging system to function correctly again.
This is a simple yet essential step in the diagnostic process.
6. How to Check the Voltage Regulator
Check for Voltage Fluctuations
The voltage regulator controls the amount of electricity generated by the alternator; therefore, it should be checked to ensure stable performance.
If the voltage readings are constantly fluctuating, it indicates that the regulator is not functioning properly.
This can lead to either overcharging or undercharging.
Replace if Faulty
If the voltage regulator is found to be defective, it should be replaced to restore proper control to the charging system.
In some vehicles, the regulator is built directly into the alternator itself; therefore, it may be necessary to replace the entire alternator unit.
Correcting this issue ensures that voltage levels remain stable and safe.
7. How to Replace the Alternator – If Necessary
Disconnect the Battery
Before replacing the alternator, it is crucial to disconnect the battery to prevent electric shock or short circuits.
This is an essential safety precaution that should never be overlooked.
Remove the Belt and Mounting Bolts
First, the drive belt must be removed; subsequently, the mounting bolts that secure the alternator in place should be loosened and removed.
This allows the alternator to be safely detached from the engine.
Install the New Alternator and Reconnect All Components
The new alternator should be positioned correctly and secured with the mounting bolts.
The belt must be reinstalled with the proper tension and all electrical connections should be carefully reattached.
Finally, reconnect the battery and test the system to ensure that the alternator is charging correctly and that the issue has been fully resolved.
Know, Important Safety Tips
Possessing the correct safety knowledge is crucial when working on a vehicle’s charging system, as even a minor error can result in personal injury or damage to the vehicle.
The alternator and battery are vital components of the electrical system; if not handled properly, they can generate sparks, produce excessive heat, or trigger sudden, unexpected reactions.
Many parts of the vehicle are constructed from metal and are connected to electrical circuits; therefore, touching them directly without taking precautions can lead to short circuits or pose a risk of burns.
Furthermore, the engine compartment contains numerous moving parts and is often a confined space; a lack of attention in this area significantly increases the risk of accidents.
Adhering to basic safety protocols not only ensures your physical safety but also guarantees that the repair work is executed correctly without creating new complications.
Understanding and adopting these safety guidelines is essential for everyone, whether they are novices or experienced professionals.
1. Always Disconnect the Battery Before Starting Work
Before commencing any repair or inspection task, it is imperative to disconnect the battery to eliminate the risk of electric shock or accidental short circuits.
The battery stores electrical energy and remains active even when the engine is turned off; this means that touching its connected terminals can generate sparks or cause damage to the vehicle’s sensitive components.
Disconnecting the battery, specifically by removing its negative terminal, ensures that no electrical current flows through the system while you are working.
Taking this simple step significantly reduces the risk of injury and safeguards the vehicle’s electrical components against any potential sudden damage.
2. Avoid Touching Moving Engine Parts
When the engine is running, several components such as: belts, pulleys and fans, rotate at very high speeds.
Touching these parts can result in serious injuries, such as cuts or the entanglement of body parts.
Even loose clothing or tools can get caught in these rotating components.
Therefore, it is crucial to maintain a safe distance from these parts and, under no circumstances, bring your hands close to them while the engine is running.
If you need to inspect something while the engine is active, do so with extreme caution and from a safe vantage point to ensure there is no direct contact with these moving parts.
3. Wear Appropriate Safety Gear
When working on a vehicle, wearing safety gear such as: gloves and safety goggles, is essential to ensure your personal safety.
Gloves protect your hands from sharp edges, heat, dirt and hazardous chemicals like battery acid.
Goggles shield your eyes from dust, debris and potential sparks generated during electrical work.
Wearing the appropriate safety gear minimizes the risk of injury, allowing you to perform your tasks with greater confidence and comfort.
4. Work in a Well-Ventilated Area
Vehicle repairs should always be conducted in an area with good airflow to ensure both safety and comfort.
When the engine is running, the exhaust fumes it emits contain harmful substances; inhaling these fumes in an enclosed space can be extremely dangerous.
A well-ventilated environment ensures a continuous flow of fresh air, allowing harmful fumes to dissipate quickly.
Proper ventilation also helps keep the workspace clear, enabling you to focus better on your tasks and complete them safely.
Know, Common Mistakes Fixing the Alternator to Avoid
When an alternator fails to charge, many people make simple yet costly mistakes that lead to incorrect repairs, wasted money and recurring problems.
The charging system functions as an interconnected network of components; therefore, focusing solely on a single part without examining the others can lead to erroneous conclusions.
For accurate diagnostics, it is crucial to inspect the battery, belts, wiring and other components in a specific and logical sequence.
Avoiding these common errors not only saves time but also ensures that the root cause of the problem is addressed, rather than merely suppressing the symptoms temporarily.
Understanding these mistakes in simple terms empowers both novices and experienced individuals to perform repairs more effectively and with greater confidence.
1. Replacing the Alternator Without Checking the Battery
One of the most common mistakes is replacing the alternator without first checking the battery.
Many people assume that if the battery is completely discharged or weak, the alternator must be at fault; however, this is not always the case.
If the battery is unable to hold a charge, it can exhibit symptoms such as: difficulty starting the vehicle or various electrical malfunctions, that closely mimic those of a faulty alternator.
If the battery itself is defective, installing a brand-new alternator will not resolve the issue.
Checking the battery’s voltage and overall condition before replacing any component ensures that the true culprit is correctly identified, thereby preventing unnecessary expenses.
2. Neglecting the Condition of the Belt
The drive belt plays a crucial role in the operation of the alternator; yet, it is often overlooked during the inspection process.
If the belt is loose, worn, or damaged, the alternator cannot rotate properly, preventing it from generating the necessary electrical power.
Even the slightest slippage of the belt can compromise charging efficiency and disrupt performance.
Neglecting the condition of the belt can lead to misdiagnosis and the unnecessary replacement of the alternator, when the actual issue may simply be a worn belt requiring only a minor adjustment or replacement.
3. Failing to Inspect Wiring Connections
Another common error is failing to inspect the wiring and electrical connections within the charging system.
If wires are loose, damaged, or corroded, they can obstruct or reduce the flow of electricity between the alternator and the battery.
The symptoms of such issues such as: low voltage or reduced power output, as it can closely mimic those of a completely failed alternator.
Without inspecting these connections and ensuring they are properly tightened, the problem may persist even after replacing major components.
Ensuring that all connections are clean, securely fastened and in good condition is a simple yet vital step toward accurate diagnosis.
4. Using Incorrect Replacement Parts
Using incorrect replacement parts is a mistake that can lead to serious problems within the charging system.
Alternators, batteries and their associated components are designed with specific ratings and dimensions that vary from one vehicle to another.
Installing a part that does not meet the required specifications can lead to improper charging, electrical malfunctions, or compromised performance.
It is crucial to select the correct part based on the vehicle model and the manufacturer’s recommendations.
The use of appropriate parts ensures the vehicle’s proper operation, long-term reliability and safe performance.
When You Should Go to the Mechanic
While many issues related to the alternator and charging system can be diagnosed and repaired at home, there are certain situations where seeking professional assistance becomes essential.
Modern vehicles feature advanced electrical systems, comprising sensors, control modules and complex wiring networks, making it quite difficult to diagnose problems without the proper knowledge and tools.
Attempting to repair such issues without comprehensive understanding can lead to incorrect repairs or cause further damage to the vehicle.
For the sake of safety, accuracy and the long-term reliability of your vehicle, it is crucial to know when to stop and consult a trained mechanic.
Professional mechanics possess specialized tools and expertise that enable them to uncover hidden faults and resolve issues effectively.
1. Complex Electrical Issues
Some charging-related problems stem from deep-seated faults within the electrical system that are not easily apparent through a superficial inspection.
These may include malfunctions within the vehicle’s computer system, hidden wiring defects, or internal faults within the alternator itself, issues that require advanced diagnostics.
Diagnosing such problems often necessitates the use of specialized diagnostic tools capable of reading system data and pinpointing the exact location of the fault.
Without the appropriate tools and technical knowledge, resolving these issues can be challenging and there remains a risk that the problems may recur.
In such instances, seeking professional help ensures that the problem is accurately diagnosed and that the necessary repairs are performed correctly and effectively.
2. Lack of Proper Tools
Diagnosing and resolving alternator-related issues requires specific tools, such as a multimeter, specialized wrenches and, in some instances, diagnostic equipment.
If these tools are unavailable, accurately identifying the problem and performing repairs safely becomes a challenging task.
Without the proper tools, relying solely on guesswork can lead to incorrect conclusions and the unnecessary replacement of vehicle components.
Professional mechanics possess the appropriate tools, enabling them to accurately measure voltage, current flow and the overall performance of the system.
This allows them to complete repair work with greater efficiency and safety.
3. Persistent Charging Issues Even After Replacing the Alternator or Battery
If charging-related problems persist even after replacing the alternator or battery, it is a clear indication that the underlying issue lies elsewhere within the system.
This problem could stem from the wiring, voltage regulator, fuses, or another component of the electrical system, issues that are often not easily detected.
Repeatedly replacing parts without identifying the true root cause of the problem can lead to increased costs and unnecessary frustration.
A professional mechanic can conduct a thorough inspection of the entire system to accurately pinpoint the actual cause of the issue and resolve it.
This ensures that the vehicle continues to operate reliably, without any interruptions or complications.
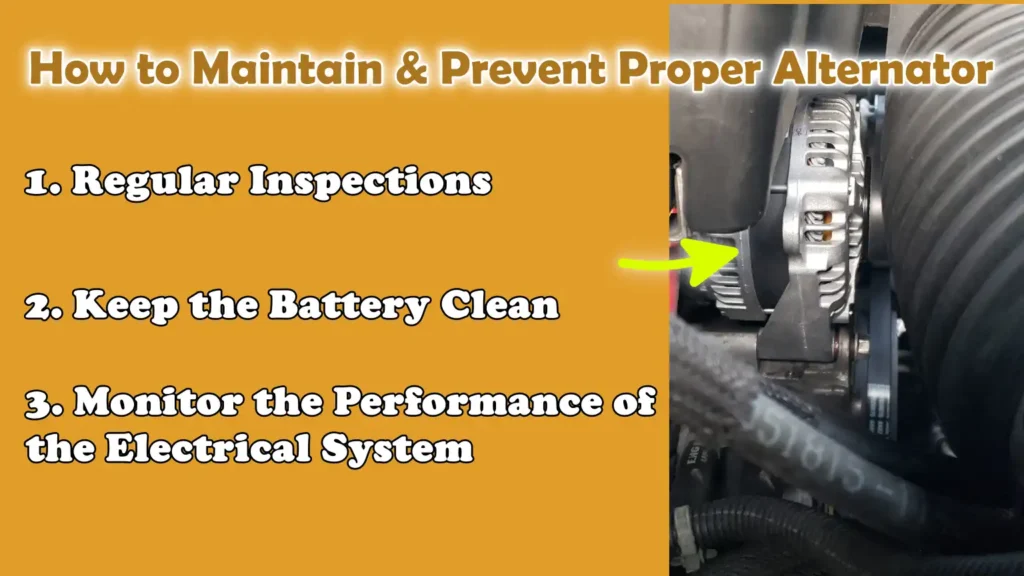
How to Maintain & Prevent Proper Alternator
Preventive maintenance is the most effective way to avoid alternator charging problems and ensure that the vehicle’s entire electrical system operates without interruption for the long term.
The charging system relies on the coordinated operation of several components; if a minor issue goes unaddressed in a timely manner, it can adversely affect the functioning of the entire system.
Regular upkeep helps maintain proper voltage levels, extends battery life and reduces the likelihood of sudden vehicle breakdowns.
Many alternator faults do not occur abruptly but rather develop gradually due to wear and tear, dirt accumulation, or loose connections.
By adopting simple maintenance practices and paying attention to subtle changes in the vehicle’s behavior, drivers can avoid major repairs, save money and ensure their vehicle remains reliable in all driving conditions.
Also, there’s study that shows that alternator efficiency is directly linked to its internal components and design as well, so whenever an alternator becomes worn out or damaged internally, then its ability to generate the power decreases very much, this shows that why older or damaged alternators may fail to charge the battery in proper way, even if other components appears to be working in correct manner.[¹]
1. Regular Inspections
Regular inspection of drive belts and electrical connections is crucial for maintaining proper charging system functionality.
Belts should be checked for cracks, signs of wear and proper tension, as these factors directly impact the alternator’s operational efficiency.
A loose or worn belt can diminish power generation capacity and lead to charging system failure.
Additionally, electrical connections should be inspected to ensure they are securely fastened and free of defects.
Periodic inspections help identify early signs of wear or looseness, allowing issues to be resolved before they escalate into serious problems.
2. Keep the Battery Clean
Keeping the battery clean is essential for ensuring proper electrical flow.
Over time, corrosion can accumulate on battery terminals, forming a layer that obstructs the flow of electricity.
This buildup can diminish charging efficiency and make it difficult to start the vehicle.
Regularly cleaning the terminals ensures a strong and stable connection between the battery and the charging system.
A clean battery not only improves the vehicle’s overall performance but also extends the lifespan of both the battery and the alternator.
3. Monitor the Performance of the Electrical System
Monitoring the performance of your vehicle’s electrical system can help identify issues in their early stages.
Symptoms such as dim lights, sluggish power windows, unusual warning lights, or difficulty starting the vehicle should not be ignored.
These minor anomalies often serve as indicators that the charging system is not functioning correctly.
By paying attention to these signs and taking immediate action, you can prevent further damage and avoid sudden vehicle breakdowns.
Detecting problems early makes repairs simpler, less expensive and more effective in ensuring the long-term reliability of your vehicle.
Read More:
Conclusion – How to Fix Alternator Not Charging Battery
So, it is true that well-functioning charging system is actually the silent backbone of every reliable drive.
The charging system is designed to maintain a continuous flow of electrical power, typically between 13.5 and 14.5 volts, while the engine is running, thereby powering essential systems such as ignition, fuel delivery, lighting and onboard electronics.
When this system fails, the battery alone cannot sustain the vehicle for long, often resulting in sudden engine stalling, difficulty starting, or a complete loss of electrical power.
This predicament is further compounded by the fact that many of its symptoms closely resemble those of a failing battery, potentially leading to misdiagnosis and the unnecessary replacement of components.
A clear understanding of how the alternator system functions, along with knowledge of its key components, such as the drive belt, voltage regulator and wiring connections, helps you accurately pinpoint the root cause of the problem.
A few simple steps such as: checking the battery voltage, inspecting the condition of the belt and testing the alternator’s output, as it can immediately reveal whether the issue is mechanical, electrical, or internal.
In many cases, problems such as loose connections, corroded terminals, or blown fuses can be easily resolved without the need to replace the alternator itself.
This underscores the importance of adopting a systematic, step-by-step approach rather than relying on guesswork.
Preventive maintenance also plays a crucial role in avoiding charging-related issues.
Regular inspections, keeping the battery clean and paying attention to early warning signs can significantly extend the lifespan of both the alternator and the battery.
Modern vehicles rely heavily on their electrical systems; Therefore, maintaining proper charging is essential for both safety and performance.
Now, that’s it from this guide and now you can ask in the comment section below.
Frequently Asked Questions
Q1. Why isn’t my alternator charging the battery?
Answer: An alternator can stop charging the battery for several reasons, such as internal wear within the alternator itself, a loose or broken drive belt, faulty wiring, or a defective voltage regulator. Sometimes, the problem lies not with the alternator at all, but rather with a weak battery that is unable to hold a charge. The charging system functions as a cohesive unit where all components work together; therefore, even a minor fault in a single component can prevent the battery from charging properly. Individually testing each component helps in accurately identifying the root cause of the problem.
Q2. How can I determine whether the alternator is bad or the battery is bad?
Answer: The easiest way to distinguish between the two is to check the voltage using a multimeter. If the battery reads approximately 12.6 volts when the engine is off, but the voltage drops or fails to rise when the engine is running, it is likely that the fault lies with the alternator. If the battery fails to hold a charge even after being fully charged, the problem likely lies with the battery itself. Paying attention to symptoms such as: dimming headlights or the need for frequent jump-starts, as it can also help in diagnosing the issue.
Q3. Can a car run with a bad alternator?
Answer: Yes, a car can run with a bad alternator for a limited time; specifically, until the stored charge in the battery is depleted. Once the battery is completely discharged, the engine will shut down because there will be no power left to operate the vehicle’s essential systems. This is why driving with a bad alternator is risky; it can leave you stranded unexpectedly while on the road.
Q4. How much voltage should an alternator produce?
Answer: A properly functioning alternator should generate a voltage between 13.5 and 14.5 volts when the engine is running. This range ensures that the battery is charging while simultaneously providing sufficient power to the vehicle’s electrical system. If the voltage drops too low, the battery will not charge properly; conversely, if the voltage rises too high, it can damage electrical components.
Q5. Can a loose belt prevent the alternator from charging?
Answer: Yes, a loose or worn drive belt can prevent the alternator from rotating properly. As the alternator relies on the belt to generate electricity, if the belt is slipping or lacks proper tension, its ability to produce power will be compromised. In some cases, simply tightening or replacing the belt can completely resolve the charging issue.
Q6. How long does an alternator typically last?
Answer: An alternator typically lasts between 80,000 and 150,000 kilometers, depending on driving conditions and maintenance. Heat, dirt and constant use can reduce its lifespan over time. Regular inspections and proper care can extend its service life and prevent sudden failure.
Q7. What happens if the alternator overcharges the battery?
Answer: If the alternator generates excessive voltage, it can overcharge the battery, causing it to overheat and sustain damage. This can also adversely affect other electrical components in the car, potentially causing them to malfunction or fail completely. Overcharging is typically caused by a faulty voltage regulator and should be addressed immediately.
Q8. Can corrosion on the battery terminals affect charging?
Answer: Yes, corrosion on battery terminals can impede the flow of electricity and reduce charging efficiency. This creates a blockage that prevents proper contact between the battery and the cables. Cleaning the terminals often restores the charging process and improves overall performance.
References:
[1] Analysis of the efficiency of an automotive alternator by replacing Mild steel into aluminum as a material for rotor
https://www.sciencedirect.com/science/article/abs/pii/S2214785320349129

Guys, I’m a car audio enthusiast and customization expert and I love clear sound and clean installation. Plus, I have spent years helping people build their dream audio setups. And whenever I’m working on cars, I probably listen to music and thinks about the next big upgrade.