Written By: Don Dodi
Fact Checked By: Kristen Brown
Reviewed By: Diego Rosenberg
It is your duty to keep your vehicle always up-to date and very well maintained, as you should not underestimate issues such as: leaking oil pan as it shows that you are not able to protect the engine’s health and performance for the longer run.
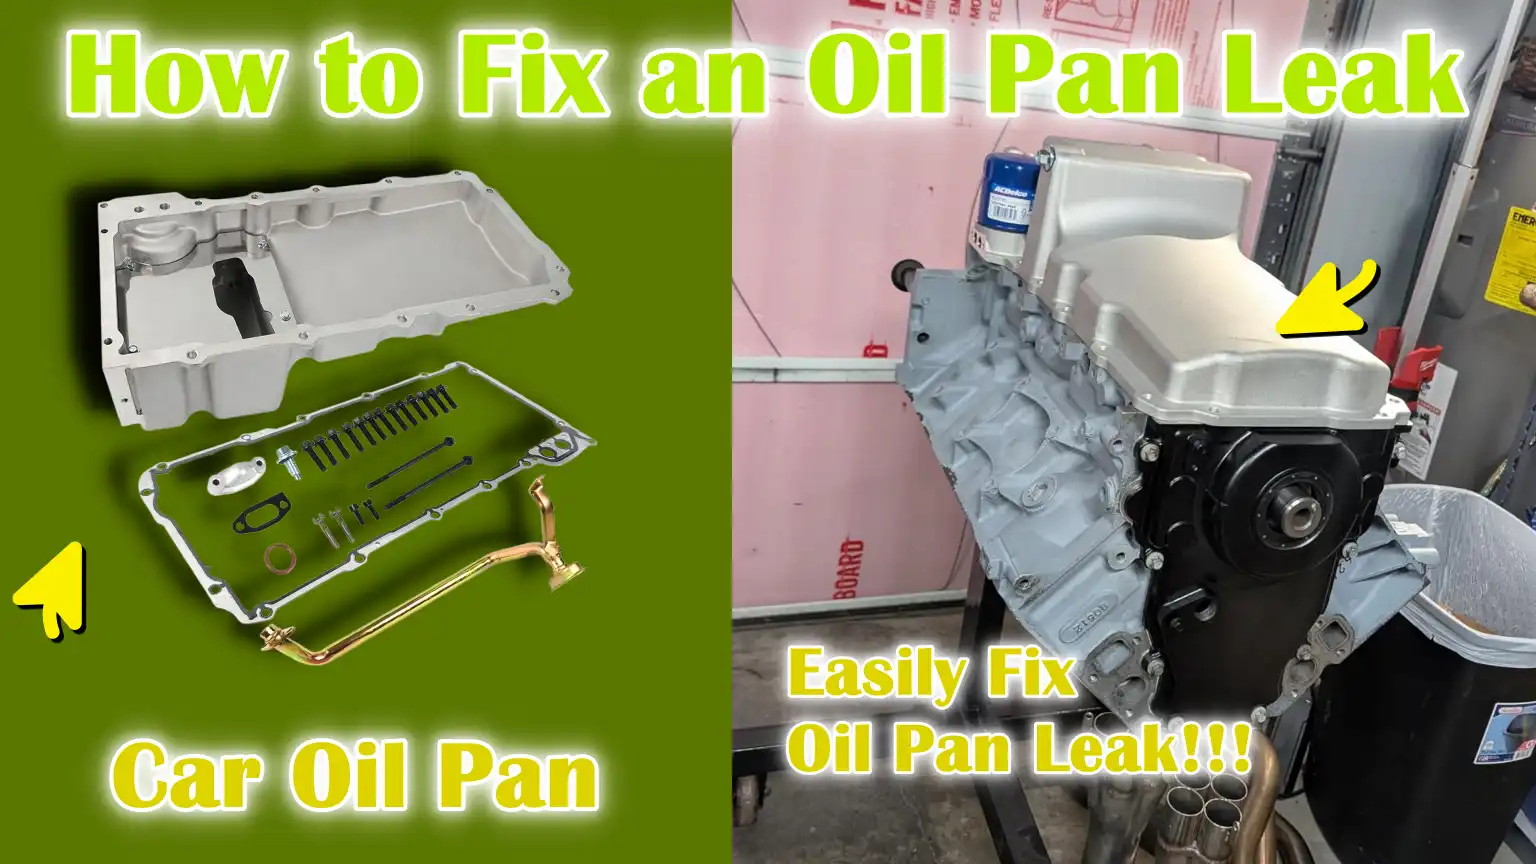
So, Oil Pan is actually located at the very bottom of your vehicle’s engine, it actually stores the motor oil that lubricates moving parts that prevents metallic friction and literally helps your vehicles to regular temperature in a great manner.
Plus, it is very much possible that over the time because of the exposure to the road debris, rough terrain, constant vibration and high heat can actually cause the oil pan or its gasket to weaken, loosen or crack up that leads to the visible oil spots under the car.
Not only this, according to the ASE, oil system leaks actually accounts for nearly 15% of all engine-related repairs which is reported each year.
Just think about this, even a minor oil leak can lead to the low oil levels, that increases engine wear and potentially catastrophic damage as well if you ignore it for too much time.
That’s why this guide shows you How to Fix an Oil Pan Leak, in that way you will be able to improve fuel efficiency and avoid costly and unnecessary engine repairs as well.
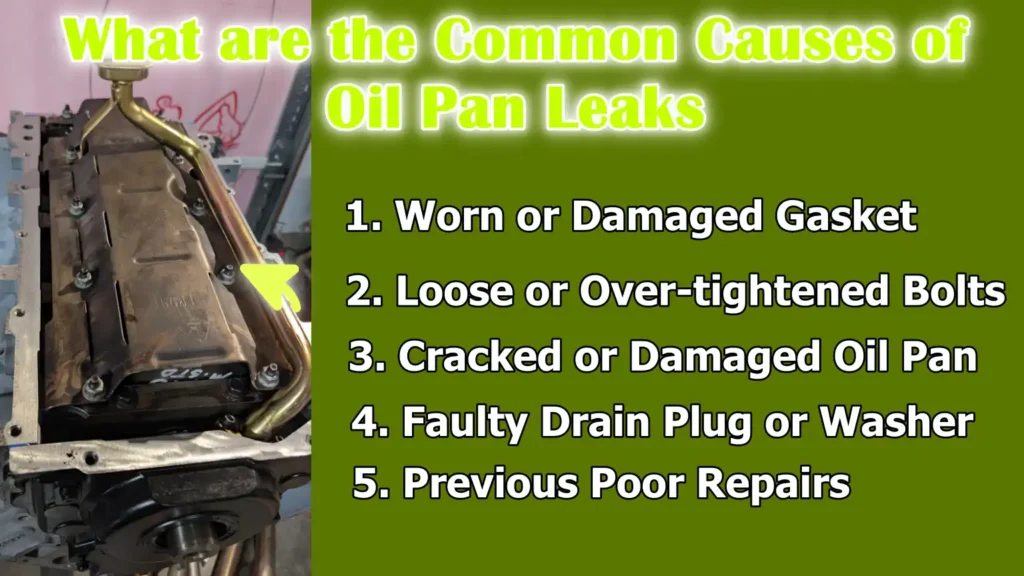
What are the Common Causes of Oil Pan Leaks
Oil pan leaks can occur due to several different reasons, most of which are related to age, wear and tear, or improper maintenance.
Understanding these causes helps vehicle owners identify the problem early and take corrective action before significant damage occurs.
The oil pan is located directly beneath the engine, meaning it is constantly exposed to road heat, vibrations and debris.
Even a minor issue in this area, if left unattended, can gradually lead to oil loss, low oil pressure and serious engine damage.
Below are the most common and well-documented causes of oil pan leaks, each explained in clear and simple terms.
1. Worn or Damaged Gasket
The gasket between the oil pan and the engine block is designed to create a tight, oil-proof seal that prevents leaks.
Over time, due to constant heat cycles, exposure to oil and pressure changes, this gasket can harden, shrink, or crack.
When this happens, small gaps form, allowing oil to seep out gradually.
Automotive research conducted by the Society of Automotive Engineers (SAE) indicates that gasket failure is one of the three primary causes of oil leaks in passenger vehicles.
Rubber and cork gaskets are more prone to failure in high-mileage engines or in areas with extreme temperature fluctuations.
Replacing the gasket with a high-quality, heat-resistant material is often the most effective long-term solution.
2. Loose or Over-tightened Bolts
The bolts that hold the oil pan in place play a crucial role in maintaining a consistent seal.
Over time, due to engine vibrations and road conditions, these bolts can become slightly loose, compromising the seal and leading to leaks around the edges of the pan.
On the other hand, overtightening the bolts can compress or damage the gasket, or even strip the threads, preventing the pan from seating properly against the engine block.
Studies by automotive repair experts show that using the incorrect torque when installing the oil pan accounts for up to 20% of repeat leak repairs.
Following the manufacturer’s torque specifications when tightening the bolts ensures a secure, leak-free seal without causing damage.
3. Cracked or Damaged Oil Pan
Because the oil pan is located on the underside of the vehicle, it is susceptible to damage from rocks, road debris, or impacts from speed bumps and curbs.
Even a small dent or hairline crack can cause a slow leak that worsens over time.
Aluminum oil pans, which are lightweight and used in many modern vehicles, are more prone to cracking because they are less flexible than steel pans.
Corrosion can also weaken the metal, specially in areas where road salt is frequently used.
Regular inspection of the underside of the vehicle and timely repairs can prevent a small crack from developing into a major problem, avoiding the need to replace the entire oil pan.
4. Faulty Drain Plug or Washer
The oil drain plug is removed and reinstalled every time the oil is changed, making it one of the most common causes of leaks.
If the plug is cross-threaded, overtightened, or reinstalled without replacing the washer or gasket, oil can begin to leak from around the plug hole.
In some cases, a damaged or worn drain plug washer will allow oil to leak even when the plug is fully tightened.
Automotive maintenance guides from manufacturers like Toyota and Honda recommend replacing the drain plug washer at every oil change to ensure a proper seal.
Using the correct torque and inspecting the threads during each oil change can prevent leaks at this location.
5. Previous Poor Repairs
Sometimes, oil pan leaks are not due to normal wear and tear, but rather to mistakes made during previous repairs.
Using poor-quality sealant, installing the wrong type of gasket, or applying the sealant unevenly can all create weak points where oil can eventually leak.
In some cases, quick fixes such as using too much RTV silicone or applying it in the wrong places can lead to blockages in oil passages or gaps in the sealing surface.
Numerous vehicle repair case studies show that low-cost, shortcut repairs are one of the main causes of recurring oil pan leaks.
The best way to avoid this is to follow manufacturer-approved procedures, use high-quality materials and allow sufficient time for the sealant to cure before refilling the engine with oil.
Common Signs and Symptoms of an Oil Pan Leak
Recognizing the signs of an oil pan leak early can prevent serious engine damage and costly repairs.
Because the oil pan is located directly beneath the engine, any leaks from it tend to become apparent long before they cause significant problems.
However, many drivers ignore these warning signs until the problem has already caused internal wear and tear or a significant drop in oil level.
Understanding what to look for and how each symptom relates to the condition of your oil system can help you take immediate action, protect your engine and maintain your vehicle’s reliability.
Below are the most common and important signs that your oil pan may be leaking, explained in simple and practical detail.
1. Oil Stains or Puddles Under the Car
One of the easiest and most obvious signs of an oil pan leak is the appearance of dark, oily stains or small puddles of oil under your parked car.
These stains typically form in the middle of the vehicle, directly beneath the engine area.
Engine oil has a distinctive amber or dark brown color and feels slippery to the touch.
If you notice fresh oil stains on your driveway or garage floor, it’s often a sure sign that oil is leaking from the oil pan or its gasket.
According to automotive maintenance studies, over 60% of oil leaks under a car are first detected by oil stains on the ground.
Placing a clean piece of cardboard or paper under the car overnight can help confirm that a leak is active and originating from the oil pan area.
2. Low Oil Level or Frequent Need for Oil Refills
Consistently low engine oil levels, even without any signs of external oil burning or smoke, can indicate a slow leak from the oil pan.
If you find yourself adding oil more frequently than usual, it doesn’t necessarily mean your engine is consuming it internally—it could simply be leaking.
Regularly checking your oil dipstick is an easy way to track any unusual oil loss.
For most vehicles, the dipstick should show a consistent oil level between the minimum and maximum marks.
If the level consistently drops despite normal driving conditions, it’s a clear warning sign that oil is leaking from somewhere, often from a faulty oil pan gasket or a loose drain plug.
Ignoring this symptom can lead to dangerously low oil pressure, causing severe engine wear or even complete engine failure.
3. Burning Oil Smell from Under the Hood
If you smell burning oil, specially after driving or when the engine is hot, it could mean that leaking oil from the pan is dripping onto hot components like the exhaust pipe or catalytic converter.
When oil comes into contact with these hot surfaces, it vaporizes and emits a strong, pungent odor that’s hard to ignore.
This isn’t just unpleasant—it can also be a fire hazard if not addressed promptly.
Mechanical studies show that engine oil can reach temperatures exceeding 250°F, which is hot enough to smoke or ignite when exposed to exhaust heat.
Detecting this smell early and inspecting the underside of the engine for oil residue can help prevent further damage and potential safety hazards.
4. Smoke Coming from the Engine Area
Smoke coming from under the hood is another serious symptom of an oil pan leak.
This typically occurs when oil is continuously dripping onto the exhaust manifold or other high-temperature parts of the engine, producing white or bluish smoke.
The presence of smoke indicates a significant leak that requires immediate attention.
Continuous exposure to burning oil can also damage sensors, wiring and rubber components in the engine bay.
Automotive diagnostic data shows that vehicles experiencing smoke from the engine due to an oil leak often lose more than half a quart of oil every few days.
If smoke is visible, it’s crucial to stop driving the vehicle until the leak is located and repaired.
5. Oil Pressure Warning Light on the Dashboard
The oil pressure warning light is one of the most important alerts on your dashboard and should never be ignored.
This light typically illuminates when the engine’s oil pressure drops below the safe operating range.
In the case of an oil pan leak, the low oil level means the pump cannot maintain sufficient pressure to properly lubricate the moving parts.
Driving with low oil pressure can rapidly wear down bearings, pistons and crankshaft surfaces, often leading to complete engine failure.
According to vehicle reliability data, engines that run for even a few minutes with insufficient oil pressure can sustain irreversible damage.
If this warning light illuminates, immediately pull over, check the oil level and inspect for leaks under the car.
Taking immediate action can save you thousands of dollars in repair costs.
Tools
| Tool / Material | Description and Purpose |
|---|---|
| Socket Wrench Set | A socket wrench set helps loosen and tighten the bolts holding the oil pan in place. It provides better grip and control, specially in tight spaces under the engine. Using the correct size socket prevents stripping or rounding of the bolt heads. |
| Torque Wrench | A torque wrench ensures that each bolt is tightened to the correct pressure recommended by the vehicle manufacturer. Overtightening can damage the gasket, while undertightening can cause oil leaks. This tool helps create a perfect, leak-free seal. |
| Oil Drain Pan | This is a wide, shallow container used to collect old engine oil when draining it from the oil pan. It keeps the workspace clean and helps to safely collect and dispose of the used oil without spills or mess. |
| Gasket Scraper or Plastic Razor | A gasket scraper or plastic razor is used to remove old gasket material and sealant from the oil pan and engine surface. This provides a clean and smooth surface for the new gasket, which helps prevent leaks. Plastic razors are safer than metal ones because they won’t scratch aluminum parts. |
| New Oil Pan Gasket or RTV Silicone Sealant | A gasket or sealant creates a tight seal between the oil pan and the engine block. A new gasket, made of rubber, cork, or silicone, prevents oil from leaking. Sometimes, instead of a gasket, RTV (room temperature vulcanizing) silicone is used to create a durable, flexible seal. |
| Engine Degreaser | Engine degreaser is a cleaning liquid that removes oil, dirt and grease from the oil pan and surrounding parts. A clean surface allows new sealant or gasket material to adhere properly and makes it easier to detect any future leaks. |
| Jack and Jack Stands or Vehicle Ramps | A jack lifts the vehicle off the ground and jack stands or ramps hold it securely in place. These tools give you ample space to work comfortably under the car. Always use jack stands or ramps for safety – never rely solely on the jack. |
| Replacement Oil and Filter (Optional) | If you need to drain the oil to remove the oil pan, it’s a good idea to change the old oil and filter at the same time. After the repair is complete, fresh oil provides better performance and protection for the engine. |
| Safety Gloves and Goggles | Safety gloves protect your hands from sharp edges, hot oil and chemicals. Goggles protect your eyes from oil splashes or debris while working under the car. Using the correct safety gear reduces the risk of injury during repairs. |
You Need to Keep Safety In-Check
The most important part of any repair is safety, specially when you’re working underneath a vehicle.
Taking the proper precautions from the start can prevent injuries and ensure the repair goes smoothly.
Before beginning any work, be sure to follow some essential safety measures that will protect both you and your car during the repair.
1. Park and Secure the Vehicle
The first step is to park your car on a completely level and solid surface, such as concrete or a garage floor.
This will prevent the vehicle from shifting or tilting while you’re working underneath it.
Avoid parking on slopes, gravel, or soft ground, as jacks or stands can unexpectedly slip.
Once parked, fully engage the parking brake to prevent the vehicle from rolling.
Even a slight movement while working underneath can be dangerous, so this precaution is crucial for safety.
2. Allow the Engine to Cool
Once the car is safely parked, allow the engine ample time to cool before beginning any repairs.
Engine oil and metal components can remain extremely hot after driving – sometimes exceeding 200 degrees Fahrenheit.
Touching them too soon can cause serious burns.
Waiting at least thirty minutes after turning off the engine allows the oil and surrounding parts to cool to a safe temperature.
This cooling period is also a good time to gather your tools and organize your workspace so you can work efficiently when it’s safe to begin.
3. Safely Lift the Vehicle
Once the engine has cooled, use a hydraulic jack to lift the vehicle at the manufacturer-specified lifting points, which can be found in the owner’s manual.
Carefully position the jack to avoid bending or damaging the car’s frame.
Once the car is lifted, slide the jack stands under the correct support areas and slowly lower the vehicle onto them.
These stands are designed to safely support the entire weight of the car.
You can also use heavy-duty vehicle ramps as an alternative if available.
Never rely solely on the jack to support the vehicle, as hydraulic jacks can lose pressure or slip unexpectedly.
After securing the car, give it a slight shake from the side to ensure it is completely stable before going underneath.
4. Wear the Right Safety Gear
Before beginning any repairs, always wear safety equipment.
Safety gloves protect your hands from sharp metal edges, hot oil and debris.
Safety glasses protect your eyes from splashes of oil, rust, or dirt that may fall from the undercarriage.
Wearing long-sleeved clothing and sturdy shoes also provides extra protection against burns and cuts.
These simple but essential steps help minimize risks and allow you to focus on the repair confidently and safely.
Taking the time to properly prepare yourself and your workspace ensures that the rest of the oil pan repair can be completed efficiently, accurately and without incident.
How to Drain the Engine Oil
Draining the engine oil is an essential part of repairing an oil pan leak because it ensures that no oil remains in the system when you remove or reseal the pan.
Any remaining oil can spill during the repair, causing a mess and increasing the risk of contamination when installing a new gasket or sealant.
Draining the oil properly and cleanly also makes it easier to refill with fresh oil later, maintaining proper engine lubrication and performance.
Performing this step carefully ensures both cleanliness and safety during the repair process.
1. Place the Oil Drain Pan in the Right Place
Before loosening any bolts, position an oil drain pan directly below the oil drain plug located at the lowest point of the oil pan.
This plug is designed to be the main outlet for old engine oil.
Ensure the pan is large enough to hold all of your engine’s oil, which is typically four to six quarts for most vehicles.
It’s also helpful to position the pan slightly behind the plug, as the oil will drain at an angle rather than straight down.
Positioning the pan correctly prevents oil from spilling onto the ground or your tools.
If your car has a protective undertray or splash guard covering the oil pan, carefully remove it first to access the drain plug.
2. Remove the Drain Plug
Once the drain pan is in place, use a socket wrench or box-end wrench that fits snugly into the drain plug and loosen it.
Slowly turn the plug anti-clockwise and have your hand ready to grab it as soon as it’s loose, as the oil will begin to drain immediately.
The oil may drain with some pressure initially, so it’s best to stand slightly to the side to avoid splashing.
Allow the oil to drain completely – this may take several minutes, depending on how hot or thick the oil is.
Hot oil flows faster and flushes more sludge and dirt out of the engine.
Letting it drain completely ensures that no old oil remains in the pan, which improves engine health after reassembly.
3. Reinstall the drain plug temporarily
When the oil has completely drained and the flow slows to a trickle, gently reinstall the drain plug to prevent any remaining oil from dripping out while you’re removing the oil pan.
You don’t need to tighten it completely at this stage; a gentle hand tightening or a slight turn with a wrench is sufficient.
This temporary step helps prevent residual oil from leaking onto your workspace while you clean or inspect the oil pan.
Later, when the repair is complete and it’s time to refill with new oil, you’ll remove and clean the plug again and reinstall it properly with a new washer if necessary.
This meticulous process not only keeps your workspace organized, but also ensures that the repair is done professionally and without any mess or leaks.
How to Remove the Oil Pan
Removing the oil pan is a delicate process that requires patience and precision.
The oil pan is located at the bottom of the engine and collects all the engine oil circulating in the system.
Because it is tightly sealed to the engine block with bolts and a gasket, it must be removed carefully to avoid damaging surrounding components.
This step allows you to access the gasket surface, inspect for cracks or leaks and prepare the area for proper resealing.
Working slowly and systematically ensures that the new installation will be properly sealed and that no components are damaged during the process.
1. Disconnect Any Components Obstructing the Oil Pan
Before completely accessing the oil pan, it’s crucial to check for any components that might be blocking it.
In many vehicles, parts such as the front cross-member, exhaust pipe, or transmission bracket may be located directly beneath or around the oil pan.
These components are installed to provide structural support and stability, but they often make accessing the pan difficult.
Using the correct tools, such as a socket wrench or ratchet set, carefully disconnect or unbolt any obstructing parts.
Keep all bolts, nuts and small hardware in a safe place, as you will need to reattach them in the same order later.
If your vehicle has oxygen sensors or wiring near the exhaust, gently disconnect them to prevent damage.
Taking the time to create clear access to the oil pan ensures that you can work comfortably and reduces the risk of accidentally damaging surrounding parts.
2. Systematically Remove All Oil Pan Bolts
Once the area is clear, begin removing the bolts that hold the oil pan in place.
The bolts are typically spaced evenly around the edge of the pan to maintain consistent pressure on the gasket.
It’s crucial to remove them systematically, often starting from one side and working your way around at even intervals, to prevent the pan from warping or bending.
Use a socket wrench to carefully loosen each bolt and then remove them by hand once they are loose.
Some bolts may be longer than others, so note their positions for correct re-installation later.
It’s also helpful to leave a few bolts slightly threaded until you’re ready to completely remove the pan; this prevents the pan from suddenly dropping if the seal breaks.
This step should be performed with patience and attention to detail, as carelessly removing bolts can strip the threads or damage the engine block surface.
3. Gently break the seal
Even after all the bolts are removed, the oil pan may still be stuck to the engine block due to the gasket or sealant seal.
Never use a metal screwdriver or pry bar to force it off, as this can scratch or dent the mating surfaces and cause leaks in the future.
Instead, use a plastic scraper, gasket remover, or a specialized non-metallic prying tool designed for automotive use.
Gently insert the scraper between the oil pan and the engine block to slowly break the old seal.
If the pan is firmly stuck, lightly tap it with a rubber mallet to loosen it without causing damage.
Once the seal is broken, carefully lower the oil pan and drain any remaining oil into a pan.
Place the removed oil pan on a clean surface and prepare it for inspection and cleaning in the next step.
Properly handling this step ensures that the sealing surfaces remain smooth and clean, which is essential for preventing leaks after re-installation.
How to Inspect the Pan and Components
The most crucial part of fixing an oil pan leak is the inspection, as it helps you identify the root cause of the problem and ensures that no hidden damage remains.
Once the oil pan is removed, carefully inspecting each component can prevent future leaks and extend the life of your engine.
A clean, smooth and properly sealed oil pan ensures that engine oil circulates correctly, keeping internal parts lubricated and preventing overheating.
By thoroughly inspecting the pan and surrounding components, you can ensure that the repair will last and function safely.
1. Check the Pan for Cracks or Warping
To begin the inspection, first look for any visible cracks, dents, or bends in the oil pan.
Oil pans are typically made of stamped steel or aluminum and both materials can be easily damaged by road debris, speed bumps, or corrosion over time.
Even a small crack or dent can gradually cause an oil leak that goes unnoticed until the oil level becomes dangerously low.
Hold the pan in good light and run your hand over the surface to feel for any irregularities.
If the oil pan is warped or bent, it will not seal properly against the engine block, even with a new gasket.
In such cases, it’s often better to replace the oil pan rather than attempt to repair it, as an uneven surface can lead to recurring leaks.
For aluminum pans, carefully inspect around the bolt holes, as these areas are prone to hairline cracks due to tightening pressure.
Ensuring the pan is smooth and free from damage is the first step towards a safe and long-lasting repair.
2. Inspect the Gasket Surface for Debris or Damage
Once the oil pan has been inspected, turn your attention to the gasket surface where the pan meets the engine block.
Old gasket material, leftover sealant, or corrosion can prevent the new gasket from sealing properly.
If you see any pieces of the old gasket stuck to the pan or block, they must be completely removed.
Leftover residue creates uneven surfaces that can cause oil leaks even after tightening.
Using your fingers or a plastic scraper, gently remove all remaining pieces of the old gasket.
Avoid scratching or gouging the metal, as even small scratches can cause leaks later.
Look for discoloration or rough spots on the edges that may indicate overheating or previous improper installation.
A clean, flat surface is essential to ensure the new gasket or sealant adheres firmly and evenly when reinstalled.
3. Thoroughly clean both mating surfaces using a degreaser
After removing any remaining debris and inspecting for damage, the next step is to thoroughly clean both the oil pan and engine block surfaces.
Use a good quality engine degreaser or brake cleaner to remove any oil film, dirt, or grease.
This grime can prevent the new gasket or RTV sealant from adhering correctly, potentially causing leaks even after careful installation.
Spray the cleaner onto a cloth and wipe all contact areas until they are completely dry and oil-free.
Be sure to clean around the bolt holes as well, as trapped oil or dirt in those areas can affect torque accuracy during reassembly.
Allow the surfaces to air dry for a few minutes before proceeding.
A clean, dry mating surface ensures a strong, leak-free bond after reinstalling the oil pan.
Taking the time during this inspection and cleaning step helps create a professional-quality seal that can last for thousands of miles without any problems.
How to Install a New Gasket or Apply RTV Sealant
Installing a new gasket or applying RTV (Room Temperature Vulcanizing) silicone sealant is a crucial step in fixing an oil pan leak, as this step creates a tight seal that prevents oil from leaking out of the engine.
The gasket or sealant forms a barrier between the oil pan and the engine block, ensuring that the oil remains contained even under high pressure and temperature.
Doing this correctly ensures proper oil circulation in your engine and prevents future leaks, saving you from costly repairs.
Whether your vehicle uses a pre-formed gasket or RTV sealant depends on the manufacturer’s design, but both methods require careful preparation and precision for a long-lasting seal.
1. If using a gasket: Position it evenly on the pan
When using a traditional gasket, proper alignment is key.
Most oil pan gaskets are made of rubber, cork, or a composite material that compresses slightly when tightened, creating a leak-proof seal.
Before installation, ensure that both the oil pan and engine block surfaces are completely clean and dry.
Gently place the gasket onto the oil pan flange, making sure all bolt holes and edges are properly aligned with the pan.
Even a slight misalignment can lead to oil leaks after installation.
Some gaskets come with small adhesive strips or pins that help hold them in place during installation.
If your gasket doesn’t have these, you can use a small amount of gasket adhesive to lightly tack it in place.
It’s crucial not to use excessive adhesive or RTV on rubber gaskets, as excess material can squeeze into oil passages and restrict oil flow.
Once the gasket is properly seated, the pan is ready to be reattached to the engine block.
2. If using RTV sealant: Apply a continuous 1/8-inch bead along the edge
If your vehicle does not use a pre-formed gasket, RTV silicone sealant serves as the sealing material.
RTV sealant is a flexible, high-temperature compound that adheres directly to metal surfaces, making it effective for sealing irregular surfaces or corners.
To apply it correctly, cut a small hole in the tip of the RTV tube and apply a continuous 1/8-inch bead around the entire edge of the oil pan flange.
The bead should flow smoothly and continuously, specially around corners and bolt holes, as these areas are more prone to leaks.
Consistency is key – too much sealant can seep into the engine, while too little will not create a proper seal.
After application, allow the sealant to cure for approximately ten to fifteen minutes before installing the oil pan.
This short waiting period allows the RTV to become slightly tacky, improving its grip when pressed against the engine block.
3. Wait the specified curing time before tightening
Once the oil pan is installed with either a gasket or RTV, it is crucial to follow the curing instructions provided by the gasket or sealant manufacturer.
Most RTV sealants require approximately one hour of curing time before tightening the bolts and a full 24 hours before refilling the engine with oil.
This curing time allows the sealant to fully harden and create a strong bond that can withstand heat, pressure and vibration.
Tightening the bolts too soon can squeeze out the sealant and create gaps, leading to new leaks immediately after installation.
If a gasket is used instead of RTV sealant, you can tighten the bolts immediately after ensuring proper alignment, but always follow the torque specifications provided in your vehicle’s service manual.
Allowing sufficient time for the gasket or sealant to properly set will create a clean, strong and durable seal that will effectively protect your engine from future oil leaks.
How to Reinstall the Oil Pan
Reinstalling the oil pan is a step that requires precision, patience and attention to detail.
This step determines whether your oil pan repair will be leak-free and long-lasting.
The goal is to reinstall the oil pan evenly and securely so that the gasket or RTV sealant forms a perfect seal with the engine block.
Proper reinstallation not only prevents oil leaks but also ensures stable oil pressure within the engine, which is crucial for lubricating moving components.
While this may seem like a simple task, following the correct procedures—specially torque specifications and tightening sequence—is essential for achieving professional-quality results.
1. Carefully place the pan in place and tighten the bolts by hand
Once the gasket or RTV sealant is properly applied, carefully align the oil pan with the bolt holes on the engine block.
Ensure the gasket or RTV sealant bead remains in place during this step; even slight movement can create a gap that could lead to an oil leak later.
Begin hand-tightening a few bolts at opposite corners of the pan.
Hand-tightening keeps the pan in place and prevents excessive pressure, which could damage the gasket or cause the sealant to leak unevenly.
This stage also gives you a chance to check that the pan is snug against the block without any gaps or misalignment.
If you notice uneven contact, remove the pan and realign it before proceeding.
Working slowly and carefully here ensures a smooth and even sealing surface, preventing potential leaks once the bolts are fully tightened.
2. Using a torque wrench, tighten the bolts in a crisscross pattern according to the manufacturer’s specifications
After hand-threading all the bolts and properly aligning the oil pan, the next step is to tighten them securely using a torque wrench.
A torque wrench allows you to apply the correct amount of pressure specified by the vehicle manufacturer, ensuring the bolts are tight enough to create a seal without damaging the gasket or warping the oil pan.
Tighten the bolts gradually in several passes rather than all at once.
Use a crisscross or star-shaped tightening pattern—starting from the center and working outward—to distribute pressure evenly across the entire oil pan surface.
This method helps prevent gasket damage or uneven compression.
Typical torque specifications for oil pan bolts range from 8 to 12 foot-pounds for small engines and up to 18 foot-pounds for larger vehicles, but always check your service manual for the exact number.
Overtightening is a common mistake that can damage the threads or bend the gasket, leading to future leaks.
Once all bolts are properly torqued, check the pan to ensure it is snug against the engine block and that no sealant has been extruded unevenly.
Taking time with this step will create a tight, even seal that will protect your engine oil and keep your vehicle running smoothly.
How to Refill the Engine Oil
Once the oil pan is securely reattached, the final step is to refill the engine with new oil and check for any leaks.
This stage restores the lubrication system that protects your engine’s internal components from friction and heat.
Failing to properly refill the oil and check for leaks can result in the engine running dry or with low oil pressure, leading to serious mechanical damage.
Refilling the oil also gives you the opportunity to ensure the repair was successful and the new seal is functioning correctly.
Carefully performing this step ensures optimal engine performance and extends the lifespan of your vehicle.
1. Reinstall the Drain Plug with a New Washer if Needed
Before adding new oil, ensure the oil drain plug is securely reinstalled at the bottom of the oil pan.
If your vehicle uses a washer, also known as a crush washer, it’s best to replace it.
This small ring is designed to slightly deform when tightened, creating a tight seal between the plug and the oil pan.
Reusing an old washer can lead to slow leaks, even after a proper repair.
Clean the plug threads thoroughly and initially tighten it by hand to ensure it goes in straight without cross-threading.
Then, use a wrench to tighten it to the manufacturer’s torque specifications – tight enough to seal but not so tight as to damage the threads or the pan.
A properly sealed drain plug prevents future oil leaks and ensures your new oil remains clean and secure within the system.
2. Fill with the Recommended Oil Type and Quantity
After securing the drain plug, remove the oil filler cap located on top of the engine and begin filling with the type and grade of motor oil recommended by the manufacturer.
Every vehicle requires a specific oil based on its engine design, viscosity requirements and operating conditions.
Using the correct oil ensures proper lubrication, cooling and cleaning of engine components.
For example, most modern engines use synthetic or semi-synthetic oil rated between 0W-20 and 5W-30, depending on the climate and manufacturer’s guidelines.
Pour the oil slowly using a funnel to prevent spills and periodically check the oil level with the dipstick while filling.
Do not overfill, as excess oil can increase pressure and cause leaks around seals.
After adding the correct amount of oil, securely replace the oil cap.
Adding new oil after completing the repair not only replenishes the lubrication system but also flushes out any remaining debris from the process.
3. Start the Engine and Check for Leaks
After filling the oil, start the engine and let it idle for a few minutes, carefully observing the oil pan area.
Look under the car for any signs of oil dripping or leaking around the gasket, drain plug, or bolts.
If you see any leaks, immediately shut off the engine and recheck the torque on the bolts and plug.
A few drops of oil dripping from the pan are normal if the pan wasn’t completely cleaned beforehand, but continuous dripping indicates a sealing problem.
Once you’ve confirmed there are no leaks, turn off the engine and wait a few minutes for the oil to settle, then recheck the oil level with the dipstick and top it up if necessary.
Finally, properly dispose of the old oil by taking it to an approved recycling facility or auto parts store.
Completing this step correctly ensures your engine is safely lubricated, leak-free and ready to run efficiently for thousands of miles to come.
How to Check if the Leak Has Been Fixed or Not?
After repairing the oil pan and refilling the engine oil, it’s crucial to ensure the leak has been completely fixed.
Even a small, unnoticed leak can worsen over time and cause significant engine damage due to low oil levels or oil starvation.
Carefully monitoring your vehicle after the repair ensures the new gasket or sealant is properly installed and that no hidden issues remain.
Taking the time to verify the repair not only provides peace of mind but also helps prevent unnecessary repairs and expenses in the future.
A properly repaired oil pan leak will result in the underside of your car remaining completely dry, without any wet spots, stains, or oil residue.
1. Check from Underneath While the Vehicle is Idling for 10-15 Minutes
To begin, start your engine and let the vehicle idle for approximately ten to fifteen minutes on a clean, level surface.
This allows the oil to warm up and circulate throughout the system, enabling you to spot any leaks as the oil reaches its normal operating pressure.
Use a flashlight to inspect the oil pan area, the edges of the gasket and the drain plug for any fresh oil drips or shiny wet spots.
It’s also helpful to place a clean piece of cardboard or a light-colored mat under the vehicle before starting the engine – this makes it easier to clearly see any drips.
If the repair was done correctly, the area around the oil pan should remain completely dry during this test.
If you notice any slow seepage, you may need to slightly re-torque the pan bolts after the engine has cooled down.
Checking immediately after reassembly ensures the seal is functioning correctly under actual operating pressure.
2. Check the Oil Level After Driving for a Short Period
Once the initial checks seem okay, drive your car for about ten to fifteen minutes.
Driving allows the oil to fully warm up and increases the pressure within the lubrication system, potentially revealing any leaks that weren’t visible while idling.
After the drive, park on a level surface and turn off the engine.
Wait a few minutes for the oil to settle, then check the oil level using the dipstick.
The reading should be within the safe range marked on the dipstick.
A drop in the oil level immediately after refilling could indicate a small, persistent leak.
While you’re doing this, re-check under the car for any new oil spots on the ground.
If the oil level remains stable and the underside is still dry, it’s a strong indication that the repair was successful.
3. Check Again After a Day to Ensure No New Leaks
Even if everything looks good initially, it’s wise to re-check the area after a day or two of normal driving.
Oil leaks can sometimes develop slowly due to the engine’s repeated heating and cooling cycles, which can cause small gaps to reopen.
Park the car overnight in a clean, dry spot and check the underside the next morning for any new oil spots or residue.
Also, re-examine the oil pan bolts, drain plug and gasket edges to ensure they remain dry.
Consistent dryness after 24 hours of driving and parking confirms that your repair was done correctly and the oil pan seal is securely in place.
Once you’ve confirmed the area is clean, you can be confident that the leak has been completely fixed.
This final check step completes the repair process and guarantees that your engine is safe, properly sealed and ready for reliable performance for the long term.
How to Temporary Fix Oil Pan Leak – If For Now Immediate Full Repair Isn’t Possible
Sometimes, a complete oil pan repair isn’t immediately possible – you might be waiting for replacement parts, lack access to a lift, or need time to gather the right tools.
In such cases, a temporary fix can help minimize or stop the leak so you can safely drive or prevent further oil loss until a permanent repair can be made.
It’s crucial to understand that these fixes are only short-term solutions; they should never replace a proper gasket replacement or oil pan resealing.
However, if done correctly, they can provide useful protection, prevent environmental contamination and help maintain a safe oil level, which is essential for keeping your engine lubricated and avoiding internal damage caused by low oil pressure.
1. Use Oil Stop Leak Additives as a Short-Term Solution
Oil stop leak additives are specially designed chemical treatments that can help reduce minor oil leaks in the engine’s lubrication system.
These additives work by softening and swelling rubber seals and gaskets, helping them regain their flexibility and temporarily filling those small gaps where oil is leaking.
They are most effective for very small leaks from worn gasket edges or old seals, not for cracks or major damage.
To use them, simply add the product to your engine’s oil fill port after checking for compatibility with your vehicle’s oil type and viscosity.
The additive then circulates with the oil and gradually works to reduce the leak over several engine heat cycles.
It’s important to note that this is not a permanent fix – the chemical treatment eventually wears off and the weakened seal will begin leaking again if it’s not properly replaced.
However, this can buy you valuable time until you can get a full repair.
2. Apply High-Temperature Epoxy or JB Weld for Small Pan Cracks
If the oil pan has a small, visible crack or pinhole leak, a high-temperature epoxy or metal-reinforced compound like JB Weld can be a practical temporary sealing method.
These adhesives are designed to withstand high heat and exposure to oil, making them useful for patching small damaged areas.
To apply them correctly, first completely drain the engine oil and thoroughly clean the damaged area using a degreaser to remove any oil residue.
The surface must be dry and free of contaminants for the epoxy to adhere properly.
After mixing the compound according to the instructions, apply it evenly over the crack, pressing it firmly onto the metal surface.
Allow it to cure completely, which typically takes several hours or overnight depending on the product.
Once hardened, the patch forms a durable seal that can withstand oil pressure and engine vibrations for a limited time.
However, this is not a substitute for welding or replacing the oil pan – it’s a temporary fix until proper repairs can be arranged.
3. Gently Tight the Bolts if They Are Clearly Loose – Never Overtight Them
In some cases, an oil pan leak may simply be due to loose or unevenly tightened bolts, specially if the pan has recently been serviced.
If you see oil seeping from the edges of the gasket, carefully inspect the oil pan bolts for looseness.
Using a torque wrench, gently tighten them according to the manufacturer’s specifications, following a crisscross pattern to distribute the pressure evenly.
Overtightening is a common mistake that can easily crush the gasket, damage the oil pan’s sealing surface, or even crack the pan itself, making the leak even worse.
If loose bolts were the primary cause, tightening them gently and evenly may temporarily slow or stop a minor leak, but if the oil continues to drip, the gasket or sealant may already be damaged beyond repair.
This method should only be used as a temporary fix to reduce the leak until you can perform a proper resealing or replacement of the oil pan.
Read More:
How to Prevent Oil Pan from Future Leaks
Preventing an oil pan leak is far easier and cheaper than fixing one after it occurs.
A few regular habits and maintenance practices can significantly reduce the risk of leaks and extend the life of your vehicle’s oil system.
Because the oil pan is located at the bottom of the engine, it is constantly exposed to heat, vibration, dirt and pressure.
Over time, even minor neglect can lead to gasket failure, plug damage, or cracks.
By regularly inspecting and maintaining the oil pan and its associated components, you can avoid costly damage, maintain proper lubrication and ensure your engine runs smoothly for years to come.
Also, it is seen that silicone RTV seals sometimes fail at the oil-pan mating surface; and the reason could be poor adhesion, contaminated surfaces and it can be incorrect sealant application as well, so you just need to improve the surface treatment and control the sealant beads literally reduces that leakage problems significantly.[¹]
1. Regularly Check Oil Level and Undercarriage for Leaks
Frequent checks are the easiest and most effective way to prevent oil pan leaks.
Checking your oil level every few weeks or before long drives allows you to detect minor drops in oil volume that could indicate a slow leak.
You should also look under your vehicle after parking it overnight, specially for any wet or shiny spots on the oil pan.
Early detection allows you to address minor gasket or plug issues before they escalate into major leaks that can damage the engine.
Regular checks also keep you informed about the health of your oil system, helping you maintain proper oil pressure and temperature.
2. Avoid Hitting Road Debris or Rough Surfaces
The oil pan is close to the ground, making it vulnerable to impacts from rocks, curbs and road debris.
Driving over potholes or rough roads can cause dents or cracks that can eventually lead to leaks.
To avoid such damage, drive cautiously on rough roads and if your car has low ground clearance, consider installing an engine skid plate for added protection.
Avoiding sudden impacts protects not only the oil pan but also other components such as the exhaust system and transmission housing, all located near the undercarriage.
3. Replace Gaskets and Drain Plug Washers When Changing Oil
A key part of preventing leaks is replacing old or worn gaskets and washers during every oil change.
Over time, heat and pressure cause these rubber or metal seals to harden, crack, or lose their elasticity.
A worn gasket or washer cannot properly seal, allowing oil to leak around the pan or drain plug.
When changing the oil, take a moment to inspect the gasket and plug washer – if they show any signs of flattening or wear, replace them immediately.
Using new seals ensures a tight, reliable fit and significantly reduces the likelihood of future leaks.
4. Use High-Quality Gaskets and Sealants
Investing in high-quality materials during repairs or replacements is one of the best preventative measures you can take.
Premium gaskets made from durable materials like silicone, cork-rubber blends, or multi-layer steel can withstand engine heat and oil pressure far better than cheaper options.
Similarly, using a high-grade RTV silicone sealant creates a flexible, long-lasting bond between metal surfaces.
Cheaper sealants can dry out, crack, or deteriorate due to vibrations, leading to oil leaks.
Quality products not only provide superior sealing but also extend the time between maintenance, saving you from frequent repairs and costly oil leaks.
Conclusion – How to Fix an Oil Pan Leak
Engine health should be your top most priority in terms of maintaining long term good condition of your vehicle and that’s why this leaks on the oil pan becomes really important to be fixed as soon as possible.
Furthermore, you should understand the causes, symptoms and step-by-step repair process.
This not only empowers you as a vehicle owner but also helps you make better decisions regarding maintenance.
Oil pan leaks are often caused by damaged gaskets, loose bolts, or impact damage and addressing them promptly prevents dirt and debris from damaging the engine’s internal components.
Whether you perform the repair yourself or seek professional help, ensuring the oil pan and its sealing surfaces are clean, properly tightened and regularly inspected is crucial for long-term success.
Regularly checking oil levels, replacing gaskets on time and using high-quality sealants significantly reduce the likelihood of recurring leaks.
Driving cautiously on rough roads is equally important, as even minor impacts to the chassis can cause damage or cracks in the pan.
Proper oil maintenance isn’t just about preventing leaks—it’s also about protecting the overall health of the engine, improving fuel efficiency and extending the lifespan of your vehicle.
Ultimately, repairing and preventing oil pan leaks is a combination of technical care and awareness.
A properly sealed oil system ensures smooth operation, consistent oil pressure and improved performance over time.
Taking preventative steps today—such as checking for leaks, properly tightening bolts and using the correct materials—can save you from major mechanical problems in the future.
Understanding the correct way to identify and fix oil pan leaks not only provides peace of mind but also the confidence to maintain one of the most critical systems in your car’s engine.
Now, you can ask some questions related to this guide in the comment section.
Frequently Asked Questions
Q1. Why does an oil pan leak?
Answer: Oil pan leaks typically occur when the gasket sealing the oil pan to the engine block becomes old, hardened, or damaged. Over time, the heat from the engine causes the gasket to harden and lose its flexibility, allowing oil to seep out. Other common causes include loose or overtightened bolts, cracks or dents in the oil pan from road debris or curbs and a faulty or worn drain plug washer. Sometimes, previous poor repairs or the use of low-quality sealants can also create weak sealing points that eventually begin to leak. Regular inspections and careful installation during oil changes can help prevent most of these problems.
Q2. How do I know if my oil pan is leaking?
Answer: You can usually detect an oil pan leak by noticing fresh oil stains or puddles under your parked car. You might also notice a low oil level even after a recent oil change, or smell burning oil from under the hood when the oil drips onto hot engine parts. In more severe cases, you might see smoke coming from the engine bay or have a low oil pressure warning light illuminate on your dashboard. If you notice any of these signs, it’s best to inspect under the car or take it to a mechanic to pinpoint the exact source of the leak before it worsens.
Q3. Can I drive with an oil pan leak?
Answer: Driving with an oil pan leak is not recommended as it can quickly lead to serious engine problems. Even a small leak can cause a slow but steady loss of oil, resulting in reduced lubrication inside your engine. Without sufficient oil, the metal parts of the engine can rub against each other, causing heat, friction and ultimately damage to vital components. In the worst-case scenario, running the engine with very little oil can cause complete engine failure. If you absolutely must drive the car before getting the leak repaired, keep a close eye on your oil level and top it up as needed, but get it fixed as soon as possible to avoid long-term damage.
Q4. How much does it cost to fix an oil pan leak?
Answer: The cost of fixing an oil pan leak depends on the cause and the type of vehicle. If the problem is simply a faulty gasket or loose bolts, it can cost anywhere from $50 to $150 if you do it yourself, with most of the cost going towards materials such as the gasket, sealant and fresh oil. However, if you take it to a professional mechanic, the cost of replacing the gasket can range from $250 to $600 depending on the labor rate and the vehicle’s design. If the oil pan itself is cracked or damaged and needs replacing, the cost can be $1,000 or more for some models. Repairing damaged drain plug threads or replacing the oil pan can also increase the price.
Q5. How long does it take to fix an oil pan leak?
Answer: Fixing an oil pan leak can take anywhere from two to five hours, depending on the severity of the leak and the design of your car. A simple gasket replacement typically takes two to three hours if all the parts are easily accessible. However, some vehicles have components such as cross-members, exhaust pipes, or suspension parts that obstruct the oil pan, which can increase the time required for disassembly and reassembly. If RTV sealant is used instead of a gasket, it’s also important to allow adequate drying time before adding oil or running the engine – typically between 30 minutes and 24 hours.
Q6. Can I fix an oil pan leak myself?
Answer: Yes, if the problem is minor and you have the right tools, patience and workspace, you can fix an oil pan leak yourself. DIY repairs are suitable when the leak is due to a faulty gasket or a loose drain plug. You will need a jack, jack stands, a socket wrench, a gasket scraper and a new gasket or RTV sealant. However, you should only attempt the repair if you are comfortable working under the car and can follow proper safety procedures. For larger leaks, such as those caused by a cracked oil pan, damaged bolts, or leaks from surrounding seals, it’s best to consult a professional mechanic, as these repairs require specialized equipment and expertise.
Q7. What type of sealant should I use for the oil pan?
Answer: If you are not using a pre-cut gasket, a high-quality RTV (Room Temperature Vulcanizing) silicone sealant is recommended for sealing the oil pan. This type of sealant is designed to withstand high temperatures, exposure to oil and engine vibrations. Be sure to apply a thin, even bead – typically about 1/8 inch – around the edge of the pan and around the bolt holes. Clean both surfaces thoroughly before applying the sealant and wait for the specified curing time before tightening the bolts or adding oil. Using a low-quality or incorrect type of sealant can lead to a quick recurrence of the leak.
References:
[1] Analysis and Solution of Oil Leakage from Silicone Sealed Oil Sump
https://www.clausiuspress.com/assets/default/article/2022/10/31/article_1667207959.pdf

Guys, I’m a car audio enthusiast and customization expert and I love clear sound and clean installation. Plus, I have spent years helping people build their dream audio setups. And whenever I’m working on cars, I probably listen to music and thinks about the next big upgrade.