Written By: Don Dodi
Fact Checked By: Kristen Brown
Reviewed By: Diego Rosenberg
You need to understand this basic thing: a car can run for a short period of time with the battery light on, but once the battery is completely drained then the engine can literally shut off without any kind of warning and that can lead you halfway down the road.
Because, in most of the vehicles; the battery light is actually connected to the alternator, voltage regulator and battery itself as well.
And, according to the automotive service data that shows that battery and charging system issues are among the most common factors of having roadside breakdowns.
Additionally, you should not assume the light means the battery is completely dead, but in reality the problem often comes from a failing alternator, loose wiring or it can be a worn serpentine belt as well.
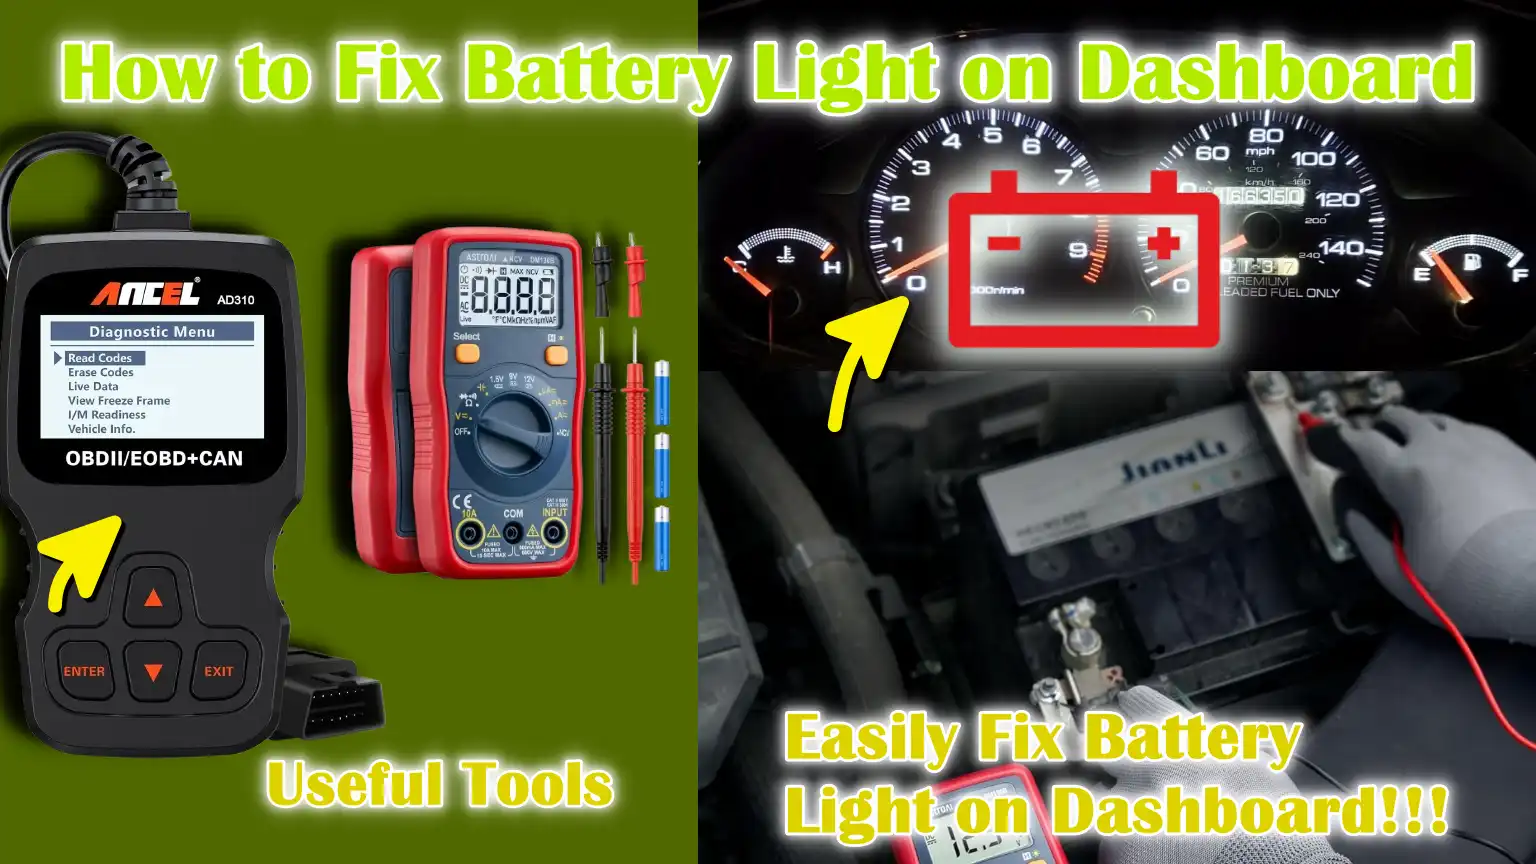
That’s why, we have come up with this guide on How to Fix Battery Light on Dashboard, so that you can ensure your vehicle always get stable power, as if the power system fails then your vehicle can lose the power to critical components such as: headlights, fuel injection systems, ignition coils and dashboard electronics as well.
Now, Understand About the Car Charging System First
The car charging system is responsible for generating, controlling and delivering electricity to your vehicle.
It keeps the battery charged and powers vital components like the engine control unit, fuel injectors, headlights, infotainment system and dashboard instruments.
According to Automotive Service Guidance published by the National Institute for Automotive Service Excellence, most modern vehicles run on a 12-volt electrical system, which relies on a properly functioning charging system to maintain a stable voltage.
When the engine is running, the charging system must generate more power than the vehicle consumes, while also recharging the battery.
If even one part fails, the battery light may come on and the vehicle may eventually stall.
Understanding how each part works helps drivers detect problems early, prevent unexpected breakdowns and avoid costly repairs.
1. The Role of the Car Battery
The car battery stores electrical energy and provides the initial power needed to start the engine.
When you turn the key or press the start button, the battery sends a strong surge of electricity to the starter motor, which cranks the engine.
In most passenger vehicles, a fully charged battery should have about 12.6 volts when the engine is off.
The battery also stabilizes the voltage and provides power when electrical demand briefly exceeds the alternator’s capacity.
However, once the engine is running, the battery is no longer the primary power source.
If the charging system fails, the battery alone can usually only power the vehicle for a short time before it is completely discharged.
Therefore, a battery light doesn’t always mean the battery itself is bad; it may simply be not receiving a proper charge.
2. What the Alternator Does
The alternator is the heart of the charging system.
Its primary function is to generate electricity when the engine is running.
It converts mechanical energy from the engine into electrical energy through electromagnetic induction.
Simply put, when the engine turns the alternator, it creates alternating current, which is then converted to direct current to power the vehicle and recharge the battery.
A properly functioning alternator typically produces between 13.7 and 14.7 volts when the engine is running.
This voltage range ensures that electrical components function properly without damaging sensitive electronics.
If the alternator’s output drops too low, the battery will begin to drain.
If it increases too much, it can overcharge and damage the battery and other electrical components.
A faulty alternator is the most common reason for a battery warning light to appear on the dashboard.
3. The Importance of the Voltage Regulator
The voltage regulator controls how much electrical power the alternator sends to the battery and the rest of the vehicle.
Its job is to keep the voltage within a safe and stable range.
Without proper regulation, voltage can fluctuate wildly, causing lights to flicker, electronics to malfunction, or the battery to overheat.
In older vehicles, the voltage regulator was often a separate part, but in most modern cars it’s built into the alternator itself.
Maintaining a stable voltage is crucial because modern vehicles have many sensitive electronic control modules.
Even small fluctuations in voltage can cause warning lights, poor performance, or long-term electrical damage.
The voltage regulator ensures that the entire system runs smoothly and safely.
4. The Function of the Serpentine Belt
The serpentine belt is a long rubber belt that transmits mechanical power from the engine to various parts, including the alternator.
When the engine runs, the crankshaft turns the serpentine belt, which then turns the alternator pulley.
If the belt becomes loose, torn, or broken, the alternator will not rotate properly and stop producing power.
This can cause the battery light to immediately illuminate.
In many vehicles, the serpentine belt powers the power steering pump, air conditioning compressor and sometimes even the water pump.
Therefore, a broken belt can cause several system failures.
Regularly inspecting the belt for wear and stretch is an important preventive maintenance step.
5. How All Parts Work Together to Charge the Vehicle
When you start the engine, the battery provides the initial power needed to crank it.
Once the engine is running, the serpentine belt turns the alternator.
The alternator then produces electricity to power the vehicle’s systems and recharge the battery.
The voltage regulator ensures that this electricity remains within a safe range, typically between about 13.7 and 14.7 volts.
Together, these parts form a balanced system that keeps the vehicle running reliably.
If any one part fails, the system cannot maintain the correct voltage and the battery light will illuminate to alert the driver.
Understanding this simple but essential relationship between the battery, alternator, voltage regulator and serpentine belt makes it much easier to identify problems early and keep the vehicle reliable.
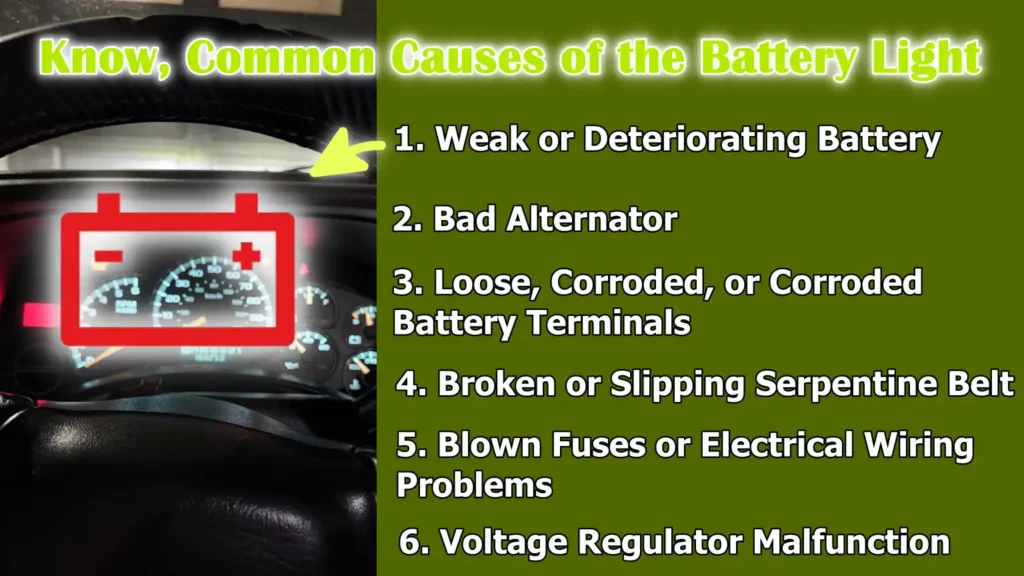
Know, Common Causes of the Battery Light
The battery warning light comes on when the vehicle’s charging system isn’t functioning properly.
In most modern vehicles, this light doesn’t just indicate a bad battery.
It usually means the system isn’t generating or controlling power properly.
The charging system should maintain a stable voltage, typically between 13.7 and 14.7 volts with the engine running.
If the voltage drops too low or rises too high, a warning light will illuminate on the dashboard.
According to guidance from the National Highway Traffic Safety Administration, malfunctions in the electrical system can increase the risk of breakdowns and sudden power outages while driving.
Understanding the common causes behind this warning light helps drivers take immediate action and avoid getting stranded.
1. Weak or Deteriorating Battery
A weak or deteriorating battery is one of the most common causes of a battery light.
The battery stores electrical energy and helps maintain voltage in the vehicle.
If the battery isn’t charging properly, the system may detect irregular voltage levels and trigger a warning light.
Batteries can weaken due to age, extreme temperatures, frequent short trips, or leaving lights and accessories on for extended periods.
When the plates inside the battery wear down or sulfate builds up, the battery loses its ability to store energy efficiently.
Even if the engine starts, the battery may fail and won’t be able to properly support the electrical system.
Signs of a Bad Battery
A bad battery usually gives several warning signs before it fails completely.
The engine may crank slowly when starting, specially in the morning or in cold weather.
Headlights may shine dimly and interior lights may flicker.
Power windows may operate slowly and electronic systems may not function properly.
In some cases, turning the key may produce a clicking sound instead of the engine starting.
A swollen battery case or a rotten egg-like smell may indicate internal damage.
If the battery voltage drops below about 12 volts when the engine is off, it may not be able to hold a charge properly.
Average Lifespan of a Car Battery
Most car batteries last three to five years under normal driving conditions.
However, this lifespan can be reduced in extreme heat, as heat accelerates chemical reactions within the battery and increases internal wear.
Frequent short trips also shorten battery life because the alternator doesn’t have enough time to fully recharge it.
Regular testing with a multimeter or battery tester can help identify weaknesses early.
Replacing the battery before it’s completely drained can prevent unexpected failures and protect other components of the charging system.
2. Bad Alternator
A bad alternator is one of the most serious causes of a battery warning light.
The alternator generates electricity and recharges the battery when the engine is running.
If it fails, the battery will begin to drain because it is no longer receiving power.
Alternator failure can be caused by worn internal bearings, damaged diodes, broken wiring, or overheating.
As the alternator powers most electrical components when the engine is running, a failure can quickly cause system problems.
Symptoms of a Bad Alternator
When an alternator begins to fail, several symptoms may appear.
The battery light is often the first sign.
Headlights may dim or flicker while driving.
Dashboard lights may suddenly flash or dim.
You may hear strange noises from the engine area, such as grinding or grinding noises.
In some cases, electronic features, such as the radio or air conditioning, may stop working properly.
If the alternator’s output drops below about 13 volts when the engine is running, it may not be charging the battery properly.
How Alternator Problems Affect Driving
If the alternator stops working completely, the vehicle will continue to run until the battery’s stored power is depleted.
Once the battery is depleted, the engine may stall without warning.
The power steering, fuel injection and ignition systems may stop working.
This can be dangerous, specially at highway speeds.
Therefore, it’s important to have alternator problems repaired immediately as soon as the battery light comes on.
3. Loose, Corroded, or Corroded Battery Terminals
Loose, corroded, or corroded battery terminals can disrupt the flow of electricity between the battery and the rest of the vehicle.
Even if the battery and alternator are in good condition, poor connections can interfere with proper charging.
Corrosion appears as a white, blue, or green powdery substance around the battery terminals.
This buildup increases electrical resistance and reduces current flow.
How Corrosion Interferes with Charging
Corrosion creates a blockage between the battery posts and cable connectors.
Electricity cannot pass properly, causing voltage drops and charging problems.
Even if the alternator is producing plenty of power, poor contacts can prevent it from reaching the battery.
Over time, this can cause warning lights to flash frequently and start problems.
Visual Tips
A simple visual inspection can help identify terminal problems.
Look for powdery deposits, corrosion, broken cables, or loose clamps.
Gently shake the cable connectors to see if they are secure.
Always turn off the engine before checking the battery.
Cleaning the terminals with the right battery cleaner and tightening loose connections can often fix the problem quickly.
4. Broken or Slipping Serpentine Belt
The serpentine belt transfers mechanical power from the engine to the alternator.
If the belt breaks or slips, the alternator will not rotate properly and stop generating power.
This can cause the battery light to turn on immediately.
How the Belt Powers the Alternator
When the engine runs, the crankshaft rotates and turns the serpentine belt.
The belt then turns the alternator pulley, allowing it to generate electricity.
Without this rotation, the alternator cannot generate power.
A properly tensioned belt ensures efficient energy transfer and stable charging.
Warning Signs of Belt Failure
A worn belt may have cracks, scratches, or shine on its surface.
You may hear a squealing sound when starting or accelerating the engine.
If the belt breaks completely, you may lose not only charging capability but also power steering and air conditioning.
It’s essential to replace it immediately to ensure proper functioning.
5. Blown Fuses or Electrical Wiring Problems
Blown fuses or faulty wiring can disrupt the charging system.
Modern vehicles rely on multiple electrical circuits to monitor and control charging.
If a fuse connected to the alternator or battery circuit fails, the system may stop functioning properly.
How Faulty Wiring Affects Charging
Faulty wiring can cause open circuits or short circuits.
Open circuits prevent electricity from flowing, while short circuits can cause excessive current and cause fuses to blow.
Either problem can prevent the alternator from properly charging the battery.
Heat, vibration and age often cause the wiring insulation to crack or deteriorate.
Common Electrical Failures
Common failures include loose ground connections, bad connectors, blown alternator fuses and faulty battery sensors.
Modern vehicles may also have smart charging systems controlled by the engine control module.
If the sensors or modules malfunction, they can falsely signal a charging problem and turn on the battery light.
6. Voltage Regulator Malfunction
The voltage regulator controls how much power the alternator sends to the battery.
If it malfunctions, the system can either overcharge or undercharge the battery.
Both situations can cause the battery warning light to illuminate and lead to serious problems.
Overcharging vs Undercharging Problems
Overcharging occurs when the voltage exceeds a safe level, often above 15 volts.
This can cause the battery to overheat, lose fluid and cause damage.
Lights may flash abnormally brightly and electronic parts may deteriorate over time.
Undercharging occurs when the voltage remains below the normal charging range, often below 13 volts while driving.
This prevents the battery from reaching its full capacity and eventually drains it.
Maintaining the correct voltage is essential to protect both the battery and the vehicle’s sensitive electronic systems.
Is It Safe to Drive With the Battery Light On?
When the battery light comes on while driving, it means the vehicle’s charging system is malfunctioning.
In most cases, the problem isn’t just with the battery, but also with the alternator or another component of the charging system.
When this happens, the car typically runs on the remaining power stored in the battery.
A fully charged 12-volt battery is designed primarily for starting the engine, not for long-term driving.
Modern cars rely heavily on electricity to power the fuel injection system, ignition coil, engine computer, power steering system, safety sensors and lighting.
According to safety guidance published by the National Highway Traffic Safety Administration, electrical system failure can increase the risk of sudden breakdowns and loss of vehicle control.
Because modern vehicles rely heavily on stable electrical power, ignoring the battery warning light can quickly turn a minor problem into a serious safety issue.
Understanding how long you can drive and when to stop is important for both your vehicle and your safety.
1. How Long You Can Drive Safely
How far you can drive with the battery light on depends on the condition of the battery and the electrical load being used.
If the alternator is completely damaged, the car can only run until the battery is completely drained.
In many cases, this can range from 15 minutes to about an hour.
However, if the headlights, air conditioning, heated seats and other accessories are on, the battery will drain much faster.
If the problem is a loose connection or a weak battery, but the alternator is still working slightly, you can drive longer.
There’s no guarantee of a safe distance, as every vehicle and situation is different.
The safest approach is to immediately reduce power usage and get to the nearest repair center without delay.
2. Danger of Engine Stalling
The biggest risk of driving with the battery light on is the engine suddenly stalling.
When the battery loses significant charge, it can no longer power vital systems like the fuel pump, ignition system and engine control module.
If these systems fail, the engine can stall even while the vehicle is moving.
This can be very dangerous on the highway or in heavy traffic because you can lose power steering and power-assisted braking at the same time.
Steering becomes difficult and braking may require more effort.
Sudden stops can increase the risk of a collision, specially if other drivers are not expecting you to slow down suddenly.
3. Potential Damage to Electronics
Driving with a charging problem can also damage sensitive electronic parts.
Modern vehicles contain many computer modules that require a stable voltage, typically between 13.7 and 14.7 volts.
If the voltage drops too low, systems can malfunction or shut down.
If the voltage rises too high due to a faulty voltage regulator, it can lead to overcharging.
Overcharging can damage the battery, burn out light bulbs and damage the control module, sensors and infotainment system.
Replacing the electronic control unit can be expensive, sometimes even more expensive than replacing the battery or alternator.
Taking immediate action when the battery light appears can prevent these costly damages.
4. When to Stop Driving Immediately
If you notice other warning signs along with the battery light, you should stop driving immediately.
These signs include dim headlights, flickering dashboard lights, warning messages for various systems, a burning smell, strange noises or grinding sounds from the engine area, or steering problems.
If the temperature gauge suddenly rises or multiple warning lights appear simultaneously, the problem could be more serious, such as a broken serpentine belt that also powers the water pump.
In such cases, continuing to drive could cause the engine to overheat and cause serious mechanical damage.
If the vehicle begins to lose power or becomes unstable, stop in a safe place as soon as possible and turn off the engine.
It’s better to stop quickly and call for help than to risk a sudden engine failure while driving.
How to Fix the Battery Light on the Dashboard – Clear & Easy Instructions
Fixing a battery light requires a calm and logical approach.
A warning light usually means the charging system isn’t maintaining the correct voltage.
In most vehicles, the charging system should produce between 13.7 and 14.7 volts when the engine is running.
If the voltage is outside this range, the dashboard warning light turns on.
Modern vehicles rely heavily on stable electrical power to operate the fuel injection system, ignition coil, engine computer, safety sensors and lighting.
According to technical guidance from the National Institute for Automotive Service Excellence, a proper diagnosis begins with a basic inspection and voltage testing before replacing parts.
Following the steps below one by one can help avoid unnecessary repairs and save money.
How to Turn Off Unnecessary Electrical Accessories
When the battery light comes on while driving, first reduce the electrical load on the vehicle.
Turn off the air conditioning, heated seats, rear defroster, infotainment screen, interior lights and any phone chargers.
Electrical accessories draw power from the charging system and reducing the load can slow battery drain.
If the alternator is weak but still working a little, reducing the demand can help maintain enough voltage to keep the engine running until you reach the repair site.
This step doesn’t fix the problem, but it reduces stress on the system and may prevent sudden engine shutdown.
1. Reduce the load on the charging system
When electrical demand is high, the alternator has to work harder to supply current.
If it can’t meet this demand, the voltage drops and the battery begins to discharge.
By reducing power usage, you allow remaining system capacity to focus on essential components like the fuel pump, ignition system and engine control module.
This simple task can provide more driving time in an emergency and protect sensitive electronics from unstable voltage.
How to Check the Battery Terminals
After safely parking the vehicle and turning off the engine, open the hood and check the battery terminals.
Loose, corroded, or damaged terminals can interfere with charging, even if the alternator is working properly.
Corrosion often appears as a white, blue, or green powder around the battery posts.
Loose connections can cause voltage drops and trigger warning lights.
1. How to Clean Corrosion Safely
Before cleaning, ensure the engine is off and remove the key.
Wear gloves and eye protection.
Disconnect the negative cable first, then the positive cable.
Use a battery cleaning brush or a mixture of baking soda and water to neutralize and remove the corrosion.
Gently scrub the terminals until the metal surface is clean and shiny.
Rinse with clean water and dry thoroughly before reconnecting the cables.
Always reconnect the positive terminal first, then the negative terminal.
Proper cleaning restores a strong electrical contact and may fix the warning light problem if corrosion was the cause.
2. Tools
Basic tools are usually sufficient for this step.
A wrench or socket set is needed to loosen the battery clamps.
A battery terminal cleaning brush helps remove corrosion effectively.
Gloves and safety glasses protect against acid residue.
A clean cloth is also useful for drying the area.
It’s also advisable to have a multimeter ready for the next step.
How to Check the Battery Voltage
Testing the voltage provides a clear picture of the health of the battery and charging system.
A digital multimeter is an inexpensive and effective tool for this task.
Set the multimeter to measure DC voltage and connect the red probe to the positive battery terminal and the black probe to the negative terminal.
1. Using the Multimeter
With the engine off, a healthy, fully charged battery should read approximately 12.6 volts.
A reading between 12.4 and 12.6 volts usually indicates a good charge.
If the reading is below 12.2 volts, the battery may be weak or discharged.
After recording the reading with the engine off, start the engine and measure again.
This indicates whether the alternator is charging properly.
2. Normal Voltage Readings: Engine Off vs On
When the engine is running, the voltage should rise to approximately 13.7 to 14.7 volts.
This indicates that the alternator is generating power and recharging the battery.
If the voltage remains around 12 volts when the engine is running, the alternator may not be charging.
If the voltage exceeds 15 volts, the voltage regulator may be faulty and overcharging is occurring.
Both low and high readings require further investigation.
How to Check the Serpentine Belt
The serpentine belt connects the engine’s crankshaft to the alternator.
Without this belt rotating properly, the alternator cannot deliver power.
Look for cracks, wear, glazing, or missing parts on the belt.
Gently press the belt to check for proper tension.
1. How to Check for Cracks or Looseness
Carefully examine the entire belt surface.
Small cracks on the ribs or shiny glazed areas indicate wear.
A loose belt may feel loose and make a creaking sound when the engine starts.
If the belt is broken or slipping, it should be replaced immediately.
A bad belt can stop charging and affect the power steering and engine cooling system.
How to Test the Alternator Output
If the battery and belt appear normal, the alternator should be tested.
This is done by measuring the voltage on the battery while the engine is running and observing how the system responds to electrical load.
1. Voltage Test Method
Start the engine and let it idle.
Measure the voltage at the battery terminals.
Turn on the headlights and other accessories to increase the load, then check the voltage again.
It should remain within the normal charging range.
If the voltage drops well below 13 volts or fluctuates significantly, the alternator may be faulty.
Some vehicles may require professional load testing equipment for a more accurate diagnosis.
2. Signs of Alternator Failure
Common signs include dim lights, flickering on the dashboard display, noises coming from the engine area, frequent battery drain and difficulty starting.
If the alternator cannot maintain a stable voltage, the battery light will remain on.
In many cases, replacing the alternator will completely fix the problem.
How to Replace the Faulty Component
Once testing confirms the problem, the final step is to replace the faulty component.
The most common replacements are the battery or alternator.
1. Battery Replacement Basics
To replace the battery, first disconnect the negative cable, then the positive cable.
Remove the hold-down bracket and lift the battery carefully, as it is heavy.
Install the new battery in the same location and reconnect the positive cable first, then the negative cable.
Make sure all connections are tight.
After installation, start the engine and confirm that the battery light has turned off.
2. Alternator Replacement Overview
Replacing the alternator typically requires removing the serpentine belt and disconnecting the electrical connectors and mounting bolts.
This process varies depending on the vehicle model.
After installing the new alternator and reinstalling the belt, start the engine and check the charging voltage with a multimeter.
Correct installation should restore normal voltage levels and turn off the battery warning light.
If the light remains on after replacement, further diagnostics may be required to check the wiring or control module.
How to Reset the Battery Light
When the charging system is functioning properly, the battery light usually turns off automatically.
The warning light is controlled by the vehicle’s onboard computer, which constantly monitors the system voltage.
In most modern vehicles, the computer requires a charging voltage of approximately 13.7 to 14.7 volts when the engine is running.
If the voltage returns to normal after fixing a loose connection, replacing the battery, or repairing the alternator, the system will often turn off the warning light automatically after a short drive.
However, in some cases, the light may remain on because the computer has stored a fault code.
The battery light should only be reset after confirming that the underlying problem has been completely fixed.
Resetting the light without correcting the problem will not solve the problem and could lead to a breakdown later.
1. When the Light Resets Automatically
In many vehicles, the battery light resets automatically when the charging system stabilizes.
After repairs are complete, start the engine and let it idle for a few minutes.
If the alternator is charging properly and the voltage is within the normal range, the computer may turn off the warning light during the same drive cycle.
Sometimes it may take several start-and-stop cycles for the system to completely clear the warning.
Driving the vehicle under normal conditions for 10 to 20 minutes often allows the computer to recalibrate the system and confirm proper operation.
If the light remains on even when the voltage readings are normal, an electrical fault may be stored in the system memory.
2. Safely Disconnecting the Battery
Disconnecting the battery can reset many vehicle warning lights by clearing stored fault codes.
Before doing this, make sure the ignition is completely off and the key is removed.
Open the hood and locate the battery.
Always disconnect the negative terminal first to reduce the risk of an electrical short circuit.
Wait at least 10 to 15 minutes before reconnecting it.
This will dissipate any remaining electrical charge in the system.
After safely reconnecting the negative terminal, start the engine and check if the battery light goes off.
Note that disconnecting the battery may reset other settings, such as the clock time, radio presets and sometimes engine learning data.
In some vehicles, disconnecting the battery may not clear all codes, specially newer models with advanced control systems.
3. Using an OBD-II Scanner
An OBD-II scanner is one of the most accurate ways to reset the battery light.
Most vehicles manufactured after 1996 are equipped with an on-board diagnostics system that stores fault codes related to the engine and charging system.
The diagnostic port is usually located under the dashboard, near the steering column.
Plug the scanner into the port and, without starting the engine, turn the ignition key to the On position until the scanner’s instructions say otherwise.
The scanner will display stored trouble codes that indicate the cause of the warning.
After confirming the repair is complete, you can use the scanner’s Clear function to erase the codes.
Once cleared, start the engine and check that the battery light does not return.
Using a scanner is safer and more reliable than removing the battery, as it allows you to pinpoint the exact cause of the warning and ensure the problem is properly fixed.
Tools
| Tool | Why You Need It |
|---|---|
| Multimeter | You use it to test the battery voltage with the engine off and running. This tells you whether the alternator is charging within the normal range of approximately 13.7 to 14.7 volts. Without it, you can only guess. |
| Socket Wrench Set | You need it to disconnect battery cables, remove the battery hold-down bracket, or remove the alternator if it needs to be replaced. The right tools prevent damage to bolts and connectors. |
| Battery Terminal Cleaner | Clean terminals allow electricity to flow smoothly from the battery to the vehicle. Corrosion can prevent charging and cause the battery light to come on. Cleaning often solves simple charging problems. |
| OBD-II Scanner | You use it to determine the exact cause of the battery light. After fixing the problem, you can clear the fault code and reset the warning light safely and correctly. |
| Protective Gloves and Safety Glasses | Working around a car battery can expose you to acid residue and electrical sparks. Wearing protective gear while checking or repairing the charging system reduces the risk of burns, cuts, or eye injuries. |
Now, Know What Can Be The Estimated Repair Costs
Understanding repair costs helps you be financially prepared and avoid overpaying.
The total cost of fixing a battery light problem depends on the part that’s broken, the type of vehicle you drive, your location and whether you want to fix it yourself or hire a professional mechanic.
Generally, parts like the battery and serpentine belt are cheaper than the alternator.
Labor costs can vary greatly, as some vehicles are easy to find while others require more time to dismantle.
Knowing the general price range helps you make informed decisions and compare repair quotes with confidence.
1. Battery Replacement Costs
Replacing a standard 12-volt car battery typically costs between $80 and $250, depending on the brand, battery type and warranty period.
Basic lead-acid batteries are generally on the lower end of the price range, while absorbed glass mat batteries, often called AGM batteries, are more expensive because they offer better performance and longer life.
Installation labor at a repair shop can cost an additional $20 to $50 if not included in the purchase price.
Most car batteries last approximately three to five years, so replacement is considered normal maintenance.
It’s important to choose a battery with the correct cold cranking amps rating for your vehicle, as low starting power can lead to frequent charging problems.
2. Alternator Replacement Cost
Alternator replacement is typically more expensive because the parts are more expensive and installation takes longer.
The total cost often ranges from $300 to $900, including both parts and labor.
The alternator itself can cost between $150 and $600, depending on the vehicle model and whether the part is new or remanufactured.
Labor charges can range from $100 to $300, as some alternators are easily accessible, while others require removing a belt, bracket, or engine cover.
Because the alternator is responsible for generating a charging voltage of approximately 13.7 to 14.7 volts, replacing the faulty unit restores stable power to all electrical systems and prevents further damage to the battery.
3. Serpentine Belt Replacement Cost
Replacing the serpentine belt is generally one of the most inexpensive repairs related to the charging system.
The belt itself typically costs between $25 and $75.
Including labor, the total cost often ranges from $75 to $200.
The final cost depends on the vehicle’s design and how easy it is to access the belt tensioner.
A worn or broken belt can prevent the alternator from rotating properly, causing charging to stop immediately.
Replacing belts at the first sign of wear can prevent major problems in some vehicles, such as power steering failure or engine overheating.
4. DIY vs Mechanic Cost Comparison
Do-it-yourself repairs can significantly reduce labor costs, but require basic tools, mechanical knowledge and safety precautions.
For example, replacing a battery at home may only cost the battery.
Replacing an alternator at home can save $100 to $300 in labor, but may take several hours, depending on your experience.
However, professional mechanics offer expertise, proper diagnostic testing and warranty coverage on parts and labor.
Although DIY repairs are initially cheaper, mistakes like improper installation or misdiagnosis can result in higher costs.
Choosing between DIY and professional service depends on your comfort level, the tools available and the difficulty of the repair.
Read More:
How to Prevent & Maintain the Battery for Long Term Quality Performance
As well as, there’s automotive standards that defines that dashboard tell-tale lights such as: the battery symbol actually indicates there’s any system faults rather than continuous status, as it is to simplifies to the driver interface, it also means that the light only appears once a charging system issue has already begun, that’s why you need to understand the importance of regular system checks and early voltage testing so that you can detect those problems before having a severe breakdown the road.[¹]
The best way to prevent the battery light from appearing on the dashboard is to perform preventative maintenance.
The charging system works every time you drive and minor problems can gradually increase over time.
A properly functioning charging system should maintain a voltage between approximately 13.7 and 14.7 volts when the engine is running.
If the voltage becomes unstable, warning lights, poor starting and electrical problems can occur.
Simple routine checks can significantly reduce the risk of a sudden breakdown.
Taking a few minutes during regular service intervals extends the life of your battery, alternator and serpentine belt and also protects the sensitive electronic systems inside your vehicle.
1. Schedule Regular Battery Testing
Testing your battery on a regular schedule can help detect weaknesses before they become fully functional.
Most car batteries last three to five years, but performance can gradually decline long before complete failure.
It’s recommended to test the battery at least once a year, specially before extreme weather such as extreme heat or cold winters.
Heat accelerates chemical breakdown, while cold temperatures reduce starting power.
A simple voltage test using a multimeter can determine if a fully charged battery reads approximately 12.6 volts with the engine off.
Many auto service centers also offer free battery testing using professional load testers.
Regular testing can help you replace a weak battery before it fails.
2. Cleaning the Terminals Periodically
Battery terminals should be checked and cleaned every few months or during regular service visits.
Corrosion often appears as a white, blue, or green powder around the metal posts.
This buildup increases electrical resistance and reduces charging efficiency.
Even a small layer of corrosion can prevent proper voltage flow between the battery and alternator.
Cleaning the terminals with a battery cleaning brush or baking soda solution removes deposits and restores strong electrical contact.
Tightening loose connections also prevents voltage drops and flickering dashboard lights.
Keeping the terminals clean improves starting performance and extends the life of both the battery and alternator.
3. Checking the Belt’s Condition During an Oil Change
The serpentine belt plays a vital role in rotating the alternator.
Checking its condition during every oil change is a simple and effective preventative measure.
Depending on the vehicle and oil type, oil changes are typically performed every 5,000 to 10,000 kilometers, making this an easy time for inspection.
Look for cracks, wear, glazing, or loose tension.
A worn belt can slip and reduce alternator output, leading to undercharging and a battery light.
Replacing a worn belt early is cheaper than the cost of a breakdown or towing service.
Regular inspections ensure the alternator continues to receive full mechanical power from the engine.
4. Avoid Too Many Short Trips
Frequent short trips can shorten battery life because the alternator may not have enough time to fully recharge the battery after starting the engine.
Starting the vehicle requires a lot of power.
If the engine runs for only a few minutes, the battery will not be able to recover the energy used.
Over time, frequent short charging trips weaken the battery.
Whenever possible, try to combine errands into one long trip so that the engine runs long enough to fully charge.
Driving for at least 15 to 20 minutes allows the alternator to replenish lost power and maintain the correct voltage level.
This simple habit helps prevent frequent battery light warnings and extends the overall life of the charging system.
Conclusion – How to Fix Battery Light on Dashboard
Now, you have understood that whenever you dashboard speaks, then it is always important and good decision to listen to it as battery light is on means it warns you about charging system.
Plus, modern cars rely heavily on stable electricity to power the fuel injection system, ignition coil, safety sensors, dashboard displays and engine control module.
So, when the engine is running and the charging voltage drops outside the normal range of approximately 13.7 to 14.7 volts, the system immediately alerts you.
Also, you should not ignore this warning as it can drain the battery, cause the engine to suddenly shut down, cause power steering assist to fail and even damage sensitive electronic parts.
Now, that’s all from this guide and let us know by commenting below your questions.
Frequently Asked Questions
Q1. What does the battery light on the dashboard actually mean?
Answer: The battery light usually means there’s a problem with your car’s charging system, not just the battery. When this light comes on, many people assume the battery is dead, but in most cases, the alternator isn’t charging properly. The charging system includes the battery, alternator, voltage regulator, wiring and serpentine belt. When the system can’t maintain the correct voltage, which is usually between 13.7 and 14.7 volts when the engine is running, the light comes on to warn you. This is a signal that your car may soon lose power if the problem isn’t fixed.
Q2. Can I drive my car with the battery light on?
Answer: You can drive for a short time, but it’s not safe to ignore it. If the alternator isn’t charging the battery, your car is running solely on stored battery power. When the battery is drained, the engine will stall. This can happen in 15 to 60 minutes, depending on the condition of your battery and how many electrical accessories you’re using. It’s best to turn off non-essential devices like the air conditioning and get to a repair shop as soon as possible.
Q3. Is the battery light on because of a bad battery?
Answer: Yes, it can, but it’s not always the battery. A weak battery that can’t hold a charge can cause voltage issues, which can cause the warning light to come on. However, sometimes the alternator or a loose connection is the root cause. Therefore, it’s important to test the battery with a multimeter. A healthy battery should read around 12.6 volts when the engine is off. Proper testing helps avoid replacing a battery that’s still good.
Q4. How do I know if it’s the alternator or the battery?
Answer: The best way to diagnose this is to check the voltage readings. If the battery shows around 12.6 volts when the engine is off, but remains around 12 volts when the engine is running, the alternator may be bad. If the battery shows very little power even after charging, the battery may be weak. Signs of a bad alternator include dim headlights, flickering dashboard lights, noises and frequent battery drains. Proper testing provides a clear answer rather than guesswork.
Q5. How much does it cost to fix a battery light problem?
Answer: The cost depends on the cause. Replacing the battery is usually much cheaper than replacing the alternator. Serpentine belts are even cheaper. Labor costs also vary depending on the vehicle model. Simple tasks like cleaning the battery terminals may cost nothing if done yourself. More complex repairs, like replacing the alternator, will cost more because parts are expensive and installation time is more time-consuming.
Q6. Can a loose battery cable cause the battery light to come on?
Answer: Yes, loose or damaged battery cables can obstruct the flow of electricity. Even if the alternator is working properly, poor connections at the battery terminals can cause improper charging. This can cause a voltage drop and cause the warning light to come on. Cleaning and tightening the terminals is often a quick and easy way to fix this problem.
Q7. Will disconnecting the battery reset the battery light?
Answer: Disconnecting the battery may reset the warning light in some vehicles, but it won’t fix the underlying problem. If the charging system is still faulty, the light will return when the engine is running again. It’s always best to determine and correct the underlying cause before attempting to reset the system. Resetting it without repairing it could result in a sudden failure later.
Q8. How long do car batteries typically last?
Answer: Most car batteries last three to five years under normal conditions. Extreme heat, frequent short trips and high power usage can shorten battery life. Regular testing lets you know when the battery is weakening. Replacing it before it’s completely damaged can prevent sudden start problems.
References:
[1] Tell-tale (automotive)
https://en.wikipedia.org/wiki/Tell-tale_(automotive)

Guys, I’m a car audio enthusiast and customization expert and I love clear sound and clean installation. Plus, I have spent years helping people build their dream audio setups. And whenever I’m working on cars, I probably listen to music and thinks about the next big upgrade.