 Skip to content
Written By: Don Dodi
Fact Checked By: Kristen Brown
Reviewed By: Diego Rosenberg
The horn is actually very important safety feature that can save from any possible collisions and to inform the others about your presence as well, also it is legally requires in many places as well.
And most of the horn actually uses your 12-volt battery and work through a basic chain: as you just have to pres the horn button, then a small control circuit acts on it and relay switch turn on and then the power flows through a fuse and then the horn unit makes a sound.
So, if there’s any of these link in this chain fails such as: fuse can be blown, a weak relay, a corroded ground, a broken wire near the front grille or even a worn “clock spring” under the steering wheel can be the reason that your horn stops working or it becomes weak or intermittent.
But you can find the problem with simple checks such as: just you have to look at the fuse first and then listen for a click from the relay, then test for power at the horn and then you will be able to make sure that the mounting point is clean metal for a solid ground or not.
Not only this, you should always first disconnect the battery before opening the steering wheel area to avoid airbag risks during this act.
So, this is the step-by-step guide about How to Fix Car Horn Not Working, so that you not only find the problem but later fix it as well.
Common Reasons Why a Car Horn Doesn’t Work
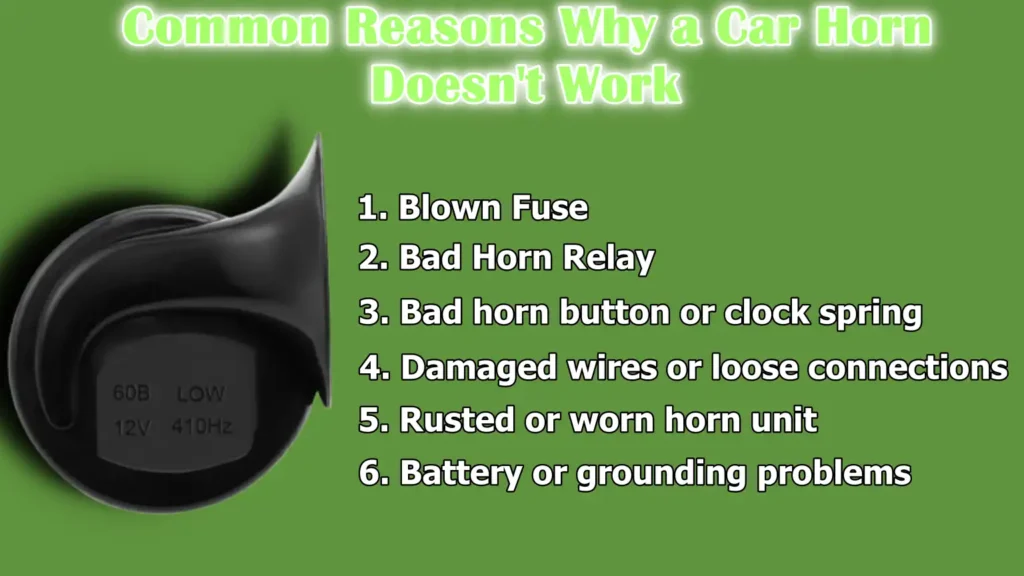
1. Blown Fuse
A car horn works on an electrical circuit and the first and most common reason for it not working is a blown fuse.
Fuses are designed to protect the horn circuit from excessive electrical current.
When there is a power surge or short circuit, the fuse breaks to protect the other parts.
If the horn fuse blows, the entire horn system will stop working until it is replaced. Fuses are usually located in a fuse box under the dashboard or in the engine compartment.
These are small, inexpensive and easy to replace, but it is important to replace them with a fuse of the same amperage to prevent damage to the system.
2. Bad Horn Relay
The horn relay is like a small switch that controls the flow of electricity to the horn. When you press the horn button, the relay activates and sends full battery power to the horn unit.
If the relay goes bad, the horn will not receive power, even if the rest of the system is working properly.
Relays can go bad over time due to heat or electrical degradation.
These are usually located in the fuse box and can often be checked by replacing them with another identical relay in the box.
3. Bad horn button or clock spring
The horn button on the steering wheel is the starting point of the circuit.
If this button or the contacts behind it go bad, the horn will not turn on.
A related part called the clock spring, which is a coiled wire that allows the steering wheel to turn while maintaining the electrical connection, can also go bad.
This is common in older cars or cars with a lot of steering wheel movement. When the clock spring wears out or breaks, the electrical connection to the horn is lost.
Repairing this part usually requires removing the steering wheel and must be done carefully, as there is a risk of accidental airbag deployment if the battery is not removed first.
4. Damaged wires or loose connections
The wiring connecting the fuse, relay, button and horn unit can be damaged by wear, heat or mice gnawing on the wires.
Loose or corroded connections can also disrupt the flow of electricity and cause the horn to malfunction. These problems can be difficult to spot because the wires run through different parts of the car.
An easy way to check is to see if the horn sometimes works and sometimes doesn’t, as this often points to a loose wire. Repairing damaged wires or tightening connections may restore the horn’s functionality.
5. Rusted or worn horn unit
The horn, which is usually located behind the grille or bumper, can malfunction due to rust, corrosion or internal mechanical failure.
The horn produces sound by making a diaphragm vibrate using an electromagnet. Over time, exposure to water, dirt and road salt can corrode the horn unit, causing it to sound weak or quiet.
If power is reaching the horn but no sound is coming, the horn unit may need to be replaced.
6. Battery or grounding problems
The horn needs adequate power from the car’s battery to work properly. If the battery is weak or failing, the horn may sound weak or not work at all. Grounding problems are also a common cause.
The horn needs a strong ground connection to the car’s metal body to complete the circuit. If the mounting point is rusted or corroded, the grounding may be poor, causing the horn to stop working.
Cleaning the ground connection or tightening the mounting bolts often solves this problem.
Read More:
Safety Precautions Before You Begin
1. Turn Off the Car and Remove the Keys
Before beginning any work on a car’s horn system, it is very important to make sure the car is completely turned off and the keys are removed from the ignition.
This prevents any accidental electrical activity while working on the car’s wiring or parts.
Modern vehicles often have sensitive electrical systems that may remain active even when the engine is off, so removing the keys ensures that no current flows through the horn circuit or steering wheel area.
This simple step can prevent accidental short circuits and protect you from injury.
2. Disconnect the Negative Battery Terminal
If you have to work near any part of the steering wheel or horn button, it is important to disconnect the negative battery terminal.
The negative terminal usually has a minus sign and a black cable attached to it. Disconnecting it completely turns off the power supply to the car’s electrical system.
This is very important because the airbag is located inside the steering wheel and any accidental spark or electrical signal can cause it to deploy.
The airbag deploying can be extremely dangerous when working near the steering wheel, as it makes a very loud noise. Disconnecting the battery also prevents damage to other sensitive parts during troubleshooting.
3. Wear safety gloves and eye 3. protection
Wearing safety gloves and proper eye protection is an important precaution when working on a car’s horn system.
Gloves protect your hands from sharp edges around the engine bay and wiring areas and they also reduce the chance of electrical shock from exposed wires.
Eye protection is equally important because you will be working near parts that may emit dust, debris or even electrical sparks.
In the event of an accidental airbag deployment or sudden movement of parts, safety glasses can prevent serious eye injuries.
These basic security tools add an extra layer of protection and ensure you can work with confidence and security.
How to Fix Car Horn Not Working – Step-By-Step
1. Check the horn fuse
The horn fuse is a small safety part that protects the horn circuit from excessive electrical current.
When a short circuit or surge occurs, the thin metal strip inside the fuse melts and opens the circuit, preventing power from reaching the horn.
This protects the wiring, relays and horn unit from heat damage. First, make sure the car is off and the keys are out.
Open the owner’s manual to find out where the fuse boxes are in your model. Most cars have one fuse box under the dashboard on the driver’s side and another in the engine bay near the battery.
Each box has a cover with a simple map on it showing which fuse controls each system. Look for a fuse labeled “Horn”, “Horn” or sometimes “Horn/Second” and note the fuse rating printed next to it, such as 10A, 15A, or 20A.
2. Locate the Fuse Box
After you know the location of the fuse box, open the correct fuse box by removing the plastic clips or pulling the cover straight off.
Keep the cover nearby as the picture below will help you find the correct slot for the horn fuse. If access under the dashboard is difficult, use a flashlight so you can see the slot clearly without applying force.
Fuse boxes under the hood can be hot after driving, so let the area cool slightly if needed.
3. Find the Horn Fuse Using the Picture
Use the picture to match the horn label to the correct slot number. The layout of fuses varies even within the same brand and year, so don’t guess based solely on the location.
Many fuse boxes have a small plastic fuse puller; if not, needle-nose pliers will work. Grip only the plastic body to avoid bending the fuse blade or damaging surrounding parts.
4. Check for broken or burned marks on the fuse
Place the blown fuse under good light and look through the transparent plastic.
A good fuse will show an unbroken metal strip or a simple bridge in the shape of an “S”. A blown fuse will show a gap, melted strip, or dark smoke marks.
If the plastic is dull or cracked, replace the fuse because the heat may have weakened it. If you have a multimeter, set it to continuity or resistance and touch the probes to the blades of the fuse.
A good fuse shows continuity or almost zero resistance; a blown fuse shows no continuity or very high resistance.
5. If the fuse is blown, replace it with the same amperage
If the horn fuse is blown, install a new fuse with the same amperage rating as the old fuse and the fuses in the diagram.
Never install a larger fuse, as this can cause too much current to flow and cause the wires or horn relay to overheat.
Make sure the new fuse fits snugly so the blades make firm contact in the slots. Reinstall the fuse box cover to protect it from moisture and dust.
Check the horn with the car on accessory power or with the engine running.
If the new fuse immediately blows again, this is a sign of a serious problem, such as a shorted wire, bad horn unit, or stuck relay. You should follow the next steps in the troubleshooting guide to find the root cause instead of replacing more fuses.
How to Inspect a Horn Relay
The horn relay is a small but important electrical switch that allows the low-power signal from the horn button to control the higher power needed to run the horn.
Without this relay, the horn button and wiring inside the steering wheel would have to draw full battery power, which could cause the parts to overheat and cause damage.
The relay acts like a remote-controlled gate: When you press the horn button, it activates a small electromagnet inside the relay that closes a powerful switch and sends full power to the horn.
If the relay goes bad, the horn will not sound even if the fuses, wiring and horn unit are all in good condition.
1. Locate the horn relay
Most horn relays are located in the same fuse box you opened to check the horn fuses.
Some cars have these in the power distribution box under the hood near the battery, while others have them located in the cabin fuse panel under the dashboard.
The relay is a small square or rectangular box that plugs into a socket.
The diagram on the fuse box cover or user manual will show its exact location.
As relays look similar, double-check the instructions on the label to make sure you are using the same horn relay.
2. Replace it with an identical relay for testing
The easiest way to test a horn relay without special tools is to replace it with another relay in the fuse box with the same part number, such as a headlight or fuel pump relay.
These relays often share the same size, electrical rating and pin layout.
If the horn still works after replacement, the original horn relay is likely at fault. If another system (such as headlights) stops working after replacement, this also confirms that the horn relay has gone bad.
This quick method saves time and gives you an accurate answer without using a multimeter.
3. Replace if defective
If replacement or testing reveals that the relay is defective, replace it with a new relay that matches the original specifications.
Horn relays are economical and easy to install; all you have to do is pull the old relay out of the socket and press the new relay firmly into place until it seats fully.
Avoid using a mismatched relay, as differences in voltage ratings or pin configurations can cause further electrical problems later.
After replacing the relay, test the horn again. If the horn now works, the problem is solved.
If it still doesn’t work, proceed to the next troubleshooting step, as the fault may be in the wiring, horn unit, or horn button and clock spring assembly.
How to Test the horn unit
The horn unit is the component that physically produces the sound and it is one of the most exposed parts of the horn system.
Most car horns are mounted behind the front grille, near the bumper, or near the radiator area where they are exposed to road debris, water, dirt and salt.
Over time, this contact can lead to rust, corrosion, or internal mechanical failure. Horns use an electromagnet to rapidly vibrate a thin metal diaphragm, producing the high-pitched sound you hear.
If the internal contacts or diaphragm become worn or rusted, the horn can become weak, distorted, or stop working altogether.
1. Locate the horn
To begin the test, you’ll need to find the horn on your car. The exact location will vary by model, but most vehicles mount it on the front of the car behind the grille, near the radiator or bumper reinforcement bar.
Some vehicles may require two horns (one high and one low) to be connected together to produce the full sound.
If there are splash shields or covers underneath your car, you may need to remove or loosen them to gain easy access to the horn.
2. Use a multimeter or test light to check for power
When you can access the horn, disconnect the electrical connector attached to it. Using a test light or digital multimeter, check if power is reaching the horn when the horn button is pressed.
If power is present, the test light will light up and the multimeter’s display will show approximately 12 volts.
Checking the ground connection is also important because the horn needs a clean and corrosion-free ground to complete the circuit.
If power does not reach the horn connector when the button is pressed, the problem is elsewhere in the circuit and you should continue diagnosing the relay, fuse, wiring or clock spring.
3. If there’s power but no sound, replace the horn
If your tests confirm that the horn is receiving power and has a good ground, but there’s still no sound, the horn unit is defective and needs to be replaced.
Replacing it is easy: remove the old horn from its mounting point, completely disconnect the wiring plug and install the new horn in the same location using the same bolts and connectors.
Make sure the mounting surface is clean and rust-free because it also serves as the ground point for the horn.
After installation, check the horn to make sure it’s working. If your car has two horns, consider replacing both units at once for a balanced sound and to prevent the second horn from wearing out faster.
How to Check the wires and connections
1. Check for corrosion, fraying, or loose connections in the wires
Start by following the horn circuit from the fuse and relay to the horn connector, looking carefully at the insulation and metal inside each wire.
Corrosion appears as a green or white powder on copper wires and as dull, flaky surfaces on terminals; this increases resistance and prevents current from reaching the horn.
Frayed or pitted insulation often occurs near the radiator support, along the front bumper and where wires pass through metal brackets; these areas move and vibrate the most and are exposed to water and salt.
Pull each connector gently to make sure it is firmly in place and check for looseness at the crimp joints. If you have a multimeter, set it to continuity and check each part from end to end; a good wire shows a steady tone or nearly zero resistance.
You can also perform a simple wiggle test: press the horn while gently wiggling the harness; if the horn repeatedly moves in and out, there is a break in the insulation or a loose terminal that needs attention.
2. Clean and strengthen the ground connection
The horn needs a strong ground connection to the vehicle’s body to complete the electrical circuit and a weak ground connection is a common cause of a weak or silent horn.
Locate any detached ground straps around the horn’s mounting point. Remove the mounting bolt or ground screw and clean both the ring terminal and the body metal until they are shiny; if you see paint or rust, sand it off.
Reinstall the fastener and tighten it firmly so that the terminal cannot rotate by hand.
If you have a multimeter, perform a quick voltage-drop test while someone is pressing the horn: place one probe on the horn’s ground terminal and the other on clean, undamaged body metal; A healthy ground connection shows a drop of about 0.0-0.2 volts during the horn sound.
Voltages higher than that indicate a poor contact that needs further cleaning or a new ground path. After cleaning, a light coat of dielectric grease on the terminals helps keep moisture out without blocking metal-to-metal contact on the clamped surfaces.
3. Replace any damaged wire
When you find a damaged part, cut out any weak or corroded wire and replace it with clean, shiny copper wire and connect the wire to an automotive-grade butt connector that matches the original wire gauge.
Crimp with the proper tool so the joint doesn’t come apart, then seal the repaired part with heat-shrink tubing to keep water out. If the harness is near sharp edges, apply a short length of split loom or tape wrap and secure it with a zip tie so it can’t rub again.
Maintain the original routing and keep the wire away from hot parts such as the radiator and exhaust; Heat hardens the insulation and makes it wear out faster.
If a connector itself is corroded or loose, replace it with a new pigtail of the correct style rather than trying to bend tired terminals back into shape.
After any repairs, check for end-to-end continuity, verify resistance less than one ohm and make sure the horn sounds louder when the engine is running. Good wiring and strong grounding provide full battery voltage to the horn, which is the key to a clear and reliable sound.
How to Check the horn button or clock spring
1. If the horn still doesn’t work, the problem may be in the steering wheel.
When the fuses, relays, horn unit and wiring are all in good condition but the horn still doesn’t work, the steering wheel is likely at fault.
This is where the horn button and clock spring are located, which are responsible for turning on the horn circuit when the button is pressed.
Because the steering wheel constantly turns, these parts can suffer significant wear over time.
The horn button can fail if the internal contacts become dirty, worn or misaligned and the clock spring can break when its coiled wires become stretched or frayed after years of use.
Both problems can disrupt the signal needed to turn on the horn.
2. Carefully remove the steering wheel cover
To check the horn button and clock spring, you’ll need to access the inside of the steering wheel. The first and most important step is to disconnect the negative terminal of the battery and wait at least 10 to 15 minutes before starting work.
This ensures that the airbag system is completely turned off, as accidental airbag deployment can cause serious injury.
After the battery is disconnected, carefully remove the screws or clips holding the steering wheel cover in place.
Handle the cover carefully, specially if it contains an airbag module and place it on a stable surface with the airbag facing up so that it does not fall open.
3. Inspect the Horn Switch and Clock Spring for Wear or Damage
After removing the cover, you can see the horn button assembly and the clock spring located behind it. Check for any obvious damage, such as broken plastic, frayed wires, or worn contacts.
The horn switch should be easily pressed and return to its original position when released. If the contacts are dirty or corroded, cleaning them with a suitable electrical contact cleaner may restore their proper functioning.
The clock spring, which is a flat ribbon-like wire wrapped in a spiral shape, should be intact without any wear or excessive looseness.
A damaged clock spring usually needs to be completely replaced, as it cannot be repaired.
4. Replace When Needed
If the horn button or clock spring show signs of failure, replacing them is the safest and most reliable solution.
These parts are available as original equipment replacements and should match your specific vehicle model.
Carefully reinstall the new parts in the correct order, making sure all electrical connectors are secure and the clock spring is centered according to the manufacturer’s instructions.
After everything is reassembled, reconnect the negative battery terminal and test the horn. If the button and clock spring were the cause of the problem, the horn should now work properly.
If it still does not work, the problem may lie elsewhere in the vehicle’s electrical system and seeking help from a qualified technician is recommended.
5. Check the battery voltage if other electrical devices are weak
A weak car battery can affect the performance of many electrical devices, including the horn.
If you notice that the headlights are dim, the power windows are slow to operate, or the starter is running weak, it’s a good idea to check the battery voltage.
A fully charged car battery should have a voltage of about 12.6 volts with the engine off and between 13.7 and 14.7 volts with the engine running. If the voltage is below these values, the battery may be damaged or the charging system may not be working properly.
Low voltage can cause the horn to sound weak or not work at all, so correcting any problems with the battery or alternator will help ensure that the horn and other electrical systems work reliably.
6. Apply dielectric grease to the connections to prevent future corrosion
Moisture and dirt can corrode the horn’s electrical connections over time, causing intermittent or complete failure.
Applying a small amount of dielectric grease to the terminals and connectors after cleaning them can create a protective layer that prevents water and contaminants from getting through.
This type of grease is a nonconductor, so it doesn’t allow electricity to pass through it, but it seals the metal contacts and prevents oxidation.
Applying dielectric grease to the horn connector, ground points and even fuse and relay terminals can extend the life of the entire circuit and reduce the likelihood of future problems.
7. If the car is under warranty, consider professional service
If your car is still under the manufacturer’s warranty or extended service plan, it may be best to have the horn problem inspected and repaired by a certified technician at the dealership.
If something goes wrong during the repair, trying to fix it yourself could void the warranty. Professional technicians have the right diagnostic tools to quickly find the problem and ensure that the repair is done according to factory standards.
Even if the warranty has expired, a professional inspection can save time and prevent costly mistakes, which can lead to a lot of damage.
8. Airbag steering wheel repair
Any repair near or inside the steering wheel requires extreme caution because of the airbag system. Airbags deploy with explosive force and accidental deployment during repairs can cause serious injury.
If you have to remove the steering wheel cover to check the horn button or clock spring, it’s best to have a professional do the job, specially if you’re not confident in properly disconnecting and disassembling the airbag system.
Certified technicians have the right tools and training to safely deactivate and reconnect the airbag steering wheel without risk.
9. Persistent electrical problems even after replacing parts
If you’ve replaced fuses, relays, the horn unit, or repaired wiring and the horn still won’t work, the problem may lie elsewhere in the car’s electrical system.
Problems such as short circuits in hidden wiring harnesses, faulty control modules, or grounding problems buried inside the vehicle’s structure may be difficult to find without special diagnostic equipment.
A professional mechanic can find the exact fault by performing advanced tests such as circuit tracing, voltage drop analysis and module scanning and fix it without replacing unnecessary parts.
10. If troubleshooting seems too complicated
Although checking the horn system may seem easy at first, it can quickly become overwhelming if there are many parts involved or if you are not familiar with automotive electrical systems.
If you are unsure at any point or fear making a mistake, it is better to seek help from a professional technician.
This not only saves time but also prevents accidental damage to sensitive electrical systems, airbag circuits or steering components.
Professionals can ensure that the horn is repaired safely and correctly, keeping your car completely safe without any additional stress.
Conclusion – How to Fix Car Horn Not Working
The Car Horn is actually a necessary tool that lets others know about your presence and it actually helps a lot to prevent any kind of collision so just make it working again don’t forget it for anything.
As you’ve seen, the horn system is made up of many interconnected parts, including fuses, relays, wiring, horn buttons, clock springs and the horn unit.
Failure of any of these components can cause the horn to fail or sound weak, but the good news is that most problems can be identified and fixed in an orderly manner.
Starting with simple checks like fuses and relays can save time and money, while a careful examination of wiring and connections can often uncover problems that are easier to fix.
If power reaches the horn but no sound is produced, replacing the horn unit is usually the best solution.
Being organized not only makes troubleshooting faster, but it also prevents the replacement of unnecessary parts.
It’s equally important to prioritize safety at every step: disconnect the battery, use the right tools and wear gloves and eye protection when working near the steering wheel to avoid deploying the airbag.
If at any point the repair seems too complicated, seeking help from a professional technician ensures that the horn system is fixed without any risk to you or your car’s other electrical components.
By keeping your horn in good condition, you’re not just avoiding traffic violations—but also ensuring your ability to communicate on the road when necessary.
There are many horn failures are happen but the reason not about the horn itself: but they trace back to wiring, as corrosion, damaged insulation or loose connectors can easily block power and that also emphasise that inspecting the wiring early often points to the real fix.[¹]
So, this is all from this guide and now we are looking for unsolved questions by the help of comment section.
Frequently Asked Questions
Q1. Why did my car horn suddenly sound?
Answer: A car horn may sound suddenly for a variety of reasons and most have to do with the electrical system or the horn button inside the steering wheel. A common cause is a stuck horn switch, which can happen if the horn button is worn, damaged or has debris stuck in it, causing it to stay pressed even when you’re not touching it. Another possible cause could be a worn clock spring, which is the coiled wire behind the steering wheel that maintains the electrical connection when you turn the steering wheel. If the clock spring is worn or broken, this can cause a short circuit and cause the horn to sound without warning. Electrical problems such as a stuck relay or shorted wiring can also cause the horn to sound repeatedly. The horn relay acts like a switch that sends power to the horn when needed, but if it’s stuck in the “on” position, the horn will continue sounding until the battery is disconnected or the relay is removed. Moisture or corrosion inside the relay or wiring harness can also cause the horn to turn on suddenly. In some cases, car alarms connected to the horn can also cause it to sound unexpectedly. If the alarm system malfunctions or senses a false danger, it may sound the horn as a warning. This is common in cars that do not have aftermarket alarms installed properly. Weather conditions such as heavy rain or excessive humidity can further aggravate these problems as water can get into the wiring or relay box. To fix the problem, you should first check the horn relay and fuses in the fuse box, then inspect the horn switch and wiring. If you are not sure where the fault is coming from, disconnect the negative battery terminal to temporarily turn off the horn and have a mechanic inspect the system. This will prevent further battery consumption and ensure that the problem is resolved safely.
References:
[1] The Most Common Causes of Car Horn Failure and Their Solutions
https://autostickz.com/the-most-common-causes-of-car-horn-failure-and-their-solutions/

Guys, I’m a car audio enthusiast and customization expert and I love clear sound and clean installation. Plus, I have spent years helping people build their dream audio setups. And whenever I’m working on cars, I probably listen to music and thinks about the next big upgrade.
