 Skip to content
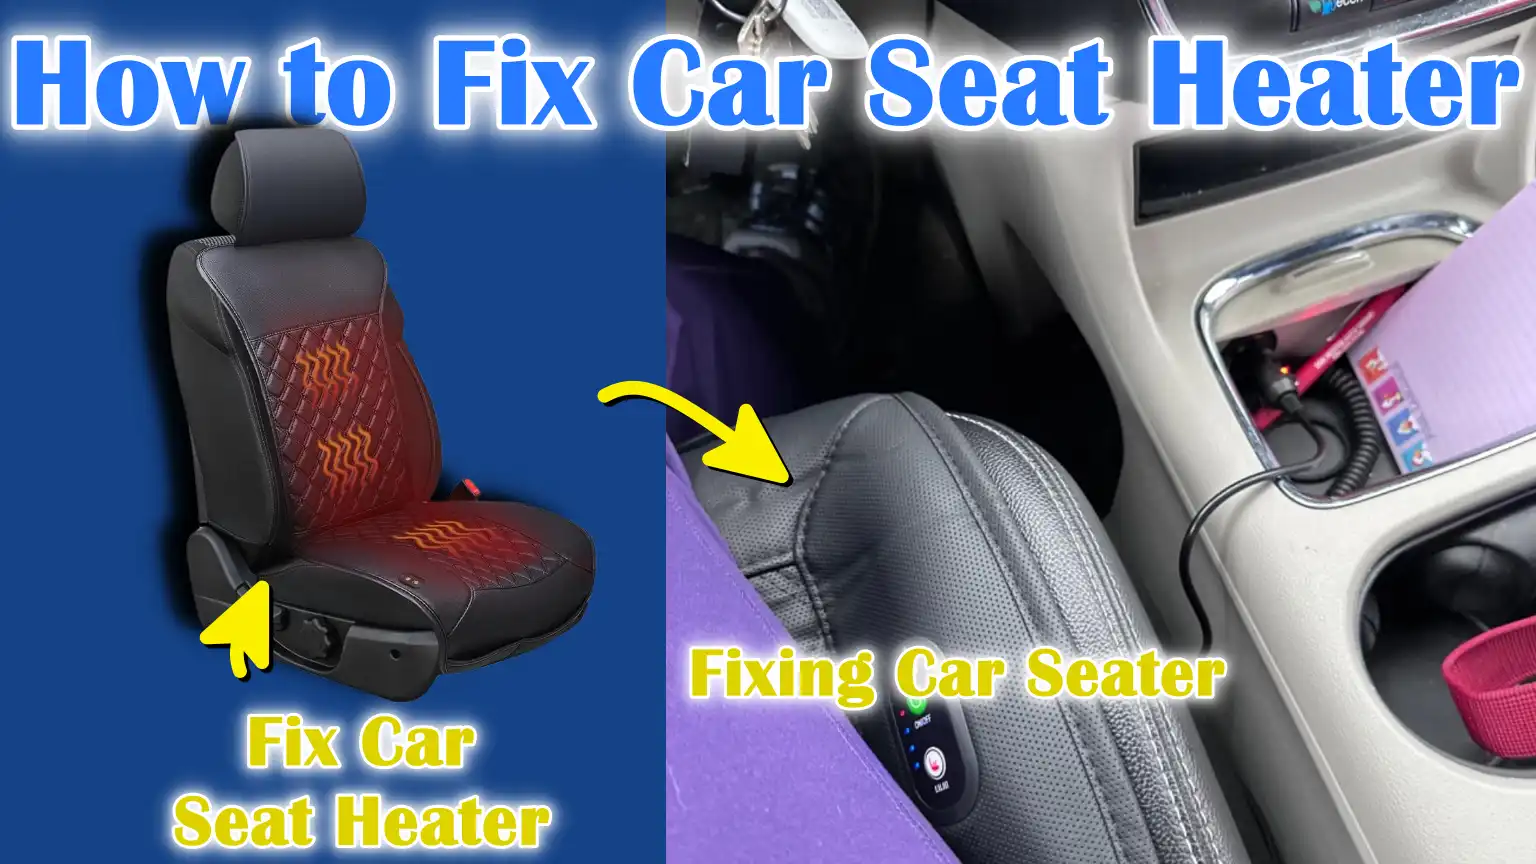
Written By: Don Dodi
Fact Checked By: Kristen Brown
Reviewed By: Diego Rosenberg
The car seat heater actually works like an electric blanket which is hidden inside your car seat and that makes cold mornings much more comfortable.
Yes, car seat heaters now-a-days become standard in many modern vehicle as it once considered a luxury feature as well, so basically it provides warmth and comfort during cold weather condition.
Actually, these heaters work by using thin electric heating elements which is embedded under the seat’s upholstery, which you can say that is very similar to how an electric blanket functions.
As well as, it is true that they are actually generally reliable, but studies from the automotive repair statistics also shows that seat heaters often fail due to the issues such as: burnt-out heating elements, because of damage wiring or just the fuses are blown up and it specifically seen in the vehicles that are over 7 to 10 years old.
And that’s where this guide becomes helpful, as it shows you step-by-step process that How to Fix Car Seat Heater, which included how to diagnose at the fist place by checking the fuse, testing the switch and inspecting the heating pad as well
How to Prepare Your Vehicle With Seat Heater With Safety
Before beginning car seat heater repair, safety is paramount.
Seat heaters are powered by electricity and even the slightest incorrect current can cause a shock or short circuit.
The first step is to disconnect the car’s battery, ensuring there is no electrical current while working.
This simple step can prevent injuries and prevent accidental damage to your vehicle’s electrical system.
1. Tools and Materials
Having the right tools ready before you begin makes the repair process much easier and safer.
Necessary tools for seat heater repair include a multimeter for checking electrical continuity and voltage, a screwdriver and socket set for removing seat panels and bolts and pliers for handling wires.
Also, keep replacement parts, such as heater pads or fuses, handy so you can fix the problem without delay.
Preparing all the necessary tools in advance reduces the risk of mistakes and ensures a smooth repair.
2. Workplace and Environment
Choosing a safe and clean workplace is another important step in preparing for seat heater repair.
Make sure your car is parked on a flat, stable surface and the area is well lit so you can clearly see all wires, connectors and any potential damage.
A clean, organized workspace reduces the risk of accidents and ensures you can focus on the repair without distractions.
Proper preparation in terms of safety, tools and workspace lays the foundation for a successful and efficient seat heater repair.
How to Identify the Car Seat Heater Problem
Before beginning car seat heater repair, it’s important to determine the cause of the malfunction.
Correctly identifying the problem saves time, prevents unnecessary replacement parts and ensures an effective repair.
Seat heater problems generally fall into two categories: the heater turns on but doesn’t heat, or the heater doesn’t turn on at all.
The first step in diagnosing the problem is to determine what’s causing the problem.
1. Check Heater Function
The easiest way to begin the diagnosis is to check if the seat heater is actually on.
Turn on the seat heater switch and observe any sound or heat.
If the seat shows no signs of heat, it could indicate an electrical problem or a blown fuse.
If the heater turns on but doesn’t heat evenly, it could point to a damaged heating element or worn wiring inside the seat.
Observing the heater’s behavior provides important clues about the source of the problem.
2. Check the Fuse
Seat heaters are protected by fuses in the car’s fuse box, which prevent electrical damage if overloaded.
One of the most common reasons for a seat heater not working is a blown fuse.
Find the seat heater fuse in the fuse box listed in the vehicle manual, remove it and carefully inspect it.
If the fuse filament is broken or discolored, it needs to be replaced with a fuse of the same amperage.
Checking and replacing the fuse is often an easy and effective way to fix a seat heater problem.
3. Check the Heater Switch
The heater switch located on the dashboard powers the seat heater.
Over time, the switch may wear out, become loose, or develop an internal electrical fault.
Carefully test the switch by turning it on and off, noticing any changes in the seat heater’s operation.
If the switch is damaged or malfunctioning, it may need to be cleaned, repaired, or replaced.
A bad switch is also a common cause of a seat heater not turning on at all.
4. Use a Multimeter
A multimeter is an essential tool for accurately diagnosing seat heater problems.
It allows you to measure continuity and voltage in the heater’s wiring and components.
Continuity checks ensure current is flowing to the heating elements, while voltage checks ensure power is reaching the seat heater.
These measurements help pinpoint the fault, whether it’s in the wiring, the heating pad, or the switch and guide the next steps in repair.
How to Access Seat Heater Parts
Accessing seat heater components is a crucial step in diagnosing and repairing a faulty seat heater.
In most modern cars, the heating elements are located beneath the seat upholstery, so careful handling is essential to avoid further damage.
Knowing how to properly access these components ensures you can safely and effectively inspect, test and repair the heater.
1. Remove the Seat
In many cases, it may be necessary to remove the car seat to fully access the heater components.
Consult the vehicle’s user manual for specific instructions, as seat removal procedures vary by manufacturer and model.
Typically, this involves loosening the bolts at the base of the seat and carefully disconnecting any electrical connectors, including airbag or seat sensors, if present.
Proper removal helps prevent damage to the seat frame, wiring, or surrounding interior components.
2. Detach the Seat Upholstery
After removing or partially removing the seat, the next step is to carefully remove the upholstery covering the seat.
This usually involves undoing the clips, fasteners, or zippers holding the fabric or leather in place.
Take special care to avoid tearing or overstretching the material.
Detaching the heating pad allows you to inspect the heating elements and wires, making it possible to identify burns, breaks, or loose connections that could cause the heater to malfunction.
3. Protect the Seat Foam and Fabric
When using a heating pad, it’s important to avoid damaging the seat’s foam padding or fabric.
The seat foam can easily shrink or tear and if used too hard, the upholstery can become permanently wrinkled or torn.
Using soft tools and gentle pressure helps maintain the seat’s integrity while also providing full access to components that need inspection or repair.
The protection of these materials ensures that the seat remains comfortable and safe to look at even after the repair is complete.
How to Inspect the Heating Elements and Wiring
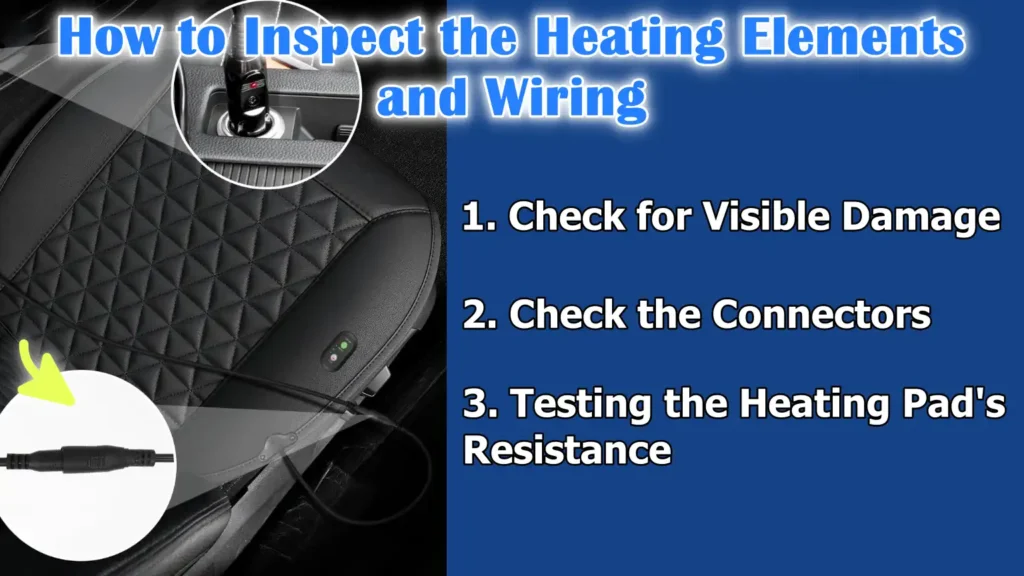
Inspecting the heating elements and wiring is one of the most important steps when repairing a car seat heater.
Most seat heaters use thin electrical wires or carbon fiber pads embedded under the seat fabric to generate heat.
Over time, these components can wear out, break, or become damaged from repeated use, pressure, or exposure to moisture.
Proper inspection helps identify the exact cause of a heater malfunction and ensures that only faulty parts are repaired or replaced, saving time and avoiding unnecessary expenses.
1. Check for Visible Damage
Start by carefully examining the heating pad for any visible signs of damage.
Look for areas with burnt spots, discoloration, or broken or frayed wires.
Damaged wires or heating elements are a common cause of seat heater malfunctions or uneven heating.
Even small broken or worn spots on the heating pad can prevent the seat from heating properly, so a thorough inspection is essential.
2. Check the Connectors
Next, check the electrical connectors under the seat.
Over time, connectors can become loose, rusted, or dirty, disrupting the flow of electricity to the heating pad.
Make sure each connector is securely connected and free of rust or debris.
Cleaning the connectors or reconnecting loose wires often repairs the seat heater without replacing the main components.
3. Testing the Heating Pad’s Resistance
Using a multimeter, test the heating pad’s resistance to determine if it is working properly.
A properly functioning heating pad should have a specific range of electrical resistance according to the vehicle manufacturer’s specifications.
If the resistance is too high or too low, it indicates that the heating element is defective and may need to be replaced.
Testing with a multimeter provides an accurate and reliable way to confirm whether the heating pad itself is the source of the problem before you begin repairing or replacing it.
How to Repair or Replace Faulty Parts
Once the cause of a seat heater malfunction is identified, the next step is to repair or replace the faulty parts.
Correctly addressing the specific problem ensures that the seat heater functions safely and efficiently, while also preventing further damage to the electrical system.
Proper operation of fuses, wiring and heating pads is essential for a successful repair.
1. Replacing a Fuse
Blown fuses are a common cause of seat heater malfunctions.
Fuses protect the electrical system from excessive current and prevent potential damage or fire.
When replacing a fuse, always use a fuse with the exact amperage specified by the vehicle manufacturer.
A fuse with the wrong rating may either not protect the system or cause it to blow again.
Correctly replacing the fuse restores power to the seat heater and often resolves the problem without additional repairs.
2. Repairing Minor Wiring Damage
If the wires appear to have minor damage, they can be repaired instead of being completely replaced.
Soldering the broken wire and covering it with heat shrink tubing can provide a secure and long-lasting connection.
Properly repaired wiring ensures that electricity flows evenly to the heating pad, preventing partial heating or future malfunctions.
It’s important to pay attention to the quality of the repair to avoid short circuits or weak connections.
3. Replace a Damaged Heating Pad
In cases where the heating pad itself is damaged, replacing it is the safest and most effective solution.
Heating pads are designed specifically for each seat model, so it’s important to install one that matches your car’s make and model.
Replacing a different pad may cause uneven heating, electrical problems, or permanent damage to the seat.
Installing the correct replacement pad ensures reliable heat distribution and long-term performance.
4. Reconnect and Check the Wiring
Before reassembling the seat, carefully reconnect all wires and double-check each connection.
Testing the system at this stage ensures that the heater is functioning properly and that there are no loose connections or electrical faults.
Verifying the repair before reinstalling the seat saves time and prevents the need to disassemble the seat again if the problem persists.
Proper reassembly and testing are essential for a safe and effective seat heater repair.
Read More:
How to Reassemble the Car Seat
After repairing or replacing faulty car seat heater components, careful reassembly is essential to ensure proper seat function, safety and comfort.
Proper reassembly not only restores the seat’s appearance but also ensures that the electrical system functions reliably and the seat remains stable while driving.
Attention to detail during this step can prevent damage to the upholstery, foam and connectors.
1. Securing the Upholstery
The first step in reassembling the seat is to reinstall the seat upholstery.
Ensure the fabric or leather is smooth and free of wrinkles, as improperly installed upholstery can cause discomfort and interfere with the heating pad’s function.
Carefully reinstall any removed clips, fasteners, or zippers, ensuring the fabric is evenly stretched and aligned with the seat’s contours.
Correctly installing the upholstery preserves the seat’s original appearance and ensures even distribution of heat from the heating pad.
2. Reinstall the Seat
Once the upholstery is secure, carefully return the seat to its original position in the car.
Align the seat with the mounting points and tighten all bolts securely to prevent any movement during driving.
Using the correct torque standards recommended by the vehicle manufacturer is crucial for maintaining safety and structural integrity.
A properly reinstalled seat ensures it remains stable and secure under normal driving conditions or in the event of a sudden stop.
3. Reconnect Electrical Connectors
Finally, reconnect all electrical connectors that were disconnected during the repair process.
This includes the wiring for the seat heater, seat sensors, airbags and other electronic components installed in the seat.
Ensure each connection is secure and free of dirt or corrosion, as loose or corroded connections can cause electrical problems or prevent the seat heater from functioning properly.
Testing the heater after reconnecting the wiring confirms that the repair was successful and the seat is operating safely and effectively.
How to Check the Car Seat Heater
After completing the repair and reassembly of the car seat heater, it is important to test the system to ensure it is functioning properly and safely.
A proper check ensures that all electrical connections, fuses, switches and heating elements are working as expected.
This also helps identify any remaining problems before regular use of the seat, preventing potential damage or discomfort.
1. Reconnect the Battery
The first step in testing is to reconnect the car’s battery.
Restoring power to the vehicle allows the seat heater and other electrical components to function normally.
Ensure the battery terminals are clean and tightly closed to avoid any electrical interruptions.
Reconnecting the battery is a crucial step because the heater will not function without a complete electrical circuit.
2. Turn on the Seat Heater
After reconnecting the battery, turn on the seat heater using the dashboard switch.
Check if the heater turns on and begins to generate heat.
If the seat remains cold, it could indicate a loose connection, a blown fuse, or a damaged component that wasn’t identified during the repair.
Testing at this stage ensures that the repair is fully functional and provides an opportunity to immediately correct any remaining problems.
3. Ensure Even Heating
Check that heat is evenly distributed across the seat cushion and backrest.
Uneven heating could indicate a partially damaged heating pad or loose wiring connections.
Ensuring even heating throughout the seat is crucial for comfort and safety, as localized overheating or cold spots can reduce the seat heater’s effectiveness and cause discomfort during use.
A properly functioning seat heater should provide even and consistent heat throughout the seating area.
How to Perform Maintenance of Car Seat Heater
Proper maintenance of car seat heaters is essential to ensure long-lasting performance, safety and comfort.
Like all electrical components in a vehicle, seat heaters deteriorate over time and if not addressed promptly, minor problems can escalate into major issues.
Following a few simple maintenance steps can prevent malfunctions, extend the heater’s life and maintain its performance throughout the seat’s lifetime.
As well as, NHTSA also shows that aftermarket and factory seat heaters have been short-circuited or overheated when the heater element actually contacted the metal seat supports or it was substantially compressed as well, which is why it is really important to maintain and take care of these accessories and things.[¹]
1. Avoid Sharp Objects and Excessive Pressure
One of the most common causes of seat heater failure is physical pressure on the seat.
Avoid placing sharp objects, such as keys, tools, or pens, on the seat, as these can puncture or cut the heating pad beneath the upholstery.
Also, avoid applying excessive pressure to the seat for extended periods, as this can compress or break the internal heating elements.
Taking care to protect the seat from physical damage ensures that the heating system continues to function effectively and avoids costly repairs.
2. Regularly inspect wiring
Electrical wear and loose connections are common causes of seat heater failure.
During routine vehicle maintenance, check seat heater wiring and connectors for corrosion, wear, or looseness.
Early detection of minor electrical problems allows them to be fixed before they become serious malfunctions.
Regular inspections improve reliability and reduce the risk of electrical short circuits that can damage other vehicle systems.
3. Replace defective parts immediately
If any seat heater component, such as a fuse, switch, or heating pad, shows signs of failure, it should be replaced immediately.
Delaying repairs can lead to further damage, including burning wires or complete failure of the heating system.
Promptly replacing defective parts is a cost-effective way to maintain seat heater performance and ensures comfortable and safe driving, specially in cold weather.
Conclusion – How to Fix Car Seat Heater
You should keep the car seat heater maintained in a reliable manner as it enhances the comfort and also it reflects the health of your vehicle’s electrical system as well.
Most seat heater problems are caused by simple issues like blown fuses, faulty wiring, worn switches, or broken heating pads.
By understanding each component’s function and working systematically—from preparation and safety to problem identification, accessing heater components, checking wiring, repairing or replacing faulty components, reassembling and finally testing—repairs can be completed safely, effectively and often at a fraction of the cost of professional service.
Regular maintenance, such as protecting the seat from sharp objects, avoiding excessive pressure and checking wiring, ensures that the seat heater continues to function reliably for years.
Ultimately, learning how to repair and maintain a seat heater not only provides comfort during cold weather, but also provides vehicle owners with practical knowledge, reduces dependence on costly repairs and increases the longevity of the vehicle’s electrical system.
So, that’s all from this guide and you can ask your questions by commenting below.
Frequently Asked Questions
Q1. How do I know if my car seat heater is faulty?
Answer: You can usually tell if a car seat heater is faulty if it doesn’t heat when turned on, or if it heats partially or unevenly. Sometimes the switch may click or a light may come on, but the seat won’t heat. Other signs include a blown fuse, a burning smell, or electrical problems with other seat functions. Using a multimeter to check for voltage or continuity in the heater wiring can confirm whether the problem is electrical or if the heating pad itself is damaged.
Q2. Can I fix a car seat heater myself?
Answer: Yes, in many cases you can fix a car seat heater yourself, if you follow safety precautions and have basic tools like a multimeter, screwdriver, pliers and a replacement fuse or heating pad. Repairs typically involve checking the fuse, inspecting the wiring and connectors, testing the heating pad and replacing any faulty parts. However, if the heater is connected to complex electronic components or airbags, or if you’re unsure about electrical repairs, it’s safe to consult a professional.
Q3. Why is my car seat heater not working even though the switch is on?
Answer: If the seat heater doesn’t work even when the switch is on, the most common causes could be a blown fuse, damaged heating pad, or a faulty electrical connection. The switch could also be worn or broken. A step-by-step check of each component with a multimeter and a visual inspection can help pinpoint the problem. Loose or corroded connectors under the seat often prevent power from reaching the heating element, so reconnecting or cleaning them can sometimes solve the problem.
Q4. How long do car seat heaters last?
Answer: Car seat heaters typically last about 7 to 10 years, depending on how often they’re used and how well they’re maintained. High pressure, sharp objects, or prolonged exposure to moisture can shorten their lifespan. Regular inspection and preventative maintenance, such as checking wiring and fuses, can extend the lifespan of a seat heater and ensure it continues to function efficiently.
References:
[1] Part 573 Safety Recall Report 14V-743
https://static.nhtsa.gov/odi/rcl/2014/RCLRPT-14V743-1363.pdf

Guys, I’m a car audio enthusiast and customization expert and I love clear sound and clean installation. Plus, I have spent years helping people build their dream audio setups. And whenever I’m working on cars, I probably listen to music and thinks about the next big upgrade.
