Written By: Don Dodi
Fact Checked By: Kristen Brown
Reviewed By: Diego Rosenberg
At the time you have decided to fix the car speakers by yourselves then immediately you have saved hundreds of dollars in repair costs or even you have successfully avoid replacement as well.
As car speakers are actually the critical part during the drive, as it literally help you to enjoy music, gives you proper navigation instructions and even you can have hands-free calls without any kind of distraction as well.
Also, the fact that studies shows that the car speakers typically last between 4 to 8 years, which also depends on the usage and the environmental conditions such as: humidity and heat as well.
And most of the time the common issues are speakers gives you crackling sounds, no audio output at all, distortion at high volumes or you have hearing imbalance between the let and the right sides.
So, mostly these problems often caused by some easy things: it can be just loose wiring, damaged cones, worn-out connectors or it can be faulty amplifiers as well.
That’s why you can fix them in the home and this guide literally shows you the best method that how to inspect the real problem behind it and How to Fix Car Speakers and make it fully functional again.
Tools
| Tool/Material | What It Does | Easy Explanation |
|---|---|---|
| Phillips Screwdriver | Used to remove screws with a cross-shaped (+) head. | Helps to open panels or unscrew speakers. |
| Flathead Screwdriver | Used to remove screws along a straight (-) line or to gently pry open panels. | Useful for removing trim without breaking it. |
| Wire Stripper/Crimper | Removing plastic from wires and adding connectors. | Allows you to easily repair or replace damaged wires. |
| Multimeter | Measures voltage, resistance and continuity in wires and speakers. | Helps to find broken wires or faulty speakers. |
| Replacement Wires | It is used when the old strings are damaged or broken. | New wires will be installed in place of the damaged wires. |
| Connectors | Connect wires securely without taping them together. | Makes wire connections safe and neat. |
| Electrical Tape | Insulates and protects exposed wires. | Prevents wires from touching each other or causing a short circuit. |
| Heat Shrink Tubing | Slips over wires and heat shrinks to seal the connection. | Protects connections better than tape. |
| Soldering Kit | The wires are permanently joined using molten metal. | Creates very strong and permanent wire connections. |
| Speaker Removal Tools | Plastic tools are used to remove the panels without damaging them. | This makes it easier to remove the door panel without scratching the surface. |
How to Diagnose the Real Problem
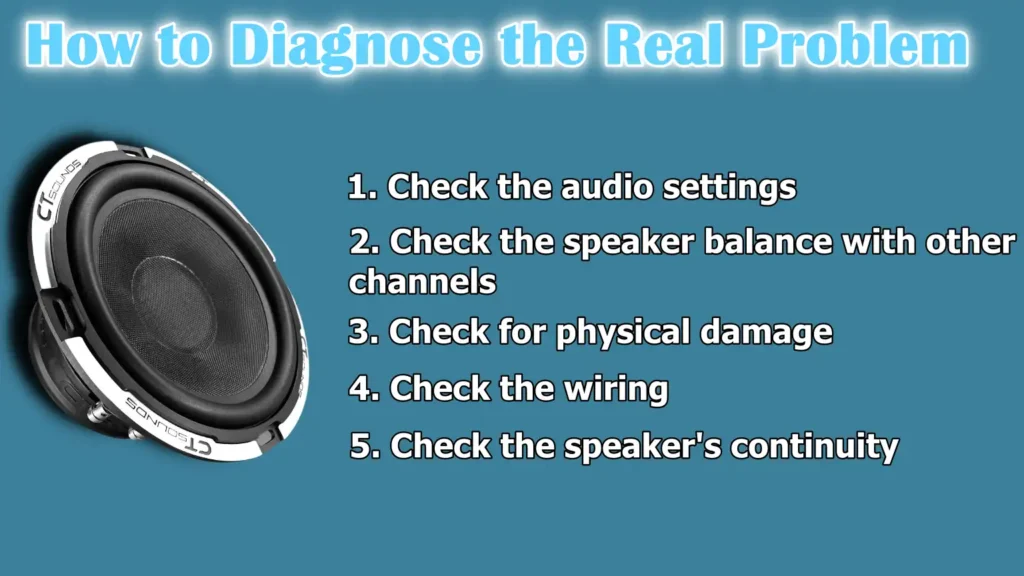
1. Check the audio settings
Before opening your car speakers, check the audio settings on your stereo or head unit. Sometimes the problem is not in the speakers, but in incorrect settings.
Make sure the balance and fade controls are set evenly—if they’re all turned to one side, it may seem like the speaker isn’t working when it actually is.
Also, check the bass and treble levels; too much bass can damage speakers over time and too low a level can cause sound to become inaudible. Try adjusting these settings one at a time to see if the sound quality improves.
Also, make sure the stereo is outputting to the correct speakers and that the mute function isn’t on for a particular channel.
2. Check the speaker balance with other channels
To determine if the problem is in the speakers or somewhere else in the system, you can test by changing speaker wires or switching between left and right channels.
For example, if the right front speaker isn’t working, replace the wires on the left front speaker. If the problem moves to the left, the problem may be with the stereo or wiring.
But if it stays on the right, the problem may be with the speaker itself. This is the easiest way to figure out which part of the system needs repair without any special tools.
3. Check for physical damage
Look closely at the speaker, specially the cone—the round, papery part in the center. If the cone has any cracks, tears, or holes in it, the speaker may produce a distorted or weak sound.
Also check that the speaker grill, which is the cover over the speaker, isn’t loose or making rattling noises.
A loose grill can produce vibration-like sounds that sound like a speaker is broken, even if it isn’t broken. Physical damage is often visible, so using a flashlight can help you inspect it thoroughly.
4. Check the wiring
Wiring is one of the most common causes of speaker failure. Over time, wires can become loose, frayed, or corroded—specially in doors, where they’re constantly bent when opening and closing. Look at the wires connected to the speaker and trace them as far back as you can.
Make sure the connectors are secure and clean. If any wires look frayed or cut, they may need to be replaced. To find out if the wires are still delivering power or signal, you can use a device called a multimeter.
This will help you measure whether power is reaching the speaker correctly, allowing you to spot hidden problems without guesswork.
5. Check the speaker’s continuity
The final step in diagnosing your speaker is to check its continuity, that is, to check if it’s still allowing electrical current to flow through.
For this, you’ll need a multimeter. Set the multimeter to the resistance or ohm setting and connect its two probes to the speaker terminals. A healthy car speaker usually shows a resistance between 4 and 8 ohms.
If the reading is far outside this range or shows “infinity” or “zero,” the speaker is probably broken or damaged inside and will need to be replaced.
This is a reliable way to make sure the speaker is still working properly.
Solve common problems
1. Loose or damaged wires
One of the most common causes of speaker problems is loose, frayed or broken wires. These wires carry the sound signal from the stereo or amplifier to the speakers and any breaks or poor connections can cause the sound to disappear or sound distorted.
Over time, wires inside car doors or under seats can become damaged due to vibration, moisture or frequent movement.
If a wire looks frayed, discolored or brittle, it should be replaced. Always use the proper connectors such as crimp terminals or wire nuts to reconnect the wires.
For a sturdy and long-lasting solution, it is recommended to solder the wires together and then seal them with electrical tape or heat shrink tubing to prevent future rust or loose connections.
2. Speaker cone damage
The cone of a speaker is the round, flexible part that moves to produce sound. If it has even a small hole or crack, you may hear a buzzing, rattling or distorted sound.
For minor tears or holes, flexible glues such as silicone adhesive or rubber cement can be used as a short-term solution.
This will restore some functionality to the speaker, although sound quality may still be affected. However, if the cone is severely cracked, damaged or separated from the edges, it is usually better to replace the entire speaker.
Once the cone is so damaged beyond repair, no matter how hard you try, the sound output will never return to normal.
3. Bad connections
Bad or dirty connections are another common cause of speaker malfunction.
The metal terminals where wires connect to the speaker can rust over time, specially if they are exposed to moisture or humidity. Rust looks like a green or white powder on metal parts.
To fix this, first separate the wires, then gently clean the terminals with a small brush or sandpaper. Make sure the connection is firm and the wire does not move when it is in place. Loose or weak connections can cause sound interference while driving.
Re-tightening these connections properly often causes the speaker to start working fully immediately.
4. Head unit or amplifier problems
Sometimes, the problem is not in the speakers or wires, but in the stereo system itself. If you have checked the speakers and wiring and they seem fine, the problem may be in the head unit or amplifier.
A bad stereo may not be sending a signal, or the amplifier may not be powering the speaker. One way to find out is to replace the bad speaker with a speaker that you know works.
If the working speaker also breaks down in the same place, this indicates a problem with the head unit or amplifier.
In such cases, professional inspection or replacement of the stereo system may be necessary. Some advanced audio systems also have built-in amplifiers that can go bad inside, even if the main head unit is working properly.
Replacing a bad speaker (if necessary)
1. Removing the door panel or rear deck
To replace a bad car speaker, the first step is to access it, which usually involves removing the door panel or rear deck, depending on where the speaker is located.
Most car door panels are held in place by a combination of screws and plastic clips.
The screws are usually located behind the door handle, inside the armrest, or near the edges of the panel. After removing the screws, you’ll need to gently pry the panel off with a flat tool or panel remover.
It’s important to be careful and patient during this step to avoid breaking the clips or damaging the door. If the speaker is in the rear deck, this process usually involves removing some seats or rear trim first.
Always refer to your car manual or look up the specific procedure for your vehicle model to avoid mistakes.
2. Disconnecting and Removing the Old Speaker
Once the speaker is visible, the next step is to disconnect it from the wiring. Car speakers usually have two wires connected by small clips or terminals.
Before disconnecting, take a picture or mark which wire connects to which terminal to remember the polarity.
Remove the speaker from its mounting bracket, which is often attached with four screws. Then pull it out slowly.
If the speaker seems stuck, check for hidden screws or adhesive foam. Be careful when removing the wiring harness to avoid damaging it.
If the wires are frayed or corroded, this is a good opportunity to replace or clean them before installing a new speaker.
3. Installing a new, compatible speaker
Installing a new speaker starts with choosing the right replacement. Always choose a new speaker according to your car’s size and power specifications.
Most car speakers come in standard sizes, such as 6.5-inch or 6×9-inch, but the mounting depth and type must also match.
Once you’ve found the right speaker, connect the wires to the new speaker terminals, matching the positive and negative ends correctly.
The positive wire usually has a stripe or a plus mark on it. If you’re using an aftermarket speaker, you may need a wiring adapter or you may have to manually cut and reconnect the wires.
Screw the new speaker in with the old one and make sure it’s firmly in place to avoid vibrations while driving.
4. Ensure the correct polarity of the wires
One of the most important steps in replacing a speaker is to make sure the polarity of the wires is correct.
Polarity refers to the direction of the electric current and if the wires are connected incorrectly, the speaker will work but will sound distorted or weak.
When two speakers are far apart—that is, one speaker is installed upside down—the sound waves can cancel each other out, specially in the bass frequencies. This can cause music to sound muffled or hollow.
To avoid this, double-check the positive and negative terminals of both the speaker and the wiring. If you’re not sure, most modern car stereo and speaker wire kits have clearly labeled wires to help you.
As well as, the research also shows that most of the speakers failures are not due to the bad speaker components but because of the simple errors during the installation process such as: misaligned mounts or loose wiring as well: which is why you should self-test it after repairs that can even help to preven these types of defects from going unnoticed.[¹]
Read More:
Reassembly and Testing
1. Reconnect the Battery
After you’ve completed all the wiring and speaker installation, the first step in reassembly is to reconnect the car’s battery.
This is important because you may have already disconnected the negative terminal for safety reasons.
Reconnecting the battery restarts the electrical flow so you can test your new speaker setup. When reconnecting the battery terminals, make sure they are clean and secure so that the electrical connection remains strong.
If the car’s electrical system doesn’t work immediately after reconnecting the battery, wait a few moments, then check for any missed or loose connections in the battery cables.
2. Test the Sound with Different Music Frequencies
Before putting all the panels and trims back in place, it’s a good idea to test the speakers using different types of sound.
Play different music tracks of high, medium and low frequencies so you can hear how the speaker responds. Start at a low volume and gradually increase it.
Listen carefully for any distortion, buzzing or rattling sounds, which could mean the speaker is not installed correctly or a wire is loose.
Using test tone audio or equalizer apps can also help you assess the clarity and balance of your new speakers. If everything sounds clear, balanced and distortion-free, the speaker is installed correctly and working as expected.
3. Check Fade and Balance to Confirm Functionality
To make sure every speaker is connected and working properly, go to your stereo’s audio settings and check the fade and balance controls.
The fade setting moves the sound from front to back, while the balance setting moves it from left to right.
Adjust each setting slowly and listen to see if the speaker on that side responds.
This helps you confirm that all speakers are receiving the signal and that no channel is quiet or unbalanced. If one side has no sound during this test, it could mean a wire is loose or the polarity is reversed.
If you think something isn’t responding properly, double-check your wiring. Once everything is working properly, you can rest assured to reassemble the panel and enjoy your new audio system.
Tips for long-term speaker health
1. Avoid constantly playing music at maximum volume
One of the most common causes of car speaker failure is playing music at maximum volume for long periods of time.
When speakers are turned up too loud, internal components—specially the voice coils and cones—can overheat or become damaged.
High volume levels can also cause distortion, which not only affects sound quality but also increases strain on both the speaker and the amplifier.
Constantly playing loud music can shorten the life of your speakers, even if they are high quality.
For better long-term performance, try to keep the volume at around 70 to 80 percent of the maximum limit, which provides clear sound without overstraining the system.
2. Use high-quality audio files and sources
Low-quality or highly compressed music files can damage your speakers over time, even if the damage isn’t immediately visible.
Low bitrate files can produce distorted frequencies or harsh tones that make the speaker work harder than it needs to.
Streaming music over a weak signal can also cause audio to stutter or sound muffled. To protect your speakers and enjoy better sound, use high-quality audio sources such as CDs, lossless file formats such as FLAC, or premium streaming services that offer high-definition playback.
A clean signal means better performance and less strain on your audio system, allowing the speakers to last longer.
3. Keep the speaker area clean and moisture-free
Dust, dirt and specially moisture are harmful to speaker health. Speakers mounted in doors, the rear deck, or under the seats may be exposed to road dust, moisture, or even rainwater if the seals are damaged.
Over time, this can corrode the contact wires, weaken the speaker cone and affect the voice coil inside the speaker.
It’s important to clean around the speaker area regularly and check for any signs of moisture or leaks in nearby window or door seals.
If your car’s interior tends to be damp, using a small dehumidifier or silica packs can help absorb moisture and keep your speakers in better condition.
Keeping your speakers clean and dry is one of the easiest ways to extend their life and maintain excellent sound quality.
Read More:
When to Seek Professional Help
1. The problem persists after troubleshooting
If you’ve followed all the usual troubleshooting steps—checking the wiring, testing the speakers with a multimeter, inspecting for damage and verifying the settings—but still haven’t resolved the problem, it’s time to consult a professional.
Sometimes the problem is more serious than basic tools and tests can detect. For example, internal damage to the speakers or a faulty circuit inside the stereo may not be clearly visible but still cause performance issues.
A certified car audio technician can perform more advanced diagnostics using specialized equipment to detect problems in amplifiers, signal processors, or complex factory audio units.
Continuing to troubleshoot without proper results can be a waste of time and cause more damage if the wrong repair is attempted.
2. Complex Audio Systems
Modern vehicles often come with complex audio systems that include factory amplifiers, digital sound processors, integrated navigation units, or systems connected to the vehicle’s main computer.
These systems can be tricky to work with, specially if the speaker signals are controlled by software or routed through multiple channels.
For example, in premium vehicles like BMWs, Mercedes or some SUVs, the speaker wiring is often part of a larger digital system that cannot be easily replaced or modified without causing electrical problems.
In such cases, professional help is recommended, as improper use can cause the system to malfunction, electrical failure, or even an airbag warning light to come on if interior panels are removed incorrectly.
3. Lack of tools or confidence
Fixing car speakers may seem easy, but it does require the right tools and a certain level of comfort working with electrical equipment.
If you don’t have tools like a multimeter, wire stripper or speaker removal kit—or if you’re unsure about how to safely disconnect the car battery or identify wire polarity—it’s perfectly fine to have a professional do the job.
Mistakes such as connecting the wrong wires, damaging door panels, or forcing parts into place can lead to major and costly problems.
If you feel unsure at any stage or simply want the job done efficiently and safely, an experienced audio installer can complete the job quickly and ensure your system works at its best.
Conclusion – How to Fix Car Speakers
So, by now you have understood that whenever your car speakers go quiet then it doesn’t always means that it is time to change the replacement, as it could be your system’s way of asking for a little fix as well.
And that’s how many speaker problems, such as crackling sound, imbalance, or no output, are caused by loose wires, corroded terminals, or minor damage that does not require professional repair.
By taking the right steps—correctly diagnosing the problem, handling wires carefully, ensuring correct speaker polarity and checking for head unit problems—most common speaker malfunctions can be fixed at home.
By replacing a faulty speaker with a compatible one and making sure it is installed securely, your sound quality can be restored to factory levels or better.
By keeping the speaker area dry, avoiding loud noises and using good quality audio sources, you can extend the life of your speakers and enjoy crisp, clear sound for years.
However, if the problem is related to complex electronics, factory-installed amplifiers, or a malfunctioning internal head unit, it is wise to seek professional help to avoid further complications.
Ultimately, understanding how your speaker system works not only saves money, but also gives you more control over your experience in the car.
So, that’s all from this guide and now you can ask questions in the comment section.
Frequently Asked Questions
Q1. Can car audio speakers be repaired?
Answer: Yes, car audio speakers are often repairable, depending on what the problem is and how severe it is. If the problem is minor—such as a loose wire, corroded connection, or a bit of wear on the speaker cone—it can usually be fixed at home with basic tools. Many people can fix problems like crackling noises, weak output, or no sound at all by checking the speaker wiring, cleaning the terminals, or adjusting audio settings. In some cases, a speaker may stop working because the voice coil inside has burned out or the alignment of the magnets has gotten out of alignment. These types of problems are more complex and may not be worth fixing, specially if the speaker is older or not high-end to begin with. For inexpensive or factory-installed speakers, it’s often better to replace them with a new set. However, if the damage isn’t too extensive, high-quality aftermarket or premium brand speakers may be worth professional repair. Overall, speaker repair is possible in many cases and with the right approach, you can often restore sound without replacing the entire unit.
Q2. Why do car speakers go bad?
Answer: Car speakers can go bad if they are pushed beyond their rated limit, specially when the volume is turned up too high for too long. One of the most common causes is distortion caused by too much electrical signal being sent to the speaker. When an amplifier sends more power than the speaker can handle, the speaker’s internal components—such as the voice coil—can overheat and be damaged. This causes the speaker to go bad, leading to a crackling, muffled sound, or a complete failure. Another common cause of speaker failure is poor sound quality input, such as low-quality audio files or weak signals from a head unit. If the sound signal is clipped or distorted before it reaches the speaker, the speaker tries to reproduce that poor signal and eventually puts stress on its components. Sudden increases in volume or deep bass shocks can also damage the cone or surrounding suspension, specially if the speaker is not designed for heavy bass or high power. Bad wiring, loose connection and physical damage such as exposure to moisture or hitting any part of the speaker can also cause the speaker to wear out over time. To prevent speaker wear, it is best to use high quality audio sources, avoid maximum volume and ensure that the amplifier and speaker are properly matched in terms of power and impedance.
References:
[1] Self-Testing of Car Audio System
https://www.klippel.de/fileadmin/klippel/Files/Know_How/Literature/Papers/Self-Testing%20of%20Car%20Audio%20System.pdf

Guys, I’m a car audio enthusiast and customization expert and I love clear sound and clean installation. Plus, I have spent years helping people build their dream audio setups. And whenever I’m working on cars, I probably listen to music and thinks about the next big upgrade.