 Skip to content
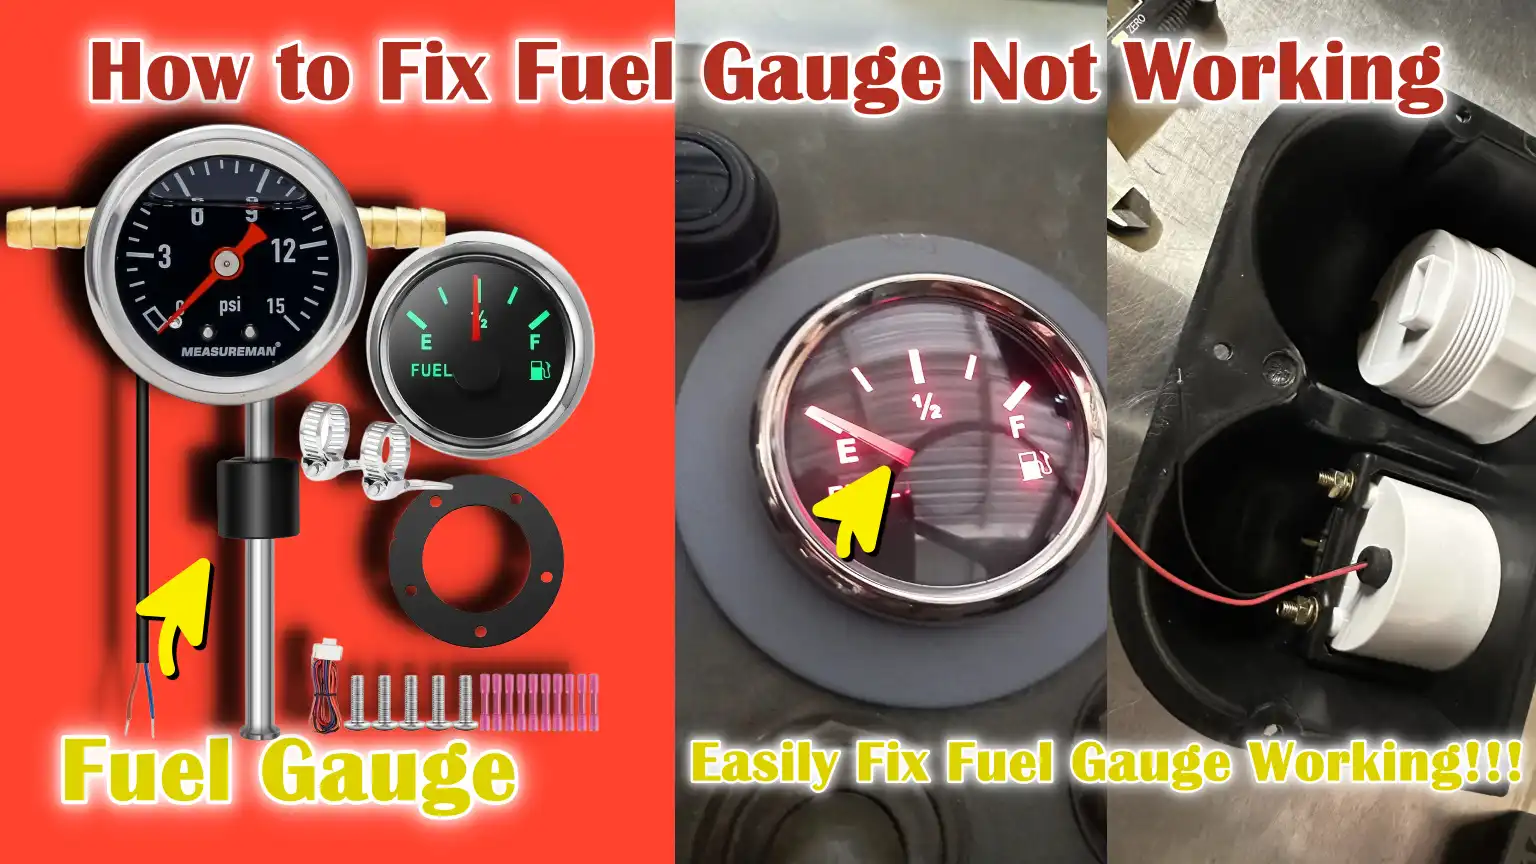
Written By: Don Dodi
Fact Checked By: Kristen Brown
Reviewed By: Diego Rosenberg
Actually, whenever you start your vehicle, then there’s a small floating thing inside the fuel tank which is already working to measure your fuel level.
And, in most of the vehicles there’s simple but effective system is available which is made up of a fuel sending unit inside the tank, which is a float attached to a metallic arm, wiring that carries an electrical signal and there’s a gauge on the dashboard that reads you loud.
As the fuel levels changes, the float moves up and down, that alters the electrical resistance that tells the gauge that how much fuel is actually remaining now.
But, over the period of time and usage: simply this system can fail due to the worn-out sender units, corroded wiring, poor grounding, blown fuses or dashboard cluster faults as well.
Plus, in many vehicles: the fuel sender is one of the most common electrical components that wears out as it is constantly exposed to the fuel and motion as well.
But, if there’s a malfunctioning fuel gauge then it can lead to the inaccurate readings, sudden drops form full to empty or a needle that does not move at all.
Yes, this is huge inconvenience: as it literally increases the risk of running out of fuel unexpectedly, which can cause roadside breakdowns and even damage certain fuel-injected systems if the tank is frequently runs too low.
So, that’s why in this guide you’ll know How to Fix Fuel Gauge Not Working, so that you can understand the fuel gauge system working and diagnose it in proper way.
Ensure Safety Before Begin
1. Disconnect the Vehicle Battery
Before beginning any work on the fuel gauge system, always disconnect the vehicle’s battery to prevent accidental electric shocks or short circuits.
In modern vehicles, electrical current continues to flow even when the ignition is switched off; touching exposed wires can damage sensitive components or generate sparks.
Disconnecting the battery also protects critical systems such as: the instrument cluster and onboard electronics, from sudden voltage surges.
This simple step significantly reduces the risk of personal injury during repairs and prevents costly electrical damage.
2. Work in a Well-Ventilated Area
The fuel system emits vapors that are not only harmful if inhaled but also highly flammable.
In enclosed spaces, such as a garage, even a small amount of gasoline vapor can accumulate rapidly.
Working in a well-ventilated area allows these vapors to disperse safely, thereby reducing the risk of inhalation or fire.
Good airflow is particularly important when opening the fuel tank or accessing the fuel sending unit, as these are the moments when vapor release is most likely to occur.
3. Avoid Open Flames or Sparks
Gasoline vapors can ignite very easily, even from a small, invisible spark.
Smoking, using lighters, or working near open flames while handling fuel-related components can be extremely dangerous.
Power tools that generate sparks should also be used with extreme caution or avoided entirely.
Maintaining a spark-free environment is crucial, as fuel vapors can spread and ignite from a distance, potentially leading to serious accidents.
4. Wear Safety Gloves and Eye Protection
When handling fuel system components, your skin and eyes may come into contact with fuel, dirt and potentially sharp edges.
Gasoline can cause skin irritation and discomfort, while accidental splashes into the eyes can result in injury.
Wearing safety gloves helps prevent direct contact with fuel and protects your hands from cuts or burns.
Eye protection serves as an additional safeguard, particularly when you are working underneath the vehicle or near the fuel tank, where debris or fluids may suddenly fall.
Now, Let’s Understand the Fuel Gauge System
1. Components of the Fuel Gauge System
A vehicle’s fuel gauge system consists of several simple yet essential components that work together to indicate how much fuel remains in the tank.
The fuel sender unit is located inside the fuel tank and features a float attached to a slender metal rod.
As the fuel level rises and falls, the float moves up and down in tandem with the fuel.
The gauge, mounted on the dashboard, presents this information to the driver in an easily understandable format, either as a needle-based indicator or a digital display.
Wiring and connectors transmit electrical signals from the fuel tank to the dashboard, while grounding points complete the electrical circuit, ensuring that the system functions correctly.
It is crucial that each of these components operates properly, as even a minor fault in a single part can compromise the accuracy of the entire system.
2. How the Fuel Sender and Gauge Interact
The fuel gauge does not directly measure the fuel level; instead, it relies on changes in electrical resistance occurring within the fuel sender unit.
As the float rises and falls with the fuel level, it alters the position of a variable resistor.
When the tank is full, the resistance is typically low; conversely, when the tank is empty, the resistance increases, though this may vary depending on the specific design of the vehicle.
This fluctuating resistance sends a signal via the wiring to the dashboard gauge, which then moves the needle or updates the display accordingly.
This process operates continuously while the vehicle is in motion, providing the driver with real-time updates regarding the fuel level.
As this system relies on electrical signals, even a minor interruption can result in an inaccurate reading.
3. Common Causes of Malfunction
Over time, the various components of the fuel gauge system can wear out or fail due to constant use and exposure to fuel and heat.
The fuel sender unit is one of the most common points of failure; operating inside the tank, it is subject to constant movement, which can cause the resistor to wear down or the float to become damaged.
The dashboard gauge itself can also malfunction, particularly in older vehicles where internal components have deteriorated.
Wiring and connectors may become loose, corroded, or damaged, thereby disrupting the signal transmission between the sender and the gauge.
Grounding issues are another common culprit, as a poor ground connection can result in unstable or inaccurate readings.
In some instances, a blown fuse can cause the gauge to cease functioning entirely, as it cuts off the electrical power supply to the system.
Understanding these common causes of malfunction helps in accurately diagnosing the problem and avoiding unnecessary repairs.
How to Perform Initial Inspection
1. Check for Visible Issues
Before using any tools or disassembling vehicle components, it is essential to carefully inspect for minor, visible issues.
Often, these very problems are the reason the fuel gauge stops functioning.
Many fuel gauge issues are not particularly complex and may stem from common electrical faults.
First, check the connectors, these are the small junctions where wires connect.
Over time, vibrations can cause these connectors to loosen, or exposure to moisture and dirt can lead to corrosion.
Corrosion creates resistance within the circuit, which can interrupt or distort the signal reaching the fuel gauge.
Next, inspect the wiring running between the fuel tank and the dashboard.
These wires transmit the electrical signal from the fuel sender unit; if the wires are damaged, severed, or frayed, the signal will not reach the gauge properly.
Wiring can be compromised by heat, abrasion, or, in some cases, pests such as rodents; therefore, this constitutes a crucial step in the troubleshooting process.
Additionally, check the fuses associated with the fuel gauge system.
Fuses are designed to protect electrical circuits; if a fuse blows, the flow of electricity is completely interrupted, causing the gauge to cease functioning entirely.
Replacing a fuse is a simple task, but it is equally important to determine the underlying reason why the fuse blew in the first place.
2. Observe the Gauge’s Behavior
Careful observation can provide vital clues regarding the root cause of the problem, often without the need for any specialized diagnostic procedures.
Turn the ignition key to the “ON” position and observe how the fuel gauge responds.
In a properly functioning system, the needle should move smoothly to indicate the current fuel level.
If the needle does not move at all, it could signal an electrical issue, a blown fuse, or a completely defective gauge.
If the needle fluctuates erratically or displays an inaccurate reading, it may point to a faulty sender unit or a poor wiring connection.
Another simple troubleshooting method is to gently tap on the fuel tank or the dashboard to observe whether the gauge needle responds.
If the needle moves when tapped, it often indicates a loose connection or a worn-out component, resulting in intermittent contact.
These minor observations can help diagnose the problem quickly and guide you toward the correct repair without the need to replace parts unnecessarily.
How to Diagnose The Fuel Gage Problem
1. Fuel Gauge Testing
Turning on the ignition and observing the gauge’s response
Testing the fuel gauge begins with a simple yet crucial step: turning the ignition key to the “ON” position without starting the engine.
This action powers up the dashboard and activates the fuel gauge system, allowing you to observe how the gauge behaves in real-time.
In a properly functioning system, the needle (or digital display) should move smoothly from its resting position and indicate the current fuel level based on the signal received from the fuel sender unit.
If the gauge does not move at all, it often indicates that no electrical signal is reaching it; this could be due to a blown fuse, faulty wiring, or a defective gauge unit.
If the needle fluctuates erratically, moves sluggishly, or displays an incorrect level, it may signal an issue with signal transmission or wear within the internal components of the gauge itself.
Carefully observing this response helps you determine whether the problem is electrical, mechanical, or related to the communication between different components.
Checking the wiring by gently wiggling the wiring harness
Another useful and simple method for identifying hidden issues is to gently wiggle or adjust the wiring harness connected to the fuel gauge system.
A wiring harness is a bundle of wires bound together that transmits electrical signals between the fuel tank and the dashboard.
Over time, due to vibration, heat, or aging components, these wires may become loose, damaged, or partially disconnected.
With the ignition in the “ON” position, gently wiggle the harness while closely observing the fuel gauge.
If the needle suddenly shifts its position, flickers, or begins to behave erratically, it generally indicates a loose connection or a break somewhere in the wiring.
This type of issue is referred to as an ‘intermittent fault’, a problem that can be difficult to diagnose without this simple test.
Identifying such issues in a timely manner helps prevent inaccurate fuel readings and avoids the unnecessary replacement of components that are, in fact, functioning correctly.
2. Testing the Sender Unit
Locating the Fuel Sender Unit
The fuel sender unit is typically mounted inside the fuel tank and measures the fuel level using a system comprising a float and a variable resistor.
In many vehicles, it is situated atop the fuel pump assembly and can be accessed without having to remove the entire tank.
Manufacturers often provide a specific access point to facilitate easy reach to the unit, typically located beneath a small panel under the rear seat or within the trunk area.
Identifying the correct location is crucial, as it allows you to test the unit safely and easily without causing any unnecessary damage or requiring its complete removal.
Knowing the precise mounting location of the sender also helps you understand how it directly interacts with the fuel level inside the tank.
Safely Accessing the Sender Unit
To access the sender unit, depending on the vehicle’s design, you may need to remove the rear seat cushion or open an access panel.
This procedure must be performed with great care to avoid damaging any clips, covers, or wiring connections.
As the sender is an integral part of the fuel system, fuel vapors may be present in the immediate vicinity once the area is exposed; therefore, ensuring proper ventilation in the workspace is absolutely essential.
Once the access panel has been removed, you will be able to see the electrical connector, and potentially the fuel lines, attached to the unit.
Performing this step correctly ensures that no components are broken and that the environment remains safe for working on the system.
Measuring Resistance Using a Multimeter
The most accurate method for testing the fuel sender unit is to measure its electrical resistance using a multimeter.
The sender operates on the principle that as the float rises and falls, its electrical resistance varies directly in relation to the fuel level.
When you connect a multimeter to the sender’s terminals, you can observe how the resistance changes.
For instance, high resistance may indicate that the tank is empty, while low resistance may suggest that the tank is full; however, this can vary depending on the specific vehicle.
If the resistance remains completely constant or changes abruptly (exhibiting a “jump”), it typically signifies that the internal resistor has failed or developed a fault.
This testing method helps verify whether the sender unit is functioning correctly or if it requires replacement.
Comparing Readings with Manufacturer Specifications
For every vehicle, the manufacturer specifies a specific resistance range to ensure accurate fuel level readings.
After measuring the resistance, it is crucial to compare your results against the recommended specifications provided in the vehicle’s owner’s manual or service guide.
If the readings fall outside the specified range, it clearly indicates an issue with the sender unit.
This step is invaluable as it eliminates the need for guesswork and ensures that your decisions are based on concrete data rather than mere assumptions.
Accurate comparison helps avoid unnecessary repairs and ensures that the correct component is the one being repaired or replaced.
Checking the Movement of the Float Mechanism
The float located inside the sender unit is a critical mechanical component that rises and falls in tandem with the fuel level.
Over time, the float may become stuck, deteriorate, or become waterlogged (heavy) due to fuel absorption, thereby compromising its ability to move freely.
When inspecting the sender unit, it is crucial to gently move the float up and down to verify that it moves freely and smoothly, without any obstruction.
If the float gets stuck or fails to move properly, it will transmit an incorrect signal to the gauge, resulting in inaccurate readings.
Ensuring that the float moves freely and easily is absolutely essential for accurate fuel measurement and reliable gauge performance.
3. Wiring and Connection Inspection
Checking Wiring for Damage and Corrosion
The wiring connecting the fuel sender unit to the dashboard gauge carries a low-voltage electrical signal that indicates the fuel level; therefore, even minor damage can result in inaccurate readings.
Over time, exposure to heat, vibration, moisture and abrasion against metal components can cause the wires to deteriorate.
It is essential to carefully inspect the entire visible length of the wiring for cracks, cuts, or exposed metal.
Corrosion is another common issue, particularly near connectors, where moisture and dirt can accumulate and disrupt the circuit.
This increased resistance can weaken or distort the signal, causing the fuel gauge to display incorrect values or malfunction.
Checking the tightness of the connectors is also crucial, as loose connections can completely interrupt the signal flow or cause intermittent faults that are difficult to diagnose.
Checking Continuity with a Multimeter
A continuity check is a simple yet effective method for verifying that electrical current is flowing properly through the wiring.
By using a multimeter set to continuity mode, you can test whether the wire connecting the sender unit to the gauge is intact.
When the wire is in good condition, the multimeter indicates a continuous connection, signifying that the electrical path is complete.
If there is no continuity, it implies that the wire is broken internally or has become disconnected somewhere along its path.
Such hidden damage is common in older vehicles and may not be visible from the outside.
Detecting a break through a continuity check helps you pinpoint the exact problem, allowing you to repair or replace the wire without any guesswork.
Ensuring Proper Grounding
Grounding is a critical component of the fuel gauge system, as it completes the electrical circuit necessary for transmitting accurate signals.
Both the sender unit and the gauge rely on a robust ground connection to function correctly.
If the ground point is loose, corroded, or dirty, the circuit may become unstable, leading to inaccurate or erratic gauge readings.
In some instances, poor grounding can cause the needle to fluctuate or get stuck.
It is essential to verify that all grounding points are clean, securely tightened and free from rust or debris.
A good ground ensures that electrical signals flow smoothly, enabling the fuel gauge to provide consistent and reliable information.
4. Gauge Testing
Simulating Sender Resistance
To verify whether the dashboard fuel gauge is functioning correctly, you can simulate the signal that typically originates from the fuel sender unit.
This is accomplished by creating a controlled resistance within the circuit using a multimeter or simple jumper wires.
As the fuel gauge operates based on resistance values, manually providing a corresponding signal allows you to effectively test how the gauge responds, independently of the sender unit located inside the tank.
In many vehicles, connecting the signal wire to ground or routing it through a known resistor allows you to simulate conditions such as the tank being empty or full.
This method is highly useful as it isolates the gauge from the rest of the system, enabling you to test it directly.
Observing the Gauge’s Response
Once the simulated signal has been applied, turn the ignition to the “ON” position and carefully observe the movement of the gauge needle or the digital display.
A properly functioning gauge should respond smoothly and settle at a specific position corresponding to the applied resistance.
For instance, low resistance may cause the gauge to indicate “Full,” while high resistance may cause it to indicate “Empty”, depending on the specific vehicle’s design.
The key criterion is that the movement should be steady and accurate, free from any sudden, erratic fluctuations or delays.
This observation helps confirm whether the gauge is capable of correctly interpreting electrical signals and displaying them in a readable format.
Identifying a Faulty Gauge
If, during testing, the gauge fails to respond at all, moves erratically, or behaves unstably, it is a definitive indication that the gauge unit itself is defective.
The gauge’s internal components such as: small electrical coils or circuits, as it can degrade over time due to continuous use and temperature fluctuations within the dashboard.
In modern vehicles, the issue may also lie within the electronic circuit board of the instrument cluster.
When a gauge fails to respond even after receiving a valid test signal, it typically requires replacement or professional repair.
Identifying a faulty gauge at this stage prevents the unnecessary replacement of other parts and ensures that the actual problem is correctly resolved.
Know, What are The Common Causes and Solutions
1. Faulty Fuel Sender Unit
A faulty fuel sender unit is one of the most common reasons for a fuel gauge malfunctioning, as it constantly moves within the fuel tank and is continuously exposed to fuel, heat and vibration.
Over time, its internal resistor may wear out, or the float may become damaged or get stuck, causing the gauge to receive incorrect signals.
Consequently, the gauge often remains stuck at ‘Full’ or ‘Empty,’ or the readings may fluctuate erratically without any apparent cause.
In many cases, the float absorbs fuel and becomes heavy, preventing it from rising and falling properly.
The most effective solution for this is to replace the fuel sender unit with a new one that matches the vehicle’s specifications.
During installation, it is crucial to ensure that the float moves freely without any obstruction and does not snag on any part of the tank, as proper movement is essential for accurately detecting the fuel level.
2. Faulty Wiring or Connectors
Wiring and connectors play a vital role in transmitting electrical signals from the fuel sender to the dashboard gauge; any fault along this path can disrupt the flow of signals.
Over time, due to heat and aging, wires may crack, break internally, or suffer from degraded insulation.
Connectors may become loose or corroded, particularly in environments with high humidity or excessive dust and dirt.
These issues often result in intermittent gauge operation, the needle may work sometimes while remaining completely stationary at other times.
To resolve this problem, damaged wires should be repaired or replaced to re-establish a stable electrical connection.
Corroded connectors must be carefully cleaned and all connections properly tightened, to ensure a robust and reliable electrical pathway.
3. Blown Fuse
A blown fuse is a simple yet significant reason for a fuel gauge failing to function completely.
Fuses are designed to protect electrical circuits from damage caused by excessive current; when a fuse blows, it interrupts the flow of electricity within the circuit.
If the fuel gauge remains completely static even when the ignition is switched on, a blown fuse may be the culprit.
Locating the correct fuse within the fuse box, a task facilitated by consulting the vehicle’s owner’s manual, is the first step toward resolving this issue.
Once the correct fuse has been identified, the faulty fuse should be replaced with a new one of the exact same rating.
Furthermore, it is essential to investigate whether the fuse blew due to an underlying electrical fault; addressing this root cause helps prevent the problem from recurring.
4. Faulty Gauge
Over time, the dashboard fuel gauge itself may fail due to internal wear, electrical malfunctions, or damage to the instrument cluster.
In such instances, the gauge may remain stuck in a fixed position, even if it is receiving signals from the fuel sender unit.
This means that even if the sender unit and its associated wiring are functioning correctly, the gauge will still display inaccurate information.
The most reliable solution is to replace the faulty gauge, or the entire instrument cluster, depending on the specific design of the vehicle.
Before completing the installation, it is crucial to test the new gauge to ensure that it responds correctly to signals and displays accurate readings.
5. Poor Grounding
Proper grounding is absolutely essential for the correct operation of any electrical system, including the fuel gauge.
A weak or unstable ground connection can disrupt the electrical circuit, causing the gauge readings to appear erratic or stuck.
This issue is common in older vehicles, where grounding points may suffer from corrosion, become loose, or accumulate dust and grime.
Poor grounding can cause the gauge to behave unpredictably, even if all other components are functioning correctly.
To resolve this issue, all ground connections associated with both the sender unit and the gauge should be inspected and thoroughly cleaned.
Tightening these connections ensures a stable electrical path, while applying dielectric grease helps protect the contact points from future corrosion, thereby maintaining long-term reliability.
What are the Post-Repair Testing That You Need to Perform
1. Reconnecting the Battery
After completing any repairs related to the fuel gauge system, the first step is to properly reconnect the vehicle’s battery.
This restores power to all electrical systems, including the dashboard and the fuel gauge circuit.
It is crucial to ensure that the battery terminals are clean and securely fastened, as a loose or corroded connection can affect voltage flow and result in inaccurate readings.
Reconnecting the battery also resets the vehicle’s electronic systems, allowing them to resume proper operation, a necessary prerequisite before verifying whether the repair was successful.
2. Turning on the Ignition and Observing the Gauge
Once the battery is connected, turn the ignition key to the ‘ON’ position (without starting the engine) and carefully observe the fuel gauge.
At this stage, the gauge should activate and, based on the signal received from the sender unit, gradually move to display the current fuel level.
A steady and precise movement of the needle, or a stable digital reading, indicates that the electrical connection between the sender unit and the gauge is functioning correctly.
If the gauge remains unresponsive or behaves erratically, it may suggest that the original issue has not been fully resolved or that another component requires attention.
3. Verifying the Fuel Level by Adding Fuel
To confirm that the gauge is providing accurate readings, it is helpful to add a small amount of fuel to the tank and observe how the gauge responds.
Adding a small quantity of fuel allows you to compare the reading displayed on the dashboard against the actual fuel level.
For instance, if you add a specific volume of fuel, the needle should rise accordingly and consistently reflect that change.
This step is crucial because it tests the system under real-world conditions and ensures that the sender unit and gauge are properly calibrated.
4. Testing While Driving
The final check should be performed while driving, as this allows you to observe how the fuel gauge performs under normal operating conditions.
Vehicle movement, vibrations and the sloshing of fuel inside the tank can sometimes reveal issues that are not apparent when the vehicle is stationary.
While driving, the gauge should remain steady and reflect gradual changes rather than sudden drops or erratic fluctuations.
Consistent and reliable readings during operation confirm that the repair was successful and that the fuel gauge system is functioning correctly over time.
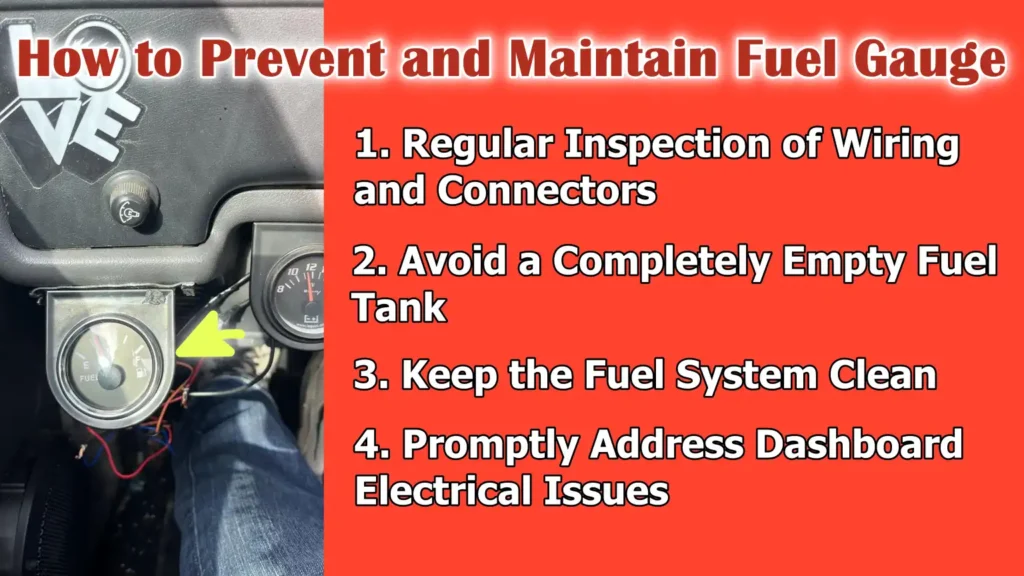
How to Prevent and Maintain Fuel Gauge
Also, there’s studies about fuel gauges that plays a important role in vehicle performance and safety as they literally helps you to predict that how far a vehicle can travel actually, so the studies also shows that even small errors in measurements can unfortunately affects fuel planning, which is why proper calibration and maintenance becomes really important.[¹]
1. Regular Inspection of Wiring and Connectors
Regular inspection of the wiring and connectors is the simplest way to prevent fuel gauge problems before they even begin.
Due to the heat, moisture, dust and vibrations associated with daily driving, electrical connections can gradually deteriorate over time.
Metal connectors often corrode, leading to increased electrical resistance and a weakened signal transmission between the fuel sender unit and the dashboard gauge.
By periodically inspecting these connections and cleaning off any accumulated dirt or corrosion, you can maintain a robust and stable electrical flow.
Tight and clean connections ensure that the fuel gauge receives accurate information without any interruptions.
2. Avoid a Completely Empty Fuel Tank
Frequently driving the vehicle until the fuel tank is completely empty can cause long-term damage to the fuel system, including the sender unit.
The fuel inside the tank helps to cool and protect components such as the fuel pump and the sender mechanism.
When the tank runs empty, these components are exposed to excessive heat and can deteriorate rapidly.
Furthermore, debris and sediment that accumulate at the bottom of the tank can easily become dislodged when fuel levels are very low, potentially obstructing the movement of the float mechanism.
Maintaining at least a small amount of fuel in the tank ensures that the system functions correctly and enjoys a longer service life.
3. Keep the Fuel System Clean
A clean fuel system is essential for accurately measuring fuel levels, as the float located inside the sender unit requires the freedom to move without any obstructions.
Dirt, rust particles, or impurities present in the fuel can accumulate over time and impede the movement of the float.
This can cause the float to get stuck or move erratically, leading to inaccurate readings on the dashboard.
Using clean, high-quality fuel and performing periodic maintenance on the fuel system helps minimize the risk of contamination.
Ensuring that the interior of the fuel tank remains clean facilitates the proper functioning of the sender unit and enhances its overall reliability.
4. Promptly Address Dashboard Electrical Issues
Minor electrical issues within the dashboard or instrument cluster can gradually impact the performance of the fuel gauge.
Problems such as loose connections, minor short circuits, or irregularities in the power supply may not seem serious initially; however, over time, they can result in inaccurate readings.
Resolving these issues in a timely manner prevents them from becoming more complex or incurring higher repair costs.
Prompt attention to dashboard electronics ensures that all gauges, including the fuel gauge, continue to function correctly and provide reliable information while driving.
Read More:
When You Should Go For Any Professional Help?
1. When Standard Testing Fails to Identify the Problem
Sometimes, even after a careful inspection of the fuel sender unit, wiring, fuses and gauges, the true cause of the problem remains elusive.
This may occur because certain faults are hidden within sealed components or involve complex electrical behaviors that are difficult to detect using standard tools.
In such instances, continuing to guess and replace parts can result in a waste of both time and money.
Professional technicians utilize advanced diagnostic tools capable of reading electrical signals, conducting in-depth circuit analysis and identifying faults that remain invisible during routine inspections.
Seeking expert assistance at this stage ensures that the problem is accurately diagnosed and effectively resolved.
2. When Replacing Parts Fails to Resolve the Issue
If you have already replaced commonly failing components such as: the fuel sender unit or the dashboard gauge, yet the problem persists, it typically indicates that the issue lies much deeper within the system.
There may be a hidden fault in the wiring, a poor ground connection in a hard-to-reach location, or an internal malfunction within the vehicle’s electronic control system.
Modern vehicles often feature interconnected systems, where a fault in one component can adversely affect the operation of another.
By conducting a comprehensive analysis of the entire system, a professional technician can pinpoint the root cause of the problem, thereby preventing the unnecessary replacement of parts.
3. For Vehicles Equipped with Modern Electronic Systems
Many modern vehicles utilize sophisticated electronic systems such as: Controller Area Network (CAN) communication (commonly referred to as the CAN bus), through which various vehicle components share information via a central network.
In these systems, the fuel gauge does not receive signals directly from the sender unit; instead, it relies on data processed by a control module.
This makes diagnosing issues even more challenging, as the problem could stem from the software, a sensor, or a communication fault within the network itself.
Working safely and effectively with these systems requires specialized diagnostic scanners and technical expertise.
In such situations, seeking professional assistance is the best course of action to ensure proper repairs and prevent further damage to sensitive electronic components.
Conclusion – How to Fix Fuel Gauge Not Working
Accurate fuel readings are always the most important thing as you can predict and know about your correct fuel readings and don’t have to guess anymore.
The fuel gauge system is based on a simple principle involving electrical resistance and mechanical movement, yet it relies on several interconnected components such as: the sender unit, wiring, the gauge itself, fuses and grounding.
A malfunction in any one of these components can adversely affect the reading displayed on your dashboard.
By performing some basic visual inspections, observing the gauge’s behavior and conducting simple diagnostic tests using tools like a multimeter, you can pinpoint the root cause of the problem without any unnecessary guesswork.
In many cases, the issue stems from common faults such as: loose connections, damaged wiring, or a defective sender unit, all of which can be repaired without incurring significant expense.
Furthermore, it is equally important to recognize when to seek professional assistance for a problem, particularly in the case of modern vehicles equipped with advanced electronic systems.
By adopting certain preventive measures such as: keeping electrical connections clean, avoiding letting the fuel level drop too low and promptly addressing electrical issues, you can significantly extend the lifespan of the fuel gauge system and ensure its consistent accuracy.
Now, that’s all from this guide and if you still left with unsolved questions, then you can comment down for more info.
Frequently Asked Questions
Q1. Why does the fuel gauge stop working properly?
A fuel gauge typically stops working due to a fault in the fuel sender unit, the wiring, the fuse, or the gauge itself. The most common cause is a defective sender unit located inside the fuel tank, where the attached float or resistor degrades over time. Wiring issues such as: loose connections or corrosion, as it can interrupt the signal, while a blown fuse can cause the gauge to stop functioning entirely. In some instances, the dashboard gauge or the instrument cluster itself may be faulty. As all these components are interconnected, even a minor defect in one part can affect the entire system.
Q2. How can I tell if my fuel sender unit is bad?
A faulty fuel sender unit often exhibits clear symptoms, such as the gauge getting stuck at ‘Full’ or ‘Empty,’ or providing inaccurate and erratic readings. You may also observe sudden drops or spikes in the fuel level while driving. The best way to confirm this is to test the sender unit using a multimeter to check its resistance. If the resistance does not change smoothly as the float moves, or if the readings fall outside the expected range, the sender unit is likely defective and needs to be replaced.
Q3. Can I drive my car with a broken fuel gauge?
Yes, you can drive your car with a broken fuel gauge, although doing so for an extended period is not advisable. Without accurate fuel readings, you will be unable to determine how much fuel remains, thereby increasing the risk of running out of fuel unexpectedly. This can lead to inconvenience, leave you stranded on the road and in some cases even cause damage to the fuel system if the tank is repeatedly allowed to run completely dry. If you absolutely must drive the vehicle, it would be best to manually monitor your fuel consumption and continue to refuel regularly until the underlying issue is resolved.
Q4. How do I check if the fuel gauge itself is functioning correctly?
To check the fuel gauge, you can simulate the signal that typically originates from the fuel sender unit. This can be accomplished by creating a controlled resistance using a multimeter or a jumper wire. When you turn on the ignition, the gauge should move in response to the specific signal you are feeding it. If the gauge fails to move or behaves erratically, it may be defective. This method allows you to test the gauge independently, separate from the sender unit.
Q5. Why does my fuel gauge read “Full” even when the tank is not full?
When a fuel gauge consistently reads “Full,” the cause is typically a fault within the sender unit or its associated wiring. The float inside the tank may have become stuck in its uppermost position, or the resistor may be faulty, resulting in a constant signal indicating that the tank is full. In some instances, a short circuit in the wiring can also cause the gauge to receive an erroneous signal. To pinpoint the exact cause, it is essential to inspect both the sender unit and the electrical connections.
Q6. Why does my fuel gauge still read “Empty” after refueling?
If the fuel gauge continues to read “Empty” even after refueling, the problem may stem from a defective sender unit, a broken wire, or a blown fuse. The float inside the tank may have become stuck in its lowest position, or the electrical signal may not be reaching the gauge at all. In certain vehicles, a poor ground connection can also be the root cause of this issue. Inspecting the various components of the system one by one helps determine whether the issue is mechanical or electrical.
Q7. How much does it cost to fix a fuel gauge problem?
The cost of repairing a fuel gauge depends on the specific cause of the problem and the type of vehicle. Simple tasks, such as replacing a fuse or repairing a wire, typically incur lower costs. Replacing the fuel sender unit may cost slightly more, specially if the fuel tank needs to be removed. If the issue lies within the dashboard gauge or instrument cluster, the cost may be higher due to the complexity of those specific components. Accurately diagnosing the problem helps avoid unnecessary expenses.
Q8. Can a blown fuse cause the fuel gauge to stop working?
Yes, a blown fuse can cause the fuel gauge to stop working completely, as it interrupts the electrical supply to the circuit. If the gauge does not move at all when the ignition is turned on, the fuse should be the first thing to be checked. Installing the correct type of fuse may resolve the gauge issue; however, it is also essential to verify whether an underlying electrical fault caused the fuse to blow in the first place.
References:
[1] Fuzzy infrared sensor for liquid level measurement: A multi-model approach
https://www.sciencedirect.com/science/article/abs/pii/S0955598619300718

Guys, I’m a car audio enthusiast and customization expert and I love clear sound and clean installation. Plus, I have spent years helping people build their dream audio setups. And whenever I’m working on cars, I probably listen to music and thinks about the next big upgrade.
