Written By: Don Dodi
Fact Checked By: Kristen Brown
Reviewed By: Diego Rosenberg
It is really important to keep the hazards lights up and running in terms of emergencies, otherwise malfunctioning hazard light literally increases your risk of a roadside accident by nearly 30%, which is huge risk.
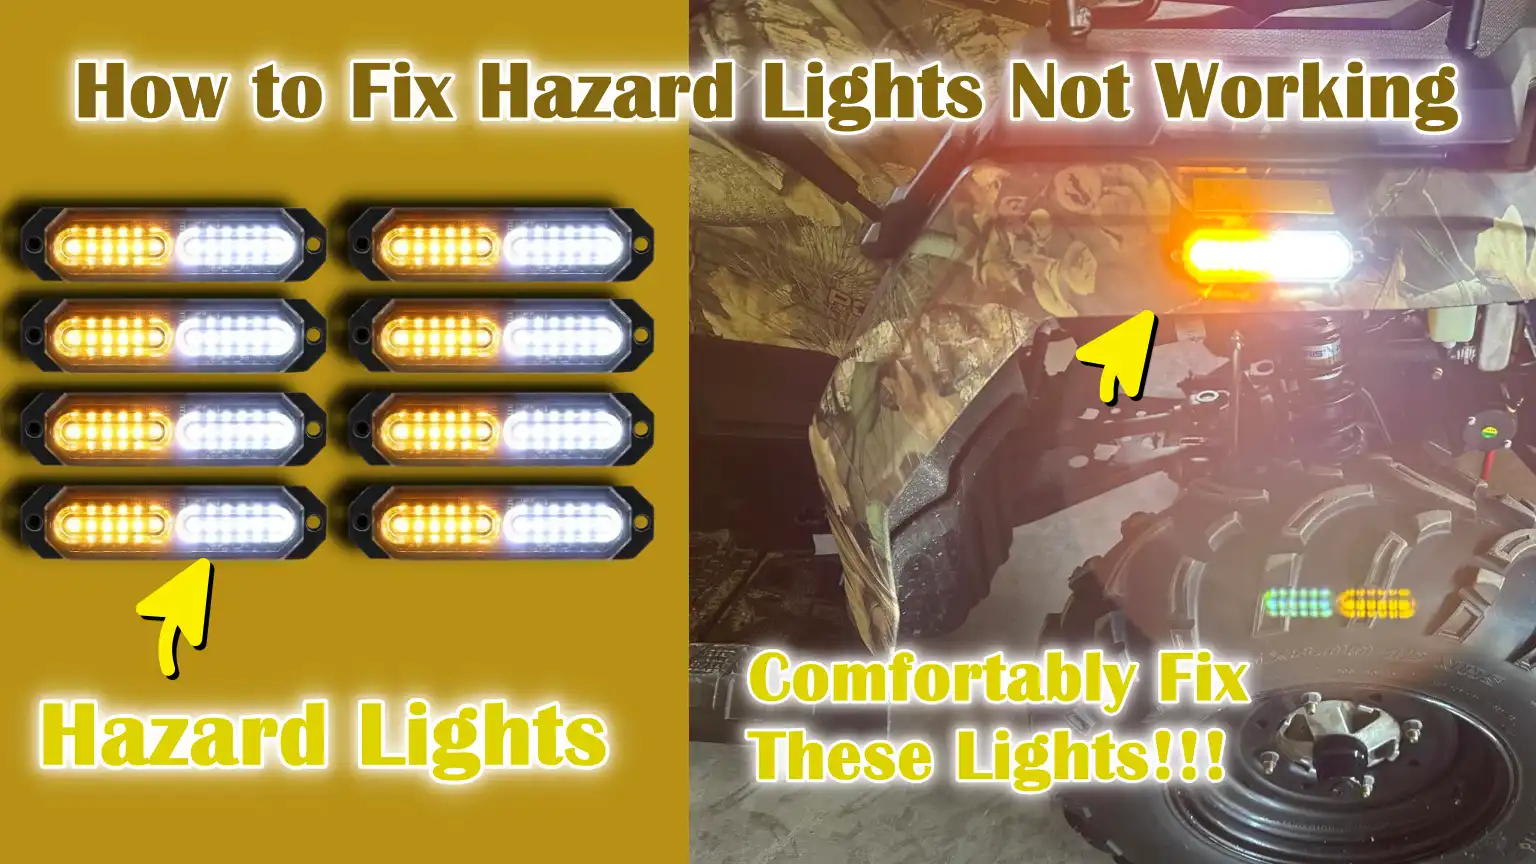
So, Hazard lights are also known as the Emergency Flashers and without a doubt these are really important as a safety feature in any vehicle, as it is actually designed to alert the other drivers during the emergencies, breakdowns or low-visibility conditions such as: heavy rain, extreme fog or in the nighttime driving as well.
Also, many drivers does not actually realize that the hazard lights actually relies on a combination of the electrical components such as: fuses, bulbs or LEDs, wiring, switches and in modern cars there’s electronic control modules are included as well.
So, even a single faulty components such as: blown fuse or damaged relay can make the whole system completely useless.
That’s why, we have come up with this guide on How to Fix Hazard Lights Not Working, so that you can able to fix those lights to prevent accidents and improve overall driving safety by huge margin.
Now, Let’s Understand About How Hazard Lights Actually Works?
Hazard lights, also known as emergency flashers, are designed to make all four turn signal lights blink at the same time to alert other drivers that your vehicle is stalled or experiencing a problem.
This system is directly connected to your car’s electrical circuit and, in most vehicles, operates even when the engine is off, as it draws power from the battery.
When you press the hazard light switch, it sends an electrical signal that activates a flasher unit or control module, causing the lights to blink and dim repeatedly.
This blinking pattern is important because blinking lights attract more attention than monotonous lights, specially in bad weather, at night, or on busy roads.
Understanding how this system works makes it much easier to identify what might be wrong when hazard lights stop working properly.
1. Hazard Light System Overview: Flasher Relay, Switch, Bulbs or LEDs and Fuses
The hazard light system relies on several key parts that work together seamlessly.
The fuse is one of the most important parts because it protects the system from electrical overload.
If too much current flows through a circuit, the fuse blows, preventing wiring damage or the risk of a fire.
A blown fuse is one of the most common and easily fixable problems.
The hazard light switch is the control button you press on the dashboard and it contains small electrical contacts that complete the circuit when activated.
Over time, these contacts can wear out, become dirty, or fail completely.
The flasher relay, sometimes called the flasher unit, controls the blinking action.
In older vehicles, this is a small mechanical device that produces the clicking sound you often hear when turn signals or hazard lights are activated.
It works by heating and cooling a small metal strip that repeatedly opens and closes a circuit.
If this relay fails, the lights may not light at all or may flash without flashing.
In newer vehicles, the blinking function may be electronically controlled from the body control module instead of a simple relay.
The bulbs or LEDs are the visible part of the system.
In traditional systems, incandescent bulbs light up when electricity passes through a thin filament inside them.
Sometimes, even a single bulb burning out can affect the system’s blinking pattern.
In modern vehicles, LED lights are commonly used because they last longer, use less power and operate faster.
However, they rely more heavily on electronic control systems.
2. Differences Between Older Cars and Modern Vehicles
Older vehicles typically have simpler electrical systems.
They use incandescent bulbs, basic wiring and a mechanical flasher relay.
Because of this simple design, problems are often easier to diagnose.
Most problems can be traced to a blown fuse, a burned-out bulb, or a faulty relay.
Repairs are generally inexpensive and can often be performed at home with basic tools.
Modern vehicles, on the other hand, often use advanced electronic systems such as LED lighting and CAN bus networks.
In these cars, hazard lights may be controlled by a central computer module called the Body Control Module.
Instead of a simple mechanical relay, software and electronic circuits manage the blinking patterns.
This improves efficiency and reliability but also makes troubleshooting more difficult.
A warning light on the dashboard or an error code stored in the system may indicate a deeper electronic problem that requires a diagnostic scan tool.
3. Common Causes of Hazard Light Failure
Hazard lights can malfunction for a number of practical and predictable reasons.
A blown fuse is one of the most common causes and should often be checked first.
A faulty flasher relay can cause them to stop blinking or flash erratically.
Burnt-out bulbs or a defective LED unit can prevent one or more lights from working.
A faulty hazard switch can also completely block the electrical signal.
Wiring problems such as loose connections, corrosion, or damaged wires can break the circuit and prevent the system from working.
In modern vehicles, software glitches, a weak battery, or a faulty body control module can also affect hazard light performance.
Low battery voltage can cause hazard lights to malfunction because hazard lights rely on constant power.
Moisture inside the light housing can cause short circuits or corrosion over time.
Do Initial Safety Check
Before you begin repairing a faulty hazard light, the first and most important step is to prioritize safety.
Hazard lights are part of your vehicle’s emergency warning system, so if they malfunction, you need to ensure you don’t endanger yourself while investigating the problem.
Many accidents occur when drivers try to quickly check their vehicle on the side of the road without properly parking it.
Taking a few simple but careful steps initially can prevent injuries, protect your car’s electrical system and make troubleshooting easier and more accurate.
1. Ensuring the Vehicle is Parked Safely and the Engine is Off
Always park your vehicle in a safe and stable location before checking the hazard light system.
Choose a level spot away from traffic, preferably in a parking area or on the side of the road, well away from moving vehicles.
Firmly engage the parking brake to prevent any movement.
If your vehicle has a traditional key system, turn off the engine completely and remove the key from the ignition.
For push-start vehicles, ensure the ignition is completely off.
Turning off the engine reduces the risk of electrical short circuits and protects sensitive electronic parts from voltage spikes.
Although hazard lights usually work without the engine running, checking electrical parts while the engine is running can sometimes cause confusion in diagnosis, specially in modern vehicles with smart charging systems.
Turning off the vehicle for a few minutes before starting to check parts also helps stabilize the electrical system.
If you’re working at night or in low visibility, use a reflective warning triangle or, if necessary, ask someone to help guide traffic.
Safety should always come first before attempting any repairs.
2. Checking the Position of the Hazard Light Switch
After ensuring the vehicle is safe, the next simple but important step is to check the hazard light switch itself.
Many drivers overlook this basic check.
The hazard switch is usually located on the dashboard and is marked with a red triangle.
Press the switch firmly once and see if it clicks into place.
In some vehicles, the switch may feel pressed but may not fully engage due to dust buildup, wear, or loose internal contacts.
Gently press the switch several times to see if the light responds.
If the switch feels strangely loose, stuck, or doesn’t click properly, this could indicate internal damage.
In older vehicles, the hazard switch completes a circuit directly to the flasher relay.
In newer vehicles, the switch sends an electronic signal to a control module.
If that signal isn’t sent properly, the hazard lights won’t turn on.
A careful inspection of the switch can sometimes fix the problem immediately, specially if the problem is simply a poor connection or minor wear and tear inside.
3. Check the dashboard indicators and any flickering lights
After pressing the switch, carefully examine the dashboard instrument cluster.
Most vehicles have a visual indicator that flashes when the hazard lights are activated.
If the indicator doesn’t illuminate at all, the problem could be a blown fuse, a faulty switch, or a power supply issue.
If the indicator illuminates but the exterior lights don’t, the problem could be with the bulb, LED, wiring, or grounding connection.
Look for unusual behavior, such as rapid blinking, very slow blinking, dim lights, or flickering.
In older systems, rapid blinking often indicates a burned-out bulb.
Dim or dim lights may indicate a low battery or poor electrical grounding.
Flickering lights may indicate loose wiring connections or corrosion in the circuit.
These small signs provide important clues that help narrow down the cause of the malfunction.
How to Fix Hazard Lights Not Working – Basic Troubleshooting Steps
When hazard lights stop working, most problems are caused by simple electrical faults, which can be identified with careful and patient inspection.
The hazard light system relies on regular power, good connections and working parts.
If even one part fails, the system can shut down completely or malfunction.
The good news is that many problems can be diagnosed without advanced tools.
By checking fuses, bulbs, switches and wiring step by step, you can often quickly identify the problem and fix it safely.
These basic troubleshooting steps focus on the most common and practical causes of malfunction.
How to Check the Fuses
Fuses are one of the most important safety components in your vehicle’s electrical system.
They protect wiring and devices from damage caused by excessive electrical current.
If a short circuit or overload occurs, the thin metal strip inside the fuse melts, breaking the circuit.
If this happens, the hazard lights will stop working completely.
1. Locate the Fuse Box
Most vehicles have at least two fuse boxes.
One is usually located inside the cabin, often under the dashboard or near the driver’s side footwell.
The second fuse box is usually located in the engine compartment.
The exact location depends on the vehicle model.
Carefully open the fuse box cover and look at the diagram printed inside the cover, as it usually shows the location and purpose of each fuse.
2. Identify the Hazard Light Fuse Using the Owner’s Manual
The owner’s manual is the most reliable guide to identifying the correct fuse for the hazard lights.
In many vehicles, the hazard lights often use the same fuse as the turn signal.
The manual will list the fuse number and its amperage rating.
Replacing the wrong fuse or using the wrong amperage can cause further problems, so always confirm the correct slot before removing anything.
3. Test or Replace a Blown Fuse
Remove the fuse you suspect using a fuse puller or small pliers.
Hold it in front of the light and check if the metal strip inside is broken.
If it is broken, it means the fuse is blown and needs to be replaced with a new fuse of the same amperage rating.
Never use a higher rated fuse, as this could damage wiring or cause a fire hazard.
After replacing, turn on the hazard lights to see if they are working properly.
If the new fuse blows again immediately, it could indicate a deeper electrical short that needs further investigation.
How to Check the Bulbs
Bulbs are a visible part of the hazard light system and are exposed to heat, vibration, moisture and regular wear.
Over time, incandescent bulbs can burn out when the thin filament inside breaks down.
Even though hazard lights use all turn signal bulbs simultaneously, a single bad bulb can sometimes cause irregular blinking or system malfunction.
1. Check all turn signal bulbs for damage or burnout
Go around the vehicle and check each turn signal light, front and rear.
Look for bulbs that are dark, dim, broken, or not lit at all.
If you remove a bulb, check for broken or black filaments.
On vehicles with LED lights, check for areas where the light is dim or appears dimmer than others.
Varying light output may indicate a faulty unit.
2. Replace faulty bulbs with the correct type and specifications recommended by the manufacturer
Using the wrong bulb can affect the bulb’s brightness, brightness and power load.
When installing a new bulb, avoid touching the glass with bare fingers, as oils from your skin can shorten the bulb’s life.
After replacement, test the hazard light again to make sure it’s working properly.
How to Check the Hazard Light Switch
The hazard light switch is the control center of the system.
It completes the electrical circuit or sends an electronic signal that activates the flashing process.
If the switch is damaged internally, the entire system may stop working, even if all other parts are functioning properly.
1. Test Switch Operation and Ensure Correct Connections
Push the hazard switch firmly and see if it clicks normally.
If it feels loose, stuck, or doesn’t respond, there may be wear or a broken connection inside.
In some vehicles, removing the dashboard panel allows you to access the wiring connector behind the switch.
Ensure the connector is properly seated and not even slightly disconnected.
A loose connector can completely block the signal.
2. Clean the contacts if they are corroded.
Over time, dust, moisture and corrosion can affect the metal contacts inside the switch.
If easily accessible, gently cleaning the contacts with a suitable electrical contact cleaner can restore their proper functioning.
Corrosion increases electrical resistance, preventing proper signal transmission.
Once cleaned and reconnected, test the hazard light again to see if there is any improvement.
How to Check the Wiring and Connections
Wiring acts as a pathway carrying electrical current from the battery to fuses, switches, relays and lights.
If this pathway is damaged anywhere, the system will not function properly.
Electrical wiring problems are common in older vehicles and cars that have been exposed to moisture, road salt, or previous repairs.
1. Check for loose connections, corrosion, or wiring damage
Look closely at the wiring near the fuse box, battery and light housing.
Look for frayed wires, broken insulation, burn marks, or loose connectors.
Corrosion often appears as a green or white deposit on metal terminals.
Loose or corroded connections reduce current flow and can cause lights to dim, flicker, or fail completely.
Tightening loose connectors and cleaning corroded terminals can often restore proper operation.
2. Pay attention to light connectors behind and near the dashboard
Most hazard light problems occur behind the dashboard, where many connectors are located.
Vibration from daily driving can gradually loosen these connectors over time.
Rear light assemblies are also common trouble spots because they are exposed to water and dust.
If necessary, remove the light housing and carefully inspect the connectors.
For reliable performance, it’s important to ensure all connectors are clean, dry and properly connected.
How to Fix Hazard Lights Not Working – Advanced Troubleshooting
When basic checks of fuses, bulbs, switches and visible wiring don’t resolve the issue, the problem may involve deeper electrical or electronic components.
Modern vehicles rely heavily on control modules and communication networks to manage the lighting system.
Unlike older cars, which used simple mechanical parts, newer vehicles often rely on computer-controlled circuits.
Advanced troubleshooting requires patience, careful observation and sometimes basic diagnostic tools.
Understanding these systems in simple terms helps you troubleshoot with confidence and avoid unnecessary repairs.
How to Fix Flasher Relay or Module
The flasher relay or flasher module is the part that controls the blinking pattern of hazard lights.
Without it, the lights may remain on, blink too quickly, blink too slowly, or not turn on at all.
Its main function is to interrupt the flow of electricity in a fixed pattern so that the lights flash and dim at a consistent and visible rate.
In most vehicles, the normal flashing speed is approximately 60 to 120 flashes per minute, which is considered the safest range for visibility and driver identification.
1. The Role of the Flasher Relay in Turning on Hazard Lights
In older vehicles, the flasher relay is mechanical.
It works by heating a small metal strip when electricity passes through it.
As the strip heats up, it bends and breaks the electrical connection, turning the light off.
When it cools, it reconnects the circuit and turns the light back on.
This heating and cooling cycle creates the blinking effect.
Because this system depends on heat and electrical load, a burned-out bulb can sometimes change its flashing speed.
In modern vehicles, the mechanical relay is often replaced with an electronic flasher module or controlled by the body control module.
These systems use electronic timers instead of heat-based strips.
Electronic flashers are more stable and less affected by bulb failure, but when they do fail, they can stop working completely without warning.
2. Signs of a Bad Flasher Relay
There can be clear warning signs of a bad relay.
Hazard lights may not come on at all, may remain on continuously, or may not respond to switches.
You may also notice that the typical clicking sound is missing.
In some cases, turn signals may also stop working, as both systems often share the same relay or control module.
Rapid blinking, known as hyper-flashing, can also indicate a relay problem, specially in vehicles with modified or incorrect bulbs.
3. How to Diagnose a Flasher Relay
Replacing the flasher relay depends on the vehicle model.
It’s usually found inside the internal fuse box, under the dashboard, or sometimes in the engine compartment fuse panel.
Its exact location is indicated in the owner’s manual.
Some vehicles have the relay clearly labeled, while others require checking the printed diagram inside the fuse box cover.
4. How to Test the Flasher Relay
Testing a traditional mechanical relay can be easy.
Turn on the hazard lights and listen carefully for clicking sounds.
If there’s no sound and all fuses are fine, the relay may be faulty.
In some vehicles, you can temporarily replace the hazard relay with a similar relay, such as one used for another lighting function.
If the hazard lights still work after replacement, the original relay is likely faulty.
For electronic modules, testing may require a multimeter to check the power supply and ground connections.
5. How to Replace a Faulty Relay
Replacing a relay is usually easy.
After turning off the vehicle and removing the key, carefully remove the old relay and insert a new one with the exact same specifications.
Always match the part number and design to avoid compatibility issues.
Once installed, activate the hazard lights to confirm it is working properly.
If the problem persists, further electronic diagnostics may be required.
How to Fix CAN-Bus or Electronic Control Problems
Many modern vehicles use a communication system called CAN Bus, which stands for Controller Area Network.
This system allows electronic modules inside the car to communicate with each other via shared data signals.
Instead of sending power directly through a simple switch and relay, the hazard light switch sends a signal to a control module.
That module then instructs the lights to flash.
This design improves efficiency and reduces wiring complexity, but it also means that problems can be more technical.
1. ECU-Controlled Lighting System
In vehicles with advanced electronics, the body control module or engine control unit manages the lighting function.
These modules monitor the electrical load, detect bulb faults and automatically adjust the flashing speed.
If the module detects a fault, it may turn off hazard lights or trigger a warning message on the dashboard.
Low battery voltage, faulty sensors, water ingress, or internal software errors can interfere with normal operation.
2. Diagnosing Using an OBD2 Scan Tool
If you suspect a problem with the electronic controls, an OBD2 scan tool can help identify stored error codes.
This tool connects to the diagnostic port, usually located under the dashboard.
Upon scanning, the system may display codes related to lighting circuits, communication errors, or module malfunctions.
These codes provide important clues as to whether the problem is related to wiring, voltage supply, or the control module.
A basic scan tool can also read fault codes, which aid further investigation.
Once you identify the code, you can learn its meaning or consult the service manual for specific repair steps.
In some cases, clearing the code after fixing a loose connection or replacing a part may restore normal function.
However, if the module itself is faulty, professional repair or reprogramming may be required.
What are the Temporary Fix for the Hazard Lights
If your hazard lights stop working while driving or during a roadside emergency, the situation can feel stressful and unsafe.
Hazard lights are designed to alert other drivers that your vehicle is stopped, slowing down, or experiencing a problem.
Without them, your vehicle becomes less visible, specially at night, in heavy rain, fog, or on busy highways.
While a permanent repair should be completed as soon as possible, there are some temporary safety measures you can take to reduce risks until a proper repair is made.
These temporary fixes cannot replace a working hazard system, but they can help you stay safer in critical situations.
1. Using Turn Signals in an Emergency
If your hazard lights are not working, but your regular turn signals still work, you can use them as a way to provide some warning.
Turn signals are designed to shine on one side of the vehicle at a time, but they still attract attention because flashing lights are more noticeable than stationary lights.
If your vehicle is stopped on the side of the road, you can activate your left or right turn signal depending on the traffic.
This lets oncoming drivers know that your vehicle is stopped or has a problem.
If you are driving slowly due to a mechanical problem, you can keep your turn signal on continuously on the side of the road closest to the traffic to increase visibility.
While this doesn’t provide as much warning as hazard lights, it still increases your chances of being seen.
It’s important to understand that in many countries, hazard lights are required by traffic laws during emergencies, so this method should only be used until the correct repairs are complete.
Always exercise caution when using this method and avoid sudden stops.
2. Portable Hazard Warning Devices
Portable hazard warning devices are highly recommended as emergency backups.
These include reflective warning triangles, LED safety flares and magnetic battery-powered warning lights.
Reflective triangles are widely used because they are electrically independent and can be seen from a distance when headlights fall on them.
Many road safety authorities recommend placing a reflective triangle at least 45 to 100 meters behind your vehicle on regular roads and a little further away on highways to give drivers more reaction time.
Battery-powered LED flares are another effective option.
They are bright, lightweight and can flash in different patterns to attract attention.
Compared to traditional road flares, which can catch fire, LED versions are safer because they don’t produce heat or smoke.
These devices are specially useful at night or in bad weather when visibility is low.
Some magnetic warning lights can be mounted directly to the vehicle’s body, providing another flashing signal if the built-in hazard system malfunctions.
Keeping portable warning equipment in your trunk is a simple yet effective safety measure.
Many safety experts recommend having at least one reflective triangle and one high-visibility vest in every vehicle.
These items are inexpensive, easy to store and can significantly reduce the risk of a second accident if your vehicle breaks down.
Know, When You Should Consult to the Professional Help
Hazard lights are an essential safety feature and if they continue to malfunction after careful inspection and basic repairs, it may be time to seek professional help.
While many common problems, such as blown fuses, burned-out bulbs, or loose connections, can be fixed at home, some involve deeper electrical faults that require advanced tools and technical knowledge.
Modern vehicles are equipped with complex electronic systems that control not only lighting but also braking, steering, engine management and safety features.
Attempting advanced repairs without proper understanding can sometimes result in serious damage or even pose a safety risk.
Knowing when to stop and consult a trained technician is an essential part of responsible vehicle maintenance.
1. Persistent Problems Despite Basic Troubleshooting
If you’ve already checked the fuses, all bulbs, tested the hazard switch, inspected the visible wiring and perhaps even replaced the flasher relay, yet the hazard lights still don’t work, this indicates a deeper problem.
Persistent problems could indicate hidden wiring damage, a grounding fault, or an internal module failure.
For example, if a fuse repeatedly blows, it often indicates a short circuit somewhere in the wiring.
A short circuit occurs when exposed wires touch each other or come into contact with metal parts of the vehicle, causing a high current to flow.
Without specialized testing equipment, it can be difficult to pinpoint the exact location of the short circuit.
Another sign that professional help is needed is when the hazard lights work intermittently.
If they work occasionally but fail without warning, it could be a sign of an unstable voltage supply, a loose internal connector, or a faulty control module.
Such faults require a systematic testing process, which is usually performed in a workshop environment.
2. Electrical System Diagnostics Beyond User-Level Repair
Modern vehicles rely heavily on electronic control units and communication networks.
In many cases, hazard lights are controlled by a body control module rather than a simple mechanical relay.
Detecting problems in these systems may require advanced diagnostic scanners that can read manufacturer-specific error codes.
While basic OBD2 tools can identify some faults, professional diagnostic equipment provides deeper access to system data and live readings.
Technicians use tools like digital multimeters, circuit testers and wiring diagrams to accurately measure voltage, resistance and signal flow.
They can perform continuity tests to detect broken wires hidden behind panels or under carpets.
In some cases, modules may require reprogramming or software updates, which can only be performed using specialized equipment designed for the manufacturer’s system.
Performing these procedures without training could damage sensitive electronics or erase important settings.
3. Maintain Safety with Modern Electronics
Modern vehicles contain dozens of electronic modules connected to a shared wiring system.
Mishandling these systems can lead to unintended consequences.
Disconnecting the wrong connector, installing the wrong fuse rating, or damaging the control unit can impact other systems such as airbags, anti-lock brakes, or stability control.
These systems are designed to protect passengers during emergencies, so maintaining their integrity is crucial.
Working around live electrical circuits also poses safety risks.
Even though vehicle systems operate at lower voltages than household electricity, improper handling can cause sparks, short circuits, or battery damage.
In hybrid and electric vehicles, electrical systems can be even more complex and require special safety precautions.
How to Prevent and Maintain Hazard Lights

Most drivers don’t use hazard lights every day, but when an emergency occurs, they should be activated quickly and without delay.
Preventive maintenance is the best way to avoid unexpected problems.
Many hazard light malfunctions are caused by minor negligence, such as neglecting dim bulbs, moisture buildup, or damaged electrical components.
By performing regular minor checks, you can prevent major electrical problems, reduce repair costs and ensure your vehicle remains safe and legally compliant.
Taking preventive measures also keeps other drivers safe, as properly functioning hazard lights provide early warning during breakdowns, accidents, or bad weather.
As well as, there’s research on emergency lighting for roadside assistance vehicles that includes hazard and warning lights, that shows that there’s state regulations and scientific finds on how emergency lighting systems that actually affects visibility, driver response and crash prevention as well in the different and harsh environmental conditions such as: darkness, fog, rain and in heavy traffic as well, so this research literally shows that having hazard lights in working conditions plays a important role to alert the passing drivers and that’s how it reduces the crash risk for stopped vehicles.[¹]
1. Regularly Check Your Lights During Vehicle Inspections
One of the simplest and most effective preventative measures is to regularly check your lights.
During a regular vehicle inspection, such as changing the oil or checking tires, turn on the hazard lights and walk around the vehicle to ensure that all four indicators are on at the same speed and brightness.
Consistent illumination usually means the system is balanced and functioning properly.
If a light dims, flickers, or doesn’t light at all, it could be an early sign of a weak bulb, a poor grounding connection, or a voltage problem.
Regular inspections help you detect minor problems before they become serious issues.
For example, a bulb may dim or flicker before burning out completely.
Catching it early allows you to replace it immediately rather than dealing with an emergency.
Many road safety officials recommend checking all exterior lights at least once a month and before long trips.
This simple habit can significantly reduce the risk of getting stranded without proper warning signs.
2. Keep Extra Bulbs and Fuses in Your Car
Keeping extra bulbs and fuses is a practical and inexpensive safety measure.
Bulbs can fail suddenly due to vibration, heat, or normal wear and tear.
A short circuit can blow a fuse.
Easy access to replacements allows you to quickly fix minor problems instead of driving without proper signal.
When storing extra fuses, always use the correct amperage rating recommended by your vehicle manufacturer.
Using a higher rated fuse can cause excessive electrical current, which can damage wiring and pose a fire risk.
Having the right type of bulb is equally important, as using the wrong bulb can cause changes in flash speed or reduced brightness.
Storing these small spare parts in a secure container inside your glove compartment or tool kit ensures they remain clean and ready for use.
3. Prevent Moisture from Accumulating in Light Housings
Moisture is one of the most common causes of lighting system problems.
Water can enter the light housing through a broken lens, worn seal, or loose fittings.
When moisture accumulates inside the housing, it can corrode metal contacts, weaken electrical connections and ultimately cause a short circuit.
Corrosion on metal parts appears as a green or white powder and increases electrical resistance, which can cause the light to dim or fail completely.
To prevent moisture buildup, regularly inspect the light lens for cracks or damage.
If you notice condensation inside the housing, have it repaired immediately.
Drying the housing and replacing worn seals can prevent further damage.
Ensuring all mounting screws are tight and gaskets are intact also helps prevent water from entering.
Park in covered areas when possible and avoid direct high-pressure water spray onto the light seal when washing, which can introduce more moisture.
Read More:
Conclusion – How to Fix Hazard Lights Not Working
We knows that every second matters on the road to be on the safe side: and that’s where if you have properly functioning hazard lights then it gives other drivers the warning as they need to stay safe.
As well as, they’re a legally required safety feature in most countries and serve as an emergency warning system that can prevent serious accidents.
When your vehicle breaks down, slows down suddenly, or stops in a dangerous area, hazard lights give other drivers extra time to react.
That extra reaction time can mean the difference between a safe stop and a collision.
Therefore, keeping your hazard lights in proper working condition isn’t optional; it’s an essential part of responsible vehicle ownership.
In this guide, you’ve learned that hazard light problems are often caused by minor issues like blown fuses, burned-out bulbs, faulty switches, or worn relays.
These are common wear parts that can deteriorate over time due to heat, vibration, moisture and electrical loads.
You may also notice that modern vehicles may use advanced electronic control modules and communication systems, which sometimes require diagnostic tools for proper repair.
Understanding the difference between basic mechanical systems and computer-controlled systems helps you make better decisions when troubleshooting.
So, that’s all from this guide and you can ask related questions in the comment box below.
Frequently Asked Questions
Q1. Why aren’t my hazard lights working, but the turn signals are working fine?
Answer: If your turn signals are working, but not the hazard lights, the problem is often related to the hazard light switch or the separate hazard flasher relay. In many vehicles, the turn signals and hazard lights share the same bulb but may use different control circuits. The internal contacts of the hazard switch can become worn, specially if it is old or rarely used. In some cars, there are separate fuses for the turn signals and hazard lights, so a blown hazard fuse may only stop the emergency flasher. Checking the fuse box and testing the hazard switch is usually the first step in this situation.
Q2. Can a blown fuse cause hazard lights to stop working?
Answer: Yes, a blown fuse is one of the most common reasons for hazard lights to stop working. Fuses protect electrical circuits from overload. If a short circuit or sudden surge causes excessive electrical current to flow through the system, a fuse will blow to prevent damage. When a fuse blows, power to the hazard light system is cut off and the lights won’t illuminate at all. Replacing a fuse with the correct amperage rating often restores normal operation. However, if a new fuse blows again quickly, there may be a deeper wiring problem that requires further investigation.
Q3. How do I know if the flasher relay is bad?
Answer: A bad flasher relay often causes hazard lights to stop working properly. The lights may flash very quickly, without flashing, or not at all. In older vehicles, you’ll often hear a clicking sound when the hazard lights come on. If that clicking sound disappears, the relay may be bad. Sometimes, both turn signals and hazard lights fail at the same time because they share the same relay. Replacing the relay is often easy and inexpensive, but you should use the exact part designed for your vehicle.
Q4. Is it safe to drive if my hazard lights aren’t working?
Answer: Driving without working hazard lights is not recommended, specially for long distances. Hazard lights are an essential safety feature used in case of a vehicle breakdown, accident, or sudden stop. Without them, other drivers may not notice your vehicle in time, specially at night or in bad weather. Your regular lights and turn signals may still be working, but hazard lights provide a stronger and clearer warning signal. If they stop working, it’s best to have them repaired as soon as possible to maintain safety and comply with traffic laws.
Q5. Can low battery voltage affect hazard lights?
Answer: Yes, low battery voltage can affect the hazard light system. Hazard lights depend on constant power from the battery, even when the engine is off. If the battery is weak, the lights may appear dim, glow slowly, or not work at all. In modern vehicles with electronic control modules, low voltage can also cause the system to malfunction or cause the lights to not turn on properly. Testing the battery with a simple voltage tester can help determine if the power supply is part of the problem.
Q6. Why are my hazard lights flashing too quickly?
Answer: Flashing, sometimes called hyper-flashing, is often a sign of a burned-out bulb in vehicles with traditional incandescent lights. This system detects a change in electrical load and increases the blinking speed as a warning. In vehicles with LED lights, if the wrong bulbs are installed or there is a compatibility issue, the bulbs may blink rapidly. Replacing the faulty bulb with the correct one usually fixes the problem.
Q7. Can water getting inside the light housing cause hazard lights to stop working?
Answer: Yes, moisture inside the light housing can cause corrosion and electrical short circuits. When water gets inside through a broken lens or worn seal, it can damage the metal contacts and increase electrical resistance. This can cause the lights to flicker, dim, or fail completely. If you notice condensation inside the lens, it’s important to dry the housing and repair any cracks or damaged seals. Preventing moisture from accumulating helps extend the life of the lighting system.
References:
[1] Roadside Assistance Vehicle Lighting: Review of Scientific Research and State Regulations
https://aaafoundation.org/roadside-assistance-vehicle-lighting-review-of-scientific-research-and-state-regulations/

Guys, I’m a car audio enthusiast and customization expert and I love clear sound and clean installation. Plus, I have spent years helping people build their dream audio setups. And whenever I’m working on cars, I probably listen to music and thinks about the next big upgrade.