Written By: Don Dodi
Fact Checked By: Kristen Brown
Reviewed By: Diego Rosenberg
The indicators lights are not just the bulbs, but rather they are a communication tool that literally helps you to prevent any kind of confusion about you and others.
The turn signals also known as the indicator lights: as these are used to indicate others that where you wanted to go, that makes it important safety features on a car.
Not only this, according to the NHTSA: the improper or non-functional turn signals are a contributing factor in thousand of the road accidents each year as well as other drivers cannot anticipate about your next move.
Now, these are just small amber or red lights and these are basically located at the front and the rear of your vehicle and they are designed to clearly communicate when you intend to turn or change lanes.
Plus, they operate through a system of bulbs, fuses, a flasher relay and a switch inside your car’s steering column.
Along with this, it is true that turn signals are actually designed to last for years but they can fail over time due to burned-out bulbs, corroded sockets, wiring damage or blown fuses as well.
So, if there’s a faulty turn signals then it is traffic violation and that can compromise your safety on the road as well.
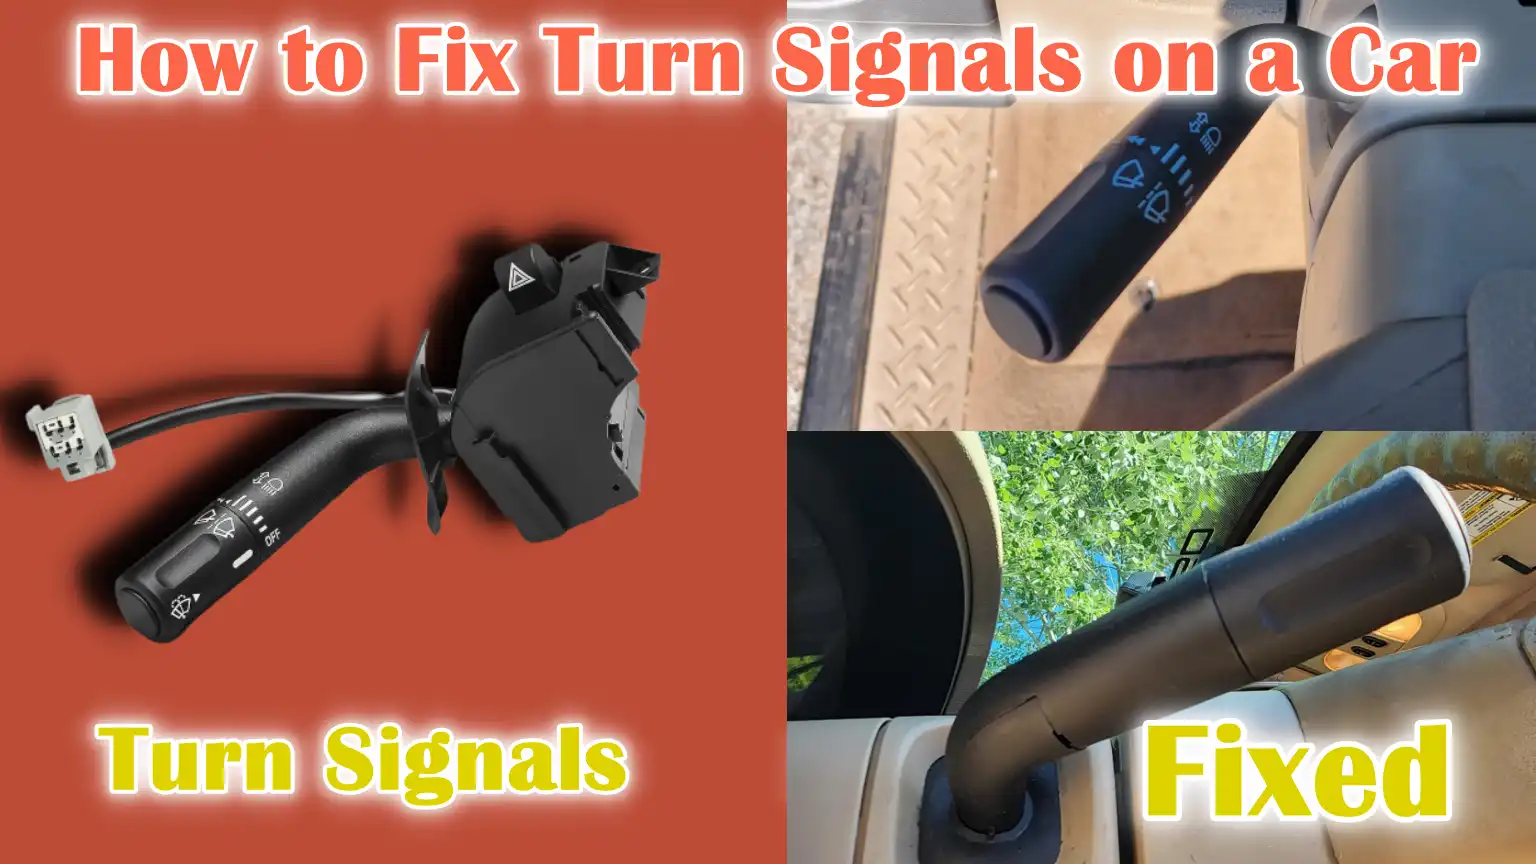
And to solve this issue this guide is specifically focuses on How to Fix Turn Signals on a Car, so that you can have fully functional indicators again.
Tools
| Tool / Material | Purpose (Why You Need It) |
|---|---|
| Replacement Bulbs | Used To Replace Old Or Burnt Out Turn Signal Bulbs To Get Your Signals Working Again. |
| Fuse Puller | A small tool that helps you remove fuses safely without damaging them. |
| Spare Fuses | Spare fuses to replace any fuses in the turn signal circuit if they blow out. |
| Multimeter | A small electrical tester that checks whether electricity is flowing correctly through wires and parts. |
| Screwdrivers (Flat & Phillips) | Helps you open covers, remove light assemblies, or tighten screws. |
| Socket Set (Wrenches) | The bolts or nuts holding the light housing or panels in place need to be removed. |
| Electrical Cleaner (or Contact Cleaner) | Cleans dirt, grease and corrosion from electrical connections for improved performance. |
| Gloves | Protects your hands from sharp edges and keeps your skin clean. |
| Safety Glasses | Protects your eyes when working on electrical parts or removing bulbs and fuses. |
Take the Safety Precautions
1. Remove the Battery Before Working on Electrical Parts
Whenever you work on any electrical part of your car, it is extremely important to disconnect the battery first.
This step prevents accidental short circuits, electrical shock or damage to sensitive parts of the car’s electrical system.
Car batteries store so much energy that if a tool accidentally touches the wrong connection, it can cause serious harm or damage.
By removing the battery’s negative terminal first, you can stop the flow of electricity and make your work safer.
This is a standard method used by professional mechanics around the world and should never be skipped.
2. Make sure the car is parked on a level surface and the parking brake is on.
Before applying the turn signals, always make sure the car is parked on level ground and the parking brake is firmly applied.
This keeps the vehicle stable so that it does not roll while you work. Even a slight tipping can cause injury or damage to the car.
Working on a stable and secure car makes the job easier because you won’t have to worry about the car moving while handling tools or replacing parts.
3. Handle the bulbs carefully and don’t touch the glass with bare hands.
When handling new turn signal bulbs, don’t touch the glass portion with your bare fingers. Natural oils from your skin can stick to the surface of the bulb and when the bulb heats up, these oils can create hot spots that can cause the bulb to burn out quickly.
If you accidentally touch the glass, wipe it with a soft cloth before reinserting it. Holding the bulb by its base is the safest way to protect it and ensure that it lasts as long as possible.
How to Diagnose the Actual Problem
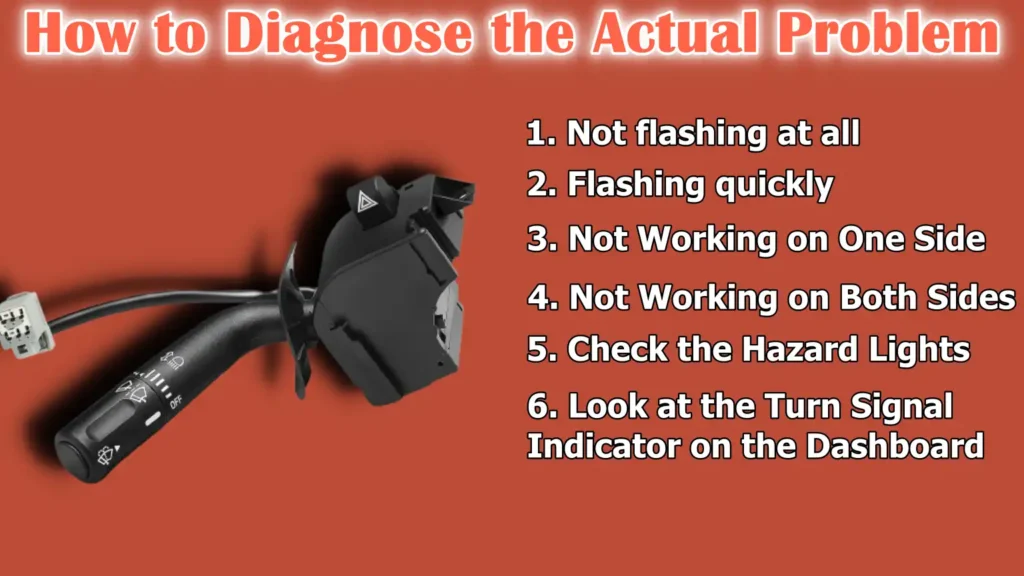
1. Not flashing at all
If your turn signals aren’t flashing at all, it often means that the circuit is completely out of order.
This could be due to a blown fuse, a faulty flasher relay, a broken turn signal switch, or a problem with the wiring. When nothing is flashing, both the front and rear lights will be out and you may also notice that the dashboard indicator is not lit.
This problem should be checked immediately because it affects both sides of the vehicle, making it unsafe to drive until the problem is fixed.
2. Flashing quickly
If your turn signal is flashing faster than normal, it usually means that a bulb has blown out.
This happens because the electrical system is designed to flash faster when there is less resistance in the circuit.
Flashing quickly: Most cars have an early warning system so you can replace the bad bulb before both bulbs fail.
It is important to check both the front and rear turn signal bulbs because the bulb that is not burning is often the source of the problem.
3. Not Working on One Side
If only the left or right turn signal is not working, the problem may be limited to that side.
This is often caused by a burnt out bulb, corroded socket or loose connection on that side of the car.
It may also be related to a wiring problem on that side. A closer examination of each bulb and socket may help you locate the problem.
4. Not Working on Both Sides
If the turn signal is not working on one side, the problem may be related to a central component of the system.
This could include a blown fuse, a bad flasher relay, or a problem with the turn signal switch itself.
As the problem is on both sides, a burnt out bulb is less likely to be the cause and more likely to be an electrical fault that needs to be repaired.
5. Check the Hazard Lights
Hazard lights, also called emergency flashers, use many of the same parts as turn signals.
If the hazard lights are working properly, it often means that the bulbs, wiring and fuses are fine and the problem may be in the turn signal switch or flasher relay.
If the hazard lights also don’t work, it’s a sign that there may be a bigger problem in a shared electrical circuit.
6. Look at the Turn Signal Indicator on the Dashboard
The small arrow-shaped indicators on your dashboard provide helpful clues in diagnosing a turn signal problem.
If the indicator doesn’t light up at all, it may mean the turn signal switch or flasher relay isn’t working.
If the indicator flashes rapidly or stays on continuously, it may mean a bulb is burnt out or there’s a problem with the wiring.
Looking closely at dashboard lights is an easy way to figure out where to start your investigation.
Read More:
How to Inspect and replace the bulbs
1. Locate the turn signal bulbs (front and rear)
The first step to fixing a turn signal problem is to locate all the bulbs in your vehicle.
Turn signal bulbs are usually located in the front and rear corners of the car, in the headlight assembly or taillight cluster.
Some vehicles may also have them located on the side mirrors or along the sides of the body. Checking your vehicle’s manual can help you find the right location.
It’s important to inspect every turn signal bulb in the car because a single burnt out bulb can cause the entire system to malfunction or blink faster than normal.
2. Remove the lens cover and inspect the filament
After locating the bulb, you’ll need to carefully remove the lens cover. Most lens covers are held in place by screws or small plastic clips that can be opened with a screwdriver or by hand.
After removing the lens cover, pull out the bulb and inspect it closely.
Check for a broken filament inside the bulb, which is a clear sign that the bulb is burnt out. If the bulb appears dark, cloudy, or has black spots, it may no longer be working properly.
This visual inspection is one of the easiest ways to confirm whether the bulb is the cause of the problem.
3. Replace Burned-Out Bulbs Correctly
If you have a burned-out bulb, it’s important to replace it with the correct type of bulb.
Car bulbs come in different sizes, shapes and wattages and using the wrong type of bulb can cause electrical problems or poor lighting.
The easiest way to replace the correct bulb is to consult your vehicle’s manual or visit an auto parts store to have the old bulb replaced.
When using the new bulb, avoid touching the glass part with your fingers because oils from your skin can shorten the life of the bulb. Hold it by the metal base and firmly insert it into the socket for a good connection.
4. Check the Turn Signal After Replacement
After replacing the bulb, it’s important to check the turn signal to make sure it’s working properly.
Reinstall the lens cover, turn on the car’s ignition and turn on the turn signals on the side you just worked on. Make sure the front and rear bulbs are shining at the correct speed and brightness.
If the new bulb doesn’t light, make sure it’s properly seated in the socket and check the socket for corrosion or damage.
After the replacement, make sure the problem is solved and your turn signals are safe and ready to go on the road.
How to Check and replace the fuses
1. Locate the fuse box (under the dashboard or in the engine bay)
The fuse box is the central point that protects your car’s electrical circuits from damage caused by overloads or short circuits.
Most cars have more than one fuse box, usually located under the dashboard on the driver’s side or in the engine bay near the battery. Some vehicles may also have an additional fuse box in the trunk or under the back seat.
If you don’t know its exact location, the owner’s manual will tell you where each fuse box is located.
Finding the correct fuse box is important because the turn signal circuit is protected by a specific fuse and knowing this will save time when diagnosing the problem.
2. Identify the turn signal fuse using the owner’s manual
After you find the fuse box, you need to identify which fuse controls the turn signals.
Every fuse box has a diagram on the fuse box cover or in the owner’s manual that shows which fuse relates to each electrical component.
The turn signal fuse is usually labeled “Turn”, “Signal” or “Indicator”, but in some vehicles it may be the same as the hazard light fuse.
It is important to identify the correct fuse because removing the wrong fuse will not fix the problem and may also damage other electrical systems in the car.
3. Remove and inspect the fuse
After identifying the correct fuse, carefully remove it with a fuse pulling tool or needle-nose pliers.
After removing the fuse, examine it closely.
A good fuse will have an unbroken metal strip inside, while a bad fuse will have a broken strip or burn marks inside.
If the fuse is blown, it means the electrical circuit was overloaded or a short circuit occurred.
This simple check is one of the quickest ways to determine the cause of a turn signal malfunction, as a blown fuse will cause the circuit to stop working completely.
4. If the fuse is blown, replace it and recheck the signals.
If the fuse is blown, replace it with a new fuse with the same amperage rating. Using a fuse with the wrong rating can cause electrical problems or even damage the system.
You can find the correct rating on the fuse or in the user manual. After replacing the fuse, recheck the turn signals by turning them both ways to make sure they are working properly.
If the new fuse blows immediately after replacing it, this is a sign of a serious electrical problem such as a short circuit or damaged wiring and you may need professional help.
Checking the signals after replacing the fuse ensures that the problem is completely fixed before driving the car again.
How to Inspect the flasher relay
1. Locate the flasher relay (often near the fuse box)
The flasher relay is a small electrical device that controls the brightness of your turn signals.
It works by interrupting the electric current at specific times so that the lights come on and go off at the correct speed.
In most vehicles, the flasher relay is located near the fuse box, either under the dashboard or in the engine compartment.
In some cars it may be behind the glove box or inside the steering column. If it’s hard to find, your owner’s manual will tell you its exact location.
Locating the flasher relay is very important because if it stops working, your turn signals will either not blink at all or will blink constantly.
2. Replace with a known good relay (if available)
The easiest way to check if the flasher relay is bad is to replace it with another relay of the same type in your car. Many vehicles use the same relay for different electrical systems, such as the horn or air conditioning.
By temporarily replacing them, you can immediately see if the problem is in the relay or another part of the system.
If the turn signals still work after replacement, this confirms that the original flasher relay is bad. This method saves time and avoids replacing unnecessary parts.
3. Replace if bad
If replacement or testing confirms that the flasher relay is bad, the best solution is to replace it with a new one.
When choosing a new relay, make sure it matches your vehicle’s specifications, as using the wrong relay can result in incorrect flashing speeds or damage the circuit.
Flasher relays are usually inexpensive and easy to replace, making them a quick solution to most turn signal problems.
After installing the new relay, check the turn signals to make sure they are flashing at a normal speed and working properly.
Replacing faulty flasher relays not only restores their functionality but also ensures that other drivers can clearly see your signals, improving overall road safety.
How to Check the wires and connections
1. Check for corrosion, wear or loose connectors in the wiring harness
The wiring harness is a group of electrical wires that carry electricity from the battery and fuse box to the turn signal bulbs, relays and switches.
Over time, these wires can become damaged due to heat, moisture, vibration or general wear. Corrosion is a common problem, specially in areas where the car is exposed to rain or road salt, as it can corrode the metal wires and connectors and interfere with the flow of electricity.
Loose connectors can also cause intermittent problems, where the turn signal works one moment and fails the next.
It is important to carefully inspect the entire wiring harness, paying particular attention to the areas around the bulb sockets, fuse box and steering column as these areas are most susceptible to wear.
2. Clean Corroded Contacts with Electronic Cleaner
If you see any connectors or terminals with signs of corrosion, such as green or white powdery deposits, it’s important to clean them thoroughly.
Corroded contacts block the flow of electrical current and can make the turn signal system unreliable.
Electrical contact cleaner is the safest way to remove corrosion because it dissolves deposits without damaging the connectors.
After spraying the cleaner, gently brush the contacts with a small wire brush or soft cloth to create a clean and strong connection. This step often fixes flickering or weak turn signals without replacing any major parts.
3. Repair or replace damaged wires
If you see any broken wires, worn insulation or burned spots in the wiring harness, repair or replacement of those parts is necessary.
Sometimes minor wear and tear can be repaired using proper electrical tape or heat-shrink tubing, but severely damaged wires should be completely replaced for safety. When replacing wires, it is important to use the correct gauge and type recommended for your car to handle the electrical load.
Ignoring damaged wires can lead to more serious electrical problems, including a short circuit or fire.
After the repair is complete, make sure all connections are strong and secure before testing the turn signals again.
It is important to make sure the wiring is in good condition, as it forms the foundation of the entire turn signal system.
How to Check the turn signal switch
1. If the bulbs, fuses and relays are okay, the switch may be bad.
The turn signal switch, which is usually mounted on the steering column and which you press up or down to indicate a turn, is a vital part of the system.
It controls the flow of electricity to the turn signal bulbs on both sides of the car. If all the bulbs, fuses and flasher relays are in good condition, but the turn signals still aren’t working properly, the switch may be bad.
Over time, the switch can wear out from the inside due to constant use or the ingress of dirt and moisture into its moving parts.
A bad switch may cause one or both turn signal lights to fail completely, or the lights may only work intermittently.
2. Use a multimeter to check continuity
To confirm whether the turn signal switch is working properly, you can check it with a multimeter.
A multimeter measures electrical continuity, which tells you whether current can flow through a switch when it’s on. To do this, disconnect the switch from the wiring harness and connect the multimeter probes to the switch’s terminals.
The multimeter should show continuity when you turn the lever left or right. If there’s no reading, it means the switch’s internal contacts are damaged or worn.
This is a reliable way to determine if the switch is the cause of the problem rather than guessing.
3. Replace the switch if necessary
If testing confirms that the turn signal switch is bad, it will need to be replaced.
The difficulty of replacing the switch can vary depending on the car’s design. Some vehicles require the steering wheel or airbag to be removed, which can be complicated and may require professional assistance for safety reasons.
If your car has an airbag, you should always disconnect the battery and wait a few minutes before working on the steering column to avoid accidentally deploying the airbag.
When installing the new switch, make sure it matches your vehicle’s make and model exactly to ensure it will fit and work properly.
Once installed, reconnect the wiring and test the turn signals to make sure the problem has been resolved.
A properly functioning switch is important because it restores full control over your vehicle’s signalling system, ensuring other drivers can clearly see your intentions on the road.
When to Seek Professional Help
1. Persistent Electrical Problems
If you have carefully inspected and repaired the bulbs, fuses, relays, wiring and turn signal switches but the problem still persists, it is best to seek help from a professional mechanic or automotive electrician.
Persistent electrical problems can be caused by a hidden fault in the car’s wiring system, a bad control module, or a problem with the car’s onboard computer.
These types of problems can be very difficult to diagnose without special tools and advanced knowledge.
Professional technicians use diagnostic scanners and detailed wiring diagrams to quickly and accurately locate electrical faults, helping to avoid unnecessary parts replacement and ensure the correct resolution of the problem.
2. Complex Wiring Faults
Modern cars have complex electrical systems with hundreds of wires running through multiple control modules.
Consulting a professional is highly recommended if you suspect a complex wiring fault, such as a short circuit, a broken wire inside the harness, or a grounding problem.
Attempting to repair these faults without the proper skills or tools could cause further damage and even create safety hazards.
Trained experts can perform continuity tests, locate damaged parts of the wiring and repair them safely without affecting other vehicle systems.
3. Airbag Steering Column (Expert Operation Required)
If the turn signal switch inside the steering column needs to be replaced and your vehicle is equipped with an airbag, professional assistance is necessary.
Airbag steering columns are extremely sensitive and must be handled with great care.
Any mistake while removing the steering wheel or handling the airbag could lead to it accidentally deploying, causing serious injury and costly repairs.
Mechanics have the necessary training and safety equipment to properly deactivate and remove the airbag before accessing the switch.
Handing this task over to a professional ensures your safety and prevents damage to your vehicle during the repair process.
The Final Test
1. Reconnect the Battery
After completing all necessary repairs or replacements, the first step in the final test is to reconnect the car’s battery.
Make sure the battery terminals are clean and firmly seated so that the electrical connections are correct.
This step restores power supply to the entire vehicle’s electrical system and gives you the opportunity to check whether the turn signals are now working properly.
It is extremely important to reconnect the battery properly because loose connections can cause erratic power flow, which can affect signal reliability.
2. Check Both Side and Hazard Lights
After the battery is connected, turn on the ignition and carefully check the turn signals on both the left and right sides of the car.
Keep an eye on each light to make sure they are turning on and off properly. You should also check the hazard lights, which flash all the turn signal bulbs simultaneously.
As hazard lights have many of the same parts as turn signals, they are a good way to confirm that everything in the system is working properly.
If a bulb does not light or flashes erratically, double-check the connections, wires and components you installed.
3. Check for proper flashing speed and brightness
It’s not enough that turn signals work; they must also flash at the correct speed and brightness. A normal turn signal usually flashes about sixty to one hundred twenty times per minute.
If the flashing speed is too fast or too slow, it could be a sign of a problem, such as the wrong type of bulb, weak connections or bad relays.
Also pay attention to the brightness of the bulbs, because in low light, specially during daylight, it can be difficult for other drivers to see your signals.
Ensuring proper flashing speed and brightness is important for your safety and the safety of everyone on the road.
Once all signals are working as expected, you can rest assured that the repair process is complete.
Conclusion – How to Fix Turn Signals on a Car
If you wanted a clear communication on the road to prevent the confusion and to keeps everyone safe you have to maintain the turn signal system properly.
By following step-by-step steps, from checking bulbs and fuses to wiring and turn signal switches, you can identify the root cause without replacing unnecessary parts.
Turn signals are a vital part of your vehicle’s safety system, as they help other drivers anticipate your movements and reduce the risk of accidents.
So maintaining a fully functioning turn signal system isn’t just about avoiding traffic tickets; it’s also about the safety of you, your passengers and everyone else on the road.
If you’ve repaired or replaced any faulty parts and completed the final testing process, you can now drive confidently knowing that your car’s signaling system is reliable.
Remember that prevention is always better than cure, so make it a habit to inspect your lights and electrical components regularly, specially before long trips. If you ever encounter persistent or complex problems that you can’t solve, don’t hesitate to seek professional help.
As well as, it is shown that when models switched from red to yellow rear turn signals, then basically crashes involving two vehicles colliding from behind decreased by approximately 5.3% when the leading vehicle was turning/changing/merging into lanes.[¹]
Now, you can comment down your thoughts about this guide and let us know what you need to know more about.
Frequently Asked Questions
Q1. Why do both turn signals stop working?
Answer: When both turn signals stop working at once, it’s usually a sign of a problem that affects the entire system rather than just one side. One of the most common causes is a blown fuse, which completely prevents power from reaching the turn signal circuit. Another possibility is a fault in the flasher relay, a small device that controls the blinking of the lights. If the relay goes bad, the lights won’t light up at all. Wiring problems, such as loose connectors or damaged wires, can also cause both signals to stop working. In some cases, the turn signal switch in the steering column can go bad and prevent the lights from coming on. As this problem can make driving unsafe, it’s important to check each part of the system step by step until the cause is found.
Q2. Can you use your hand as a turn signal?
Answer: Yes, if your car’s turn signals aren’t working, you can use hand signals to indicate your intentions. This method has been around long before cars had electric indicators and is still recognized by traffic laws in many places today. To signal a left turn, extend your left arm straight out the driver’s side window. To signal a right turn, extend your arm out and bend it at the elbow to form an “L” shape. To indicate that you’re slowing down or stopping, extend your arm down at an angle. Although hand signals are legal in most areas, they are less visible at night or in bad weather, so they should only be used as a temporary solution until your turn signals are fixed.
Q3. Is it illegal to drive without a front turn signal?
Answer: In nearly every state and country, it’s illegal to drive without a working front turn signal because it can put you and other drivers in danger. Turn signals are required by law and are an important part of safe driving because they let other drivers and pedestrians know when you are about to turn or change lanes. If your front turn signal is not working, you could be fined or get a ticket. More importantly, not signalling properly can cause accidents because others cannot predict your move. If your front turn signal malfunctions, it should be repaired as soon as possible to remain legal and safe on the road.
References:
[1] The Effectiveness of Amber Rear Turn Signals for Reducing Rear Impacts
https://crashstats.nhtsa.dot.gov/Api/Public/ViewPublication/811115

Guys, I’m a car audio enthusiast and customization expert and I love clear sound and clean installation. Plus, I have spent years helping people build their dream audio setups. And whenever I’m working on cars, I probably listen to music and thinks about the next big upgrade.