Written By: Don Dodi
Fact Checked By: Kristen Brown
Reviewed By: Diego Rosenberg
Why you actually need to improve the sound quality of your car: the reason is most of the car manufacturers actually spend less than 1% of a car’s total cost on its sound system.
And YES, a car’s audio system do affect your overall driving experience as well, as it can enhance the silence during you’re stuck in the traffic, or going on a long road trip, or just daily work.
Not only this, according to a study by Consumer Reports: they found out that nearly 60% of the factory car speakers are actually made from low-cost paper cones and that lack the proper tuning and that’s why it result to the weak bass, poor clarity and distortion at high volumes as well.
Don’t think sound quality is just about the higher the volume, but its more about hearing every note, voice and beat clearly: and without buzzing, rattling or muffling.
And with the rise of the streaming apps such as: Spotify and Apple Music that does offers high-resolution audio and that’s where more driver are realizing the need for the better speakers, amplifiers and tuning that actually unlock the true audio potential as well.
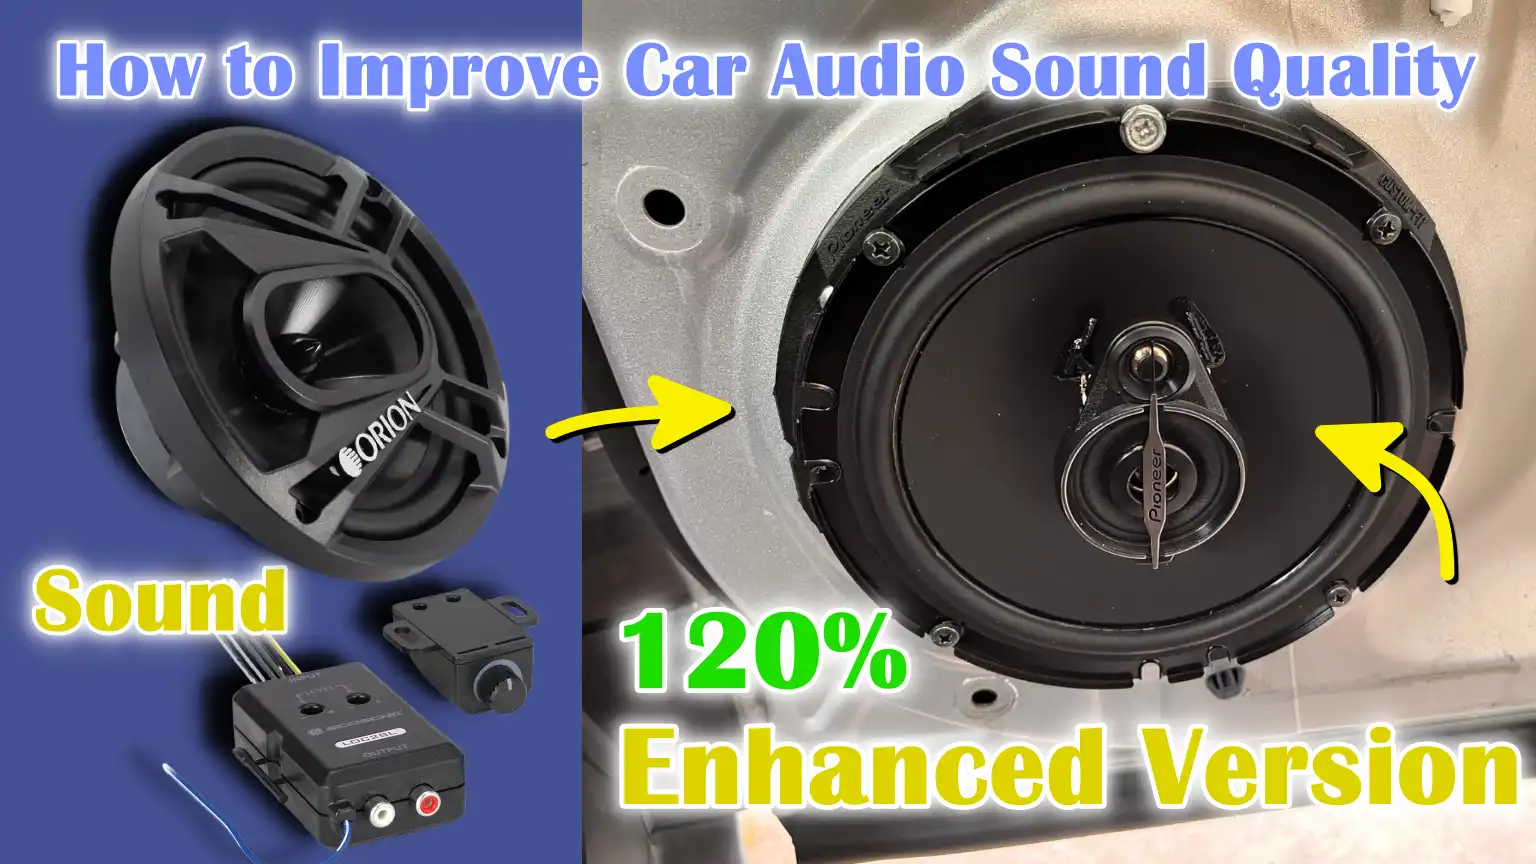
That’s where this guide becomes helpful as it shows you How to Improve Car Audio Sound Quality and you’ll see that dramatically enhanced the richness, balance and depth of your car’s overall sound quality.
First Assess your current sound system
1. Evaluate your current speakers, head unit and amp
Before making any upgrades, it’s important to know what you’re currently working with. Most factory-installed car audio systems have basic speakers made from low-cost materials like paper cones, which wear out over time and can’t handle deep bass or loud volume.
The head unit (also called the stereo receiver) is usually limited in sound processing, which means you’re not getting the full detail of your music.
Amplifiers, if included, are often built into the head unit itself and deliver very little power—typically around 15 to 20 watts RMS per channel—which isn’t enough for rich, dynamic sound.
Pay attention to the size and placement of your speakers, whether or not your system has a dedicated amp or subwoofer and the brand or specifications of your head unit.
Understanding what components you currently have helps you determine where improvements are most needed, whether it’s better speakers, more power, or advanced tuning options.
2. Identify distortion, imbalance or poor bass response
After you understand your components, listen carefully to how your audio system performs during everyday driving.
One of the easiest signs of a weak system is distortion—this is when music sounds fuzzy, raspy, or crackly at high volumes.
Another sign is imbalance, where one side of the car sounds louder than the other, or when voices drown out the sound of instruments, or the bass sounds loud but unclear.
If you find that the bass sounds weak or nonexistent even at full volume, your speakers may not be designed to handle low frequencies.
In many cases, poor sound is not just caused by weak components, but also by misplaced speakers or a lack of sound insulation in your car’s doors and panels.
3. Use a test track or sound app to measure performance
To get a more accurate idea of your sound quality, use specially designed audio test tracks or mobile apps that measure frequency response and sound stage.
Some free apps like “AudioTools” or “SPL Meter” can measure decibel levels, while test tracks available on YouTube or Spotify can help you evaluate bass, treble, stereo balance and clarity.
When listening to a test track, notice whether sounds are clear at low volumes and distort at louder volumes.
A well-performing system should deliver balanced, distortion-free sound across the entire range—from deep bass (20 Hz) to clear treble (20 kHz). If you notice any noticeable gaps, rattles, or heavy tones, this is where you should focus your improvements.
Upgrade Your Speakers
1. The Importance of High-Quality Speakers (Coaxial vs. Component)
Upgrading your car speakers is one of the most effective ways to improve sound quality. Most factory speakers are made to save costs, not sound performance.
They typically use cheap paper that breaks down quickly and produces a dull or fuzzy sound. High-quality aftermarket speakers use better materials like polypropylene, Kevlar or silk, which help provide clearer mid and high sounds, stronger bass and a more accurate overall sound.
When buying speakers, you’ll find two main types: coaxial and component. Coaxial speakers are full-range speakers that combine all the elements – woofer and tweeter – into a single unit.
They’re easy to install and are a good choice for casual listeners. Component speakers, on the other hand, split the tweeter, woofer and sometimes the midrange driver into separate components.
This setup provides more accurate sound staging and improved clarity, specially for listeners who want studio-quality sound in their car.
2. Choosing the right speaker for your vehicle and listening preferences
Not every speaker will fit in every car, so it’s important to check the size and depth of your existing speaker slots.
Most cars come in standard sizes like 6.5 inches or 6×9 inches, but always double-check compatibility.
Think about how you like to listen to music. If you like bass-heavy tracks, choose speakers with a strong low-frequency response.
If you listen to vocal, acoustic or classical music, you’ll want speakers with detailed midrange and high clarity.
Consider your volume preferences, too. If you like to listen loudly without distortion, choose speakers with a higher power handling rating.
Tailoring the speaker’s capabilities to your music preferences and driving style can help you have a more satisfying sound experience.
3. Brand and Wattage Considerations
There are many speaker brands available in the market, but quality matters a lot when it comes to audio.
Trusted brands like JL Audio, Focal, Rockford Fosgate, Alpine, JBL and Kicker are known for making durable speakers with great sound performance.
Another important factor is wattage, which tells you how much power a speaker can handle. Look not just for maximum power, but also for the RMS (root mean square) rating.
RMS tells you how much power the speaker can handle continuously, which helps prevent distortion or damage over time.
For example, a speaker with 60 watts RMS is suitable for a powerful amplifier, while factory head units typically only produce 15 to 20 watts RMS. Matching your speakers to your amp or head unit ensures clean sound and long speaker life.
4. Proper Speaker Placement and Mounting
Even the best speakers won’t perform well if they are misplaced or placed in the wrong location. Most car doors are not designed for proper acoustics and they often allow sound to escape or create unwanted vibrations.
Tightly mounting the speakers in sealed cases or using foam baffles can help the sound penetrate the car and reduce distortion.
Placing the tweeter at ear level—either on the dashboard or on the A-pillar—can improve clarity, specially for vocals and high frequencies.
Ensuring that the speakers are mounted securely and with the right insulation will reduce rattle, improve sound focus and allow you to get the most out of your advanced system.
Add or upgrade an amplifier
1. Why amplifiers are important for clean, powerful sound
If you want better sound quality, an amplifier is one of the most important parts of a car audio system.
Most factory head units and even many aftermarket stereos provide very limited power—typically between 15 and 20 watts RMS per channel.
This is often not enough to properly drive high-quality speakers, specially at loud volumes. When there isn’t enough power, the sound can be distorted, flat, or weak.
A dedicated amplifier provides enough clean power, allowing your speakers to perform at their best without strain.
Amplifiers also help you hear the full nuances of your music, from deep bass to clear vocals and crisp highs.
In short, if you want louder, clearer and more dynamic sound, an external amplifier isn’t just an upgrade—it’s a necessity.
2. Matching Amp Power to Your Speakers/Subwoofers
Choosing the right amplifier means adjusting its power output to the needs of your speakers and subwoofers. Every speaker has an RMS power rating, which is the amount of continuous power it can handle.
Ideally, your amplifier should deliver power equal to or slightly greater than your speakers’ RMS rating, but no more.
For example, if your speakers are rated at 60 watts RMS, your amplifier should deliver about 60-75 watts RMS per channel.
Subwoofers typically require a lot more power—from 150 to 1000 watts RMS, depending on size and model.
Too little power will underpower your system or cause distortion, while too much power can damage speakers. Proper power matching improves sound quality and extends the life of your audio components.
3. 2-Channel vs. 4-Channel vs. Mono Amp
Understanding the types of amplifiers is important when building your system. A 2-channel amplifier is typically used to power a pair of speakers or a subwoofer in bridged mode.
A 4-channel amplifier is more versatile and can power four speakers—such as front and rear door speakers—or two speakers and a subwoofer with the proper wiring.
Mono amplifiers, also called single-channel amplifiers, are designed specifically for subwoofers and are built to handle higher power loads at lower frequencies.
If you plan to install both upgraded speakers and a subwoofer, many people use a combination of a 4-channel amplifier for the speakers and a mono amplifier for the subwoofer.
Choosing the right configuration depends on how many components you have and what kind of sound you want.
4. Installation Tips
The correct installation of your amplifier is just as important as choosing the right amplifier. The amplifier should be installed in a cool, well-ventilated area—usually under a seat, in the trunk, or on board.
Use a high-quality wiring kit with proper gauge wires to ensure clean power delivery. It is important to connect the power wire directly to the battery using a fuse and to firmly connect the amp to any bare metal in the vehicle.
Always keep the power cable separate from RCA and speaker wires to avoid unwanted noise or interference.
Set the gain level correctly using a test tone or multimeter—never treat gain like a volume knob. Taking the time to set the amp correctly not only ensures better performance, but also protects your system from short circuits or overheating.
Install a Subwoofer
1. The Role of Subwoofers in Improving Bass Response
Subwoofers are specially designed speakers that handle the lowest range of sound frequencies, typically from 20 Hz to around 200 Hz.
These low frequencies are what give music its depth, impact and fullness. Most standard car speakers, specially factory-installed ones, cannot reproduce deep bass effectively because they are too small and not designed for heavy low-frequency output.
As a result, even good music can sound dull, thin, or incomplete. Installing a subwoofer makes up for the lack of bass and makes the overall audio experience sound more powerful and natural.
This doesn’t just help with bass-heavy music genres like hip-hop or EDM – subwoofers also make rock, classical and even podcasts sound better by enhancing the richness and warmth of voices and instruments.
A well-placed subwoofer takes the pressure off the main speakers as they focus on the mid and high frequencies, keeping the overall system sound clean and balanced.
2. Types: Powered, Passive, Sealed, Ported
There are many types of subwoofers and choosing the right one depends on your setup and sound preferences.
Powered subwoofers have a built-in amplifier, making them easy to install and ideal for users who want an all-in-one solution without adding a separate amplifier.
Passive subwoofers require an external amplifier and are often more powerful, making them better suited for custom or high-performance systems.
There are also two main types of subwoofer enclosures: sealed and ported. Sealed boxes are airtight and provide very precise, tight bass.
These are great for listeners who want clarity and accuracy. Ported boxes, on the other hand, have a hole or vent that increases airflow, resulting in louder and faster bass. These are great for genres that rely on deep, heavy low-end sounds.
Understanding these types helps you choose the right subwoofer that suits your car space and your listening style.
3. The right box size and location
The size and type of box that houses the subwoofer greatly affects its performance. Subwoofers are extremely sensitive to the air inside their box and using the wrong size box can lead to distortion or poor performance.
Manufacturers usually give the recommended volume of the box in cubic feet for sealed or ported designs and it’s important to strictly follow these guidelines.
As for placement, the most common location is in the trunk or cargo area. Placing the subwoofer in the rear of the car often results in louder bass because sound waves reflect off the back surface.
In smaller vehicles, under-seat subwoofers are also an option. It’s important to install the box properly—it should be stable and not slide around while driving.
The right location and box design allow the subwoofer to work to its full potential without wasting sound energy.
4. Crossover Tuning for Clarity and Balance
Once your subwoofer is installed, tuning the crossover is an important step to ensure it blends well with the rest of your speakers. The crossover is the frequency point where the subwoofer takes over from the main speakers.
Depending on your speaker setup, a common crossover setting for a subwoofer is between 70 and 100 Hz. If the crossover is set too high, the bass can sound loud and overlap with your midrange speakers. If it’s set too low, the subwoofer can cause you to miss out on hearing some deep bass notes.
Some subwoofers or amps also offer phase control and bass boost options, which should be carefully adjusted.
Its purpose is to create a seamless transition between the subwoofer and the other speakers so that the bass sounds full but not overdone.
Tuning your crossover correctly can dramatically improve overall clarity and make your entire system sound more integrated and natural.
Read More:
How to Connect Bluetooth in a Car
Use soundproofing materials
1. Reduce road noise, rattles and vibrations
One of the most overlooked aspects of improving car sound is dealing with unwanted sounds coming from inside the vehicle.
Road noise, engine noise, wind and vibrations from the car’s structure can all interfere with the clarity of your music.
Even if you have high-quality speakers and amplifiers, all this background noise can mask important sound details, specially soft sounds or vocals. Rattles are another problem that usually come from loose panels or hollow metal surfaces in doors and compartments that start to vibrate when bass is coming in.
These sounds not only reduce the sound quality but also make the audio system sound unbalanced or shoddy.
Using soundproofing materials helps reduce these problems by absorbing or blocking vibrations and noises in your cabin. When background noise is reduced, your music sounds more spacious and you don’t have to turn up the volume as high to enjoy it, protecting your hearing and your speakers.
2. Install soundproofing mats (e.g., Dynamat, Hushmat)
Soundproofing mats are special sheets made of dense, flexible material—usually butyl rubber and aluminum foil—that stick to your car’s metal surfaces.
Brands like Dynamat, Hushmat and Noico are among the most trusted names in the industry and are known for their excellent ability to block out unwanted sound.
These mats reduce both airborne noise, such as traffic noise and structural noise, such as vibrations. When installed correctly, they can reduce a car’s interior noise level by up to 10 decibels, which is a noticeable difference.
These mats also improve thermal insulation, keeping your car cooler in the summer and warmer in the winter.
Application involves cutting the mats to size, peeling off the adhesive backing and pressing them firmly onto clean metal surfaces.
A roller tool is usually used to ensure the mats adhere well and cover every corner. Although it takes some time and effort, the improvement in audio clarity and overall cabin comfort is well worth it.
3. Areas to focus on: Doors, boot, floor, ceiling
To get the best results from soundproofing materials, it is important to apply them in the right places.
Doors are one of the most critical areas as they house the main speakers and are thin, hollow metal surfaces that vibrate easily.
Applying soundproofing mats to the outer and inner surfaces of doors can significantly reduce rattling and improve speaker performance.
The boot is another critical area, specially if you have a subwoofer installed there. Subwoofers produce strong low-frequency vibrations that can cause metal surfaces to shake and produce buzzing sounds. Installing soundproofing mats on the trunk floor and side panels helps absorb this energy.
The floor and ceiling of the car can also let in a lot of road and wind noise, specially at highway speeds.
Installing mats in these areas reduces ambient noise even more and creates a more sealed, quiet environment inside the vehicle.
All of these components combine to provide a more enjoyable and immersive listening experience, where every detail of the music can be heard more clearly.
Upgrade the Head Unit (Stereo Receiver)
1. Better Signal Processing, EQ Controls and Features
The head unit, also known as the stereo receiver, is the central control hub of your entire car’s audio system.
Upgrading the factory-installed head unit can significantly improve the overall sound quality as modern aftermarket receivers come with advanced signal processing technology.
Factory units often limit audio performance by sending weak, raw signals to the speakers.
Aftermarket head units, on the other hand, provide cleaner and stronger signals, resulting in better clarity, more pronounced bass and smoother highs.
They also have built-in equalizers (EQ) that let you adjust sound frequencies according to your preference or your car’s acoustics. Some advanced units also come with digital sound processing (DSP), which can adjust time alignment and speaker levels for a more balanced and immersive sound.
Upgrading the head unit also opens the door to better connectivity, more control over your music and support for higher-quality audio formats.
2. Look for features like FLAC playback, Bluetooth, Apple CarPlay Android Auto.
Modern head units are packed with a number of features that improve both sound quality and user convenience.
One of the key features is FLAC (Free Lossless Audio Codec) playback, which lets you play studio-quality audio files that preserve more details than MP3s.
FLAC files offer full dynamic range and clear sound, specially if you’re using high-performance speakers and amplifiers. Bluetooth connectivity is another important feature, allowing you to stream music wirelessly from your smartphone or tablet without cables.
For even more functionality, many new head units support Apple CarPlay and Android Auto. These systems mirror your smartphone interface to the head unit’s screen and provide hands-free calling, voice-controlled navigation and easy access to your favorite music apps.
All of these features not only improve sound quality, but also make your driving experience safer and more enjoyable by keeping you focused on the road.
3. Consider double-din vs. single-din units.
When choosing a new head unit, the size and fit of the unit should match your vehicle’s dashboard. There are two main sizes: single-din and double-din.
Single-din units are about 2 inches high and fit most older or simpler dashboards. Double-din units are twice as high—about 4 inches—and usually have a larger touchscreen display.
Double-din head units often come with more advanced features, such as built-in navigation, larger visual interfaces for apps and easier-to-use controls.
However, not all cars support double-din units without custom modifications, so it’s important to check to see what your vehicle can accommodate. In some cases, installation kits or dash adapters are available to properly fit differently sized units.
Choosing the right size and layout ensures that the unit not only performs well, but also integrates easily with your car’s interior and controls.
Use high-quality music sources
1. File types: FLAC, WAV, vs. MP3
The sound quality you hear in your car depends heavily on the type of music files you’re playing. MP3 files are the most common, but also the most compressed.
This means they remove portions of the audio to reduce file size, which significantly reduces sound quality—specially in the bass and high frequencies. In contrast, FLAC and WAV files are what’s called lossless formats.
They preserve all the original sound data from studio recordings. WAV files are uncompressed and provide excellent audio quality, but they take up more storage space.
FLAC files provide the same sound quality as WAV, but are compressed in a way that doesn’t lose audio details.
So FLAC is the best choice for most people who want high-quality music without using a lot of storage.
If you’re serious about improving your car’s sound system, switching to a lossless format like FLAC or WAV can make a huge difference in clarity, detail and the overall listening experience.
2. Streaming services with high-resolution audio (Tidal, Qobuz)
If you stream music rather than download files, choosing the right service is just as important.
Popular apps like Spotify and Apple Music use compressed formats by default, which are fine for general listening, but won’t match the sound quality of your upgraded system.
Services like Tidal and Qobuz offer high-resolution or “hi-fi” streaming options that use lossless formats like FLAC. Tidal’s Hi-Fi Plus and Qobuz Studio plans stream music at CD-quality or better, meaning they retain the depth and richness of the original audio.
This makes instruments, vocals and even soft background noises sound more noticeable and realistic. For those who have invested in good speakers, amps, or subwoofers, these streaming services are a must to get the most out of the system.
Using high-resolution streaming ensures that you don’t limit your sound system’s potential with poor quality audio sources.
3. USB vs. Bluetooth vs. AUX Input Sound Differences
How you connect your music device to your car’s audio system also plays a big role in sound quality.
USB connections are usually the best because they send the digital audio signal directly to the head unit or amplifier, preserving full sound quality.
This means that if you’re playing a FLAC or WAV file via a USB flash drive or smartphone, it will sound clear, detailed and powerful.
Bluetooth is more convenient, but compresses audio during wireless transmission, which can reduce sound quality—specially for high-resolution music.
However, newer versions like Bluetooth 5.0 with aptX or LDAC support offer better performance, although they’re still not on par with USB.
The AUX input uses an analog signal and is heavily dependent on the quality of your phone’s headphone jack and cable.
AUX can still sound good, but it’s often the weakest option in terms of clarity and bass response. For the best listening experience, specially with high-end systems, USB is usually the best choice, followed by high-quality Bluetooth and then the AUX input.
How to Tune the Sound System
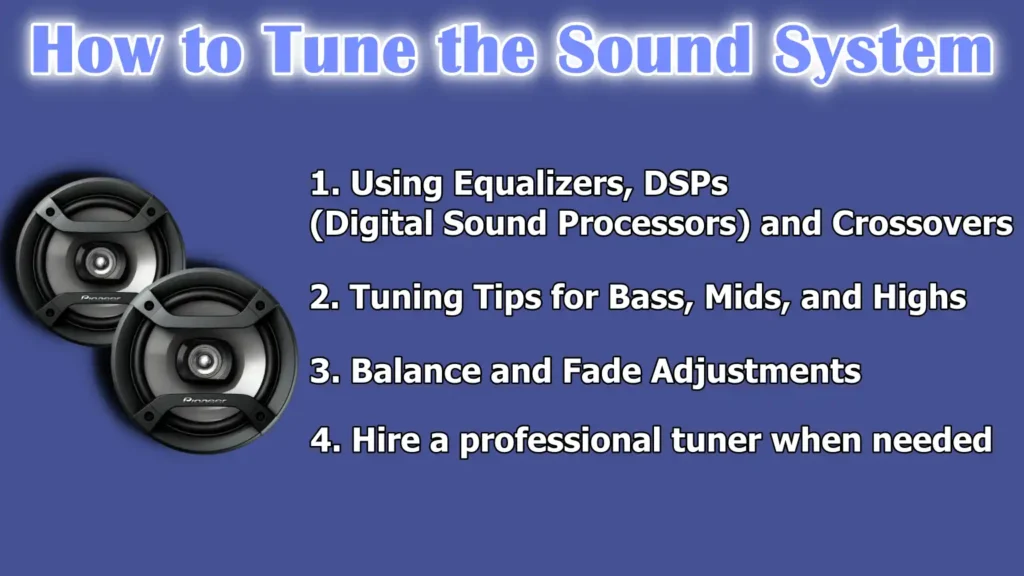
1. Using Equalizers, DSPs (Digital Sound Processors) and Crossovers
After upgrading your car audio system with better speakers, amplifiers and head units, the next step is to fine-tune it to get the best sound possible.
Equalizers, digital sound processors (DSPs) and crossovers are powerful tools that allow you to shape and control the sound of your music inside the car.
Equalizers let you adjust specific frequency bands—such as bass, midrange and treble—to correct imbalances in the sound or to suit your personal preferences.
A digital sound processor goes a step further by adding advanced tuning features such as time alignment, which ensures that the sound from each speaker reaches your ears at the same time and frequency shaping, which helps create a more accurate and natural sound stage.
Crossovers are used to direct specific frequency ranges to the appropriate speakers.
For example, low frequencies are sent to subwoofers, mid frequencies to door speakers and high frequencies to tweeters.
Without proper crossover settings, different sounds can overlap or distort, making the system sound muffled or unclear. Proper use of these devices can significantly improve clarity, separation and overall listening pleasure.
2. Tuning Tips for Bass, Mids and Highs
Tuning the different parts of your audio system ensures that your music sounds balanced and natural.
For bass, start by adjusting the subwoofer level so that it provides depth without overpowering the rest of the music.
Too much bass can overwhelm vocals and high frequencies, while too little bass can make the system sound thin.
Midrange frequencies contain mostly vocals and instruments, so they should be clear and distinct, not too loud or too soft.
High frequencies, such as cymbals or vocal details, should be loud but not harsh. If your highs are too loud, they can tire the listener, specially on long drives.
Using an equalizer with multiple bands allows you to make small adjustments in each range until everything sounds similar. It’s a good idea to listen to different kinds of music while tuning to make sure the settings work well for all genres, not just one type.
3. Balance and Fade Adjustments
The balance and fade settings control the direction of sound in your car.
Balance adjusts the sound from left to right, while fade adjusts the sound from front to back. In most factory settings, sound can be too concentrated at the front or one side of the car, creating an uneven listening experience for passengers.
A good starting point is to set both balance and fade to the middle, then adjust them slightly to suit your seating position.
If you’re alone in the car most of the time, you can shift the soundstage slightly toward the driver’s seat for better clarity.
As well as, the correctly placed speakers and the fast attack responses actually improves the perceived clarity and that shows that why you actually need to upgrade and position your speakers in a well manner that can actually makes a real difference in audio quality.[¹]
However, if you often have passengers, it’s best to keep the sound distribution even so everyone in the car hears the same sound.
These small changes can make a big difference in the immersive and enjoyable quality of your audio system during everyday driving.
4. Hire a professional tuner when needed
Tuning a car audio system can be quite technical, specially when using advanced tools like DSPs, RTAs (real-time analyzers and multimeters.
If you don’t know how to use these tools or just want the best results, hiring a professional tuner is a wise decision.
Professional audio tuners have the training and equipment needed to measure frequency response, adjust time alignment, correct phase issues and fine-tune each part of your system to your specific vehicle and listening preferences.
Although this service is usually more expensive, sound quality can be significantly improved. Many high-end car audio stores offer custom tuning packages that include both hardware setup and acoustic optimization.
For those who want to achieve concert-quality sound in their car, professional tuning is often the final and most cost-effective step in the upgrade process.
Maintain your audio system
1. Check connections and settings regularly
Maintaining your car audio system starts with regularly checking all connections to make sure everything is working smoothly.
Over time, vibrations, temperature changes, or even minor bumps in the road can cause wires or connectors to come loose, causing static noise, channel dropouts, or a complete loss of signal.
Speaker wires, RCA cables, power wires and grounding points should all be checked to make sure they are secure, corrosion-free and properly insulated.
It’s also important to check your amplifier and head unit settings from time to time. If you’ve added new components or changed music sources, adjusting your EQ, crossover and gain settings can keep the sound optimized.
Regular checks not only help prevent sudden malfunctions, but also help keep the system sounding great in all weather conditions and driving conditions.
2. Protect the device from moisture and overheating
Car audio components are sensitive to moisture and extreme temperatures, which can cause serious damage over time.
Moisture can enter the vehicle through leaks, humidity or condensation, specially in rainy or coastal areas. If it reaches your amplifier, head unit or speakers, it can corrode circuits and reduce performance or damage them completely.
To avoid this, make sure your trunk and cabin areas are sealed and dry and consider using moisture-proof covers or casings for equipment installed in hazardous areas.
Overheating is another problem, specially for amplifiers installed in confined spaces such as under seats or in a tightly packed trunk.
Excessive heat can cause amplifiers to shut down or go into protection mode. Make sure there is adequate airflow around your amplifier and avoid placing it near heat-producing parts of the car such as the exhaust tunnel.
Some aftermarket amplifiers also have built-in cooling fans, which can help maintain safe operating temperatures during prolonged use.
3. Clean the speakers and head unit
Keeping your audio system clean not only improves its appearance but also maintains its performance.
Dust, dirt and grime can accumulate around the speaker grills, door panels and head unit, specially if the car is used frequently or parked in a dusty environment. This buildup can block sound waves, reducing the clarity and output of your speakers.
Gently cleaning the speaker grills with a soft brush or cloth keeps the sound clean and clear. The head unit should also be wiped down regularly to prevent dust from accumulating on the control knobs or touchscreen.
If you have a touchscreen display, it’s best to use a microfiber cloth with a screen-safe cleaner. Never use harsh chemicals or water directly on electronic devices.
Keeping parts clean not only improves their functionality but also extends their life by preventing wear and damage caused by dirt and debris.
Conclusion – How to Improve Car Audio Sound Quality
Actually music has the power to change the mood, also it calm stress and even it can boost focus while driving as well, which is why you should consider to have the better car audio which is again luxury as well.
Although factory-installed systems are designed for basic functions and cost savings, they often lack the power, clarity and depth that music really deserves.
By carefully evaluating your existing system and upgrading essential components like speakers, amplifiers, subwoofers and head units, you can make a big difference in audio quality.
Using soundproofing materials, using high-quality music sources and fine-tuning your setup with an equalizer or DSP can ensure that every note, rhythm and song sounds exactly as it’s supposed to.
In fact, acoustic engineering studies show that proper speaker alignment and clean signal processing can improve audio clarity by more than 40% compared to a stock system.
Maintenance also plays an important role—regular checkups, temperature control and simple cleaning help maintain the performance of your investment for years to come.
Now, that is all about this guide and from now on if you got all the answers and still you are not able to get them clear then you can comment them.
Frequently Asked Questions
Q1. Can an amplifier improve car sound quality?
Answer: Yes, an amplifier can significantly improve the sound quality of a car audio system. The main function of an amplifier is to provide a clear and powerful electrical signal to the speakers. Factory stereos or simple aftermarket head units often don’t provide enough power to drive speakers to their full potential. As a result, you may hear distortion, weak bass, or poor clarity—specially at loud volumes. When you install a good quality amplifier, it gives your speakers the power they need to play sound more accurately and clearly. This means deeper bass, more pronounced highs and a more balanced sound overall. Amplifiers also allow you to connect better speakers and subwoofers, which require more power than a head unit alone can provide. Even if you’re not driving your system very loud, an amplifier helps provide clear and rich audio, which is specially evident in vocals, instruments and low-end tones. So, if you want to improve the sound quality of your car, installing an amplifier is one of the most effective and essential upgrades you can make.
Q2. How many watts does a good car sound system need?
Answer: How many watts you need for a good car sound system depends on how loud and clear you want your music. For most everyday drivers who want clear and rich sound without being too loud, a system with 50 to 100 watts RMS (continuous power) per speaker is a great starting point. RMS power is more important than peak power because it shows how much power the system can handle or produce continuously. For example, a 4-speaker setup with 75 watts RMS per speaker will need about 300 watts RMS in total for excellent sound quality. If you’re adding a subwoofer, you’ll want an amplifier that can deliver at least 200 to 500 watts RMS, depending on the size and type of subwoofer. High-end or competition systems can use 1000 watts RMS or more, but for most people, a total system power between 400 and 800 watts RMS provides loud, clear and satisfying audio without putting too much strain on the car’s battery or electrical system. Remember, it’s not just about more power—it’s about mixing amp and speaker power correctly so that everything works smoothly and efficiently.
References:
[1] Objective evaluation of sound quality for audio system in car
https://www.researchgate.net/publication/333134666_Objective_evaluation_of_sound_quality_for_audio_system_in_car

Guys, I’m a car audio enthusiast and customization expert and I love clear sound and clean installation. Plus, I have spent years helping people build their dream audio setups. And whenever I’m working on cars, I probably listen to music and thinks about the next big upgrade.