 Skip to content
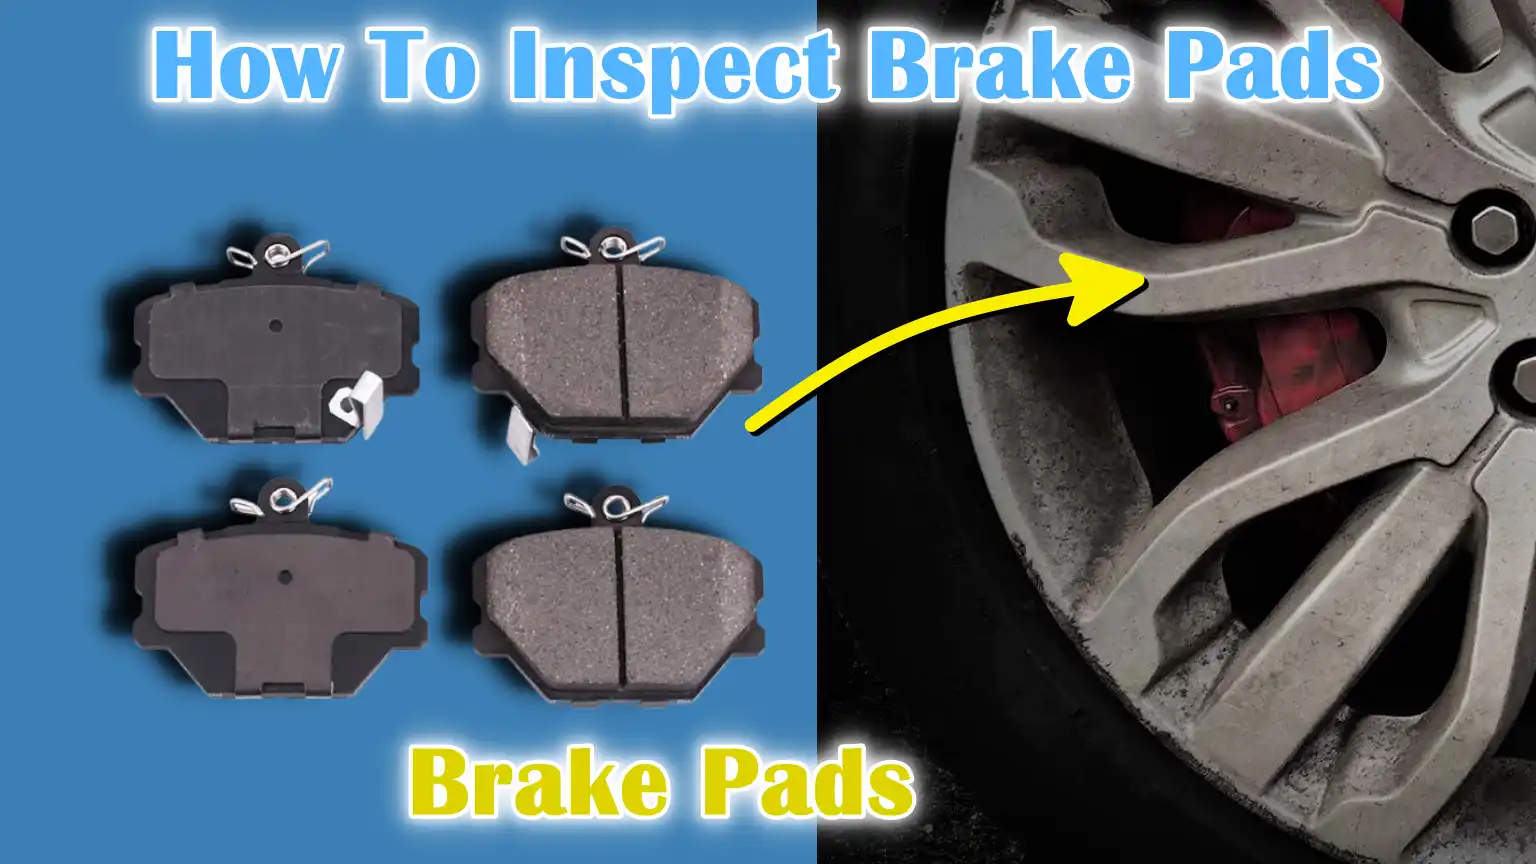
Written By: Don Dodi
Fact Checked By: Kristen Brown
Reviewed By: Diego Rosenberg
It is clear that brake pads actually carry a big responsibility and every time you hit the brakes, you should not rely on a small piece of material which is actually no thicker than a smartphone as it is really unimaginable.
So, when you press the brake pedal, then actually the pads applies pressure to the brake rotors and by the result it slows your car down or stop it completely.
And by doing this thing over and over again these pads wear down due to the friction and heat and worn brake pads really can double your stopping distance as well as the time passes.
Not only this, according to the NHTSA, the faulty brakes are actually the factor in about 25% of all vehicle crashes which are caused by the mechanical failure.
Which is why it is really important to inspect your brake pads at the regular time interval that ensure your safety and enhance your driving experience as well.
Plus, most of the manufacturers actuallly recommend to check your brake pads every 10,000 to 15,000 miles or at least you should check them once a year.
So, basically this guide is all about How To Inspect Brake Pads, so that you can have clear instructions that what tools will be used, how to do it and what to check during this inspect.
What Are Brake Pads and How Do They Work?
1. Understanding the Brake System: Key Components
Your vehicle’s braking system is made up of several parts that work together to help you slow down or stop safely.
The main components include the brake pedal, brake lines, master cylinder, calipers, rotors (or discs) and brake pads.
When you press the brake pedal, brake fluid is sent through the brake lines to activate the calipers. The calipers then press the brake pads against the rotating rotors attached to the wheels.
This contact produces friction, which slows down the wheels and eventually stops the car.
2. What Exactly Are Brake Pads?
Brake pads are flat, thick pieces of material designed to withstand high levels of friction and heat. They are mounted inside the caliper and apply pressure to the rotor when the brake is applied.
Their main job is to convert the car’s kinetic energy (motion) into heat energy, which helps stop the vehicle. Over time, this constant friction wears down the pads, so regular inspections are a must.
3. How Brake Pads Work in a Disc Brake System
Most modern cars use disc brakes, where a metal rotor (disk) rotates with the wheel. When you press the brake pedal, the caliper clamps the brake pads onto the rotor. This action creates friction, which slows the wheel’s rotation.
The harder you press the brake, the more force is applied. Because of this process, brake pads must be strong enough to withstand thousands of stops without breaking down under extreme heat or pressure.
4. Types of Brake Pads: Which One Do You Have?
There are three common types of brake pads and each has its own advantages and disadvantages:
- Ceramic Brake Pads
Made from ceramic fibers and a bonding agent, these pads are quieter, longer-lasting and produce less dust. These are ideal for everyday driving, but can be more expensive. - Semi-Metallic Brake Pads
These contain 30%-70% metal (such as copper, steel or iron) and offer excellent performance and heat resistance. They are commonly used in performance vehicles, but can be noisy and wear out rotors quickly. - Organic Brake Pads (these are also called Non-Asbestos Organic or NAO)
Made from fiber, rubber and other materials, these pads are soft, quiet and economical, but they wear out quickly and don’t perform well under heavy braking or in high temperatures.
Signs Your Brake Pads Might Need Inspection
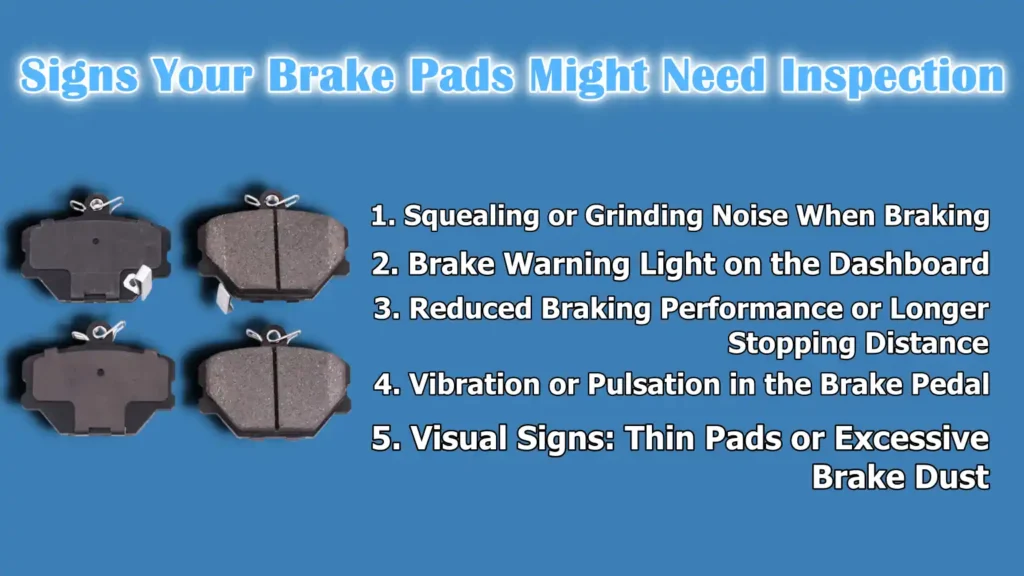
1. Squealing or Grinding Noise When Braking
The most common and earliest sign of worn brake pads is a loud squealing sound when you press the brake pedal.
This noise is often caused by a small metal wear indicator built into the pad, designed to alert you that the pad material is wearing down.
If you hear a loud grinding noise, it could mean the pads are completely worn out and the metal backing plate is rubbing against the rotor – this can cause serious damage to your brake system and should be repaired immediately.
2. Brake Warning Light on the Dashboard
Many modern vehicles are equipped with electronic sensors that monitor the thickness of brake pads. When the pads wear beyond a certain limit, a brake warning light may appear on your dashboard.
Although this light can also indicate other problems, such as low brake fluid, it should never be ignored. Always refer to your vehicle’s owner’s manual to confirm the cause and have the brake system inspected as soon as possible.
3. Reduced Braking Performance or Longer Stopping Distance
If your car takes longer than normal to stop or responds less to braking, it could be a sign that your brake pads are worn out. This reduced performance occurs because there is less material available to create the necessary friction against the rotors.
Worn pads can also increase braking distance, specially at higher speeds or during emergency stops – making your vehicle less safe to drive.
Actually data shows that in urban driving conditions: the brake pads can actually lose about 3 mm of thickness within just 18,000 km, which clearly means that it drops 16% in the braking efficiency; which is why a visual inspection paired with measurement is really important specially once pad thickness nears 3 mm that affects the safety and performance as well.[¹]
4. Vibration or Pulsation in the Brake Pedal
If you feel vibrations, jolts, or pulsations when braking, this could be caused by unevenly worn brake pads or warped rotors.
This vibration often means that the pads are not making even contact with the rotor surface, which can reduce brake stopping ability and increase wear on other parts of the brake system. This can also cause the brake pedal to feel “spongy,” which is another sign that an inspection is necessary.
5. Visual Signs: Thin Pads or Excessive Brake Dust
You can often check brake pads by simply looking at the spokes of your wheels. A healthy brake pad is usually around 8-12mm thick. If the pad material looks thin (less than 3mm), it’s time to replace it.
Also, if you notice black dust on the wheels, it could be a sign that the pads are wearing out quickly. Excessive dust can affect the wheels’ balance and appearance and it’s a good sign that a closer inspection is necessary.
Tools
| Tool/Equipment | What It’s For | Why It Matters |
|---|---|---|
| Jack | Used to lift your car off the ground. | This allows you to safely raise the car to remove the wheel and access the brake components. |
| Jack Stands | Once the car is lifted up, it keeps it up. | Increases safety by supporting the vehicle; never rely on the jack alone. |
| Lug Wrench | Used to loosen and tighten the nuts on the wheels. | Wheel removal is necessary to inspect the brake pads. |
| Flashlight or Work Light | Helps you see brake components clearly. | Good lighting ensures that you don’t overlook signs of wear or damage during your inspection. |
| Inspection Mirror (optional) | A small mirror mounted on a stick for viewing hard-to-reach spots behind the caliper. | Helpful for checking inner brake pads or tight spots without removing the caliper. |
| Measuring Gauge or Ruler | Used to measure the thickness of brake pad material. | Brake pads thinner than 3mm usually need to be replaced – taking a measurement helps you to be sure. |
| Safety Gloves | Protects your hands from dirt, sharp parts or hot surfaces. | Your hands stay safe and clean when working around wheels and brakes. |
| Safety Glasses | Protects your eyes from dust or small debris when removing wheels. | It is important to prevent eye injuries from rust, brake dust or falling particles. |
Step-by-Step Guide to Inspecting Brake Pads
1. Park the Vehicle Safely
Before doing anything, make sure your car is parked on a flat and level surface so that it doesn’t roll. Then, fully apply the parking brake.
As an added safety measure, place wheel chocks (or heavy bricks) behind the rear wheels—specially if you’re working on the front brakes. This keeps the vehicle stable and doesn’t move while you work.
2. Loosen the Lug Nuts
Before lifting the vehicle, use a lug wrench to slightly loosen (but do not remove) the nuts on the wheel you are inspecting.
Doing this while the car is still on level ground prevents the wheel from spinning while you try to loosen the nuts. Turn each nut about a quarter to half turn—just enough to loosen them.
3. Lift the Car with a Jack
Use a car jack to raise the vehicle to the correct jack point near the wheel you are checking. Once the vehicle is raised, slide the jack stands down and slowly lower the vehicle onto them.
Don’t rely solely on the jack—it can malfunction and jack stands provide the support necessary to work safely. Once secured, remove the lug nuts completely and take the wheel off.
4. Locate the Brake Pads
Removing the wheel will show you the brake rotor (round disc) and the caliper, which holds the brake pads.
The pads are usually located inside the caliper, on either side of the rotor. You may only see the outer pad, but it’s just as important to inspect the inner pad—use a flashlight or inspection mirror if needed.
5. Perform a Visual Inspection
Look carefully at the visible brake pad. A healthy brake pad is usually 8-12mm thick. If it looks thin (3mm or less), it’s time to replace it.
Also, check for cracks, glazing (shiny or glass-like surface), or uneven wear, which could indicate other problems such as a sticking caliper.
Always check both the inner and outer pads – sometimes caliper problems will cause one pad to wear out faster than the other.
6. Measure Pad Thickness
Use a brake pad thickness gauge or a simple ruler to measure how much friction material is left. Most vehicle manufacturers recommend replacing brake pads when their thickness is less than 3 mm.
New brake pads typically come with about 10-12mm of material. Taking measurements ensures you’re not just guessing—it gives you a clear idea of how much life they have left.
7. Inspect Brake Rotor Surface
While you’re there, inspect the brake rotor as well. A smooth and flat surface on the rotor is a good sign.
But if you notice deep grooves, scratches, rust spots, or signs of warping (such as uneven color patterns), it’s time to replace the rotors or resurface them. Damaged rotors can reduce braking effectiveness and cause vibrations when braking.
Read More:
Inspect Without Removing the Wheel
1. Check Through the Wheel Spokes (If Accessible)
In some vehicles — particularly those with open-spoke alloy wheels — you can inspect the brake pads without removing the wheel.
If you just need a quick visual check, this option can save time and effort. Look at the gap between the wheel spokes.
You should be able to see the outer brake pad, which is positioned against the brake rotor. While this method won’t allow you to see the inner pad or accurately measure pad thickness, it can give you a basic idea of pad wear.
2. Use a Flashlight for Better Visibility
As the wheel area may be dark and difficult to see, use a bright flashlight or work light to clearly illuminate the brake assembly.
This will give you a good idea of the thickness and surface condition of the pad. Make sure you check for any obvious wear marks such as thin pad material, cracks, or glazing (shiny, hard surface).
3. Inspection Mirror Helps With Hard-to-See Angles
If the view is limited, consider using a small inspection mirror mounted on a telescoping stick. This allows you to see behind the caliper or check for angles blocked by the wheel or suspension components.
While this method isn’t as intensive as wheel removal, it can still help identify obvious warning signs of brake pad problems, specially when used with a flashlight.
4. When This Method Is Useful—and When It’s Not
This “through-the-wheel” inspection is best used for routine checks, such as before a road trip or during routine maintenance.
However, this is not a substitute for a full inspection in which you remove the wheel. You won’t be able to measure the correct thickness or properly inspect both sides of the pad.
If you suspect a problem with the brakes or you haven’t checked them in a while, it’s still safest to remove the wheel and do a full brake pad inspection.
How Often Should You Inspect Brake Pads?
1. Follow Manufacturer Recommendations
Most vehicle manufacturers recommend inspecting your brake pads every 10,000 to 15,000 miles (16,000 to 24,000 kilometers), depending on your car model and driving habits.
You’ll usually find this information in your vehicle’s owner’s manual or maintenance schedule. Some cars may also have built-in sensors or service reminders that alert you when it’s time to check the brake system.
Regular inspection ensures that worn pads are detected early, preventing damage to the rotors and maintaining safe braking performance.
2. Check More Frequently in Harsh Driving Conditions
If you frequently drive in high-traffic urban areas where frequent intermittent braking is common, or if you live in a hilly area where driving downhill is frequent, your brake pads will wear out faster.
This is because constant braking and high temperatures cause the pads to wear out. In such cases, it is wise to check your brake pads every 6,000 to 8,000 miles, or at least twice a year.
Heavy loads, towing and aggressive driving also wear out brakes faster.
3. Inspect Before Road Trips or After Rough Terrain
Before setting off on a long trip, it is wise to check your brake pads to ensure they are in good condition. Driving long distances with worn pads can increase your stopping distance and pose a risk to you and others.
Likewise, if you’ve recently driven in muddy, rocky or off-road conditions, you should check for any debris buildup or abnormal wear on the pads and rotors.
Dirt and small stones can become trapped in the brake system, causing premature brake wear or damage.
4. When in Doubt, Inspect at Least Once a Year
Even if you don’t notice any warning signs, it’s still a good habit to inspect your brake pads at least once a year or during every scheduled service.
Regular inspections help you spot early signs of wear, preventing costly repairs and keeping your vehicle safe.
What to Do If Brake Pads Are Worn
1. When Should You Replace Brake Pads?
You should replace your brake pads when the friction material is 3 millimeters (mm) thick or less, or you see obvious signs of cracks, glazing, deep grooves or uneven wear.
Even if the pads still work, driving with worn pads can damage rotors, increase stopping distances and make driving conditions unsafe.
Some brake pads even have built-in wear indicators – these make a squealing sound when the pads wear down, signaling it’s time to replace them.
Also, if your vehicle pulls to one side when you apply the brakes, or if the pedal feels spongy or vibrates, this could mean uneven pad wear or related issues that need immediate attention.
2. DIY Replacement vs. Professional Service
Replacing brake pads can be a do-it-yourself (DIY) job if you have the right tools, basic mechanical knowledge and time.
The cost of replacing brake pads yourself is usually much less than taking them to the shop — mainly the cost of the pads, which range from $30 to $100 per axle for most standard vehicles.
However, professional service is highly recommended if you are not confident in maintaining the vehicle.
A certified mechanic will not only make sure the brake pads are installed correctly, but will also make sure related components — such as rotors, calipers and brake fluid — have been inspected and are working properly.
Improper installation can pose a serious safety risk, so if in doubt it is advisable to seek expert help.
3. Always Replace Brake Pads in Pairs
Whether you’re doing it yourself or hiring a mechanic, it’s important to replace brake pads in pairs – either on both front wheels or on both rear wheels at once.
This helps balance braking performance and prevents your car from pulling to one side when braking. Uneven brake pad thickness between wheels can cause instability, excessive wear on suspension components and, in severe cases, brake system failure.
Matching pad wear ensures that both wheels apply the same amount of stopping power, giving you smoother and safer braking overall.
Safety Tips and Common Mistakes to Avoid
1. Never Work Under a Car Without Jack Stands
One of the most important safety rules in car maintenance is to never crawl or work underneath a vehicle that’s only resting on a jack. Car jacks are meant to lift the vehicle up—not to take the weight of it while you’re working underneath.
A sudden slip or malfunction of the jack can cause the vehicle to fall, causing serious injury or even death. Always use good quality jack stands to firmly support the vehicle after lifting it.
Once the jack stands are in place, slowly lower the car onto them and give the vehicle a firm push before lowering to make sure it’s stable.
2. Don’t Ignore Small Noises or Warning Signs
A slight squeaking, clicking or grinding noise when braking can also be a sign of a malfunction in your brake system. Many people ignore these noises until it’s too late, resulting in worn pads, damaged rotors or brake failure.
These small noises are often an early sign that your brake pads are wearing thin, or that something in the braking system is loose or misaligned. Always have brake noises checked immediately, even if your vehicle seems to stop normally.
3. Avoid Touching the Rotor or Pads with Greasy Hands
When inspecting or replacing your brake components, it’s essential to keep your hands clean and dry – specially when handling brake pads and rotors.
Oil and grease from your skin or gloves can contaminate the brake surface, reducing friction and causing uneven braking or squealing noises.
This contamination can also reduce the life of the pads. Always wash your hands or wear clean, grease-free gloves when handling any part of the braking system.
4. Reinstall the Wheel Securely with Proper Torque
After inspecting your brakes, it’s important to properly tighten the lug nuts when reinstalling the wheel.
Use a torque wrench and follow the manufacturer’s recommended torque specifications (usually found in the owner’s manual). Undertightening could cause the wheel to come loose while driving and overtightening could damage the wheel studs or brake rotor.
Also, always tighten the lug nuts in a crisscross pattern to distribute pressure evenly and prevent the rotor from twisting.
Conclusion – How To Inspect Brake Pads
It is the good practice to do the inspection of the brake pads and it actually ensures your safety and the safety of everyone on the road as well.
Brake pads may be small in size, but they have a big job to do. Every time you stop your vehicle, they are subjected to intense pressure and heat and over time, they gradually wear down.
By learning how to inspect them – whether through a full inspection or a quick look at the wheel – you empower yourself to catch problems early, save money on costly repairs and, most importantly, avoid dangerous driving situations.
Following a simple step-by-step process, using basic tools and knowing what warning signs to look for can make a big difference.
Always put safety first—use jack stands, check torque settings and never ignore strange brake noises. And when in doubt, consult a certified technician.
Inspecting brake pads doesn’t take much time, but its benefits last for thousands of miles. Make it part of your regular vehicle care routine, specially before a road trip or after heavy driving.
That’s it from this guide and now you can ask questions related to this topic in the comment section below.
Frequently Asked Questions
Q1. How can I tell if brake pads need replacing?
Answer: You can usually tell if your brake pads need replacing by looking for a few common signs. The most obvious sign is a squealing or squealing sound when you press the brake pedal. This is because most brake pads have a built-in metal wear indicator that makes a noise when the pad gets thin. If you hear a grinding sound, that means the pads are completely worn out and metal is rubbing against metal, which could damage your rotors. Another way to check is to look at the brake pad to see if it is visible through your wheel. If the pad feels less than 3 millimeters thick, it’s time to replace it. You may also notice changes when braking, such as longer stopping distances, a soft or spongy brake pedal, or the vehicle pulling to one side. Some cars have a brake warning light that comes on when the pads are too thin. If you notice any of these signs, it’s a good idea to have the pads inspected closely or have them checked by a mechanic.
Q2. What is the life expectancy of brake pads?
Answer: The life expectancy of brake pads depends on many factors, but on average, they last from 30,000 to 70,000 miles. This wide range is due to different driving habits, vehicle type, road conditions and the quality of the brake pads. For example, If you often drive in stop-and-go traffic, in cities, or down steep hills, your brake pads will wear out faster because you use the brakes more frequently. On the other hand, brake pads are more useful when driving at leisurely stops on the highway. The material used in the pad also plays a role. Ceramic pads usually last longer and are not as noisy, while organic pads wear out more quickly but are less expensive. Depending on your car and driving style, it’s always a good idea to check your owner’s manual or get specific suggestions from your mechanic. Regular inspections—at least once a year—can help you spot wear before it becomes a problem.
Q3. How much does a brake job cost?
Answer: The cost of a brake job depends on the vehicle, the type of pads used and whether you’re replacing just the pads or the rotors as well. On average, the cost to replace brake pads alone can range from $100 to $300 per axle (this is for either front or rear wheels). If the rotors also need to be replaced or surfaced, the cost can go up to $300 to $600 per axle, or even more for high-performance or luxury vehicles. Labor is a big part of the cost, specially if you’re getting the work done at a dealership or shop in a big city. Do-it-yourself brake job is usually cheaper because you pay for most of the parts, which cost anywhere from $30 to $100 for standard pads. However, if you don’t have any experience, it’s always safer to have it done professionally to ensure the brakes are working properly. Remember, brakes are a vital part of safety, so it pays to invest in quality work.
Q4. How to tell if front or rear brakes are bad?
Answer: To figure out if your front or rear brakes are bad, you can pay attention to how your car behaves when you apply the brakes. The front brakes do most of the stopping of the vehicle—about 60% to 70%—so they wear out faster. If the steering wheel vibrates when you press the brake pedal, or the car pulls to one side, it’s often a sign that the front brakes are the problem. If the rear of the car feels unstable or you hear a grinding or squealing noise from the rear wheels, your rear brakes may be worn out. Some cars have rear drum brakes, making it harder to identify by sound alone, so a visual inspection may be necessary. Also, if your parking brake doesn’t hold the car as well as it used to, this could be a sign of a problem with the rear brakes. The best way to be sure is to remove the wheels and check the front and rear brake pads for thickness, cracks or uneven wear. If you’re not comfortable doing this yourself, a mechanic can check all four brakes during a routine inspection.
References:
[1] Ilie, F.; Cristescu, A.-C. Experimental Study of the Correlation between the Wear and the Braking System Efficiency of a Vehicle. Appl. Sci. 2023, 13, 8139. https://doi.org/10.3390/app13148139

Guys, I’m a car audio enthusiast and customization expert and I love clear sound and clean installation. Plus, I have spent years helping people build their dream audio setups. And whenever I’m working on cars, I probably listen to music and thinks about the next big upgrade.
