 Skip to content
Written By: Don Dodi
Fact Checked By: Kristen Brown
Reviewed By: Diego Rosenberg
Yes, it is 100% possible that a body kit actually transform your car from ordinary one to eye-catching, as it gives a sleek and aggressive appearance and at the same time some body kits even improves the aerodynamics as well.
Indeed, it is the popular way to improve a vehicle’s appearance, as it makes your car’s look sportier and even it enhances the aerodynamics if you have them correctly installed.
So, basically Body Kits are aftermarket accessories that include parts such as: bumpers, side skirts, spoilers and fender flares as well.
And they are actually designed to replace or modify the original panels of your car and in that way it provides a unique and truly customized look.
As well as, it is possible that some body kits are just cosmetic thing, that’s why you need to choose correctly such as: actually engineered one as that reduces the air drag and improves the stability at the higher speeds.
Not only this, you actually need a careful planning, proper tools and you need to focus on details of it so that you can ensure that each piece fits in the perfect way and that’s where this guide shows you How to Install a Body Kit on a Car, which includes from choosing the right kit for your car’s make and model, to understanding the installation process and safety precautions as well so that you can end up with professional finish.
How to Do Preparation to Install a Body Kit On a Car
1. Choose the Right Body Kit for Your Car’s Make and Model
Before you begin installing a body kit, it’s important to choose a body kit specifically designed for your car’s make and model.
Body kits aren’t available everywhere and choosing the wrong kit can result in poor fit, gaps, or the need for major modifications.
Most manufacturers design kits to suit specific vehicle sizes, mounting points and dimensions.
Researching online reviews, manufacturer specifications and watching installation videos can help you understand how a particular kit will fit your car.
It’s also important to know the kit’s material, whether it’s fiberglass, polyurethane, or ABS plastic, as each material has different flexibility, durability and weight.
As well as, it is really important to choose the material based on how you drive and how you wanted to maintain that body kit as engineering studies also shows that fiberglass actually offers low weight and easy to repair quality, on the other hand polyurethane actually gives the best everyday resilience; so does the carbon fiber also delivers race-level of weight savings at a high cost and low impact tolerance as well, which is why material choice matters a lot.[¹]
2. Check whether the kit includes bumpers, side skirts, spoilers, or fender flares
A complete body kit typically includes several components, such as front and rear bumpers, side skirts, spoilers, or fender flares.
It’s important to ensure which parts are included in your kit so you can accurately plan the installation process.
Some kits may only include bumpers, requiring you to purchase other parts separately.
Preparing a complete list of your kit helps you avoid parts shortages and ensures that all parts fit together to create a cohesive and professional look.
3. Tools Needed
Installing a body kit requires several tools to ensure proper alignment and secure attachment.
Commonly used tools include a screwdriver, socket set, drill, jack stands, masking tape and adhesive.
A socket set is often needed to tighten bolts securely, while a drill may be needed for minor adjustments or creating new mounting points.
Jack stands help to safely raise the car up to the lower panels.
Masking tape is useful for temporarily holding parts in place during test fitting and adhesives or sealants can strengthen the bond of some parts.
Preparing all tools in advance ensures a smoother, safer and more efficient installation process.
4. Safety Precautions
Safety should be a top priority during any body kit installation.
Always wear gloves and goggles to protect your hands and eyes from sharp edges, debris, or chemical adhesives.
To avoid accidents, ensure your workspace is stable, well-lit and free of obstructions.
If you’re lifting a car, double-check that the jack stands are secure and placed on a level surface to avoid the risk of the car falling.
Following these safety precautions not only protects you but also prevents damage to your car or body kit parts during installation.
How to Remove Existing Parts
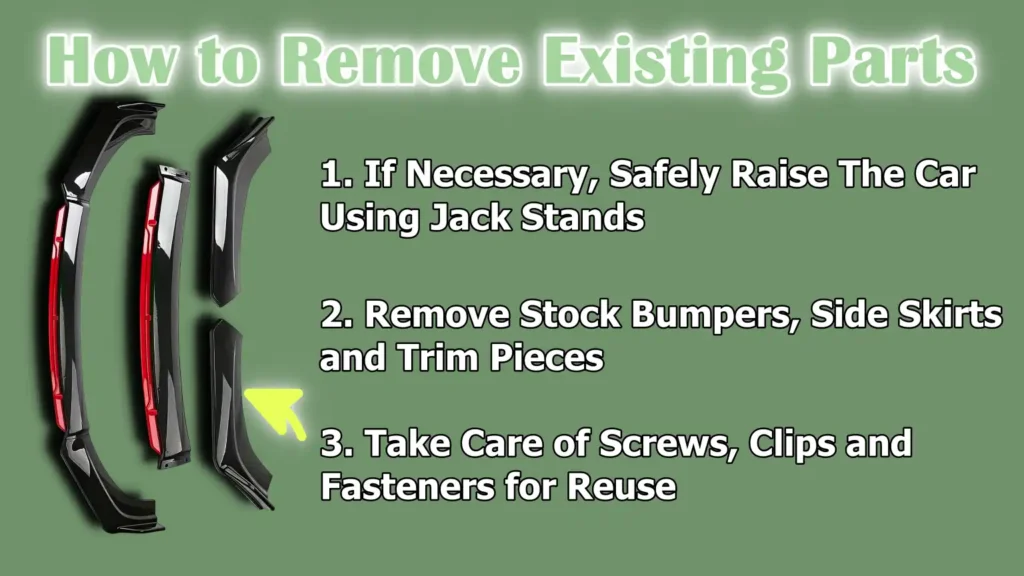
1. If Necessary, Safely Raise The Car Using Jack Stands
Before removing any parts, it’s important to ensure that the car can be safely raised if access to the lower panels is required.
Using a hydraulic jack alone is not sufficient, as it could malfunction or slip, causing injury or damage to the vehicle.
Jack stands provide stable support and evenly distribute the car’s weight, making it safer to work underneath.
Always place jack stands on a flat, solid surface and double-check that the car is securely positioned before beginning any removal work.
2. Remove Stock Bumpers, Side Skirts and Trim Pieces
Once the car is safely raised or accessible, the next step is to carefully remove the original parts that will be replaced with the body kit.
This includes the bumpers, side skirts and any trim pieces that may interfere with installation.
Start by loosening the screws, bolts and clips using appropriate tools to prevent parts from breaking.
Remove each piece gently to avoid scratching or damaging the paint.
Some panels may have hidden fasteners or plastic clips, so it’s important to take the time to locate and remove all attachments for a smooth installation process.
3. Take Care of Screws, Clips and Fasteners for Reuse
During the removal process, it’s important to organize and care for all screws, clips, bolts and fasteners.
Many body kits require some original mounting hardware and misplacing these parts can delay installation or result in a less secure fit.
Place the hardware in a labeled container or bag to ensure each part can be easily identified and reused when installing new body kit components.
Keeping everything organized also helps avoid confusion and reduces the risk of damaging the car during reassembly.
How to Test the Body Kit Fitment
1. Place each kit component on the car to check alignment
Before permanently installing any body kit component, it’s important to test fit each component on the car to ensure it aligns properly with the vehicle’s dimensions.
Body kits, even if designed for a specific car model, may vary slightly due to manufacturing tolerances.
Installing the components allows you to see how the front bumper, side skirts, rear bumper and spoiler fit relative to each other and the original panels.
This step helps prevent mistakes, reduces the need for re-drilling and ensures a professional and seamless final installation.
2. Adjust the gaps and ensure proper fitting before drilling or fixing
Once each component is in place, carefully check the gaps between the body kit component and the car’s existing panels.
Uneven gaps can make the car look poorly modified and can cause rattles or strain on the kit over time.
Minor adjustments, such as bending flexible edges or repositioning brackets, can improve the fit before drilling any holes or tightening bolts.
Taking time to adjust ensures that all parts fit snugly and maintain the car’s aerodynamic lines, while also providing a clean, high-quality look.
3. Mark Mounting Points with Masking Tape or a Marker
After confirming proper alignment and fit, marking the exact mounting points is a crucial step.
Use masking tape or a temporary marker to indicate where the bolts, screws, or brackets will be installed.
This practice prevents errors during actual installation and ensures that each component is installed exactly where it should be.
Precise markings also reduce the risk of damaging the kit or the car’s original panels and help maintain uniform spacing and symmetry across all components.
How to Install Body Kit Components
1. Front Bumper
The first major step in installing a body kit is often the front bumper.
Start by aligning the bumper with the car’s existing mounting points, ensuring it is level with the fenders and hood.
Correct alignment is crucial to maintaining the car’s appearance and avoiding gaps that could allow dirt or water to enter.
Once aligned, secure the bumper using the provided bolts, clips, or brackets.
Tighten them slowly and evenly to prevent warping or cracking the material.
Double-check that the bumper is stable and doesn’t move before moving on to the next component.
2. Side Skirts
Side skirts run along the car’s rocker panels and help improve both aesthetics and aerodynamics.
Carefully position each side skirt so that it aligns with the car’s bottom edge and the front and rear panels.
Use screws, rivets, or a strong adhesive to securely attach the skirts.
It’s important to ensure that the skirts are identical on both sides of the vehicle to maintain symmetry and a professional appearance.
Properly installed side skirts also protect the car’s lower panels from debris and minor bumps.
3. Rear Bumper
Installing a rear bumper is similar to installing a front bumper, but often requires attention to alignment with the trunk, taillights and side panels.
Place the bumper on the front of the car and align it with the existing mounting points.
Secure the bumper using the screws and brackets provided in the kit.
Ensure all fasteners are evenly tightened so they don’t shift or loosen over time.
A well-installed rear bumper not only completes the look of the body kit but also ensures safety by properly covering impact areas.
4. Spoiler or Lip – If Included
A spoiler or lip can significantly enhance a car’s styling and, in some cases, improve aerodynamics by controlling air flow.
Carefully measure and center each part before drilling any holes to avoid misalignment.
Use the hardware provided with the kit or high-strength adhesive for secure installation.
Correct placement is crucial because even the slightest misalignment can be very noticeable and affect the overall balance of the car.
Spoilers and lips must be firmly installed to withstand wind pressure and vibration during driving.
How to Seal and Strength It
1. Use weatherproof adhesive or sealant if needed
After installing all body kit components, it’s important to apply weatherproof adhesive or sealant to areas exposed to water, dust, or air.
This step helps prevent moisture from entering the spaces between the body kit and the car’s original panels, which can lead to rust, corrosion, or loosening over time.
Adhesives and sealants specifically designed for automotive use are flexible, durable and can withstand temperature changes and vibrations.
Carefully applying them to edges and joints not only strengthens the installation but also prevents damage to the car’s paint and structural components.
2. Recheck fasteners to avoid loose fittings
Even after installing the body kit, it’s important to recheck all fasteners, including bolts, screws, clips and brackets, to ensure they are completely tight and secure.
Loose fittings can cause parts to move, rattle, or even break while driving, which can be dangerous and damage the car or kit.
Inspecting each attachment point and carefully testing the stability of each component helps ensure a safe and long-lasting installation.
Proper reinforcement with adhesive or sealant ensures the body kit stays firmly in place and maintains a neat, professional appearance.
How to Paint and Give It Finishing Touches
1. If the body kit isn’t painted, sand and prime it
If the body kit parts aren’t painted, the first step is to lightly sand them to create a smooth surface and remove any imperfections.
Sanding helps primer and paint adhere better to the material, whether it’s fiberglass, polyurethane, or ABS plastic.
After sanding, apply a high-quality automotive primer to provide a uniform base.
Primer not only improves paint adhesion but also protects the body kit from environmental damage like moisture, UV rays and rust.
Proper sanding and priming are essential for achieving a professional and durable finish.
2. Apply paint or a custom finish that matches the car’s color
Once the primer has dried, you can paint the body kit to match your car’s existing color or choose a custom finish for a unique look.
Matching the original color requires either the exact factory color code or professional mixing to ensure consistency across the car and kit.
Applying multiple thin coats instead of one thick coat helps prevent leaks, drips, or uneven coverage.
For custom finishes, special paints or clear coats can be used to create metallic, matte, or glossy effects.
After painting, allow adequate drying and hardening time to ensure a long-lasting and smooth finish.
3. Install Trim Pieces and Final Detailing
Once the paint has completely hardened, reinstall any trim pieces, emblems, or decorative elements removed during the installation process.
Pay attention to alignment and secure each piece properly to avoid gaps or misalignment.
Finally, perform a thorough inspection and detailing to remove fingerprints, dust, or overspray.
Applying a protective wax or sealant can enhance the shine and protect newly painted surfaces.
These finishing touches not only improve the appearance but also ensure that the body kit looks professionally installed and well integrated with the car.
Read More:
How to Perform Final Inspection
1. Check the alignment and fit of all parts
After the body kit is completely installed and painted, carefully inspect the alignment and fit of each component.
Check the gaps between the bumpers, side skirts and fenders to ensure they are even and consistent on both sides of the car.
Proper alignment is important not only for aesthetics but also to prevent parts from rubbing against each other or the original panels, which can cause damage over time.
Visual inspection from different angles and distances helps identify any minor adjustments needed before final tightening.
2. Ensure no parts are loose
After confirming alignment, check every attachment point, including bolts, screws, clips and brackets, to ensure that all parts are securely in place.
Loose parts can cause rattling, reduce the kit’s durability and even pose a safety hazard while driving.
Gently test each component by applying light pressure to see if it moves or shifts.
Retightening the fasteners where necessary ensures that the body kit remains firmly in place during normal use and provides long-term stability.
3. Test Drive to Check Stability and Clearance
Finally, carefully test drive the body kit at low speeds to check its overall stability.
Pay attention to any unusual noises, vibrations, or movement of parts.
Also, monitor the clearance when cornering, braking, or driving on rough roads to ensure the kit doesn’t scratch or interfere with the car’s handling.
A successful test drive confirms that the installation is secure, all parts are properly fitted and that it is safe to drive the car with the new body kit.
How to Maintain a Body Kit on a Car
1. Regularly Check Bolts and Adhesives
To ensure the long-term stability and safety of your body kit, it’s important to regularly check all bolts, screws, clips and adhesives.
Over time, vibration from driving, temperature changes and exposure to the weather can cause fasteners to loosen or adhesives to weaken.
Regularly checking and tightening loose parts can prevent parts from moving, rattling, or breaking, which could damage the car or body kit.
Maintaining a simple maintenance schedule, such as checking fasteners every few weeks or after long trips, helps maintain the integrity of the installation.
2. Clean carefully to prevent damage to the paint or kit materials
Proper cleaning is essential to keeping the body kit looking its best and preventing premature failure.
Use gentle, non-abrasive cleaning products designed for automotive surfaces and avoid harsh brushes or scrubbers that could scratch paint or plastic parts.
Thoroughly rinse off dirt, dust and road grime and carefully dry surfaces to avoid water spots.
Regular cleaning not only maintains the body kit’s beauty but also helps identify any small cracks, chips, or loose parts in a timely manner, allowing for timely repairs.
3. Touch-up or reseal the paint if necessary
Despite careful driving and maintenance, minor chips, scratches, or wear on the paint or sealant may occur.
Touching up the paint immediately upon discovering damage prevents the body kit from rusting or further deterioration.
Similarly, resealing parts exposed to weather or road debris protects the kit from moisture and environmental factors.
Using high-quality automotive paint and sealant designed for the kit’s contents ensures long-lasting results.
Timely touch-ups and resealing keep the body kit looking new, maintain its durability and protect your investment over time.
Conclusion – How to Install a Body Kit on a Car
You can simply upgrade your vehicle’s look, as you can style it and give it more personal expression as car body kit actually makes the appearance truly flawless.
The process involves careful planning, proper fitting and attention to every detail at every stage, from selecting the right kit to final inspection.
By preparing your tools, safely removing existing parts, test-fitting the parts, securely installing the kit, applying paint or finish and performing regular maintenance, you can achieve a professional-looking result that lasts for years.
Understanding the materials, proper installation techniques and safety precautions ensures that the kit not only enhances your car’s style but also maintains its structural integrity and safety on the road.
With patience and diligence, a well-installed body kit transforms your vehicle into a unique, attractive machine, while protecting your investment and increasing driving satisfaction.
Now, you can ask the questions related to this guide in the comment below.
Frequently Asked Questions
Q1. What is a body kit and why should I install one on my car?
Answer: A body kit is a set of aftermarket parts designed to enhance a car’s exterior. It typically includes components like bumpers, side skirts, spoilers and fender flares. Installing a body kit can transform your vehicle’s appearance, making it more sporty and stylish. Some kits also improve aerodynamics, which can slightly improve performance at high speeds. Besides aesthetics, a properly installed body kit can increase a car’s value and help protect certain panels from minor damage.
Q2. Do I need special skills to install a body kit on my car?
Answer: Installing a body kit doesn’t require professional training, but it does require careful attention, patience and basic mechanical skills. You should be able to use hand tools like screwdrivers, wrenches and drills and be able to safely lift and support the car if necessary. Following detailed instructions, taking accurate measurements and performing a test fitting before final installation are crucial steps. If you’re unsure, seeking professional help or watching a detailed tutorial can simplify the process.
Q3. What tools and materials are needed to install a body kit?
Answer: Common tools for installing a body kit include a screwdriver, socket set, drill, jack stands, masking tape and possibly adhesive or automotive sealant. If you’re painting the kit yourself, you’ll also need sandpaper and primer. It’s recommended to wear safety equipment, such as gloves and goggles, to avoid injury when handling tools and sharp edges. Having all the necessary tools and materials ready before beginning the installation makes the process easier and safer.
Q4. How do I ensure a body kit fits my car correctly?
Answer: Before permanently installing any parts, you should perform a test fitting. This involves placing each part on the car to check alignment, gaps and overall fit. Adjustments may be needed to ensure the kit fits snugly against the car’s panels. Using masking tape or a marker to mark the mounting points helps during final attachment. Proper fitting gives the kit a professional look and prevents future problems like rattling or uneven gaps.
Q5. Is it necessary to paint a body kit?
Answer: Most body kits come unpainted, so painting is usually required to match your car’s color or achieve a custom finish. Sanding and priming the kit before painting ensures proper adhesion and a smooth surface. Applying several thin coats of automotive paint and allowing it to dry for a sufficient amount of time results in a durable and professional-looking finish. Some kits come pre-painted, saving time and reducing the risk of mistakes.
References:
[1] DESIGN AND FABRICATION OF BODY KIT MATERIAL FOR STUDENT FORMULA RACING CAR
https://ir.uitm.edu.my/id/eprint/110192/1/110192.pdf

Guys, I’m a car audio enthusiast and customization expert and I love clear sound and clean installation. Plus, I have spent years helping people build their dream audio setups. And whenever I’m working on cars, I probably listen to music and thinks about the next big upgrade.
